After my tile laying extravaganza, the tasks of grouting and sealing seemed tiny by comparison – especially considering I had taken off the entire week between Christmas and New Year’s and had several days to accomplish them. But for some reason, I really dreaded grouting. From my dad calling it “the pits” to Katie Bower admitting it’s the hardest part of tiling for her and Jeremy, it really had me nervous. Even the guy at a the home improvement store kinda hinted that it wouldn’t be pleasant. Couldn’t we just leave it like this?
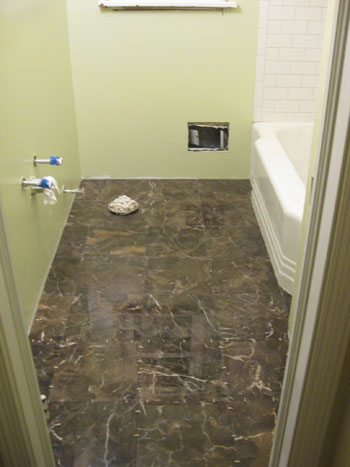
Unfortunately, it had to be done. And I had already put it off twice. Once when I mixed the grout wrong (I read “3 cups/1.4 Liters” of water as “3 Liters” – oops) and a snowstorm kept us from getting more. Then the next day, I picked up a replacement box with plans to grout after work, but then an accident (train + SUV = bad back up, but no injuries) got me home too late to tackle it before bed. The funny thing is that in the end these two twists of fate ended up being a lifesavers.
See, long before we even demo’d our first wall we had purchased our grout – nonsanded Polyblend grout from Home Depot. We opted to use nonsanded grout on both the shower walls and floor because it’s recommended for 1/16th” grout lines and because sanded grout can scratch marble. So we had had our box of “bright white” (for the shower) and our box of “nutmeg” grout (for the floor) all ready to go from almost day one… even though the nutmeg was a little redder than we would’ve liked. But sometime over Christmas break we got the tip that we should check out a specialty store like The Tile Shop for better grout that would last longer and was more mildew and mold resistant – plus they offered a wider color selection. Why didn’t we think of that?
We can’t speak to the quality yet (it’s supposed to be more durable and mold/mildew resistant according to the label) but our tipster was dead-on about the color selection. Not to mention they had a handy color guide that allowed us to hold up our tile against real grout (not just a colored label) to see how they’d look together:
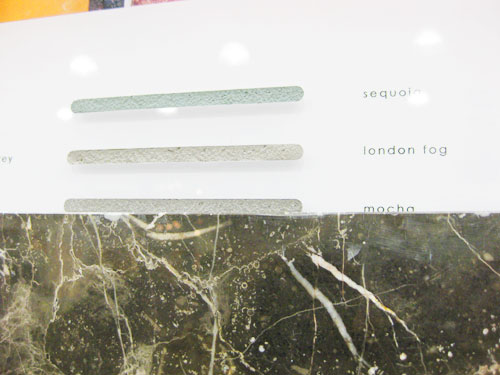
So thanks to this trip we scored a batch of “standard white” (a more subtle white, which is much closer to our actual tile color than the “bright white” from Home Depot) and “mocha” (a much browner version of nutmeg without the garish red undertones). And it was the same price as the Home Depot stuff! Not bad. We’d later count our blessings that we hadn’t used the previous grout that would’ve made our shower lines look like over-whitened teeth and our floor ones look like bad auburn streaks, but first we had to actually get down to business and grout everything. So with better grout in our possession (and after allowing all of the tile in the room at least two full days to set) I couldn’t put off the dreaded project any longer. I semi-enthusiastically gathered my supplies, almost all of which were inherited from my dad’s previous bathroom projects (most of which were purchased at The Tile Shop), and this is what my little arsenal of grouting tools included:
- A grout float
- Sponges
- Buckets (at least one for grout, one for water)
- Paper towels & rags
- Flexible Grout Admixture
- Grout Release
- Marble Sealer
The first step was actually to use the last two items to prep the surfaces. The grout release acts as the “Pam” of the process (to borrow a baking analogy we once heard) when it comes to protecting your tiles. By applying it beforehand, it makes it easier to clean the excess grout off of your tiles later. The marble sealer did the same thing for our marble floors (oh and it’s the same product we would later use to seal the grout too- gotta love a multitasker).
Once the release had been applied to the shower walls and the sealer had been applied to the floor in advance of grouting, it was time to mix the grout. This go-round we were determined to follow the instructions on the box quite carefully (which had been a challenge to me in my previous attempt). Luckily this time I mixed the correct amount of liquid and grout powder to form some nice toothpaste-like grout. You can opt to mix powdered grout with water (like we did in our previous attempt) but after talking with the tile specialists we decided to use Flexible Grout Admixture since it was recommended with the grout that we bought and we already had some leftover from my dad’s bathroom projects. The perks? It’s supposed to help reduce shrinking, cracking and the discoloration of your grout in the long run. Always a plus, right?
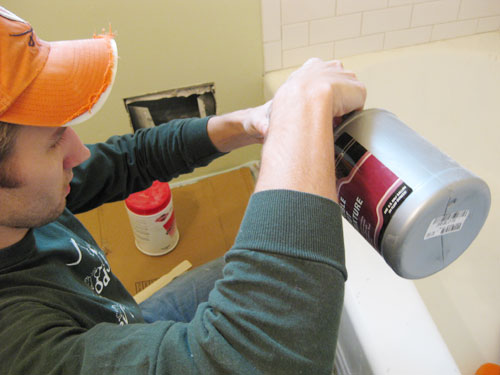
More than one person had warned me that mixing grout sucked – especially by hand (which I was doing because I didn’t want to buy a special tool for the little amount of grout that I was going to be using). So I trepidatiously measured out as much grout as I thought I could use in a 25-minute span (since more time than that could cause it to dry out) and added the corresponding amount of Flexible Grout Admixture. Then I began mixing with a simple paint stir stick and, well, it really wasn’t that bad.
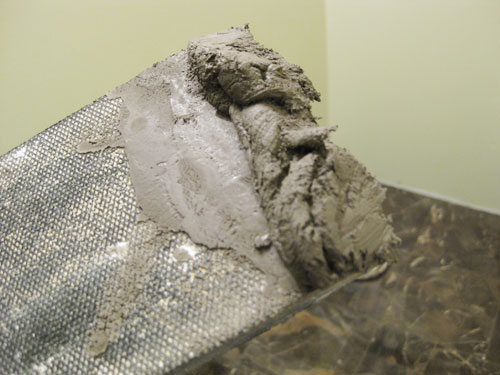
It took a little bit of arm power (okay, and one broken stick) to get all the lumps worked out and achieve what appeared to be the correct consistency- I’d read it should be somewhere in the neighborhood of a cream cheese, cake batter, peanut butter or toothpaste. I personally don’t consider all of those to be the same thickness, so I figured there was room for interpretation. The key is just to avoid anything too gooey/drippy or anything too dry and non-spreadable. Below is a shot of the mocha floor grout at what I deemed to be an acceptable take on toothpaste-cream-butter-batter. So after letting it set for ten minutes in the pail as instructed, I mixed everything up again and armed myself with the grout float.
The grout float is like a rubber trowel. I like to think of it as the notched trowel’s friendlier, less ornery cousin. As I anxiously awaited impending disaster, I followed everyone’s instructions of using the float to pick up a small glop of grout and firmly press it against the tile. Holding the grout float nearly flat against the tile, I spread the glop back and forth against the lines between the tiles letting it generously fill all of the cracks. With such small grout lines, this took little time and effort (although you should apply firm pressure to be sure to really pack those cracks). Then it took just a few scrapes of the float – this time at a 45 degree angle- to swipe away excess grout from the faces of the tile. Nothing too difficult yet. I started to wonder if I was doing it wrong.
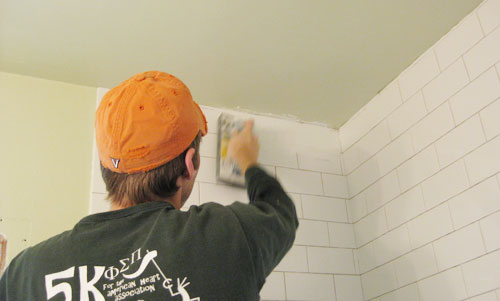
Even after using the float to remove excess grout, there’s still going to be some left hanging around on the faces of the tile (remember, you just want it in the cracks). This is where the damp sponge comes in after you’ve done about eight to ten minutes of grouting (you don’t want to wait over 15 minutes since the grout is harder to wipe off once it starts to set). Using another bucket filled with water, I lightly dampened a big yellow sponge (lightly is key, I learned). Then with a few light passes (again, light is key) I was able to not only lift most of the remaining grout from the faces of the tiles, but also to smooth the grout lines in the process. Seriously, the ease of this step amazed me. As long as I kept my sponge clean (which involved freshening my water bucket a couple of times) and didn’t get too water-happy, the process was remarkably effective. Maybe it was the Pam-like Grout Release that I applied beforehand? Either way this project was a lot less miserable than I thought it would be.
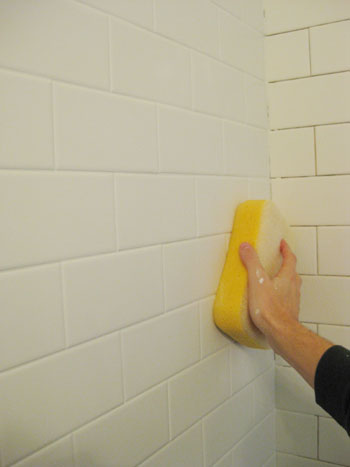
Now before I make this sound like a walk in the park, I’ll admit that it was a bit tiring and boring to do this across the entire shower. Not to mention having to stop a couple of times to clean my bucket and mix new grout (in the end, I used about 3lbs of a 5lb container for the tub/shower surround). But when I was done, the effect was AMAZING. It actually looked like a place people could shower! And all the dark negative spaces between the tiles were filled with clean white grout which promptly shifted the emphasis away from the lines between the tiles and back where it belonged: to the tiles themselves.
When I managed to stop admiring my own handiwork on the subway tile long enough to repeat the process I turned my attention to the floor. Although mixing this batch was a bit more challenging (darker color = more powder to mix and more color consistency concerns to worry about), the actual grouting was much faster. I barely used 1.5lbs to cover the minimal amount of grout lines (since they were only 1/16th” wide and much less abundant than in the shower since the tile was a lot bigger). Once again, the difference was incredible.
That was, at least, until the haze started to make itself visible. No matter how awesome your sponge skills are, you’re bound to leave some degree of grout film on your tiles that may only show its ugly face once things start to dry.
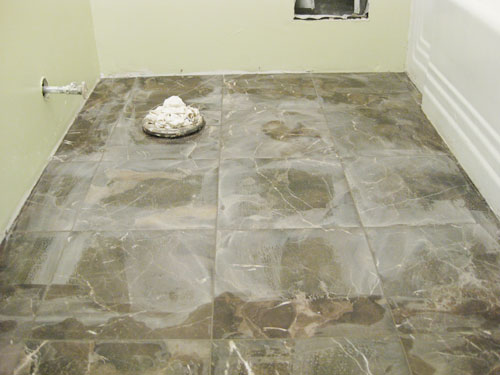
But this is where that previously applied Marble Sealer is supposed to make your life easier. Whew. I used a damp sponge a few more times to wipe away the haze, which helped but still moved the haze around more than actually removing it. Hmm.
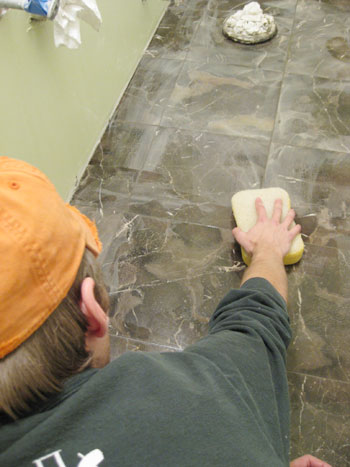
We did have a bottle of Haze Remover borrowed from my dad, but I was hesitant to apply yet another chemical to our marble floors so I tried another pass with a dry paper towel instead of a moist sponge. Voila. It took a bit of elbow grease and quite a few passes, but the dry towel technique did the trick on both the floor and wall when it came to removing the slight haze that was left behind after multiple spongings. Both surfaces even passed the white glove test (okay, we didn’t really use white gloves, but I didn’t have any haze left on my bare finger after dragging it across the shower walls or the floor). Victory!
After 48 hours of curing, the last step was to seal the grout. It actually ended up being 72 hours later for us, since about 12 hours in we had a minor “water incident.” Explanation: while I managed to work in the bathroom for weeks on end without this happening, Sherry joined me for about three hours to caulk and paint trim (more on that later) and somehow her posterior came into contact with the water valve for the sink, turning it on and sending a jet of water shooting up onto the ceiling (and therefore some heavy drips of h20 back onto the floor). She then ran screaming out of the room while I fought to turn off the valve. Needless to say, we thought an extra day of curing time couldn’t hurt.
But back to the sealing process: that was also a super simple and straightforward job, and I applied a few extra coats to both the floor and the shower wall to keep our grout protected and hopefully mildew & stain free for the long haul (we also plan to reseal things every few years for added security). Note: after sealing the grout it was slightly darker, so it blended in with the mocha tones in the tiles even more than it appears to in the pic below- score).
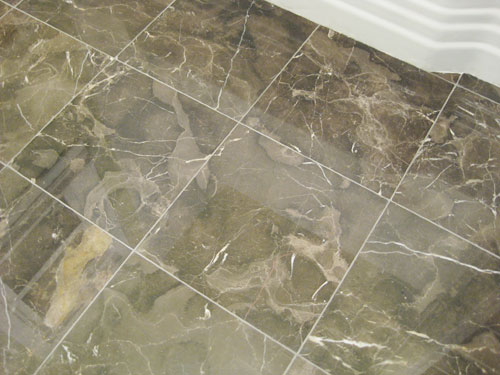
So as I wondered what all the fuss about grouting was – maybe working with super thin grout lines in a small room made our experience easy? – I finished applying a couple coats of grout sealer (the same Marble Sealer on the floor, and a product called SurfaceGard on the tub/shower surround). Believe it or not, the room could almost be called showerable again. We just needed to install the fixtures and caulk some of the edges first. Hello light at the end of the tunnel, it’s nice to see you.
Psst- Wanna read about the first few chapters of the big bathroom makeover? Check out Chapter One, Chapter Two, Chapter Three, a little teaser post, and Chapter Four right here.

Rose says
John, it looks great!
When we tiled our 1000 sq. ft. basement floored (not personally, hired out) I always thought it was interesting our tile guy hired out two non-english speaking immigrants to come in the next day and do all the grouting. Now I know! I’m glad it went smoothly for you! Can’t wait to see the final product!
ESBlondie says
Bravo!!!
The tile looks amazing. We are getting ready to tackle a few tile projects and this is going to be a huge help.
Thanks a great DIY tutorial.
Oonafey says
Wow, wonderful job! I bet you are both excited to be able to shower in your own home again soon!!
Jessica @ How Sweet says
It is looking fabulous!!
Danielle says
Great job so far!
When my husband and I tiled our three season room it was a breeze. Yes it was painful on the knees and back but I didn’t understand why everyone was so against us DIY. The room looks great!
Can’t wait to see the whole thing put together!
Jessie (Vegan-minded) says
I hate grouting! I tried (unsuccessfully) to re-grout my shower and it was such a mess. You did a beautiful job!
Dan says
Looks great I really like the color of the marble. Grouting a small job like this where you are standing for most of it is one thing: short and relatively sweet. After 8 hours on a great room floor despite the sweet sweet strains of southern rock music I was bored to tears. (The comment from my better half about looking like Quasimoto when I finished crawling on my knees all day didn’t help my mood much) however a frothy cold one took some of the pain away and according to the powers that she “the floor still looks great”.
Liz says
That looks just fabulous! I’m having such a great time finding decorating sites online. (I’ve got the bug!) So many good ideas out there. I’m just in awe of people’s creativity, not to mention their helpful hints. I tend to do better when I have a plan, plus step-by-step directions and pointers (I color within the lines, I guess you could say), and many people are offering those. Plus I’m using kind of as my overall guide to redecorating, the book “At Home with Laurie Ann.” She’s got tips and pointers, and ways to do things on a budget. Plus she shows how to “make it matter.” Everything matters — my family, my home, our time together, our meals together — everything. Great book.
I’ll be anxious to see what you tackle next!
erin g says
i’ve done 2 tiling projects before, and i always thought the grouting was the easiest part… kind of boring work, but easy. Glad it went smoothly for you too!
candace says
STUNNING work. That bathroom is going to be so swanky and swoon-alific I’m inspired. Thanks again for the long post – it helps a lot for a clueless DIYer like myself.
CarMaj says
Looks great!!! I think I have to agree with you – tiling and grouting are not too hard, it just takes some time and it seems like you did a bang-up job! Looking forward to the big reveal!!
jessica says
Looks good! I know know why people told you that grouting is a pain. Yes, you have to follow the directions, but if you can manage that feat, it’s painless. I find it kind of enjoyable, probably because it’s mindless, and there is little that I do regularly that is really mindless.
My boyfriend is a carpenter, though, and he also enjoys tiling.
Amelia says
It looks incredible (and so professional!). I cannot WAIT to see the finished product. I’ve been following the progressions on this bathroom like my life depends on it. Can’t wait for Chapter Six! Keep up the amazing work (so I can almost feel as though I’m doing the work myself!) :)
Amy says
What’s the brand of marble sealer you used? It’s great that it works as a grout sealer as well.
I’ve been reading up on marble as flooring quite a bit since we bought it for our bathroom reno, and it sounds like you have to be pretty careful with what you let touch the floor! You may already know this, but you have to keep anything acidic (many household cleaners, face wash, vinegar, etc) off of the floor, cause it will etch it. It’s also important to keep it clean and dirt-free so that the soil doesn’t grind in and etch the marble. Going to be a challenge for me…I’m not the best at keeping everything perfectly clean and I use vinegar to clean almost everything (including bathtub, sink, etc).
So glad to hear the grout tip as well! That will be useful when we pick that up…I’ll head straight to The Tile Shop. Thanks guys and beautiful work!
YoungHouseLove says
Hey Amy,
The marble sealer we used is sold by The Tile Shop and is called Premium Gold Marble & Onyx Sealer (by the brand Superior). As for maintaining marble, we do know that we have to keep acidic cleaners and things like lemon juice and wine off the floors, but since it’s a bathroom that should be a breeze (we use extremely mild organic cleaners and don’t have acidic food or drinks in the bathroom on a regular or even occasional basis). We actually have granite counters in the kitchen, which have the same “reputation” when it comes to keeping them free of certain products and stains, etc. But I have to say they have been extremely easy to live with. We’ve even spilled berry juice on them (which sat there for days) and we were able to lift the stain (more on that story here). In short, wiping stains down when they occur instead of allowing them to set is best, and even if they sit there for days all isn’t lost. Especially when you keep your stone sealed extremely well (which is our trick in the kitchen which we plan to implement in the bathroom as well). Hope it helps!
xo,
s
Jill Stigs says
Looks fantastic! Glad your experience with the grout was better than feared. Woo hoo, it’s almost done!!
Eryn says
The tile looks so beautiful! I am SO jealous and this makes me even more determined to bust out our 58 year old pink tile!
Ana says
What I’ve seen so far looks great. It’s funny that you mention going to a specialty shop for grout since I just discovered that this weekend while helping my parents shop for tile. I had no idea there were so many colors of grout.
Sally says
This was my favorite part… “But when I was done, the effect was AMAZING. It actually looked like a place people could shower! ”
I’ll probably never tile and grout my own shower, but I love reading about you guys powering through the project. I think it’s your lovely descriptions and positive attitudes that draw me in.
Thanks!
Rebecca says
Love your choices in the room. However, I want to do this too and know how to do everything except put up new drywall & backerboard. Can you give us the low down on this important step? I don’t have much help and my dad doesn’t know anything but I know I could do it if I had some tips.
YoungHouseLove says
Hey Rebecca,
Good news! I covered the backerboard and drywall hanging process here in this past post: https://www.younghouselove.com/tackling-the-bathroom-chapter-three/
And as for finishing the drywall (mudding and taping it before we got to priming and painting it), here’s how we attacked that step: we did a few rounds of mudding and sanding to get the greenboard/drywall ready for paint. I’ll admit it’s not as perfect as I’d like, but I’m pretty satisfied for my first time every doing it. We mudded and taped where the drywall joined, as well as over the exposed drywall screws. Plus we had to install a metal corner piece on the outer edge of the linen closet to create a crisp edge. Some places were easy (like some screws only took one coat of mud) whereas others I had to do 3 or 4 times (corners, mostly). I’m not an expert yet, but a couple of lessons learned were: (1) opt for larger spackling/putty knives, even if you’re filling small areas. It really helped the edges feather out more smoothly than when I was using a tiny putty knife. (2) We sprung for a special corner tool to help get the corner smooth. It was a huge help. (3) Sand. Sand. Sand. It won’t fix everything, but when in doubt, sand it a bit more. The places where I said “that looks good enough” don’t look as great as the parts where I said “I’ll sand it once more just to be safe.”
Here’s another good article, from an actual expert, about tips for getting a clean, smooth finish: http://www.askthebuilder.com/B387_Ten_Secret_Drywall_Finishing_Tips.shtml
Good luck!
-John
Barbara says
I will take grouting over laying tile ANY DAY. Whoever told you it was hard – well, they lied. It is just boring though. Lots of people skip the sealing part and wonder why their grout is so hard to clean. Myself, I can’t wait until I can tear out the old tile in my house and redo it – but my money tree has died!!
The bathroom looks great and I’m so jealous that you two can accomplish anything! It’s just me, and one bathroom. If I tear it up, I’ll have to rent a portapottie!! Ew!!
___
Barbara
http://ifididnthaveasenseofhumor.blogspot.com
young says
Wow, looks great!
Gord says
My only complaint with your “Tackling The Bathroom” series is that it’s taking WAY too long to see the finished product! he he. I can hardly wait to see it all done. It looks like it’s shaping up to be stunning. Although, that might be hard to say because you keep teasing us with only partial pictures. :) Great job though – thanks for all your tips. I’ve been following this closely as we are gearing up for a bathroom renovation in our own home.
Stan says
Hey there!
I’ve really enjoyed watching the whole process with the bathroom. My wife Hailey turned me onto your blog about a month ago, she’s been an avid follower for quite a while.
It’s nice to know that there are other couples out there, working on the house just like us. It’s great not to feel so alone.
Keep up the good work, and thanks for all the detailed photos.
Stan
Ashley M. [at] (never home)maker says
Awesome! I’m scared to do any tiling mostly because of the whole grout part. So this gives me hope! Lookin’ good — keep up the great work!
Amelia says
looks so good! Grouting really does make a big difference. Really enjoying the white subway tile with the white grout – so clean, so fresh, so simple, so…perfect! Can’t wait to see final finishes :-)
Katie says
This looks awesome, and the grout makes SUCH a difference! Love the painted ceiling too- is it the same Dune Grass? It looks so different from the walls in the 5th pic.
How do you apply the sealant? Do you just wipe it across the surface with a sponge?
YoungHouseLove says
Hey Katie,
Yup, it’s the same Dune Grass color on the ceiling (since it’s a different plane it’s reflecting light differently in that 5th pic, hence the slight variation in color). As for the sealant, John wiped it over all the subway tiles with a clean sponge (being sure to cover every single grout line) and then wiped the face of the tiles down with a dry rag to remove it from the fronts (so it remained just in the grout cracks). For the floor he actually applied it just to the cracks using an applicator brush (sort of like a Tide To Go pen) that we also snagged at The Tile Shop. Hope it helps!
xo,
s
Amy E. says
glad to see that was *mostly* painless! we’ve been putting off grouting since mid-december on our own shower reno. i love the way everything’s coming together, and the marble floors look amazing! can’t wait to see it all put back together again!
Jocelyne says
Congratulations on all the hard work! I have started work on tiling the floor of a small main floor bathroom–as in, I bought the penny round tile a couple months ago, and purchased all the tools, grout, etc to lay the tile. On Monday, full of motivation, I ripped out that ugly linoleum with ease, only to find that the wax seal under the toilet must have a small leak because there’s a wide water stain on the subfloor, which, at minimum will have to be replaced. Sigh. More work than I anticipated.
So how do you decide when to call in professionals or when to plunder on ahead and try to DIY? I must admit, I am not as much of a perfectionist as I would like to think, and often have to “touch up” painting projects and the like. I just can’t decide whether or not to return the stuff to Home Depot and call in the pros to do the job, or to feel the sense of accomplishment after continuing to tackle the project myself.
Any thoughts?
YoungHouseLove says
Hey Jocelyne,
Well, it’s really a subjective decision when it comes to calling in the pros. We usually do internet and library research first to see if we feel comfortable tackling the task ourselves (and if we don’t we never hesitate to call in an expert). Here’s an article all about that process: https://www.younghouselove.com/email-answer-diy-damage/
And as for patching the subfloor, we actually also uncovered some water damage during our bathroom reno, so you can see how we fixed things up in this post: https://www.younghouselove.com/tackling-the-bathroom-chapter-three/
Hope it helps!
xo,
s
Amanda says
Yeah, you probably just psyched yourself out for grouting. It’s not really hard per se, but it is boring and kind of tedious, and can be stressful if you take on too much at a time and it starts to dry. Everything looks great though!
maura says
you guys are unbelievable. I am excited about painting a dresser and you are totally redoing a bathroom yourselves. Good to see you guys getting it done before the bean arrives as it can get a little hectic for those first few months. The bathroom looks great! I love the subway tile pattern in the shower. I can’t wait to see the finished product.
Olive says
Wow Rose- maybe you didn’t mean it that way but your statement kind of devalues immigrants as people, no?
John and Sherry- looking great and I can’t wait to see the finished room!
Aimee says
Great job – congrats on having the tiling finished! I’m surprised to hear that people think grouting is the most difficult part. We regrouted our shower in our last house (someone had installed tile and apparently not sealed the grout; it was almost gone), and I didn’t find it to be a problem at all. Laying the tile itself always seemed to be much more labor-intensive and brain-intensive (hello, math!) to me.
Jeannette says
those marble floor tiles look DELICIOUS!
may says
g8 work…
you guys won the Homies awards…congrats.
YoungHouseLove says
Hey May,
Woah, you scared us there for a minute. We actually came in second but we were absolutely thrilled to be nominated among so many amazing and inspiring fellow bloggers!
xo,
s
Wendy says
I use an old baking beater hooked to my drill to mix grout and it works like a charm! In case you do it again. Your bathroom looks great, makes me want to use the subway tiles somewhere, they look amazing! love your blog!
erik says
One thing to note about marble floors in the bathroom – aim is very important. If any (you know) gets on the floor it takes off the finish. Something to consider for those of us that boys. We almost got marble from The Tile Shop and that was the first thing the guys asked us – “Do you have little boys or girls?” Good thing it’s a girl!
Traci says
Those tiles look great! We got our tile and grout for our kitchen re-do from The Tile Shop too. We love it.
Great job!
Kevin M says
Hmmm, other than the mixing (which I also did by hand due to a dead drill) I actually liked grouting a lot. Probably because it’s the part you can actually see all the hard work coming together. Yours looks great, BTW.
Sarah says
Wonderful job! You can see a HUGE difference between the completed wall and the back wall that hadn’t been done yet… and the floor looks beautiful! I love it!
robyn ross says
It does look professional! Fantastic job,guys. I was nearly reduced to tears when we grouted our first floor (although I was very pregnant at the time) because the haze came back after I went over the tiles of the 115 sq ft room at least six times. I looked online for helpful hints and learned (when grouting something not made of marble), to add a big dollop of vinegar to the bowl of water you’re using to wipe away the haze on the 2nd pass. It takes away the need for so many future swipes.
Amber says
Thanks for such detailed accounts of your adventures, as always. We have an almost identically sized bathroom (same layout and everything, although our hideous blue toilet and tub – non-matching, natch – definitely set ours apart, ha) and our goal this year is to totally remodel it and do everything (except maybe some plumbing and wiring) ourselves. These posts will be extremely helpful!
Erin says
The bathroom is so much more fresh and welcoming! The color choices compliment one another nicely.
FYI: the only problems I’ve had with grouting is caused by my trying to rush. Otherwise, it is pretty painless and easy.
Maggie says
As far as the grout haze goes, shiny, manufactured tiles wipe up with warm water after 24 hours well enough (change out your water often), but when using stone or matte tiles, I’ve found that white vinegar is a wonder cleaner to get every last bit of haze off. Saves on expensive, and less effective, “haze remover” and is probably a lot faster too.
Amy says
I love how this is turning out!!!!!! Your selection of materials and color scheme are perfect (and affordable/doable!) Very inspiring! We have a 50 yr old house that we have been working on for a while. Isn’t it funny how one project leads to the next (we sometimes wonder if we will ever be able to stop?!)
All of our bathrooms are original (one with pink tile, the others with white…but old). I am tempted to use yalls color scheme as a basis for all the bathrooms. We found that marble on sale for $2.00/ft at lowes the other day!!! It’s beautiful too! With the marble for the floor and subway tile for the shower surround- we could do that in every bath and vary the style with the vanity/counter top/etc.
anyway- I love what you’ve done!!
side note- how many hours total would you say this took? and what would your advice be if we need a larger sink vanity (any ideas on an affordable replacement)?? we’d love to re-do our sons pink bath, but the vanity and counter can get pricey- any tips?
YoungHouseLove says
Hey Amy,
Stay tuned for a full time and cost breakdown in the final bathroom post coming soon…
xo,
s
Andrea says
Great tips! We are waiting to tackle the bathrooms until all the other rooms are done. Bathroom remodels scary me – but hopefully I can learn enough from others like you to be brave once the time comes.
Chloe and Company says
What timing! I just added a post this morning on my sister’s bathroom renovation and she mentions that she purchased some of her tile at The Tile Shop, too. She also mentions Grout Boost in her write-up.
http://chloeandcompany.blogspot.com/2010/01/jackies-bathroom-transformation.html
Can’t wait to see your finished bathroom!
Magchunk says
Looking good, Youngsters! I have vague memories of my parents tiling our bathroom when I was a kid and I remember some choice words during the grouting process. Taking notes for any bathroom reno’s in my future!
Maggie
Alan says
Thanks guys for this update. If you recall from me “Alexander the Grout” comment on FB, we are preparing to do almost the exact same thing. We are in the midst of removing the old grout from one of our showers and re-grouting it. We have white 4×4 tiles that are in great shape, but the grout was pretty sorry looking. The space was so narrow between some of the tiles that I needed to borrow a Dremel tool and buy a special grout removal attachment, which we’ll try this weekend. We also bought the bright white Home Depot Polyblend grout but I think we’ll stick with it so maybe we can compare results! :)
Dana says
Great Grout! Waiting anxiously for the dresser/sink/faucet workup!
Jeannine @ Small & Chic says
The bathroom is looking great!
However, I have to comment about The Tile Shop, specifically the store in Richmond. I had a very difficult experience with them (that’s the story on a message board…it happened before I started blogging), which delayed my bathroom renovation over a month. I’m very glad you didn’t get any marble tile from them!
YoungHouseLove says
Hey Jeannine,
Wow, that sounds like a quite a snafu but we’re glad they made it right. From our personal experience here (and from John’s dad’s experience with the in Northern Virginia) they have been extremely helpful and honest folks. So sorry to hear about your hurdle but it seems (as others mentioned on the thread that you linked to) that it was good of them to provide new tiles instead of just saying “inconsistencies are part of the deal.” That’s something we see as a disclaimer online and in many tile shops around the country. Glad it all worked out in the end!
xo,
s