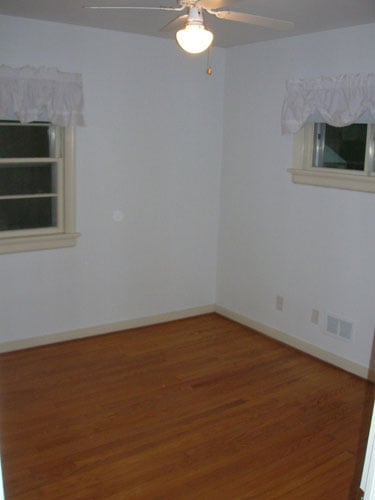
Do you hear that high pitched scream? It’s me, all the way in Richmond, shouting at the top of my lungs that the office/guest room/playroom makeover is finished. Woot! Come on in and take a look around. But wait, for old time’s sake, let’s check out the room as it looked when we moved in:
And here it is now, all office/guest room/playroomed out:
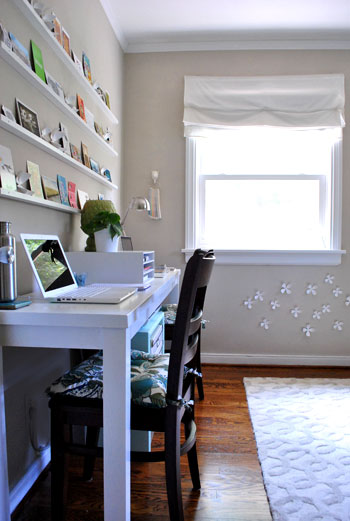
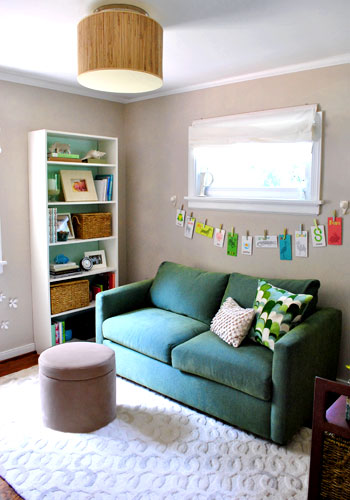
We love this room because although it’s only a 10 x 10.5′ box, it easily gets the best light in the house. So it’s not a bad spot to spend 80+ hours a week logging blog time, playtime, and accommodating the occasional guest or two. It was totally worth all the projects that we took on to get it to where it is today- in fact it was a darn good time.
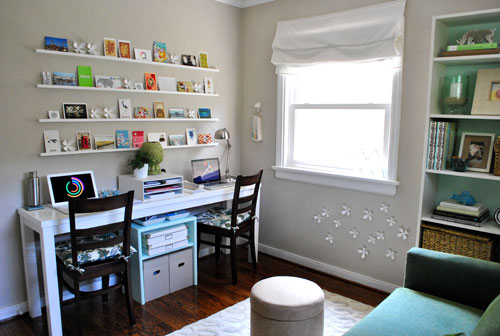
We did our best to squeeze in as much function as we could, from the shallow DIY desk and the magnetic wallflowers under the window to a ton of shelves and bookcases and a storage ottoman that’s filled with Clara paraphernalia (aka: Claraphernalia). And we can’t forget the fact that our budget friendly sleeper sofa (with a comfy full sized mattress tucked inside) really freed up some serious floor space.
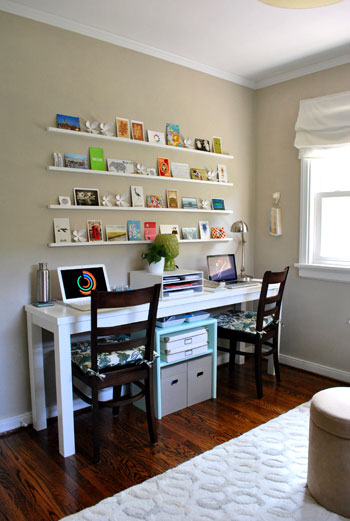
The desk that John built with our old bathroom door really saved us money and space (since it’s not too deep to keep the sofa bed from easily folding out when guests arrive- stay tuned for photos of the bed folded out in this afternoon’s post). We also found a lot of room for files and paperwork thanks to some woven baskets on the tall bookcase by the window and the small blue filing cabinet under the desk, which John also built.
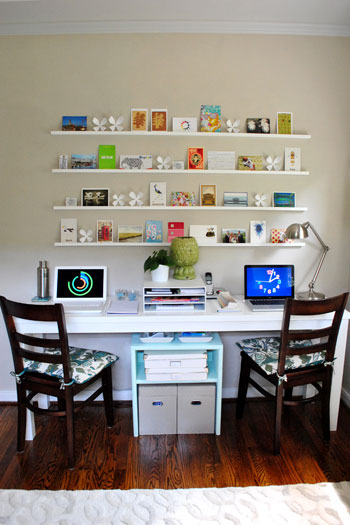
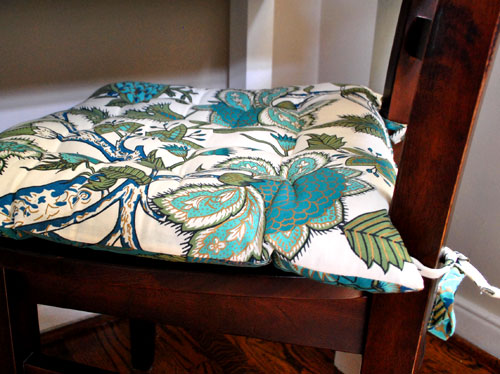
You’ll also notice that we picked up some fun patterned seat cushions that work really nicely with the sofa and the rest of the colors in the room. We already had these chairs at our disposal since we switched them out for a padded bench in our dining area a while back. And happily the cushions were just $12.50 a pop at World Market, and they definitely make our already-comfy dining chairs even easier on the ol’ backside (we’ve put in some super long days on them and can’t complain a bit).
And we can’t forget how we wrangled all of our wires to keep things looking streamlined. The whole office side of the room really works perfectly for us- and there’s enough room on the rug behind us for all sorts of playtime with Baby P (since one of us is usually on Clara duty while the other blogs away at the desk).
John also got to flex his problem solving muscles. A few days ago I was telling him how I wished there was a way to keep paint decks from taking over my side of the desk, and he smartly suggested that we hang a $5 ceramic pig hook (from Mongrel here in Richmond) at arm’s reach. It totally does the trick- and actually looks like art. Especially because we used two other pig hooks across the room to hold up our flash card clothesline and a fourth one in the closet to hang Clara’s growth chart. And you know I love a good ceramic animal (or four) to swank up a room.
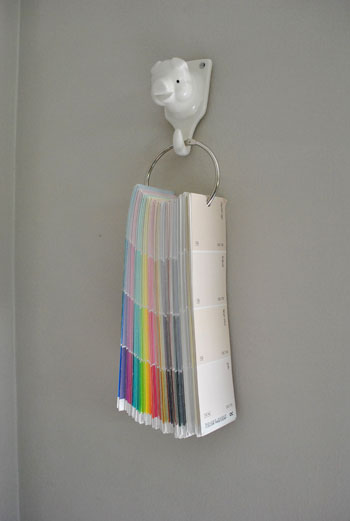
Oh and that’s actually a DIY paint deck that I made by grabbing a slew of my favorite swatches, hole pinching them all in the same spot, and sliding them onto a 3″ binder ring (snagged at Office Max on the cheap).
We’re also really enjoying our never-boring homemade postcard shelves since we can easily rotate things in and out whenever the mood strikes. In fact we’ve already switched out a ton of postcards and other small objects that make us smile. It’s addicting. Thanks again to everyone who generously sent postcards and other notes for the art wall our way!
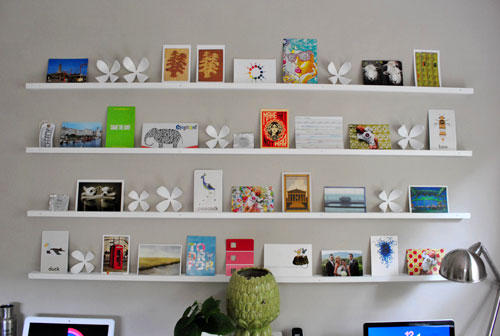
We’ve received them from England, Holland, Switzerland, Afghanistan, Greece, Spain, Austria, Italy, India, Africa, Australia, Canada, and a ton of interesting domestic locations as well. We keep all of the ones that aren’t currently on display in the handy top compartment of one of our filing boxes so we can change things up in a snap. So if you don’t see your card it doesn’t mean it won’t be up on the wall soon!
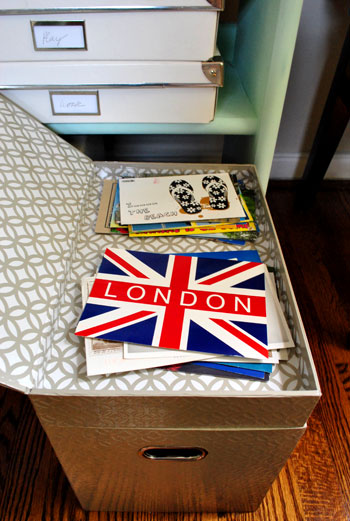
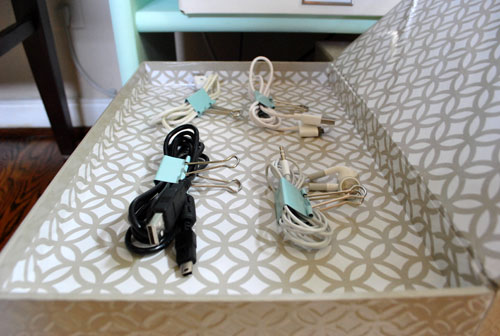
We use the other small compartment in the top of our second filing box to house all of our cords and wires in neat little bundles, thanks to some little blue binder clips from Office Max (which keep them from turning into a huge knotted mess).
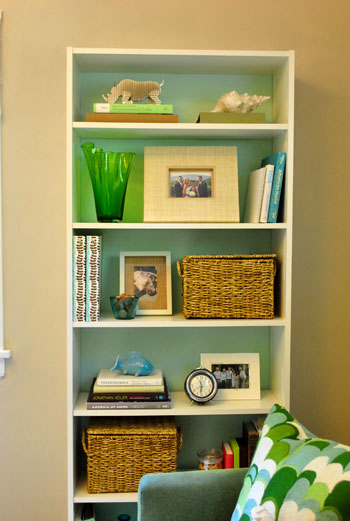
Then we have the Ikea bookcase that we tweaked with a soft blue background and some sawing at the molding to ensure that it would sit flush against the wall. It’s another really important storage piece in the room (those baskets from Michael’s are filled with paperwork and office accessories that we like to have on hand- plus it houses our printer). But we did our best to add some eye-pleasing accessories to keep it from feeling too work-heavy when guests come to stay.
We even have a quick shelf switcheroo that we pull when friends and family members arrive (stay tuned for that info in this afternoon’s post).
We also used an already-owned white Ikea planter to corral mailing tubes for shop orders that we like to have nearby (they used to be stored in a cabinet in the kitchen, which made for a lot of trudging back and forth).
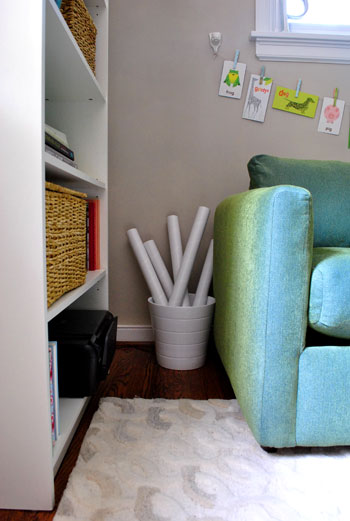
And of course we have the DIY flash card clothesline that we whipped up. Safety note: twine, wire, or ribbon can be strangulation hazards. Hanging things out of reach and keeping an eye on children who may get hurt is always advised!
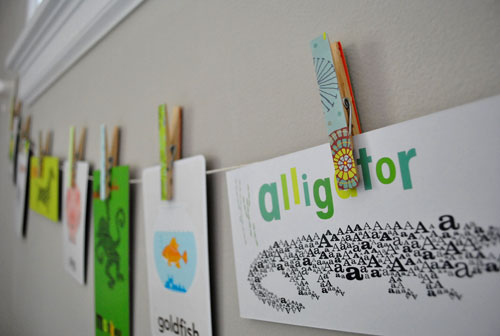
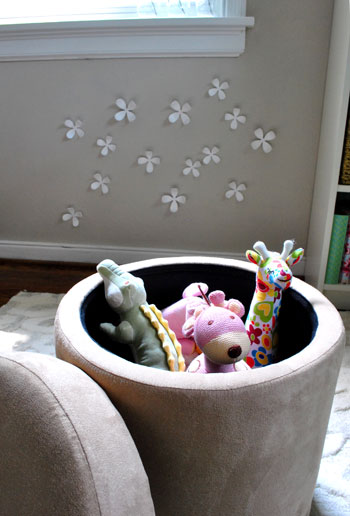
We love that it can also be used to display art that Clara makes as she gets older- or even a strand of colorful paper flags (check out those pictures here). Plus this morning we explained how we made those patterned clothespins over on Babycenter, so be sure to drop in on that post too (just click here)! We really didn’t want to- er, half butt- the playroom aspect of the space by tossing a few toys on the floor and calling it a day. So adding things like the flash card clothesline and the magnetic wall (for Clara to interact with thanks to our already owned magnetic wallflowers) really introduced that authentic playroom feeling. Not to mention that we have tons of spots to stash her books, toys, blankets, and blocks. Like this $27 storage ottoman from Target…
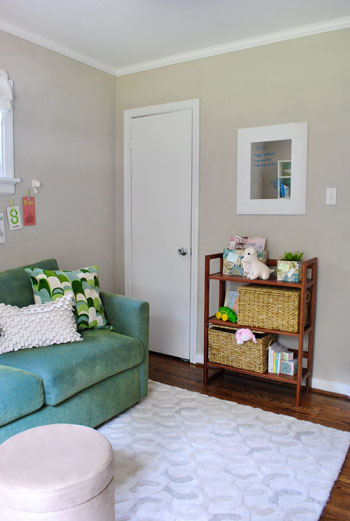
…and the woven baskets on the bookcase by the closet…
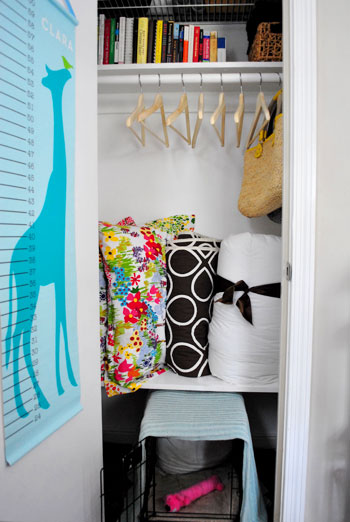
And speaking of the closet, our little makeover last week really transformed it from a dark and gloomy mess to a totally functional place to store linens when the guest bed isn’t in use (and clothing and luggage for our friends and family when it is). Remember, stay tuned for photos of the bed all folded out and ready for company in this afternoon’s post.
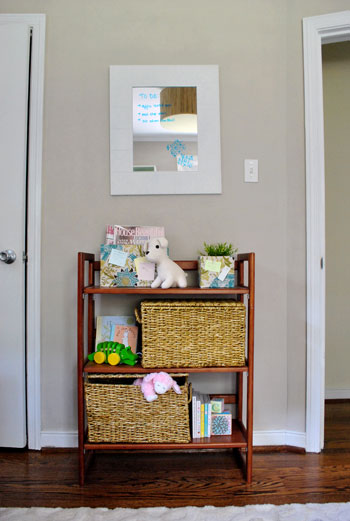
Who knew we’d end up with two bookcases in one tiny room? But they really do the trick. This one is perfect for all of Clara’s books, stuffed animals, block sets, and other “playroom” stuff that we stash in those generously sized baskets (from Michael’s) when things aren’t in use. And do you see those two patterned boxes on the top shelf? Stay tuned for a quick tutorial on that fun little project coming soon.
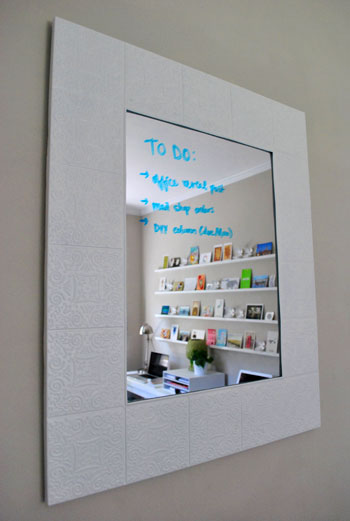
We can’t forget about our mirror/to-do list. A mirror is always nice to have around for guests to check their hair before emerging. And we gave it some office function by using a dry erase marker to write down whatever we need to accomplish and crossing things off as we go. But when guests come to town we erase all of our scribbles and write them a sweet little welcome note instead.
So that’s the big office reveal. But how much did it set us back? Here’s the budget breakdown:
- DIY pendant light: $32
- Homemade desk: $70
- File cabinet: $20
- File boxes & desktop cubby: $42 (from Target)
- Chairs: already owned
- Chair pads: $12.50 a pop (from World Market)
- Post card shelves: $23
- Post cards: free (thanks to you wonderful people!)
- Small bookcase: already owned
- Large bookcase: $69 (from Ikea)
- Baskets: $40 (from Michael’s)
- Mirror: already owned
- Storage ottoman: $27 (from Target)
- Full sized sofa bed: $699
- Pillows: already owned (from West Elm and Crate & Barrel)
- Rug: already owned (from Pottery Barn Outlet for $129)
- Wallflowers: already owned
- Magnetic primer for wallflowers: $21 (from Home Depot)
- Clothesline: $20 (for decorative paper, ribbon, and flash cards)
- Pig hooks: $5 a pop
- Closet shelf: $12
- Eco power strip for cord wrangling: $39
- Wireless printer: $79
- Mailing tube caddy: already owned (a repurposed planter from Ikea)
- Total: $1,238 ($539 without the sleeper sofa)
We’re pretty excited that the entire room makeover came in at a little over a thousand dollars and we were able to add: a two person desk, a bookcase, a sleeper sofa, an ottoman, a wall of built in shelving, a pendant light, a file cabinet, a wireless printer, and tons of storage solutions. We figured that much new furniture would bring the budget to more like 2-3K going in. Especially because many of the sleeper sofas that we researched cost over $1200 alone. And the idea that we only spent $539 after the cost of the sofa has us pretty proud (since someone could easily spend that amount on a two person desk or just an ottoman and a bookcase – and we were able to stretch that amount to include a slew of other furnishings, accessories, and electronics). Now we have a multifunctional space where we spend tons of time each day, and it also works to host our friends and family whenever they swing by.
Oh and we’re thrilled that we were able to take on 90% of the transformation after Clara came into the picture. Hooray for naptime projects and taking turns with the beanette while the other parent applies magnetic paint, builds a file cabinet, or whips up a flash card clothesline. And we’re even more excited to tackle our next mini makeover (did somebody say sunroom?). Stay tuned!
Update: You can check out what this room looks like when it’s all set up for guests or being used as a playroom right here!
Psst- Looking for more info on any of the projects or items that you see above? Click here for the intro post, here to read about the big sleeper sofa hunt, here for the DIY desk play-by-play, here for the homemade light fixture project, here for our hacked Ikea bookcase, here for the file storage we built, here for how we squeezed in some toy storage, here for how we picked out some DIY art that we could agree on, here for how we wrangled our wires, here for the play-by-play of creating our postcard art wall, here for our magnetic wallflower paint project, and here for our closet overhaul.

One Junk Drawer says
It looks amazing! If I had to select just one area, I think the desk is my favorite. Though I love how you managed “areas” in such a small space.
nue says
what a worthy office reveal! though you’ve shared bits and pieces since day 1, this really puts everything together for us readers. can’t wait until this afternoon and seeing the ‘guest space.’
liz @ bon temps beignet says
Love all the Claraphernalia hidden throughout the room. And I -really- love that alligator flashcard… going to check the link now : )
Diana says
I love it! Even with the neutral walls, I love the pops of color all over (and it doesn’t hurt that blue is my favorite color). I have enjoyed watching this transformation and have been inspired to fix up my own office.
Thanks for sharing!
Amara says
WOW!!!! What you guys have accomplished on such a small budget is amazing. Beautiful job and with a newborn too! I am going to be tackling my office soon which currently includes a desk and stacks of papers all over the floor. Boo! So, I can’t wait to use some of your ideas in my space. Congrats again!
Amanda @ Our Humble A{Bowe}d says
The office looks great! I wish my office was completely finished: http://ourhumbleabowed.wordpress.com/2010/06/02/office-progress-2/ We still have some building to do, but I love having it instead of our little desk. I’m sure you are thrilled to have an actual working space.
AnnabelVita says
That looks awesome guys! It really all works together, doesn’t look like the three-room mash up it could be.
I wrote a post about your wall of art on my blog here: http://post.ly/nzo1 (because I love it so much. You can also see how I combined two of your great ideas (magnetic surfaces and easy-switch art display) in a big magnetic photo frame.
Emily B. says
LOVE IT! We have a small bedroom that we want to make an office/guest room and you have showed me it is possible, even on a tight budget. LOVE the blog, check it everyday! I feel like I know you guys. I live in Hampton Roads, so next time I go to Richmond I am going to go to all the places you’ve mentioned. Can’t wait for the sunroom makeover!
Angela says
I have to admit, I wasn’t loving this transformation in the beginning but it came together nicely.
I do have to question a line in the budget breakdown though. Didn’t you buy the rug from Pottery Barn Outlet specifically for this room? So technically it wasn’t already owned. How much did that cost?
YoungHouseLove says
Hey Angela,
We actually purchased the rug back in late February for the guest bedroom (with the full sized bed) at the time. Back then we had no idea that John could come on full time and work from home with me, so we didn’t know we’d be needing a two-person home office at that point (although we did plan to freshen up the guest room and add some kid-friendly function for Clara). We didn’t brainstorm and announce our three-function room until late April/early May. As for the cost, it was just $129 for the 5 x 8 beauty (which was originally $429). So I guess you can add that into the total if you want to account for the new-ish rug. Here’s that post for ya with more info: https://www.younghouselove.com/window-shopping-charlotte-or-bust/
xo,
s
Emily says
love it! great job, sherry and john!
Robin O says
Awesome job guys. Looks homey and fresh. Makes me want to go organize something! :)
Holly says
Love the office makeover. I’m in the process of doing ours as well. Our office is about half the size of yours and it serves as an office and a craft/sewing room. Do you guys have any advice on what to do with all the paper? Like what documents do you keep and file and what is just surplus that can be tossed? We seem to have major paper pile ups in our office, because we keep all statements and such that come in the mail.
YoungHouseLove says
Hey Holly,
We try to keep things as digital as possible (we sign up to get lots of statements online, so we never have to file them). We’re also minimalists at heart, so we try to record things in our online calendar and toss (well, recycle) the paper slips that tend to pile up. We pretty much just keep major paperwork (like tax stuff) in our file boxes under the desk – we even work out all of our contracts so they’re online documents. Hope it helps!
xo,
s
Kate @ Twenty-Six To Life says
Love it! My favorite part is the Clara height magnets on the wall – well, they’ll be Clara height when she starts toddling around at least :) Great job!
Sarah says
You guys have done it again! I LOVE it. I would be screaming too!
Ann says
Hi, a few questions- I didn’t see a printer there, do you have one in the room?
Also, where was the sleeper sofa purchased? I like it.
And the wallflowers? They’re fun. WHere were they bought, and for how much?
YoungHouseLove says
Hey Ann,
Just check out all the links on the bottom of the post for that info. The printer is on the bottom shelf of the bookcase (you can see it in the shot of the mailing tubes). It’s wireless so it doesn’t need to be near the desk. And you can find the wallflower info and sofa bed info from the bottom of the post (and also by clicking a bunch of links in the post, whenever we mentioned the wallflowers or the sofa bed we embedded a link for ya!).
xo,
s
Jane says
Thanks for the inspiration! We’re moving to a new place soon, and will definitely put together an office space/guest room, so I’ve been reading every office-related post with an eye to technique & room arrangements.
Jessica @ How Sweet says
Wow! It looks absolutely incredible!
Patti says
Love the transformation! My fav is the little group of stuffed animals poking out of the ottoman, reminds me of the movie Toy Story. And yes, and there is absolutely nothing half-butt about this space LOL!!
Nichole@40daysof says
Really love this one. You guys did an amazing job, as usual. I can’t believe how much function you stuffed into that room, but it doesn’t look stuffed at all!
http://40daysof.wordpress.com/2010/08/05/hunter-douglas-genius-or-insane/
Carmen says
It looks amazing. It really is multi-functional and yet totally kid friendly. Any ideas how you could make a long room multi functional? Love your ideas and since I am working on a similar project, your posts has been very helpful. Awesome job!
YoungHouseLove says
Hey Carmen,
Our den is a great example of a long multi-functional room (we have a “mini mudroom” in one corner, a desk in another, and a seating area on the other side of the space). Using a rug or two to define different areas is always a great idea in a long space. Check out this design dilemma from a while back which also might give you a few ideas: https://www.younghouselove.com/ginas-design-dilemma/
xo,
s
Chrissy (The New Me) says
I love, love, love this. You’ve inspired me to look into building/making a two person desk for my home office. Great use of space, color and OMG – even your clothes pins are adorable! Thanks for sharing and inspiring.
Dennis says
It looks fantastic you guys! You are full of such great ideas!
Tashia D says
It looks so great! It’s hard to believe that it’s such a small space. I have to say that the artwork shelves in front of your desk is fantastic! I just might have to borrow that idea for my home office…whenever I can find the time to make one! Thanks for all you do and share!
hi-d says
Beautiful! You definitely were able to combine function & fashion together. We’re working on a nursery for our little one due next year; however, it’s going to be a combo type space. We have a large closed door cabinet & treadmill that we have to have in that room. Thinking about getting some decorative standing screens to kind of hide the clunky treadmill that will be on one side of the wall. Any other ideas? Let me know. :) Thanks! hi-d
Lisa says
Love it! We’d love to do something similar, but not sure how we would make things fit. Do you think it would be possible with more room for the computer stuff (we’re tech geeks with big desktop computers)?
YoungHouseLove says
Lisa- Absolutely! Just work with what you have (and need). We needed a lot more room for magazines and paint decks and notebooks so things like baskets and the three-cubby shelf on the desktop worked for us. But if you have other items just try to display them cleanly and use other means to store things away when you can. Hope it helps!
Hi-D- A screen is a great idea and we’ve also seen people hang a curtain from the ceiling to create sort of a cubby or a nook for the treadmill so it’s semi-out-of-sight. Hope it helps!
xo,
s
Kristen says
What about the roman shade? Where did it come from? I’m looking for some good ones for my living room…
YoungHouseLove says
We’ve had those practically since we moved in four years ago! They’re from Ikea. So cheap! Hope they still have them.
xo,
s
Catherine says
It’s fabulous! So much personality packed into a small space!
I was caught of guard at the beginning of the write up, though. When you say “80+ hours” blogging, do you mean you each spend 80+ hours or that if you add up the hours you both spend, it comes out to that? It’s none of my business, but egads, if it’s the former… I was just curious.
YoungHouseLove says
Hey Catherine,
One or both of us easily spend 80 hours a week in the office (all four of us- including Burger are in here right now!). We just meant that someone is using this room for at least that amount of time each week. And the four of us like to be together… so it’s usually a party of four!
xo,
s
Jasmine @ Eat Move Write says
I love this room! I especially love the two-person desk. Hubby and I need that, for sure!
We’re working on our second bedroom, which needs to be a (future) nursery and a guestroom, which is difficult considering it’s a 10 x 10 box, too.
Ella @ The Princess and the P says
LOVE the floral / paisley pattern on those seat cushions!! And the spare wallflowers you used on the bookshelves look great – the whole room does! :mrgreen:
heather s. says
I was going to make the same comment about the rug. You mentioned in the original post that you bought it specifically for this make-over yet you left it off the total cost list. You also bought the new wireless printer specifically for this makeover so that should be included as well.
YoungHouseLove says
Hey Heather,
You’re definitely right about the printer! Sorry for the oversight. We’ve added it to the budget breakdown. As for the rug, we considered something purchased in February as being already owned (especially because we had no idea we’d be creating a home office at the time, we just knew we wanted to use it in the guest room) but feel free to add the $129 price of the rug to the total if you’d like!
xo,
s
Catherine says
Okay, that makes so much sense. Thanks for clearing that up for me! As a beginning blogger who looks to you two (or four) as role models, I got a little knot in my stomach when I (mis)read that.
Keep up the great work as always!
Jess says
Hi, I’m a lurker :)
This room is so inspiring! Right now my husband’s office/our guest room is more dissertation than relaxation. I feel the need to renovate. Brava!
Kelly says
What is the paint color in that room? It looks like it has a touch of gray to it….
YoungHouseLove says
Hey Kelly,
It’s Glidden’s Sand White. Yup, it’s the perfect sandy-taupey-gray tone (we also have it in the living/dining room). Hope it helps!
xo,
s
Kate says
The room is looking great! I can’t wait to see it this afternoon all set up for guests.
Right now I’m not really ready to do any makeovers (mini or otherwise), but I am trying to do a few little things here and there to spruce up our apartment. I just scored a $5 mission style coffee table on Craigslist that should be a great replacement for our old Ikea Lack coffee table (which has seen better days but will be broken down and stored in the storage area in case we need it once we move to a house). I’m also rearranging accessories (and maybe looking at the thrift store for one or two beauties) to give things a fresh look.
Honestly, the biggest thing I’ve done lately to make the apartment look great is just to pick up all the clutter and give it a good cleaning. It’s like a free mini makeover! I wish my husband and I could keep our place as nice as your’s (even in those “real life” photos it still looked great).
Carmen says
About the paint color…so home depot doesn’t carry the same one anymore, but they can mix it? Is that correct? (Read your post about glidden paint new revamp.).
YoungHouseLove says
Hey Carmen,
Yup, if you ask at the desk they can look up the formula. They also have a new Glidden color called Natural Linen (which is almost if not completely identical). That way you can grab a swatch if you’d like. Hope it helps!
xo,
s
nikki says
LOVELY! Form + Function at its finest! I love that you worked hard to repurpose and give a new life to so many of the items in your office! I also love that it’s become a place for the entire family to work/play! Even little Burger has a place to hide out! Fantastic job!
Vonda says
I’ve been following along (or more like stalking) the whole time but to see it all rounded up in one post is great. You did an amazing job. It’s inspiring me to clean our office/guest/junk room up a bit and to create a small desk area in our den. I can’t wait to see the guest room pics later today!
I LOVE the wall flowers and actually ordered them from Amazon when I ran across them (after seeing your original posts on hanging them). Of course I haven’t even opened the box b/c I’m not sure if I can create as cool of a design. I’m trying to put them on 2 small parallel walls while keeping the pattern flowing from one wall to the next. Any suggestions??
YoungHouseLove says
Hey Vonda,
Our suggestion would be to lay them out on the floor to mimic the pattern that you’ll create on both walls (we love that idea by the way). That way you can figure out what layout you’d like by easily sliding them round on the floor!
xo,
s
Page says
I love this! I’m in the process of trying to turn one our rooms into a multifunctional one, so thanks for the inspiration!
Caryn says
Awesome job! Thanks for sharing a final wrap-up. My husband and I are buried in our own kitchen renovation and it’s nice to see someone who made it to the other side. We’re doing all the work ourselves so it’s taking a while, but it’s so exciting to see it start to come together!
claire says
it looks great!!! thanks (as always) for offering the world such inspiring design!
Krista says
oh wow! I love it!
Brittany says
FYI — the link that is suppose to go to the clothes pin how-to sends you to the original post showing the 3 different ways to decorate the line. Just thought you’d want to know.
LOVE the office!!
YoungHouseLove says
Hey Brittany- Thanks for the tip! Off to fix it!
xo,
s
Jenny @ DIY Newlyweds says
You guys did it again! Beautiful job, I love how one room seamlessly serves so many purposes. I can’t wait to see the sunroom makeover next, you guys are too much!
Beatrice says
I vote the rug counts as already owned. It wasn’t bought with the office in mind. Just my .02 ;)
Jacquelin Seybert says
FABULOUS as usual!
cassie @ hi sugarplum! says
Great job! So fresh and clean…and totally YHL! I love the soothing colors you guys always choose. What a fun space for you all to be together in, and so lucky that you can work together at home with Clara as well.
I just finished a total room makeover for my son while he was visiting his grandparents out of town. He gets home tomorrow and I can’t wait for him to see it! I’ve been blogging about all my DIY/cheapo projects in the room. Thanks for the inspiration!
Suzie says
Awesome, awesome, awesome! I love every single thing about that room!!!…especially that hook for the DIY paint deck!!
Carmen says
Quick question: have you ever painted picture frames?
YoungHouseLove says
Hey Carmen,
Yup, just use the mirror that we painted in the nursery as a guide (same process).
xo,
s
Amanda@The Hand Me Down House says
Well as always you guys knocked it out of the park! :) I LOVE your new office…in fact, can I come over and work in there??? Everything looks absolutely perfect! WTG!!
Gemma says
Looks absolutely fabulous! For such a small room, it is so functional, but not at all cluttered. Nice work, you two!