Alternate post title: Look how domestic my wife is.
I don’t know why I’m writing this post since Sherry is the mastermind/executor of this project. Maybe just to brag about her mad ironing skillz? I just watched the baby and approved comments while she did her thang for the better part of the day yesterday. The first step was cutting our 12.5 yards of our on-sale $8.49/yard yellowy green fabric (more info on that here) into perfectly sized panels for each side of the two bedroom windows (leaving enough leftover for one closet panel). Lucky for us, the living room rug made a great guide for keeping our cuts straight and our corners square. Especially since it’s 8′ long – so it was easy to lay a tape measure next to it so Sherry could cut five 90″ panels without breaking a sweat. As for the width, we left them the same width as the bolt itself, which was around 61″ wide. This means two panels can easily be drawn to cover each of our 39″ windows without feeling too taut or stretched.
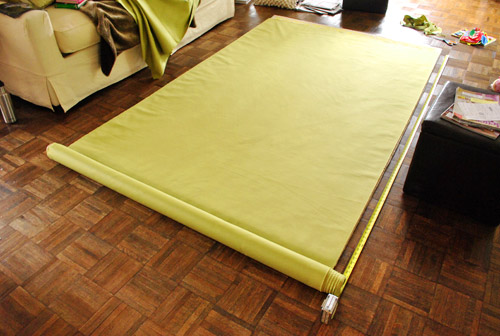
Within about fifteen minutes she had cut all five 90″ x 61″ panels (two for each window and one for the closet) and we realized that we apparently cut it very close when buying those 12.5 yards (pun intended). This is all that we had leftover:
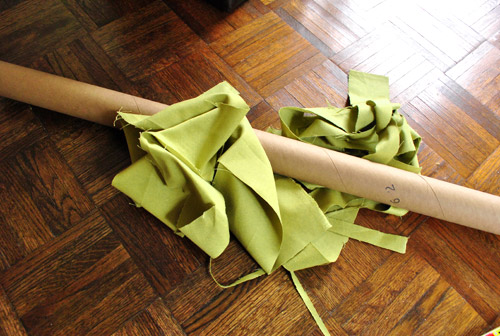
Not necessarily a bad thing (since we’d hate to dole out cash for more yardage than we needed).
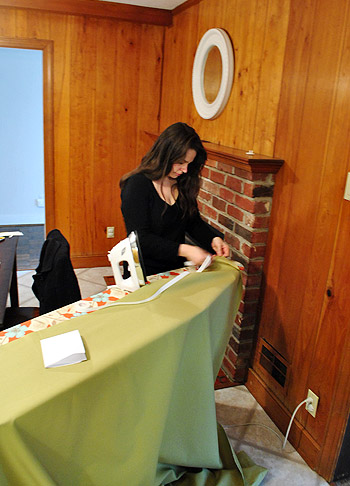
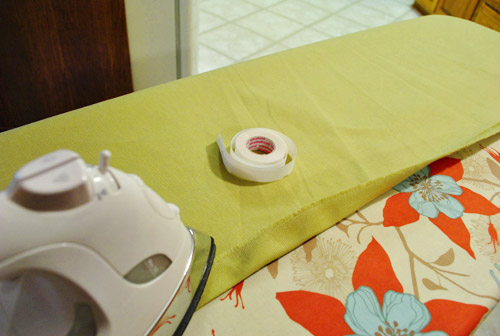
Then came hemming, which Sherry tackled using her favorite trick: heavy duty no-sew hem tape. Read more about that process and learn how to make DIY curtains in general right here (for even more iron-on hem tape info, we made a video of the process here and we have even more in-depth pics of its use here). It basically involves ironing, peeling, folding, ironing, and moving onto the next seam.
It wasn’t exactly a quick task to hem all four edges of all five panels (Sherry kept yelling out “1 down, 19 to go” which got old by about “3 down, 17 to go”) but getting that nice finished edge is certainly worth it. Plus, Clara and I kept the ol’ ball and chain company in the kitchen by singing, approving blog comments, and, um, eating while she ironed the day away. Quick, everyone freak out, Sherry’s hair is down:
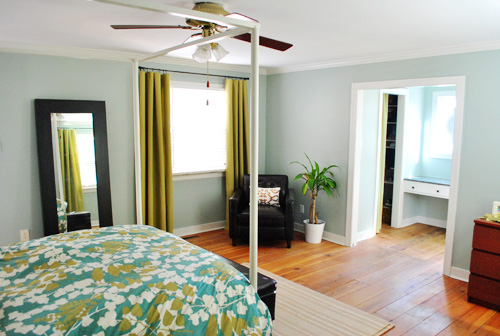
But let’s fast-forward through all of the tedious stuff (the ironing, the clipping of curtain rings to each panel, and the hanging of all three curtain rods, which you can learn more about in this post of yore) and get to the fun stuff: the finished product.
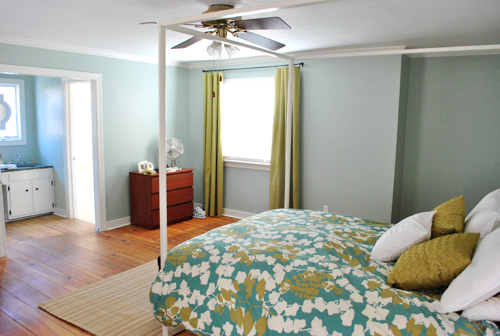
Oh and don’t mind the dresser or the fan or the lack of wall art and everything else that’s amiss. This room is definitely one of those works-in-progress that we’re taking one day at a time.
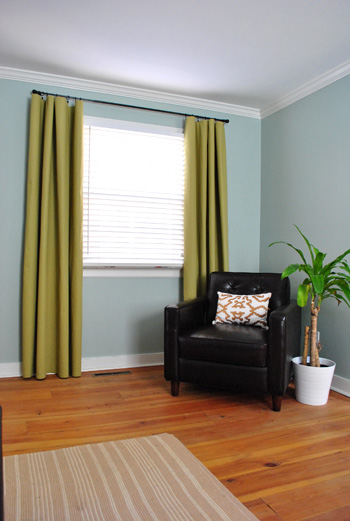
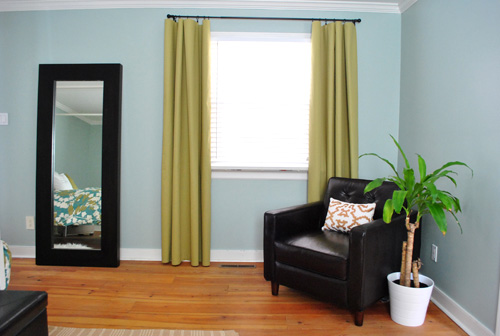
We’re really happy with how our DIY curtains turned out. And it should be no surprise that we chose to hang them higher and wider than the window itself to give the whole thing a bit more height and presence. We’ve actually had a reader tell us that she dreamed about us and Sherry mentioned something about hanging curtains “high & wide” in the dream. How crazy/hysterical/awesome is that? Nice catch phrase, babe. Who wants a “high & wide” bumper sticker?
Sometimes we like curtain fabric to “pool” a bit on the floor, but after looking at it both ways we decided to let these babies barely graze the floor boards. It kept them looking crisp and modern (and created that cool loopy draping effect, which didn’t happen as much when I held the rod lower and they bunched up on the floor). So that would be our tip. Clip your panels to the rod and then move the rod around on the wall to pin down the perfect placement. That way you can raise it and lower it by hand and eye everything until you find the perfect height. Then just mark your curtain brackets and hang them right where you like them best – so your panels graze or pool to your heart’s content. It definitely beats hanging the rod and then clipping up the curtains only to find out they look all dorky and short.
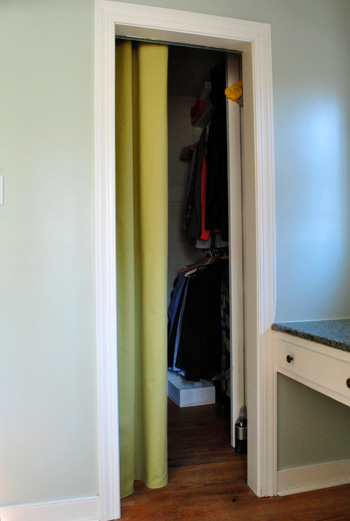
We also hung one panel on the inside of our closet to act as a less-intrusive alternative to the bi-fold door that used to be there. Most of the time it’ll sit pulled to the side like this:
But if we ever need to conceal our mess (or duck in there for privacy if someone’s over but we need to make a quick change) we can pull it closed like this:
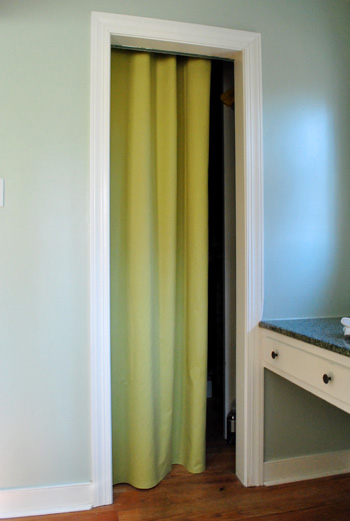
It’s kinda like a mini dressing room in there now- there’s even a light. And Sherry gets a kick out of picturing Clara doing puppet shows and other stage-related things from within the closet when she gets bigger and has that amazing imagination that only kids have.
Oh and if you’re wondering, here’s how it’s hung from the inside. We placed the rod high enough so that it’s not seen from the outside, and wide enough so the curtain can be completely closed (for privacy) or fully opened (so it’s not in the way of anyone walking in or out). It’s kinda the best of both worlds.
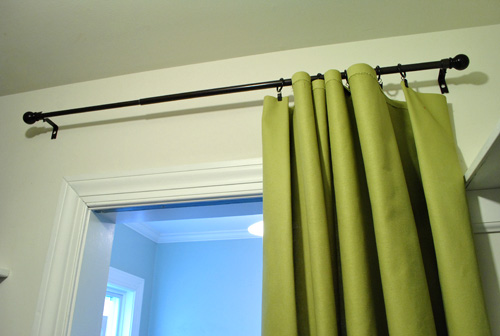
Oh and we got our oil-rubbed bronze curtain rods and ring clips from Target (aka Tar-hay) for cheap. It was around $40 for all three rods and all five packs of ring clips thanks to a few sales going on in the curtain aisle (and the 5% off we get for using our Target card). We love ring clips because they make curtain-creating a lot easier (no grommets or sleeves or pleated details to deal with, so you can literally clip up bedsheets or tablecloths as curtains if you’d like, or just hem fabric on four sides like we did). We also like ring clips because they’re particularly kid-safe. Should Clara decide to go crazy and try to swing on them like a monkey, the clip will release the fabric, which will fall to the floor while the rod and the rings will remain on the wall. Gotta love a safety feature that looks this good.
As for the finish, Sherry prefers oil-rubbed bronze rods (even in a nursery) because she says they’re “like eyeliner for the window.” And I have to agree that I like the look too- especially with the deep wood furnishings that we gravitate towards (along with some white things and even some painted pieces). But again I ask, why am I the one writing this post? Makeup references & hemming aren’t exactly my forte.
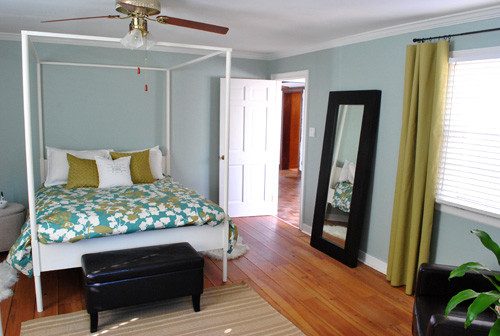
Anyway when it comes to the panels, beyond the function, height, and softness they add, we’re really happy with the color. Which means those three days of fabric hunting were all worth it. The yellowy green tone does exactly what we wanted it to do – it brings out the golden-green color of the bedding without matching it exactly (Sherry has this song she likes to sing called “Matchy-Matchy, Tackly-Tacky” which came about when she was imitating her sweet Italian mom, which is always amusing). But getting back to the curtain color, we’re glad we went a bit greener (instead of browner or yellower) than the bedding, because it looks nice and fresh against the Caroline Went Clubbin’ Aqua Carolina Inn Club Aqua wall color (get that joke here) while still obviously relating to the color in the duvet.
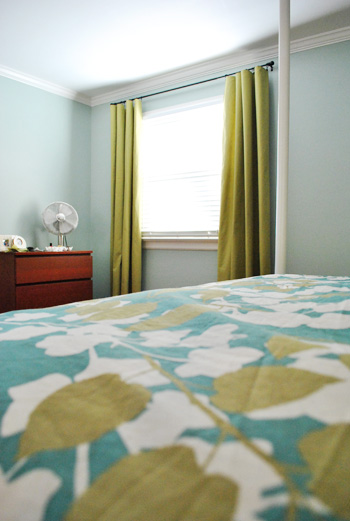
The curtain color also goes nicely with the new pillows that we snagged purloined for the bed too. So between them, the curtains, and the bedding we feel like we’ve got that golden green color sufficiently injected into the room. Now we can start layering in some other colors and textures for a little dimension and interest. Eggplant? Navy? Charcoal? Inky blue? Who knows where we’ll end up. But let the fun begin. Oh yeah, and pardon the missing nightstands, bedside lamps, etc. They’re also on the ol’ to-do list.
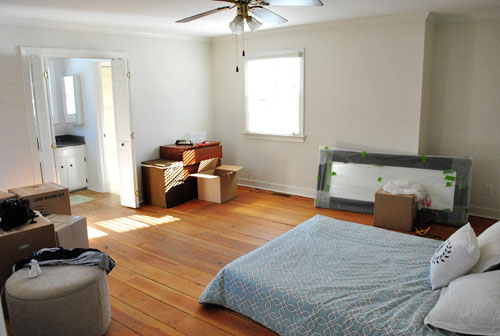
We definitely still have a lot more things to do in here (and we’re happy to take our time), but it really has come a long way in the past seven weeks or so. We almost don’t recognize this bedroom shot taken right after we moved in:
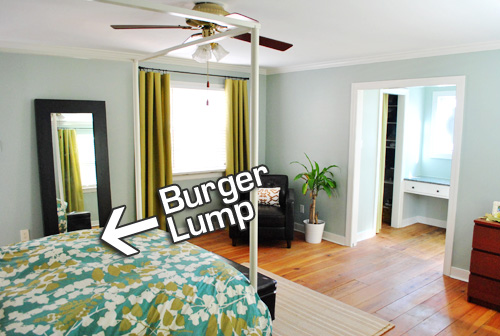
Oh, and last but not least, we thought you might appreciate a little “behind the scenes” tidbit. Sometimes we have to work around a sleepy chihuahua who refuses to get out of bed. Such a diva. But at least Burger doesn’t mind when I make the bed right over him. And our new fluffier duvet makes him nearly invisible. Yup, he was hiding in bed the entire time we shot these after pics.
And so ends the curtain diatribe that is this post. The whole process – as long as it was – has given us a bit of curtain fever. At least that’s what Sherry’s calling it when we drive by fabric stores and she presses her nose against the car window and says things like “I’ll never let go” in her best Rose-from-Titanic voice. We need them in a bunch of other rooms and we’re determined to choose bold and patterned textiles to add some serious interest. Because we definitely don’t want to end up with white Ikea curtains everywhere again (not that we don’t love ’em, but we’re just ready to have some fun and take some risks). So don’t be surprised to find us posting about our fabric store adventures again sometime soon. A guy can only listen to those Rose-from-Titanic impressions for so long before parking just to make it stop.
Psst- Burger’s totally letting fame get to his head. Check out his big DogMilk interview here.
Psssst- We just announced this week’s giveaway winner, click here to see if it’s you.

Melissa says
What?! No ponytail??
Love the curtains :)
Julie says
These look great! Totally inspires me to find the right fabric to make curtains for our bedroom.. a task I have been putting off for too long.
jordan Thompson says
Yall are so awesome! I can’t ever get curtains to look like that! And the Burger bump made us laugh out loud. hilarious! The room looks amazing!!!
Katherine says
LOVE heavy duty no-sew hem tape. My husband has some on his pants that he is wearing to work today – don’t tell him that though. You have inspired me to make my own curtains. Watch out here I come.
Amanda @ Our Huble A{Bowe}d says
The new curtains look great! I love the pop of color! Glad to see you’re taking more risks with the new house, they’re paying off!
Claire says
Wow!! Her hair is down!!
Love the curtain colour, would never have thought of using that colour. It’s the same colour as the crayon that never got used when I was little. :)
Stephanie says
I have to admit, I wasn’t too sure about the curtain color, but it REALLY ties the whole room together. Looks great- good job you guys!
Jenny says
Looks fabulous! I love how you’re taking things one at a time instead of a whole room makeover in the blink of an eye, easier for those of us with NO time to follow! Love the burger lump :)
Carole says
very nice! I just hemmed some curtains by hand this weekend, because I don’t like the look of machine sewn hems….but hem tape would work just as well.
I love the colour combo, I would have never thought of those two colours together, but they look great. Maybe it’s because it always makes me think of that saying that “blue and green should never be seen without a colour in between.” Who makes up those rules? Let me know, and I’ll send them the link to your lovely room!
Robin says
I’ve never heard that saying! Anyone else heard that?
YoungHouseLove says
We hadn’t either! But it’s pretty funny. Apparently we break that rule all the time because we love mixing blue and green in Clara’s room too!
xo,
s
Jen @ The Decor Scene says
I just recently mixed blue & green together as well. Slate Blue and a light Lime Green. Love it. Never heard that little saying. I guess someone needs to change the “Rules”.
Suzanne says
I’ve always heard it as… ‘except with yellow in between’. and you’ve kinda done that with the gold.
Laurie says
I remember that saying except it was “blue and green should never be seen except in a washing machine.”
Meredith says
What I have learned is that colors opposite the color wheel (purple/yellow, red/green/ orange/blue) go well together and then complimentary colors are any that are right next to each other – blue/green fits that, as does red/orange purple/red, orange/yellow, blue/purple….etc.
Emily says
Looks great! I have a question about the hems though. How do you get a straight 1″ (or whatever you use) hem all the way down the fabric. I feel like I measure, pin, and iron, and the line gets wavy all the way down the edge.
Any help is appreciated!
YoungHouseLove says
The way the hem tape is applied, it’s ironed on with the fabric flat first (then it’s folded over and ironed down again to create the hem). So it’s really easy to just place the hem tape along the edge of the curtain and use that edge as a guide to keep things straight. Then you just fold over the fabric at the same 1″ interval all the way down the panel and iron the seam in place.
xo,
s
susie says
I would love to do curtains like that (because they look awesome), but we have huge hot water radiators under almost every window, and I feel like the length would be a fire hazard. sad trombone. any ideas?
YoungHouseLove says
Anyone have any ideas for Susie? You could hang cool fabric valances (and DIY those too!).
xo,
s
Lisa says
Hey Susie,
We have annoying windows like that too but even with our floor length curtains, we haven’t had a fire/heat problem at all. The only thing you’d probably want to do is double check the fabric you choose to make sure it’s non-flammable just in case. Hope that helps.
Youngsters – love your new curtains. They really suit the room and tie in the bed, walls and even the floor. Looks fabulous.
Cheers, Lisa
Felicity @ Our Little Beehive says
We did valances because I couldn’t pass between the window and the bed when we tried long curtains (oh the small rooms!) They look like cute bonnets for the windows. I’ll be posting about them on our blog in the coming days.
Christina says
We have lots of the big old steam radiators in our home. Some of them had covers when we moved in, you know the metal kind with the decorative holes punched in them. With the cover there we’ve never had a problem with hanging the curtains behind the heater, same length as all other curtains in the house. No burning or scorching. I would use a natural fiber curtain though, so it doesn’t melt. Since not all the radiators have covers we plan to build wooden benches to cover them and have inserts made of that fancy punched out metal for ventilation. Right now we don’t have any curtains hanging behind uncovered heaters.
LauraC says
Our 1940’s house is heated by radiator/water heat too. And yes, they’re under all our windows too. So I understand. But it’s not a fire hazard because the hottest it can get is the boiling point of water, and fabric won’t catch fire at that temp. I mean, you can boil water on the stove and stick cloth in and it’s just going to get wet. So we didn’t worry about it at all, we have long curtains that rest against the heaters. They get warm, but not even too hot to touch. Hope that helps (and that I was a little bit clear)!
Patti says
I have steam heat radiators under my windows too so what I did to keep my floor length curtains out of the way was to place two very large empty vases on either side of the radiator to act as a kind of tie-back for the curtains. Tucking the curtain beside the vase (and not the radiator) not only relieves my mind of any worries of scorching or fire but helps the heat flow freely.
Stephanie Phillips says
Laura, that is so logical! It makes perfect sense!
Page says
*Love*
Amber says
Love these! I have those same curtain rods from Target, and my best friend told me they look like batons. :) Punk.
Lara says
Love it so much! Can’t believe what you have done in seven weeks! You make such great choices.
Psst. I’ve never seen anyone look so glamorous while ironing.
YoungHouseLove says
Really?! I almost didn’t let John post that terribly pic. Haha. I’m surprisingly vain.
xo,
s
K says
Lovely! You are a patient woman to tackle all the ironing.
linda O says
You guys are adorable !!
Amy says
So I tried to make some curtains using your method a few months ago and the hem tape didn’t stick! I ironed and ironed but it never seemed to get sticky and properly adhere to the fabric. I was totally disappointed and discouraged. Can you give a step-by-step on the minutia of the process so I can get it right? Are there any tricks? Have you ever had this problem? Thanks
YoungHouseLove says
Hey Amy,
So sorry about that! We’ve never had that experience so maybe you didn’t get the “heavy duty” stuff I love, or your iron was too hot or not hot enough, or your fabric was somehow not compatible (not sure why that would be, but I guess if it’s too slippery like faux leather or something). We did make a video of the process here so that should help, and we have some more in-depth step-by-step pics of its use here! Good luck!
xo,
s
Sara says
I have had problems with the iron on tape if the fabric is too thick. I usually can get it to work by turning the iron up pretty high. Just crank up the heat slowly and watch it carefully so you don’t scorch the fabric.
kami says
looks good! do you two happen to know what the flooring in your family room is called? it’s hardwood, but in tiles? i have it in my kitchen…
YoungHouseLove says
Hey Kami,
It’s called parquet flooring. Hardwood parquet if it’s wood (sometimes it’s laminate, so we feel lucky to have wood!).
xo,
s
Kristen says
The bedroom looks divine! It always amazed me how photogenic your rooms are, even when they’re not ‘complete’. The curtains are perfect!
Care says
Great Job! Looks Amazing!
I love the contrast/mix of colors.
The burger lump is too funny :)
Stephanie says
See, I am so amazed when you guys find stuff that goes together/falls into place like that (the color of the curtains, and pillows especially). I know you really work at it though and it’s not like it just appears from out of nowhere. Anyway, do you have any tips for that? Like did you take a swatch of the curtain fabric with you while you were shopping for pillows?
YoungHouseLove says
Hey Stephanie,
Wait, did you read about our curtain fabric hunt? We wrote a post about that a few days ago- but it involved 6+ stores and 3 days of searching and returning home with swatches until we found the right fabric! It hardly fell into our laps, but we love the thrill of the hunt. When it came to the pillows we didn’t have a swatch with us or anything, but we knew we could return them if they didn’t work. We did have a few paint swatches tucked in my purse that were similar to the greeny-gold leaves in our duvet during our fabric hunt, but it still took us a while to get that right. Hope it helps!
xo,
s
Stephanie says
Oh how I wish I had that love of the thrill of the hunt! That is what I am missing! The room looks so great so far; can’t wait to see more. It is awesome that you were able to find those pillows. It really brings it all together so well. Also I would have been scared of the stuff not “matching” perfectly like you described, but I see it all works. It looks so good!
Krysta says
The curtains look awesome!! It’s amazing how a little color and ironing can bring a whole room together.
angie says
Kudos to a job well done!! You nailed the curtain color for sure! It looks amazing with the wall color and duvet. And yes, I did freak out. My first thought was not, “look at the ironing/hemming queen” but “holy smokes! sherry has her hair down!”….which is beautiful, by the way.
Clare says
Whoa nice! Good job Sherry – and I notice the hair down…it looks great! You are a lucky man John!
Chelsea says
Hahaha love the Burger lump! :D
I’ve gotta say, the curtains are a color I never would have picked out, but they really work. So fun to see your fabulous room come together piece by piece!
Liz W. says
I am totally inspired. We just moved, and our master is beige…time to get ‘a movin with some COLOR! Does the hem tape really hold up over time? I know I’ve used it on pants before and haven’t been too pleased :)
YoungHouseLove says
Hey Liz,
I swear by the heavy duty stuff. It lasted over 4+ years on curtains in our old house (which are still going strong, we just moved out and left them behind, but I’d expect them to hold up for at least another decade or two). Even on super thick fabric it works well (like Clara’s curtains, which were made from indoor/outdoor fabric that had some serious heft). Hope it helps!
xo,
s
Leslie Walker says
I’m a new reader of your blog and love it! The curtains look great :) And my vote is for an eggplant colored pillow ;)
Jill Stigs says
They look great! In fact, I think this post has actually cured my paralysis about curtains. Can’t wait to get my tax refund now.
You could paint the dresser to match the chair/ottoman/mirror frame and put a cool large colorful canvas above it. Maybe Sherry can paint it herself in some of the other colors from Sue? Then you could take a risk and get colorful with the nightstands. Just a thought.
Cait @ Hernando House says
Nice job! I need to tackle some curtains for our living room soon, and I’m sure I’ll be equally punchy after all that ironing…
Angela says
Looks awesome! You have a way of making home improvement and decorating projects seem very doable. Thanks for the inspiration!
JMJE says
Those look great. I just DIYed some curtains for the inside of my closet door and I sewed them. It took foreves. I might need to try this next time cause I’m kind of obsessed with the fabric store too.
Chris says
Awww. Little Burger likes to burrow? Too cute. Love the curtains, they are quite inspiring!
Tanis says
It is so fun to see how this room is coming together. I love that you’re using bold fabric and colours, but are still keeping it fresh and light overall. The curtains look perfect!
Tanis
Lindsay@Tell'er All About It says
Haha! You guys are definitely a little slap happy over there! Love the curtains! Everything’s looking good! Oh, and stop apologizing for the house not being perfect! You shouldn’t have to apologize for your “to do” list. Just sayin!
Lindsay
Monica says
The entire room looks so great! It’s really starting to come together :]
Sara @ House Bella says
The color looks great, it was an excellent choice! I really love it with the color of the walls as well as how it matches (but not matchy-matches) the bedspread.
I love buying fabric and making my own curtains, the possibilities are endless! I usually sew mine though, if only to prove that I know how to use a sewing machine (hey, it took me a long time to learn). http://www.housebella.com/2010/11/30/a-sewing-adventure/
And I’m putting down one vote for inky blue. I just love how it sounds.
Kristin F says
I was scrolling to the end to put in my vote for inky blue too! It would help unify the colors that have been used so far (the bookcase).
That green looks fab against the aqua. I like the subtleness of the wall color with the boldness of the duvet and curtains. Awesome!
Elizabeth says
This is silly and off topic, but I love your ironing board cover. Where did you find it?
YoungHouseLove says
It’s from here: http://www.etsy.com/shop/citychiccountrymouse
Love it so much! We’re actually hoping to line up a giveaway with them in a little while so stay tuned…
xo,
s
Michelle N says
I was going to ask the same thing! I love it, thanks for the link.
Carla T says
Good job Sherry and good job John for commentating :)
Kelley says
Very nice. Very nice, indeed. Mamma likey.
ALittleBite says
I love the new curtains! They complement the duvet without being too matchy-matchy.
Kellie says
was a little hesitant about the color you picked out for the curtains, but it looks great. how dare I doubt you guys??
I’ve made my curtains with the hem tape but have never washed them yet. Have you done so and does the tape hold up okay in the wash?? I want to make some mudroom curtains but before I embark on that process, want to figure out the washing method… otherwise it’s the sewing machine for me!
YoungHouseLove says
Hey Kellie,
We haven’t had any issues with the heavy duty tape holding up in the wash, but we do wash things on cold and then tumble dry or line dry them, just to keep them from getting hot- which would probably make them shrink and cause the tape to get goey. Yikes!
xo,
s
mypatsyann says
I especially love the green of the curtains with the color of the wood floor. Very nice.
Stacie M. says
It’s looking great! What a big difference from the stark white room it was.
The Burger Lump always cracks me up.
Pam @ diy Design Fanatic says
Your curtains look fabulous!! I have tried the tape a couple of times, but I can’t ever get it to work and it takes me too long, so I always end up sewing.
Dog Milk says
Thanks for guest blogging Burger! :)
YoungHouseLove says
Anytime! Except that Burger is now walking around saying “no autographs.” Such a diva.
xo,
s
Jenny @ Bakography says
I can’t wait to use this technique when we move in June! We are moving to Charleston, SC… what better place to use some serious color on the windows! P.S. Burger’s interview had me seriously laughing. Y’all are so clever!
YoungHouseLove says
That was all him. He has some serious attitude, eh?
xo,
s
Liz W. says
As a long-time resident of Charleston, you will love it here!
Maggie Rose says
Curtains can add so much to a room!
I followed your instructions for the curtains for my home office, but I had problems getting the corners to stay stuck (even with the super heavy duty hold stuff). Guess heavier weight fabric doesn’t work so well for that – I tried doing a loop instead of clips and it was kind of disastrous. That’s ok though – going to repurpose the fabric into a diy roman shade. I have tons of extra hemming tape if you want it (thought it said 10 feet, not 10 yards, doh, so we bought 3 packs).
Tanya says
haha I knew there was going to be a “purloined” reference in this post the minute I saw “Tar-hay.” You guys are too funny. The curtains look amazing. (Way to go Sherry!) It’s crazy how much they change the room.
sharon says
What a difference drapes make! Love your pops of colour.
Kellie says
and not too steal too much of your time, but how do you submit questions for a design dillemma? I have a serious one going on that I could use some guidance on! Would love to submit photos to you guys for review!
YoungHouseLove says
Hey Kellie,
There sadly aren’t enough hours in the day to dole out design dilemma advice anymore, but we always encourage people to post pics of their rooms on our Facebook page, where other people usually love to weigh in with ideas and advice! Tons o’ fun.
xo,
s