How you like them handles?
(Handles, apples. It’s all the same. Right Matt Damon? What? You don’t think Matt Damon reads this blog? Of course he doesn’t.)
Anyway, I’m back to share the hardware makeover play-by-play and a ton of pics that we couldn’t squeeze into our door-painting post on Wednesday. So fasten your seat belts. Oh yeah, it’s gonna get crazy. First I have a secret. The hardware on our sliding doors in the living room looked like this:
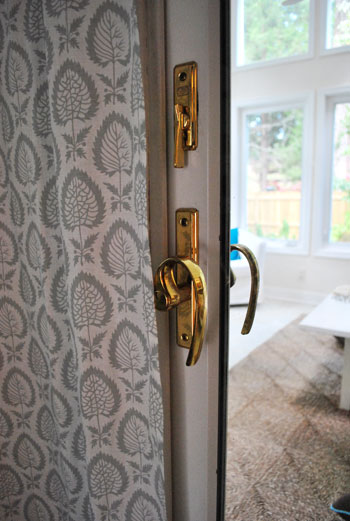
Le yikes, right? It’s all sorts of bad with the swoopy handle. If you look a little closer it’s not even shiny and new looking gold, it’s all rusted and neglected…
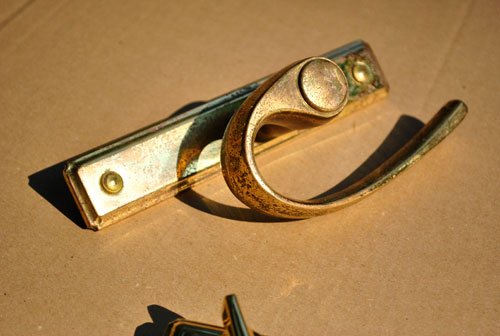
So as you can probably tell from the photo above (duh) down they came. We stripped the hardware off of both of the sliding doors in about five minutes (I took one side while John got the other one) by just unscrewing things on the front, back, and side to free them with a regular old philips head screwdriver…
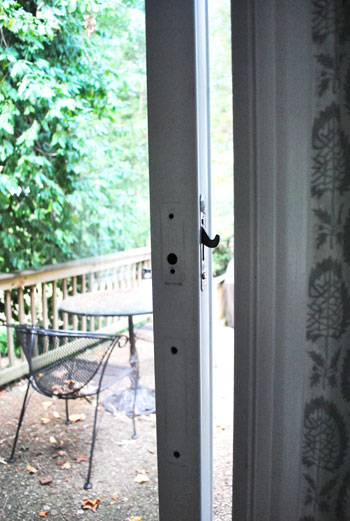
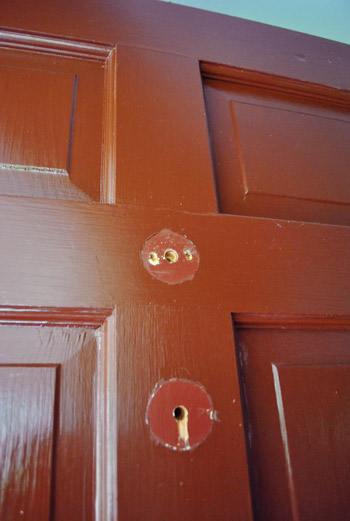
… and then we removed the doorknob and the rusty old door knocker on the front door (also with a screwdriver – there were exposed screws that we just removed from the back).
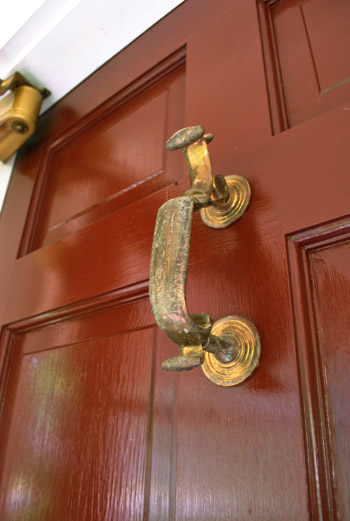
You can check out our door-painting post for more details on that stuff (like how we sanded the paint around the hardware that we removed so it was nice and smooth before painting).
But back to our pile o’ removed hardware. Here we have the sliding door hardware along with the doorknob, deadbolt, and the door knocker from the front door:
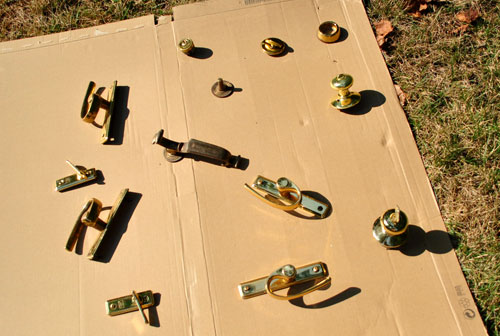
It was like a Gold Hardware “Where Are They Now?” Special on VH1. Some folks weren’t as crusty as others, but they were all well past their prime.
So after some decent amount of online research and chatting up the paint pros at Lowe’s (there’s a woman at the one near us who is phenomenally knowledgeable) we learned that the most recommended method for refinishing hardware (to gain the most durability and long-lasting finish) was:
- Sand as much of the hardware as you can with high grit (200+) sandpaper to rough it up
- Use a liquid deglosser (like this one) to degloss everything to get oils and sanded particles off of the hardware before spraying
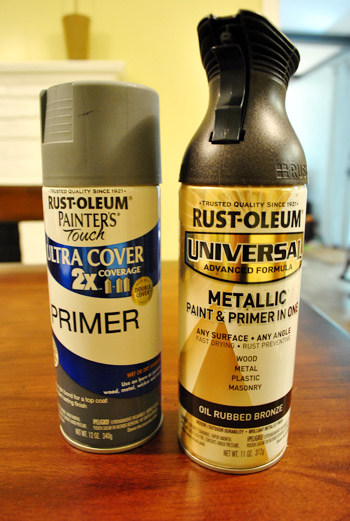
- Apply one thin and even coat of high quality spray primer meant for metal (we grabbed Rustoleum Painter’s Touch Ultra Coverage Primer in gray since we figured it would blend more than white)
- Apply two to three thin and even coats of high quality spray paint meant for metal in your color of choice (of course, our poison was: Rustoleum Universal Metallic All-Surface Spray Paint in Oil-Rubbed Bronze)
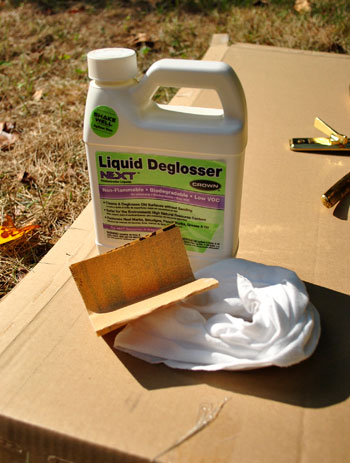
So I grabbed my high grit sandpaper and started on the first step: sanding.
Ahhhhhhhhh. Baaaad idea. The sandpaper left tons of obvious scratches in the gold finish that I knew wouldn’t completely be covered by thin coats of primer and spray paint. I should have taken a picture of the one side of the doorknob that I thought I ruined with the dumb sanding step but I was too busy freaking out. So naturally I made some sort of sound that resembled a walrus screaming and chucked the sandpaper as far away as possible while cradling/apologizing to my doorknob and promising him that I’d never hurt him like that again. Luckily I realized the knob would be installed with that part underneath, so only Clara-height children may be able to see the slightly roughed up texture on the underside. Whew.
Update: A few smarter-than-me commenters recommended trying steel wool or super high grit automotive sandpaper to rough up the surface, so I plan to try that next time. Just tossing that out there for anyone who might be doing this (who may want extra “insurance” that the spray will hold).
So it was out the window with step one, and on to step two: deglossing. I just used some rubber gloves and a rag to apply the deglosser and then let everything dry a little so it wasn’t soaking wet before moving onto step three: applying one thin coat of spray primer. But when I went to grab the primer I noticed something intriguing on the ORB can next to it. It said “paint & primer in one” right on the label. Duh. No need to beat a dead horse.
So I trusted my beloved ORB spray primer + paint to lead the way and just applied three thin and even coats to all of my hardware (that I strategically placed on cardboard so I could access all of the exposed parts by piercing the long metal interior hardware rods through the cardboard so they stood up). I will now repeat that thin and even is the key when it comes to spray paint. If you apply thin & even coats they won’t be globby and thick, and they’ll bond/cure very strongly, which will greatly reduce any issues with things flaking, scratching, or peeling down the line.
Oh and see that key? That’s a secret.
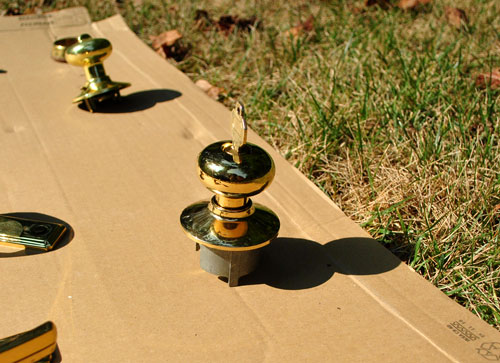
I decided I didn’t want to muck up the inside of my lock with spray paint, so I used a spare house key to block the spray from getting into the lock (while allowing me to access the rest of the knob). I didn’t push the key all the way in for fear that the top of the key would block some of the outside of the doorknob, so I just stuck it halfway in so it would block the interior part without inhibiting access to the metal facade around it. Then I just removed it and used it on the deadbolt’s keyhole when I sprayed that.
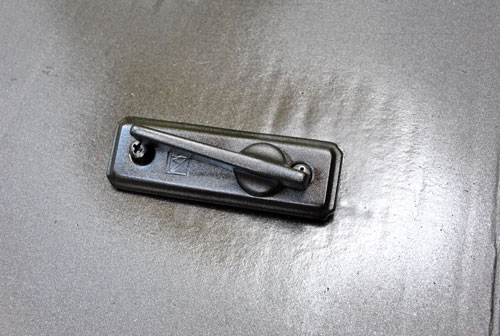
Oh and another spraying tip would be to put all of your screws into the hardware and pierce them through the cardboard so the ends of them get sprayed to match (like the two that you see below). Also, be sure to move things like latches back and forth between coats to make sure you can access all areas of the hardware with spray paint. Like this…
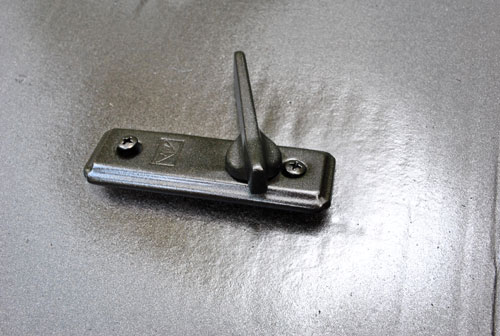
… and this:
About an hour later (I probably waited 20 minutes between each of my three thin and even coats, just to be sure it was nice and cured before piling more on) I was left with these beauties:
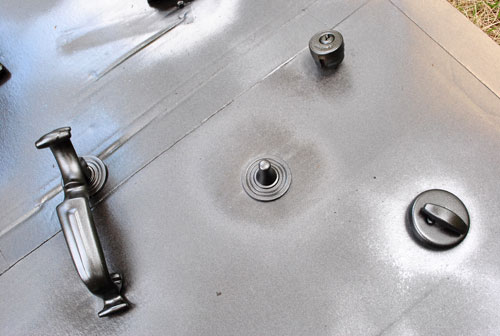
Who sees a winking face? Just me?
I probably waited six full hours after my last coat of spray paint before reinstalling anything. Just to give them a lot of time to fully cure and ensure that I wouldn’t scratch or ding something while putting them back on the doors. I can’t speak to the long-term durability of this process since it has only been… oh, about 48 hours. But I can tell you that reinstalling them went really smoothly and everything works just as well as it used to and nothing was even remotely marred or dinged during installation or in the past two days since.
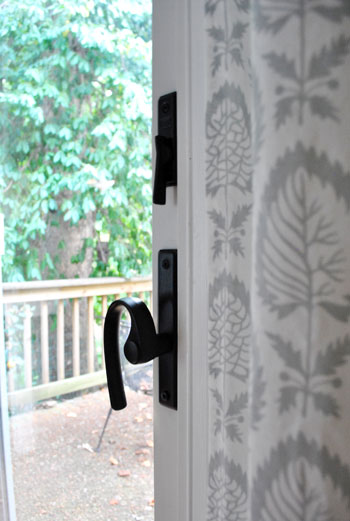
So I guess we’ll check back in with an update about how they hold up over the long haul (these doors are used every single day thanks to a dog who loves going in and out). But so far, so good. And it definitely beats buying all new hardware (we figured we didn’t have anything to lose in trying to make the old stuff work before resorting to trashing it and splurging for all new hardware).
Oh and it bares noting that things look pretty black in some of these pics, but it’s just because ORB is a mystical creature. So it’s hard to capture the true color that you see in real life (which is a rich metallic-y chocolate). Actually, the exterior sprayed shots above show the true color really well. It still looks like that inside, it’s just seemingly impossible to get it on film.
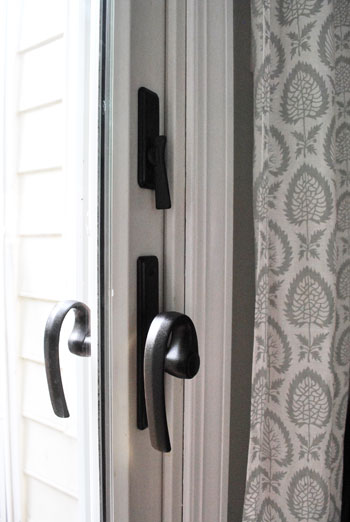
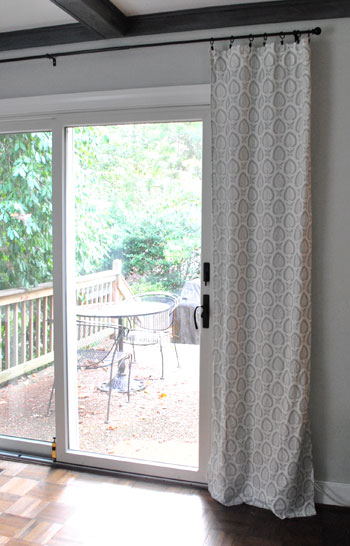
Perhaps the most exciting thing is that in taking this style quiz, the thing that I loved most about the room they said was “my style” was the white door with the dark hardware. And now it’s mine. All mine. Mwahahaha. (<– yup, I broke out my maniacal laugh)
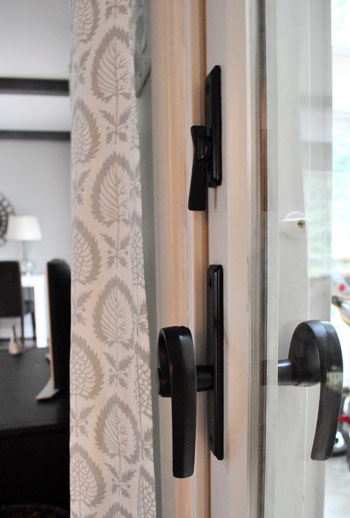
I think it looks delish with the oil-rubbed bronze curtain rods and the dark beams. And John digs it too (delish just isn’t an adjective he’s apt to use).
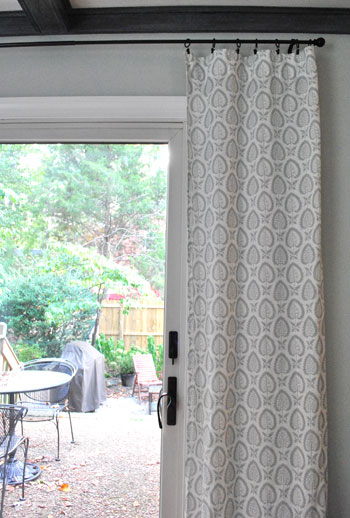
Me-ow old sliding door friend. My how you’ve matured. Well, as much as a twisty twirly old 80’s knob can really mature.
And you’ve already seen our freshly sprayed front door hardware, but let’s just revisit it for a moment:
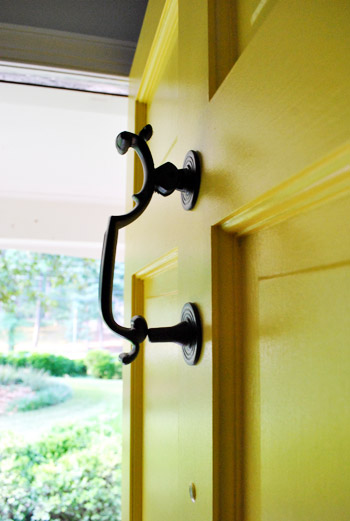
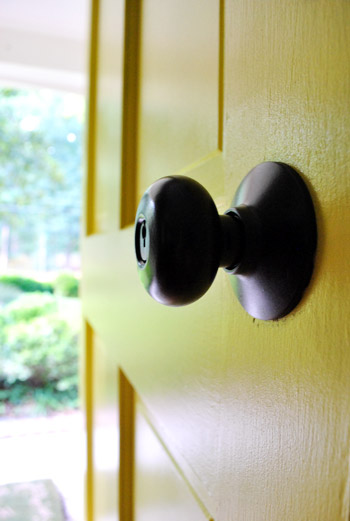
So yeah. We’re happy with our little almost-foiled-by-the-sandpaper process. Although I must admit that after I sprayed the underside of the knob, the scratches were hardly noticeable. So maybe if you’re a staunch rule follower (and not a freaked out walrus impersonator like me) you could get away with the sanding step. Either way, I have high hopes that the deglosser and included-primer will do their job when it comes to adhesion (especially since our old scratched and rusted fixtures weren’t too glossy or shiny to begin with).
As for the ORB finish: Hi my name is Sherry, and I’m addicted to oil-rubbed bronze. They say you can’t help who you love. But it could be worse. I could be addicted to sanding things, which would have been a cruel joke since sandpaper was the kryptonite of this project. I wonder why. Has anyone else successfully sanded their metal hardware before spraying it? Was it not all scratched up? Maybe it just looked “brushed” in the end? I just didn’t trust myself to do it all in one consistent direction (aka: not make a hot mess that was oh so obvious after the spray-job). So in summary, my method was just to: use a liquid deglosser (although I’ll also try steel wool or extra high grit sandpaper next time), lay everything out on cardboard standing up so it could be sprayed evenly from all angles, use a half-inserted key to block any keyholes, spray everything thinly and evenly in 3 coats applied every 20 mins or so, be sure to move toggles and locks so all parts of the hardware were sprayed, and let it cure for about 6 hours before rehanging it.
Oh and the total cost of this project was $6 for the spray paint (I was able to return the unopened can of primer and I already had the deglosser and that dastardly sandpaper on hand). But for someone who needs to purchase deglosser, you might want to budget four more dollars for that. Considering a new knob, deadbolt, knocker, and two locks and four handles for our sliding doors would probably come to about $200, I think we got one heckova deal. So I’ll let you know how they hold up. If they’re anything like our ORBed sofa legs (which we sprayed five months ago, and they still look mint) we’ll have bona fide jazz hands going on. So it’s probably only a matter of time before I really go nuts and remove every last interior brass door and hinge and go to town. Like I said, my name is Sherry, and I’m addicted to oil-rubbed bronze. Holla.
Update: Our handles are still holding steady. Check out the update post here.
Wanna know where we got something in our house or what paint colors we used? Just click on this button:
*This post contains affiliate links to items we have purchased and loved*


Chris says
Love it! I will say that I’ve tried the ORB on a glossy brass finish without sanding, and it chipped off after a couple of months, so horrifying! So sanding is a big deal on the shiny finishes.
I also removed brass plating from a lamp once by using Easy Off oven cleaner and a fine scotch brite pad – it became a lovely brushed chrome look! (This obviously doesn’t work on real brass, just things made of another material like zinc or steel and plated in brass finish)
YoungHouseLove says
We actually noticed that old cans of our ORB didn’t have the built-in primer (that’s a very new addition, it seems) so we’re hoping that added “foundation” along with the deglosser will help with adhesion!
xo,
s
Quiana says
I see the winking face!
Natalie @ Queen of Whirled says
Me too! Before I read the text I rhought she did it on purpose. ;)
Sara says
Very excited about this post. Time to stop replacing our 1950’5 two-tone (yep! two-tone) door knobs and break out the spray paint.
Thanks for the idea ;-D
Devon @ Green House, Good Life says
Love it as usual.
I may have mentioned this before, and I know you guys have top-notch security, but for anyone else with sliding glass doors — which make me so nervous since they can be lifted right out of the track and are usually the weakest security point in a house — the “Deerfield Lock” is the best thing I’ve seen for sliding door security.
BTW, I tried to comment yesterday but it didn’t go through — one of my favorite things about your dining room (apart from the gorgeous built-ins) is the view of those awesome chair backs in the office, so I’m glad you’re keeping the desk on the carport wall (even if you do eventually put doors on the office).
YoungHouseLove says
Thanks so much for the tip Devon! As for the backs of those chairs, I totally agree. So much fun to look in on from the dining room…
xo,
s
Sara says
We didall of our interior doors like this. The sanding did completely rough them up but you couldn’t tell at all in the end. Maybe because we didn’t sand in one direction? We just sanded each piece all over and it completely took off the shiny-ness of the knobs and hinges. We were VERY happy it worked in the end!
YoungHouseLove says
That’s great to hear! Of course, I’m an over-reactor.
xo,
s
Iomay says
Walrus noises and Jazz hands. Best. Post. Ever!
:) The tutorial wasn’t bad either!
Emily says
You could also try very fine steel wool. It would rough up the finish without leaving scratches.
YoungHouseLove says
SO SMART! I might just have to give that a try next time. And do my best not to overreact (as is par for the course).
xo,
s
susan says
Your hardware looks awesome! I also like the fact you have all the directions here for me so I don’t have to do the research. My whole house is full of that ‘Donald Trump’ hardware. Now I just have to convince the Hunk we need to update! Great idea. susan
Jill says
Definitely keep us posted on how these hold up – I’d love to be able to do this to all the brass hardware in our house! So far I’ve ORB-ed a brass chandelier and it looks sooo much better than before, but I’m a bit worried about doing it to fixtures that get more use. Also, can I just say that the hubs and I are hoarding ORB Rustoleum spraypaint? After searching for it everywhere we found it at a Walmart and bought all 5 cans they had!
YoungHouseLove says
Oh yeah, my friend just bought 8 cans. I better start hoarding!
xo,
s
heyruthie says
this makes me laugh, because a few years ago the girl at Our Suburban Cottage’s favorite ORB was discontinued, and she went crazy!
Chrissie says
I love it! Those outside shots that show the depth of the colour are lovely :-) Now I’m wondering whether we could get away with doing this to our inside door hardware.
Most of the internal handles are in decent condition, although a couple are rusty and a couple are quite loose – hopefully they just need their screws tightened, if you know what I mean ;-) … Actually, I really did mean I’ll just try tightening the screws. But hey, who can resist the opportunity for a bit of wink wink nudge nudge?
Chrissie says
I spoke too soon. The handle on our bedroom door is stuck, so the catch won’t… catch. Which would be fine if our kitten wasn’t so insistent on getting in there! I tried to trick her by holding it shut when she tried to push her way in, but she’s too persistent.
YoungHouseLove says
You know, sometimes when that happens it just means something is hung a smidge too high or low or deep when it comes to the little metal “catch” piece in the doorjamb. Maybe try watching it almost-close and try to see if you can figure out what’s not lining up? Good luck!
xo,
s
Wendy says
Thanks for showing this. I want to re-do our all-white front front/entry but don’t have the $$$ to replace the handle.
Here’s a tip for sanding — try steel wool next time. I used it my plastic/metal contractor bathroom lights. It did nothing on the plastic, but gently roughed up the metal parts. (And I painted them ORB!)
YoungHouseLove says
That’s such a great tip that someone else has mentioned. I’m going to add that tip to the post to hopefully help other and give that a try next time!
xo,
s
Sonel says
I wish I would have thought of painting doorknobs! In our last house I replaced all the old rusty gold doorknobs with brushed silver ones. It wasn’t that expensive since I got the new brushed silver knobs from Habitat’s ReStore, but it was a hassle making the new knobs line up with the original holes in the door frame.
Thanks for the great idea for next time!
ShellyP says
You are a silly ORB fool!!! Love the yellow door (my favorite color) and love the ORB updates to the handles. I do LIKE THEM HANDLES. Who knows, maybe Matt Damon might just read this blog. Anonymously. At 3 am. When he has insomnia. I am painting my front door now after being inspired by you!
YoungHouseLove says
This would be a good blog for insomnia as all the wordiness will surely put even the strongest of men (Matt Damon) to sleep.
xo,
s
Lindsay says
Your name is Sherry? I thought it was $herdog…
YoungHouseLove says
Oh man, how could I have missed an opportunity to plug my not-catching-on-at-all nickname?
xo,
s
Paige @ Final Clothes-Out says
If it makes you feel any better, whenever I tell my husband about a good idea I saw on here, I refer to you as $herdog.
Roeshel says
I sanded our bathroom faucets before using primer, ORB (love it too!) and then gave a coat of matte lacquer. Holding strong since 2009! ;)
Your new finish makes a huge difference! Great job!
YoungHouseLove says
Wahoo! Love that it’s still holding since 2009!
xo,
s
Lauren says
Oooh…spray painting faucets! Great idea!
YoungHouseLove says
I have heard that you don’t want to get any spray where the water runs (just for health reasons) so be sure to tape off the inside of the faucet! Good luck!
xo,
s
[email protected] says
love it! I’ve got a bunch of those metallic spray paints (from spray painting pine cones at xmas!)and a bunch of hard wear to make pretty. Thanks for the motivation!
CAN NOT WAIT to have you guys on our radio show this afternoon. About to post about it any minute now!!! xx
YoungHouseLove says
Thanks Martine! We’re excited. I hope I don’t sound like a big dork, but… it’s kind of par for the course.
xo,
s
[email protected] says
hahah- you’re going to sound great! you’re a pro! (have you seen the list of all your super cool media appearances!!?)
YoungHouseLove says
I dunno. Have you seen me flap my arms around and go crazy in this interview?
xo,
s
Adriane Wacker says
I too will be curious to see how it holds up…I tried the same thing with, sanding, the primer, and the metal spray paint and after a few months it chipped off from using the key in the front door! I then removed the paint completely with a metal brush, because we are renting and did not want to buy new hardware! ahhh Great Post!
Momlady says
Nice save on the hardware Sherry! For future reference and to forestall panic attacks just remember to use progressively finer sandpaper to smooth out any scary scratches. I work with very soft metals (silver and gold) and the saying goes: you have to put scratches in to take scratches out(they just need to be finer and finer scratches!). So, if they tell you to use 200 grit…then sand with 320 and 400. If you want a very fine surface you can even use some 600. I’d use the automotive wet/dry..you can actually rinse the paper and then dry it before storing it for future use. Handy stuff!
YoungHouseLove says
So smart. Never heard that about putting scratches in to take them out but it totally makes sense!
xo,
s
heyruthie says
i recently followed the same process for my ’80 brass door knocker–complete with engraved monogram from the previous owners. that moved out three years ago. yeah….it was time to greet guests with something other than the former owner’s name. (i smeared a little spackling paste over the monogram before painting the metal. it worked!)
anyway, the high-grit sandpaper did the same thing to me. it was bad! but with no deglosser on hand, i resorted to extra-fine grit paper as a second try–and it worked great, when used lightly. even that made me nervous because it made the finish so ugly, but then my ORB stuck really well. so far it’s held up fine, but it barely gets touched, and my doorknob was already bronze, so i didn’t have to paint it. (yes, they were unmatched when we moved in.) so, super-fine grit paper seemed a better option.
Caity says
Looks amazeballs!! Now I know what I’ll be doing with the ugly brass handles on every door in our house. :)
Adrianne says
Looks great! Where did you get your curtains/fabric for the sliding door?
YoungHouseLove says
Those were from Ikea a while back (called Alvine Kottar I think- they no longer sell them though). Maybe try ebay?
xo,
s
Nikki says
I LIKE the swirly twirly handle on the door!! Looks great! Our house is saturated in 1980’s gold, its awful…..
amy says
Last summer I painted our front door a an inky blue (used to be “country” blue) and took off the hardware that was brass and sprayed is satin nickel to match the rest of the hardware in the house. I didn’t sand it or degloss it, and it’s held up wonderful. Used the Rustoleum brand as well. But, we do have a storm door (glass with hiding screen combo) that covers it, so maybe that’s why. No one could believe I spray painted the hardware!
YoungHouseLove says
That’s awesome to hear! So glad it has held up so well since last summer!
xo,
s
Samma says
I painted our brassy stormdoor hardware ORB this spring, but I did not take it off first, and I did not sand it. The paint is definitely chipping and peeling away. I suspect I also did not do a good job at thin layers, drying completey.
Hope yours works better!
Meghan, UK says
That’s it, you’ve completely inspired me to ORB-ify the stinking gold door handles littered throughout our house. They were there when we moved in and I’ve never been able to face paying up to replace them, so your way is the new way! Thank you!
Julia @ Chris loves Julia says
Every doorknob in our home interior is that brassy finish. This post gave me the push I need to get them ORBed. I kinda want to just cut a hole the size of the knob in a big piece of cardboard and go around to each door. Bad idea??
YoungHouseLove says
I say try it. And freak out and throw things if it doesn’t work. Haha. That seems to be my method. In all seriousness, maybe cover stuff (like the floor and the wall) and try one of them to see if it works?
xo,
s
heather says
My two cents: the cardboard has a thickness to it (even cardstock. If the hole is cut snug enough around the base of the doorknob so no paint can seep through to the door, it’s going to likely be so snug against the base that the sides of it won’t get sprayed. It would leave a rim of unpainted hardware.
YoungHouseLove says
Oh yeah- good point! It might actually be less trouble to remove them in the end…
xo,
s
Meredith says
I saw on Pinterest that aluminum foil works around hardware; you could probably mold that around the handle to prevent the not-painting-the-sides problem. (I haven’t done it myself, just passing it along).
YoungHouseLove says
Ooh that sounds like a fun science experiment.
xo,
s
Jen says
Personally, I wouldn’t want the spray paint fumes inside my house from spraying them in place. Maybe I’m crazy, but I always leave spray painted items in the garage for a few days until the fumes are completely gone before I bring them inside.
YoungHouseLove says
Oh yeah that’s a great point! We love spraying outside since it’s ventilated and they can cure up nice and firm in the sun (and get rid of the stink!).
xo,
s
Meghan, UK says
Oh – and hallelujah! Our diy stores stock Rustoleum!
steph says
I wouldn’t be surprised at all if Matt Damon reads your blog!
Cindy says
Me neither. Hello? Tori Spelling, Jen Lancaster, Nate Berkus…
YoungHouseLove says
Ok, you’re giving me blog stage fright. I like to pretend we’re writing to ten people. None of whom are famous and all of whom are my mom and John’s sisters.
xo,
s
Cindy says
$herdog and Delish John got no fear!
Pip says
Orb-tastic result. Who knew what sophisticated door hardware was lurking under all that golden 80s glory. Your slider handles look like they’ve melted in a heatwave (in a very glam way of course).
Amanda Feste says
Guess what I’m doing before the weekends over… Yep, getting rid of our nasty goldness. I’ve been wanting to do it with spray paint but kept putting it off, now that I see yours and how amazing it turned out (and we’re getting a new deck) it’s high time I suck it up and go for it!!! Thanks for the info, you guys rock my socks off!! :-)
Monica says
You guys are totally inspiring me on ORB’ing my doorknobs. Definitely, let us know if it chips! That’s the one thing I’m worried about, especially since we’re selling our house.
YoungHouseLove says
I promise to tell the whole truth and even post pics with current newspapers held up next to them. Haha.
xo,
s
Leigh Anne says
Sherry – love the Parks and Recreation reference! Can’t wait for all my sitcoms to be back on!
Cindy says
Okay, two things in addition to my opinion that these are great upgrades! 1) My husband’s nickname at work is Walrus because our last name is vaguely similar, so your walrus comments were hiLARious to me; 2) I believe that John *would* use the term “delish” – he knows what VPL is! Haha ;)
xo
YoungHouseLove says
Haha, I think he might draw the line at VPL though. Haha. Tell Walrus that Delish John says hi.
xo,
s
heather says
I legitimately have absolutely zero idea what VPL is. Now I’m curious.
YoungHouseLove says
Haha- visible panty line. I taught John about it and he thinks it’s hilarious that girls check for that before leaving.
xo,
s
heather says
I just busted out laughing at that. I was totally expecting VPL to be some renovation term, not visible panty line. I give you my applause. That was unexpected and hilarious. Second, always check for VPL AND to make sure there’s no funky bra line. Bra with embroidery + silky shirt = terrible idea, also referred to as a VBL. I should have known what VPL was.
YoungHouseLove says
Haha, not only do we share our insane house projects, we teach people completely unnecessary things like that.
xo,
s
Cara D says
I’m glad you kept the swoopy door handles, very interesting shape. They look so much better painted. You could try spraying them with a coat of Minwax Polycrylic for extra protection too.
YoungHouseLove says
We did hear from someone else who added a lacquer to theirs too. So we’ll have to see how it all holds up (I think I like the slightly less shiny finish of oil-rubbed bronze in real life).
xo,
s
Michelle says
I was thinking the same thing!! Love the funky old knob!
Debby says
Love the ORB. Since seeing you use it in previous posts, I ran out and got myself a can. I brought back a ugly lamp from my mothers a while back and decided to give it a spray. It looks brand new now. It was white ceramic (I guess) and fake brass, but she had had it forever, so it probably was a nice lamp originally. Looks wonderful now. Just gotta find a shade. Thanks for all the tips.
Veronika says
Nice to meet you Sherry! Were you always addicted to ORB? How did it begin? What was the first thing you ORB-d? Karl’s legs? (sounds weird)How did you discover ORB? Did you always know it was there but never tried it?
Just curious….
YoungHouseLove says
Yes, I think it was Karl’s legs. What a slippery slope that has been! Haha. I’ve always loved ORB curtain rods (we hung them in every room of our first house and continued them in this house) but slowly my addiction grew to sofa legs and chair legs and patio sets and frames. Now hardware. It’s official. There’s no turning back.
xo,
s
Rachel says
I NEVER would have thought of spray painting hardware! Brilliant!
Elizabeth Poynter says
Does spray painting affect the functionality of the hinges and knobs at all? In other words, to they end of sticking from the layers of paint? Just wondered if you were stick able to turn/open…etc.
YoungHouseLove says
Nope, nothing functions any differently than it did before. Thin and even coats are key, and giving everything lots of time to dry so nothing gets gummed up helps too!
xo,
s
Rebecca @This Nest is Best says
I never would have thought of spray painting our front door hardware, but this turned out fantastic!
*adds to to-do list*
Melanie @ Mailbox Journey says
Love it, like always! :)
Wendy says
Duh, why didn’t I ever think of this? I look at my nasty gold hardware on my front and back doors all of the time and sigh because I don’t want to go buy new ones! Plus, every doorknod in our house is brass and I hate them. It NEVER even occurred to me to just take them off and repaint! Simple things like this that I would never think of – that’s why I love you guys so much! When I get home tonight I’m going to make a mental checklist of everything I can convert to ORB that I’ve hated about our house (built in the 80s) but never wanted to fork up the cash to update!
Callie says
Sherry, You have inspired me. I just ORB spray painted old lawn furniture. My grandma gave it to me because basically none of the other cousins wanted peeling off-white half rusted lawn furniture but I saw them for the beauties that they were (wroght iron!) and now they are a thing to envy. I am about to be unemployed for (hopefully only a month or less) and I just told my best friend to watch out because I was morphing into one part martha stewart and one part sherry petersik for the next month. Yeah, she thought that was as dorky as I’m sure you do.
But anyhow, just wanted to let you know that the lawn furniture looks awesome. Thanks to you and your inspiration.
YoungHouseLove says
I think if you combined me and Martha it might make the world start spinning the other way or something. Haha. There would be an internal ironing vs. no ironing debate. Haha.
xo,
s
Steph says
Love the re-do. Love pretty much everything you guys do, though, so THAT’S not a surprise. I do have to say (and of course this is your blog, your style and you get to decide the manner in which you convey information) that I miss what I would call your “toned-down” writing style of the past. Sometimes lately it seems like all these puns and attempts to be clever and funny are really over the top. I don’t know… maybe I’m having an off week (which could certainly be the case), but sometimes I feel like… Wooooahhh, calm it down! (I think that about myself a lot, though, too… so maybe I’m just crazy?)
YoungHouseLove says
Sometimes we get giddy and just can’t help ourselves, and we know our brand of humor/weirdness isn’t for everyone. It’s pretty much been a theme since 2007 when we started this ol’ blog though. Here’s Exhibit A and Exhibit B. We’re definitely more comfortable letting our freak flags fly now though (and we write more/longer posts in general, so it might be a mo words, mo weirdness thing). Dorks for life.
xo,
s
Mary Thomas says
Gotta do you, can’t please everyone <3 Love it, though, really. We are all John's sisters, after all, so there’s no need to be self-conscious.
Ashley says
Hey guys! I’ve been meaning to tell you for a while that your blog is one of the things that is keeping me sane these days. My son was born in May with a congenital heart defect, and has been in the hospital ever since. So, your craziness is some of the only humor I get every day! Don’t you dare “tone down” your writing style! Know that you bring happiness to some folks every day.
YoungHouseLove says
Aw thanks so much Ashley! We’re sending a whole lot of love to you and your family. Especially the little man!
xo,
s
ashlee says
your silliness and quirky sense of humor is what keeps me coming back. my life can be pretty stressful at times, and i always leave this blog with a smile on my face. i used to come for information re: home improvement. now i come because you guys are just so personable and friendly – it’s so nice to see.
Kat @ Big Apple Little Kitchen says
Nice work! What a difference the black makes! And I totally think Matt Damon reads your blog :)
Val says
I came to check out the comments in the hopes that there would be a little box with “Matt Damon says: I totally read your blog!” complete with a little thumbnail picture of him and everything. Sigh. Maybe he checks in mid-day, not first thing in the AM.
YoungHouseLove says
Haha, that would probably make my brain explode.
xo,
s
Lisa in Seattle says
Val, I am now sponging Diet Coke off my blouse. Thaaaanks! =)
Tiffany Nevil says
You guys inspired us with the ORB spray paint. We dismantled our 80’s shiny gold ceiling fan in our kitchen and gave it the ORB Treatment. It is so GORGEOUS! No one believes that we didn’t get a new fan…and I totally love that. :D Thanks for the ORB love!
El says
Looks sooo much better. I spray painted all the hinges at my old house to match the new iron style handles. Too expensive to buy new hinges. Plan to do it to match our ORB in our current house too (brass hinges), but want to replace the doors so won’t do it until then. Costly to replace doors since I want to move from the ugly fake wood look hollow core to solid doors.
I used steel wool to remove some of the imperfections on my hardware when painting it. Probably better than sandpaper. Gets the loose stuff off.
Page says
Whoa! I never thought about the hinges! Did you have to take them off the doors? I’m guessing yes? So, Sherry, I didn’t see hinges in your photos, so what’s it like having hinges a different finish from the other hardware? Or did you do them also?
YoungHouseLove says
Our two sliding doors didn’t have hinges and our front door had two that were only visible from inside (but they were already painted over with the same white paint on the back of the door, so they blended in well enough not to bother us).
xo,
s
Sarah says
Seriously, what a great little afternoon DIY fix. I have been thinking about buying the pretty knobs from Anthro for a WHILE now, since our home doesn’t have locks on the interior doors anyway. But now I see that it is possible to paint them! Please update us with the “wear and tear” after the handles have been used a while!!
Elizabeth says
Holla!!! Those look fantastic!!!
Amanda @ Our Humble A{Bowe}d says
The spray painted handles look so much better! Please keep us updated on the durability of it, please? I’ve considered using spray paint to give our interior handles a new look. I also have another idea I’m tossing around, but I just have to try it.
YoungHouseLove says
I promise I’ll definitely check back in with pics and details (whether they still look mint or fall apart completely). We have heard from a few other folks who used the exact same spray (it’s good stuff) a while ago (someone said in 2009 and someone else said last summer) and theirs still look great so I have high hopes!
xo,
s
Bob says
$herdog,
Do you know if that Next liquid de-glosser is low-VOC and biodegradable?
YoungHouseLove says
Yes! In fact it says so right on the can and I mentioned it not once, but twice in this post. Haha. $herdog likes to hammer things home when she’s excited.
xo,
s
Bob says
Geez! How could I have missed it if it was mentioned so many time? ;)
jess says
“So naturally I made some sort of sound that resembled a walrus screaming and chucked the sandpaper as far away as possible while cradling/apologizing to my doorknob and promising him that I’d never hurt him like that again.”
— this is what TOTALLY makes your blog worth reading… plus all the awesome projects! Haha!