Alternate punny post title: Joist to the world. (I’ll pause while you golf clap)
Good news! My dad made it back from my grandma’s house in West Virginia so operation double-up the girders and bolt them to the posts was able to commence with him at my side. As I started to tell my dad “Okay, you’re going to hold the board in place in the air while I drill pilot holes…” he cut me off and suggested we just put both girder boards on the ground, nail them together and that way they’d both rest on the notched posts – no air-hold required. Smart. I knew there was a reason I picked him as a father.
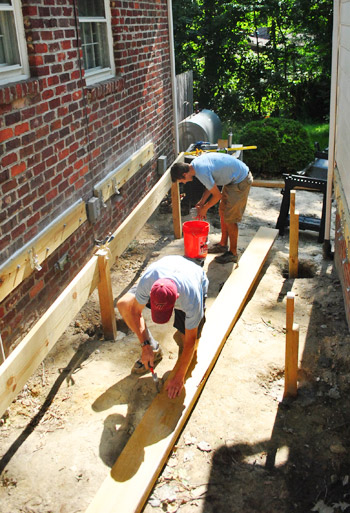
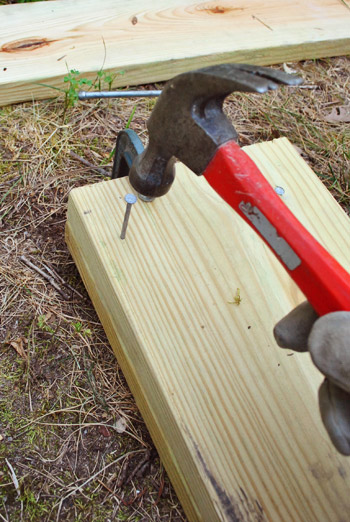
So we clamped the girder boards together so what-would-become-the-top-edge was perfectly lined up (boards are never perfect, so even two boards marked 2 x 10 might be slightly different widths). Then we nailed them together.
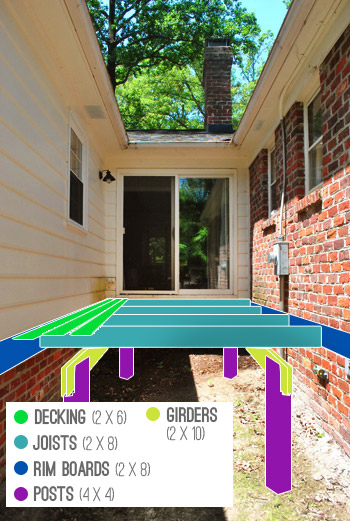
To refresh your memory about how this deck will come together, here’s this handy little graphic that hopefully makes it a bit more clear:
Next we were able to rest the now double-thick girder on the notches and proceed with bolting them together. Our county requires us to use “two 1/2″ through bolts” – which meant I had to drill 1/2″ pilot holes through about 4.5″ inches of wood – which was a little bit of a challenge since my longest drill bit was barely that long.
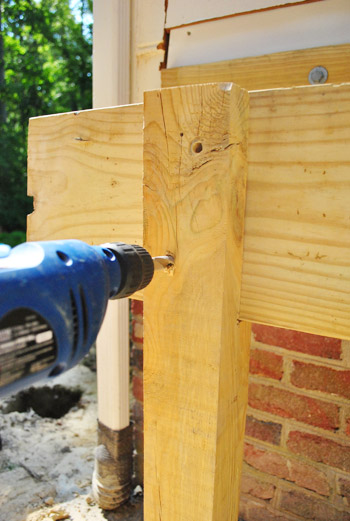
But we got it done and were able to slide the bolts through with a bit of hammering, and then tightened the nuts on the other end.
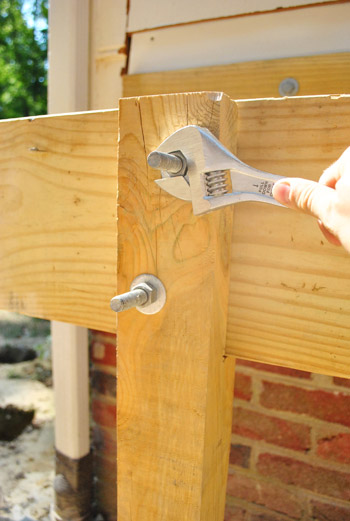
It was actually a remarkably simple process, and it probably took us about two hours to do the whole thing. Not necessarily a short time when you’re standing in 95-degree morning heat. But, I’d say it’s the first part of this process that has actually been faster than we anticipated.
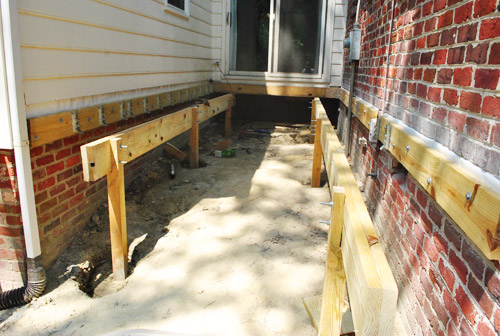
Oh, and here you can see how we joined the girders on the long side where it’s actually two sets of boards that butt up against each other on one post. It’s like a through bolt party up in here.
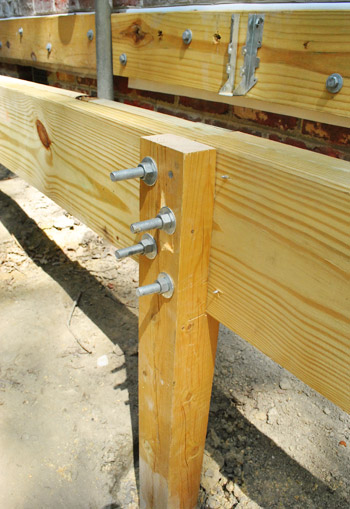
Since our morning was going so speedily, I even convinced my dad to help me go ahead and get the diagonal girder and posts measured, cut and set in place.
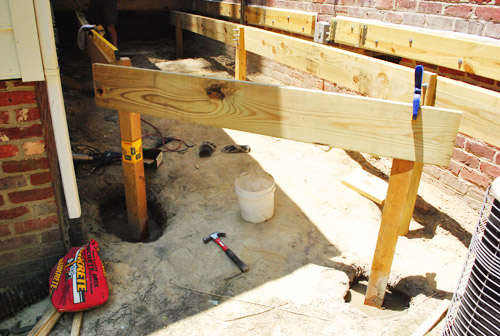
So by about noon we were looking at having accomplished pretty much our entire goal for the day.
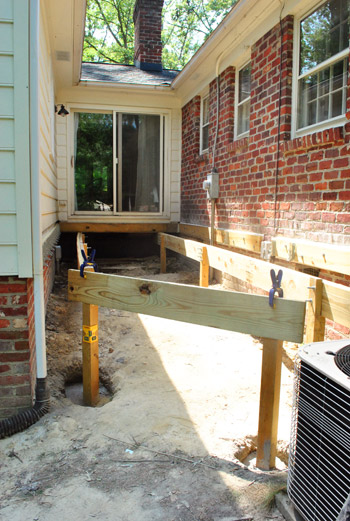
Does that mean we get to stop? Of course not. Well, it did for my dad since he had other things to do at home. But after taking a breather (by which I mean working on something else inside with Sherry for a couple of hours) I returned to my slowly-getting-completed deck for my next step: laying weedblock and gravel.
A bunch of you guys have recommended taking some weed-preventative measures and I figured this was my last chance to have easy access to the entire space under the deck (since adding joists will mean lots of new obstacles). So I removed one existing obstacle – the diagonal girder that we hadn’t bolted in yet.
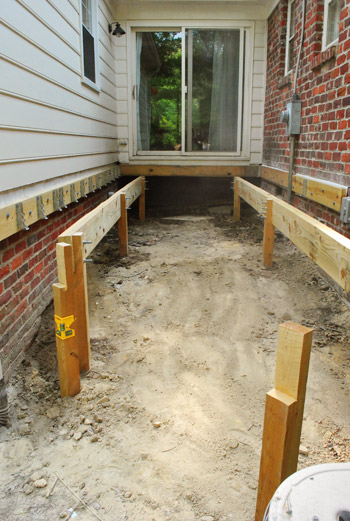
Next came the weedblock. Using some leftover from Clara’s rock box plus another $12 roll from Home Depot, I was able to cover the whole area without a problem. I have mixed feelings about weedblock (since my experience has been that some weeds just grow on top of it instead of under it) but I figured it’s better than nothing. And for about $15 (including the ground staples to hold it in place) it’s worth giving it a shot since it’s the recommended method in our area when it comes to dealing with the ground under a deck.
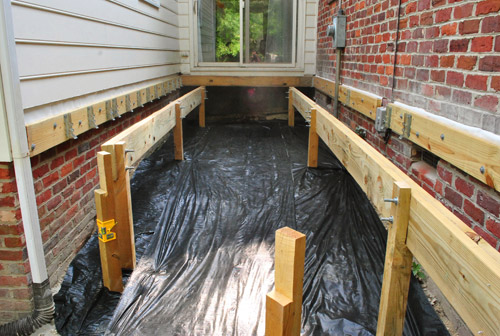
Next up was covering the area in gravel, since it’s harder for weeds to grow in a soil-less environment (and pests will like a weed-block-and-gravel-filled area a lot less than a damp-muddy-and-weedy spot to hide). My original plan had been to get a delivery of rocks from the same stoneyard where we bought the gravel for our DIY patio, but I forgot to place the order and then was too impatient to wait. So instead I picked up two car-loads of this bagged gravel from Home Depot (it was marked down from $3.38 to $2.50/bag, saving me about $35!).
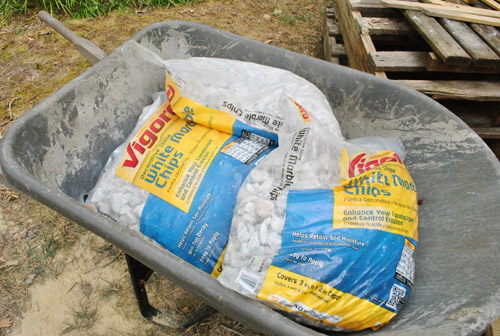
It wasn’t necessarily easy hauling all of it from our driveway to the other side of the house where the deck is going in (again in near-100-degree heat) but by this point I had become pretty accustomed to being sweaty and gross (and the people at Home Depot were unfortunately accustomed to seeing me that way). So here’s the space slowly filling up with rocks…
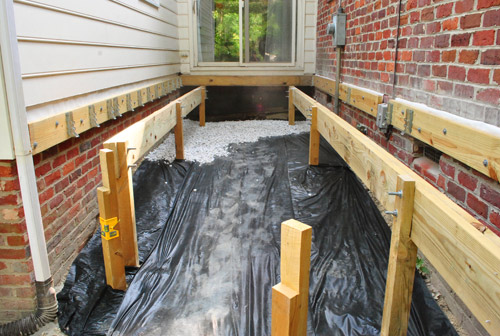
Almost there…
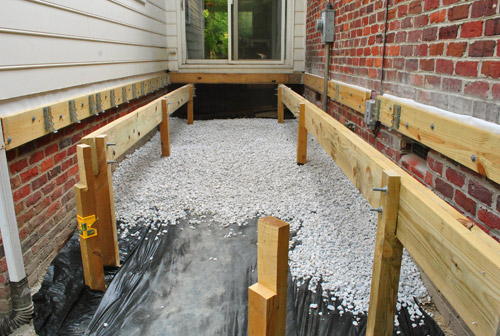
…and complete. It took me 40 bags total. I know I’ll need more once I put the stairs in, but for now I’m just going to cross that bridge when I come to it.
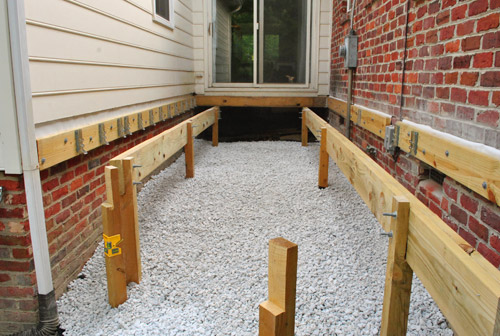
It was about 7:30pm by the time I finished getting my rocks down, so I called it a day. Though I was almost excited enough to keep going because my next step would be joists… which meant it would finally start looking like a deck.
So the next day – despite being more sore than I’ve been in recent memory – I bucked up and got my joist on. Each of my joists would be about 7.5 feet long, so it meant trimming a smidge off of my 8 foot long 2 x 8″ boards.
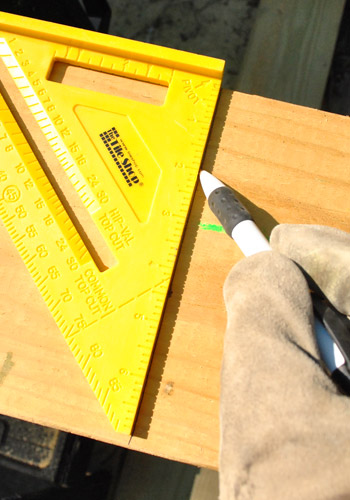
I mainly took this picture of me marking my cut because every time I did this my eyes kept catching the word “PIVOT” in the corner of my straight edge and this scene from Friends would replay in my brain.
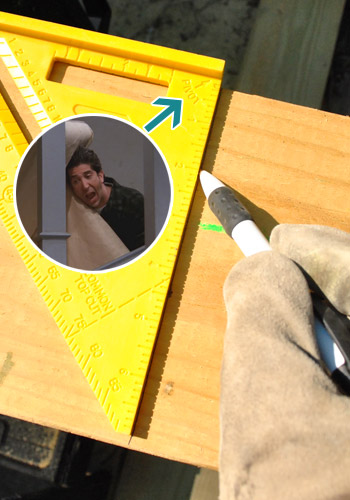
Anyways, once Ross was out of my head, I got to cutting with the circular saw – who’s like my new best buddy on this deck project.
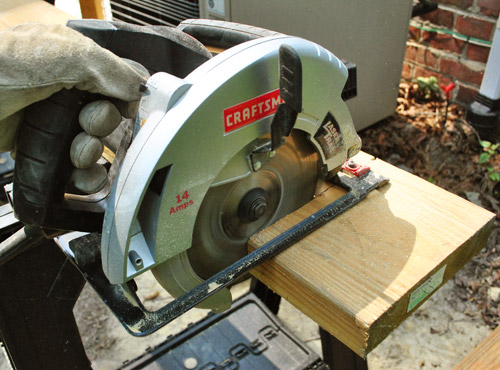
Once cut, the joists actually just rest on top of the girders – so there’s no additional support needed to keep them up. But I did have to add some hangers on either side to give them some stability side-to-side. I had already installed all of the hangers on the siding side of the house, so it just meant adding them on the brick side.
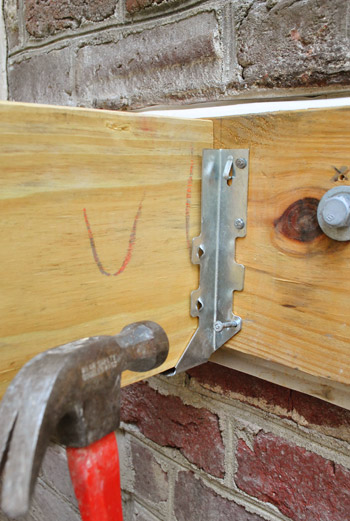
And since these hangers were no longer about keeping the hangers up, it was actually more critical that I nail them in on the side (thanks to the handy angled-nail guides already in the hanger).
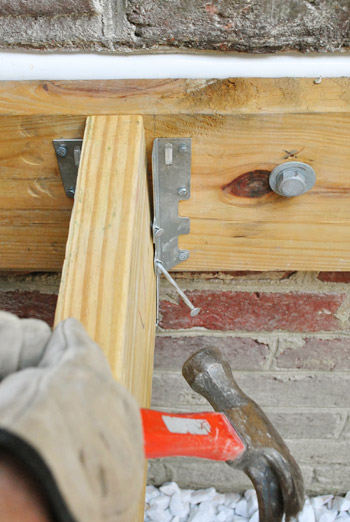
This was by no means a swift process (each hanger required 10 nails) and it didn’t take me long to wonder if I should’ve bought a nail gun for this project. It wasn’t much longer after that that I was actually pretty certain I should’ve bought one. But alas, I just kept plugging along – thinking of how I would look like Hercules when all was said and done (spoiler alert: this did not happen, strangely enough).
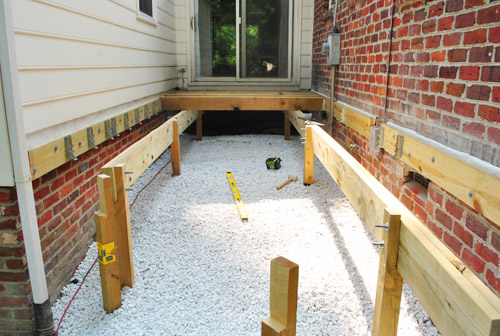
As I added each joist, I double-checked my level as I went. If they weren’t level (while accounting for a slight slope away from the house for drainage) there wasn’t a whole lot to be done since my girder was already set. But doing this did help me spot one board that was too warped to use (it curved up on one end). And had anything been too crazy un-level I could buy (or rent) a planer to scrape a bit off the top of the offending joist.
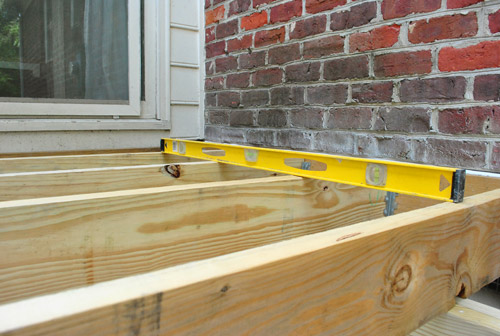
Here’s Clara watching me build what she now called my “pretty pretty deck.” Not the adjective I would choose myself, but as long as she’s showing interest in the project – I’ll take it.
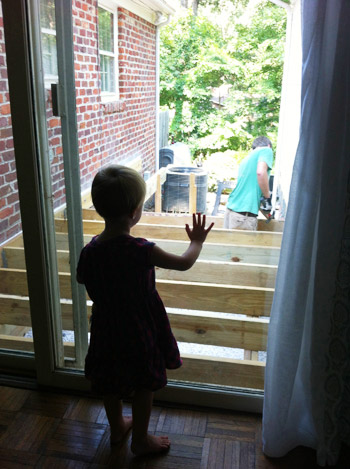
Slowly but surely more joists joined their joist-y brethren and the space started looking more and more deck-ish.
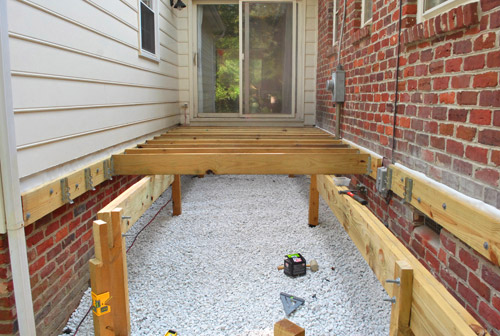
When I got towards the end I did have to go ahead and bolt the diagonal girder in place, since the joists on the end would need to rest on it.
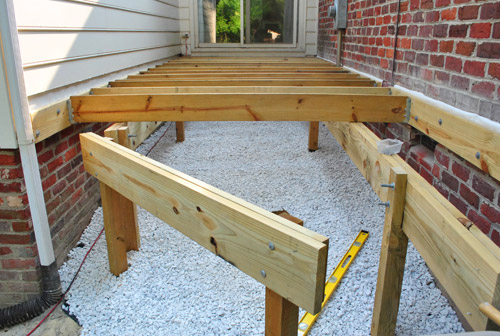
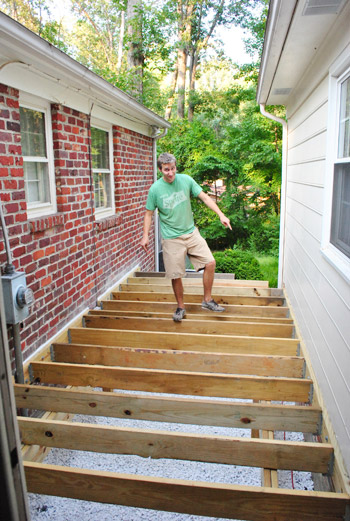
And finally, about four hours later – all of my joists were in.
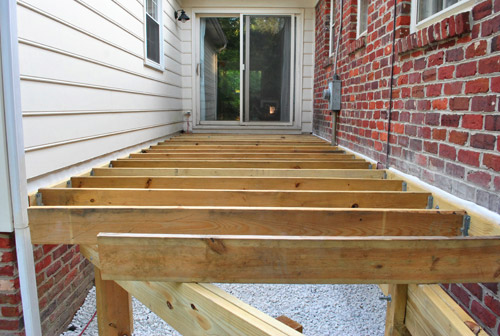
I still have to add the rim boards along the exposed edge. It will be a bit complex because this is where I have to be precise about the angle I cut, so I didn’t have the mental juice left to tackle it after such a long day. And for now I just left the joists on the end extra long (once I’ve determined my angle, I’ll use the circular saw to cut them more precisely).
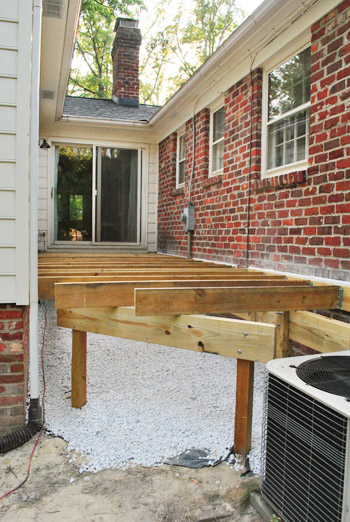
Not too shabby though, right?
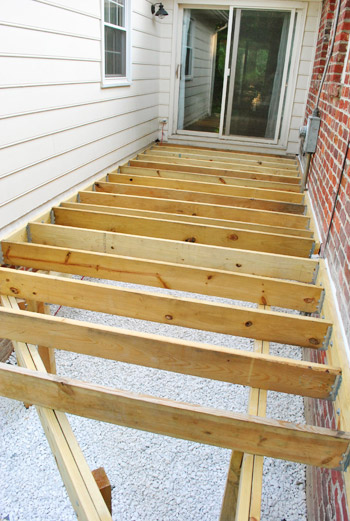
Before the day was through, I couldn’t help but test out my new creation a bit. You know, to make sure it actually could hold some human weight.
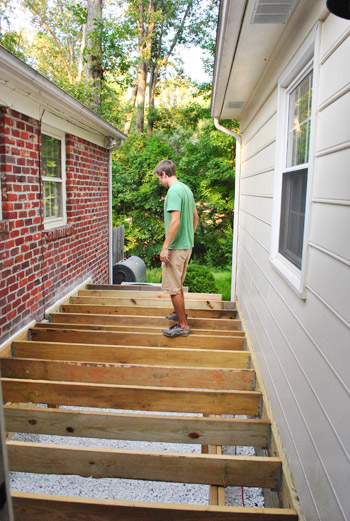
It did! So I broke out a little happy jig. Call it my “Happy Happy Joist Joist” dance if you will.
Once I get those rim boards in, my next step is deck boards. I can’t tell you how excited we are to finally be at this step. This project has taken much longer than we anticipated (for which I blame equal parts on ourselves, inspectors, heat, and the lack of an army of helpers to speed things along). Oh well, that’s DIY for ya. It’ll totally be worth it when we’re sitting out there sipping lemonade, right? What have you guys been up to this weekend? Any outdoor or indoor projects that are finally turning a corner and looking like they’re closer to done than undone?
Psst- Wanna catch up on all of the deck action? Here’s where we shared our vision for the space, then we removed the plantings and the old balcony, followed by selecting our materials and documenting our first day of building progress. Then we dug our post holes, and then learned that we failed our first inspection. We revised our plan and dug more holes (which got approved) and proceeded to set posts. Whew, all caught up.

Kristen | Popcorn on the Stove says
Lookin’ good!
And John, if it makes you feel better about dancing on the deck to test it out, when my parents got their electric pool cover, we (the kids) were all invited to dance on it to see how strong/great it was (granted, we were also 8 and 6 years old so we didn’t weigh much, but that’s not important… it was fun!).
SherriMc says
Thanks for sharing the joists!! Great post, you’re doing awesome, especially at picking your parents.
Katie says
Hooray! It’s looking like a deck! Congratulations!!
Katy says
Wow! That looks amazing so far. I stayed inside where it was cool but I was in a kitchen where the oven was hot…Not as hot as it was for you, but baking up a storm can be a drain on you. All those bowls that need to be licked. So much effort! Also, I had to poison test everything. These were my favorite to test: http://thefirstapartment.blogspot.com/2012/07/croquets.html
~Katy
YoungHouseLove says
Mmmmmmmmmmmm.
xo,
s
Jennifer says
Love your titles!
Christina says
At first glance, I didn’t read titles…I will let you guess. HA!
Penny says
I am SO glad that I’m not the only one that thinks of Ross yelling “Pivot!” whenever I’m moving furniture or see the word. It’s a curse, but a funny one.
Allie ~This Yellow House says
It looks awesome! I’m soooo excited to see it almost finished! It’s been a lot of fun seeing the whole process of it all. It makes me want to talk my husband into building me a deck! We spent our weekend, or should I say my husband spent the weekend, cleaning up a big tree that fell in our backyard. Not fun.
Oh and I love hat episode with Ross saying pivot! So hilarious!
Kelly {the Centsible Life} says
It’s finally starting to come together! You must be thrilled. It’s awesome that you are doing this now so I can learn from all your mistakes before we build our deck. Of course ours comes with a bit more demo (we’re talking bulldozers), so it’s awhile away still.
Eva says
Wow what a productive day!!! You talk about the project taking longer than anticipated… Reading that made me realize that we started our bathroom renovation about the same time you started working on the deck, and it took much much longer than anticipated but it is finally completed. I thought it would take 2 weeks (very optimistic, I know) but it ended up taking 5 weeks and by the end of it I thought that would be the last home improvement projet for a long long time to come. But we love our new bathroom and the diy appetite is coming back :)
YoungHouseLove says
Wahoo! It sounds amazing! Yay for DIY appetites!
xo,
s
Angie @ The Country Chic Cottage says
We are unfortunately still chugging away at our “little” deck project which is probably about 5 times the size of yours. So yep spent most of Saturday on that. And it actually looks more undone than done. I am estimating 2 more months. Looks like that will be one to enjoy NEXT summer I guess. These loooong home improvement projects are no fun. I want INSTANT satisfaction — or at least satisfaction after 8 hours of work. Where is DIY Network when you need them? Yard Crashers…hello…I need you! LOL!
YoungHouseLove says
Haha- amen! There’s nothing like a team of twenty people to make something look like it was churned out in one commercial break!
xo,
s
MissCaron says
Lookin great y’all! Great job!
Crystal @ 29 Rue House says
DIY does take longer sometimes but man is it worth it!
We finally finished our bed build and your joists remind me of the slats on our bed. Even though we were excited to have a bed, seeing the raw wood all built up was so exciting (like your joists). It is probably a good thing I didn’t do a Happy Slat Dance on our little 1x3s though…lol. I was also thinking of Sherry as I combed the house for anything to make the bedding and nightstands look nicer without spending money. :)
http://29ruehouse.blogspot.com/2012/07/getting-down-to-bedness.html
YoungHouseLove says
Haha- awesome!
xo,
s
Rachel says
Wow! You are almost there! It’s going to be so awesome when you’re finished. We recently added railing to our deck and landscaped our backyard, and it’s completely changed how we use the space!
Elisabeth says
Did I spot a “Perfect Strangers” reference (Happy, Happy Joist, Joist Dance)? Please tell me you know the show I’m talking about. Cousin Larry… Balki… causing all sorts of hijinx in Chicago.
YoungHouseLove says
Haha, sadly it was a Ren & Stimpy (Happy Happy Joy Joy) joke. Highbrow, I know. Haha.
xo,
s
Emily says
This is looking so great!!! Very very nice work- I think you’re doing a fabulous job, especially since you’re doing a lot of the work on your own John. I also love that scene from Friends- hilarious!!
I was busy busy busy this weekend and finally got my office looking decent- it’s been a long time coming- check it out:
http://davenportdiy.blogspot.com/2012/07/weekend-work.html
YoungHouseLove says
Looks awesome!
xo,
s
Janette@The2Seasons says
Smart move on putting in the weed blocker and gravel first. I would never have thought of that.
Lori says
OMG! John you are amazing! You must be thrilled to finally be in the home stretch. Love the “happy happy joist joist” dance :-)
Callie says
Color me impressed! It’s really looking great guys!
John@Our Home From Scratch says
Looks great guys! Nice work! I def agree with you regarding the weedblocker. We have it in our front garden bed and we get a lot of grass growing on top of it. Easy to pull it out, but it’s still a pain.
I built a deck at my parent’s house with my dad a few years before he died and it was a lot of fun. We enjoyed trying to out smart each other in the whole building process. :)
YoungHouseLove says
That sounds like an awesome time John! So sorry for your loss. Very glad you got to build a deck with him! It’s such a memorable experience and I’m sure you were both equally brilliant in the end.
-John
Eileen says
I’m always super impressed with your (and Sherry’s) work.
That must be the most pristine “under deck” I’ve ever seen. We’ve had decks on every single house we’ve owned (20+years of houses) and we’ve never had a weed problem. I would think the virtually 100% shade would prevent them.
Can’t wait for the final push to the finish. Good luck!
Megan @ Two Live Colorfully says
I cracked up when you referenced that Friends episode! One of my favorite scenes ever! Picture me wheezing silently with laughter because I found it too funny to laugh like a normal person!
Anyways, I’m so excited to see the final result of this deck! It’s so awesome that you guys opted to DIY-it. You give us normal folk hope! :D
Tracy says
Runners know the importance of cross-training (wait, do we?) and this deck-building totally counts, right John?
It’s really shaping up nicely :-)
YoungHouseLove says
Oh yeah, totally counts!
-John
Sara says
Soooo exciting! Looks like you’ll be wrapping this puppy up just in time for the weather to cool down enough to enjoy it!!
Stacy@http://www.california-poppies.net says
The deck is looking good! I can’t read the word ‘pivot’ without cracking up and picturing Ross and Chandler on the stairs! One of the best episodes ever! (Does this age us that we quote Friend’s episodes? LOL) :)
Lisa says
Great progress! Laughed out loud at the Ross/Friends reference. Just curious, did you and your dad check for the crown of each piece of lumber and place the crowns up? As experienced builders, I assume you both know to do that, but I don’t recall you mentioning it in a post – it might be a good tip to pass on to your readers.
YoungHouseLove says
Oh yes, there are usually ten things we do along the way that I forget to mention after the deck dust clears out there. Haha. For anyone who wants to know more on that, here’s an article for you: http://www.askthebuilder.com/check-for-crowns-in-lumber/
-John
Crystal @ 29 Rue House says
I didn’t know that curveture was called a crown but I always put boards the same way because I like things nice and neat like that.
Emily D. says
LOVE the Friends reference…”pivot, PIVOT!…”
The deck is looking awesome!
Ashleigh says
Looks amazing! I can’t wait to see the finished project. Great work John!
robin @ our semi organic life says
What a project! This makes me appreciate hiring people to do this since it is so involved! Even a tiny thing like weed blocking required 40 bags of gravel! Pheww.
Elizabeth@ wake&gather says
This is totally off topic but I have to tell you guys that I had a dream in which John came over to “my” house (not my real house, my fake dream house) to interview me about something (no idea what! ) and my dad (with whom I do not live) was super rude to him and I was so embarrassed! So please apologize to dream John on behalf of my dream father. I hope the interview turned out well.
YoungHouseLove says
Hahahahaha, hilarious!
xo
s
Kristi says
PIVOT! That’s hilarious.
The deck looks great! I’m anxious to see what it looks when it’s finished.
Rachel says
Holy Moly!!! It looks amazing!! So exciting for you both! AND hilarious “PIVOT!” mention. You guys really make my day :)
Ryan says
I have to say: I am crazy impressed with the deck so far! What a complicated, difficult project. I would have just broken down into tears by now and called it done. :)
Jen D. says
So exciting!
Misty says
this is so exciting and will be well worth it when you can actually sit on it and enjoy a cold bevy! My boy friend and I (mostly him) were busy with trimming our house this weekend! I am so thankful to have a genuine hangman around, although he hated doing the trim and at one point after a bit of swearing he eventually said… “maybe you should leave..” But I couldn’t leave him to bare it alone, goos news is its done! Oh except for sanding and painting… sigh.
Sarah M says
Ok, now I have “Joy to the World” stuck in my head! =) It looks fantastic!
Misty says
ps. after bumping into a friend of mine here in Ontario at Home Sense this weekend where I proudly showed her my Silver Metal Gazelle head find she sent me a message saying “fyi, you should check out younghouselove.com” I responded with “funny you should say this….I check their blog daily!” You guys are getting pretty popular! :)
YoungHouseLove says
Haha- no way! That’s so funny.
xo,
s
alex says
The pivot/Ross picture is the funniest picture to date…also, the bloopers to that are way funnier.
Jen@The Decor Scene says
John, you are doing an awesome job!!! So excited for you. You are almost done. YAY!!! So I was just thinking about how thin this area is, what kind of table are you putting out there? Do I see another project coming your way John? A nice thin table maybe? I can’t wait to see how you guys decorate it. Very exciting!!! We have been at a stand-still with our outdoor projects. :( But we do have a bunch of projects to do like finish painting our deck stairs and even painting the underside of our upper deck, so that it is cleaner and lighter when sitting under the upper deck. ;)
YoungHouseLove says
Yes, we definitely might have to DIY a table if we can’t find one that works! It’s 8 feet wide though, so it looks narrower than it is (ex: our first house’s den was 8 feet wide and we had a sofa, a media table, ottomans, and a big area rug squeezed in there). We’re crossing our fingers that we can make it work without feeling cramped at all!
xo,
s
KathyG says
I put legs on an Ikea thick piece of butcherblock, and it works as an awesome long skinny ‘farmhouse’ type table. You’d have to seal the heck out of it for the weather.
YoungHouseLove says
Love that!
xo,
s
Jamie D says
PIVOT!!!!!! hahaha. It is looking SO great John! Don’t get too sore- Color Me Rad 5K is this Saturday! Hopefully it will be nice weather for the run, I can’t wait.
YoungHouseLove says
So excited! Clara and Sherry have been practicing by throwing various things at me.
-John
Marion says
Sorry I don’t have time to read thru prior comments to see if this has been suggested – but I want to pipe in – we are doing a similar-but-different project, and my aunt told me that whenever work is done that is near the foundation of the house, it is important to include termite-prevention treatment at the same time. Apparently the area where outside-stuff-meets-house is their favorite place to live and breed.
YoungHouseLove says
Oh yes, we have heard that too! We just had things checked/maintained before starting this process (we have them come every spring to look around).
xo,
s
Paige says
OMG – the PIVOT episode of Freinds – hystericcal!!! Awesome progress! So excited to see more. Rock on!
rachael says
Do you have to have more support for your joists? I know when we built our deck last year we were informed that between each joist we had to have a support piece that was screwed in from each side and staggered. Also, do your posts (the ones that are in the concrete) have to have more support? Ours had to have pieces cut on an angle that attached from that post to the outside boards. We don’t live in the same area, and our deck is bigger so I’m not sure if that’s a factor?
YoungHouseLove says
We are doing everything to code in our area per our county (we actually had them design this entire deck plan after we failed their first inspection, so they’re calling the shots). These things definitely vary by area though!
xo,
s
Shelley says
Love the way this is shaping up! Good work John & Dad!
Jess! says
My living room ceiling started leaking last fall, but given that we were expecting a snowy winter, I decided to wait until spring to take care of it, as well as the offending shingles above it. What was supposed to be a patch job ultimately turned into a large-scale roofing task that took three days (my entire Victoria day weekend … we’re Canadian).
With only 3 helpers (my dad, my boyfriend, my brother), two of which were part time (dad/bro), it took us 3 days to strip, repair, ice+water, and shingle the roof, in the blistering sun. It was a DIY that ended up saving me about $3,000 total, taught me several lessons about making sure that things are done the right way (rather than the fast/easy way), and ruined my workpant. I burned my butt by sitting on the hot (charcoal coloured) through one of the holes in my workpants, and made some friends in the neighborhood (who lent us their magnet rake- INGENIOUS!). All in all, our 1-day proposed timeline turned into 3 days, but it was totally worth it.
YoungHouseLove says
Wow- that sounds like a ton of work! So worth it to save all that money!
-John
Lindsay L. says
Way to go John! I am fairly certain I will never build a deck but just wanted to comment to say your hard work and dedication to this project is awesome.
Giulia says
Well done! Looking forward to seeing a table on it to see the proportions.
Reenie says
You’re moving right along….looking good :)
Stephanie says
Looking good! Finally some payoff for all that planning.
And I have to say, in my book, that Friends scene is one of the most memorable TV scenes. It’s just the way David Schwimmer says it that makes it. What is sad though is I’ll say it in whatever situation I think is funny and no one “gets it”. Glad you would! :)
Jess @ Little House. Big Heart. says
Looking great, John! I can’t wait to see this all done up and decorated! Have you guys thought about what you’ll use for light out there? I see one little light on the side of the house, but that doesn’t seem like enough.
And please, oh please tell me you weren’t standing on your AC unit to take the third pic from the bottom… the engineer in me cringes at the thought. ;)
YoungHouseLove says
We’re looking forward to draping big bulb string lights between the two roofs so there’s a pretty “starlit” sky effect above us in the evening! As for that third to last shot, I was standing on the ground behind the air conditioner unit with my arms way up (which puts the camera almost 8 feet in the air since I have nice long arms). It was a blind shot, hence the crookedness, haha. I’m crazy but I’m not that crazy.
-John
Amanda says
Seriously, of all of the projects I’ve seen you guys tackle, this is the one I’m most impressed by. Maybe it’s the lumber, power tools, and the fact that I’m more familiar with interior projects than exterior…maybe it’s the fact that you’re willing to tackle this in the ridiculous heat we’re having…but, yeah, SUPER IMPRESSED. It looks great!
I’m also thinking that this may be our limit for DIY – the deck we have to build on our new house is off the second floor (walkout basement, so it’s the first floor, technically), so we may contract it out. I dunno.
*bowing in your presence*
YoungHouseLove says
Aw thanks Amanda! I think the hardest thing we’ve done is still the bathroom reno at our first house. Demoing out that metal mesh in the walls was brutal! So whenever we get intimidated we think about that project (and how we lived to tell the tale) and it keeps us going!
-John