T-minus twenty for hours until we have furniture on the deck!!! Woah nellie, I’m excited about it. Hence the use of three exclamation points and the term woah nellie. Heck, I’m about to break out some coordinated and not at all bizarre dance moves. Watch out now.
We still have to choose what stain or sealer to use on the deck (some require a waiting period for pressure treated wood to dry out/acclimate while others can be used sooner) but we decided (read: I prodded John until he agreed) that putting some furniture on the deck in the meantime just means that we can start enjoying this baby. It’ll only take about twenty minutes to clear it when the time comes to seal it, and we purchased the table and chairs a while back (when we wrote this post) so I just didn’t want to wait a second longer. Yes, I’m playing the role of Veruca Salt in Charlie & The Chocolate Factory (I want it now! I want a bean feast!).
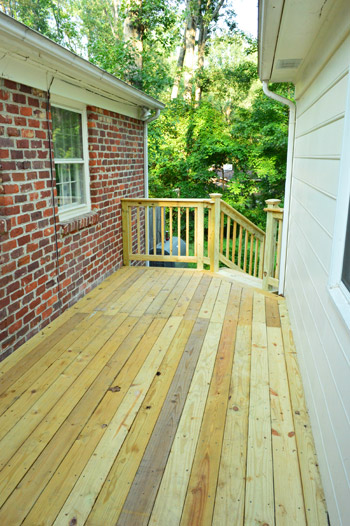
So by this time tomorrow we’ll have furniture out there (along with outdoor pillows and other accessories because you know I can’t help myself). But the reason this post isn’t full of furniture pics is that prep work is a pain in my backside sometimes keeping outdoor furniture looking good for the long haul includes some pre-putting-it-out work. Boo. But it really does add up to longer use (and better looks down the line) so we’re down. Sure beats having to buy new furniture in a few years…
For starters we learned that the amazing couldn’t-have-built-one-any-cheaper table from World Market that we bought for $73 (more on that here) called for at least three coats of protective water-based poly to keep it from cracking and peeling in a year or two. So we broke it out of the box, assembled it in the carport, and ran out for some poly that would do the trick.
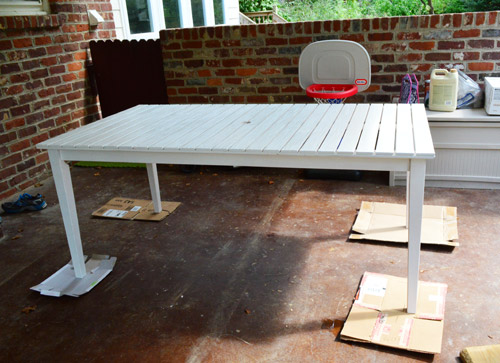
We landed on this guy:
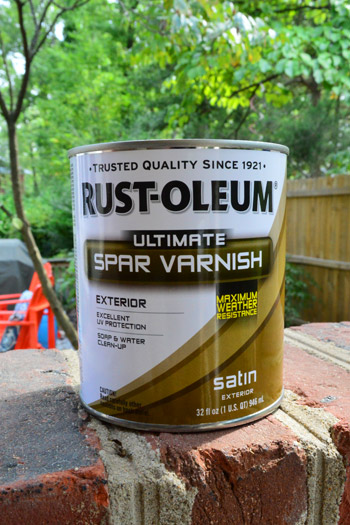
Why? Well, for starters, it’s water-based and distinctly says that it dries clear (which is very important if you’re polying something that’s white since oil-based varieties can yellow over time). It’s also made for being outside (it’s not a water-based poly that’s meant for an indoor dining table that never gets wet) and it actually sports one of the highest durability rankings out there (it has “maximum weather resistance” and is often used for wooden parts on boats, so it can stand up really well to water, sun, and the elements at large). Although it mentions that it’s great for boats, I also liked that it specifically mentioned outdoor tables in the description on the back since sometimes it’s scary to buy a product that’s made for one thing (boats) and wonder if it’s not so good for other things (wood patio furniture). It even said that it worked on painted or unpainted exterior furniture, which was great since our table is painted.
As for the application, here are my tips:
- I set each of the legs on cardboard, just to protect the floor of the carport
- I used an extra wide brush that I picked up for a few bucks at Home Depot so it would get into the slats between each board with each swipe
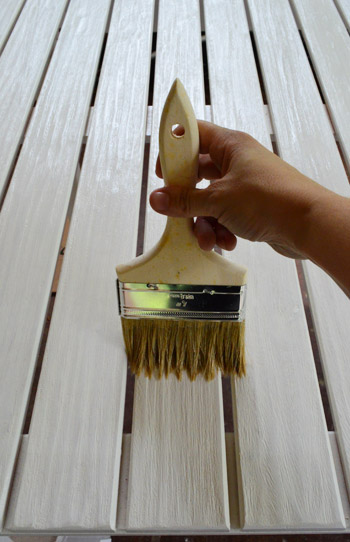
- I followed the directions to the letter, applying three thin coats at two hour intervals (the first one went on at 4pm, the next at 6pm, and the last at 8pm by the light of the carport)
- I gave it all of the drying time it allowed (I plan to carefully carry it over to the deck later this afternoon so I can set things up and shoot some pics for tomorrow’s post in the morning)
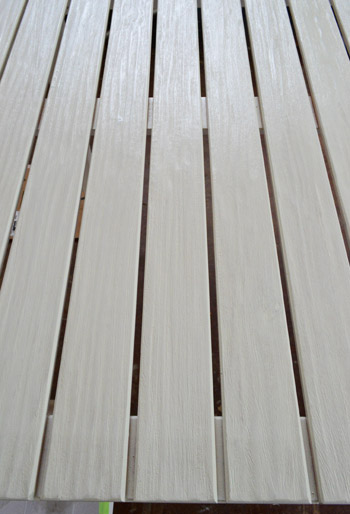
So there are those pesky DIY maintenance details for our deck table. Onto the chairs that I tackled yesterday!
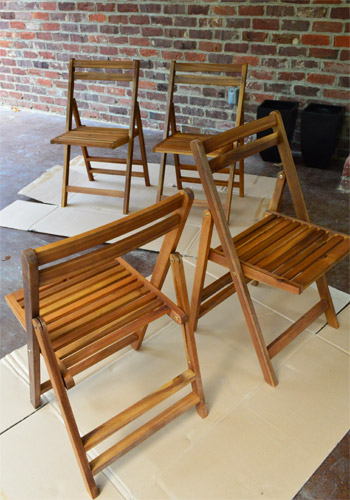
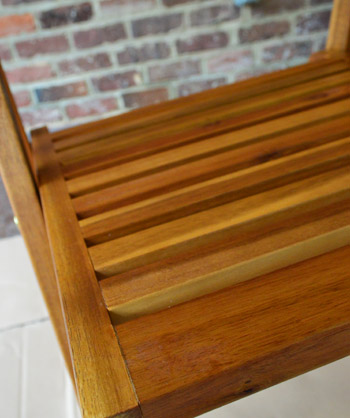
We also mentioned in our mood board post that we bought a set of these affordable wooden outdoor chairs from Joss & Main for around $40 each with free shipping. They’re made from acacia wood (it’s a material that’s sort of like teak, which does really well outside and in moist conditions) and the other awesome thing about acacia wood is that it has an awesomely rich tone that’s especially gorgeous (and durable) when it’s oiled. So for ten bucks we grabbed this Teak Oil from Home Depot (which also works well on acacia wood).
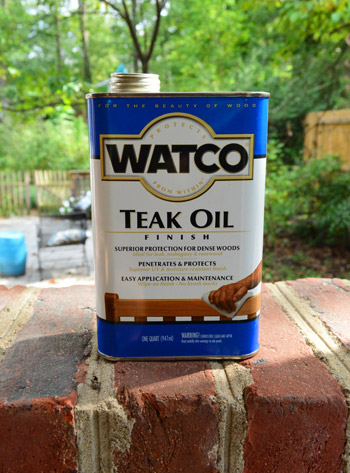
Here are a few wood-oiling tips:
- I set things on cardboard to protect the carport floor and wore clothes I didn’t care about so I didn’t have to worry about grease stains
- Per the directions on the container, I applied one coat of oil, let it sit for thirty minutes, and then applied another coat of oil and let that sit for fifteen minutes. Then I wiped it all down with a dry cloth as directed. Look how serious I am about it:
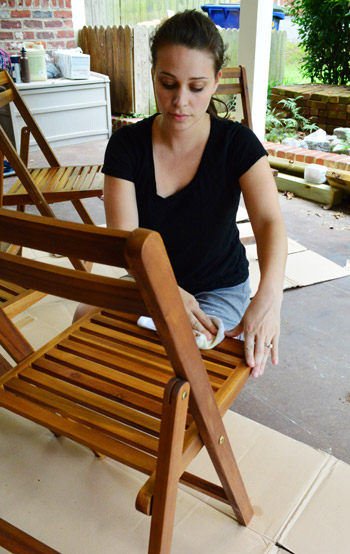
- Actually, instead of using cloths to apply it, I used a pair of old socks (one to apply the oil, and one to wipe things down later in the process)
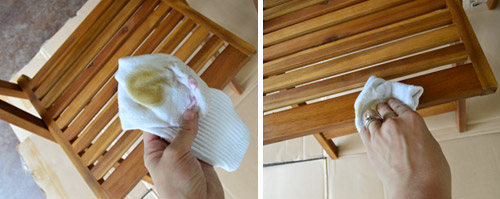
- I gave them all ample drying time (it called for 8-10 hours) before sitting in them or touching them, so I’m planning to move them over to the deck this afternoon along with the table, at which point they should be ready to use. They sure are purty, eh?
There you have it. Annoying before-the-fun-stuff maintenance that we hope will make all the difference when it comes to enjoying our deck for years to come. What are you guys polying or oiling to keep it in tip top outdoor shape? Any other acacia wood fans out there (it’s such a pretty finish!) or end-of-the-season outdoor furniture purchases?
Psst- You can see how we planned, sourced, and built this beast of a deck here – and you can read about how we prime, paint, and poly indoor furniture so it doesn’t yellow or peel here.

Lu says
so excited for you! cant wait for pics!
Rad Designing says
Oh my goodness i cant wait for tomorrows post! I love how the deck turned out and it was such a good idea for an awkward space!
Katy says
Ohhhhh, I looks quite nice! Can’t wait to see it all come together! I started painting a bookshelf yesterday in oil-based paint (’cause it matched the trim). After one coat, I decided to give up, slats can sometimes be the death of me. I am envious you kept on going!
~Katy
Vidya @ Whats Ur Home Story says
Love the finish of the table and the size. Can’t wait to see how you are going to style the space. I just finished another Royal Design Studio stencil project.
http://whatsurhomestory.com/im-at-it-again/
Got to tackle refinishing a dresser we found at an auction soon.
YoungHouseLove says
Love it!! The border idea is genius!
xo,
s
Vidya @ Whats Ur Home Story says
Thank you Sherry! I was kinda worried how the sides and ceiling line would turn out.
YoungHouseLove says
It looks great!
xo,
s
Captain Micah says
It’s so funny how my projects always take longer than I think. I took down our old lighting fixture and mirror in the master bathroom to replace them yesterday. I waited for Hubby to get home from work so we could cut the new lighting hole (the new mirror is really tall, so we get to move the new lighting fixture up). But lo and behold, we found a BLOCK WALL right behind where the new light needs to go. So I had to patiently order the right electrical box online, and I get to pick it up today. Patience is a virtue, right?
Your deck is going to look amazing. Fall entertaining, here you come!
Rebecca @This Nest is Best says
This post is such a teaser! Can’t wait to see it all put together :D
Maureen says
Yay!!! Just in time for Labor Day! I can’t wait to see how you lay everything out. So happy for you guys that you can finally enjoy the deck that John worked so hard on.
bridget b. says
Thanks for this post! We bought a little patio set at World Market this summer and I haven’t set it outside yet because I wasn’t sure how to protect it.
How did you decide that only the table (and not the chairs) needed spar varnish?
And, how often do you think the spar varnish will need to be re-applied?
Thanks!
YoungHouseLove says
I just did some googling about what acacia wood needs and the recommendation was to keep them oiled for a nice long durable result, so I went for it! As for the varnish, maybe every 3-4 years? I’ll just watch the table and make sure water still beads up on it and it doesn’t look worse for wear, and if it does I’ll drag it into the carport for another coat to keep it sealed. Hope it helps!
xo,
s
Robin @ our semi organic life says
Wow! Such prep work I’d totally forget about. Can’t wait!
Jen @ Four Marrs & One Venus says
OH Oh OH!! I am doing a headstand and leg kicks for you! I can’t Wait to see!!
Suni says
Whoo-hoo!!! So excited for you to be able to use your new deck, and soon!!
YoungHouseLove says
Aw thanks guys!!!
xo
s
Kelly {the Centsible Life} says
This is such a teaser post! Don’t you wish life was like HGTV sometimes? It would have all been done in 30 minutes. ;)
YoungHouseLove says
Haha yes! Nobody wants to see that furniture out there more than I do! Haha. Darn prep work! I’d never poly’d a painted outdoor table or oiled wooden chairs before though, so at least I got to learn (and share the deets). Hope they help someone out there!
xo,
s
erin says
Why didn’t you guys apply the poly before you assembled the table? It seems like it would be easier to spray all the individual pieces down rather than paint it all by hand.
YoungHouseLove says
It was just legs that you screw on (the slats were all in place already) so the legs actually held it up so I could do both sides.
xo,
s
Anele @ Success Along the Weigh says
Can’t wait for the deck all jazzed up!
Carly says
I want to lock it all up in my pocket, it’s my bar of chocolate! … Although “I want a bean feast!” is by far the best line in that song… I mean, who doesn’t want a bean feast?!
YoungHouseLove says
Amen.
xo,
s
Hannah says
SO gorgeous! You guys are always so happy and inspiring. Total bright spot in my day!
Amanda says
Don’t put a rug on your deck until it is properly weathered (about a year or two) or you will end up with a huge rectangular “new” spot and the rest will be all seasoned. Not that I’m speaking from experience or anything…. ;)
Can’t wait to see pics!!!
YoungHouseLove says
Great to know! Thanks Amanda!
xo,
s
Jen@The Decor Scene says
All pieces are gorgeous!!! I can’t wait to see it all together. I love the look of teak or acacia wood, but we do not have any of that type furniture. Some day. Can’t wait to see how you style the deck. :)
Jess @ Little House. Big Heart. says
Ahh! I can’t wait to see everything put together! Question: would you reccommend using a brush to apply poly? I probably would have used a roller and been none the wiser.
All these deck posts are making us itch to get going on our patio! Come on cool weather!!
YoungHouseLove says
Yes, I always like to use a brush and apply super thin and even coats. Sometimes a roller makes bubbles for some reason.
xo,
s
Crystal @ 29 Rue House says
I have used a little foam roller with water based poly before and it did leave little bubbles. I did brush them out but I wouldn’t do it again.
Sheila says
A timely post. We are working on a class project for the auction and decided to paint (and seal!) an adirondack chair. How much did you pay for the spar varnish? When I googled it came up pretty expensive!!!
YoungHouseLove says
Aw, so glad! I think that can of varnish was around $9? It’s a small quart can, not the gallon but that stuff is so thin that it’ll last forever. It basically still looks full after doing three coats on the table!
xo,
s
Krystle @ Color Transformed Family says
The acacia wood should hold up well. I think it is the same wood Noah used to build the ark! At least you will be prepared if you have a flood.
YoungHouseLove says
Wahoo!
xo
s
Meagan {Green Motherhood} says
Now I know why my teak outdoor table fell apart…..
YoungHouseLove says
Yeah, we had teak chairs from Ikea that we didn’t oil and they got trashed :(
xo,
s
Calli says
Very timely post. I’m in my spray painting clothes now working on some outdoor furniture of my own. I’m sanding, priming and painting a love seat and chairs. I plan to make my own cushions too. Fingers crossed for me!
YoungHouseLove says
Aw, good luck Calli!
xo,
s
Monica Williams says
Hope you guys have better luck with the World Market table. We purchased a whole set last year and in less than a month’s time the top of the table was warping pretty bad. Luckily the manager at World Market gave us the option to return it all and receive our money back!! She explained that several tables had come back due to warping :(
YoungHouseLove says
Thanks Monica! I wonder if that’s why they were warning us about polying it. Apparently if it was left unsealed it would break down/warp quickly, but three good coats of poly should hopefully fend that off! Will keep you posted for sure!
xo,
s
Allyn says
Can’t wait to see it! Also, I now have Veruca Salt’s voice in my head. Blergh.
Kristen says
I think it is crazy that outdoor furniture does not come prepared to be used outdoors. But I fully admit to being lazy!
YoungHouseLove says
Yeah, we were surprised! But enough furniture has been trashed by the elements (we had some cute teak Ikea chairs that basically got all chalky and terrible) without oil, so we were hoping to keep these guys looking better for the long haul.
xo
s
Ellen says
Can’t wait to see it with the furniture!
But, I don’t think we all need to see a bunch of pictures of you following the directions on the container. It seems like y’all are reaching for content these days!
YoungHouseLove says
We’ve always posted about how we do projects or use materials, even if there are details right on the container! We have an entire archive full of how we painted cabinets, brick, paneling, furniture, ceramic items, metal items, etc! We even get countless requests for “how to spray paint” posts when all of those tips are pretty much on the can. We just share how things went for us along with our pics and tips, which is what has gotten us here (for which we’re forever grateful). It’s the backbone of this entire blog :)
xo,
s
heyruthie says
I TOTALLY DISAGREE WITH Ellen!! Sherry, I actually LOVED this post. I am a “short-cut” kind of gal, and (as a sad result) I often wonder why my projects fizzle. But I also know that you and John love a good shortcut, ***if*** it’s not going to short-change you in the long run (heh….short-cut, as long as you don’t short-change!) Anyway, see where you and John save time, and where you DON’T–and go the long-route really helps me. I felt the same way about your “painting your cabinets” videos and posts. I even appreciated your “how to use wood putty” demo (where you kept calling it paint and all the wrong words!) Many of your readers came from homes where basic maintenence didn’t really happen. My Dad was a techie in Northern Virginia, whose motto was, “I’m handy. Handy means I make enough money to pay someone to do it for me.” I think a lot of people in our generation may have to roll up our sleeves and learn to DIY….more than our parents did. Thanks for the basics on how to do that….along with the more “fun” posts.
Also, question: Were the chairs completely unfinished? (Raw wood?) Is that how they were able to accept the tung oil? The outdoor chairs I’ve gotten had some flimy, thin poly on them, but it didn’t weather well, and peeled right up, then requiring sanding….ugh.
YoungHouseLove says
Aw thanks Heyruthie! As for our chairs, they were raw and unsealed acacia wood. Very matte and dry so they soaked the oil right up. Maybe sanding your chairs down to their raw form and then oiling them will work?
xo,
s
Sarah says
Haha – the flip side of this comment is that I’ve been hoping for this exact post because I’ve been trying to decide what finish to put on this exact table, and had been debating that exact poly vs another product. The content is great and will reach different people on different ways at different times. Glad y’all are confident enough to just “do you” – it’s gotten you this far!
Stacey says
I have to chime in and say I appreciated this post (as well as other prepping posts). I wouldn’t have even thought about prepping outdoor furniture before putting it outside. You probably saved us from ruining our future outdoor furniture, because now I know to look for how to prep it!
YoungHouseLove says
Aw, thanks guys! Glad to help.
xo,
s
Karo says
I have to say that even though this wasn’t my favoritepostever, I hardly thought is was an indicator of “reaching for content.” I love the way you guys mix things up. There may be the rare post that isn’t for me, but I always appreciate the breadth (and detail) of your posts, regardless of the topic.
I don’t normally have time to read the comments, but today I did scroll through them since I have one of my own. Apolgies if this was already covered on a previous day. Am I the only one who misses the “home” button?
YoungHouseLove says
So sorry about that button going missing Karo! If you click on our blog header (the thing that says Young House Love with all the pics at the top) that’s basically one big home button! Hope it helps :)
xo,
s
Linda says
Total and respectful disagree….what I love about YHL is the tutorial nature of so many of the posts. In fact, I’m sort of sad that I can’t seem to find any nice pictures of how to wash wallpaper glue off walls with TSP (since that’s what both Benjamin Moore and Ace recommended). I’m sort of scared of the instructions on the box :-(
I honestly really used Sherry’s approach to spray painting a small outdoor plastic table – yep, pretty much the same as on the can, but her notes and those photos made it much more clear for this novice painter.
Ellen says
I never have a response to any DIY projects when you ask your end of post questions since I’m not doing much DIY these days… but today… Yes! I bathed a pull up rig (named Big Bertha – she’s HUGE!) in mineral spirits last night to remove the oil coating from the raw steel & will be “sealing” with linseed oil tonight to protect it from rust! We’re opening a CrossFit gym!
YoungHouseLove says
Wow! That’s exciting! Good luck!
xo,
s
Crystal @ 29 Rue House says
I can’t wait to see your table all “decked” out for dinner! It isn’t furniture but I’m still wishing I would have picked up this peacock for my backyard. Now I’m off to call the Restore to see if it is still there!
http://29ruehouse.blogspot.co.uk/2012/08/theres-peacock-in-my-back-yard.html
YoungHouseLove says
Um, he’s awesome.
xo,
s
Sam @ The Junk House says
I can’t wait to see the deck all decked out! (pun intended)
We bought a bunch of patio furniture off of Craigslist last night. Dining table, 6 chairs, umbrella, umbrella stand, love seat, 2 chairs, and coffee table for $150. I need to buy new cushions, but I couldn’t pass up that deal. I’d love a wood set, but we have a destructive dog that would probably chew it up, so metal it is.
YoungHouseLove says
Wow- that’s an amazing deal!
xo,
s
VickiP says
LOVE IT! May I offer a little unsolicited advice? Maybe have a no shoes policy while you are using the deck before you stain it. You don’t want your decking to get all dirty before you put the final finish on :) We replaced the boards on our front porch and then waited a while before we stained it, and we had A LOT of cleaning to do before we could apply the stain because we did not take that precaution. Sock parties on the deck!
YoungHouseLove says
Thanks for the tip! We have heard that before you stain or seal you want to scrub things down with something to clean the wood anyway (since cutting and marking it and sanding it in order to build the deck didn’t keep it all pristine) so that’s the plan!
xo,
s
Christina @ Homemade Ocean says
Wahooooo what I have been waiting for!!! I can’t wait to see it.
Did you get new pillows for this special occasion?
YoungHouseLove says
You bet your buns I did! Haha.
xo,
s
Abby says
It would be a much better world if furniture came ready to use! Why don’t these things come already poly-ed up and ready to go?? Have fun finally setting it all up :)
YoungHouseLove says
Yeah, we were actually surprised about the table not being ready for outdoor use, but we heard from a bunch of folks and World Market salespeople that it’ll hold up a lot longer with poly. I guess it would be ok for the short term without it, but adding it is much more of a long-term solution.
xo,
s
Jessica says
Bean Feast. Classic! Looking forward to seeing the finished product soon, everything looks great so far!
Amy @ PaintWineRepeat says
Ooh fun! Can’t wait to see the styled pics!
Paige says
I can hardly wait!!! Note: three exclamation points!!!
YoungHouseLove says
Wahoooooooo!
xo,
s
Erin says
Looks amazing!
We went for a composite line at Crate and Barrel called Alfresco and have been super happy with it over 3 summers, but there’s nothing like the real thing.
YoungHouseLove says
That sounds really cool too! I bet C&B made a really quality table!
xo,
s
J.Mill says
My husband and I just bought our first home EVER and we close this friday (nail biting). I am so excited to know about your blog and to now follow with a “I can do that in my house!” mentality! Yay home ownership!
YoungHouseLove says
That’s so exciting! Congrats!!
xo,
s
Robin Grey says
I’ve had acacia wood flooring throughout my house for about five years now. I really couldn’t love it more. It’s got beautiful color changes from blonde to mahogany and holds up pretty well. When we bought it was right at $4 a foot, but it looks like it’s a lot more expensive now. Whew! When doing my research, I learned that not only is it beautiful, but it’s also a sustainable wood source. Go green!
YoungHouseLove says
Wow- I love that!
xo,
s
Tara says
Looks great & I cant wait to see all the furniture out on the finished deck. But I was a little surprised to see you used conventional varnish & oil products as opposed to more eco-friendly ones, since you usually make very green choices! Is the stuff just not available in the market or was there some other reason? Also was the whole process a little stinky & fume-y?
YoungHouseLove says
When it comes to outdoor stuff that gets totally beat on by wind/rain/head, we think it’s an eco choice to make things last and give things a ton of durability, so we’re not dumping our furniture into a landfill after a year or two. Now hopefully our table and chairs will last us, and the poly is water based (which is much less fumey than oil-based stuff – both items were actually lower VOC than many other options on the shelves). The wood oil smelled sort of like a cedar chest, but there was no odor to the poly when applied outside in a ventilated area. Hope it helps!
xo,
s
Linda says
FWIW, our condo association learned this year that thanks to EPA regulations(seriously, I do thank the EPA for a lot of their work – not all companies/industries have the best history of self-regulation, IMO), most outdoor stains and exterior finishes have been reformulated to be more ‘earth-friendly’, including a Benjamin Moore line. Cost a bit more, but I think worth it. Beware of contractors using the older stains and saying how you’re getting a bargain.
YoungHouseLove says
Yes, we noticed that a lot of them are now low-VOC! So surprising!
xo,
s
Gabriella @ Our Life In Action says
Very exciting!!! (notice the 3 exlamation marks ;-) just had to join in the fun)
YoungHouseLove says
Haha, love it!
xo,
s
Stacey says
Hubby is still plugging away at the foundation for the patio (using John’s posts about your patio, edited for New England weather), but I’m dreaming about its eventual finish. We actually bought an acacia wood table, bench, chairs, and outdoor sofa at IKEA way back in the spring and I can’t wait to assemble them, prep them (thanks for the oil tips!), and finally get to use them when the patio is done. Maybe by fall . . . ;)
YoungHouseLove says
Aw, good luck Stacey and hubby!
xo,
s
LMG says
Beautiful! My neighbors didn’t do that and ended up having to repaint their Cost Plus furniture every year.
Will you be talking about what you found out about stains for the deck? We are in the thick of it with choosing something for a new fence and would be really interested in what you’ve found out. For example, we’ve heard the wood needs to adjust for anywhere from 3 weeks to 3 months!!! Given that we want to get something on before the rainy season, we’re hoping the time is closer to the former….
YoungHouseLove says
Yes, we’re still doing some research but we’ll definitely share all the details about what we have chosen (and why) when we do :)
xo,
s
Kamaila says
Can’t wait to see how you style the deck. It looks amazing good job. We used teak oil on our outdoor furniture too and do far it worked out very well
jennifer says
I LOVE teak furniture…reminds me of boats…I like that it is close enough! Can’t wait to see the results!
linda says
I so wish I had done this when I bought my CP adirondeck chairs in 2010. The paint on the arms is peeling pretty badily since last summer,even though I live where it doesn’t rain often and try to pull them under a breeze way when it does rain. I’ll put this on my winter chore list. Are you going to do this on your adirondeck chairs too?
YoungHouseLove says
Those already came painted and sealed, so we’ll reseal them if we notice any wear over the years. Will keep you posted!
xo,
s
Jennifer S. says
Good idea sealing the World Market table. We purchased 4 white adirondack chairs from there and by the end of the summer, the arms were rotting. Looking forward to your final product!
Fatime says
Hello guys,
This is my fist comment on your blog ever, even though I read all of your posts (actually found you a few months ago, and did it all in like a week – it was fun to see it all in a fast-forward way :-). I know you must hear this a thousand times, so I’ll be short – you guys rock!
I do not know how much experience you have with teak oil, but since my hubby works with it on a daily basis, I though you might find a few comments useful (he uses a different brand, for sailboat decks). If the info is redundant, just ignore me lol
First, he sands the surface lightly, with a 300 sandpaper as a cleaning-and-preparation – I guess this might not be necessary with a new piece of furniture, but opens up the pores nicely before the oil treatment. Then, he blows off all sand, and applies the oil in a quite thick coat (he usually uses washing up sponges for that). The thus-treated pieces then sit and wait for at least a day – by this time, they usually soak up all of the oil, and kindof “show” the spots that need some more. He then applies one more, thinner coat, and leaves it to soak up for another half day – usually in the sun. In case the wood is really dry, a third application might be necessary, but that usually happens with deck pieces not treated for years by lazy ship-owners. If any residue is left on the surface, he wipes it off with a clean cotton cloth at the end.
I think its important to note that the oily treatment is the most natural one, and makes the wood really water-resistant, but, as all treatments, this needs after-care as well. If your chairs will sit in the sun, I would suggest a quick touch-up after the first month, or in the middle of the hot season, and a thick coat before the next season. I am not familiar with the brand you used, but the one he uses also produces a Cleaner and a Brightener, which can be great if the wood starts to turn black a bit. If you use either, you will need to re-apply the oil, of course.
I hope you will find this info useful – I will be looking forward to seeing your new posts every day, as I always do. They are always funny, witty, informative and fun to read… Thank you for them.
Greetings from Hungary!
Fatime
YoungHouseLove says
Thanks so much for the tips Fatime! So helpful!
xo,
s
Megan says
For my birthday, my husband had me pick out a glider bench and it finally arrived yesterday!!! So crazy excited to put it together and have a cozy spot to enjoy our fire pit now that the nights here are cooling down. Excited to see the final set up on your new deck!
Jessica says
I can’t believe you even had to convince John to put stuff on it now! I couldn’t imagine waiting months. I’m surprised we didn’t get this post last week! ; )
YoungHouseLove says
Haha, I know! I think the man was too tired to sign up for helping me carry tables and chairs right away. Haha.
xo,
s