Things are getting steamy in the foyer! As a refresher, we have five rooms full of wallpaper and we’re attempting to take five different removal methods for a spin, just to see what ends up working (and what bites the big one). For our first time at the wallpaper removing rodeo we used hot water and a spray bottle, which actually worked out pretty well. And in this week’s hard-hitting Wallpaper Exposé we’ll be tackling the foyer with this guy. His name? Steamer. His game? Steaming clothes. He’s actually John’s sister’s, but it was free to borrow and we thought we’d see how it worked out for wallpaper too.
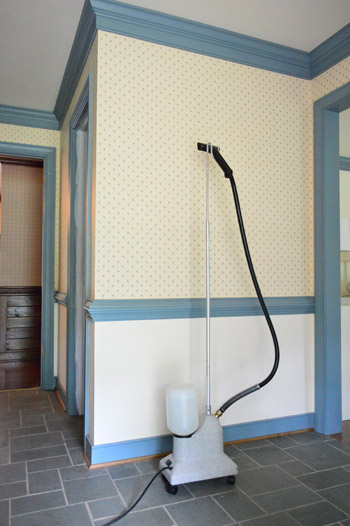
But first, a moment of silence for the small blue flowers.
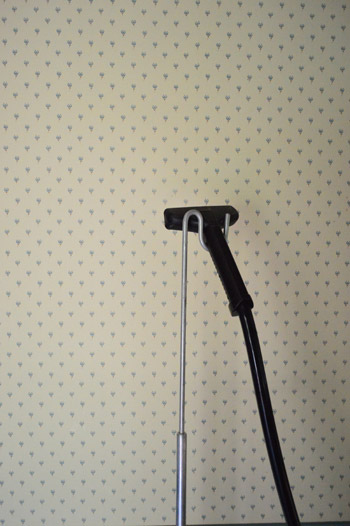
Ok, let’s get it going. This is the first area of the foyer we tackled, and our method for this area was for John to run the steamer all over that section of the wall and then I followed behind him, yanking all the way.
It worked pretty well (some areas left the backing when I peeled so they had to be resteamed and reyanked, but it wasn’t too bad. I’d score it as working a smidge better than the boiling water method simply because it was probably 10% faster/easier since around 10% more of the backing seemed to come off so it didn’t have to be removed in a second pass. But when you factor in the expense of buying or renting a steamer I’d say it was only marginally better than our first (free) method of hot water in a spray bottle. So it’s kind of a toss up. Do you want to pay $20-50 for something a little bit easier or would you need it to be a whole lot easier to spend that loot? Of course someone else might swear by a steamer and say it worked in two minutes, so the paper and how it’s applied are definitely a factor too.
Oh but it got a little hairy when we had to get the tops of the walls.
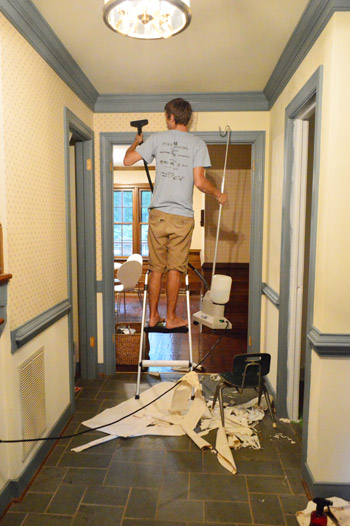
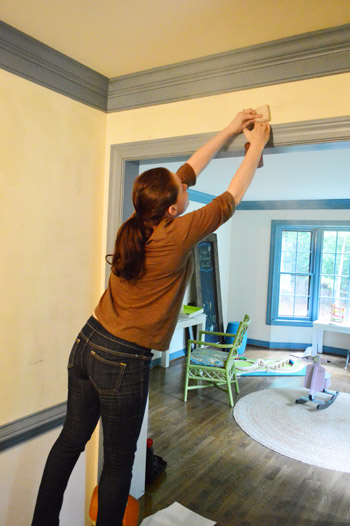
Since we were only dealing with a clothes steamer the hose wasn’t built to stretch very far, so it wasn’t quite long enough for the steamer to rest on the floor while we did the upper areas (which we never thought about until we got to that part). It wasn’t too much of a big deal, but John did get a nice workout holding up the equivalent of a gallon of milk as he worked his way around the top part of the foyer. So that’s just something to think about (definitely rent/buy a wallpaper steamer over a clothing steamer if you’re actually going to spend money on something).
Around halfway through we decided to try another method, which was pulling the paper right along with the steamer, so instead of John doing a big area and then me following behind him peeling, I literally peeled as he went like so:
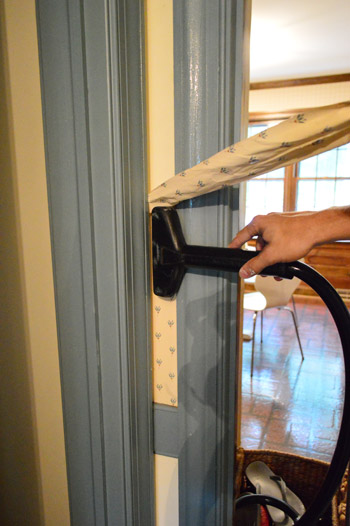
This method was awesome. In almost every case it removed both the wallpaper and the backing behind it so the wall was bare and perfect underneath. Must have been because there was more heat on the part we were actively peeling instead of pulling the paper off after it started cooling down and John had moved on to another area.
Another reason this second steamer method was awesome was because one person can do it, so if you have a solo meeting planned with a wallpapered room, don’t fret. You can do it. And you can look this sexy doing it:
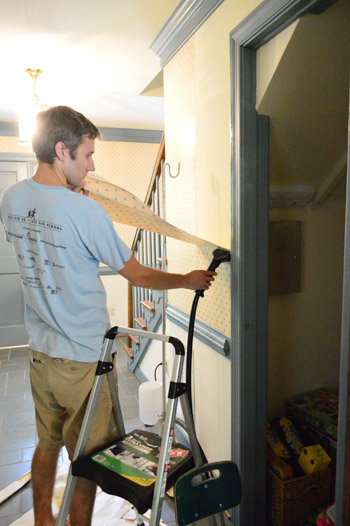
So I’d rank this second faster-peeling steamer method as around 30% quicker & easier than the hot water/spray bottle method. Although we were tackling a larger area than a small bathroom, so it was still a substantially longer process for us. Especially when we hit this Amazing Race-ish Road Block. Layered wallpaper.
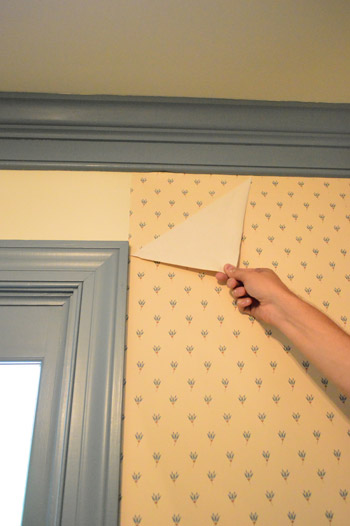
For some reason, there had been two layers of wallpaper applied to the entire front door side of the wall. But it wasn’t an older paper underneath, it was exactly the same stuff.
You guys. It was like GROUNDHOG DAY. Basically we had to do that wall twice and I’m not gonna lie. There was whining. But we got ‘er done. Eventually.
The funny thing is that we have no idea why it was doubled along that entire wall. Our only guess was that something didn’t match up so they redid it with a second layer of wallpaper to correct whatever got crooked or mismatched.
Oh and we did have one “incident” where we think the paper was glued a lot more in one spot for some reason, so our drywall’s top layer got peeled off. Pretty, eh?
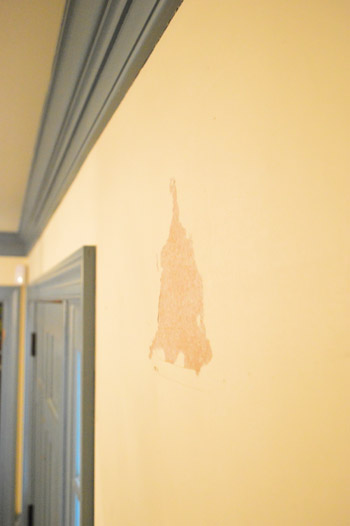
My plan is just to skim coat that with some spackle and then sand it down so it’s hopefully flush with the rest of the wall and just as smooth.
After we wrestled all of the paper down I went over the walls with a spray bottle full of half vinegar and half water (not hot, just room temperature) and used the rougher scrubby side of a sponge to make sure there wasn’t any glue residue anywhere. For the most part it had all come up with the backing so there wasn’t much to scrub, but a few tacky areas were a lot smoother after this step, so it’s definitely worth adding onto the end of your peeling project.
So that’s how we steamed things up, all in the name of deflowering the foyer.
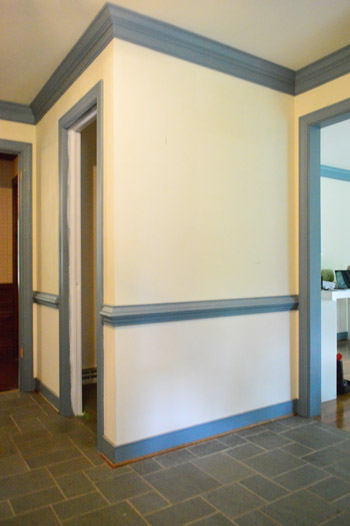
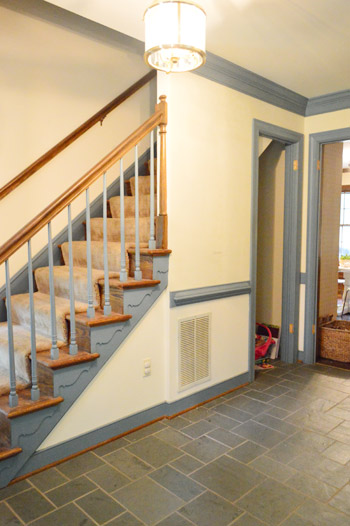
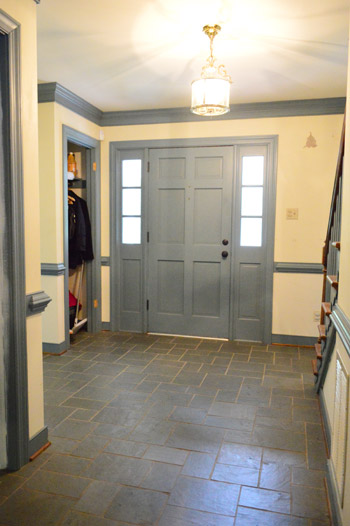
Obligatory before shot from our walk-through. You know, for closure.
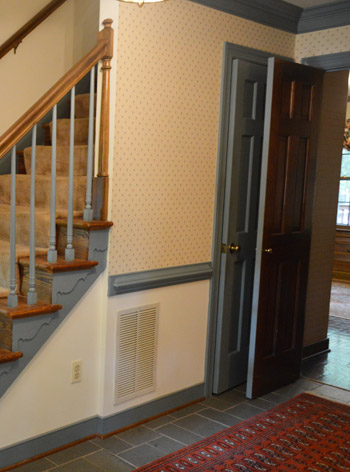
Oh but you’ll notice that the closet and the bathroom doors are off in the second to last shot, since we’re actively working on taking those from blue to white. We’re also about 20% into the blue trim out there, so we can’t wait to get that done and share the photos, hopefully sometime next week (four coats = Barfville).
Has anyone else taken a steamer for a spin? Did you do the follow-right-away peeling approach, or the steam-a-section-and-then-peel method? So far we’ve loved that we’ve never had to score anything and haven’t even needed a spackle knife (hand-yanking has done the trick). So I’d definitely put that in the pro column, right along with the zero dolla (holla!) cost so far.

Anne @ Planting Sequoias says
I love the magic of the internet…we get to appreciate amazing before and afters (well, eventually, though this is much improved already) without having to do any of the hard stuff! Wallpaper removal is one of my least favorite things, so good work and congrats on having one more wallpaperless room!
Allyn says
I wonder if the former owners follow your blog . . . perhaps they will reveal the secret of the double wallpaper caper. As much as I like wallpaper, I’ve removed so much of it in my time that I’m highly reluctant to use it anymore. Paint sure is easier!
HeatherB says
I’m with you. There are some really beautiful papers out there right now, but I have had so many nightmare experiences removing wallpaper that I just can’t quite bring myself around to biting the bullet. For now, I’m sticking with paint…
Dustin says
I love wallpaper and I’m not afraid of it either. Paint is OK but it can be very boring. I’m actually sick of seeing so much paint everywhere. Design has gotten dull. Remember when people did what they wanted to, rather than worry about resale? It made life more interesting that is for sure.
Anele @ Success Along the Weigh says
That method looks like something that even *I* could handle!! Ugh man, that blue trim. I bet you can’t wait for that to be gone. If I lived closer I’d offer to come over for a painting party to help usher it out quicker.
Oh yeah and I don’t know if you’re keeping that return or not but a few months ago on Kevin and Amanda’s site they showed this cool cold air return at Van Dyke’s Restorers website (not listing the site so Google doesn’t pick it up as “spammy”) but the name of it is “Worth Home Luxury Return Air Grille – Premier (Primed)” if you want to give it a gander. I think it would look really good there!
YoungHouseLove says
Thanks Anele!
xo
s
Lisa E says
Wow, those are really nice!
Lindsay says
Any ideas yet on what to paint the inside of the front door? My eyes can’t handle that blue :)
YoungHouseLove says
I want to do that the same teal color that’s on the front of the door once the trim/sidelights are white so it doesn’t look like a weird dull-blue-on-teal sandwich.
xo
s
Sophie says
It is amazing how much lighter the foyer looks without the wallpaper. Can’t wait to see what you guys are going to do with it!
Also, I am totally trying out this method the next time we have to remove wallpaper. We spent two days on our living room last summer, that was with four adults working! Who would put three (!!) layers of different wallpaper on a wall?
xx Sophie
Michelle says
Someone who doesn’t want to strip it! Sorry for your extra work, that would have been frustrating.
Wendy @ New Moms Talk says
I wonder if using a chair with wheels (perhaps with a back for stability) would help to carry the steamer for spots that are high. Then the steaming person could just gently guide it around the de-papering area.
YoungHouseLove says
Smart idea!
xo
s
Megan @ Rappsody in Rooms says
Can I just say I really enjoy your writing style? It’s a great mix of informative and funny, without trying too hard. I mean, who can make wallpaper removal sound fun? You can. Well done, on both writing about it and doing it.
YoungHouseLove says
Aw, thanks Megan.
xo
s
Claire says
“So that’s how we steamed things up, all in the name of deflowering the foyer.”
In total agreement Megan.
Lela says
Well said Megan & Claire! I agree :)
Kathy says
I also agree. The entertaining and informative writing is one of the main reasons I was drawn to follow your blog back in 2008. :)
YoungHouseLove says
Thanks you guys! Quit making me blush.
xo
s
Lisa E says
It looks a lot brighter when you compare the before and after shot. I never thought to use a clothes steamer, very clever! That’s wonderful that the backing is coming down so easy as well. I took down wallpaper in a bathroom in my first house and just wanted to scream and cry in frustration. They obviously didn’t use sizing and the backing took a LOT of effort to come down. Awful! Thankfully in our present house bathroom that wasn’t the case. Looking good Petersilks!
Valerie says
We borrowed a wall paper steamer from my sister (free!) and peeled as we steamed. Two differences from your method: we scored the wallpaper first (using this kind of thing http://www.amazon.com/Zinsser-2966-PaperTiger-Scoring-Wallpaper/dp/B0000DI7WP), which worked great compared to the small amount we tried pre-score, and we used a wide flat putty knife on the edge of the wall paper as it peeled. Took EVERYTHING off with no backing or glue residue. It was fantastic! We still did the vinegar wash, just to be safe.
Bonnie says
Was just coming on to recommend the paper tiger! I used it to remove the all the flowered wallpaper in my first home. Made removal so much easier.
JenB says
Ditto. The Paper Tiger Scorer is great! We rented a steamer to remove a TON of wallpaper in our first house before we moved in. I felt like it was well worth the money since we had so much to remove. Also, they recommended putting a little ammonia or vinegar in the steamer. That worked great, too.
Stacey says
OMW, how did the previous owners stare at that wallpaper and trim for so long without going bonkers?! I’ve started reading Bower Power too and cannot handle all the original rag-rolling either! Yuck, yuck, yuck!
Dustin says
Well the combo is classic Colonial. I actually don’t think it looked bad. The Colonial style was very popular for many decades.
Kelly says
Just wanted to say really quickly…it’s still extremely weird seeing you guys in this house and not the other. I just can’t seem to wrap my head around the fact that you are in a totally new place. Just sayin…
Oh, and as for wallpaper, I personally think it should be banned…like illegal to put up. I have tackled wallpaper removal before…and I will tear the drywall down and start over before I remove wallpaper again…
djs says
GREAT idea using a clothes steamer! Not as messy as a wall paper steamer. And probably hotter. Kudos.
The slate floor looks so much better without the blue floral paper. More neutral. It will actually look beautiful once the blue trim is gone.
Liz E. says
How sad will you be when the blue is gone?! I shed a tear just thinking about it…
Kidding! Looking great, Petersiks! When I helped my parents with their basement a few years ago (walls and waaaallllssss of tiny ivy-print wallpaper…my mom’s fault, she picked it!) we used a steamer and it worked wonders! (My prior non-eco-friendly go-to was DIF, but for that much paper we went the steamer route). Be grateful you only had one ripping-off-the-top-paper-of-drywall incident. We had more of those instances than we could count! The problem? The drywall hadn’t been properly primed/prepped for the adhesive. Boo. To top it all off, we had a terrible time getting a smooth coat of drywall mud over the patches. And now that I’ve been a total Debbie Downer: wishing you much more luck than we had! Excited to see if you have any tips for a smooth finish!
Maggie S says
I rented a wallpaper steamer and it worked like a charm! The pan was about 12″ X 15″ and I used the “follow right away” method. I only had 3 bedrooms to do but I did it in one weekend.
Maggie
Lisa says
Before you skim coat the torn drywall, make sure to first seal it with an oil-based primer! Otherwise the water from the spackle or joint compound will be absorbed by the paper and cause it to bubble. (Go ahead – ask me how I know!) :)
YoungHouseLove says
Thanks Lisa! Great tip!
xo
s
Nancy says
Good to know! Not soon enough…but still good to know :-/
Marinn says
Same thing happened to me, but I did not use an oil based primer, I found a water based one specifically for that purpose: http://www.idealtruevalue.com/servlet/the-48891/Detail
It worked really well, didn’t smell too much, clean up was super easy. I had a whole room that had been wallpapered directly onto bare drywall, so I had a lot to prime.
Corien says
Lisa, how do you know?? Do tell!
Jill says
Raw drywall paper or raw mud/spackle always needs to be sealed because it is absorptive and either causes problems as Lisa describes or, in the case of painting a patch, will be a noticeably different sheen from the rest of your wall if not sealed with something before being painted because the paint will absorb differently into the patch compared to the wall around it.
But just a note about the oil-based primer she recommended for sealing the rip in your wall:
The old standard for sealing raw drywall (like where your wall is ripped, or walls that are mudded and taped only) is using oil-based primer, but there is a guy online named Jack Pauhl who has taken all things wall-painting to the seriously the most impressive level of thoroughness (he’s a professional painter), and he tested literally over 20 primers for sealing raw walls and found that Zinsser Gardz was the best.
You can see his extensive testing methods here: http://jackpauhl.blogspot.com/2008/12/drywall-primers.html.
Here’s a bit just about using Gardz on new patches on finished walls:
http://www.jackpauhl.com/patching-without-flashing-yes-way/
All in all, I was very thoroughly convinced when I first read his blog. I also liked that Gardz was not oil-based. When my husband and I did all the mudding and taping for our new bathroom drywall, we used Gardz all over the walls and ceiling as our only primer before painting, and it came out great. Gardz wasn’t particularly smelly or anything, which I really appreciated. We’ve also since used Gardz on a patch in another room before painting, and the patch blended right into the wall.
Not that I didn’t think he was a thorough guy before based just on his testing methods and blog, by after this experience with a product he recommended, I really trust Jack Pauhl for painting advice.
For your purposes, if you used Gardz over this little area to seal it from what Lisa experienced, then skim-coated with mud or spackle and sanded till smooth, then Gardz again to seal the skim coat, then painted, I think you’d be entirely happy with your result.
YoungHouseLove says
Love the info!
xo
s
Lisa says
I’ve used Zinsser’s Guardz , as well as trying the Kilz 2 Latex primer, before skim coating, but it was honestly just easier to seal with something oil-based and I didn’t have to worry about it failing down the line (it was a kitchen ceiling so that would have been a HUGE pain in the tush). Joint compound over that to skim coat and then usually the Kilz 2 latex before painting.
(Just thinking about all of that again is making me tired!)
Mary says
I wonder if you could put the clothes steamer on a rolling cart of some kind to drag around with you when doing the tops of doors (and other high places)?
YoungHouseLove says
Smart idea!
xo
s
Courtney Madden says
When we removed the wallpaper in our entryway, we used a clothes steamer and it worked really well! The “peel-as-you-go” method definitely was the best way to do it. Unfortunately, our wallpaper was directly on the drywall (ugh!) so we had a lot more work to do patching it all up! http://www.yearofdoing.com/2013/01/19/so-long-wallpaper/
kaycee says
You guys got lucky! I used some solution of Dawn dish soap to remove wallpaper in my house, I can’t remember exactly why.. but two years later the smell of the blue Dawn soap makes my stomach spin lol. I’ll be renting a steamer if theres ever old wallpaper in my next home! Your new home is looking great!
Tash says
What are you planning on doing with that blue (tiled?) floor? Can’t wait to see what you do… And can’t wait for all the blue to be gone! It will be beautiful I’m sure!
YoungHouseLove says
We’re trying to work with the slate (it’s damaged in a few areas but we love working with what we have). If it’s too far gone we’ll have to replace it and we’ll run something new from the foyer into the half bathroom and the kitchen so that whole area is more cohesive. Maybe some new heated tile floors…
xo
s
Nicole B. says
If you can keep it, I wonder if concrete stain could stain it another color? Maybe something darker?
YoungHouseLove says
We’ll definitely look into a bunch of options and keep you guys posted!
xo
s
Bren says
Try that steamer on the tile floor’s grout! Speed cleans it.
Tyra says
Dear God I hope you are getting to spray those doors and not having to do it all by hand. Painting 4 coats by hand bust equal double barf.
Lauren (in PA) says
Sigh.
I’m already breathing easier with that wall paper gone!
Bring on the paint!
Jennifer says
Have you considered using the paint sprayer for the downstairs trim? I’ve never used one, but it seemed to work so great for you both upstairs. Good luck!
YoungHouseLove says
Oh yes, we’re using it for the doors but the trim just leads into too many areas (the kitchen, the dining room, two closets, the bathroom) that taping those all off to protect them from flying paint would take about a million years. She says as she cries softly into her paintbrush.
xo
s
Lauren says
We just finished updating our 1972 kitchen (wallpaper removal, repainting walls/board and batten/cabinets, adding new hardware) and the wallpaper removal was what we were dreading the most BUT it turned out to be the easiest part! I’d read up on the different removal tactics online but got antsy one night and just started pulling on a corner and BAM 15 minutes later we didn’t have any wallpaper! It was a “fall leaves” pattern, btw, so brown and yellow and red leaves (YUCK). The paper did leave some residue, but we needed to sand down the plaster walls anyway so I took care of that with some 150 grade and my trusty palm sander. And then we painted the upper walls Colorado Gray(BLUE), wonder where we got that idea?! ( : Thanks for the inspiration!
YoungHouseLove says
Aw, I love a story with a happy ending! Sounds like you got so lucky!
xo
s
Lauren says
OOH hey also, looks like we have the same flooring as y’all in our kitchen! I’m looking forward to seeing what you do with yours, we’re thinking slate but it looks like you already have a good bit of that in your house so maybe you’ll go another direction and give me a better idea!
Laura @ Rather Square says
Looks like the steamer method was a success! And so nice you didn’t have to buy/rent one and could borrow it instead.
We recently removed a wallpaper border in our stairway and hallway, and trying two different methods (the spray bottle water and then Dif Gel), the Dif Gel was the clear winner:
http://www.rathersquare.com/2013/07/walls-without-borders/
YoungHouseLove says
So interesting!
xo
s
Megan M. says
Oh yes, we have used before too and it worked wonders!! Took everything, including the backing and glue, off!
Tabbitha @ Turnip Tootsie says
Ah man this post cracked me up! I can’t believe how open your foyer looks now that the wallpaper is down. Lookin’ good guys!
<3
Tabbitha
Bonnie @ The Pin Junkie says
I borrowed my mother-in-law’s steamer to remove wallpaper and it worked great! I plan to use it again to remove wallpaper in the hallway. You two are making great progress and things are looking great in your new home!
YoungHouseLove says
Thanks Bonnie!
xo
s
Annie says
I’d love to hear how spackling the drywall goes! We had an “incident” when we took down a shower rod in our house. It looks like the previous owners had super glued it directly to the drywall (!) and I had no idea how to repair the paper. Thanks for being awesome, as always.
Benjamin says
“John to run the steamer all over that section of the wall and then I followed behind him, yanking all the way.”
that’s what she said
YoungHouseLove says
Nice one.
xo
s
shay says
Amazing transformation! Love seeing the progress. Have y’all thought about painting the trim before removing the wallpaper, so it wouldn’t matter if you got a little on the wall? Just curious!
YoungHouseLove says
You never want to get paint on wallpaper (even just the edges) because it can act like glue and make it crazy hard to remove. So we were sure to get that down before we started on the trim – just so we didn’t make the wallpaper removal a lot harder in the end :)
xo
s
Rene @thedomesticlady says
I have done both ways. I loved the professional steamer the best!!!
Here is our wallpaper removal project.
http://thedomesticlady.com/2013/04/17/home-improvement-stenciling-the-great-wall-before-and-after/
Mandy Grimes says
I always thought you guys had your hands full with having to repaint all that blue trim but I literally just realized (even though I seen it the whole time) that you also have to paint all that chair rail and the crown molding… Baahhhh
YoungHouseLove says
Oh yes. It’s like a triple decker sandwich with the baseboard, the chair rail, and the crown. Then add in the trim around the four doorways and the two closets (and the bathroom and two closet doors) and you have our foyer.
xo
s
Rebecca A. says
So both your previous houses had a color pallet scheme going on. Is that something you guys have already decided what color scheme will be going on in the new house, or do you just pick as you and see what works?
YoungHouseLove says
We like to figure those out as we go, just taking it one room at a time, so we’ll have to see where we end up! We’re just starting to stare at paint chips so we hope to share a little “what we’re thinking” post about colors soon.
xo
s
Courtney Madden says
We found the most success with the steam-as-you-pull method when we de-wallpapered our entryway. Unfortunately, the previous owners had wallpapered directly onto the drywall so we had a LOT of work patching that up!
http://www.yearofdoing.com/2013/01/19/so-long-wallpaper/
YoungHouseLove says
Oh man, that sounds rough!
xo
s
Kate says
We had the same thing happen! It was a nightmare with the wallpaper coming off in tiny pieces (we used steaming as well). I’m jealous of your clean wall afters… we had to skim coat the entire wall!
Megan A. says
Why did people ever think wallpaper was a good idea?
cck says
We just dealt with this (three layers of wallpaper on unfinished drywall FTW!). Humble advice? Use an exacto knife to make the tear in drywall paper neat and even – no scraggly edges. It will make skim-coating easier and less noticeable. We also got advice to prime it before skim-coating – but that may be because we live in super humid south Florida. Good luck!
YoungHouseLove says
Great tip!
xo
s
Jenn @ Home Style Report says
It goes without saying that this looks a million times better! I mainly wanted to say that I liked to here that there is still some whining/complaining during projects that aren’t so fun given your level of expertise. I’m learning that if a portion of a room project is going to take more than a day my hubs and I both don’t fare to well the second day. The first day we’re all “go team” “we’re rockin it!” The second day is when choice words are said and we whine…like little babies.
YoungHouseLove says
Oh yes, we know that routine well.
xo
s
Hayley says
LOL, “Barfville”! You guys crack me up and I’m sooo excited to see you redo this house!
Shubha says
There’s something so therapeutic about this! Almost makes me want to buy a place with wallpapers so I can take them off and resurface & paint!
I have a question that’s off-topic. I’m house hunting in the NJ area and most of the homes we lean toward have no air-conditioning. I don’t like the idea of a window-ac and wanted to see if you had an idea about how hard/expensive it is to get central air-conditioning put in? Or if you can recommend something else?
YoungHouseLove says
Anyone have any tips for how expensive it is to convert a house to central air? I’ve heard of people who do it (great for resale, awesome update to an old house, etc) but I don’t know what it could run ya.
xo
s
Blythe says
If the house already has a forced air furnace, it will be much cheaper to add central air, because the duct work is already there. About $2,500 – $3,000 (for the unit and install) [but I live in Michigan, not NJ].
If it has radiant heat (a boiler) it would be a very large and expensive project because they would have to add all new duct work for the air conditioner.
Lisa R. says
As mentioned, depends on your ductwork. My parents had some ductwork already, but needed a few updates…they put in a heatpump and furnace…a little less than $10K I think. This included a gas furnace and the heat pump for an approx. 2500 sq ft house.
We have the same size house and we put in a heat pump (so heat and AC in one unit) and did some ductwork – around $7K. You would want to get someone out to take a look at the house and give you some options. Central would end up cheaper down the road than a window one, but certainly not right off!
Lisa E says
I concur with Blythe and also live in MI. I had this done to my first house in 2001 and thankfully already had the forced air furnace and duct work.
Casey @ Waffling says
I think you guys got very lucky with your wallpaper! If it is properly installed it comes off pretty easy…but in most cases it wasnt. In my house (built in the 50s) my poor father spent TWO whole days taking off the wallpaper on ONE wall in my room. He tried everything!! I dont think he would like to see wallpaper ever again!
Heather says
I am so excited you posted this. I was hoping you would. We are moving into a new house at the end of August and almost every single room has wallpaper. I’ve been reading lots of methods but wanted to go chemical free. We already have the clothes steamer so we are going to try this method. Hope we have as much success as you did.
kim says
You guys are machines! Removing wallpaper is up there with root canal. I agree that it’s a menace for the most part because people have such diverse taste – the old owners probably LOVED it. I’ts a treat to watch the progress.
Dustin says
I think it is funny how everyone seems to think wallpaper removal is so hard. I have done it many times with no problem. I like wallpaper it can add a lot to a room. Worse than wallpaper is taping off sections of a wall to paint different colors or patterns. Now that is hard to cover over, the difference in paint depth is hard to fix.
christina @ homemade ocean says
Man oh man….I do not miss wallpaper removal!!!
Ashley@AttemptsAtDomestication says
Woohoo for no more flowers! I’m so excited about this new house! This is actually the first time that I’ve been reading about a new house in actual time with you guys and I love it!
However you do work way faster than I do ;)
Kristin says
Thanks for keeping it real & sharing about the whining…makes me feel better about mine. We bought a house in PA in 1995 & there was wallpaper EVERYWHERE too…and the same blue trim & a very similar paper print. After removing all of that, we pretty much swore that we would never use wallpaper ourselves again. I might reconsider using one of the neutral grassy-types if I ever had a wall that was in need of some camo.
Jessica says
What strikes me as funny is that the previous owners looked at this space with no less than 5 doors and a chair rail to work around and decided to hang wallpaper. We had a house with a little vestibule with a doorway leading to every room on that floor. 6 doors in a TINY hallway and it had been repeatedly wallpapered-at least five LAYERS-what!?. Glad the paper came off easily!
Julie @ Living on the Ledge says
Gah…I can’t believe how much you guys are tackling with that house. I’m getting exhausted watching! But I love the before and afters so I can’t stay away!!
Angela says
Good bye blue flower wallpaper. Looks great! We bought a 1959 ranch and removed wallpaper from every room and man is it an AWESOME feeling when it is all down. :-) I know this post is about wallpaper, but I happened to notice you have the same slate floor as we have in our kitchen. I love the character of it, but our grout has turned into petrified silicon and our slate has a washed out, milky appearance. Have you given any thought about what you are going to do with your slate? I have not figured out how to restore it.
YoungHouseLove says
There are some great grout/slate tips from commenters in yesterday’s post, so I’d check those out. And of course we’ll keep you posted!
xo
s
Jennifer says
We’ve started taking down the wallpaper accent wall in our dining room. It’s only wide enough for five strips of wallpaper, but on one of them there are two layers of the same paper… There are already two layers of different paper, so the extra layer seems like a dirty trick.
Kaesey says
Woo! Looks great. And may I say, I have wallpaper envy? By that I mean that the previous owner over your home didn’t do something crazy like paint over paper over paper….(yep, that’s the deal in my house, http://kaesey.wordpress.com/2013/07/06/now-you-see-it/) Tip for those dealing with paint over paper over horsehair plaster: Score the walls really well and use the hot water in a spray bottle method that Sherry talks about. =)
YoungHouseLove says
Holy cow that sounds hardcore!
xo
s
robyns says
the foyer light looks kinda intriguing. maybe ORB it to make it last longer? or do you already have something fabulous in mind?
YoungHouseLove says
Yes I actually like the lines of it, at least for now, but ORB might be in its future!
xo
s