The wallpaper in our dining room is gone. Phew! Hooray!
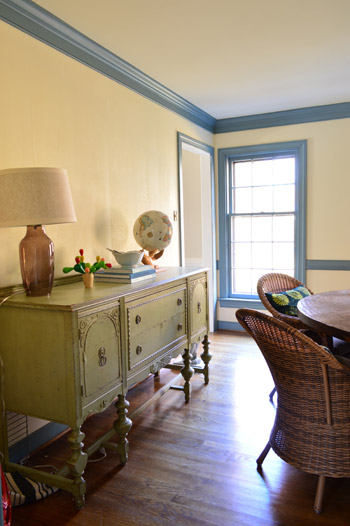
Ahh, fresh ready-to-paint walls, you make my heart sing. (And seemingly endless blue trim, you make my eyes twitch).
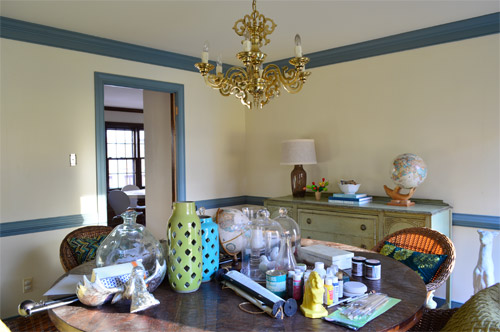
You might remember that each time I tackle wallpaper removal I’ve tried out a different method so I can report back to you guys on who’s the fairest of them all what’s the most effective of them all. Yes, I’m the Anderson Cooper of wallpaper. Except less handsome and more pregnant. Up until this point, I had tried boiling water sprayed on with a spray bottle for method #1, a steamer for method #2 (the one that’s in the lead so far for the easiest), and warm water mixed with Dr. Bronner’s soap along with a wet rag to get the underlayer as method #3.
This time’s method was recommended by a former professional painter named Sarah (who did her fair share of wallpaper removal before many a paint job) and her suggestion was “the dry stripping approach” which was followed by a round of “wet stripping.” Sounds saucy, eh? Don’t worry, it’s rated G. Essentially she said she just peeled the paper by hand without spraying it or scoring it with anything, and then used a large damp sponge to saturate the underlayer and peel that off as a second round. So I gave that the old college try…
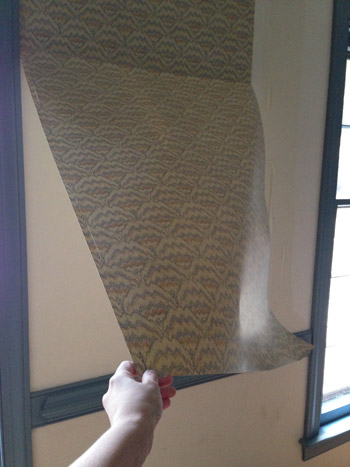
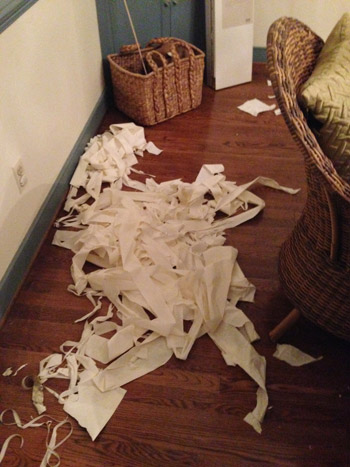
A lot of it actually came off in big sheets like the swatch above. Although you can see from this pile that there were a fair amount of thinner strips and leftover corners that I went back in for. It was by no means fast, but not super slow either. Surprisingly, I’d rank this dry stripping method as taking the same amount of time as spraying it all down, waiting for it to soak in, and then peeling it. Maybe even slightly faster because there’s not that spraying and waiting step. Obviously this won’t work for all situations, but if you have drywall that seems to have been properly prepped for wallpaper (as ours was) then you’ll hopefully have the same luck (especially if it’s old – this stuff was 30 years old and at some of the seams it was already loose and ready to be yanked).
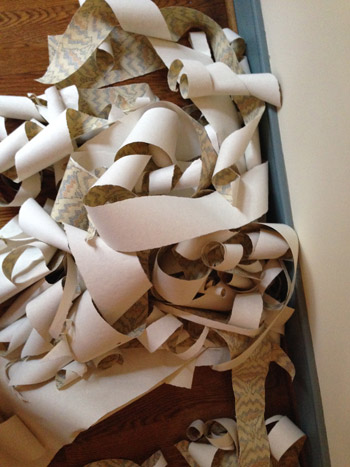
This “dry” approach only took off the top layer of wallpaper for the most part (some other methods, like steaming especially, took care of both of them in one fell swoop if I was lucky) so I just ignored the white papered/glued underlayer and just pulled off the glossy top patterned part of the wallpaper, slowly making my way around the room over the course of a few days.
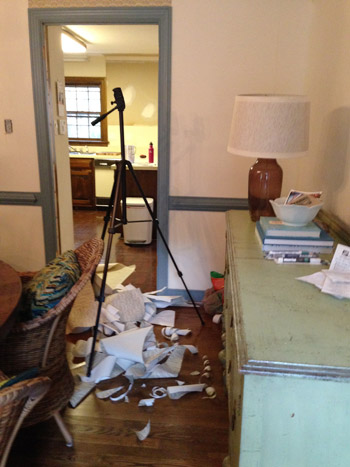
This is that underlayer I was talking about. As for how I loosened that up and peeled it off…
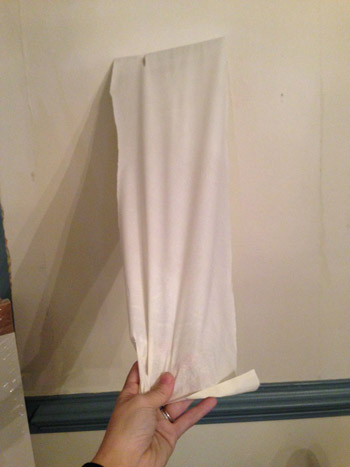
… I just dunked a large sponge in warm water…
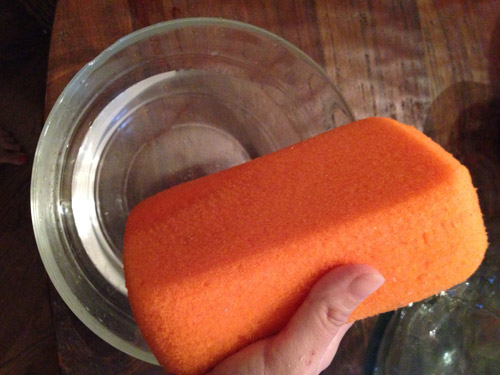
… and wiped down the walls with it. That seemed to deposit enough water to soak through that underlayer so it started to loosen (see how it’s bubbling away from the wall on either side of the sponge in this picture?).
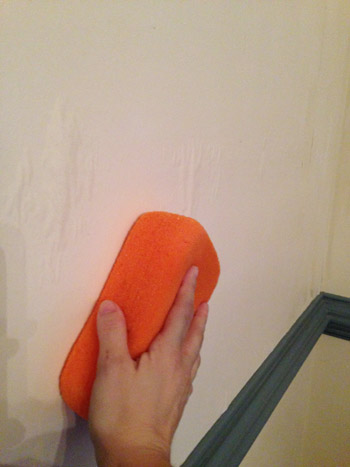
Then I could just peel it off. This was the slow-going part. You can see from the pile below that it came off in tiny slivers for the most part, so each wall took about an hour and a half just to free it from this clingy glue-riddled film.
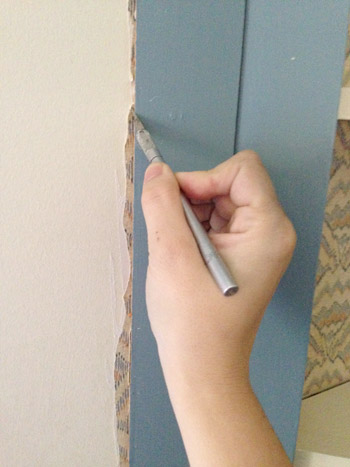
One challenging area that this room had were the seams next to those corner built-ins, which appeared to be installed after the wallpaper was in place (meaning the wallpaper was pinned down behind the sides of each one). My solution was to use an exacto knife to slice the edge of it. I scored it a few times to be sure I got all the way through, running the blade right against the trim so I could get the closest cut possible.
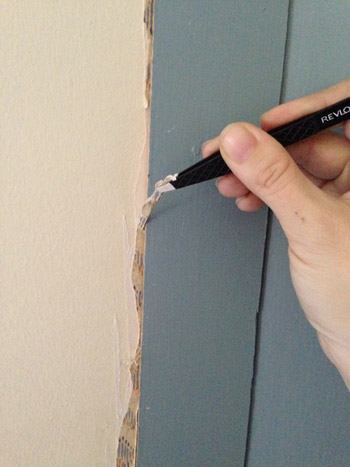
Then I used a tweezers to grab each of those strips, and slowly I could work my way down each side of each built-in to get a nice clean look.
And now for my nemesis. The wallpaper inside of those two built-in bookcases. It was wasn’t properly prepped like it was on our primed walls – instead it was glued with some sort of permanent adhesive to the unprimed and unsealed plywood backing of those built-ins, which pretty much made it a permanent application. Which I discovered after spending about two hours on just one of those cubbies (with seven more to go) and getting a lumpy and rough looking result in the one that I was able to sloooowwwly strip. So at that point, I called John in and we made the executive decision to OBI (officially bag it).
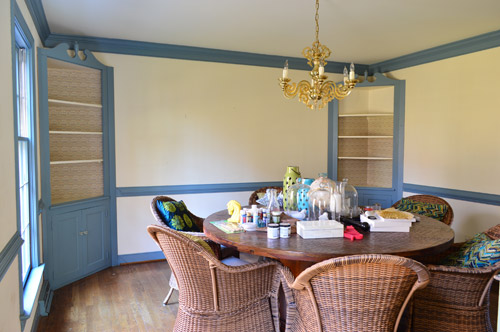
We figure we can either paint, re-wallpaper, or even add some starched fabric right over those stubborn wallpapered areas since getting them down to the bare wood is next to impossible (and they’re actually a lot smoother and better as a foundation for any of those options with the existing wallpaper in place since that one cubby got a lot rougher and bumpier when I tried to remove the paper).
So that’s sort of a bummer, since there’s technically still a little bit of wallpaper in there mocking me from inside those built-ins, but I’m so relieved to finally have the actual walls of the room completely free of paper, and ready for some paint – along with that blue trim!

Oh and to prep the walls before paint after removing wallpaper, I’ve had luck in all of the other rooms just by spraying them down with a vinegar and warm water mixture and scrubbing them with the nubby side of a sponge to make sure any residual glue is gone before painting. I’ve heard that there are some primers that are great after removing wallpaper to block leftover glue, but so far we haven’t had any issues with glue surviving after my vinegar rub-down, and it’s nice to save that priming step (and that money on specialized primer) and just use the vinegar that we have in the pantry.
Aaaand, just because I like to cross things off, here’s how my before-the-baby-comes goal of no more old carpeting/no more blue trim/no more old wallpaper is coming along:
- de-blue-trim-ify the dining room
de-wallpaper the dining roomfinish Project No More Graph Paper in the kitchen- strip the bold blue master bathroom wallpaper
rip up the old carpet runner on the stairs- paint the blue trim in the office
Slowly but surely! Can you believe we still have another whole room full of wallpaper laughing at us from upstairs? What do you think our final method should be? Maybe fabric softener? We keep hearing good things about that…
So far the steamer has been the fastest and easiest, although every other approach that we’ve tried has been 100% free using stuff we have around (we borrowed the steamer from John’s sister so that was free too – but it does involve renting or borrowing or buying something if you don’t have access to one in your house). Have you ever tried to remove wallpaper that was seemingly super glued to plywood? It’s enough to make you shake your fist at nobody and mutter “this is the most fun I’ve ever had in my life” while rolling your eyes so far back into your head that they make actual sound affects as you roll them. Not that I’d know…
Psst- John’s over on Young House Life chatting about the half marathon he ran this weekend for the folks who requested a post about that.

Leslie R. says
Sherry, Have you thought of adding luan to cover the wallpaper. You could glue it in, caulk around it and then paint. No one would ever know how you covered the wallpaper. It would just look like wood.
YoungHouseLove says
Never even thought of that! Thanks for the suggestion Leslie!
xo
s
Dana says
Possibly better than luan, if you want a nice smooth surface in there, you could go with 1/8″ to 1/4″ tempered masonite. You could just screw it into the built-ins and paint it, or spray adhesive some fabric over it.
Luan can have a lot of raised grain going on. If you’d prefer a true wood-look in there, I’d look for some nice cabinet-grade plywood (thin, like maybe 1/4″) and stain it…perhaps with your Espresso polyshades??
The point is, you have options to just cover your wallpapered cubbies, including the bumpy messed up wall.
YoungHouseLove says
Thanks for all the tips guys! So smart!
xo
s
Isabella says
Oh, You stole my idea!
Regardless, I’d also be tempted to block off the back corner with some luan and turn the shelf space into a trapezium. I think it would look a little better, but that’s just me. (I don’t like hiding things on the back of shelves)
Wendy says
That is EXACTLY what I was coming on here to suggest! Take the shelves out, nail up some luan, and caulk just like Leslie suggested. Then you’ve got a uniform, fresh surface to work with and can even do paint without (*cringe*) painting over wallpaper!
Kristin says
Yup, that’s what I was going to say. Should’ve know someone else (someONES) would’ve beaten me to it.
Wendy @ New Moms Talk says
It seems as if you are sold on keeping the built ins, no? If so, what are your plans for them beyond hiding the wallpaper?
YoungHouseLove says
We’ve seen some awesome inspiration images so we’d love to link to those as we go, but I think we’ll remove those scrolly tops and either build them up to the ceiling or just square off the top with some thick crown molding and paint them white and go sort of dark/dramatic with the walls so the trim and built-ins pop.
xo
s
Anele @ Success Along the Weigh says
I don’t know how you do it. We went to an open house that had about the same amount of wallpaper in it and the Mr was starting to itch from anticipation of the removal process. I said “YHL is doing different stripping methods so we can do this!” and his response was “then have them come strip this because I don’t wanna!” Needless to say the house was crossed off the list but I see it was snapped up so hopefully those people stumble upon this series! :)
Amy says
I’ll see your wallpaper glued to plywood and raise you wallpaper over cheap paneling.
YoungHouseLove says
Boo! That sounds nightmarish.
xo
s
threadbndr says
I’ll see your wallpaper over paneling and raise paneling over wallpaper with asphalt like adhesive. And under the paneling three layers of depression era and earlier paper that had been painted over (very fragile, but stuck down like WHOA, so it didn’t peel off) over lathe and plaster. OMG – the ladder hours!!!!
And every room in the house (open Craftsman style bungalow floor plan) a different color. I hate, hate that the prior owners took down the plate rails in that dining room. I can see where they used to be – sigh. At least they left the built ins.
YoungHouseLove says
OH MAN! Ladder hours = the worst ever.
xo
s
Erin @ One Project at a Time says
Me too! We’ve been removing wallpaper from cheap wood paneling in our new cabin for weeks now! To top it off the previous owner was a big smoker, in the house, so the steamer seems to be releasing 20 years of smoke back into the room. It’s how convicted murderers should finish out their days.
YoungHouseLove says
That sounds terrible!
xo
s
Lisa @ Double Door Ranch says
Girl I cannot even imagine dealing with all that wallpaper!! Just the one border I have in one room has taken forever. I keep going back and doing it in shifts bc its such a pain! All the props to you!!
YoungHouseLove says
Thanks Lisa! I’m so glad to be close to the end of this wallpaper marathon!
xo
s
Jenna says
I really like reading your blog, and have been a regular reader for 3+ years, but I feel like some of the posts lately have gotten so redundant. I understand that removing wallpaper is a long-ish process and frustrating to anyone who has attempted it, but a whole days post just on this seems to be a bit of a cop-out. I know you all have a lot going on in “real life”, but it seems like with both of you still theoretically at home full time, there would be more to post about on a given day than just yet another wallpaper post. Just some CC from a long-time reader.
YoungHouseLove says
Sorry you feel that way Jenna! Every post certainly isn’t for everyone, but when we shared a glimpse at the dining room wallpaper coming down on Instagram & Facebook a lot of people couldn’t wait for a post about what method was working this time, and some have even asked again for an update (since it has been a few weeks since we shared that first glimpse). Not everyone is going to have the same challenges in every house, but we get so many wallpaper questions/requests as we tackle each room, so we’ve been happy to share the details (just as we always have for all of our home adventures – even if we’ve painted 20 rooms by now we still share that info as we go in real time). This wallpaper job was a 12 hour process that we condensed into just one post, and we feel like we’ve been doing a nice range of diverse projects lately (stenciling the floor in our sink nook and building out the vanity, painting a mural and bright door in Clara’s room, outdoor tiling and ceiling lofting/planking, installing a stair runner, landscaping before & afters, starting in on the kitchen, etc) but I’m truly sorry if they’re not your cup of tea.
xo
s
sb says
I’ll admit I kinda felt the same way about wallpaper posts, but that is a really good point that readers would be upset if you painted a room and didn’t share details. Instant gratification makes you forget that prep takes 12 hours and is more important than the 2 hours to paint. Also, I don’t have wallpaper but if you were doing trial and error of non-asbestos popcorn ceiling removal I would be all over that.
YoungHouseLove says
Aw thanks SB! The one “method” to our blogging approach has just been to share whatever we’re doing as we go, since we figure other people out there must be dealing with it too (we wish all of our projects were thrilling big reveals, but about 90% of our archives are just small steps towards room evolutions that take months or even years). Speaking of that, does anyone have tips for removing non-asbestos popcorn ceilings for SB? Hope it’s not too difficult (so lucky they’re not asbestos).
xo
s
Jenna says
Thank you for responding, and please know I am not trying to be snarky! I understand that some people are super interested in wallpaper removal methods, as they may have a project of their own to tackle. I was just trying to point out that it really does seem like lately, the posts are spread thinner and thinner, with more and more “teasers” and then weeks later, the actual post appears. It seems like the old John and Sherry would have ripped out all the wallpaper within, say, a month and then done one or two large posts comparing all the methods! Twelve hours is definitely a chunk of time, but if you both are at home full-time, it doesn’t really make sense that it would take months and months to remove all the wallpaper and warrent so many posts!
Like I said, I understand you all have a lot going on, but it seems like this would’ve been a pretty quick fix months ago when you all moved in.
YoungHouseLove says
We actually intentionally spaced our wallpaper removal out for sanity and also for post reasons (spending 50+ hours over 2-3 weeks doing it in the beginning of moving would have meant posts on little else, so by doing other big projects between each room of wallpaper removal, it meant we could report on those other projects and updates as well – like redoing all of the floors upstairs, painting seven rooms/100% of our doors/70% of our trim, completely renovating the sunroom, upgrading our sink nook and the half bath downstairs, etc). This blog is our full time job, but DIYing is just a small slice of that what-we-do-everyday pie (more on that here). Beyond writing posts, coding the site, taking photos, DIYing, answering comments, and organizing giveaways, we’re also writing our second book, doing a showhouse for charity, and working on two other secret projects that we can’t wait to share.
xo
s
Wendy @ New Moms Talk says
Some time ago, Sherry included in a post that she was going to be trying five different wallpaper removal posts. I see this post a continuation of that previously shared note and am fully prepared for one more installment, if not possibly a wrap up one.
There are times when it’s best to change the course, but in this case, it seems right to continue with it. It’s about continuity with readers and the set plan, but I could be wrong. It’s not my blog.
Who knows… maybe John will surprise us with some really cool wallpaper removal infographic post. I can only imagine how hilarious that might be.
YoungHouseLove says
Haha, I love that!
xo
s
Elizabeth says
sb – we have only removed popsorn ceilings in one room of the house (the nursery), but were able to do it with a spray bottle of tap water and a scraper. We used a large one – I think it’s a drywall tool – but essentially a very large putty knife. It came off very easily and we were able to just paint the ceiling afterwards with no other steps (after it dried).
Our house was built in the mid-80s, so we weren’t worried about asbestos.
I hope your popcorn ceiling removal goes as easily as ours. It’s such a messy thing to do or our whole house would be popcorn-ceiling-free by now!
Wendy @ New Moms Talk says
J&S,
If you do an infographic wallpaper removal post, would you please consider doing one with Sherry and a bubble of words she uttered during the removal process and approximate times she said them.
That’s the image that I had when I shared the idea. Well, that and maybe a bar graph or a pie chart with total time or type of removal method. Each bar or piece of the pie would have the wallpaper image.
Hope you don’t mind these ideas. They’re just went through my mind.
YoungHouseLove says
Hilarious! I think John would get great pleasure from that!
xo
s
annie says
you know what’s funny? I read your blog EVERY.DAY. to find out what you two kids are up to, what’s new at Casa YHL and to find out about real-life DIY stuff. mostly because that’s just what I’m interested in. but mainly because that’s what you’ve always done! regular, unapologetic, not fancified in anyway LIFE. so, if you’re all wallpaper removal, all the time right now, so be it! I’m checking in everyday to find out how it’s going. {kinda silly that you would receive comments regarding you doing anything other than what you said you’d be doing. hmmm. can you imagine if y’all “sold out”? whooo doggie!} :)
Niks says
Personally, I can’t wait for each new post. Are the big reveals more fun? Definitely! But who cares, your writing is so fabulous, I love all the posts, even if it’s a project I will never do myself, I can always learn something. And I’m just so impressed that y’all have turned something you love into a full-time gig and let us share in it. Do what you love!
YoungHouseLove says
Thanks guys!
xo
s
Melissa @ Loving Here says
Here’s how we did our popcorn—it was actually easier than I expected…but still really messy!
http://lovinghere.com/no-more-popcorn/
(And I like the wallpaper posts, even if they seem a little “boring” in terms of progress. As a part-time blogger who struggles with having enough content sometimes, I think it’s so so so important to be honest with readers about how long projects really take, even when they aren’t that “fun.” And having this as a resource on wallpaper removal makes it so easy to compare different methods! I say, keep the posts coming!)
Jill says
I’m going through my own condo remodel now. The problem with houses that start in such deeply unfortunately states (our place is even worse than John and Sherry’s – we’re down to studs) is that they take a lot of prep work that takes hours and hours and hours to get them up to the point when you can do anything fun.
If I had a blog, it’d be like, “Well, I spent 5 hours leveling my shower studs so the drywall guys could hang our underlayment for our shower walls perfectly straight so that when we hang our Swanstone walls on top of that, they won’t flex too much. Here’s a picture of the shower studs. They still look like studs, except in some places they have pieces of the cardboard strips stapled to them. And then I spent another 7 hours researching stuff on the internet today too. Here’s a picture of me at my computer. Don’t mention fire codes for can lighting or the bathroom faucets I can’t find to me again today if you want to keep your head.”
I know that my hypothetical readers would be deeply underwhelmed by what was 12 hours of constant effort — hard labor with the planer in the bathroom and a lot of hard thought/research at the computer — because when I showed my husband how gorgeously level the shower wall studs were, he did not faint from the beauty. He was, like, “Mhm.” And then he was like, “And you still haven’t found any faucets?!” So then I divorced him.
But my point is that I’ve seen this trend of John and Sherry’s readers saying (totally respectfully and kindly, as you did) that their blog used to be more exciting. They used to have more fun reveals and house projects. Now they’re spending too much time on what seems like filler posts.
But I think it’s just because we all were used to John and Sherry living in a house that had long since been brought into good shape. So their projects were making a decent house better.
Whereas now, John and Sherry have for months been bringing this house up to the zero point from which the true fun can start. The zero point is where there is no wall paper, where everything that was cream/pink/blue/dark has been painted white, where basic function has been achieved, where dangerous things have been fixed, and where the truly mood-dampeningly hideous things have been been neutralized (Phase 1).
Once they have achieved zero, then they can actually start doing the fun, fast payoff things that the readers got used to at the other houses.
It’s just kind of an unfortunate fact that the prior-to-zero stuff takes so long and has basically no payoff (as readers, the removal of the wallpaper is perfunctory — we know what this room would look without it or with the blue trim painted, but taking off the wallpaper takes 12 hours, and painting the blue trim takes 4 coats), and the after-zero takes less time and has all the fun payoff (they could paint the dining room a great color and make a mood board about their other plans for it in 5 hours, and all the readers would be delighted).
So in conclusion, I can totally see why you and several other readers have noticed a change, but I don’t think it is so much the Youngsters as much as the current needs of their currently subzero house. But the Youngsters are flying through their to-do list, so I predict everybody cheers up soon.
Except for me. Because at the rate of my progress, I am probably never going to have functioning bathroom again. Alas.
YoungHouseLove says
Oh Jill, I totally know what it feels like to spin your wheels like that – but you really are making progress, and it’ll all be worth it! I also totally agree with your comment about the different phases of a house being interesting to different people. We noticed at our last house right after we moved that it was exciting for some people to read about the annoying first step things we had to do since they were also on their list, while others wanted a House Tour full of before and afters when we were literally years away from that. The good news is that we’re really excited about a few side jobs that we’re simultaneously tackling – like the showhouse we’ll complete within four months (that’s like 15 rooms of before and afters!) and a surprise holiday makeover that we can’t wait to share over the next few weeks!
xo
s
Kathy says
UGH wallpaper. Most homeowners have been there. But most who have more than a small area to remove quickly discover the steamer is the best thing since sliced bread for wallpaper removal.
I’m just curious, why didn’t you just return to that and get it done instead of messing around with the other ones? Sure you might “try” a couple (of feet) with another method so you could report on it, just for the blog if nothing else, but I don’t get why you didn’t return quickly to the steamer and knock it out faster than – what was it 12 hours? wow.
YoungHouseLove says
Good question! Steaming was only slightly faster (if you check out that post it was a really close call to being the same as my first method) and we don’t own a steamer, so by the time we borrowed/rented/bought one it might have been the same amount of time spent (the foyer still took around 6 hours to do with the steamer, and it’s about half the size of the dining room). But if we ever tried something that straight up didn’t work, we’re definitely cool with bagging it and coming up with an alternate plan (like we did in this post for those stubborn built-ins).
xo
s
Debby says
I love your blog and your posts. I think you have accomplished an amazing amount of projects in just 5 months while having a three yr old and being pregnant. You WORK from home full time which can have greater distractions than ever imaginable. I know I have been on both sides. So kudos to you for ridding the dining room of that wallpaper. Keep up the great posts. You two inspire me. And if I came to visit your blog one day and I didn’t really relate to what you were talking about that day, I would just hit that close button in the upper corner and come back tomorrow.
Can’t wait to see that blue trim gone. I hate when it peeks into a picture of some other project you are showcasing that day. So I cannot imagine how much it must taunt you daily.
Hugs.
Natalia says
The above comment is obviously from a person who has never stripped wallpaper! It takes FOREVER. We moved into a house completely covered in the stuff, the previous owner has 16 different patterns of wallpaper in here. We are still working on getting it down room by room on the weekend. My full time job could be stripping wallpaper, washing off the glue and priming and I’d be doing it for months straight. The prep work takes time.
I really appreciated this post, especially the part about needing the tweezers to take the wallpaper off the part that the built-ins were on top of. In our house, the previous owner put the crown moulding ON TOP of the wallpaper. We needed to exacto and tweezer off, ON A LADDER, the entire perimeter of the room. Torture. Needless to say, we still have several rooms to go.
Keep up the great work Sherry. I am 7 months preggo, joining my heart with yours, stripping wallpaper alongside you home girl. I agree, steamer is best ;) We’ve tried a bunch of different methods, I look forward to hearing more about your adventures in Wallpaper land. Keep the posts coming in real time, I like that you guys are not doing TV DIY, it’s real life DIY, and the prep work takes way longer than the sexy stuff.
YoungHouseLove says
Aw thanks Natalia! Good luck with those other rooms! Hopefully there’s less tweezer time in your future!
xo
s
Katie {deranchification} says
Looks so much better already! You’ve already made a ton of progress on your before-the-baby-comes goals – I’m totally jealous – I’m due any second and still have half my list to go :(
YoungHouseLove says
I bet you’ve done a ton Katie! I keep adding more things to the list in my head (we haven’t started the nursery, I’d love to redo the office so it’s functional before the baby’s here, we’d love to add built-ins to the bedroom along one long wall, etc) so I think it’ll be just like yours. In the end we’ll do about half, but we’ll be so glad for the things we did manage to squeeze in there!
xo
s
JG says
When I was at the tail end of my pregnancy, I swear the baby was waiting for our house projects list to be done before coming out! So we finally decided the before-the-baby-comes projects had to be declared “done!” (even if, shhh, they weren’t completely) because I was sooooo ready for the baby to come out already!
But we have a lovely photo of me with a *huge* pregnant belly holding a giant framing nail gun! :) Not everyone has one of those!
YoungHouseLove says
That’s so funny!!
xo
s
Dani says
My method is sort of a combo of a couple you have used: Remove the top layer like you did in the dining room, then use a pump sprayer (like what you would use to spray for bugs or weeds) to soak the paper layer in a mixture of Murphy’s Oil Soap and water. It has to be Murphy’s – I have tried others and they don’t seem to work as well. I kid you not the glue layer FELL off the wall the last time I did this. I stripped a whole bedroom in 30 minutes. I know that won’t happen in every case, but it might be worth a try.
YoungHouseLove says
Thanks Dani! Love that tip!
xo
s
Vivian says
How much Murphy’s Oil Soap? That sounds like a genius solution.
Meg M says
I would definitely try Dani’s technique instead of the fabric softener method. I removed wallpaper from one room using fabric softener, albeit, mine was installed over bare, non-prepped plaster walls (who does that!?) and the peeling edges had been superglued back to the walls by the previous owners. It did not go over well, but your situation is a tad different from mine so maybe it would work for you after all. Good luck on the final removal stages!
YoungHouseLove says
Thanks Meg!
xo
s
Dani says
Vivan I would say a couple big glugs. Just sort of what you would use if you were washing down your walls. Its just soap, so it won’t really hurt if you use too much. Plus it smells amazeballs.
Sandra T says
Ha ha…”a couple of big glugs”! That’s priceless! :)
Rebekah says
Congrats on the wallpaper progress! This is the first method I used to remove the wallpaper in my 1966 ranch. I’m guessing most of the paper was put up during the 80s (just looking at the patterns), but the worst part is that the walls were NOT properly prepared and I had the hardest time getting it off. (I’m wondering if the kitchen/dining wallpaper was original to the home, though, because we seemed to have removed down to plain old drywall with no paint on it!) In some cases, the paper ripped down to the drywall, and I’ve had to smooth out a lot of dings and chunks. I’ve also used the fabric softener method, steaming with an iron (since that’s what we had), and just wetting it all down with a commercial wallpaper remover. Every method gave just about the same results for me. It is SO nice to have it all gone, though!
YoungHouseLove says
Oh man, congrats on having it all gone Rebekah!
xo
s
Laura says
Any suggestions for painted over wallpaper removal? We recently bought a house with 70% of the walls AND ceilings have painted over wallpaper. It is kind of a nightmare. Thanks for your help!
YoungHouseLove says
I wonder if in that instance it’s best to use a scoring tool to get through the paint and paper and then spray the wall down with vinegar and water and let it soak and then try to peel it! Good luck!
xo
s
Lisa says
Our old house had painted over wallpaper on the walls and ceiling- it was a nightmare- sorry! But we did use the tiger scoring thing and a steamer we bought from Lowes. Not fast, but it did work. And I’ve gotten my money’s worth on the steamer. In our current house I’ve removed wallpaper from 4 rooms, and ONLY have the basement bathroom left. It’s on the list to happen before Christmas. Best of luck to you!
Traci says
We had a ton of painted wallpaper when we moved into our house. I used a scraper (the razor kind you’d use to take paint off a window) to remove the paint and top layer of paper. This left just the underlayment which I removed with a spray bottle of half and half water and white vinegar. Came up easy peasy and our walls were not properly prepped!
Isabel says
Hey Laura, I smartly (sarcastic tone) painted over my dining room wallpaper when I first bought my house (guess I was desperate) but since I didn’t do my research it did not work out and you could still see the paper through the paint. It got old really fast. Since that layer of paint had actually made the first layer of paper come up and stick to it, I was able to take a flat knife, stick it under a bubble and slowly press both the paint and first layer of paper off from the wall. Sometimes and entire sheet came off and it even took both the first and second layers with it. Where there was paint left over, I scored and wet it with my water/fabric softener mix and it came right off. Good luck!
Mary says
I had painted over wallpaper in 3 rooms of this house and I tried each method that YHL has used. I found the best luck with scoring and then using a steamer. My daughter would steam a section and then I would immediately peel that section before it dried. It got most of the top layer and some of the bottom layer. For any remaining bottom layer, I used the fabric softener method followed by the vinegar rinse. There was a small of amount of wall repair and then I primed before painting.
The process seemed to take days out of my life! The end result is wonderful!
Jessica says
I feel your pain regarding the blue trim. We have it in our house too. It is the devil!!!!
JenB says
That groovy, white wallpaper that you linked to yesterday (for a ceiling) would look very cool behind the shelves in your built-ins. I like the idea of fabric, too.
How are your nails after peeling all of those little slivers of wallpaper! I’ve destroyed what little I have more than once on wallpaper. But it’s oh-so satisfying:) Looking great!
YoungHouseLove says
That’s a fun idea for those bookcase backs! As for my nails, they’re full of glue and a few are actually filed down from all that peeling. It’s hilarious. They slant down to the left.
xo
s
Jenny says
We ended up painting over the wallpaper in our dining room and bathrooms (our contractor’s recommendation) after spending days getting just a border off in the kitchen and causing a fair amount of wall damage. I think just covering it up in the built-ins makes sense. And the room already looks 100% better!
Katy @ The Non-Consumer Advocate says
I can see how the job of removing wallpaper at once would be tedious and extremely satisfying. Not to mention hard to stop as “I’ll just get this one last but over here” mindset could take over your brain!
I look forward to seeing what you’ll do next in this room.
Katy
Katy @ The Non-Consumer Advocate says
“Bit” not “but.”
“I’ll just get this one last but” is for an entirely different blog post. ;-)
YoungHouseLove says
Haha!
xo
s
YoungHouseLove says
Thanks Katy!
xo
s
Reenie says
DIF = the best for stripping wallpaper. I had several layers of wallpaper/paint/wallpaper/paint, etc. It now comes in an easy squirt bottle.
YoungHouseLove says
Thanks for the tip Reenie!
xo
s
Mary | Lemon Grove Blog says
I guess the good news is – painting will feel so EASY now in comparison :) Can’t wait to see this room with some painted trim and color!!
YoungHouseLove says
Wahoo!
xo
s
Crystal says
Can I just tell you how lucky you are that the previous owners primed the walls before wallpapering!!! We bought a house at about the same time you moved in and we have found out that the wallpapered bathrooms (master bath with vaulted ceilings no less) were put directly onto the drywall with no prep! So when you steam the wall paper off parts of the drywall start to tear off with it. We are going to have to skim the whole wall to even get to the point to prime it!!! It has been a complete nightmare. After spending 3 hours on a wall that is 8 ft high by 3 ft wide, we decided to get some quotes to hire it out. Many painters have told us they would paint over it with oil based primer after skimming the seams and such. We were hesitant at first but think we will go that route since they told us it will save us a lot of money. Wallpaper is our nemisis!!!!
YoungHouseLove says
Oh man Crystal, that sounds terrible!
xo
s
BaxterDIY says
We had the same issue. We bought a former 1970s builder’s model home where the decorator had gone a little crazy. Virtually every wall had been papered (picture gold, brown, orange and avocado…) and none of the walls had been primed or painted underneath. In hindsight it might have been easier to remove the trim rip off the drywall and install fresh drywall. That could have been done in a few days if we’d hired out the drywall installation – but instead we spent weeks stripping paper, patching damaged drywall and finally applying the primer and paint that was never done originally.
YoungHouseLove says
Oh man, I’m so sorry! That sounds so terrible to deal with!
xo
s
Erin {Home Everyday} says
Wallpaper! I have a love/hate relationship with it. There is some really cool wallpaper out there now a days, but when I even think of wanting to use it, I panic and say think of the days when I will have to remove it. I’m thinking stenciling might be more my thing. Great job! Now go take a nap!
YoungHouseLove says
Haha!
xo
s
Jeff says
If you really wanted to, you could cut thin plywood to fit in the back of each built-in and just nail it in over the wallpaper. That’s what I’d do if I was in your situation.
Good luck! Can’t wait to see what you guys do with this room.
YoungHouseLove says
Thanks Jeff! So smart!
xo
s
~Maria~ says
I painted over a wallpaper border successfully in my second home, no one including myself could even tell. My current house has head to toe wallpaper on all 3 floors. Knowing the time and effort involved I chose once again to paint over it. Because some of the paper is textured, some rooms are more revealing than others but it’s good enough for me!
YoungHouseLove says
So glad it worked for you! I hear if the seams are loose it can look pretty obvious, so you must be lucky enough to have some still-secure paper!
xo
s
Brooke says
The fabric softener method is the jam! :) I dry stripped our wallpaper and used about a cup of fabric softener in a bucket of warm water. The glue came right off and the whole room smelled fantastic!
YoungHouseLove says
So good to hear that Brooke! Thanks for the intel!
xo
s
Lauren (in PA) says
Haha…I loved the smell of the fabric softener too when I had to do the removal. Worked great, smelled great. But I did have to do the Exacto and tweezer dealio as well…which was frustrating and didn’t smell great! Fortunately I only had one bathroom to deal with!
Samantha says
I love that you have tried several different methods of wall paper removal. My only wish is that I would have waited to remove my own wallpaper until after you did all these test runs. If only I had known!! :) Anyway, I used the fabric softener method, and while it worked alright, it was REALLY messy. I wouldn’t recommend it if you have other ways that work well, simply because of the ooey sticky mess it creates.
YoungHouseLove says
Aw thanks Samantha! Such a great tip!
xo
s
Marlena says
I posted about this before, but I removed the wallpaper from our bathroom using the scorer, a wallpaper removing tool and some eco-sprays/hot water, and it took me 8 hours. I was also left with terrible walls, since it was done on plaster and not prepped correctly, so we ended up having to get new walls installed! The handyman we work with from time to time recommended just putting drywall over the wallpaper rather than plaster, since they would have had to completely go to the studs and re-plaster and lathe. I thought it would be a super quick fix, but it involved my time + new drywall + I now need to re-paint. Wallpaper is the bane of my existence! I’m so glad we only had it in one room, too. Good luck!
YoungHouseLove says
Oh man, that sounds like quite the process!
xo
s
Amy says
We had eight layers of wallpaper to strip in our bedroom – we think some of them dated back a hundred years! At first I kept samples of each layer to frame and put on display (some of them were real works of art) but as we’ve moved on to subsequent rooms I’ve settled for just taking pictures. In our dining room we removed 1970’s wood paneling to reveal wood paneling wallpaper! We started off with the steaming/scraping method but it was really slow going since the walls are plaster and the original paper was glued directly to the plaster – it tends to disintegrate and stay stuck on instead of peeling off in bigger pieces. More recently we’ve been using a product called Chomp, which seems to speed the process a bit.
YoungHouseLove says
Oh man, that sounds so hard Amy! Thanks for the tips!
xo
s
Patti says
I’m thinking maybe a palm sander with 60 or 80 grit sandpaper would work on the wallpapered plywood…could be worth a shot.
YoungHouseLove says
Thanks Patti! I should try that!
xo
s
Jess @ Little House. Big Heart. says
Taking down wallpaper is the worst! All that slimy, old wall paper sticking to everything? Gross!
A note on Dani’s suggestion of Murphy’s Oil Soap: it tends to haze hardwoods, so you might put down plastic if you try it!
YoungHouseLove says
Great tip Jess!
xo
s
Megan says
I use fabric softener! I try and dry peel whatever I can, then warm water and softener mixed in a spray bottle. Let it soak for a minute and then use a big putty knife to lighly scrape it off the wall. It worked like a charm… till we found all of the seams had been glued :/ But it’s great and makes the house smell nice! Good luck- Wallpaper is my nightmare.
YoungHouseLove says
Thanks Megan!
xo
s
Stefanie says
My boyfriends father had HIDEOUS pink glittery floral wallpaper in his living room since they built the house in the 90’s. There was one piece by the front door that was peeling and just BEGGING to be yanked off. So while he was on vacation, I helped myself to taking down all of his wallpaper in the living room and hallway. (He had been planning on taking it down, just didn’t have the time.) Now if I could just talk him into ripping up that blue carpet!
jenna says
Hehehehe, this comment really cracks me up. Stefanie is a vigilante re-decorator!
YoungHouseLove says
Agreed! Go Stefanie, go!
xo
s
Elaine says
We’ve had success with a mix of vinegar and water (recommended by the nice people at Home Depot) and a sponge. My mother got tired of that and put her vinegar and water combo in a steamer. THAT took the glue off fast and without wall damage. Sure your hands smell like vinegar for a little while afterwards with the sponge method but what’s a little vinegar smell for wall-paper free walls?
YoungHouseLove says
Thanks Elaine! That sounds really easy!
xo
s
Andrea says
I wouldn’t wish that much wallpaper on anyone! You’re doing a fantastic job; what a difference it’s making in the house!! <3
YoungHouseLove says
Thanks so much Andrea! I can’t tell you how happy I am to have one more room left and the entire house is wallpaperless!!
xo
s
Sarah says
Removing wallpaper is SO. MUCH. WORK. You’re a champ, Sherry!
YoungHouseLove says
Aw thanks Sarah! I’m trying to rock that glue-under-my-nails look like it’s in fashion.
xo
s
Shelley says
We also have two layered walls to peel. Sometimes I walk by and just yank it off. I can’t stand it. But we’re painting other parts of the house and I want to finish that before I tackle our bedroom. So right now I’m calling out bedroom “eclectic”. Ha
YoungHouseLove says
Haha!
xo
s
Ginny @ Goofy Monkeys says
Steamer is the best method. We actually bought one for about $50 to do our house. Money well spent!
We tried fabric softener (didn’t work AT ALL) and also tried DIF wallpaper remover, which worked ok. But the steamer was the best.
Of course we had 4 layers of paper on un-painted plaster walls (and ceilings) and it was all 40-50 yrs old…
YoungHouseLove says
Oh no! Sad to hear that about fabric softener! But so glad steamer is your favorite method too! Makes me feel like it might be a good starting place for folks who wonder what method might be the easiest!
xo
s
Jessica Hill says
Yes, our purchase was WELL worth it. After we were done, we sold it on Craigslist to recoup a bit of the cost too.
YoungHouseLove says
Really smart!!
xo
s
Lauren says
I used this method on a bunch of the wallpaper in the house we moved into in June. However, it sounds like you didn’t use anything but your hands to peel off the underlayer (after soaking it). I bought a wallpaper scraper from Home Depot for a few bucks and it was SO FAST. I peeled off the top layer with my hands (it usually came off in big sheets), then used a rag to get water on the underlayer. After the underlayer is wet, the scraper takes it off with no effort. Way faster than just using your fingers. Getting it wet was the slowest part of the process. It’s definitely worth the few dollars for that little tool.
It’s such a wonderful feeling to de-wallpaper a room – looks great!
YoungHouseLove says
Great tip Lauren! Thanks for sharing!
xo
s
Melissa@TheChicDream says
What a job! We had quite a bit of wallpaper in our last house, over plaster! Luckily, there is none in our new house so it’s just paint, paint, paint. Can’t wait to see what y’all do to the dining room!
Erin says
I did this a couple of weeks ago and it worked very well and was pretty easy. Also, the fabric can be peeled off with no problem– it all comes off in one piece, unlike paper, so if a girl changes her mind down the road, it can be removed, sanded and painted or replaced with new fabric!
http://delovelydelightful.wordpress.com/2013/11/13/roses-are-red/
YoungHouseLove says
LOVE THAT!
xo
s
Loribeth says
I’ve been reading all over that wallpaper is coming back in style. Maybe you should have waited. ;) LOL!
I put the paintable beadboard wallpaper in my china cabinet. You might want to think about that for you built-ins.
Honestly, the paintable kind of wallpaper is the only kind I’d consider putting up, because I just can’t deal with the patterns of other wallpapers!!
YoungHouseLove says
Really smart solution!
xo
s
Jessica Hill says
Ugh. Removing wallpaper is the worst. I don’t think I could ever bring myself to put up any of my own after having to steam down all the wallpaper in our new house when we moved it The walls in my son’s room were papered, painted over, and then papered again. Yes, there was a lot of angry fist-shaking at those walls too11
Jen says
“And seemingly endless blue trim, you make my eyes twitch”
Bahaha! Perfect!
We just bought our first house (1916 build) and every.single.room. was wallpapered atleast 5 times (and most had wallpaper on the ceiling). I, being young and very naive, was all, “Lemme at em!” Then the first room took six hours to remove all 8 (!!!) layers of wallpaper and I still had 5 rooms left. Then I was all, “Open concept. I don’t like rooms anyway, let’s just rip down all the walls!”
Well, we still have all our rooms. And about 26 hours later, nice clean walls with no wallpaper on them. So I totally understand being tired of taking down wallpaper :)
Thanks for the tip to use a knife and tweezers for the little stuff stuck in the seams!I’ve been trying to figure out how to get those pesky bits out!
Cheers!
YoungHouseLove says
Aw you’re welcome Jen! Hope it helps! Tweezers can be used in many a situation (stray eyebrow hairs? check! splinter? check! wallpaper stuck in a crease? check!)
xo
s
Cynthia says
Just removed some wallpaper. What worked best for me, after trying several methods, was the last method you just finished. I removed the patterned layer. Then I sprayed the glue layer with warm water and some fabric softener. The glue layer came off fairly quickly and the room smells fresh because of the fabric softener.
YoungHouseLove says
Love the tips Cynthia!
xo
s
Megan @ Rappsody in Rooms says
Wow! That’s a lot of wallpaper stripping. But it looks so good! I am curious about that light fixture though. It is glaringly brassy but I kind of dig its scrolliness. Any plans on giving it a quick spray paint to see how it would look?
YoungHouseLove says
I’m with you! I think with some fresh paint it could be fun. Maybe in another space, like Clara’s room once we add an overhead fixture in there…
xo
s
Tanda says
When my husband and I purchased our first house 4 years ago, 75% of it was covered in wallpaper. I THOUGHT the removal process would be fairly straightforward, but boy was I wrong. None of the walls were prepped before the wallpaper was applied and each room took eons to strip. We also tried the steamer, fabric softener, and vinegar approach. The vinegar and hot water was the most effective, but it certainly didn’t make the job easy by any stretch of the imagination! I swear, the paper was at least 50 years old and sported some crazy, super adhesive! Good luck with your remaining stripping!!
YoungHouseLove says
Oh man, that sounds so tedious Tanda! So glad you got it done!
xo
s
Lindsey says
We had some walls that were not prepped properly in the kitchen of all places…I’ll need to skim coat a few spots (picture me biting nails – skim-coating seems scary), so I’m glad for you that the built-ins are the only spots where you have Doesn’t it feel GREAT to be done with such a big room, though??? THANKS so much for the wallpaper posts; they may not be everyone’s cup of tea, but they sure are mine. :)
YoungHouseLove says
Aw thanks Lindsey! I’m glad! And yes, you’re right about me being so relieved it’s just those built-ins that are being especially stubborn. Just to have all that pattern off the walls makes it feel like the room’s 2 feet wider!
xo
s
Emily R. says
Could you sand the wallpaper since it is plywood behind? That would at least smooth the section you worked on and mentioned was more rough.
YoungHouseLove says
Someone else recommended that so I’ll give it a try! Plywood by nature isn’t super smooth so I don’t know if it’ll splinter as I sand or if it’ll stay smooth. Will have to report back on that!
xo
s
Lil says
When we bought our first house there were THREE (three!) layers of wallpaper in one of the bedrooms (used as a den). The last layer had been applied around a wall hung cabinet/shelf that the previous owners took with them when they moved…so removal was not an option. The first layer seemed to be applied directly to the plaster walls. We literally spent a month of evenings/weekends stripping wallpaper…that was pre-baby. Not the most fun I’ve ever had. In case you’re curious…We used a scoring tool and a wallpaper stripper/baking soda/fabric softener concoction that I found online. It worked, but if I had to do it again I’d rent/buy a steamer.
I have a solution for the wallpaper in your built ins…tear those suckers out! Wallpaper gone! ;)
YoungHouseLove says
Haha! That would work too!
xo
s
Gaby {lifeineight.com} says
Stripping wallpaper has to be the most tedious job ever! We’ve done it in every room of our first house and after that, we bought two new-built houses with immaculate walls :)
Nancy says
After three solid weekends of prepping a rental house I am OVER wallpaper removal and also painting!
Removed bright red apple wallpaper from the kitchen/dining, plus border from three rooms and the hallway. Could have been A LOT worse. Prepped ALL the walls (1,050 SF house…so again, could have been worse!), painted all the walls and the kitchen cabinets. Painted all the trim, including built-ins in one bedroom and crown molding in the living room. Painted all the doors. Touched up everywhere. Discovered that there was a border along the ceiling in one of the bathrooms that hid under the paint..until the new coat went up, when it bubbled up some. LEFT IT to deal with when we change renters one day.
O.V.E.R. I.T. (and rented – yay!) But I still like reading about your projects ;-)
YoungHouseLove says
Wahoo! Congrats on renting it out! That’s awesome! Sounds like you got a ton done!
xo
s
Emiles says
I’ve been there with wallpaper over plywood. Our entire kitchen was wallpapered with pink over what appeared to be green walls previously. It was lovely. The house is old enough that it did not originally have a fridge or stove, so they placed it where a doorway to the porch used to be…or still is…because all they did was plywood over that door and wallpaper it. So. When we did our “Stage 1” redo, the wallpaper ended up staying on the “door” after gently, but difficulty pulling down one corner and seeing the plywood was splintering in the process. It doesn’t look very good because there’s a seam, but if there’s no seam, I’d have problem leaving it. In fact, if you textured over it, one probably couldn’t tell.
Good luck with your built-ins, though! Can you pull them out since they were added after the wallpaper? Maybe you could replace the backs rather than cover them again?
YoungHouseLove says
I think leaving them in place but sliding new wood to create new backs over the wallpaper could work! Genius readers recommended that and it sounds really doable, so I’ll have to keep you posted!
xo
s
Shelly says
I would SERIOUSLY! recommend the fabric softener. We tried one of our rooms with the DIF brand gel that is supposed to help, and the next room with the fabric softener. Looking at our third and final room, we are 100% fabric softener backers! Hardly any wait time for it to soak in, plus, as a bonus, your hands are super soft afterwards and your room smells great!
YoungHouseLove says
So interesting! Thanks for the tip Shelly!
xo
s
Nicole @ Post Grad says
Peeling off wallpaper with tweezers? The thought gives me an eye twitch. Virtual high five for not just giving up and painting over it like I would have. :)
YoungHouseLove says
Haha! That was when I was trying to recite the alphabet backwards in my head. Anything to keep from realizing how slow-going it was!
xo
s