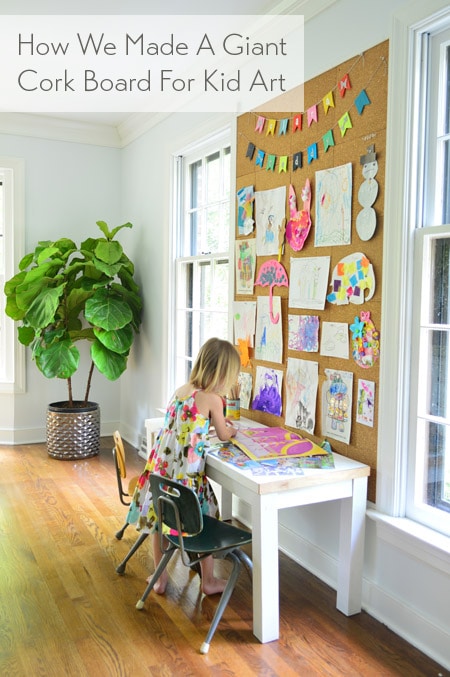
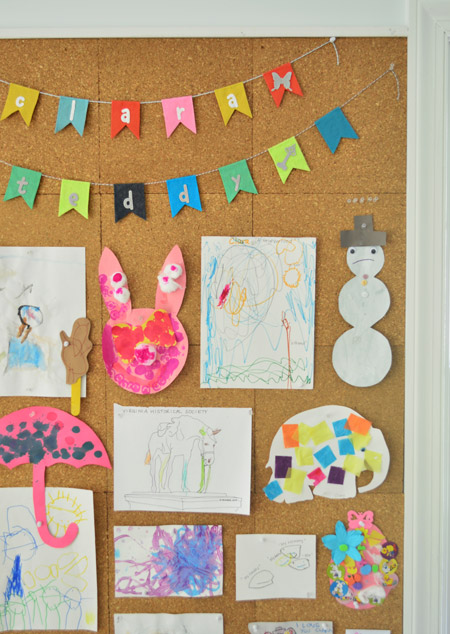
When your kid reaches the stage where they beg you to hang up nearly every painting, drawing, and stickered creation that comes out of her school bag, you may find yourself needing some more display space. Here’s how we hooked up our daughter with a giant cork board wall with a nice framed-in look and lots of room for art galore.
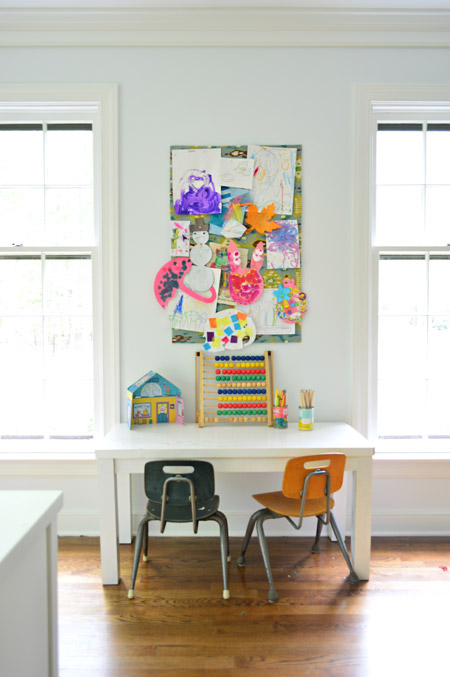
The “bell-etin board” that she used to be referring to was this smaller fabric-covered cork board that hung in our office for the last eight months or so (it was originally made by Sherry for our old closet) – but it had been getting pretty crowded. Sherry had the idea to turn things up a notch and take that cork board wall from window-to-window so that we’d have more room to display stuff – and so that it would more clearly define that little section of the room as Clara’s (and eventually Teddy’s) workspace.
Creating A Base For The Cork Tiles
We started by hanging a thin wood base for the cork tile squares to be adhered to. Not only would this make the squares hang more securely than individually tacking them up, it would solve a slight problem of the existing board: some of the pushpins poke all the way through the cork and into the wall, which would mean a plethora of wall holes over time from window to window if we skipped the backing.
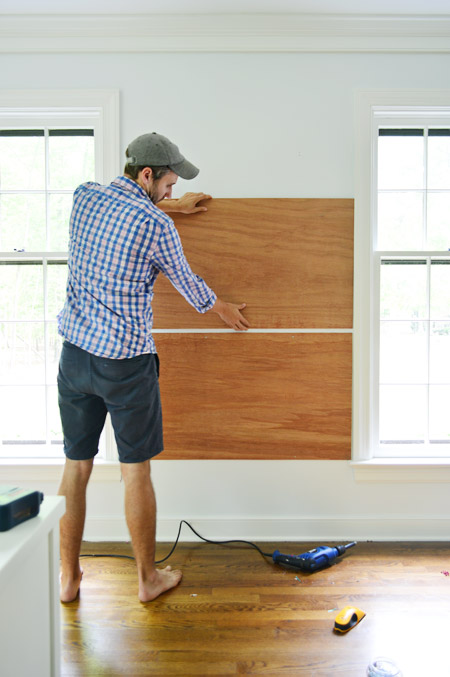
Now we’ll only have a few screws to remove if we ever want to take this down, and a few small holes to fill – as opposed to a swiss-cheese-like wall full of divots.
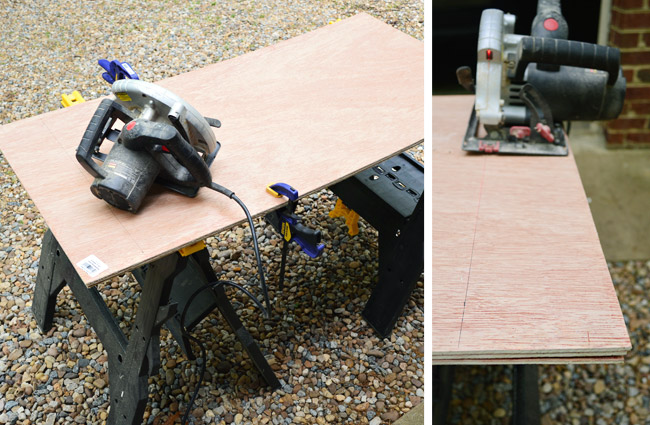
The wood backing was made of three 2 x 4′ sheets of 5mm underlayment from Home Depot. All of them needed a little trim to fit the 43″ wide gap between the windows. I clamped them together tightly and cut them all with one slice of my circular saw.
Starting from the windowsill, I attached each board with a few 2″ wood screws each, using my stud finder to be sure they were going securely into studs.
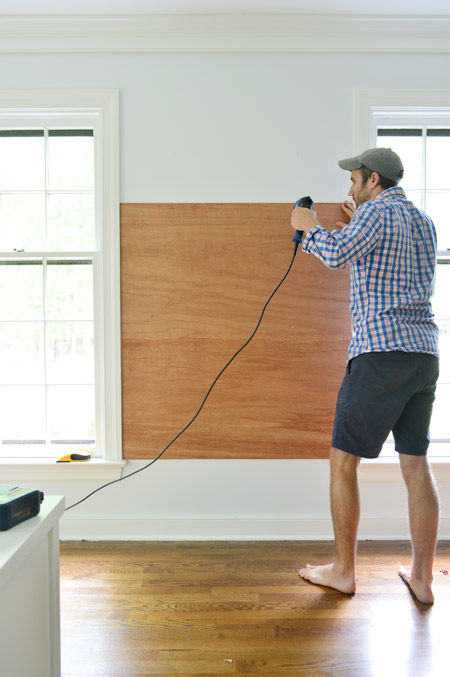
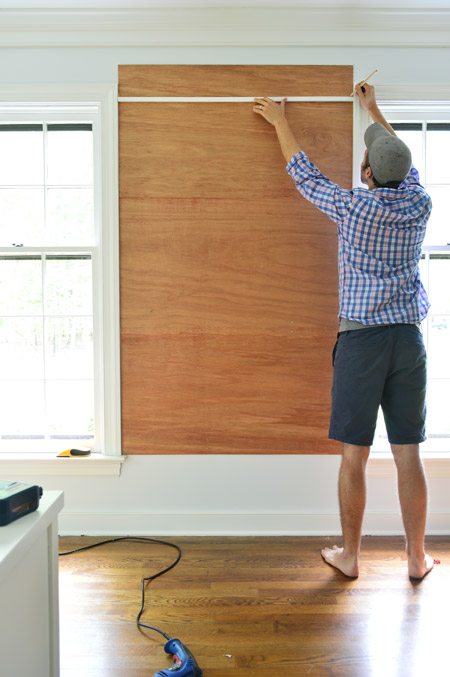
We wanted the third board to stop just slightly below the window for a stepped-down inset effect, so Sherry stepped back and eyed things so I could mark where it needed to be cut with a pencil. I also sliced two thin strips of wood to act as a basic molding for the top and the bottom, just to give it a more polished look so the cork didn’t just end.
Gluing The Cork Tiles To The Wall
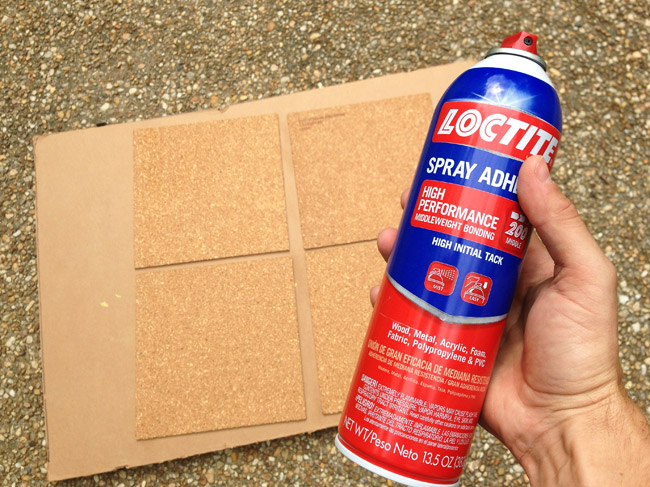
With the boards all cut and attached to the wall, we could start attaching the cork squares. We used this Loctite Spray Adhesive, since the back specifically said it worked for bonding cork to wood. It suggested spraying both surfaces, but since I didn’t want to spray indoors – I just spayed the back of the cork outside and Sherry carried each square in and stuck it up. Seems to have worked just fine so far.
Tiling the wall was pretty straightforward (read: it went really fast), especially since we could use full squares for most of it and we were tag teaming things. We did all of those first before doing any partial pieces.
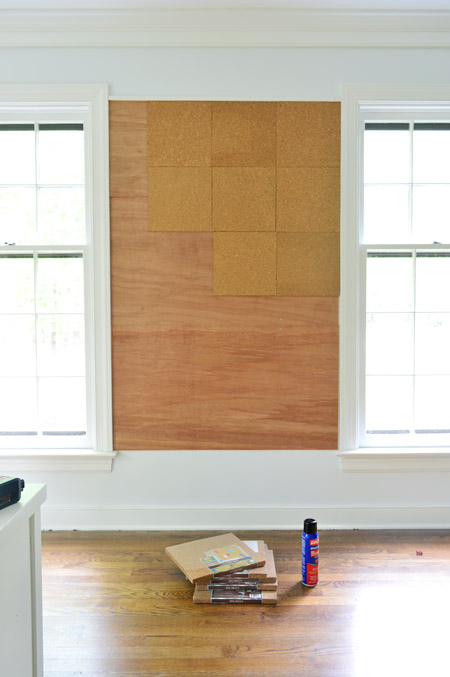
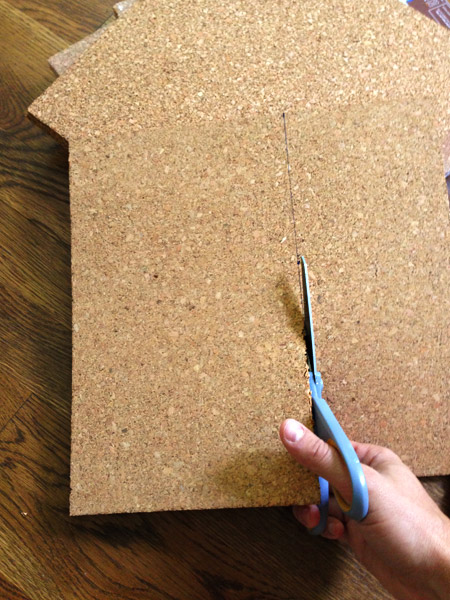
Sherry marked the partial squares with a pen and a ruler and then we just used regular old scissors to cut them. We discovered that making small cuts (rather than using the entire length of the scissor blade) helped keep the cork from cracking, which made for a cleaner edge.
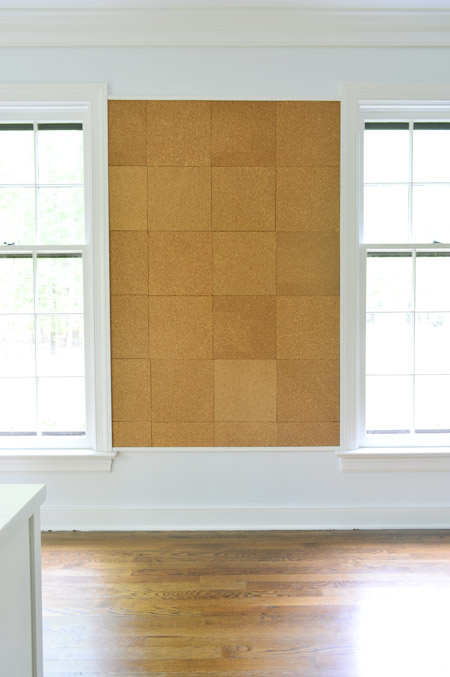
Here’s the finished cork board wall. Ideally, the seams would be less visible (we even considered covering it in fabric or painting it a pattern, or just the plain wall color) but ultimately decided that once art went up the lines would be a lot less noticeable. So since we both liked the natural color and texture it added to the room, we opted to leave it as is for now.
Arranging Art On The Cork Wall
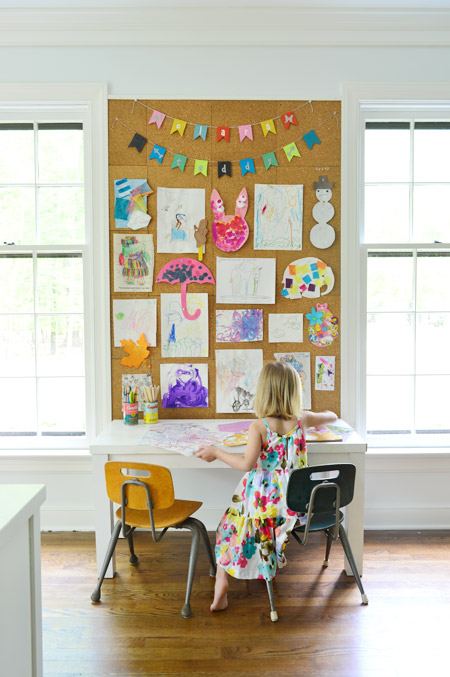
Sherry literally sprinted to arrange Clara’s current body of work on the board the second we finished hanging it (picture her rubbing her hands together and whispering “faaaavorite part starts… now!” Clara helped with choosing what to put where, and after a few minutes of shuffling things around, we ended up here. The artist herself was also quick to assume the role of producing more stuff to hang, although we’ve explained that even with a bigger board, we’ll still need to switch things out to make room for new stuff. So far she’s cool with it. She even seems to like the challenge of choosing what to remove to make room for her newest creation.
As for the rest of her art, we have a box full of other paintings/drawings/crafts that we save, and Sherry has a new app on her phone called Artkive, which she uses to take/store photos of it, with the intention of making a photo book full of her creations someday. We think it’ll be really fun to look back on (both for us, and for Clara).
We’re really happy with how our new cork board wall is adding some personality and color to the office, and Clara couldn’t be more proud. We’ve realized it will get in the way of any curtains we might have hung, but we’ve been thinking about doing some inside-mount roman shades for the room anyway.
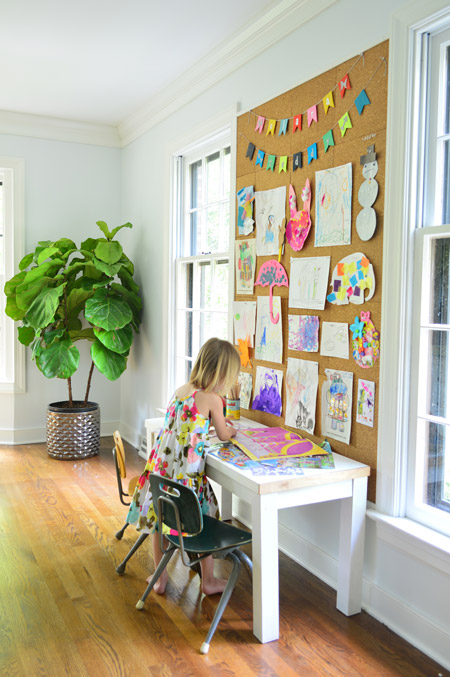
Oh, and those felt name banners are a little homemade surprise that a sweet reader sent us (thanks so much Jes!) as a welcome/big sister gift for Teddy and Clara. I like that it sets the stage for Clara that she’ll eventually be sharing her gallery space. Although I’m sure we’ll have a tough time bumping some of her stuff up there. We’re especially enamored with Grumpy Snowman.
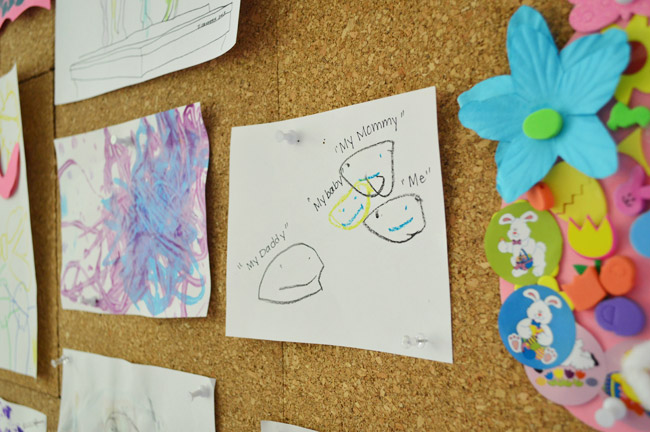
A clear family favorite is this drawing that came home from school last winter, where Clara had drawn a portrait of her soon-to-be-bigger family. She did it shortly after we told her that Sherry was having a boy, so it was a huge relief to see her embracing the idea of having a brother so quickly. Especially since she almost immediately started calling him “my baby.”
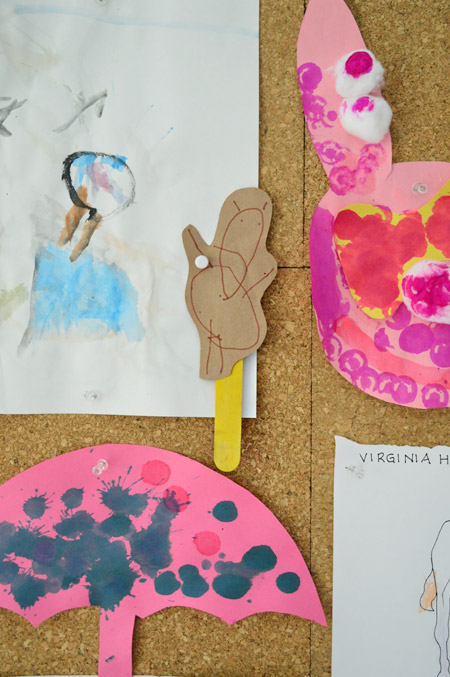
We’re also pretty big fans of this bear-on-a-stick that she made at school. It shows the evolution of her people drawing skills, since they went from just having heads to suddenly having bodies. Although some people still don’t get a torso, so this bear was pretty lucky.
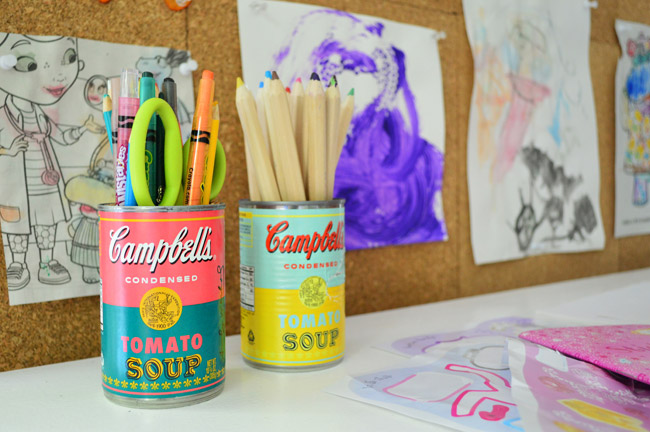
You may have also noticed that our repurposed Campbell’s soup cans (the limited edition Warhol ones from this old project from two years ago) are still going strong.
The rest of the office still hasn’t made much progress, but with Teddy keeping one of us occupied pretty much at all times, there isn’t really a rush on getting the double-desk thing going just yet. For now, Clara will just have to be our most productive office-mate.
Update: We love to share an update when something didn’t work out the way we thought it would – and explain how we fixed it! – so here’s how we dealt with the cork board curveball that this wall sent our way.
Note: This project was originally published in May 2014

rebecca says
Sounds like Teddy is doing his job! So glad y’all are able to slow down and enjoy him. What a blessing! Tell Clara I adore her art!!!
rachael says
What a great idea! And I like the term “stud finder” especially when it’s combined with pictures of John :) Gotta love a man that can work power tools!
Brittany says
Love those sweet name banners!
Mary Beth says
What a SMART idea… I love how Clara’s little space is in your office. Being able to work from home is amazing and I’m sure she feels quite special and grown up having her own little office!
:)
It looks lovely and she’s truly a gifted little artist!
Happy Monday, Petersiks!
MB
ps – Sherry you’ll love what I found in the garbage AGAIN.. look at this antique dresser, I’m dying!!
http://hystericallyeverafter.com/2014/05/05/gonna-dress-it-up-in-my-love/
YoungHouseLove says
Such a find!
xo
s
Nikki H says
That’s a perfect place and size for Clara’s own bulletin board.
Jess @ Little House. Big Heart. says
What a great idea!
And I’m glad you left the cork au natural! With the art and banners the seams are barely noticeable and I really love its color and texture.
JessicaL says
Loving it! This will bring so much color and delight into your office.
Tyler Anne says
I don’t have a young one, but this looks like a fabulous DIY for MY office! Great post!
Emily says
Have you been to the Warhol Museum in Pittsburgh? It is a really fun place and there are interactive exhibits that I think Clara would love!
YoungHouseLove says
Sounds awesome!
xo
s
Maureen says
So cute!
Helene says
If you really wanted to, you could still do curtains just on the outside of the windows. The way the cork board is set up integrates the two windows and makes it all look like one big cohesive piece. Just a thought…
Kim says
Kid’s artwork is the best! I still have some from my kids, and they are your age.
I know popups on your site drive you crazy, so I thought I would let you know I had one this morning. It asked something about beef, and said it was powered by Vizu, if that helps at all.
YoungHouseLove says
Boo! Thanks Kim. Will block that asap.
xo
s
Mary | Lemon Grove Blog says
It’s so nice that the entire family has a space in your home office. Bet you guys really enjoy having her so close while you’re working each day!
Jacqui says
I just love your blog. This is the first current post that I’ve read. I’ve been reading your behind the scenes post since I’m thinking of starting a blog myself. I love how your personalities come shining through! Keep up the good work because will be a subscriber.
Carla Kohlwes says
Thanks for the info on the Artkive App. Love this idea for my grandkids art projects!!
Stefanie says
That little banner is adorable. Such a sweet fan.
I love the cork board wall idea. After seeing the cork board wall in one of the houses at Homearama this weekend (I can’t remember which one it was..it’s all a blur haha) I’m pretty set on doing a whole wall in my daughter’s room. I love the idea of her being able to hang up what she wants and change it out when she wants without putting holes in the walls.
Katie says
Cute! Definitely see how it will be very functional. I’m curious (and maybe I’m missing it in the post), but why did you decide to use tiles instead of a sheet of cork?
like this: http://www.lowes.com/ProductDisplay?partNumber=34744-66257-38177&langId=-1&storeId=10151&productId=4747231&catalogId=10051&cmRelshp=req&rel=nofollow&cId=PDIO1
YoungHouseLove says
We find the rolls/sheets to be thinner so pins tend not to hold as well.
xo
s
Lauren says
FYI – Hobby Lobby has cork rolls as well, and they offer 2 different thicknesses. One is very thin, but the other is thicker than most squares I’ve seen.
YoungHouseLove says
Thanks Lauren!
xo,
s
Abby says
Guys! Have you ever read any of Dr. Elisabeth Kubler-Ross? Particularly her work with children? She does some therapy sessions where she has children (and their parents) draw, with crayons, how they’re feeling about big life events (she worked primarily with people who were dying – including children – but any life event works, too). In one video I watched of this therapy, she was interpreting a child’s drawing and his use of gold and yellow – she said that when yellowish colors are used by children, it symbolizes a closeness to God/the soul/etc. (For example, a little boy who was dying drew himself with his family – his family was all one color, but he, who knew he would soon die, drew himself in yellow.) How intuitive and lovely that she drew her future brother in yellow – since he wasn’t earth side yet, it is so fitting!
(haha sorry if this doesn’t make sense – I love stuff like this!) ;)
YoungHouseLove says
So interesting!
xo
s
Lisa P. says
LOVE this!
rashi says
Nicely done! Where did you buy the table from. And how u store all the school supplies….apart from whats there on the table..curious! x
YoungHouseLove says
We made the table here and we store her other supplies here.
xo
s
Sy says
Hi sherry,
What table top would you recommend for a kid’s art table? I love the all white look but I have two toddlers who basically turned out white ikea tables rainbow and toothpaste only removes so much. Thank goodness it’s one of those cheapo ikea table tops. But if I went with a light stained wood, do you know whether marker stains etc can come off easily with a layer of the safecoat acrylaq stuff you guys use? Thank you!!
YoungHouseLove says
We have a white painted tabletop that we sealed with Safecoat and then we use a magic eraser to get everything off – even stubborn crayon and marker. I don’t know if that would work with wood stain, but you could test it on a piece of wood and see how easy it is to clean. Good luck!
xo
s
Christi says
Love this idea!
But…John, my father would be yelling at you for not having shoes on while using power tools! ;) I have been yelled at sooooo many times for doing home stuff in flip flops!
Gothammom says
JUST what I was going to write. Safety first!
Lindsey d. says
Goodness yes, the shoes. My husband fusses at me when I try to do any project in bare feet…
Of course, this is the man who is about to get new steel toed boots for work and is pretty sure he will use the old ones to mow the lawn now instead of tennis shoes. He has convinced me that eye and ear protection is a priority for pretty much any project involving dust or noise and taught me how to properly put in earplugs. Definitely all good things…
Cheyenne Kira says
Haha! I was just thinking “Does he ever wear shoes” LOL but I didn’t even think of the safety thing, I just love the barefooted-ness ;)
Sarah @ Sarah's Daybook says
Aww! She is so funny! Bell-etin sounds like something I would have said. I swear up until I was 12 I thought that pig-tails were pink-tails.
No rush, but are you guys going to update the house tour with larger pictures?
Sarah
http://www.sarahsdaybook.wordpress.com
P.S. Homearama was AMAZING! It was so funny to see all of the rooms that you guys haven’t shown yet. The back-patio fireplace had my drooling. And in the girls room where you had the “Alice” metal thing, that was so sweet. Also, the boys room was incredible. Not going to lie, I want that reading nook.
Sorry to have a really long comment, but which of the other houses were your favorite? I loved the one with the reclaimed wood ceiling in the living room. I was also loving that they had free popcorn, ha!
YoungHouseLove says
John’s parents loved the popcorn too! I think ours was the one with the bookcase/door that led to the hidden video game room (it also had those grain sacks in the central mudroom space and that cool bedroom with the pretty overhead beams. And we’d love to update the house tour pics so theyre bigger. Soon I hope!
xo
s
erin says
Please be careful if you go the roman shade route. A 2.5 yr old boy in my area recently died of strangulation from the cord of a roman shade. http://www.today.com/moms/moms-anguish-leads-renewed-warnings-window-blind-dangers-2D79449314
YoungHouseLove says
Such a tragedy. Thanks for the info Erin.
xo
s
JenN says
I love Artkive. Soooo easy. I had a book made last year of my daughters first year of preschool stuff and it came out great.
YoungHouseLove says
Love that!
xo
s
JoAnne says
I truly love this wall. Such fun for Clara! My son loves to make creations too and has them stored all over the house. I’ll be looking up that app to try and bring some organization to his creative process.
Thanks for sharing!
JoAnne
Joanna @ thenestbook says
Love this! I can’t wait until my little one has sweet artwork that I can display. Oh and I’m dying over grumpy snowman… That frown is tickling my funny bone!
Jeff says
Hey! This is slightly off topic, but I’m really curious where John gets his shirts from. They’re classy and yet still able to be worked it! Any info would be appreciated! I definitely need to copy this style! Thanks!
YoungHouseLove says
I usually grab the casual cut ones from the J Crew outlet at the beach in Delaware when we go there a few times each year.
xo
s
Melissa @ Loving Here says
I also like to see that he sometimes works barefoot…like my handy husband does. It may not be the safest or the best method, but it’s honest. Because sometimes DIY happens while life is happening at the same time. Although my Hubs did step on a hammer a month or so ago and cut his foot. Ouch! (And now, I’ve convinced him to at least wear shoes when he’s doing “big projects.”
Robin says
I wanted to give a quick Hi! I went to homearama this weekend and loved your house! All the houses were great and so fun to see yours in person. The live music and food trucks really made it a party! I took tons of photos of ideas and will get around to posting for my blog followers.
YoungHouseLove says
So glad you had fun! I think food trucks make any event. Haha!
xo
s
Robin W says
I went this weekend, too. I loved your house, it looks even better in real life. Yours and the rustic one with the two-way fireplace right off the entryway (with the pool) was amazing.
I totally agree about the food trucks (had fries from one and pork taco from the other – have to spread the love) they were great :) The bluegrass band was good. It was a perfect afternoon to spend with a friend.
Thanks for sharing info with us about this event – I never would have known about it otherwise.
YoungHouseLove says
So glad you had fun Robin!
xo
s
Katie says
This is super cute. I just love your family office! Everything you do is done with such thoughtfulness, and it shows.
alicia says
For some reason this post showed up in my reader a while ago and not on your actual site until just now. Not sure what that’s about.
I’m curious if you’ve ever thought about turning your storage area into your office? You could make it a comfy place with plenty of desks, couches, tables and even a big built in to store home décor items you aren’t using. You could even create stairs and a separate entrance for when you have meetings. It would also give you the ability to shut the door and leave work at work when you’re done for the day. Just a thought…
YoungHouseLove says
I think we like the idea of using that unfinished storage space as a TV/sleepover room down the line when the kids are a little older (we picture them going in there and playing video games or watching movies and we’d like to build some awesome bunk beds along one wall). For now, having an office on the main floor (closer to the kitchen and other things we access throughout the day – like letting Burger out the back door) seems to work – but that’s a fun idea too!
xo
s
Liz || Shopping My Closet says
This is awesome! Perchance, you wouldn’t want to come over to help me do this for my office, would you? :)
Liz @ http://www.shoppingmycloset.com
YoungHouseLove says
Be right over ;)
xo
s
Sarah says
Looks great!
Rena says
Wow, this is a wonderful idea! I stuck the pictures from our children on the kitchen cupboards and I remember so well how proud they were. And now they are both grown up …
xx from Bavaria/Germany, Rena
http://www.dressedwithsoul.blogspot.de
Tara says
I LOVE IT!!!!
Renee says
Love this new cork board update.
However, I must admit, it drives me crazy that the cork isn’t centered. My type-A personality would have liked to see two columns of full cork tiles in the centre and two cut-to-fit columns of cork at the edges.
Jackie says
Agree!
-alex says
Bwa ha ha! I was thinking the same thing! Good thing there is lots of cute art to counteract it.
Jennah says
YES! Or staggered like tile/bricks. I cannot unsee it. I know you said the rolls are thinner, but could you have doubled them up? I would have either done that, or done something (symmetrical or tile staggered) to make the tiles of corkboard look more “on purpose” rather than “crap I ran out of room”. Love the big corkboard in the office in general, though.
Also, why not create it as a separate piece and then hang the whole thing? Now, if/when you want to remove or move it, you’d have to rip off the glued in corkboard, then unscrew it from the wall in pieces.
YoungHouseLove says
We thought about doing it separately and hanging it afterwards but it would have meant screwing through the cork (which would have flaked out in those areas) or it being mounted in the back on nails, which means it would have stuck out from the wall more (instead of being inset between the molding) so we opted to go with this route so it would look flush to the wall and no have areas where the cork was flaked where the screws went through it.
-John
Jennah says
You could also have made the wooden frame/backing, added any screws/hangers to that (so no need to drill through cork – just drill through that piece – maybe use picture wire like you would for a large, heavy mirror and then put the trusty 3M velcro strips on all 4 corners for extra sturdiness?), then added the cork to the one side after.
I know you plan on it being there for a while between two kiddos, but I never like to put in anything quite that permanent – plus it’s totally trash if you do need to remove it, since most of the cork would be not salvageable.
Love Clara’s artwork, though! I have much more limited space, so I need to find a space to display my kiddo’s.
YoungHouseLove says
Thanks Jennah, maybe I didn’t explain it well above, but we realized if we added hangers with picture wire to the back of the wooden frame (or nails or screws to hang it on) after we added the cork it would be deeper than the molding of the windows on either side of it – meaning it would stick out further than the trim around it, which we thought would look weird.
-John
jeannette says
i can’t help but believe that giving both children space in your home office, instead of barricading them out, speaks to their [future] good manners and ability to sit still for a second and concentrate on pencil/crayon/brush work. good work, ‘rents.
JessB says
Looks awesome. I love the idea of making a book of the art. I’ve been tossing the non-gallery worthy ones but have to be careful that she doesn’t see them in the recycling or she’s very hurt. LOL Poor thing.
Emily says
My dad did this exact thing for me in middle school – was absolutely awesome. I got to put whatever I wanted on my bulletin board, and he didn’t have to have a million holes in my wall. :)
Whitney Dupuis says
Oh my goodness I LOVE THIS! I am thinking that this will be an inspiration for our house once we move {in three weeks – eek!}
Ambaa says
Back in the 80s, my dad always photographed my art work and the birthday cards I got each year and put them in albums.
Kristen says
Love this!! Been struggling planning a room in our new house – specifically an awkward window corner in a family room. I’d love to make it an art space (and homework station in the future). Do you have any posts on organizing Cs art supplies? I have a 4.5 year old and want her supplies in her reach but out of sight. Thanks so much!
Been following you since 2007 and it’s so great to you all doing such awesome things! :) Congrats on everything, and especially the barnacle!
YoungHouseLove says
Here’s a post about how we organize a ton of toys/art supplies/etc: https://www.younghouselove.com/who-needs-coats-when-you-can-have-toys/
xo
s
Pat S says
Nice display board. I’m glad to see that you are archiving her artwork for a future photo book. That’s one really nice thing about technology these days.
sasha says
John why are you operating power tools while barefoot? Love the new board for Clara though:)
YoungHouseLove says
I don’t demo stuff while barefoot or anything heavy duty, but I might occasionally hang a picture (or use the drill to hang something else) without shoes. In this case I had shoes on outside while cutting with my saw and removed them at the door so I didn’t track sawdust in.
-John
taria says
Very cute. I always need more room on my pin board too. If you don’t have a rotary cutter you might get and try one. They would probably work really well on the cork tiles. Just be careful with one. They are really sharp.
Katharine says
Clara’s people (and bear and grumpy snowman) remind me so much of Hyperbole and a Half!
On an unrelated note, my husband and I drove up from the Lynchburg area to see Homearama this weekend. I have to admit, as you were posting sneak peeks of the house, there were a lot of things I wasn’t sure I liked. But it all made sense once I saw everything in person and all tied together, and I ended up liking nearly everything I was on the fence about (the laundry room was probably my biggest, “Hmm, I dunno about that!” area, but it TOTALLY works). The biggest WOW moment for me was that tile in the powder room — it’s so amazing! Love, love, love.
I grabbed a source list, and I know you’re planning on doing a source post here, but I wanted to know about the artwork hanging on the angled wall between the kitchen and living room, as well as the cordless Roman shades in one of the bedrooms (master, I think). I loved both of those.
YoungHouseLove says
Aw thanks so much Katherine! So glad you liked it! The art on that angled wall is Lindsay Cowles (she’s amazing, and based here in Richmond) and the roman shades in the bedroom are from a local company (small, family owned) called A Shade Above.
xo
s
Ellie says
Such a cute idea!! I love that she can hang up everything in her own little gallery.
This reminds me that my mom bought giant zippered art portfolios for my younger brother and me (apparently I asked for a little brother just like Clara haha). That way we had a place to keep all the art we made that felt really special and it was super easy to store behind a dresser or under a bed.
Nadia says
Any chance you know where the cork tiles are from? All the ones at target seem to have terrible reviews :-(
YoungHouseLove says
These are from JoAnn (they sell them in packs of four, and you can use those awesome 50% and 40% off coupons on them).
xo
s
Renee says
Where do you get your cork squares? I love Clara’s art wall and want to do this for our craft room!
YoungHouseLove says
These are from JoAnn (they sell them in packs of four, and you can use those awesome 50% and 40% off coupons on them).
xo
s
susan says
I love this update for so many reasons. First, it looks awesome. Second, I love that Clara and Teddy have a prominent place in mom and dad’s office. Third, I adore the little drawings. And on and on and on :O)
Nicole says
Adorable. My mom actually made an entire wall like that in my bedroom when I was a kid. I thought it was the coolest thing ever!