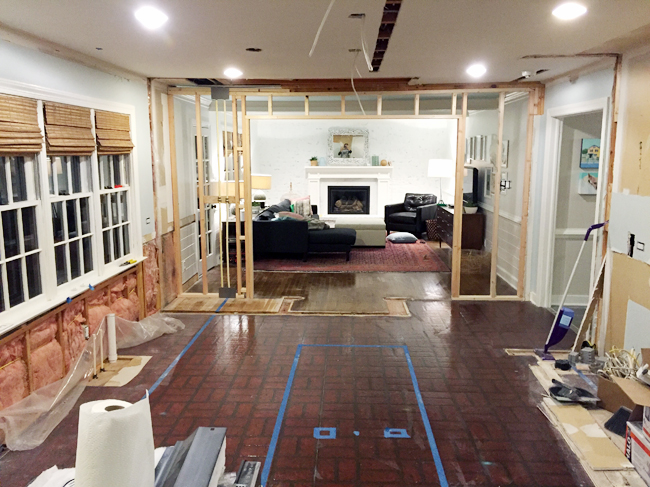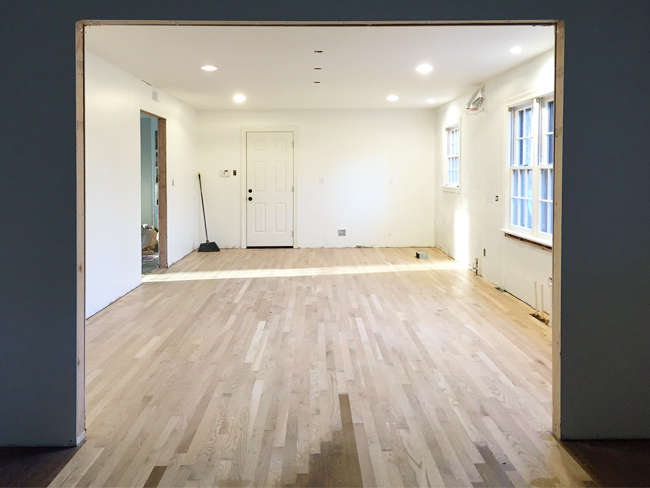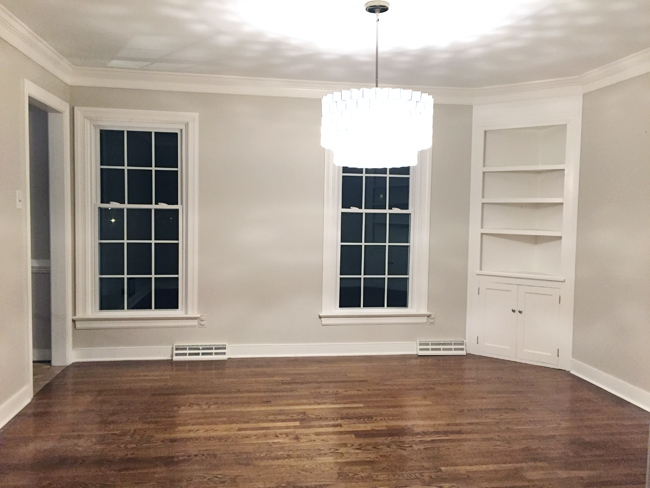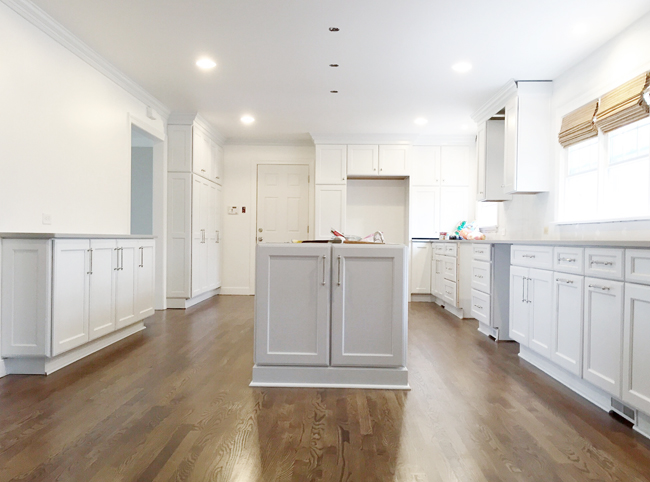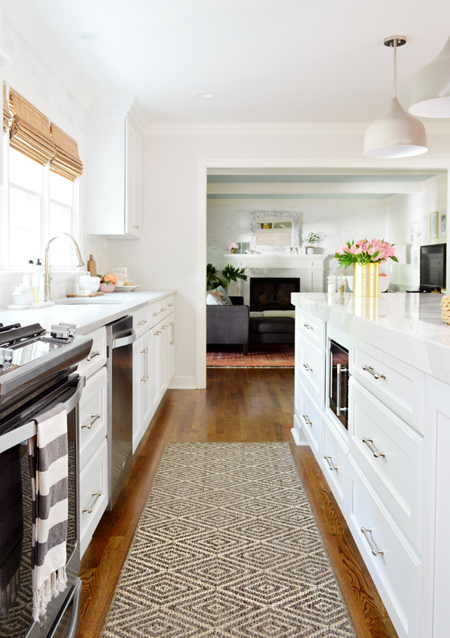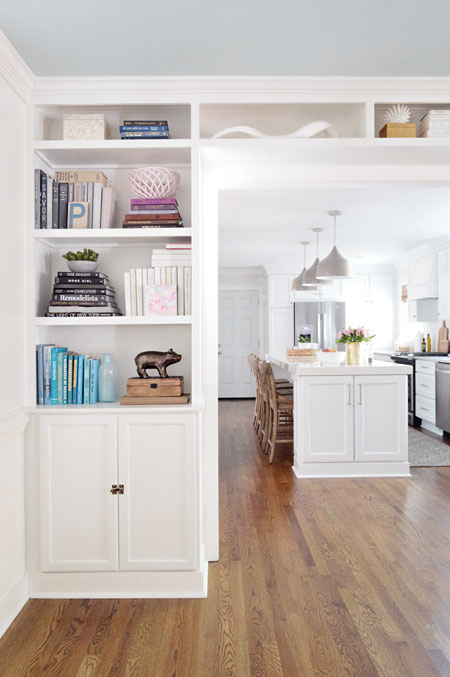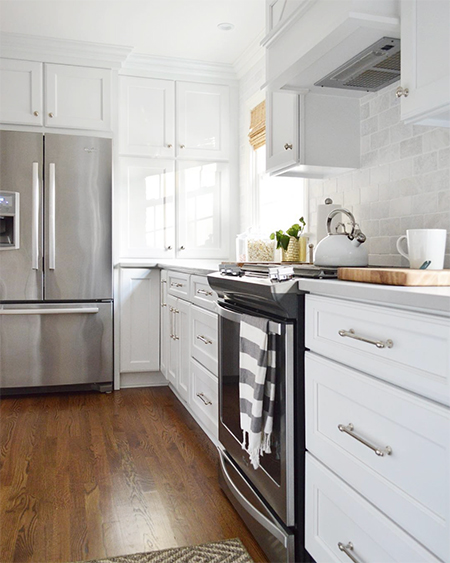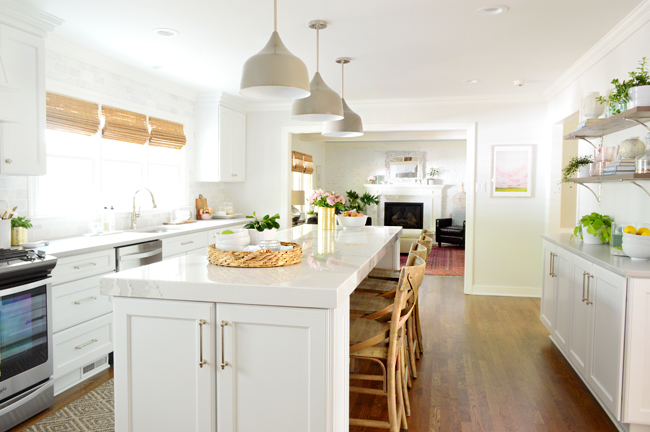
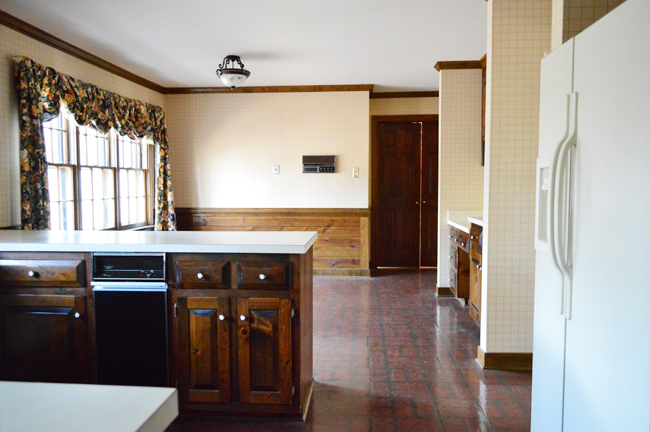
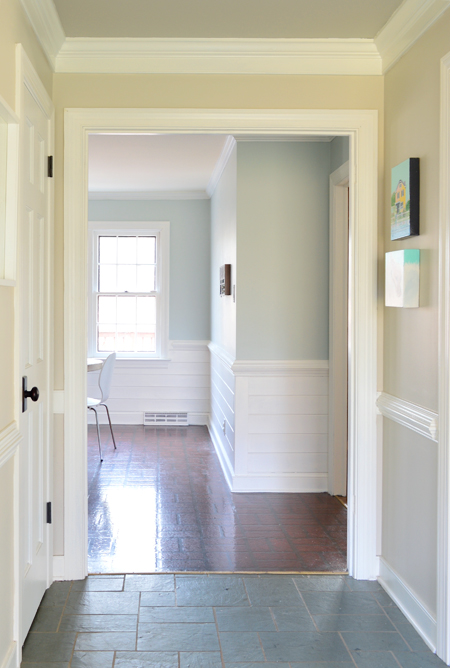
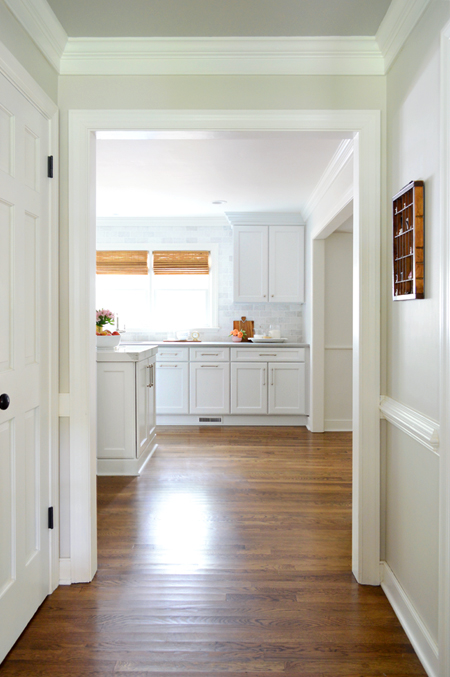
This before picture does a good job of demonstrating just how much of a difference the new floors have made. Yes, the photo below was taken from the same exact spot as the after shot above. And no, we don’t miss that faux brick linoleum ONE BIT.
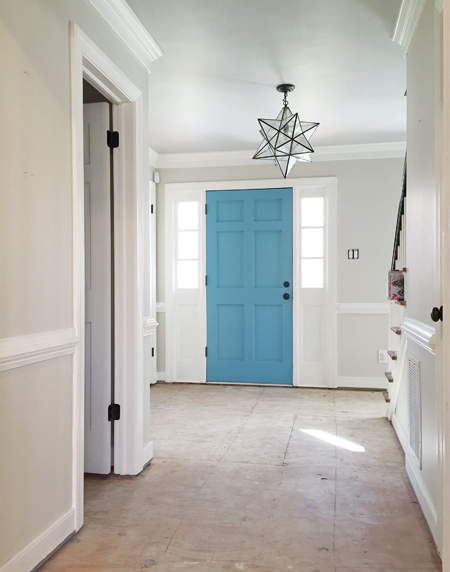
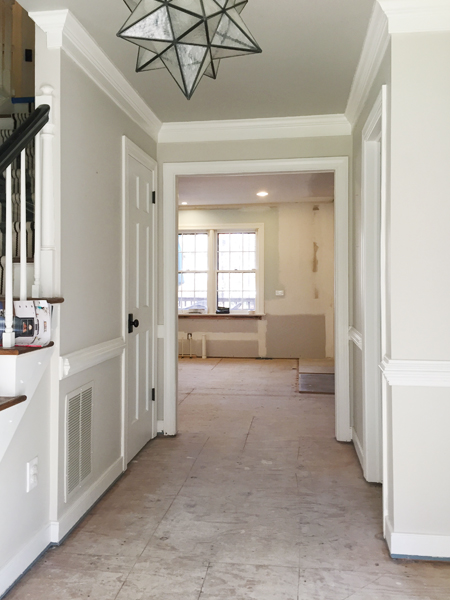
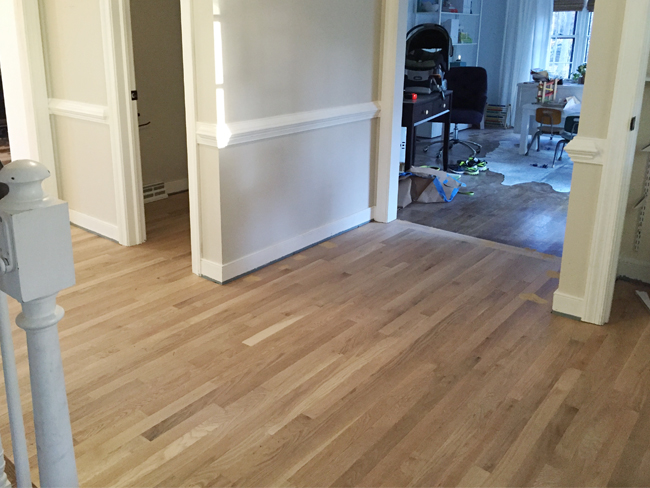
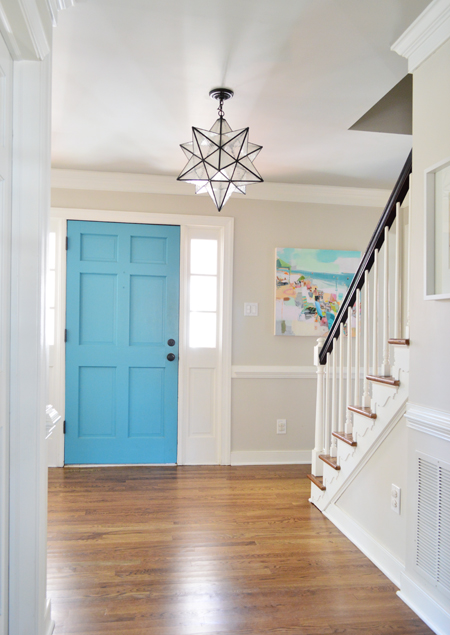
From this other angle (taken from the front door) you can see a little more how our downstairs flooring had been so choppy. We had hardwoods in three main rooms (living, dining, and office) but none of it WAS CONNECTED TO EACH OTHER because of the slate in the foyer and the linoleum in the kitchen. Talk about interrupted flow. We had FIVE doorways that transitioned from one flooring type to another, often with a classy metal strip in between for sporadic toe stubbing. #blingbling
Now it’s all one big even swath of hardwood – no transitions, no steps up or down, no change in color, and no evidence that it wasn’t always like this – which was always our goal. Generally, we just love the warmth of hardwood in the kitchen (we had it in our first house too) and cohesive flooring throughout many rooms can help with flow and make everything feel bigger. But getting there was not necessarily speedy or painless. We chose to hire out the project because, as you’ll see, it was a weeks-long project even with pros at the helm (remember: we couldn’t get a functioning kitchen back until this was all done). So although we installed all the prefinished hardwoods upstairs by ourselves, seamlessly blending existing boards with new boards and then sanding and staining it all to match perfectly was something we felt best leaving to the pros. Fortunately, we had worked with a local company called Howdyshell Flooring on some of our builder spec projects, so we were significantly less worried and neurotic than we could have been.
Demo
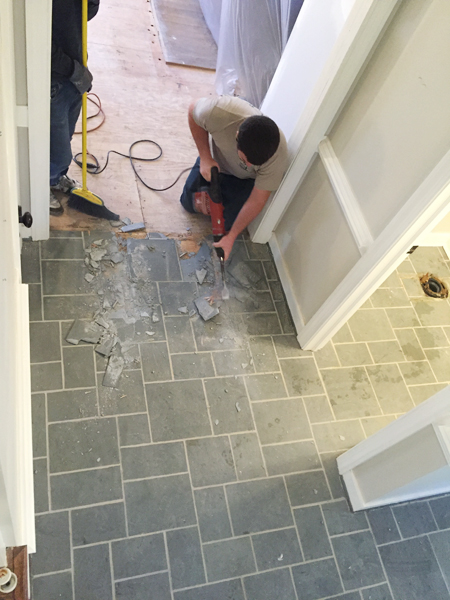
First up – removing the old linoleum and slate. Although we thought we might tackle the slate demo ourselves, Howdyshell quoted it for us and said their team could knock it all out in a day-ish AND that it would include removal/reinstallation of quarter round and plumbing fixtures (like our powder room toilet and sink). Since we’d need to rent tools to get it done, it made our savings margin a lot smaller, and after seeing how quickly they did it – and how dusty & noisy it was – we’re grateful we didn’t try to squeeze it in across a few evenings after the kids went to sleep. Let’s just say they wouldn’t have been asleep for long…It took a team of guys a full day and a half to get everything out, leaving us with empty plywood throughout the foyer, half bath, and kitchen. Luckily all of the plywood was in good shape, so there was no need to patch or replace any subfloor (we don’t usually have that luck so we savored it! Ha!).
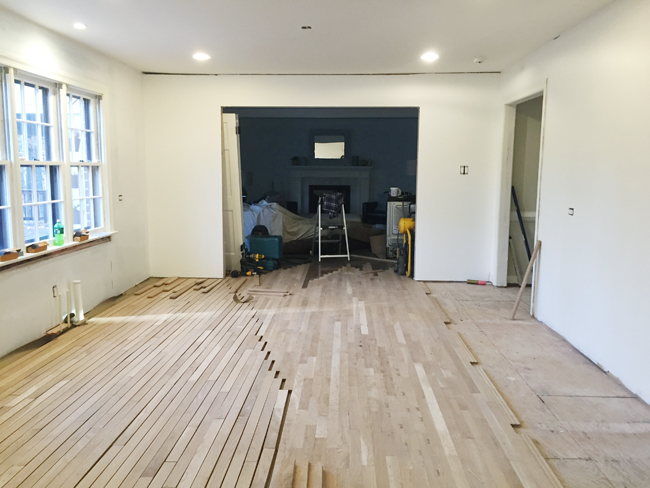
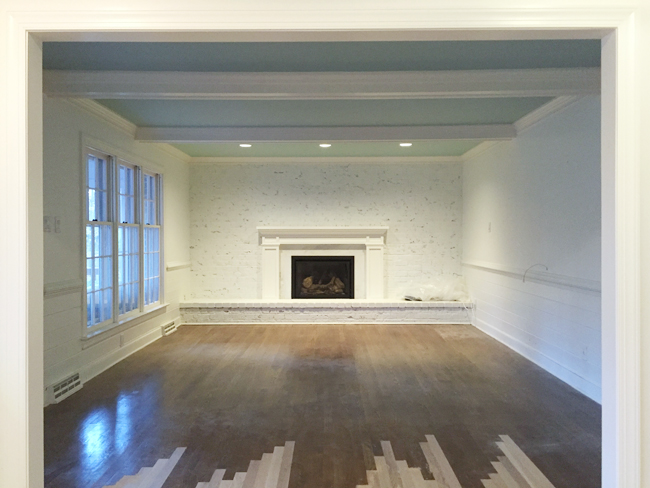
Here’s the view looking back into the kitchen. You can see some of the original hardwood flooring in the living room jutting in on the right side.
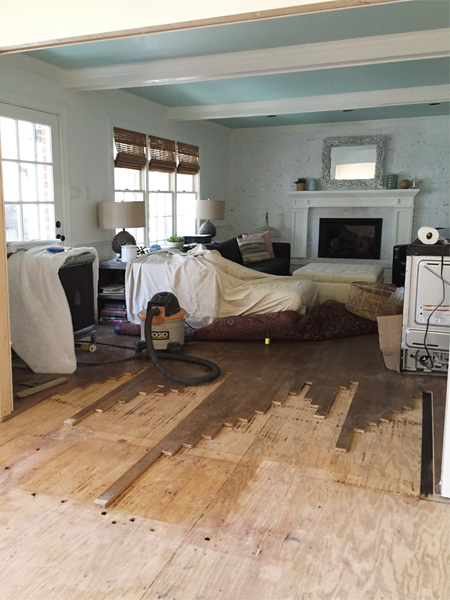
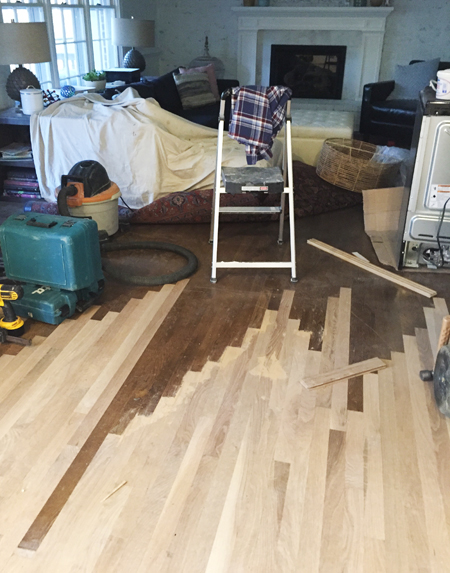
Those weird portions of existing hardwood – which you can see better in this older photo – show the footprint of the old wet bar (center) and the living room’s built-in bookcase (left, where the wood wasn’t ever stained since the bookcase was built right on top of it). Patching in the new hardwood to be seamless with the old stuff was a big reason we opted out of DIYing this ourselves. If our attempt resulted in cracked or uneven boards, it’s not like we could hide it under a rug or something – it’d be right in the middle of that high-traffic doorway.
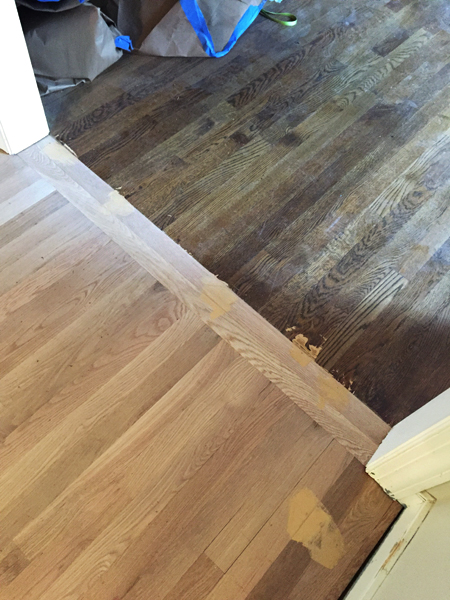
To get a seamless transition, the Howdyshell guys carefully removed some of the existing hardwood planks so they could install the new stuff in a staggered pattern (rather than just cutting it straight and leaving us with a big line between the new and the old stuff that would be a dead giveaway). You can sort of see a faint outline on the subfloor of what used to be covered and what was cut out to make way for new stuff:
Installation
With everything out, they started by patching the new boards in, using wood putty to fill any grooves where it wasn’t perfect. The wood putty also helped fix any boards that were nicked or damaged during the process of removing the old planks.Once they had “feathered in” the new boards where they met the existing floor, two guys worked the rest of the day to lay out the remaining flooring throughout the kitchen. This was their progress at the end of day one.
I should add that the new wood was delivered to our house a week beforehand so that it could acclimate to our house before installation. Wood expands and shrinks based on the moisture in your home’s air, so it’s best to let it adjust before it gets nailed down, otherwise you might have gaps or buckling later. It took the same two guys another day to finish laying everything in the kitchen…
…and then they moved on to the foyer, including our half bath and two closets, which carried over to day three.
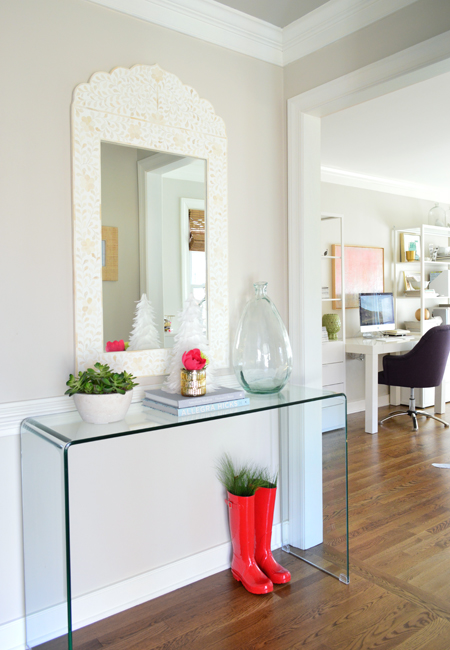
They couldn’t guarantee the boards would line up with the existing floors in the office and the dining room (you begin laying new flooring wherever you want to guarantee that things will line up – which was the doorway between the living room and the kitchen for us – and the rest of the flooring just falls where it will from there on out). So we opted to do “turnboards” at each of those doorways, which are basically two planks placed perpendicularly at the thresholds. They aren’t raised at all – so they’re completely smooth to walk over, and once everything was stained to match, they ended up adding a nice decorative detail to the foyer floor. RIP metal strips.
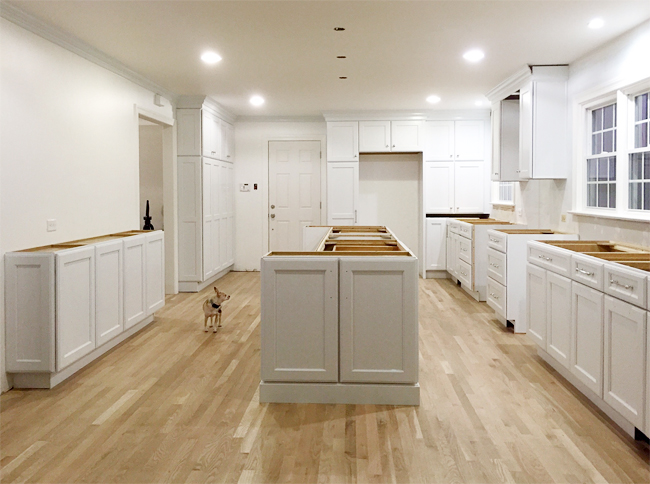
You’d think the next step would be sanding and staining, but they actually prefer to install the cabinets first. You may have the same thought we did: “then isn’t the wood not stained under the cabinets??” Both the flooring guys and cabinet guys agreed this was best. Cabinet installation can be rough on floors, so this means you don’t have to worry about scratching up brand new stain while you’re sliding your cabinets into place. Plus, it condensed the overall timeline because we could get our counters templated and into production while the floors were getting stained – both of which required a week or so of waiting time, so it was nice to have them happening simultaneously instead of back to back. Lastly, they argued that by the time you’re likely remodeling or changing your kitchen layout so significantly that you’re exposing anything that isn’t stained, your floors are probably due for a refinishing anyways.
Moving Out
Once the cabinets were installed we began theThe dining room was probably the most annoying because we had moved most of the kitchen into it, so it was overloaded already.
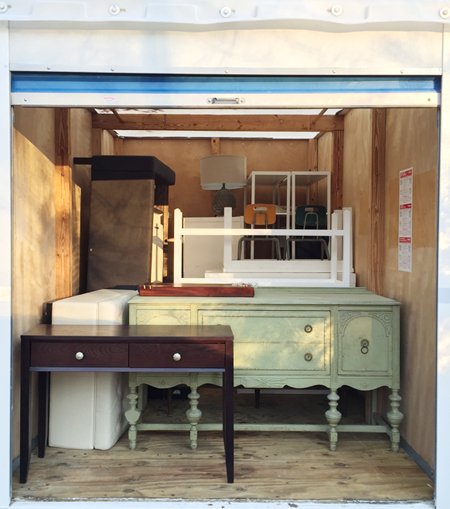
Most of the small to medium stuff just got dumped upstairs in random places. Frames and pillows in the guest room. Microwave in our bedroom. Couch cushions in the upstairs hallway. You get the idea. Oh, and appliances went into the garage. For storing the big stuff, we rented a storage pod for our driveway. We got the smallest one since it turns out we don’t have a crazy amount of “big” furniture. Sherry and I moved it all ourselves in one day using a dolly. At one point her desk might’ve accidentally fallen facedown in the driveway, but other than that there was minimal yelling at each other.
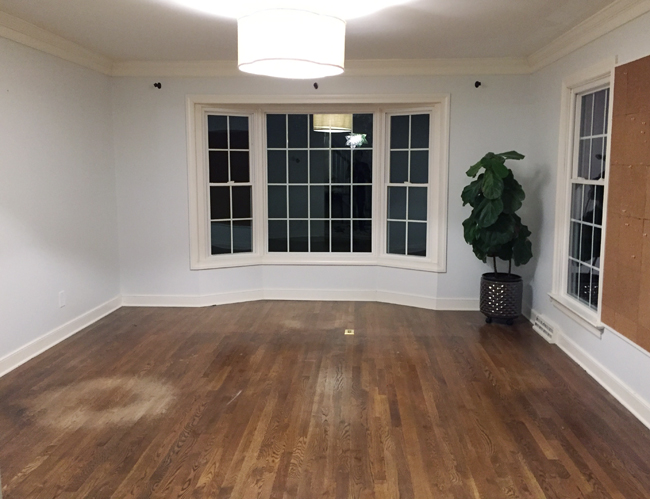
Oh and note the wear on the office floor. The worn down mark in the middle of the room was already there, but those two donut-shaped marks were from us rolling around in our wheely office chairs while working (and possibly thinking about donuts). GAH! We didn’t even realize we were wearing them down until it was too late. So we’ll share how we solved that at the end of the post (patience, grasshopper).
Sanding
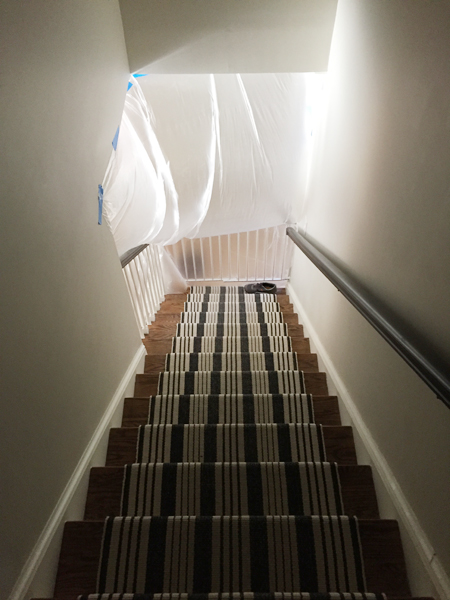
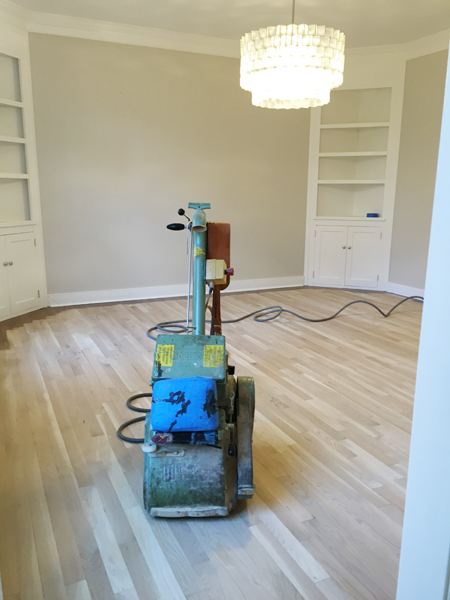
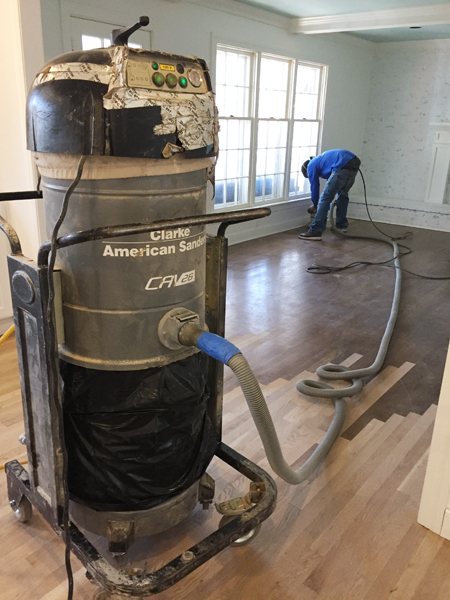
We spent one last day in the house while sanding began, which gets the old stain finish off the existing floors and leaves ten million dust particles everywhere (the top ledges of your doorway and window trim will forever be dusty if you don’t wipe it down before moving furniture back in). We holed ourselves upstairs behind this bubble that we taped at the bottom of the steps to keep the dust contained to the first floor. It actually worked!Sanding was also a two man job. One guy ran the big sander, which took care of all the major areas in each room.
Meanwhile a second guy used a smaller hand sander to get the edges. This is another part of the process I’m grateful we didn’t try to tackle ourselves. That’s one whopper of a sanding machine, amiright?
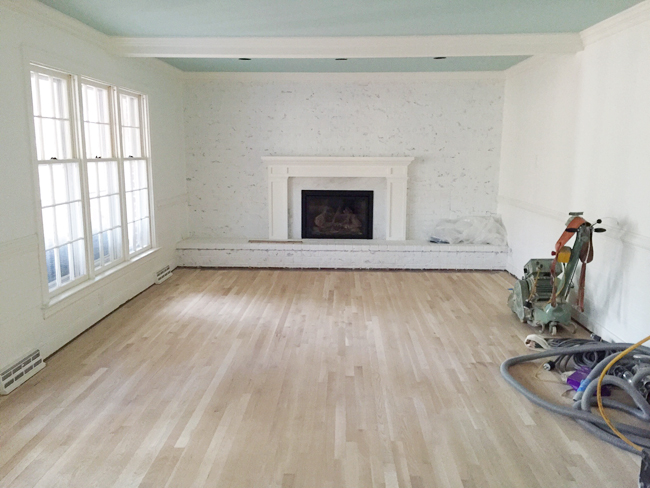
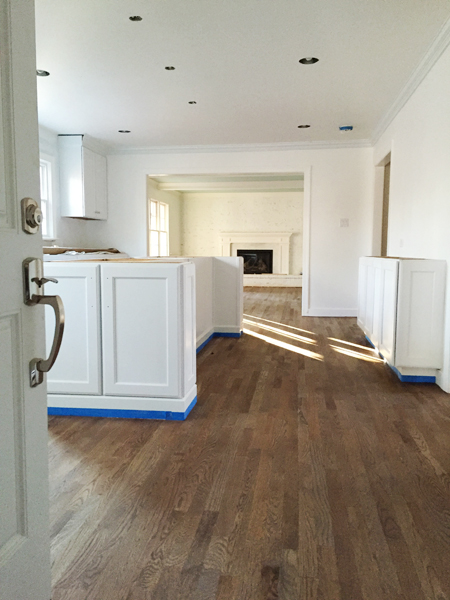
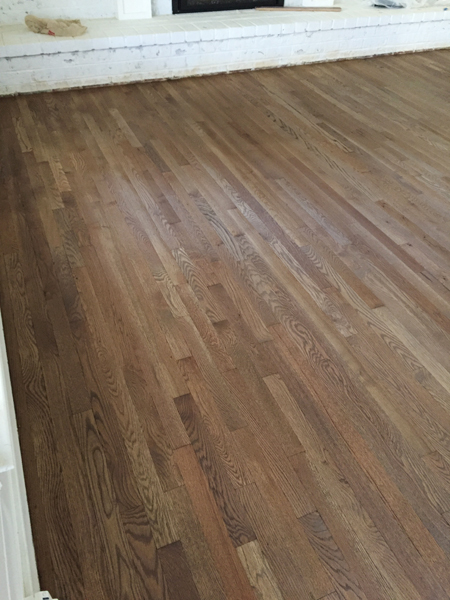
Here’s what we were left with. The dark lines around the edges are unpainted portions of the baseboards/brick where they temporarily removed the quarter round that would later be added again, so they’re not areas the sander missed.
Staining & Sealing
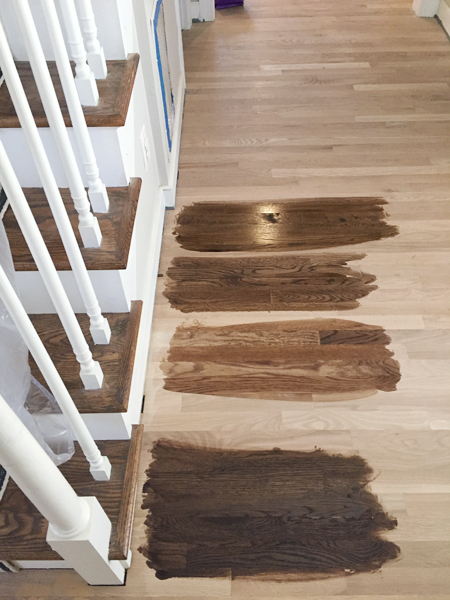
Our last order of business before getting kicked out of our house entirely was picking a stain color. Our goal was to match what was already on the steps, since we weren’t refinishing those. We did some test spots near the stairway to find the closest match: the bottom one was Jacobean, the next one up was Special Walnut, then Provencial, and the top was a blend of Jacobean + Provencial together. We went with the Provencial (third one up) because it felt like a nice classic medium stain and it looked really close to the color of the stairs (spoiler: it looks nearly identical now that it’s all said and done – phew!).Since we wouldn’t be allowed to walk on the floors while they were getting stained (and since being trapped upstairs for a week didn’t sound like fun) we made ourselves scarce for the next several days. We stayed at my parents house locally for a couple of nights and then we took a short trip for another few nights. But before we left town, we popped by to see progress. And I’ll be honest – we were MAJORLY NERVOUS at first.
It’s hard to tell in these photos, but it looked very… ummm… French Countryside? Like kinda patchy and very rustic/weathered. It was pretty, but not what we were going for.
So after some deep breaths into a paper bag, we called the flooring guy and he reassured us that it’s just because they hadn’t sealed it yet, which would add richness and a hint of shine to the stain. Made sense – but I’d be lying if I said we weren’t still a little nervous. But we gave them the green light to charge ahead while we went off on our little family getaway. The reason we had to be gone so many days is that after the stain dries they apply three coats of polyurathane sealer. So they’d come back each morning, lightly sand it, seal it, and then let it dry overnight. Repeat. Repeat. And even once those three coats of sealer were applied, they advised us not to walk on it for 48 hours to let it cure. So six nights later, we finally returned to see it looking MUCH better. The sealer had evened out the color and added just enough gloss (we went with a satin finish) that it looked just like the stairs. I think we still spent the seventh night away, just because there was still some lingering odor – but boy did it feel good to duck our heads inside and see things coming together so nicely.
Moving Back In
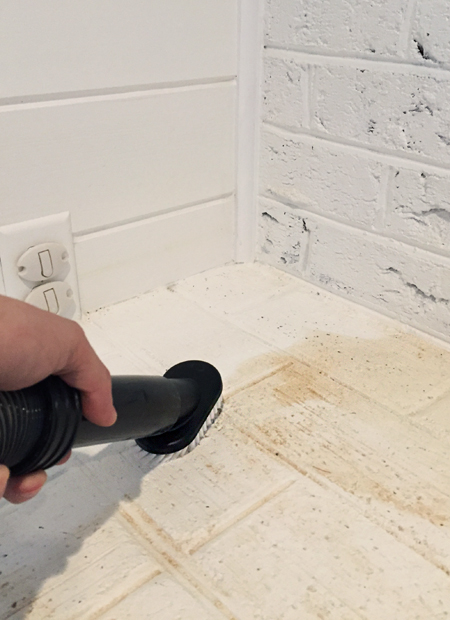
The saga didn’t end there though. We were advised to wait another TEN DAYS before putting down heavy furniture or rugs, since they could leave imprints in the sealer. So we holed ourselves upstairs for another week-ish, coming down basically just to pass through in our socks to leave (we still had no sink or appliances at this point). We also had little tasks to tackle like cleaning up the layer of sanding dust on everything (they use “dust mitigation machines” but it doesn’t get it all) along with caulking and touch-up painting all of the quarter round throughout the first floor so it looked so fresh and so clean clean against our rich wood floors.The story has a happy ending – I mean, just look how seamless the floors are – but even in writing this post I’m reminded that it was quite the involved process (it was roughly 16 days from demo to walking on them again, plus another 10 before we could bring our furniture back in). But on the bright side, we didn’t drop any furniture off the dolly during the move-back-in process! #happywifehappylife
And we really can’t say enough about how completely undetectable the transition is between the new floors in the kitchen and the existing floors in the living room. I would honestly have to reference an old photo to pick out where the new boards start and the old boards end. There is literally zero indication that we ever added hardwoods, and when people are over in person they can’t believe it wasn’t always like this (except for the ones who are still scarred by the memory of our faux brick floors).
We’re also really loving having hardwoods in the foyer now too, and not just because it helps the whole first floor feel more connected. They’re smoother and warmer underfoot than the craggier slate used to be, and we worry less about a kid wiping out and scraping themselves in the process (the slate was not kind to little knees, let’s put it that way).
And you can sort of see in this holiday picture how the transition into the office looks. Almost like an intentional decorative detail that lines up with the doorway.
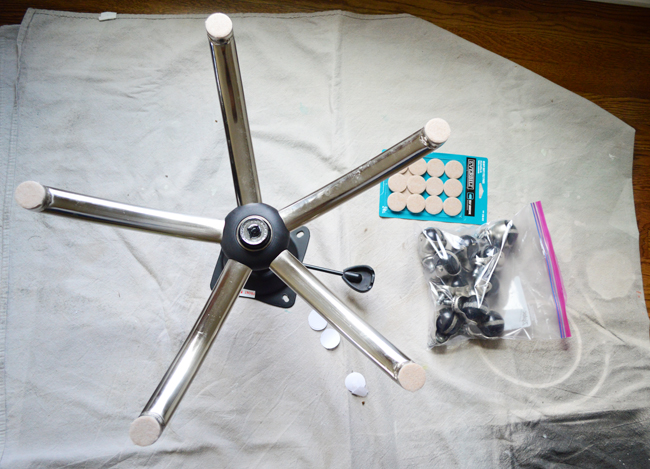
You’ll also notice the rolly office chair is back in the picture above…. but we made a quick modification to both of them so we weren’t scratching up our new floors. We didn’t want to buy one of those big rectangular plastic floor protector things, so we just pried the wheels off and put furniture pads on them, which has been a perfect solution. They still slide around easily (and the chair still spins, since that function remains) so they’re just as easy to use without worrying that they’ll make more accidental-floor-donuts.
In summary, it took a lot of time, a significant amount of inconvenience, and a painful-but-worth-it hunk of cash. It was around $3,400 for the materials (3/4″ solid oak hardwood flooring for three rooms) and around $4,100 for the labor (which included demo, removal of quarter round/plumbing, laying/patching new hardwoods, sanding & staining & sealing the entire first floor, and reinstalling the plumbing & new quarter round after completion). UPDATE: Since many asked on social media, our entire first floor is approximately 1,300 square feet – with about half (~650 sf) having the existing hardwoods and the other half (~650 sf) being replaced with new hardwood flooring. Having done it, and seeing how it was not a small commitment, I can totally see why we didn’t take the leap in our last two houses… but we’re also basking in the giant leap forward that every corner of the entire first floor took towards feeling more finished.
I’m also extremely grateful that the next time we have to refinish any floors (i.e. the beach house) we won’t have to move any furniture out or live there while it’s happening. Yesssssssssss.
More Hardwood Floor Refinishing Projects
If you would like to read more about our specific hardwood floor refinishing projects, please see the posts below. They range from matching original hardwoods to new prefinished flooring to restoring 100-year-old pine floors!- Refinishing Mid-Century Oak Floors in Our First House
- Refinishing Historic Heart Pine Floors in Our Beach House
- Repairing Historic Oak & Pine Floors In Our Duplex
- Clear Sealing Our Refinished Floors In Our Florida House