This has been a LOOOOOONG TIME COMING, and we couldn’t be more excited: our beach house has walls again! When we first “met” our house the original crumbling plaster was full of mold and termite damage, so it has taken over eight solid months to rebuild this baby from the studs up, including adding new electrical, plumbing, an updated HVAC system, and even tearing off a side of the house to rebuild it from scratch. So this stage may not look like much, but it feels enormously momentous to us.
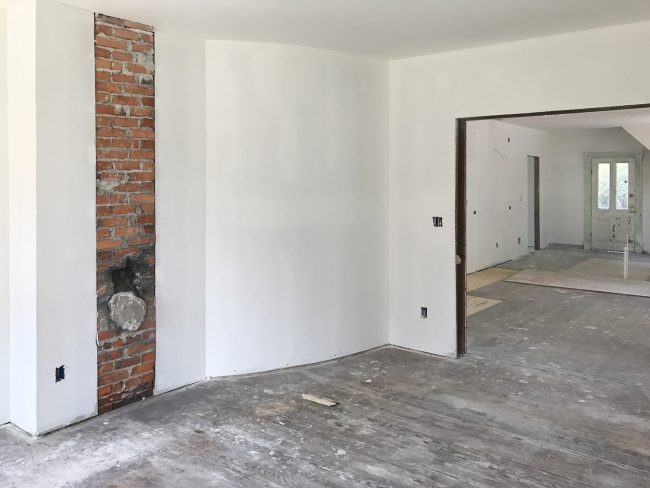
I’ll toss in a few before photos as a refresher. You can see the whole house’s “before” state here and the fully torn apart/demo stage here, like the shot below.
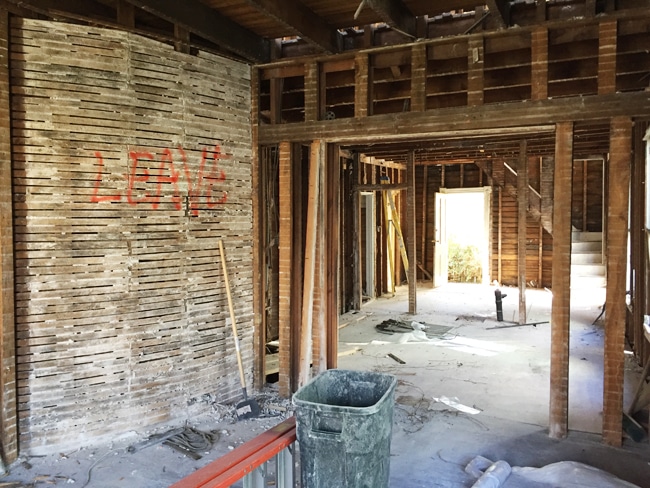
We still don’t have a working water/sewer line quite yet, which has been a huge unexpected ordeal involving city officials, metal detectors, and excavating a huge chunk of the front yard – but we found an old hookup and we’re working on getting it running again. So yeah, this renovation has been less than smooth, but dangit if we don’t love this little old house. So today is about celebrating the not-so-small victory of WALLS, GLORIOUS WALLS!
I shot this video tour last week to show off the drywall and to explain what’s gonna be where, what we can’t wait to do next, and how the new layout is going to work for us (and renters) moving forward.
If you are viewing in a feed reader, you may need to click through to see the video. You can also view it here on YouTube.
And just for fun, here’s the original video tour we shot shortly after closing on the house.
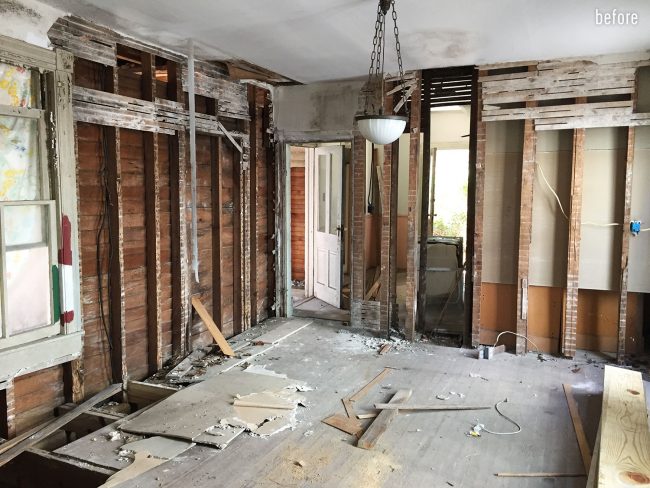
Looking at these before and afters also reminds us how far we’ve come. This was the back of the first floor when we bought the house, complete with crumbling walls, missing floors, and some pretty gnarly termite damage and mold on that left wall and ceiling.
This is a pretty similar view now, with fresh drywall (and primer!) and a slightly tweaked layout. For example, what was a window into an enclosed porch is now a door into a mudroom. You can get an even better idea of the layout/flow in the video tour above.
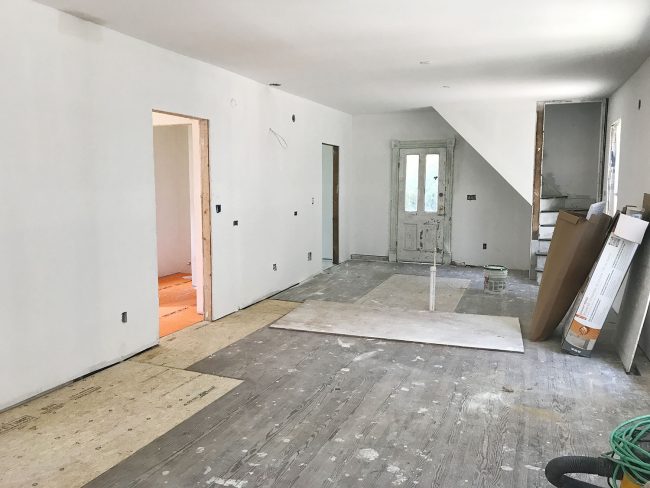
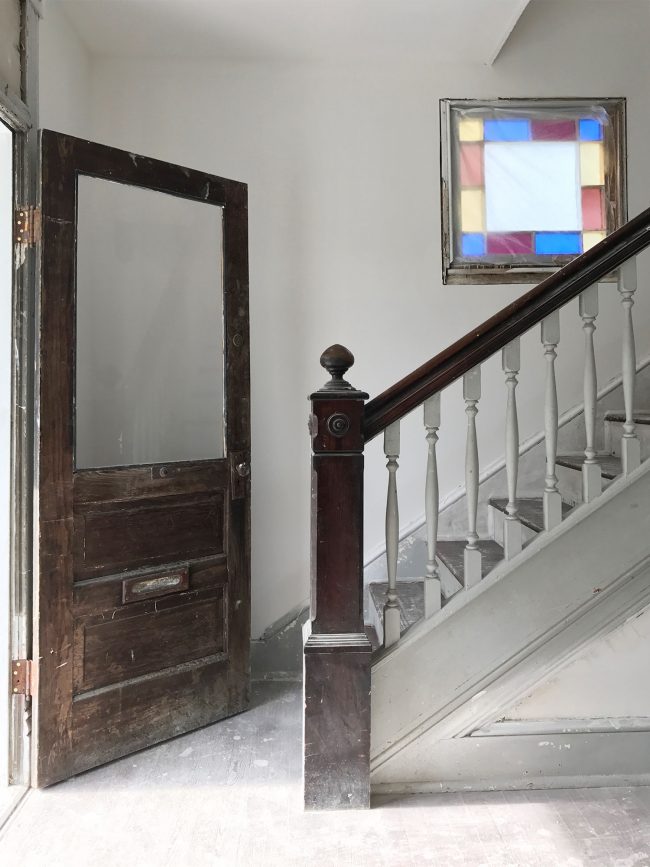
We’re one of the few homes in our row that got to keep the original back stairs (remember how there are four identical houses to ours lined up on this block?). Two of our neighbors lamented that their back stairs were ripped out before they bought their homes, and our other neighbor to the left (the one whose house was on HGTV) still has them. So while a house this small certainly doesn’t need two staircases, and it definitely made floor planning more challenging, we couldn’t resist keeping ours for all of the original charm and character they add. They’re actually one of our favorite things about this 100-year-old house.
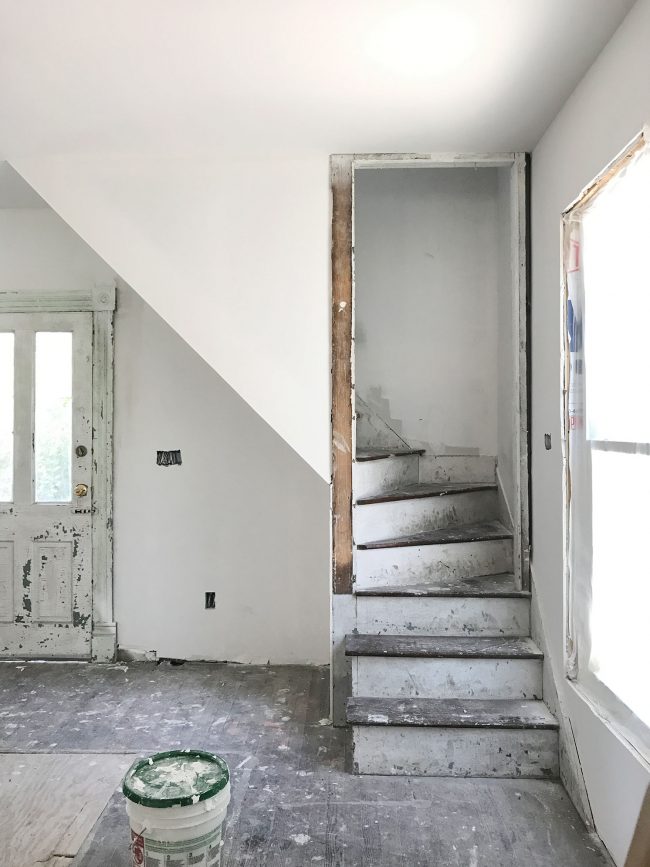
Here’s another space that has seen a pretty dramatic change over the last eight months. This is the view from the front door into the foyer.
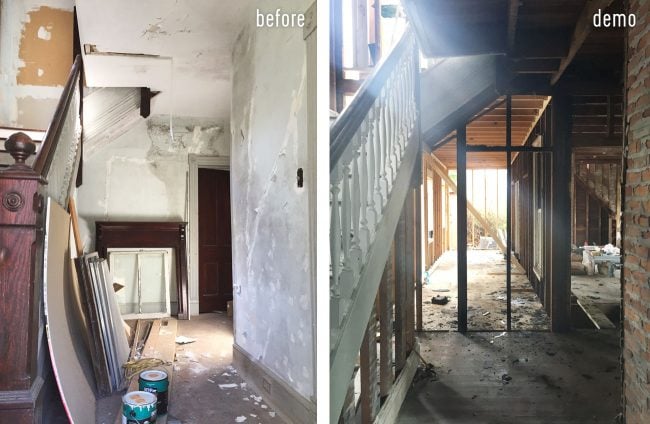
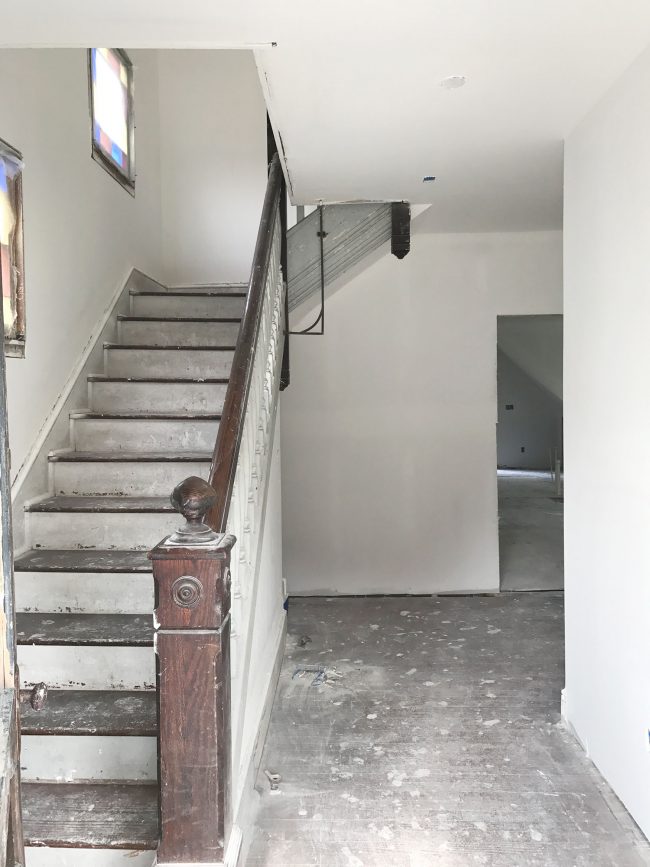
The new walls made me fall in love all over again with the stained glass windows on the stairs (even though they’re covered with protective plastic at the moment). Everything is just primed at this point, but we’ve got our paint colors all picked out. We’re going to be using a light/soft neutral with crisp white trim in here – which will help those windows, and a few other details (like the gorgeous old newel post and railings) be the stars of the space. Just picture this room with the heart pine floors refinished and shiny, the moldings all cleaned up, and a pretty light fixture hanging overhead. I can see it if I squint.
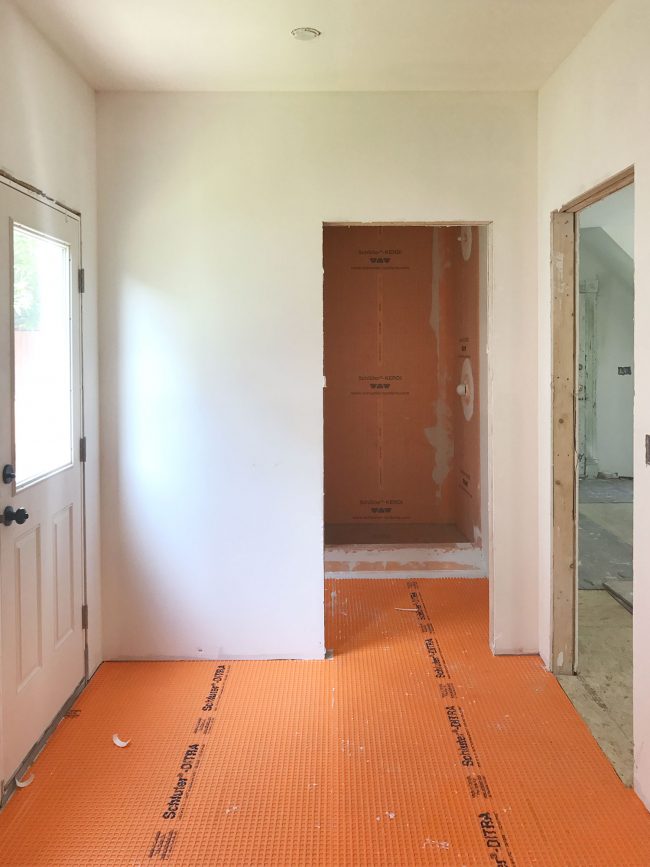
Here’s another pretty satisfying before and after. This room had been a side porch that was enclosed at some point, but not very well. Remember this was the side of the house that was all rotted outside and had sunk several inches lower than the rest of the house thanks to literally no foundation (the footers here were set on sand).
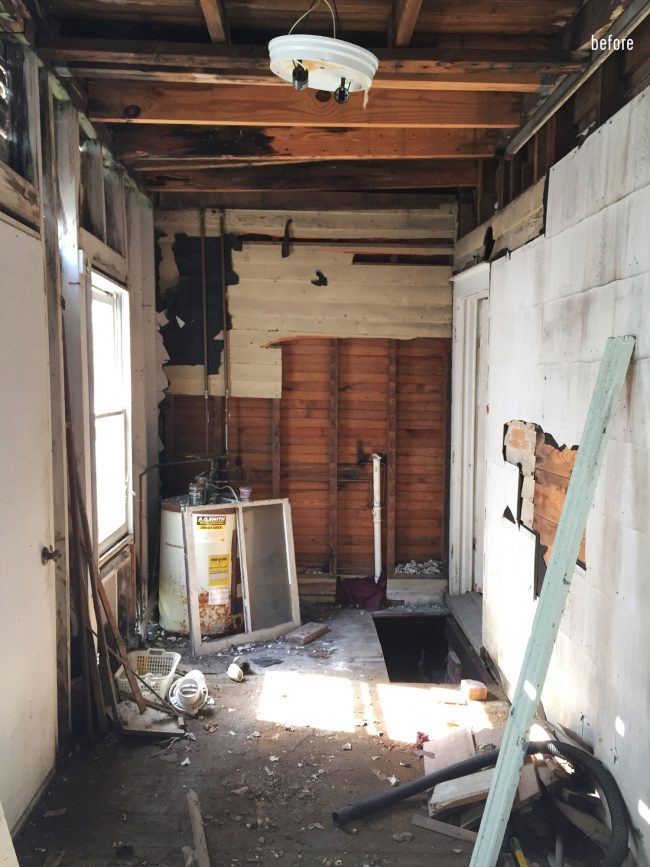
But look at her now! This room will become a small but mighty mudroom, which will be our main post-beach entrance since there’s a full bathroom to wash off (there’s also an outdoor shower) and we’ll add some hooks and baskets for beach gear along with a washer & dryer for towels. And no, we’re not going for a bright orange color scheme in here – that’s just the waterproof underlayment that we’ve recently started tiling over. More on that another day (there’s a quick Facebook & Instagram post for anyone who wants a sneak peek).
Moving upstairs… this was one of the most dire spots of the house when we bought it. It’s also part of the sinking side we had to rebuild and at one point we were all standing in here and the contractor rushed us out of the room when he realized the floor boards were sagging under our weight as we stood there. It was a full-on miracle that the tub hadn’t fallen through the floor yet. Ah, memories.
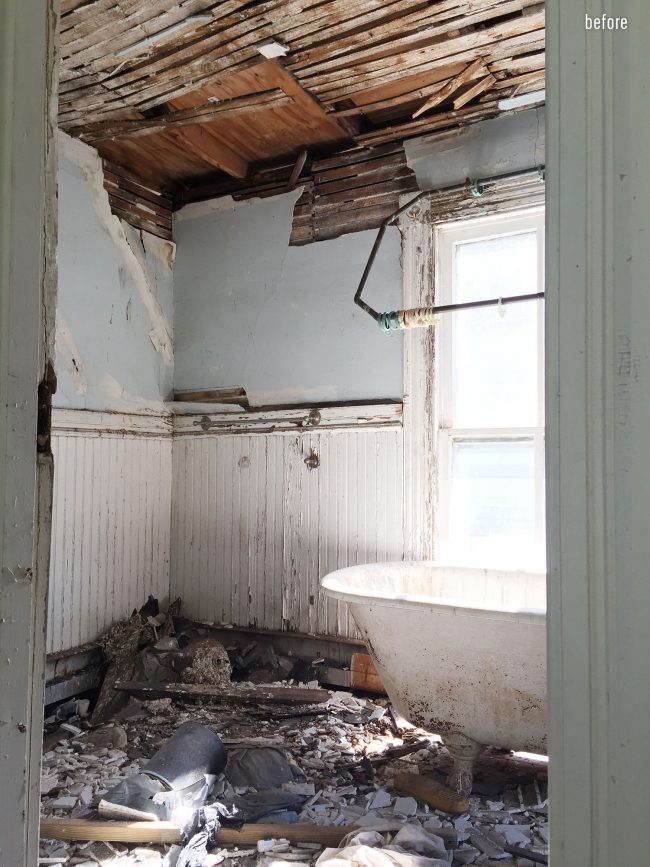
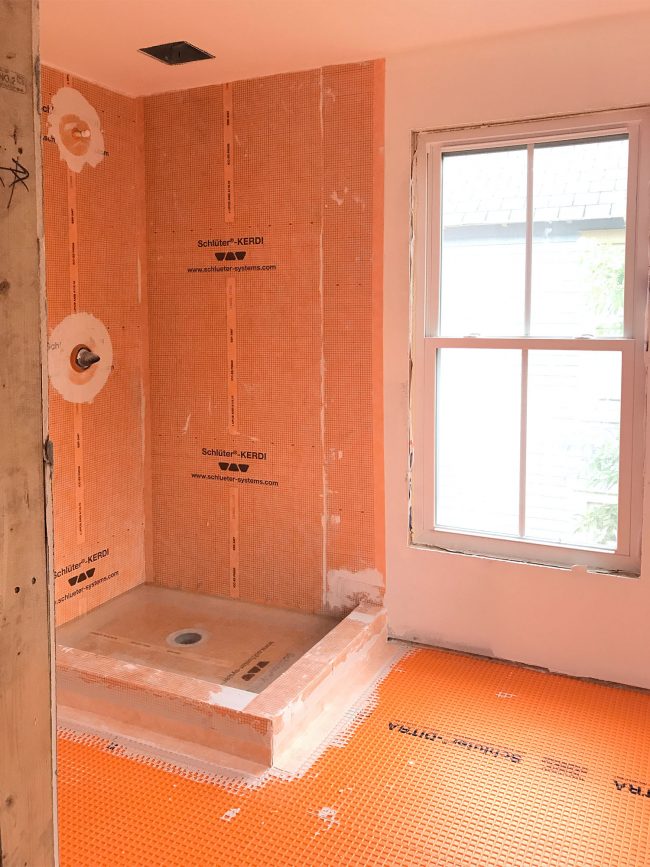
I’m happy to report that there’s no more panicking and rushing out of this room, or worrying that it can’t support the heavy cast-iron tub, which we can’t wait to refinish and bring back in. It’ll go on the wall across from the shower because we wanted to squeeze both a shower and a tub into this bathroom since it’s the largest. There’s more of that orange Schulter underlayment which is really giving the room a nice Cheeto-orange tone. Yummy.
So yeah. We are giddy. We are grateful. And we are extremely relieved about solving the whole water/sewer issue (in the next few weeks hopefully!).
After getting some paint on the walls and ceilings, and continuing with our tiling escapades, we also have a few more things on the list, like installing doors (we saved all of the original ones which are oozing with character and cool old details), hanging trim, putting in lights & fans, installing our kitchen cabinetry, adding all of the bathroom fixtures/toilets/tub, refinishing the floors, bringing in appliances, and probably a million other little details my tile-planning brain can’t grasp at this moment (huge tip for giant projects like this: take it one step at a time). Then it’s time to furnish this baby and take a long nap. Preferably on the beach.
