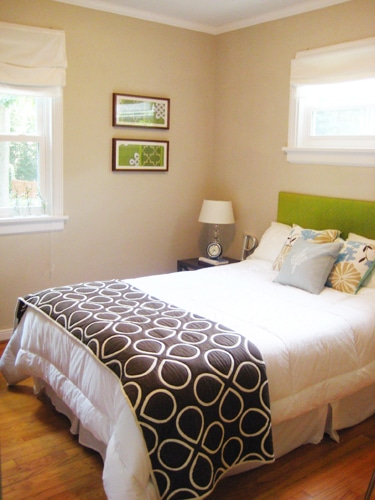
We pulled a little art switcheroo in the guest bedroom and wanted to share the play by play. Since it’s the room with one of the best views of the house (it overlooks our big green backyard) we wanted to introduce a little more green (to work with the existing green headboard & compliment the view) and some graphic elements (to tie in the super graphic blanket at the foot of the bed).
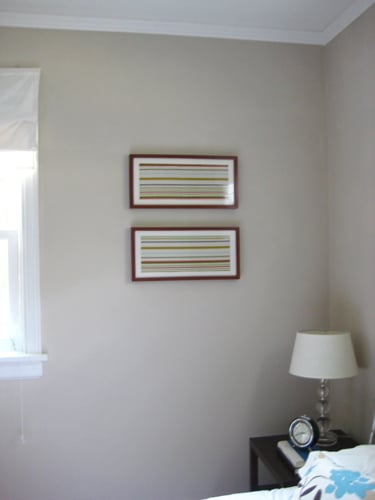
Here’s a shot of the old art work (striped fabric that we framed a few years ago):
And a close up of the new art that we introduced instead (blown up color copies from a decorating magazine of two graphic green wool rugs which I then snipped into strips so both patterns could appear in both frames):
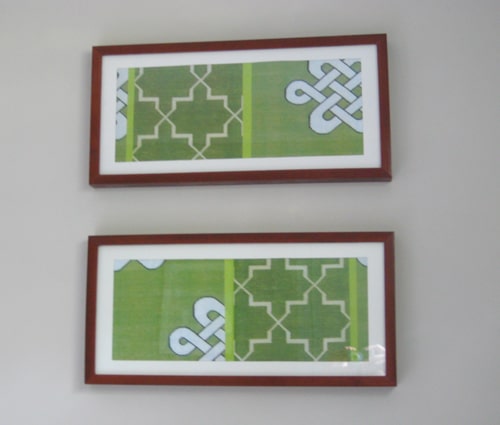
I love the newer, more interesting patterns and textures going on- and they work like a charm with the quilted bright green headboard that we made a while back (as well as the crisp, modern lines of the blanket at the foot of the bed):
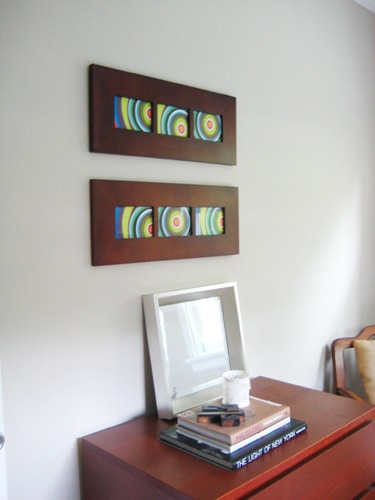
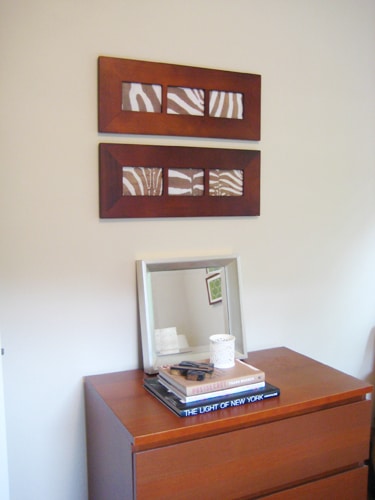
I also removed some old circle art that I made using photoshop about five years ago in NYC when I was in desperate need of some bright, colorful art in my bleak and boring studio apartment.
All the bright reds, oranges and turquoise shades seemed a bit much, so I decided to tone things down and introduce some texture that really plays off of the brown and white blanket. And who doesn’t love animal prints? This was actually another image of a rug found in a decorating magazine that I blew up and then cut into sixths:
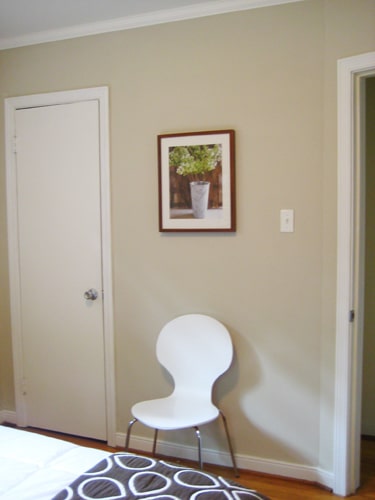
I also added another print in our new green and brown color scheme to tie everything together and keep things looking soothing and fresh for our guests (and ourselves!):
Hope you guys like the switcheroo!

Jen M says
It all looks great! What fab ideas. I’ve been updating our bedroom today too (and blogging about it) but haven’t quite got to artwork yet. I think it’s my favourite part of decorating. Thanks for the ideas.
Christie says
Love the blanket at the foot of the bed. Please share where you got it.
Aimee says
What a pretty guest room! And switching the art really makes a difference, and without a lot of work too! :) The blanket on the bed is gorgeous too. Well done!
Katie says
Looks awesome! I love the zebra prints…I keep wondering how long that trend will stay fresh, so this is a great way to use it without a big investment.
Have you ever posted on how you made your upholstered headboard? I’m planning to do the same for our master BR in a few months, and yours turned out great so I’d love to hear your tips.
sarah says
looks great! using patterns from magazines is a great idea! :)
Jean says
What fun and inspirational changes! Have you posted on the wall color of the room? It’s a great neutral.
The Rauths says
i love that headboard…i’m begging you to tell how you made it! pretty please?
YoungHouseLove says
Howdy peeps,
Thanks for the new bedroom art props. We’re excited such a quick and easy project could serve as inspiration.
Christie, the blanket on the edge of the bed is from Bed Bath & Beyond and although we got it a while ago we’ve seen it pretty recently as well. We picked it up on sale and also used one of those coupons that are always in our mailbox so we got it for something like $18. Pretty sweet deal. Good luck on your own blanket hunt!
Jean, the wall color is Sand White by Glidden- and yes it’s the perfect neutral (which explains why we use it in our living room, guest bedroom, and even our bathroom). Hope that helps!
As for the two upholstered headboard questions, we’re planning to do a how-to post any day now (since we’re in the process of creating another headboard for John’s sister’s house), but for those who can’t wait another moment, here’s the gist:
Get a frame that’s meant for stretching canvas at an art store in the dimension of the desired headboard (most craft stores don’t carry these so it should really be a true art store). Then buy enough fabric to wrap the canvas frame with a few inches to spare and be sure that the fabric is thick enough to feel luxurious (no cheap thin junk or the headboard will look budget). Also pick up some batting in the same dimensions as the fabric. Then use a regular stapler or a staple gun to staple the batting around the frame (stapling in the back of the frame so the staples are out of sight) and do the same for the fabric. Viola- it’s done. It sounds a bit complicated but it takes about ten minutes and it’s super light and easy to hang (and move if the time comes). I’m sure photos will make the whole process even simpler so stay tuned for some step by step pics along with some more detailed instructions. And of course send us photos of any and all headboards that ya make!
xo,
Sherry
Megan says
I really love that pop of green in the headboard and even better with the matching art. How clever to use a color photocopy for art.
I am new to this site, but so inspired by it. Love all the colors and feels that your room have. Love, love, LOVE!
Michelle says
You’re so creative! I need some art on my walls. Which magazines had the images you used? Are there any others that you would suggest to thumb through for wall art ideas?
YoungHouseLove says
Hey Michelle,
I actually think those pretty patterns and prints came from an old House Beautiful magazine (they were these close-up ads for rugs and fabric and we instantly thought they were art-worthy). Hope it helps!
xoxo,
Sherry
Michelle says
Thanks!
Erika says
Hi Sherry,
I have been looking all over for the plant print in your last photo and haven’t had any luck. Where can I find it? Thanks a ton! :)
YoungHouseLove says
Hey Erika,
It’s actually a set of three prints from Ikea. Super cheap and you get more than one! The other two are actually hanging in our living room. Gotta love cheap art.
xo,
s
Meghan says
Wherever did you find those cute flowered throw pillows? They are exactly the color scheme and style I have been looking for…
YoungHouseLove says
Hey Meghan,
They were actually a gift but we believe they were from Bed Bath & Beyond. You might want to try ebay as well, just in case they’re no longer available at BB&B. Hope it helps!
xo,
s
Annelise says
I love all your updates and decorating styles. I am looking for frames similar to the ones that housed the striped art (at the top of the page). Any clue where you got them?
Thanks!
YoungHouseLove says
Those are from Ikea.
xo
s