There are almost always three main steps to the room makeovers that we tackle, and depending on the scope/depth of them, they can take a few days or a few months (ok, and sometimes we jump around so much that things take years). Either way, the order seems to go like so:
- prep/planning (brainstorming, picking a color palette, going shopping, priming, sanding, spackling)
- bigger upgrades (painting walls, refinishing or painting cabinets, laying new flooring, etc)
- finishing touches (curtains, new hardware, art, accessories – all the things that add “you” to the space)
So when John’s mom mentioned his grandma’s half bathroom could use a little makeover we got to put those three steps into action. It resulted in a three day bathroom blitz that involved two seven hour drives and some obligatory midnight painting (thank goodness John’s parents traveled with us to keep Clara busy and happy). First you should meet Granny. She lives in Huntington, West Virginia, and is one of the happiest, kindest women you’ll ever meet. Here she is holding baby Clara for the first time:
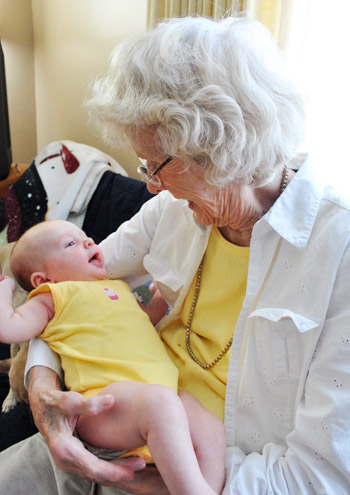
And you know we love to share the day-by-day play-by-play, so with further ado, here’s what our To-Do list looked like for our turbo-charged three-day project (along with guesses about when we’d actually tackle things in parenthesis after each line item):
- Brainstorm colors & go shopping for accessories (Day 1)
- Spackle/sand/caulk everything to prep the room for paint (Day 1)
- Rebuild the cabinets a bit so they look more balanced (Day 1)
- Prime and paint the cabinets for a more updated and open look (Day 1 & 2)
- Paint the entire room, including the ceiling (Day 2)
- Fix a few issues, like a rusted duct and an old dingy corner below the sink (Day 2)
- Redo the floors, which were that old sheet laminate stuff (Day 2)
- Revive some hardware/accessories with a fresh finish (Day 2)
- Make & hang curtains to add some charm (Day 3)
- Bring in some meaningful art (Day 3)
- Add some functional/personal accessories to finish things off (Day 3)
- Reveal the whole shebang for Granny, who promised not to peek beforehand (Day 3)
Here’s her charming 1920’s house, which they’ve in since the 1940’s so John’s mom and her siblings all grew up here. John’s late grandfather (“Papa”) actually did a lot of the handiwork himself over the years so there are lots of stories and memories tied to this place.
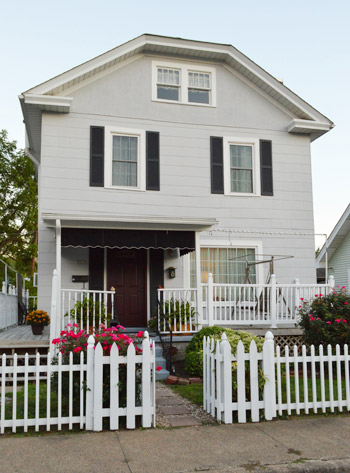
In fact, it was Papa who converted an old kitchen pantry into this little half bathroom! So everything from adding the plumbing to the electrical was all him. But that was decades ago, and the room was looking ready for an update, especially thanks to some wallpaper that Granny was “ready to tear off the walls” herself (at 90 years old, she still has that DIY spirit running through her veins, by the way). So here’s what the room looked like before the wallpaper was removed:
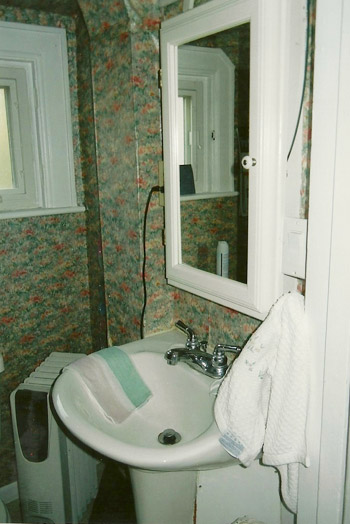
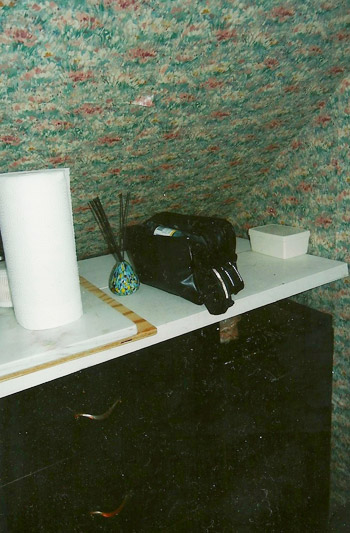
Thanks to Granny, our Aunt Ellen, and our Uncle Dean, the wallpaper was all miraculously removed before we arrived around dinnertime – just in time to work the night away prepping the rest of the room. But not knowing our store options in Huntington, we did some shopping before we left, including a mad dash into HomeGoods for some items we thought could work (we over-bought, knowing we could return whatever she didn’t need). We also knew Granny might have some of the items that we grabbed, so ideally we would get to use some of the new stuff, and some of her existing stuff, for a nice mix (and some nice savings).
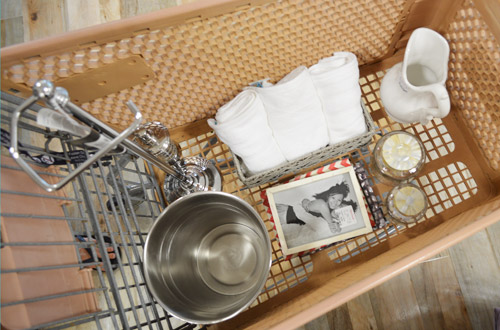
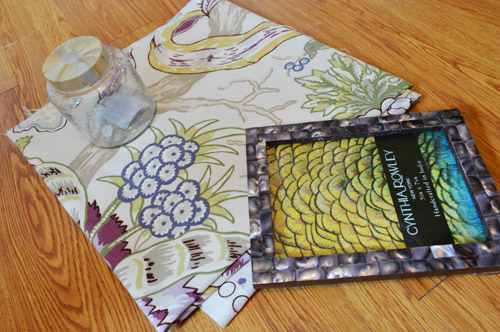
We also stopped at our favorite fabric outlet (U-fab) and grabbed a yard of pretty floral-printed fabric that felt a lot like Granny (it’s made by Braemore, for anyone looking for it) to make sweet little cafe curtains for the one small window in the bathroom. Here’s that fabric with some of the accessories we picked up, just so you can see where we were “going” in our brains:
We also stopped into Home Depot and grabbed some new flooring (which you’ll see more of during Day Two) and we used our seven hour drive to brainstormed a few other ideas for the space while we took in the road trip scenery (slash kept a pooch and a toddler occupied).

Here’s what the room looked like when we arrived. It was already looking worlds better with just the wallpaper being gone.
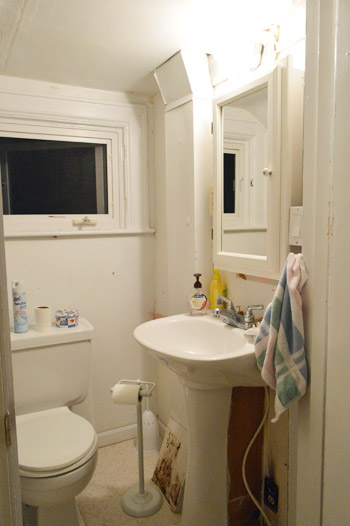
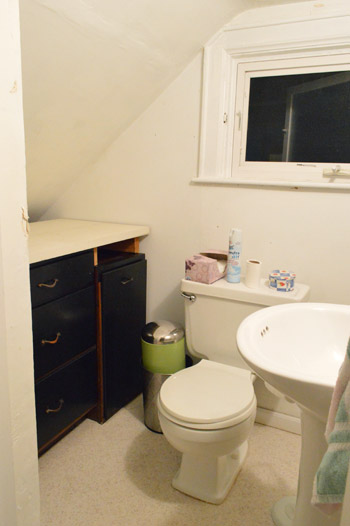
Apparently the paper came down with just a little tugging, so that was the good news. But without the wallpaper, some areas of the room actually looked even more worse for wear… like the bottom corner of the sink, the burned outlet, and the rusted vent on the other side of the pedestal sink.
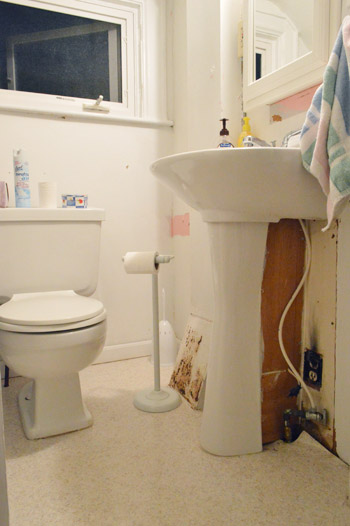
Yup, there were definitely some areas that needed attending to…
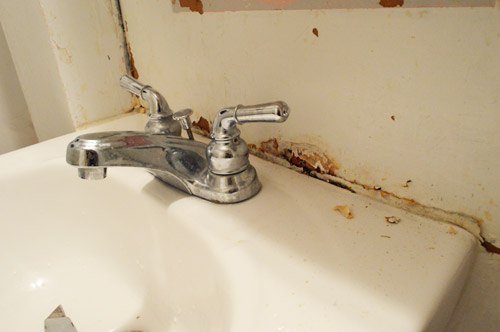
So we got right down to business. My job was cutting all of the old caulk out. It’s a step that doesn’t look much better immediately (sometimes it looks worse)…
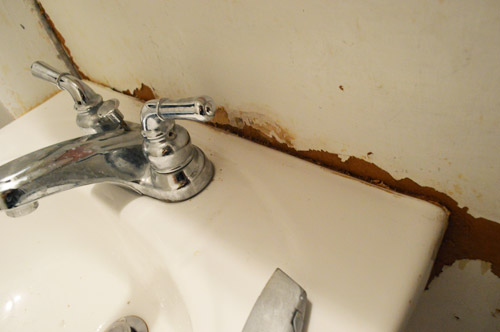
… but once we get some fresh caulk and painting done, it looks as good as new.
Speaking of cutting out caulk in general, it’s amazing how much of it there can be. Just look at my pile after tackling the sink, the baseboards, and other random corners that also had bits of leftover wallpaper and cracked flooring:
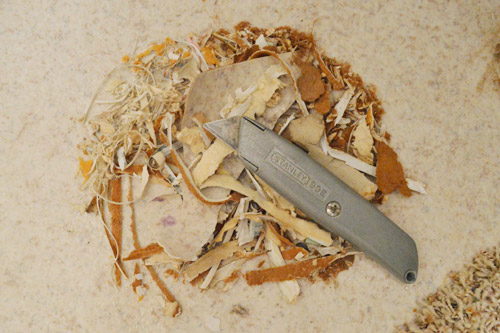
I actually ended up using an entire tube of caulk in this tiny space! Everything from the baseboards to that area around the sink and the doorway/window trim got some fresh caulk. It’s definitely a tedious job, but so worth it for a polished look.
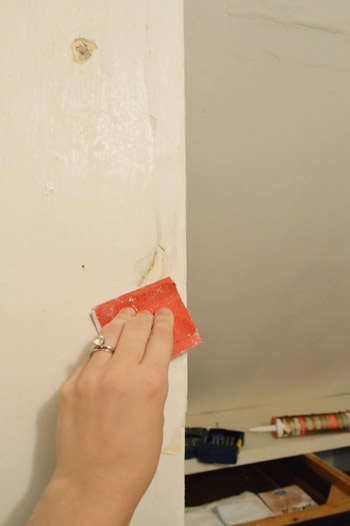
Then it was on to spackling and sanding. We just used regular old Dap spackle (with the blue lid) and a spackle knife, and pressed it into every crack and crevice, working our way around the room. Sometimes I’ll sand something before I spackle it, just if there’s something hanging off (ex: a flake of plaster) so I get a better finished look and a less crumbly foundation under my spackle job.
Meanwhile, John was off doing some wood cutting in the middle of the kitchen. I guess this is what happens when you don’t have your usual workspace and tools with you?
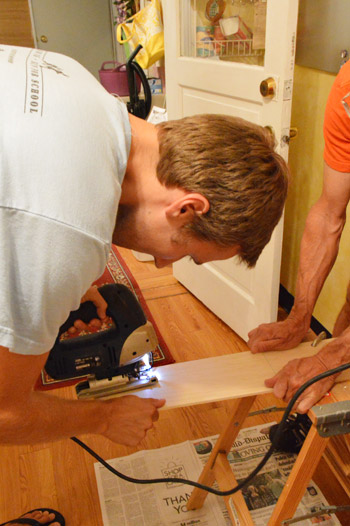
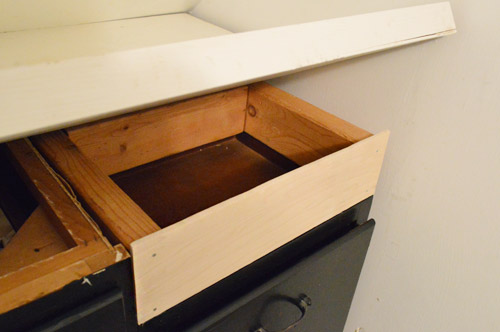
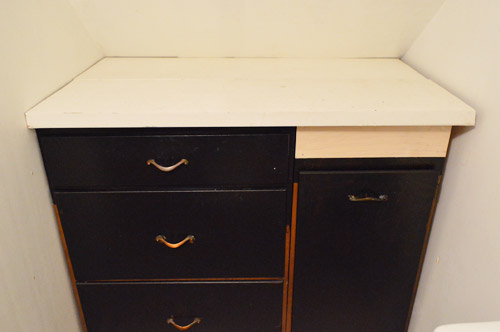
He was cutting a small plank of wood to cover a gap in the top of Granny’s cabinets since they’re actually two cabinets pushed together and topped with an old hollow-core door. So we filled the gap for a seamless look by nailing the plank into the 2 x 4 pieces that were already there to support the counter.
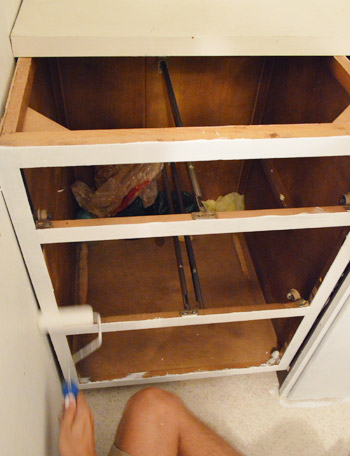
It would of course look more seamless once it was painted, which meant it was time to remove the hardware and prime those cabinets.
Here’s John rolling on some primer (this post has a much more thorough rundown of how we prime and paint cabinets).
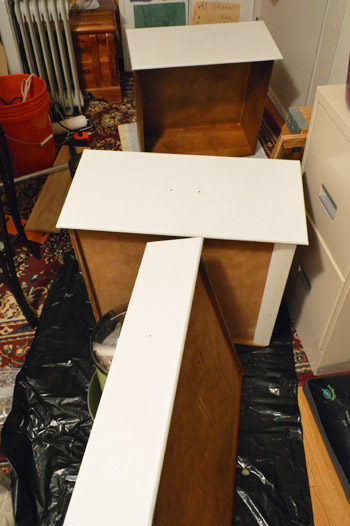
And here are the drawer fronts all drying in Granny’s back-room-turned-cabinet-painting-studio:
It took us a good four or five hours to prep the room as well as prime the cabinets and the countertop, so our to do list now looked like this (with little notes next to each remaining task about when we hoped to tackle them):
Brainstorm colors & go shopping for accessories (Day 1)Spackle/sand/caulk everything to prep the room for paint (Day 1)Rebuild the cabinets a bit so they look more balanced (Day 1)Prime andpaint the cabinets for a more updated and open look (Day 1 & 2)- Paint the entire room, including the ceiling (Day 2)
- Fix a few issues, like a rusted duct and an old dingy corner below the sink (Day 2)
- Redo the floors, which were that old sheet laminate stuff (Day 2)
- Revive some hardware/accessories with a fresh finish (Day 2)
- Make & hang curtains to add some charm (Day 3)
- Bring in some meaningful art (Day 3)
- Add some functional/personal accessories to finish things off (Day 3)
- Reveal the whole shebang for Granny (Day 3)
We had high hopes that we could bang everything out in our three day blitz, and we were really happy with our end-of-Day-1 result. A nice fresh clean slate to start gussying up in the morning. So it was off to bed exactly at midnight, after a very full day of shopping, driving, prepping, and priming.
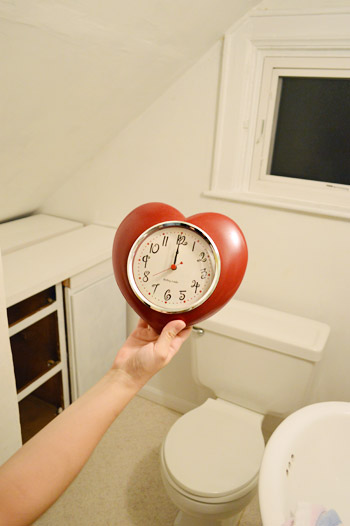
We’ll be back with the full Day 2 rundown tomorrow, we just have to edit some photos (um yeah, we might have taken 1,294 in just three days…). Are there any other bathroom updates going on? Or shopping/prepping/brainstorming? Have you ever done a little room makeover for someone you love? It sounds weird, but it was even more fun than doing something like this for ourselves because the excitement of the big reveal for Granny got us so dorked up and giddy.

Sarah says
Just wanted to see if I could actually be the first to comment! haha
Sarah says
By the way, I attended college at Marshall University in Huntington! Your Granny lives in a wonderful little city:-)
YoungHouseLove says
No way! My mom and Aunt went to Marshall. Such a small world.
-John
Sue J. says
you guys rock. just saying.
Seriously Sassy Mama says
What a nice thing to do.
Jess @ Little House. Big Heart. says
You guys are too sweet! I love the idea of gifting a reno to someone who needs it!
Your Granny’s house is adorable, by the way. I love the charm of the picket fence and rose bushes… looks just like a granny’s home should!
Can’t wait for day 2!
harmony says
We’re smack dab in the middle of a bathroom redo ourselves! Cant wait to see what you did with Granny’s space
Paige says
Her home is so cute. I love older homes, ours is 1933. Can’t wait to see more pics!
Mona O | Renters In Love says
Aww, that is so sweet of you! That clock is so cute too.
danika says
My husband and just bought our first house – it was his great-great aunt’s home {she passed away in February}; a half bath and the tub-room have the same floral wallpaper as John’s Granny’s bathroom! And unfortunately, it did not come off easily for me, reinforcing how much I hate wallpaper. :)
So excited to see how Granny’s bathroom turns out!
Morgen says
Please tell me you aren’t going to throw away the cabinet pulls! We are renovating a 1965 mid century modern ranch and know how amazing those knobs are to find! Sell them or donate them please. You will make a renovators day :)
I look forward to seeing all of your progress!
YoungHouseLove says
Don’t you worry- we used them ;)
xo
s
Riki says
Perfect timing for this post! I am starting a major bathroom reno this week.
Currently my bathroom has: a pink (yes, pink) tub, a crimson red tile floor, and horrible gray tile on the walls. Oh, and a gray toilet and gold fixtures.
I’m getting rid of the tub, building a custom shower, and putting in a bunch of lovely (modern!) grey tile. It’s not a DIY job but I happen to have a father who specializes in building custom tile bathrooms so I’ve convinced him to build me one. :)
There is NOTHING better than a fresh bathroom.
YoungHouseLove says
Wow- you’re busy! Good luck Riki!
xo
s
lo says
We just bought our first house and it also has a pink tub. Sigh.
Riki says
We should totally start a Pink Tub Club. And I once lived in a house with a purple tub and toilet.
YoungHouseLove says
Haha!
xo
s
Penny says
May I join your Pink Tub Club? Our boys share a bathroom that used to have a pink tub, pink potty, pink tile floor and pink stained glass window. They totally loved it! No they didn’t.
Catherine @ DCCL says
Sherry and John, you two are so great! What a wonderful treat for Granny! I cannot wait to see how it turned out!
Kristen @ LoveK says
How sweet of you two to give Granny’s bathroom a makeover! I can’t wait to see how the unique space turns out!
P.S. Do you have any posts discussing how you caulk around doors/trim? We’re needing to do that in our house and I’d love to read your tips!
YoungHouseLove says
I actually made a video when I had to go back in and do some more caulking on Day 3, so we’ll share that soon with you guys!
xo
s
Katy @ The Non-Consumer Advocate says
John is such a good boy to take care of his grandma. Can’t wait to see this project through!
Katy
Cariki says
Oooh, such a sweet thing to do, excited to see the next edition!
Danielle says
Looks like this bathroom is off to a great start! So glad you all got to take in some scenery. Both my husband and I are from WV. I am from Morgantown while he is from Charleston. We live in DE now and miss it terribly!
Nancy says
My husband and I are also from Morgantown. We’ve lived in AZ for many years and miss the beautiful green hills of WV.
Sarah says
I live in Clarksburg!!
heather s. says
My mother is from Morgantown! I loved to visit my grandparents there but alas we just sold their home as neither are there anymore.
Michelle Kersey says
Looking great thus far! Can’t wait to see day2! :D The impending surprise is so much fun with a makeover! I was stoked to surprise my son with his new bedroom last year :)
Hallie says
Never commented before, but I think it’s pretty sweet that you’re redoing “Grandma’s” bathroom. BTW her house is fabulous!
Julia @ Chris Loves Julia says
I’m with you! I think painting/renovating/even cleaning someone else’s home is much more exciting and fun! Man, I’m excited about this little reno.
Robin @ our semi organic life says
What a fun project! And such quick results! Phew.
Reenie says
How fun and sweet of you guys to help granny. It looks so much better with the wallpaper taken down. Can’t wait to see the updates and finished project.
Diane says
Thought this would be about potty training Clara…
YoungHouseLove says
Hahahah!
xo
s
Kasey M. says
So did I! However, I love what you and John’s parents are doing!
Gabriella @ Our Life In Action says
The bathroom looks like it is going to be so cute – and that is so sweet of you guys to do that for her.
Side note – I absolutely LOVE her picket fence.
Jennifer says
I LOVE giving people surprises!! I bet she was thrilled! I hope we will see a video of it?!
I feel like I’ve been working on my half bath for a year…oh that’s right I have! You can see the before here:http://www.refreshandrepurpose.blogspot.com/2012/09/window-inspiration.html I’m still waiting (I don’t know why, maybe my 3 children needing to eat breakfast lunch and dinner?) to finish my roman shade and do a reveal. But at least it’s only the shade I’m waiting on…I couldn’t live with that sink and the toilet was the first to go.
YoungHouseLove says
Yes, there’s a video of her reaction. So much fun! Good luck with your half bath! Sounds like you’ve been busy!
xo
s
Kalyn Mace-Guilloux says
So cute! Love it :) I lived in Huntington and never noticed that house (don’t know where it is, obviously), but it is SO beautiful outside. Whew. So cool to see DIY and beautiful homes run in the family.
John @ Our Home from Scratch says
It’s very kind of you guys to do this. Can’t wait to see how it turns out.
Crystal @ 29 Rue House says
How sweet to be able to do this! I bet it is a lot of fun to be able to help someone special to you. Can’t wait for Days 2 & 3!
Nora Rose says
Can’t wait to see a flash bathroom update! We did our’s this winter in a weekend but I can’t wait to see what you guys do to see if there are any ideas we can use to spice our’s up!
notsupermum says
Looks like an interesting little project and I’m looking forward to seeing the other two days work. I’m currently planning a newly extended downstairs bathroom/laundry room. I’m not sure what to do with it because it is essentially a new room.
P.s. I had to look up the word ‘spackle’ it’s not a term used here in the UK.
YoungHouseLove says
No way! What do you guys call it? Putty?
xo
s
notsupermum says
Putty is used around windows, but when I read the rest of the post I realised it was ‘filler’….we’re very literal here :)
YoungHouseLove says
So funny! I love that.
xo
s
sara says
Such a charming house. Looks similar to the houses in my neighbourhood (mine was built in 1910). Can’t wait to see what you do!
carlotta says
I’m the Italian girl who pre order your book, and I’m going to be in Huntington visiting friends today! it’s sucha small world.
YoungHouseLove says
No way! That’s so sweet!
xo
s
Jessica H says
Such a great thing for you guys to do! The front picture of the house exudes so much older home charm. Any chance we might get to see some of that great character in any of the other rooms?
YoungHouseLove says
We’re afraid Clara was a little tornado in Granny’s house, but next time the second we arrive we’ll have to remember to take some pics!
xo
s
Ruthie says
How sweet of you to help Granny out!! Small world. Miss those WV hills!
Emily H says
Hi guys!!
Considering this house was built in the days of lead-paint-possibility, how do you handle room makeovers like this one? I’m in a rental in the Fan built in the 20s and want to ask my landlord if I can do some updates, but I’m worried about bad jujus I may stir up in the process! Thoughts?
Thanks!! You guys rock! :)
YoungHouseLove says
Thankfully the bathroom was converted/rebuilt after lead paint was an issue (the plumbing, walls, and paint were added much later by John’s grandpa) so we didn’t have to worry about it, but in older homes we either suggest zero sanding and just repainting everything (so no lead dust is released, which is actually the safety recommendation) or to use a lead paint test kit (Home Depot sells them for cheap, just to be sure) before you tackle anything. Hope it helps!
xo
s
Stephanie @ Legally Blinde says
Oooh, I’m so excited for this “bathroom bootcamp” series! You guys are seriously inspiring. I live in an apartment in a very old building, and my bathroom (the tub/ tile surround, especially) could use some TLC. Now I’m considering re-caulking on my own… we’ll see, but it would definitely be a huge improvement. Can’t wait to see what else you guys did! Also, what a nice, generous thing to do for John’s grandma – I’m sure she and the rest of your family are beyond appreciative. It’s really nice that they already had the wallpaper stripped when you got there!
YoungHouseLove says
Yes, that was so nice of them! They’re such a sweet family. I’m so lucky to have married into such an awesome group. Corny but true.
xo
s
Esther says
It’s so funny that your post today was about bathroom reno’s, because that is what has been on my mind this last weekend. I can’t wait to tackle our bathroom. Everytime I clean that room, I get the urge to tear everything out!
Your Granny’s house looks absolutely charming!! Love the picket fence.
Looking forward to the reveal!
Leigh Anne says
Gahhhh! Can’t believe you guys were so close to me. We live in Charleston, we’re transplants( from Louisiana) but we love WV so much. So sweet of you guys to makeover a room for Granny ;-)
YoungHouseLove says
No way! Such a small world.
xo
s
LeCheech says
We’re buying a new house instead of renting [FINALLY]… But the house we want has all new stuff in it so we don’t really need to redo everything, we just need to paint and accessorize so that it’s not all neutral.
Oh, did I mention ALL THE HARDWARE is ORB by default? Oh yes, I drooled BIG TIME. I’m going to be getting color ideas from the line you released, I’m loving the Shiitake Mushroom and Antiqued Aqua– not in the same room mind you, but I love them. :D
YoungHouseLove says
Wahoo, you lucky lady!
xo
s
Chelsea @ Riding Escalators says
This is so great! My grandma still has the DIY bug too! She’s constantly rearranging furniture in her house or painting and reprinting rooms, or ,, her more recent task was to pull up all the carpet on their stairs and install a runner herself!! She’s always my go-to when I need an opinion, including over this weekend when I was trying to decide on a front door color!! Would love a few more opinions though!!
http://ridingescalators.blogspot.com/2012/09/red-door-blue-door-front-door-screen.html
YoungHouseLove says
Ooh, I love red with black shutters for that charming house of yours!
xo
s
Jaime @ Queen of the Creek says
Oh yeah. Mine’s been going on for over a month. Maybe two.
Why is it the smaller the space is, the longer it takes?! lol… http://www.queenofthecreek.com/search/label/Guest%20Bath
YoungHouseLove says
Haha, it’s so true! I now believe “the smaller the space, the more cracks and crevices to caulk” – haha!
xo
s
Brandi from Bloomington says
Can’t wait to see the finished product since I’ll be tackling a 1920s 1/2 bath next. I have one question, where do you go for ideaboards? Do you use a website, software, or the good, old-fashioned ideabook?
YoungHouseLove says
We make our mood boards in Photoshop (there’s more info on that on our FAQ page, including some tips for free software you can try). Hope it helps!
xo
s
Brandy says
I live about 30 minutes from Huntington. I wish I would have known you were in town. :) Can’t wait to see the reveal!!
Gabriella @ Our Life In Action says
Question – on your other post you deglossed, and sanded the cabinets before priming them. On this post it looks like you just primed them. Is that because they were already painted?
Just curious if I can leave out the deglossed and sanding step when I do my cabinets.
YoungHouseLove says
These felt really matte (they appeared to have been painted with flat paint) and since this room wasn’t a kitchen (no grease all over things) we didn’t think we had much gloss/sealer/grease to cut through, but if the cabinets felt more glossy/greasy we definitely would have deglossed. Hope it helps!
xo
s
Gabriella @ Our Life In Action says
Huge help – mine are in the kitchen so looks like I’ll be buying degreaser,etc. Thanks :-)
YoungHouseLove says
Good luck!
xo
s
Brynn says
What a beautiful gesture! You guys are truly wonderful people.
We are gearing up to paint pretty much everything in our new to us house! Been studying your tutorials like I am studying for an exam. I feel like every other sentence I say starts with “Well on YHL they did…” LOL
Lisa says
Ooh this is so exciting and very sweet of you both! Can’t wait for the big reveal!
Brenda says
I love the idea of a blitz makeover. It’s fun to see what regular people can do in a short amount of time (as opposed to a team of professionals with professional budgets and resources). It’s also super sweet that it’s for John’s grandma. She sounds very spunky!
YoungHouseLove says
She totally is! She pushes giant furniture around by herself! It’s amazing.
xo
s
Megan @ The Mego Blog says
So fun to see this progress! What a great way to spend time with family and help at the same time. I just posted on my blog today about little bathroom updates (a curtain and art) but it is definitely more of a process for me. It’s fun to see someone do it all in 3 days! I kind of like that type of a challenge. It’s like those crazy tv shows that do total room makeovers in a few days!
paintergal says
Yep, I’ve done room makeovers for my sister (master bedroom) and my mom (kitchen, bathroom, living room, and dining room) It is a satisfying experience.
Looking forward to the next progress post.
Karen F says
such a neat project – can’t wait to see the rest, and can’t believe you did it in 3 days! also, the outside of her house is so pretty!
Wom-mom Ethne says
Every time my mom goes to MI (from MN) to visit our fam out there, she does work on their houses. As a kid, she re-did my grandma’s bathroom. It’s still looking good, even though it’s all pink paint and flowers a la the early ’90’s, but Grandma likes it and it’s still in good shape. This past time, she tore out rotting siding and roofing on my aunt’s house and pretty much gutted the whole place (outside). She’s pretty much the DIY home improvement whirling dervish. If I do a blog post about my aunt’s house make-over, I’ll let you know for sure.
YoungHouseLove says
That’s amazing! Would love to see it!
xo
s
Steph says
You two are too sweet. I love how family oriented you guys are, it’s part of the reason I love your site so much! That and your creativity is amazing!
The last pic with the clock made me so happy. It reminds me so much of the heart clock the Wizard give the tin man in the Wizard of Oz. Was my fav movie as a kid, the pic brought a big smile to my face :) Thank you!