Again? Already?!? If you had told me 10 months ago that I’d be doing deck construction again less than a year later, I would’ve punched you in the face.
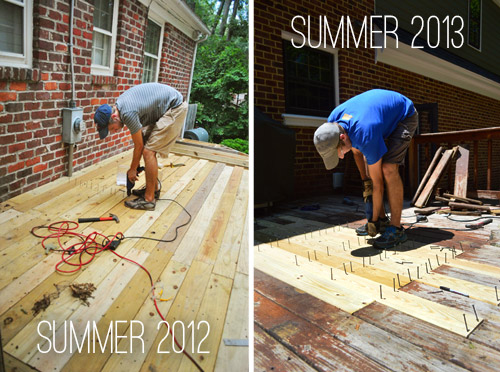
Okay, not literally. I’m not the punching type. But I would’ve thrown you a look that said “I would be punching you in the face right now if I were the punching type.”
It’s not that I didn’t enjoy the process of building a deck in the heat of summer… I just wasn’t really looking forward to doing it again so soon. But at least it wasn’t an entire deck this time. It was more of a patch job. Remember this puppy?
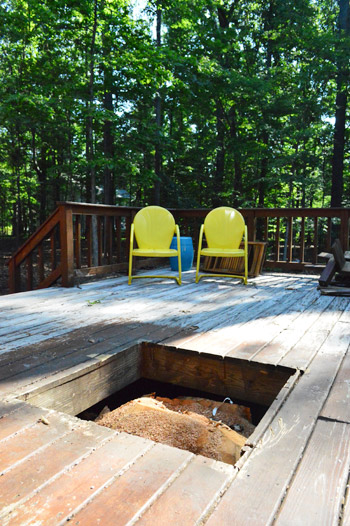
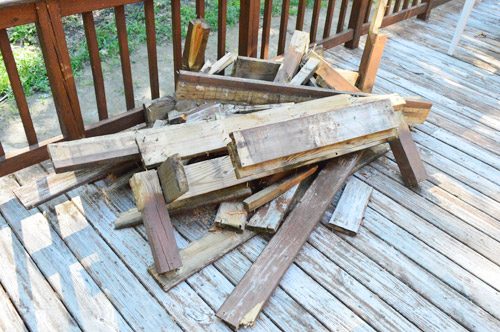
That’s the hole leftover from the big tree that we had to remove. The tree guys were nice enough to disassemble the bench that surrounded it (okay, technically they had to demolish it to remove the tree). Only downside is that it left us with this pretty pile of bench scrap.
Rather than rebuild the bench, we decided it would make the deck more functional to just cover the hole so we could place a table on a centered spot out there (if the hole stayed it would squish the outdoor dining area over in a not-as-centered-and-more-cramped way. My biggest worry was trying to find deck boards that were the same width as the existing who-knows-how-old decking. I even attempted to salvage some full boards from the scrap pile, but I came up three short.
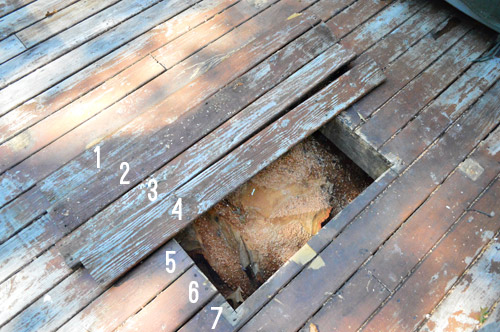
So I headed off to Lowe’s to get my supplies and (with an old scrap piece of board in hand) quickly discovered they were a standard width that I could buy right off the shelf. Score! So into my car I packed:
- Seven 8 foot long deck boards – $42
- One 8 foot long 2 x 8″ board that was cut in half (those pieces would act as my joists) – $9
- Four metal hangers to hold the joists in place – $4.50
- TOTAL: $55.50
First up, I cut my 2 x 8s to the width of the hole and secured them with the hangers, using some decking nails that we had leftover from last summer.
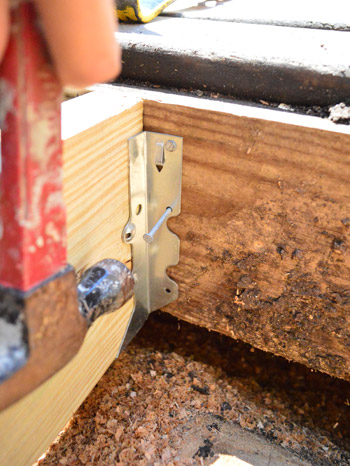
I probably only needed to do one joist (the space was just a little over three feet wide) but the tree guys had cut the stump down at a weird angle so I couldn’t put a joist right across the middle – so this ended up being my weird spacing. As long as it keeps the deck boards from falling, it’s cool by me.
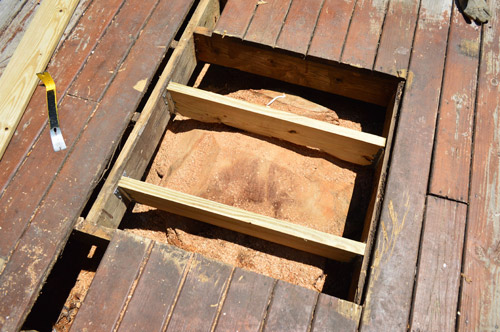
For stability and appearance reasons, I knew I wanted my new boards to extend beyond the hole. That way my patch-job would looked a smidge more natural and the new boards could rest on an existing joist at either end for even more stability. So that decision involved cutting back some of the other planks to lay in my fresh new boards and camouflage the hole.
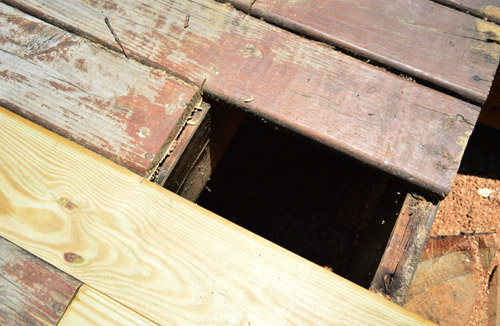
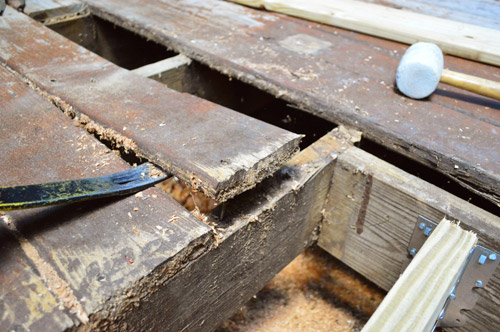
To do this, I broke out my Dremel Sawmax and cut a deep slice. It wasn’t deep enough to go all the way through, but it was enough to make the board snap right where I wanted it (hence the slightly rough edge you see above).
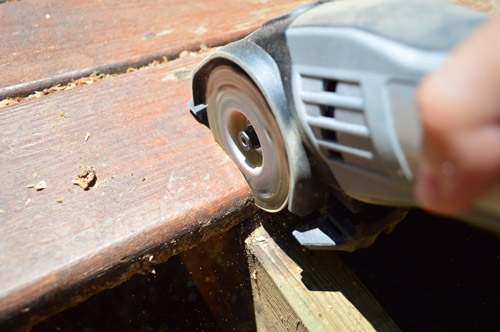
This process saved me from having to pry up the entire length of each board. Instead, I just had to pry the sections that I wanted to remove.
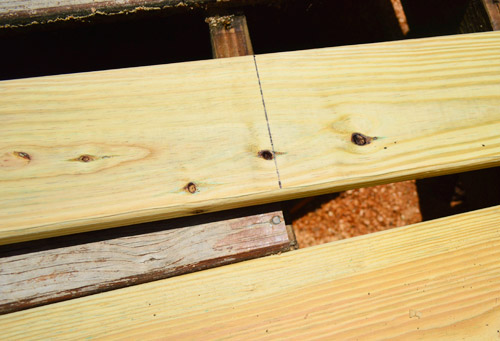
When it came time to fit the new board, I just laid it across the space and marked it with a pen. No measuring tape needed.
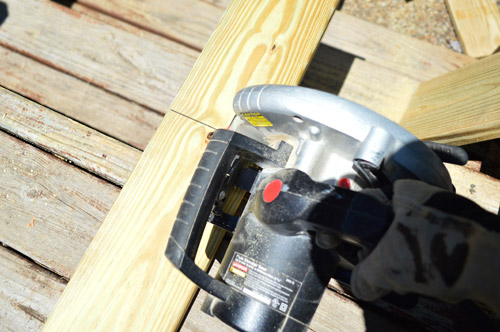
Then using the stairs as a makeshift sawhorse, I cut each board down with my circular saw.
Then it was just a matter of putting my puzzle pieces together as I went.
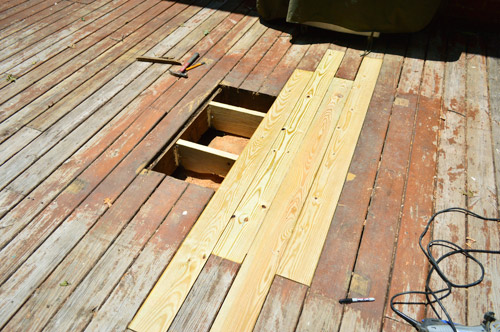
Well, that and screwing them down. I was thankful that I had kept all of my leftover screws from last summer (maybe the universe knew I’d be doing deck-work sooner than I thought?). It saved me a few bucks and most of all it saved me from doing one of those annoying extra trips to the store because I forgot to grab something.
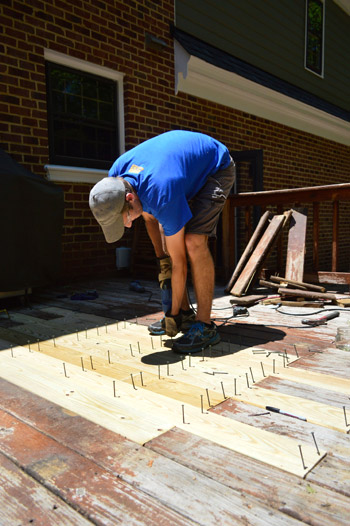
So here she be. Certainly not the prettiest home improvement “after” but the mismatched boards are at least an improvement over a gaping hole. Oh, and don’t mind that weird long board on the bottom left. One of the old boards cracked while I was prying it up so I had to patch a little more than originally planned.
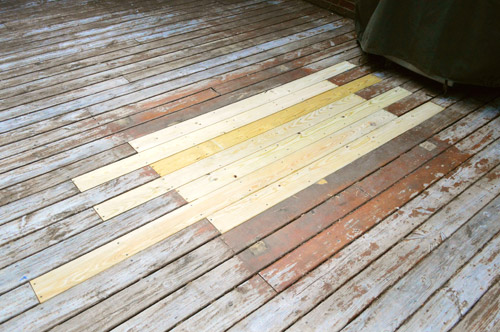
We’re hoping that once the whole deck gets a good cleaning / stripping / restaining the new boards will blend right in with the old ones. Or maybe I should say that hopefully the old boards will look newer and they’ll all fit right in.
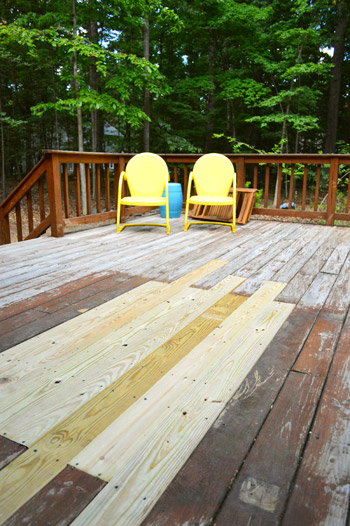
But for now, we’re just enjoying being able to have people over without worrying that someone’s about to fall through the deck. Check out Sherry’s chair bravely sitting right where the old hole used to be (she took this photo, which is why she’s missing).
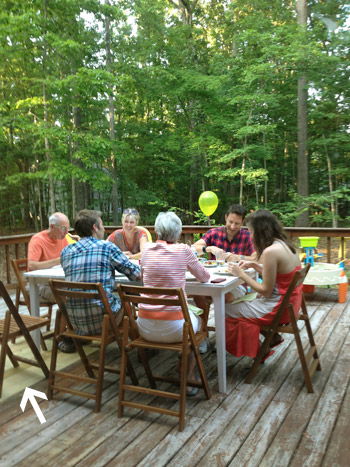
So next on the deck to-do list is to give the whole thing a deep cleaning/stripping and then stain & seal it to hopefully bring back some like-new glory. And eventually we’d love to open up the back of the deck by adding extra wide stairs that lead down to the backyard. Sort of like this. Maybe from the thick post that’s in front of Sherry’s left elbow to the thick post that’s in front of the pot of herbs in the photo below? But that’ll probably be a “Phase Two” thing for us down the line.
We also later added two gates to the deck to keep the dog from running away!
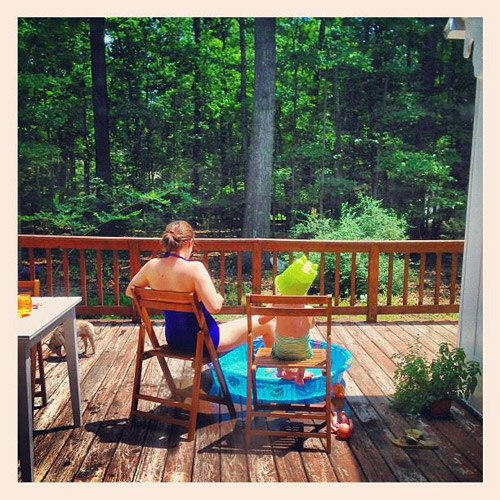
Is anyone else tackling a project they didn’t foresee in their future? Something that was a pleasant (or maybe not so pleasant) surprise? As much as I didn’t enjoy having a deck to-do on my list again, I definitely appreciated the fact that this one only took me one afternoon to complete.

jenna says
“Tetanus anyone?” Hahahahahahaha. Too funny.
Anele @ Success Along the Weigh says
Fingers crossed a good powerwash will make it all match up. At least it was a patch job and not the whole deck, right? :)
We had an unpleasant surprise Friday. The left track of our garage door decided it was done staying screwed into the ceiling so it fell out and the whole left side fell down. Yay. The Mr got the brace screwed into the ceiling into a stud but we knew not to mess with the spring. The guy came out yesterday and said that if you’re able to get the garage door open, just hook the spring on the hook since there’s no tension to worry about. It was a $55 lesson but I guess I’d rather have the knowledge and pray we never have to use it again.
YoungHouseLove says
Oh man, that’s scary! So glad everyone’s ok and it’s all fixed!
xo
s
John @ Our Home from Scratch says
Maybe a slap across the ear then?
We are three years into our home and still deck-less. Thinking about this fall or next spring. I like what you did there. If it doesn’t ever blend well, you could always re-plank the whole deck. I’m sure after it’s cleaned up and stained it will be pretty close though.
Kelly {the Centsible Life} says
Not the most fun project, but definitely better than a gaping hole! I keep seeing commercials for a Rustoleum product that’s supposed to be awesome for renewing your deck. I have no experience with it (we don’t have a deck) but thought I’d mention it, since it looks so easy to use.
YoungHouseLove says
I hear that too! And Behr just came out with something too (supposedly it’s a little less gritty and easier to use) so we’re looking into those options! Will keep you guys posted!
xo
s
Diane says
Looks like Burger approves. Always a good sign!
Lauren says
as long as you are able to enjoy the summer, the mismatched boards dont matter!! looks great so far.
Lindsey says
I love how every kid in the history of the world feels the need to wear the sand bucket on their head.
Oh yeah, nice job on the deck! Haha.
YoungHouseLove says
Haha it’s true! I think it’s the little handle thing, it just fits so perfectly under the chin…
xo
s
Lindsey says
I totally just texted a fellow YHL fan friend of mine that I was geeking out because Sherry talked to me! Bahaha! Thanks for making my day. :)
YoungHouseLove says
Of course!
xo
s
Olivia says
I noticed that too! Bucket on head = so adorable.
Robin says
Do you think placing all the screws first really speeds things up?
Looks good by the way :)
YoungHouseLove says
That seems to be my favorite method, just because putting the drill down and picking it back up feels less time efficient than placing them all and just keeping the drill in my hands and driving them all in at one time.
-John
M says
Does miss Clara have a bucket on her head?
YoungHouseLove says
Oh yes, that’s her “lifeguarding costume.”
xo,
s
Ashley says
We just had a dumpster delivered this morning for our deck tear down! I can’t think of a better way to celebrate Independence Day than some demolition! We’re putting in a fab tiered patio. Tetanus is already UTD!
Your home is looking so much better already! Love following along!
YoungHouseLove says
Wahoo! Happy demolition Ashley!
xo
s
Annelies says
Love the idea of adding wide steps. I already have that in my mind to for any future garden. You are so lucky to have such a beautiful large deck, and the view ! Good job John !
Kristi @ Addicted 2 Decorating says
Rather than going to the trouble of stripping and restaining, have you considered using that new(ish) Rustoleum product that you just paint right over decks? It comes in lots of different colors, and I think they said it protects for up to 15 years. Ethan at One Project Closer used it recently on his deck, and the result is quite amazing: http://www.oneprojectcloser.com/rust-oleum-deck-restore/
Just seems a heck of a lot easier than stripping and restaining. :)
YoungHouseLove says
Oh yes, that looks awesome and we hear Behr has a similar product that just came out (we hear it’s a bit less gritty and easier to apply) so we’re definitely weighing those options!
xo
s
Cathy says
Kristi, I’ve actually recently used Rustoleum’s product you mention, called Restore and really liked it. You can actually have it mixed in any color you like and contrary to the many negative reviews I read, it’s not a big deal to apply. I almost did not use it because of the reviews, but it’s just like painting with peanut butter. No big deal. One big complaint I read over and over was that the coverage estimates were incorrect, but I used exactly what they estimated I would need. I used it on cracked, ugly, mismatched concrete and it improved the area enormously. As you mention, Sherry, it is gritty, and if you don’t want that under foot, the Behr would be better. It is pricier in my neck of the woods, however. My thought was that the texture of the Restore would help hide the imperfections and it did just that.
YoungHouseLove says
That’s awesome Cathy! So good to hear!
xo
s
Carla says
I think the look of Rustoleum is like that of paint (versus stain). At least that’s how it photographs? A friend of ours had his deck painted and hates it; when I went over to see it I had to agree with him. I had this weird feeling like I wanted to rip off the paint and let. the. wood. breathe! :) To me there is no substitute for beautiful stained decks. If I remember correctly you intentionally chose natural wood for your former deck?
YoungHouseLove says
Rustoleum’s look is a lot like a textured paint but the Berh stuff is like a solid stain, so it has a lot more natural look to us (we have seen them both in person). We’ll definitely keep you posted on our decision – and all of the why-we-picked-that-one stuff – once we make a choice :)
xo
s
Brandi says
Thanks so much for sharing that link, Kristi! My deck is in bad shape again after staining it 2 summers ago. I am going to look into that product.
Good luck with your deck project John and Sherry! Can’t wait to see which product you choose.
Nicole says
Loving the new house! It reminds me of our wooded neighborhood in Maryland. I have to ask, do you guys have those pesky daytime mosquitoes (Asian Tiger mosquitoes)? They can be brutal around the wooded areas. We have them and they drive us bananas!
YoungHouseLove says
We only seem to have mosquitoes in the evening, so as long as we light some citronella candles when we’re out there then, it’s not too bad. Otherwise we hang out on the deck during the day, even eat out there on the early side sometimes, and then come in right before the mosquitoes come out for a snack.
xo
s
Ana Silva says
I have seen those exact mosquitoes in my yard! Thanks for saying what theyre called. They sworm at me and attack in seconds. How do I get rid of them?
Erin says
I’d recently heard rosemary drives away mosquitoes and just found these two websites which mention other plants, too, like lemongrass, mint and marigolds. A natural way to keep the little blood-suckers at bay.
http://www.ahamodernliving.com/blog/garden/five-plants-that-keep-mosquitoes-from-buzzing-in-your-ears/
http://www.curbly.com/users/diy-maven/posts/1930-top-10-ways-to-repel-mosquitoes-low-tech-style
YoungHouseLove says
LOVE THAT!
xo
s
Johanna P says
I was recently given a household hints book from the 80’s and early 90’s. It has a few tips about pest control with plants.
For flies: Basil, Tansy, and Rue.
plant around your doors or areas of frequent traffic as pinched and trodden on leaves release the aroma and make them more effective.
Flies fleas and Mosquitos: Pennyroyal & Wormwood
Flies, ants, aphids, cabbage butterfly, catiilars, fleas, beetles and moths: Mint.
Stable Flies: Walnut trees.
Hope that helps someone :)
YoungHouseLove says
Love it!
xo
s
Brittany says
This is going to sound lame, but snaps to you guys for being such hard workers! I know it’s your full-time job now and all, but I am always so impressed at how you guys always seem to be working so hard :)
P.S. I FINALLY got your book a couple of weeks ago! My sister surprised me with it for an early birthday present. She knew I had been wanting it since it came out but couldn’t justify spending the money in my head (we’re trying to become debt-free) I was so excited and looked through the whole thing that night! Thanks for all the great ideas!
YoungHouseLove says
Thanks so much Brittany! So glad you’re enjoying our book!
xo
s
Heather says
Looks great! Newbie question here: When you were pulling up the older boards to use additional joists for support, how did you know how far apart the old joists were to begin with so that you knew where to cut your boards? Sorry if this is a totally obvious question!
I’m moving into a (rent) house with a deck VERY similar in appearance and age so, I’m glad to hear that having an older deck doesn’t mean you absolutely have to tear down and start from scratch. Looking forward to your deck restoration post :)
YoungHouseLove says
We could see where the old joists were just by looking at the nails/screws in the existing deck boards (wherever they were placed, we knew they went into a joist below).
xo
s
Heather says
Omg, I feel dumb. More coffee for me…
YoungHouseLove says
No worries at all! Totally legitimate question!
xo
s
Carole says
Be sure to try that spiffy new pressure washer. It will coat your legs with wood shavings but will clean up the deck really well. It does tend to leave grooves if you concentrate in one area too long but an easy first step to clean-up!
Mandy Grimes says
You could have curved stairs….
http://pinterest.com/pin/52565520623291818/
They look tricky to build but would be so pretty for down the road when you guys are ready.
We live in a bi-level and have a deck on the second story. One day I’m tearing it down and building a more ground level deck. Cash wise that won’t be happening for a while, but a girl can dream.
YoungHouseLove says
Really pretty!
xo
s
Stephanie says
Right in the middle of building a paver patio, one of our pear trees along the street split down the middle. We came out one morning to find half of it lying across the road, blocking traffic. Not what we needed while we were working on such a major project. And between the tree, the bagster full of debris, the yard waste awaiting pickup and the generally unkempt state of our yard due to the patio project, I’m sure our neighbors were less than thrilled with us.
Great repair on the deck. Looks completely professional.
YoungHouseLove says
Holy cow Stephanie! That’s crazy! So glad no one got hurt!
xo
s
Angela says
Bradford Pears have a tendency to split like that. They are usually not recommended for planting due to that fact.
Tandra@LittleHousesBigDogs says
I’m sorry I was secretly hoping a YHL bench rebuild, but I can totally see now why you wouldn’t want to. We are in the process of planning a new spa deck/pergola, love the first deck how to, printed it out and put it on the TV remote for the hubby.
Abby J. says
We just had our first unexpected homeowner’s emergency, though it was really a blessing in disguise. Husband came home during his lunch break to grab something from the house and everything is fine. When he returns just a few hours later (I work farther away), the hot water valve to what used to be the sink is gushing water everywhere over our freshly gutted, newly drywalled kitchen. He immediately shut off the water main, used my hairdryer to save the portion of drywall that had gotten wet, and three hours and two trips to Home Depot later, had replaced the shutoff valve, which had given out.
I say it’s a blessing in disguise, because obviously the shutoff valve was ready to go at any second, but thank heavens it happened when our kitchen was gutted. No cabinets or flooring to damage (we’re on slab) and it was gushing only for a matter of minutes or hours, not days as it might have been if we weren’t already living in the house.
All this was just last night! Woke up this morning, showered, and rushed downstairs still in my towel just to make sure running the shower hadn’t caused some other problems. But the Husband fixed it good – the valves were perfectly dry.
YoungHouseLove says
Oh my gosh, that’s so scary! So glad you caught it in time!
xo
s
Erin says
Solidarity shout out… We are in the trenches with you guys on deck work right now. We have a wraparound deck and front landing that probably haven’t been cleaned in 10 years. Hubs is outside with his new love interest, a Craftsman pressure washer, right now. It’s taking forever, which is why we bought the washer instead of renting, but the difference is amazeballs.
YoungHouseLove says
High fives for solidarity shout outs! Good luck with everything Erin.
xo
s
Kathryn says
You always mention coupons when you go to Lowes or Home Depot. Where do you find them?
YoungHouseLove says
We’re on the mailing list for both of them (we have credit cards there, are a member of the Home Depot garden club, etc) so they show up in the mail for us. We also get an additional 5% off just by using our credit cards there (which we pay off in full each month to keep from paying any interest). Hope it helps!
xo
s
shanna haycraft says
We just took out our deck last week to put in a stamped concrete patio – The whole deck was a giant splinter/Tetanus shot waiting to happen for our 2 year old. I love your guys’ wooded lot – can’t wait to see more progress! Where did you get your outdoor dining table & chairs?
YoungHouseLove says
The stamped patio sounds awesome! As for the dining table, that was from World Market on clearance last year, and the chairs are from Joss & Main (they came in a set of four for a really cheap price).
xo
s
Ava says
Aren’t you worried the stump would grow back into a tree and burst a new hole in deck? My question should tell you that I basically have no knowledge of stumps but a quick search told me a stump growing new tree is always a possibility
YoungHouseLove says
Without any light it shouldn’t have any chance of growing back – although we can access it from under the deck if we need to drill holes into the trunk and add epsom salt, which we hear can speed up the decomposition.
xo
s
Ava says
Ah makes sense, thanks!
Katie says
I’m also surprised that you didn’t get them to grind the tree stump. Did you get the other stumps ground after the trees were felled? In addition to suckers popping up, I’d also be a little concerned about fungus.
YoungHouseLove says
We got all the other stumps ground but they weren’t physically able to grind this one because it would have damaged our deck (to access it with their machine/blade they basically would have had to tear the deck apart in a 2′ radius all around the stump). A friend of ours had the same thing done though (an old tree removed from a deck hole and then boarded over it) and it has never grown back in 4 years – or had any issues with fungus since it’s ventilated under the deck – so we’re hoping we have the same luck.
xo
s
Beth Anne says
That was my question!
I kept thinking, “Oh man. They should have had it ground down first!”
Susan Hines says
GREAT JOB!!
Derek says
Nice work! I’m considering building a ground-level deck off the back of our house – have any experience with that? I think they look nicer than brick or stone, but worried about rotting.
YoungHouseLove says
We’ve never tackled that. Anyone have advice for Derek?
xo
s
Hanna says
I think they are doing that over at House*Tweaking, but so far have only shown the prelim work:
http://www.housetweaking.com/2013/05/28/gettin-our-deck-on/
Kristin says
Derek…we removed a patio made of pavers under our 2nd story deck a couple of years ago. They were always damp, dirty, and uneven due to tree roots. Put in a ground level composite deck, and we love it. We use the space so much more than we used to. No rotting because of the composite, and we haven’t felt any suspicious movement indicating any rotting in the joists beneath the floor.
Ashley says
On page 163 of the July/August 2013 HGTV magazine (the one that features John and Sherry!)they show some deck tiles, which are wood tiles that snap together. It says the wood decking tiles are available at IKEA. Seems like it would be a good option for a ground-level deck!
YoungHouseLove says
Those looked cool!
xo
s
Derek says
Thanks all!
Mary says
Looks great! I love the gorgeous view that y’all have!
Have you seen this deck-stair-remodel? http://tommyandellie.com/index.php/2013/06/27/deck-remodel/
I luuuurve those steps. Thought you might like another inspiration pic! :)
YoungHouseLove says
So pretty!
xo
s
Tanya says
Not to be one of “those people”, but I beleive you crosscut the boards instead of ripping them. A rip cut is a lengthwise cut with the grain – or this is at least what I am remembering from industrial arts from about 20 years ago. Ripping does sound 100% cooler though – I just wanted to help with lingo. I am also posting this with the understanding that I may be totally incorrect or mis-understood the step you were talking about.
YoungHouseLove says
Totally correct! Off to fix that.
xo
s
Julianne says
Gotta love those unexpected side jobs that seem to pop up left, right & centre. *urgh*…but I’m sure you’re glad that it’s finally done. Karma’s way of making sure you don’t forget your deck-building skills! ;O)
Meagan {Green Motherhood} says
Oh man! I totally get the move into a new house and get all the little projects complete first experience.
We put up our own blinds too! And we’ve slowly been putting things away, unpacking and finally (finally!) have hung some pictures.
The one thing hanging over our heads? The YARD! Ugh! It’s like weed city out there. So embarrassing.
Wondering after seeing an upclose shot if the deck is still in good shape or if you’re going to need to do some more repair/salvaging of the rest of it?
YoungHouseLove says
We definitely have a few more boards to replace (some of the railings have cupping/warping issues) but we’re looking into some awesome products that should get the deck back into great shape after we patch those planks, clean it, and apply them to stain/seal things in.
xo
s
Sarah says
We had some super heavy rain here in Ontario on Friday, and we made the not-so-pleasant discovery that our basement is leaking. AGAIN. We had foundation cracks fixed TWICE about 18 months ago, waited about a year to be safe, then refinished our basement (new drywall, carpet, furniture). To find soggy carpet and mouldy drywall 6 months later… NOT COOL.
YoungHouseLove says
Oh no! So sorry Sarah!
xo
s
Claire says
I feel your pain. My deck was built around not one, but two trees, with a third large tree that hovered precariously adjacent to one side of the deck . . . and that third one came down in a microburst 80 mph winds that hit our neighborhood a few years ago and lifted up my deck. Went through 10 months of tree removal, covenant committee approval, permits, winter, contractor hiring, waiting to rebuild. After all of that, my contractor had literally put the final new boards down on a Thursday and on Friday morning the landscape committee guy was out on the new deck wrapping a caution tape around one of the other trees and left a notice saying they wanted to remove it in the next 10 days. Color me apoplectic. I gave a pretty calm tongue lashing. We reached a “compromise” that they would cut the tree down and leave stump about Sher-Dog waist high. My contractor came back out and built a table top off of it after I put a sealer on top of the stump. But good to see how you can do a patch job that doesn’t stick out like a sore thumb if the table and stump ever need to come out or God forbid the other tree falls on its sword too. Thanks for showing the how to!
YoungHouseLove says
Haha, I love the calm tongue lashing and the Sherdog-waist-high table. Sounds awesome!
xo
s
Traci says
We are just in the process of restaining our old deck. We ended up using Deck Over by Behr from the Home Depot. AMAZING stuff – if you use that, no one will ever know there is a patch there. It’s seriously made our deck look like a brand new deck. And with a lifetime warranty (when prepped and used correctly obviously), we’re excited that we never ever have to do anything with the deck again. Such a pain! Can’t wait to see how it all turns out!
YoungHouseLove says
Oh man, we keep hearing the best things about Deck Over! We are definitely heavily considering it. Thanks for the glowing review!
xo
s
Hanna says
It looks great John! Just curious, I can’t remember — did you power wash the deck back when you rented the power washer, or is this a pre-powerwash look?
Also, I remember watching an HGTV episode a couple years ago (the one where they help you get your house ready for sale for less than $2k), where they added steps to the center of deck. The steps gradually lengthened until the last step was about twice the length of the first step (sorta like a fan effect).
They did it to create an “opening” feel, which I remember because it made me giggle. What WAS really nice about it was that it looked awesome with potted flowers layered down the sides.
YoungHouseLove says
That sounds really nice! As for the power washing thing, John did run the power washer over about a quarter of the deck before abandoning it (it wasn’t taking any of the stain off or making much of a difference at all, so he thought it would take 5 hours to do the whole thing and since it wasn’t stripping off the stain or anything it worked a lot better on brick/concrete for us – although it really cleaned the wood deck at our previous house, so I think it depends what shape the wood’s in and what it’s sealed with).
xo
s
Virg says
I have to comment about the bucket on Clara’s head. My son, who is now in college, wore a bucket on his head EVERYWHERE when he was 3. We have so many bucket head photos, that as a family we just laugh and laugh. So, way to rock the bucket Clara!
YoungHouseLove says
That’s so cute!
xo
s
Jenna says
I redid our old deck this spring. I was worried about my crawling baby getting splinters so I used the Behr deck cleaner and then used Deck Over paint. It works great. The cleaner made the wood, that I considered throwing away, look brand new and the Deck Over made the wood really smooth. I dont have to worry about the old wood splintering.
YoungHouseLove says
Love the reviews on Deck Over! It’s one of the front runners that we’re considering and hearing from real people who have loved it is awesome.
xos
Lauren @ The Highlands Life says
Stairs would be awesome going down into the backyard!
Mr. & Mrs. P says
The deck is definitely more functional now!! Can’t wait to see how it will look all pressure cleaned and repainted or stained!!
Mr. & Mrs. P
http://cristyandmichael.blogpost.com
Faith@The Stirring Place says
Well it’s not much of a project (for us at least) but we sold our house and are temporarily renting. But we discovered there may be lead paint in/on the house so we have to have it tested this weekend. Oh, and did I mention I’m 18wks pregnant. There has been much wailing and gnashing of teeth. Fingers crossed all is well.
YoungHouseLove says
Oh man Faith, stay safe! Hope it’s all ok (apparently lead paint isn’t bad as long as it’s not flaking and peeling and it’s painted over – so it’s sealed inside – so maybe if the landlord has things painted and nothing is flaking off you’re ok?).
xo
s
Keeley @ My Life on a Plate says
There’s also the option of using a solid (opaque) stain instead of a transparent color. We bought a house in 2005 that had a very rough looking deck that even power washing couldn’t save. We went with a Behr solid stain (I think the color was Terra Cotta) and we loved it. It covered all the imperfections and even our neighbor (who initially thought it was a dumb idea) thought it looked great. Several of our neighbors ended up using the same product once they saw our deck.
YoungHouseLove says
We have heard awesome things about solid stains too (lasting longer, looking flawless, etc) so those are definitely in the running! So awesome that you (and the neighbors) have loved using it!
xo
s
Phyllis says
Just wanted to chime in with my experience using the solid stain option. We just recently had our deck washed and stained using Sherwin Williams “Deckscapes” product in a solid color. It looks great and the coverage is exceptional.
But one caveat (and you may already know this), solid stains are usually water based and will not adhere to a deck that’s been stained with an oil based semi-transparent. And power washing may not remove all of the original stain (as was your experience a few comments up thread). We had the same experience with the old stain not coming off with a power washer, so our deck contractor used a product that is non-toxic and biodegradable (http://www.homedepot.com/p/Krud-Kutter-32-oz-Original-Concentrate-Cleaner-Degreaser-KK32-12/203396788?N=6yg). It worked great and it took off all the old stain.
Your deck is coming along quite nice! There are so many options out there, but I wanted to vouch for the solid stain option. So far we’ve been pleased with the durability, especially with an 85 lb dog!
YoungHouseLove says
Thanks so much for the tip Phyllis! So good to know!
xo
s
Kari says
I hear ya on unexpected house jobs. When we bought our house 2 years ago we were enamored by our Caroma 2 button flush toilets that were water efficient – we felt so European! That is until we had a major clog in the line upstairs at 1am on a Monday morning in December and we had sewage dripping from our ceiling in our family room. When the emergency plumber came out to auger, his 1in auger head couldn’t fit into the diameter of our toilet upstairs. Now I’m not trying to be graphic, but if a 1in auger head can’t fit, you know we have some problems! He told us we needed to replace our toilets upstairs. Fast forward to now and I’m going today to look at toilets. It’s not a huge deal, it’s just not what I call an “exciting” project to spend my money on…especially when I’ve been trying to get new wood floors in my dining room. Buzz kill.
Your deck patchwork looks awesome! Your-all’s go-get-’em spirit amazes me! I love how adventurous you are and how that has led you to become so knowledgable on home repairs! Kuddos to you!
YoungHouseLove says
Oh man Kari, that stinks! Literally. Ok, not funny but I couldn’t resist. Good luck with toilet shopping! Oddly enough that sounds fun to me.
xo
s
christina @ homemade ocean says
Little bucket head…..well that’s just adorable!
Way to go John, I thought you would never want to touch a deck again. You know, unless you were relaxing on it :)
Cheryl says
At least you didn’t need a permit this time!!!!
YoungHouseLove says
AMEN!
xo
s
Mary | lemongroveblog says
Woot! First step done! Good to get rid of the big old hole in the middle – can’t wait to see this guy when it’s all stained with the nice set of stairs in the back. What a great outdoor space y’all will have!
heather says
Best intro sentence on this blog to date.
Maureen @ Altes Haus says
We have needed a new deck since we moved in…. 9 years ago. We have just gotten around to replacing the floor boards after my husband (who is 5″3″ like me and weighs only about 140) fell through the deck while throwing tomahawks. lol He found it pretty hysterical and wished he had it on video. So anyway, that prompted us to finally chew into the little savings we had and get the boards done. It’s gorgeous already even with the old railings and stairs (which will be replaced in spring).
YoungHouseLove says
Oh my gosh, so glad he’s ok! Love someone who can laugh about falling through a deck.
xo
s
Laura says
My husband and I are also redoing our pool deck! We pulled up the old decking because it was rotting to find many surprises underneath, including rotting supports underneath and nothing holding those supports together! This is when it feels good to DIY! We will know its safe:) we’re also building a cabana hut !!
YoungHouseLove says
Sounds awesome Laura! Good luck!
xo
s
Julie @ livingontheledgeblog.blogspot.com says
Tackling a project we didn’t foresee? We’re building a house, which we truly never saw coming. So happy that you are moving/renovating at the same time – you have such great ideas! (And hopefully not tetanus!)
Kelli says
You guys have become real experts…the deck patch looks great! Just wanted to thank you for producing such a wonderful blog! I look forward to reading your post every morning and sipping my cup of coffee. I don’t even have to wait since I am way over here in Anaheim, Calif.! Thanks for letting us ” hang out” with you!
YoungHouseLove says
Thanks Kelli! So kind of you to say.
xo
s
Kristen says
We have a gigantic deck on the front of our house that we thought was great when we purchased the house. Now it has become a gigantic project. We found many boards were rotting through so we have replaced about 15 of them. Now we are in the process of cleaning and painting the beast…it might just take us all summer as we have to chase around a 2 1/2 year old and a 3 month old!