Favorite project ever! Ok, I probably say that to myself every month or two, but this one might reign supreme for a while. Especially in the small/easy division (our sunroom reno and Teddy’s built-ins might have given it competition if it fell into the heavy-duty upgrade category, but there’s no way it belongs there because it was so simple). Ladies & gentlemen (gentleman?), I give you… Clara’s closet:
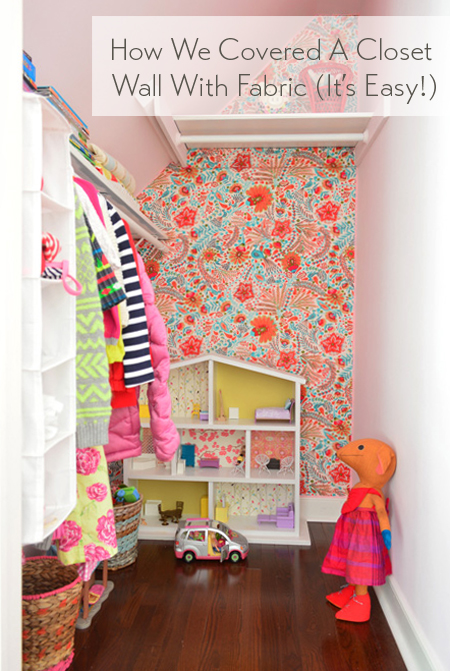
I’ve been obsessed with the idea of covering the back wall of Clara’s closet with something fun for a while, especially since images like this inspired me to add some playful to make it feel more like a little hideaway within her room. Right after we moved in she proclaimed her closet her favorite spot in the whole house. She plays in there a ton since there’s a lot of space in the back for her dollhouse and a few other favorite toys since we store most of her clothes in her six-drawer dresser with the exception of a few hanging items – and it’s a super deep closet, clocking in at 6.5′ feet deep and 4 feet wide.
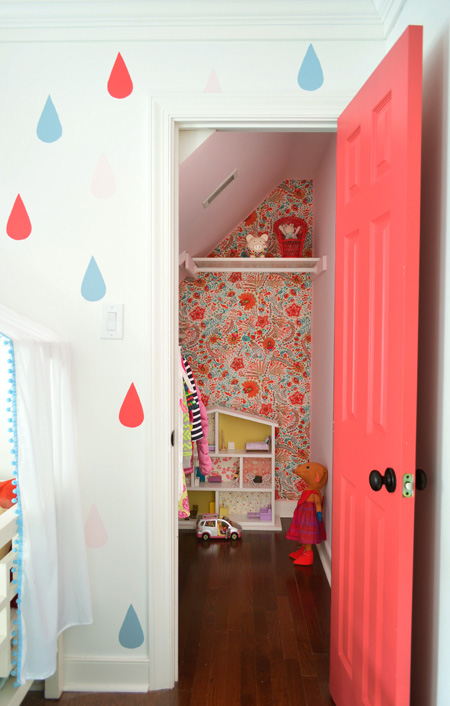
I thought we would end up using wallpaper or a stencil for some back-wall pattern, but then we came across this fabric (called Peaceful Perch by Waverly at a local fabric shop called U-Fab – but here’s an affiliate link to the same fabric on Amazon) and just KNEW it was the one.
Clara was with us and before I could even say “what do you think?” she was rubbing her face all over it (she’s her mother’s daughter) and saying she loved the birds. Jackpot. I was going to cover that back wall with that fabric if it was the last thing I did.
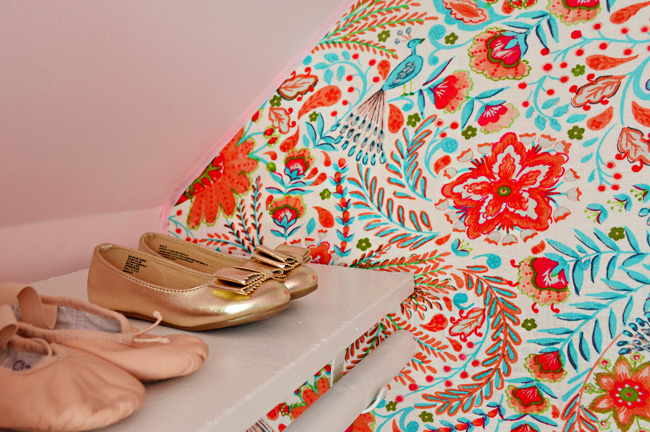
So I bought three yards of it (enough to go from floor to ceiling with a little wiggle room to spare) and rejoiced that the bolt’s width was easily wide enough to cover that back wall. When we got home Clara went to color something in the office and I fed Teddy in the living room and then she walked into the living room ten minutes later and screamed “YAY! DID YOU MAKE MY CLOSET PRETTY?! I can’t wait to see it!!” Needless to say the girl never covered a wall with fabric. But neither had I.
The surprising news is that it only ended up taking about an hour and a half to adhere the fabric along that back wall and another half hour to trim it all out for a finished look, so it can’t be done in the time it takes to feed a three month old, but it can be done between feedings (even if your son is on an every-two-hours schedule). In other words, it was way less intimidating and time consuming than I initially expected. And all it set us back was the cost of the fabric, some fabric glue, and some ribbon.
The first thing I did was empty her closet.
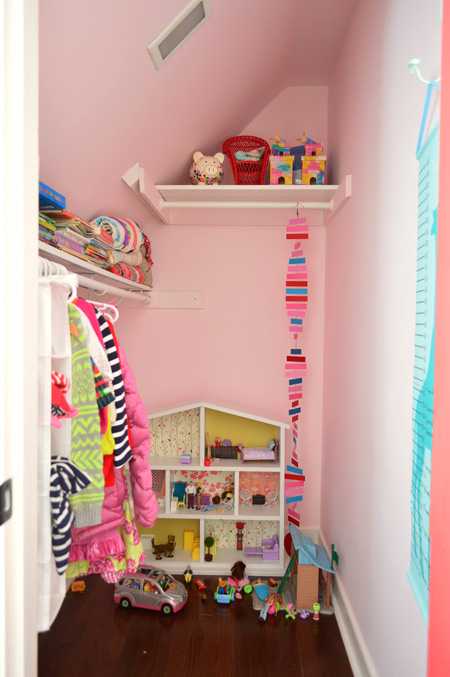
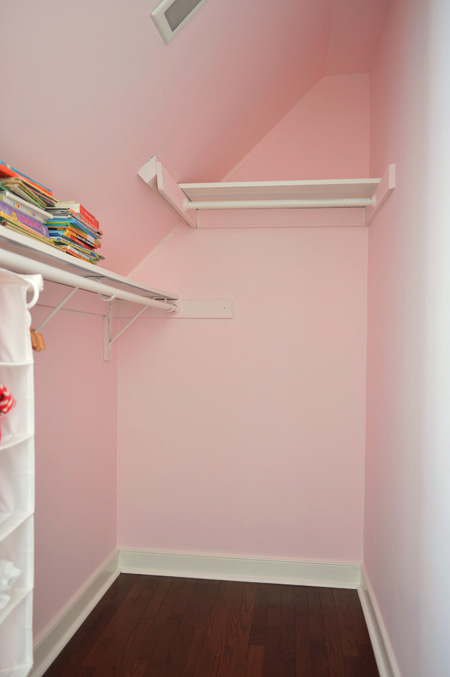
Everything came out, including the shelves and hanging bars that you see here which I removed as I went (I needed free access to all of the nooks and corners along that back wall).
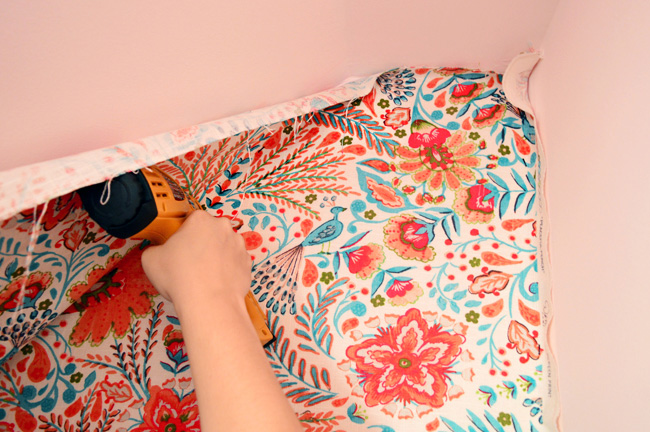
I stood on a step ladder with my staple gun and started in the top right-hand corner, stapling it nice and tight around the perimeter of the back wall. Every few inches I shot a staple in, making sure they were nice and tight against the wall, and that the fabric wasn’t wrinkled or folded. By starting in that top corner with my completely untrimmed three yards of material, I knew I could work my way down and across, keeping things tight and straight as I went, without running out of fabric. It really was that simple.
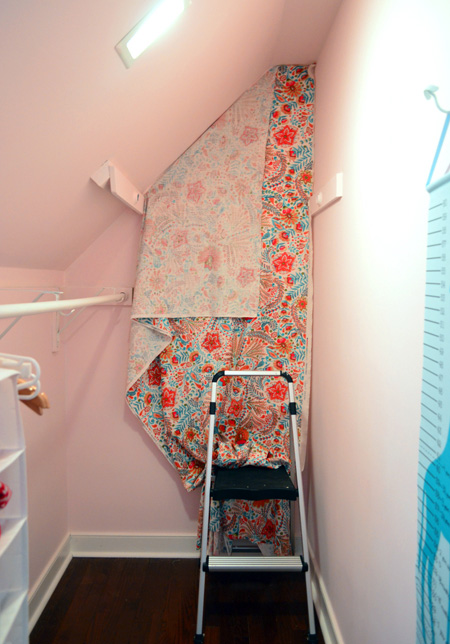
I think if I had been working with something striped or geometric in a the-naked-eye-can-tell-if-that’s-not-level way, it might have been more of a challenge, but since this print is so wild and free, I really just focused on keeping things pulled taut, and stapling them every few inches around the edge.
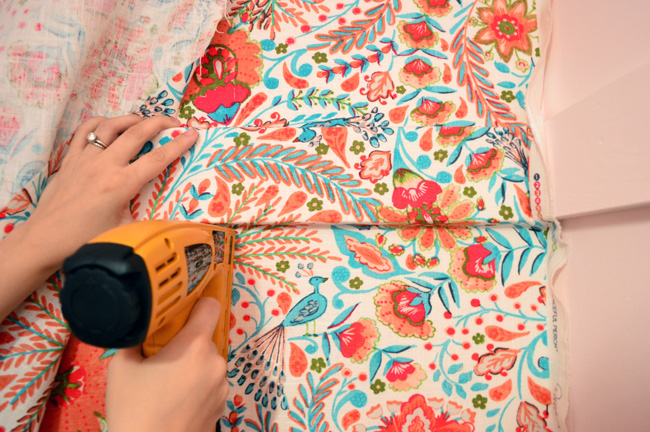
I even realized that I could wrap the fabric around the shelf board on the back of the closet with a few staples on either side of it so it was nice and clean looking.
My only real warning would be that if you have a big flap of extra fabric going on like I did on that angled part (I didn’t trim the fabric at all before hanging it for fear of cutting it off at the wrong angle or taking too much off that would make the entire remnant unusable), just be sure you don’t staple it behind itself or something. I never did that, but almost did a few times. If you did it wouldn’t be the worst thing because you can just pop staples out with a flat-head screw driver if you mess up anyway.
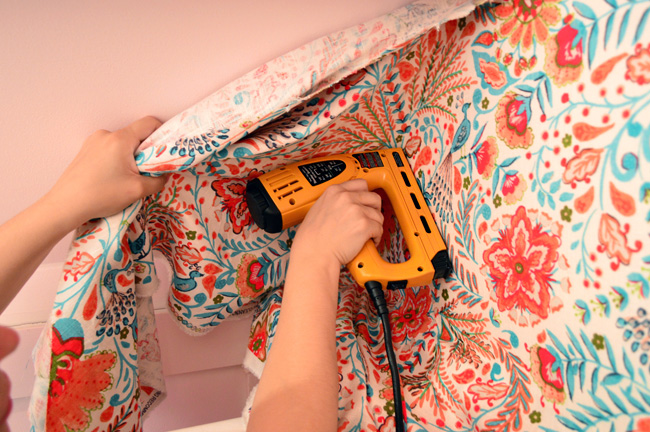
I did that a few times if I thought I hadn’t pulled something tight enough, or when I got to the bottom of the wall and felt like the corner had a crease or a bubble it shouldn’t have. You just sort of undo a few staples and re-pull things and re-staple until you like the look.
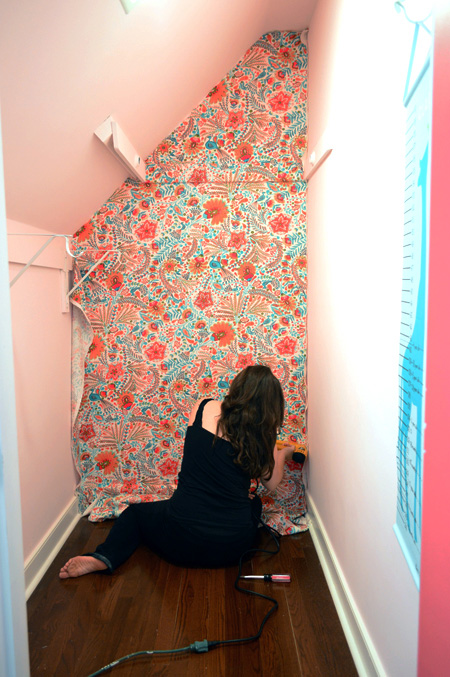
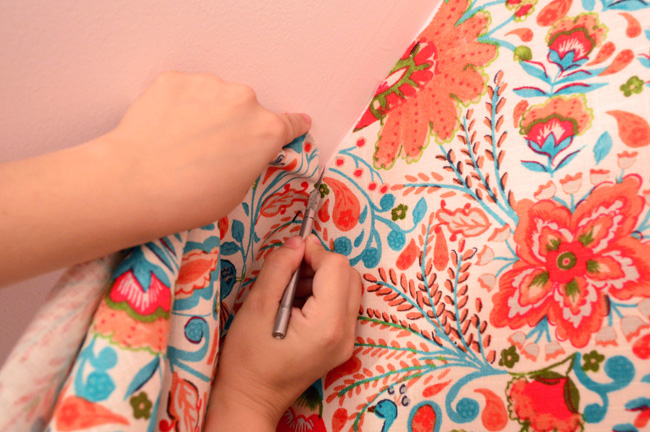
When I finished with all of my perimeter stapling, after the obligatory victory dance with the unplugged staple gun (unplugged is the key word), I ran an exacto knife along the entire perimeter of the back wall to cut off the excess. You’ll want to put a nice new blade in there to get as clean of a cut as possible. I tried to push just hard enough to cut through the fabric but not hard enough for it to go into the drywall. Since it’s the corner and I knew I’d be adding a trim piece of ribbon for a finished look, even if I jammed it into the drywall a little, it wasn’t a big deal, but for the most part I could slide it through the fabric without digging into the wall itself.
Next came the ribbon for that nice polished edge. I held up various ribbon remnants in red, pink, blue, and white that we had on hand and John and I both liked how the pink looked because it blended into the wall color (bold colors like red made it a little busy when combined with such a bold fabric, so we liked the more seamless look of the soft blurs-into-the-wall pink option).
We didn’t have enough pink ribbon just laying around, so I ran out to JoAnn and grabbed two 6 yard spools (we calculated that we’d need around 8 yards to go around the wall’s perimeter) and also grabbed some Aileen’s Fabric Fusion glue to attach that all the way around. It was almost like clear silicone caulk, so I just ran a thin line of it down the edge of each wall…
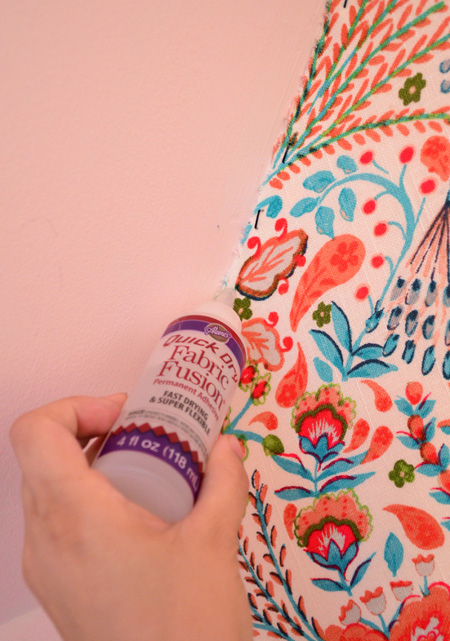
… and stuck a pre-cut-to-size ribbon against it for each portion.
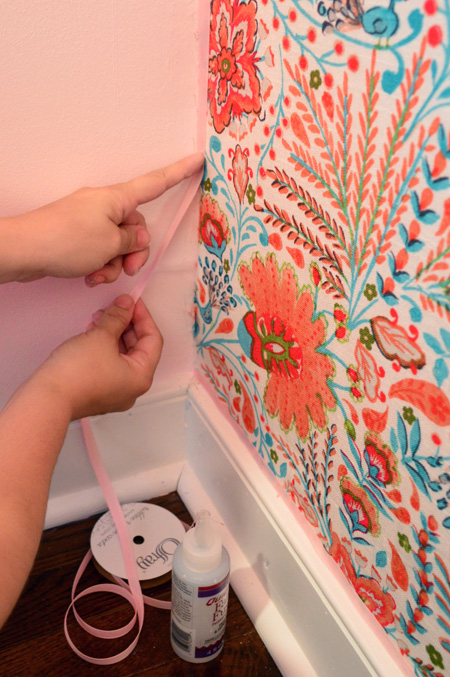
Here’s the finished result:
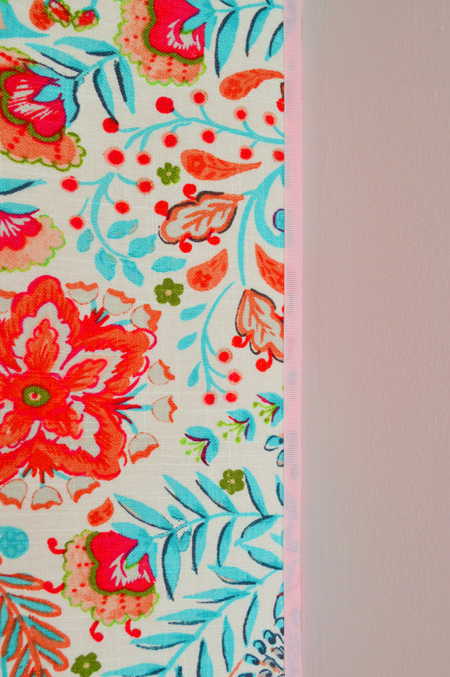
Once that dried (within about an hour) I brought back all the shelves and hanging rods I had removed, and put the closet back together.
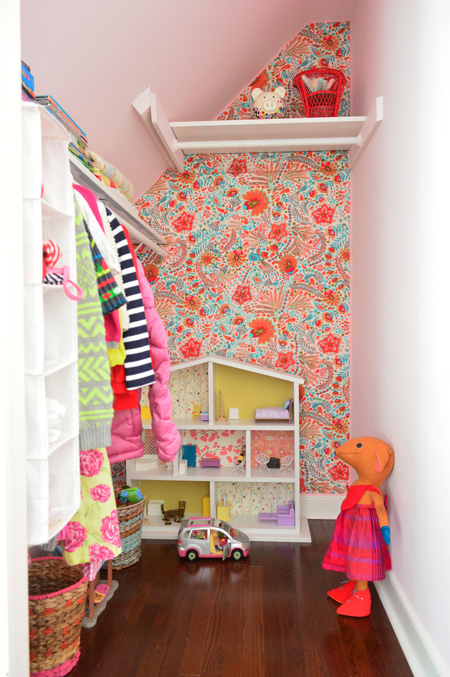
Clara’s PSYCHED about it.
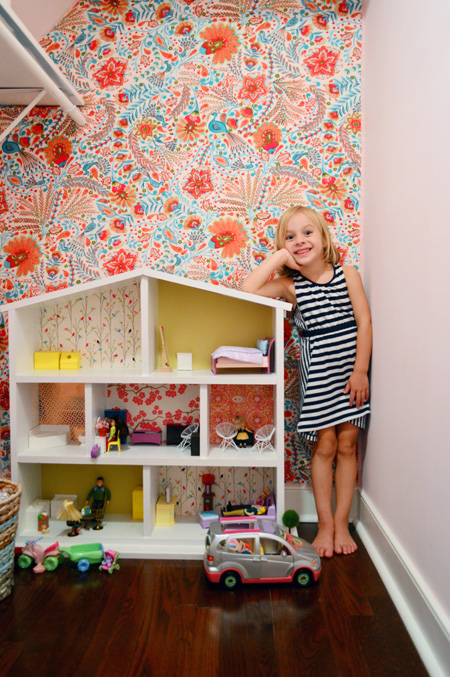
So is momma. Dad’s pretty keen on it too. Burger and Teddy are ambivalent, but I’ll take it.
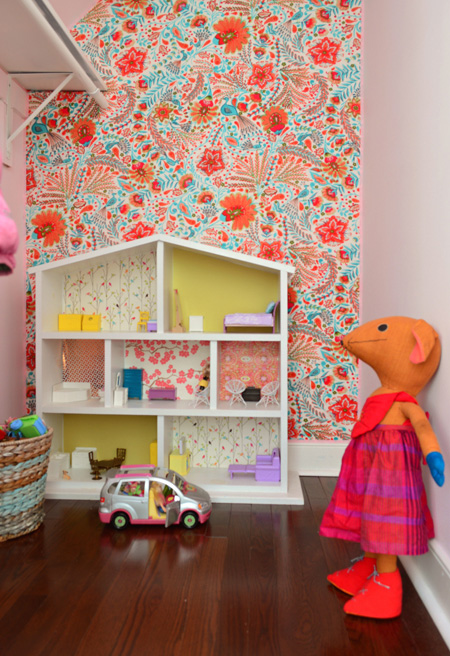
The coolest thing about this project is that I completely expected it to be one of those kinda-complex-and-tedious jobs that are worth it in the end, but it ended up being one of those surprisingly-simple-and-straightforward projects that make you beam because it looks way more expensive and complicated than it was. We already have had a few people over and all of them thought it was wallpaper until they touched it and said “no way, it’s fabric?!”
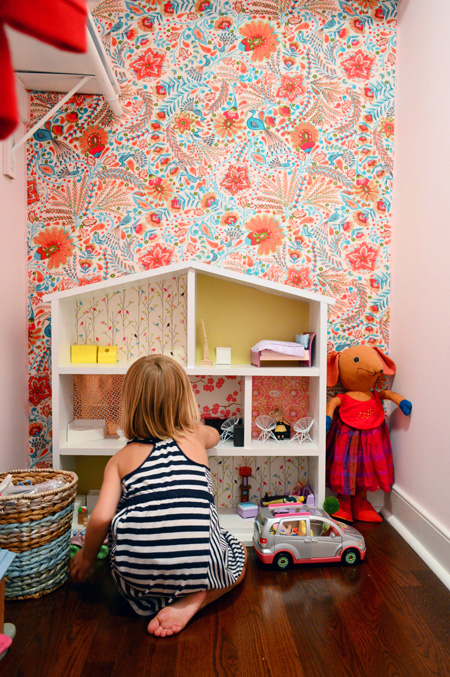
What did you guys do this weekend? Any kids-room stuff? Fabric projects? Victory dances with your 16 pound baby? Sometimes I feel like all I manage to get accomplished is to feed these kids and keep them semi-clean, so fun little projects like this are pretty exciting. Especially when I can squeeze them in between feedings. We also managed to get a little hiking in this weekend, and although it involved a particularly “memorable” port-o-potty visit with Clara, it was pretty awesome while it lasted.
Update – Wanna know where we got something in our house or what paint colors we used? Just click on this button:


jp says
I’m getting pop up spam surveys on your site. Not sure what you can do about it, but wanted to let you know.
YoungHouseLove says
Argh, thanks JP. We have been trying to block them but they keep changing their code. It’s so annoying and they’re not authorized at all, but we’re on the case! Do you know what the one this morning was for? Triscuits? Beef?
xo
s
jp says
Beef. Thank you! Yeah, just wanted you to know.
YoungHouseLove says
Thanks JP! Emailing them now!
xo
s
Lauren says
I was pretty sure JP was saying that he was GOING to blast your site with spam lol and couldn’t understand you guys’ reply lol it was funny trying to figure out what was going on here…
YoungHouseLove says
Ha!
xo
s
Molly says
My husband does website repair / defense with a concentration on spam / site hacking. Please email us if we can help in any way! I know how much of a hassle these things can be.
YoungHouseLove says
Thanks Molly!
xo
s
kb says
LOVE. Clara, I covet your closet.
Gilly says
I’m a step-mom (read: not bio at all) and I’ve never had littles, but one of my friends with 2 in diapers said, “If everyone has clean butts and is fed, it was a good day.” So, it sounds like you’re winning! Beautiful addition to Clara’s closet, mama!
YoungHouseLove says
So funny!
xo
s
Anele @ Success Along the Weigh says
That looks AWESOME and it’s such a great fabric that it will last her well into her teens! Sweet project!
Heidi says
What an amazing tutorial – I can’t wait to find a spot in our house to try this! We spent the weekend remodeling a bathroom – to the tune of only $600! Subway tile shower, flooring, gray vanity – yes, please! http://krusesworkshop.blogspot.com/2014/07/a-long-distance-bathroom-remodel.html
YoungHouseLove says
So charming!
xo
s
haverwench says
That is definitely going into my next “budget decor” post on my blog! http://ecofrugality.blogspot.com/2014/02/best-budget-decor-part-2.html
Jen @ Migonis Home says
That looks amazing, Sherry! I just love it… and I also love it when a project is easier than you think (which rarely happens. :)).
We designed and built our own shutters and hung them this weekend (the whole front of our house has had a major makeover in the past six-ish months). http://www.migonishome.com/2014/07/shutters-everywhere/
YoungHouseLove says
Those look amazing!
xo
s
MelissaPurls says
Thank you for posting that link to your blog about the shutters! They look fantastic–and like something I could do! Thanks!
Julia H says
What a cool idea and a wonderful project! I also wanted you to know that when I landed in the post a video ad started playing really loudly in my headphones. It was a bummer because it startled me! I think I remember y’all saying you didn’t use video ads so wanted to point it out. Thanks!
YoungHouseLove says
ARGH! Ads are never authorized to have sound! No idea how that slipped through. Do you know what it was an ad for, and what spot it was in (ex: the first one on the sidebar under our bio, etc). Thanks! We hope to get that blocked asap!
xo
s
Julia H says
Yes very first box underneath your bio box and above your search box. It says “viewster” when I went back to look at it a second time.
YoungHouseLove says
Thanks Julia! We’re on the case!
xo
s
Megan H. says
I’m getting the same one. Its the 300×250 on the right rail. Its a Viewster unit that’s constantly playing. It has shown celebrity gossip, a dish washing detergent ad, etc.
YoungHouseLove says
Argh! Is there sound? When we see that it’s silent (ads that play on silent are ok, but nothing blaring with sound is permitted).
xo
s
Anne says
Oh, my gosh! That is rad!!! Rad!!! :-)
And I totally know what you mean about the rush from doing something creative when taking care of (delightful) children.
Thanks for sharing!!
Erinn says
Looks great! What a fun pop of color and pattern! I’m curious why you didn’t use liquid starch to adhere it to the wall though. It works just as well but is easier to remove and doesn’t leave holes. Just a thought…
YoungHouseLove says
Meant to mention that in the post! We actually debated liquid starch (we featured a tutorial for using that in our first book) but realized that in this case we didn’t want it to be easy to remove (we pictured Clara or one of her friends peeling it down!). When we saw a few pro tutorials for wall upholstery using staples, we were all for it, just to keep it firmly up there – and spackling tiny staple holes down the line shouldn’t be too tough.
xo
s
JenWoodhousecom says
Wow! So much easier than the ole starch-mixture-fabric-wall tutorials you see all over the blogosphere. Genius!
Mary Beth says
I’ve been thinking of doing this for a while… I considered covering the front of dressers drawers in fabric too. I LOVE how it looks and you picked a great spot for it.
Good job!
MB
http://www.hystericallyeverafter.com
Tasha says
That’s so cute! What a clever idea. My only query is if there’s a risk of the fabric sagging over time. I suppose in a more humid environment, that might be possible. Closets tend to be cooler in my experience, so probably not something you have to worry about.
YoungHouseLove says
I will let you know how it goes! So far it seems to be holding firm :)
xo
s
Vidya @ Whats Ur Home Story says
OMG! That is totally cute. Love the print. Coral & birds what else do you need! Our weekend was a whirlwind, took a trip down to Kings Dominion(guess pretty close to you guys right?) with friends but squeezed in a whopping 5 mins to whip up a Summer wreath for our front door. :) I’m totally inspired to cover my walls with fabric now.
http://whatsurhomestory.com/summer-wreath/
YoungHouseLove says
Fun! We have been thinking about taking the kids to Kings Dominion or Busch Gardens one of these weekends!
xo
s
Steph says
That is adorable and I *love* the fabric.
My roommate and I had a party on Saturday so we did some serious house cleaning and then spent the next few hours walking around the house going “WHO LIVES HERE?” It’s just sort of descended into madness lately so seeing it so clean is a shock to the system. I actually stopped walking halfway down the stairs this morning because I was confused. LOL
YoungHouseLove says
So funny Congrats Steph!
xo
s
Meagan says
Love the addition to the closet! Such a fun hideaway play area – those are the best when you are a little kid. Also, I am kinda dying to know what was so ‘memorable’ about the port-a-potty visit? I know that makes me weird :)
YoungHouseLove says
Oh man, it’s too gross to type out, but it involved Clara seeing something extremely unpleasant in the port-o-potty before using it and insisting that we flush it (which, as you know isn’t possible) so we had this long detailed chat about how port-o-potties work and walked out to see that a family was waiting in line and heard the whole thing and was cracking up.
xo
s
Heather says
Glad I wasn’t the only reader dying to know!
Christy says
I wanted to know too. That was too funny.
Kara says
Hahah, I wanted to know too! My active imagination was taking me to much grosser situations (such as falling in, *gags*). Port-o-potties makes me thankful for modern-day plumbing!
YoungHouseLove says
Thank goodness there was none of that!
xo
s
Jamie Smith says
I love this fabric, and how it ties together all the pink and blue in her room!! Do you have enough remnants to sew a pillow for her bed with the fabric too? That’s another easy project. :)
P.s. It looks like Clara has a skylight in her closet, if so, that makes her closet extra awesome.
YoungHouseLove says
Yes! I have enough to do a nice long bolster I think! Just need some batting!
As for that glowing rectangle, I wish it was a skylight but it’s actually just one of those old flat lights from the 80s, but I like that it looks like a skylight to you :)
xo
s
Leah says
Have you ever looked into solar tubes? Not the best in a closet but a nice way to bring in light without a big skylight.
YoungHouseLove says
We hear they’re awesome!
xo
s
Plein Jane says
I also thought it would be fun to “paper” a wall of one of the dollhouse rooms with any extra fabric.
YoungHouseLove says
LOVE THAT!
xo
s
April says
OMG what an awesome idea. I have been searching for an idea to finish an awkward corner shelf in my closet and this is the perfect answer!
Breanna says
Obsessed! Doing this soon! We paint our laundry room with paint from TARGET (that store just keeps getting better) and painted our mud room with pain from Sherwin Williams (most expensive they had and it was terrible) CANNOT wait to add this project to the list!
Laura @ Rather Square says
Wow, great idea for a closet! We just recently painted our kids’ closets – they were old and dingy, so we just went with a bright white on the inside. They are much smaller than Clara’s closet though, so I don’t know if the kids will end up playing in them much – we’ll use them mostly for storage, I think.
http://www.rathersquare.com/2014/07/painting-tiny-closets-for-tiny-people/
But I am glad you wrote about your experience with fabric on walls – I think I’ll use this somehow around our house! At first I thought you’d be glueing the whole piece in, but staples sound like a much better/faster/tidier alternative. :)
Katharine says
LOVE! I also love that you drag visitors up to your daughter’s closet to show off your handiwork. I totally would, too.
Kate says
Cute! Look like you could use a little throw rug in there to cushion those little knees, though!
Kimberly@emmamariedesigns says
I love this! It’s so cute and colorful, perfect for Clara’s closet nook. I’ve seen this done with fabric adhesive but never with stapling – genius! Looks so much faster and requires less steps.
Mallory says
So simple and so pretty! I might have to do something like this in our little one’s nursery when I start putting it together. There are always such great ideas on Pinterest for shallow and wide closets but I never seem to find any for larger walk-ins. Thank you for sharing!
When do we get to hear more about this “memorable” port-o-potty adventure? ;)
YoungHouseLove says
Oh man, it’s too gross to type out, but it involved Clara seeing something extremely unpleasant in the port-o-potty before using it and insisting that we flush it (which, as you know isn’t possible) so we had this long detailed chat about how port-o-potties work and walked out to see that a family was waiting in line and heard the whole thing and was cracking up.
xo
s
Allyn says
So fun! I always wanted to do something like that when I lived in a dorm room, but with more of a glue/paste situation (cinderblocks and staples don’t work well together. Or so I’ve heard). Really like the idea of a such a big punch in a small space.
Janelle @ Two Cups of Happy says
This turned out so well! The bright pattern is so happy-looking. I love how you were able to wrap it around the shelf support for the continuous look. it’s nice to see a new mini-project from you guys. These posts are some of my favorites!
Richelle says
Love, love, LOVE. I was all set for it to be a liquid starch project. Staples didn’t even occur to me… brilliant.
Genelle Gardner says
Love the wall! What a great find!
Also, when friends and family visit you do they ask what projects you have completed since their last visit? I only ask because I imagine if I were on
“stopping-by-for-a-visit” terms with your family I would love seeing all the changes you make. Maybe that’s just because I have a DIY heart… ;)
YoungHouseLove says
Haha, yes! They come in and say “what did you guys do since the last time we were here.” I’m usually the one who is holding the baby like “uh… I’ve changed approximately 50 diapers and fed this little guy 80 times, oh wait, you mean projects…”
xo
s
Jess @ Little House. Big Heart. says
I love this so much, not least of all because I could totally do this over our ridiculously textured walls!
Any thoughts on how to do it if you were doing a wall wider than your fabric panel (ie. how to match it up like wallpaper)?
YoungHouseLove says
I think a few panels that looked centered with a little ribbon seam to keep things clean could work!
xo
s
Candice says
Beautiful job. Did you consider using wall paper paste on the fabric vs staples? If so, why you picked staples?
YoungHouseLove says
Meant to mention that in the post! We actually debated liquid starch (we featured a tutorial for using that in our first book) but realized that in this case we didn’t want it to be easy to remove (we pictured Clara or one of her friends peeling it down!). When we saw a few pro tutorials for wall upholstery using staples, we were all for it, just to keep it firmly up there – and spackling tiny staple holes down the line shouldn’t be too tough.
xo
s
Amy says
So cute! Also, that closet is so clean, not a dust bunny to be found! Which brings me to, will you do an updated post on your cleaning routine in this new house? Unless I missed one you did already, in which case, woops.
YoungHouseLove says
It’s pretty much the same as the one we shared a while back (I think it was for our first house? it’s on our projects page under cleaning and organizing). Although these days there are dust bunnies to be found- I just try to tackle them when I remember (read: when they get big enough to resemble actual bunnies).
xo
s
Jess @ Crunchy Hot Mama says
LOVE THIS! Such a super cute idea :) Now I just need to find a way/place to do it in Emma’s room. I can’t get over how big Clara is getting! Emma turns 4 in 3 days and it’s still surreal…our little girls were supposed to stay little forever.
That’s okay, that’s what our sweet babies are for, right!?
Allyson says
Love this! Turned out so great! I found a wallpaper that has a fabric version that’s significantly cheaper than rolls. Would you recommend this for a bathroom? Say, above a chair rail?
YoungHouseLove says
I’m not sure if over time from moisture it might sag in a bathroom. Anyone ever try it?
xo
s
Lita says
My daughter covered her dorm walls with fabric. The trick was spray starch. A little starch on the walls and enough on the fabric, a squeegee to put it on smoothly, and when it dries it sticks to the walls until you peel it off. A nice temporary fabric solution for walls by itself and would help with this more permanent one here I think.
kimi says
OMG!!! I’M IN LOVE!!!! Great job once again!!! What a sweet print for such a sweet girl!! We tackled an upholstered headboard for our little Ellie girl, she is 3.5 years old and moving to a twin bed!!:( Its also a sweet flowery fabric! I also painted her ceiling and closet with Cadillac Pink which of course I got from you guys!! Thanks!!;)YOU GUYS ROCK!!
Laura says
Super cute! Definitely something to consider as we’re redecorating our office, as wallpaper and I do not get along. And I’m all for celebrating nap time productivity. :)
Bonnie C says
Awesome! We did some DIY drywall work before we moved into our new house – we rocked the framing and hanging the drywall, and FAILED on the mud and texture (we have that horrid orange peel texture everywhere, blech). So It sat like that for several weeks making me crazy before it occurred to me to just cover that nightmare up. I hung some groovy line art IKEA fabric (it’s in the playroom) and five minutes later I was weeping on the floor in happiness. Possible exaggeration, but it’s some one of my FAVORITE things we’ve done in the house to date. ;p
YoungHouseLove says
Wahoo! Love hearing what you guys have been up to!
xo
s
Lynn @ Safebeauty says
That’s a fantastic addition to a play closet. I can see those bright bold colors activating Claras’ imagination every time she goes in there. And the fact that it was an easy addition makes it okay in my book. This weekend I was knee deep in fabric too. I reupholstered my parents kitchen chairs. Now I can’t stop staring at them…they just look so much better now. Who knew the power of fabric could change lives?
My best, Lynn
Melissa @ Loving Here says
It’s so lovely! We worked on our never-ending kitchen remodel this weekend. And sadly, we’ll be working on it for many more weekends to come, too. Ugh. It’s going to be worth it, but it’s certainly not one of those surprisingly easy projects like you lucked out with this weekend! :)
Erica S. says
This looks great!
Ironing fabric to the wall also works ;) I ironed some cupcake fabric to a wall in my 4yo’s playroom to tie into her play kitchen textiles.
Paige @ Little Nostalgia says
This is so delightful! Really, there’s no other word for it. It’s just a happy little space. And I’m keeping the staple gun in mind, that’s a great tip.
Isabel says
So cute and so inspiring! Love the wild and colorful print. Perfect first step for the future closet playhouse ;-)
Marianne in Mo. says
Love that fabric! And so much easier than starch. Clara is a lucky little gal!
Love the port a potty story! :-)
Jessica says
There was a video ad for Viewster right below your bio.
Clara’s closet is AMAZING!!!
YoungHouseLove says
Thanks Jessica! When we see that ad it’s not playing sound, is yours? As long as it’s silent we’re ok with it, but loud blasting sound isn’t something we allow.
xo
s
Natalie Royall says
OK… so you guys are always making me want to gut my house and re do it all to look like yours.. BUT THIS LITTLE UPDATE!!!! Takes the cake!! I LOVE IT!!!! i kind of want to get rid of 1/2 my clothes in the master and do something in there… haha!! LOVE IT!!! And I do mean get rid of my clothes so I could just lie on the floor and stare at the pretty walls… hahaha!! Love you guys and you always brighten my day with your humor and decorating skills :) Keep up the AWESOME work!!
Reshma Sanjeev says
Love it. The fabric is so colorful.
Caitlin says
So cute! I love that print, especially for a little girl. I might have to try affixing fabric in a less permanent fashion in our soon-to-be rented apartment.
Sarah says
Thoughts on doing this in a half bath? I am in love with this idea, but think I would need to stick with small space. Wondering about moisture issues, but hopeful due to toilet/sink only.
YoungHouseLove says
I think that could work since you won’t have steam/moisture unless someone splashes around in the sink a lot. Maybe give it a try just with a few staples to hold part of it taut and see how it does before doing the whole thing?
xo
s
Jen @ RamblingRenovators says
That project is completely adorable! And easy and quick too. High five!
Reshma Sanjeev says
Love it. The fabric is so colorful and ties so well with everything.
April says
When my sister and I were young my mom wallpapered our rooms with floral sheets. I loved them and would lie in bed and focus on one color of flower and then watch that color seem to pop out all over. It is such a nice memory of childhood and this brought that all back to me. Beautiful job! Clara is getting so big!! My mom is 82 now. She was ahead of her time in the DIY world :) She also wallpapered a bathroom once in National Geographic covers, lol.
YoungHouseLove says
That’s awesome! Your mom = my hero!
xo
s
Jessica P. says
April,
I had a mom like yours and Sherry’s fabric-wall post made my day, too. My mother (with her trusty staple gun) used different floral fabrics in the same hues (it was the mid-1970s) and covered my bedroom walls and the ceiling. It was magical. I loved it so much and Clara will, too.
Leslie says
Where’s the like button around here?! Looks faboo.