Dude. We got things DONE this weekend at the beach house. And by that I mean, we showed up with a giant to-do list and only got about half of it checked off, but it really felt awesome after four days there (thanks to the kids having no school on Monday & Tuesday) to lock the door knowing that we’d knocked out a huge portion of the kitchen.
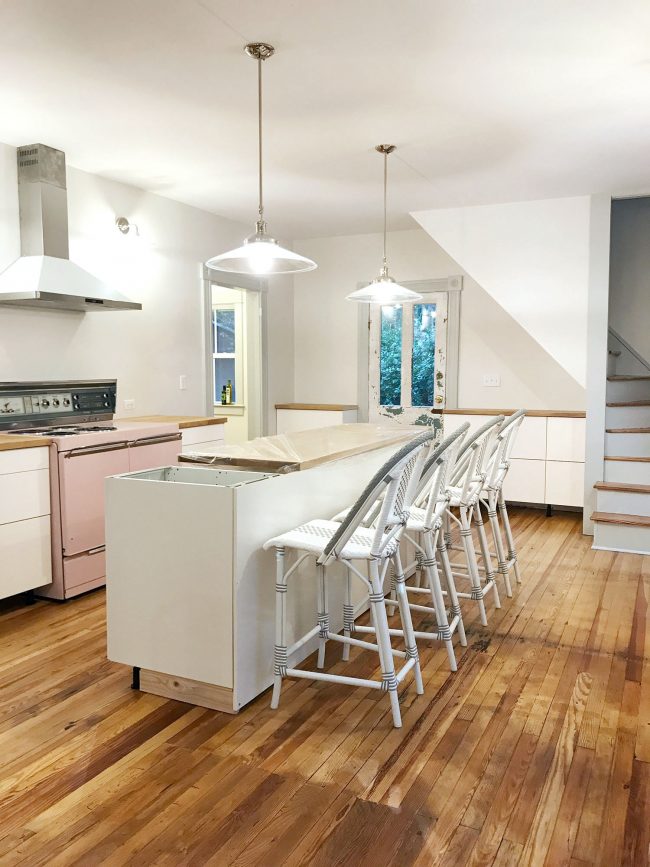
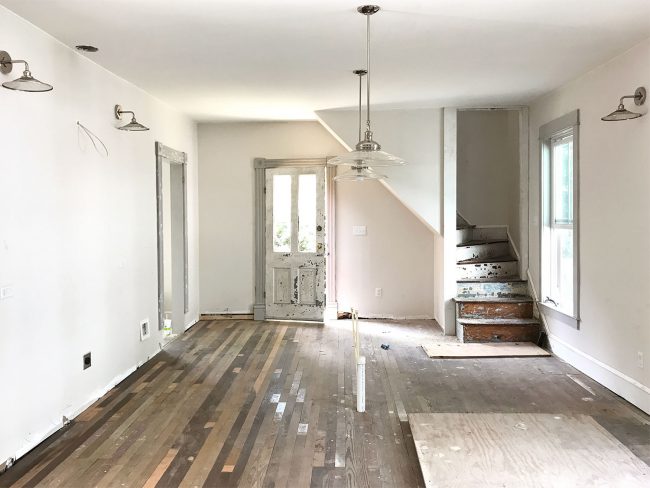
We still have to get a fridge and a dishwasher, add floating shelves around the stove, add a backsplash, do the toe kicks & quarter round down at the cabinet bases, and the island will have a larger counter with a sink in it and a 12″ overhang for the stools… but we are getting there! We actually have perimeter counters! I mean, they need to be screwed in and sealed, but they’re there! And we have working drawers (still need hardware) and a hood that’s hung up (that white part is just a protective cover, it’ll all be stainless once we peel that off). I love how everything I say is countered by a “but we still need to do blank!” But seriously, this kitchen progress feels pretty freaking exciting for us. Especially because just a little while ago it was looking more like this:
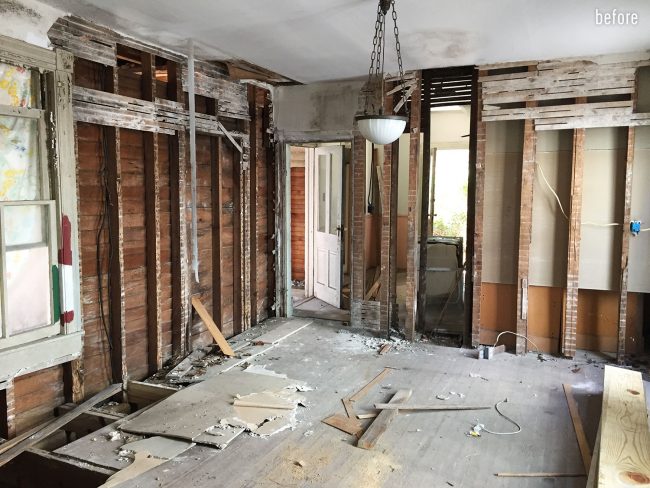
And back when we bought it last fall we were staring at a room that looked like this:
So…. progress!
And without further ado, here’s a video walk-through that we took right before we locked the door behind us yesterday. It’s full of all the what’s next & what’s changing info along with a bunch of explanations about the whole house as it has progressed since our last tour back in October. Note: If you’re viewing this post through a reader, you might have to click through to the actual post to see the video. And if for any reason you’re having an issue with the video loading here on our site, you can also view it here on YouTube.
Once again I’ll mention that I can fit a whole lot more words and info (and pictures!) into a video. Heck, a video is worth a million pictures! So that’s the best way to get all caught up and see/hear about what’s going on these days. But if you’re at work or somewhere that you can’t watch the video, here are some photos to tide you over.
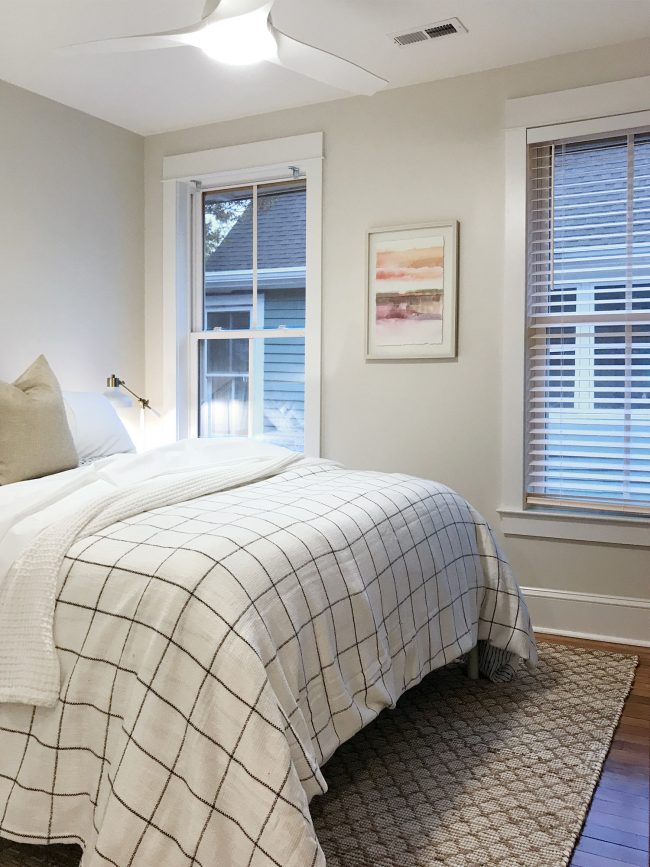
The front bedroom is moving right along. We couldn’t fit the headboard in the packed car on the way out, so that’s coming (and we’ll also hang curtains to make that bed feel a lot more balanced and grounded in front of the window) but it’s really feeling super cozy in there now. Something magical happened when we moved the side tables from the back bedroom in and rolled out our new 8 x 10 rug. It’s 20% off on Serena & Lily right now – not sure how long that’ll last, but it’s so soft and it’s also indoor/outdoor so we love that we can hose it down outside and it’ll hopefully be super durable for the beach house.
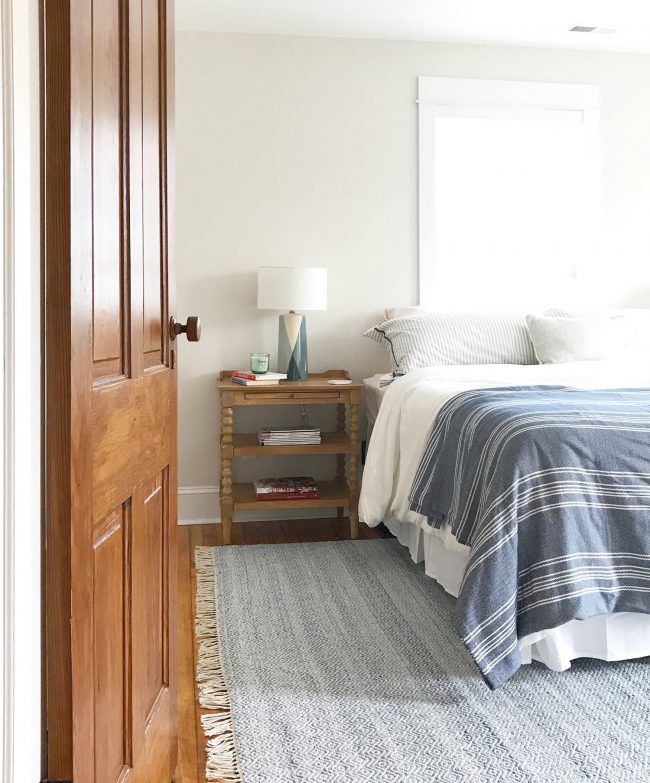
As for the other sources in the room, there’s a mood board with links at the bottom of this post, so there you can find the bedding & lamp info, etc. And picture me cupping my hands around my mouth and shouting a resounding “yes, we’d love to!” to everyone asking us to build a “Shop Our Beach House” page like the one we have for our current house. We’re hoping to do that as things come together more – maybe within the next month or two.
We also got this 5 x 8′ rug (also on sale for just $258 right now) for the guest room, which is a pretty sandy color and is a hemp/cotton blend for a nice durable and beachy feeling. We’re realizing we’re drawn to a lot of blue things (hello, beach house… and also, hello, we love blue) so it’s nice to have some warm tones in the refinished wood doors & floors, the pink stove, and also in this warm textured rug. Gotta keep the balance so it doesn’t turn into the “I’m Blue Abadee Abadaaa” house (does anyone else remember that crazy song?! They were just taking nonsense right?!).
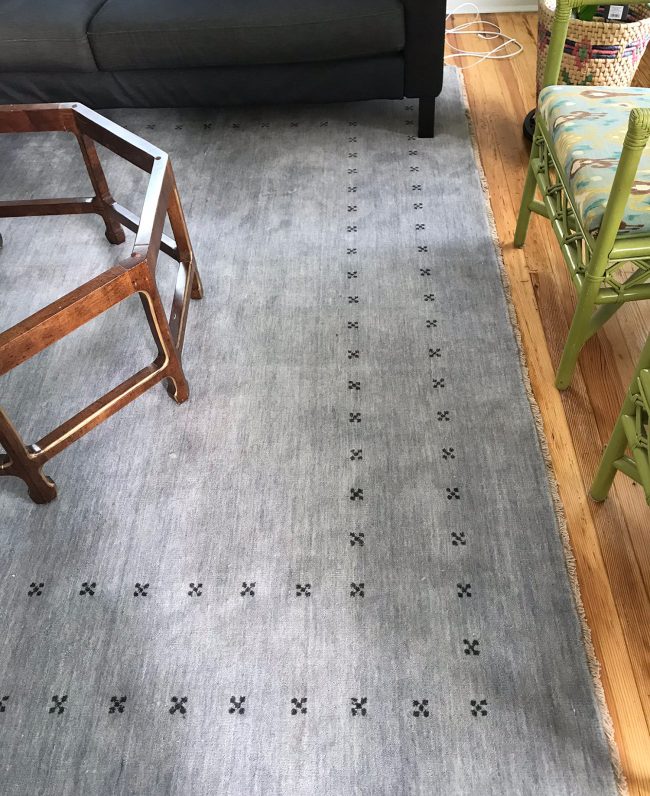
Speaking of blue, downstairs we also got this 8 x 10′ rug, which is a nice silvery gray-blue, especially on sunnier days (so sorry the video was filmed on the grayest of gray days – BOO!). We’re actually debating bringing this rug up to the back bedroom and perhaps getting something slightly warmer and less blue since the sofa sometimes reads like a deep denim blue, and again… there’s lots of blue here, so we want to make sure it doesn’t get overwhelming.
It’s a really nice plush rug though! Super soft feeling and the little X detail around the border is so cool. Looks way more expensive than it was for that large size in all wool. And yes, we still need a top for that coffee table and to paint and reupholster those crazy green chairs. Soon I hope!
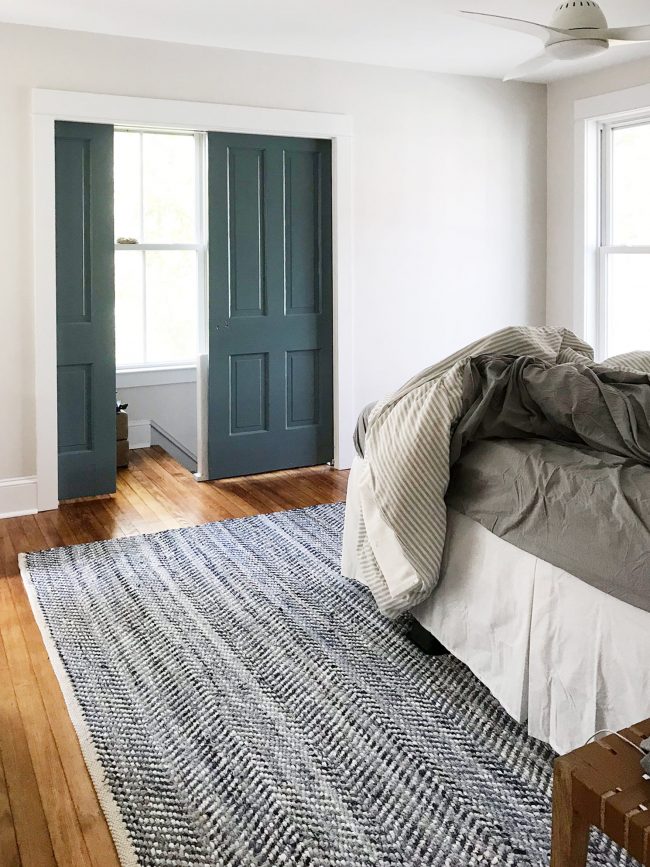
And now let’s talk about the rug that didn’t work. As soon as we rolled this one out we were like “Uhhhhh, it’s really dark. And kinda crazy looking in here.” In the photo on the site it looked a lot more subtle and subdued, but in person it felt more chaotic than this picture even conveys. In person you couldn’t really pick up on the diagonal lines of the pattern, it just sort of looked like a rag rug with lots of randomly placed bumps in dark blue, and with the blue doors and the blue tub in the master… it was A LOT of blue (and not all the same tone of blue – the rug sort of clashed in person).
So although we gave ourselves a few days to live with it to see if it grew on us, the verdict was “we’re sending it back.” Again, this picture makes it look less busy. In person, it just didn’t work for us. Which is sad, because packaging and mailing back a rug is akin to running a triathlon for a 5’2″ gal like me.
So the little X-border rug from downstairs might come up here (it reads a lot more like a light silvery-gray) and then we have to find a good rug for the living room, but it helps that the three big rugs that we need for this house are all 8 x 10’s, which is nice for flexibility & swapping (you know I love to switch things around – a little too much probably).
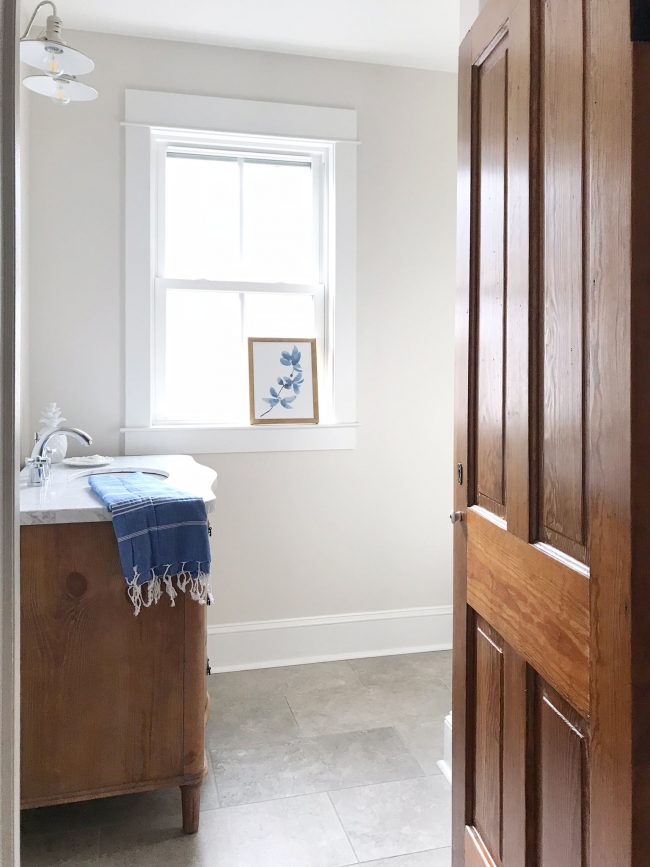
The hall bathroom is still my favorite bathroom, and we actually found the perfect mirror for it, but alas, we couldn’t fit that in the car either, so we’ll have to hang it next time. We did manage to hang a shower curtain in there and caulk the tile edges (we finished caulking all the showers!). So pretty much all we need to complete this room is a toilet paper holder, a few towel hooks, and the easy small stuff. HUZZAH! Also need to hang the art and add window treatments so we can stop blocking the windows with cardboard while we’re there because that just doesn’t feel very classy you guys.
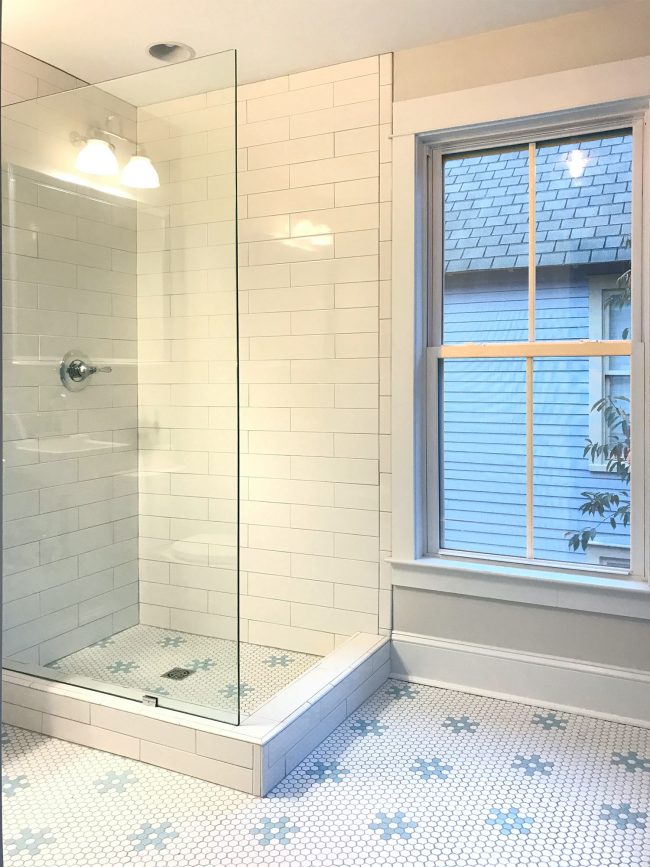
This is a terrible picture taken with the lights on during a super rainy day, but the master bathroom shower finally got glass! WAHOO! We worried that shower might feel tight, but thanks to getting this glass panel instead of a big bulky wall, it feel so bright and open in there! It actually feels just as big as the bigger hall shower which is around 6″ wider – so it’s funny how much your eyes play tricks on you when it comes to the actual perceived size of something. Still need a lot of stuff in here (I want a wooden stool by the tub, a few other hits of wood to add warmth, window treatments of course, towel hooks, etc). Slowly but surely…
But now let’s get back to the kitchen that we assembled from approximately 4,567 small parts with a single allen wrench.
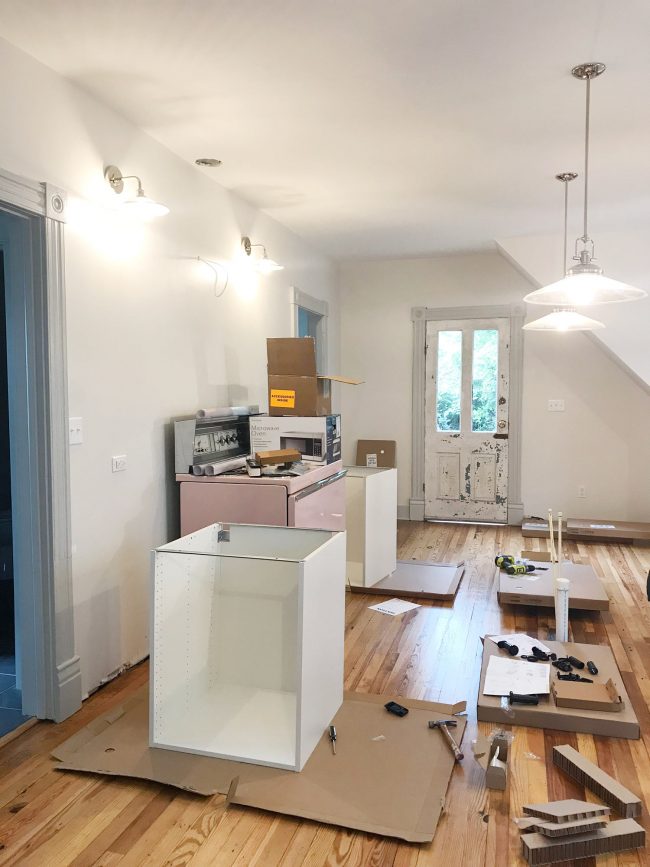
Just kidding, it was slightly fewer parts and it actually didn’t involve a single allen wrench (go figure!), but it was sort of like a DIY marathon of snapping, drilling, hinging, hooking, and leveling things over a four day period.
As for why we opted for Ikea cabinets at the beach house, we’ve been really happy with the ones we put in our laundry room and our bonus room – and the budget called for something affordable since we’re also adding beds and furnishing a lot of other rooms at the same time. We even got to take advantage of Ikea’s spring kitchen event (yes we ordered all of this waaaay back then) to save some extra money. This entire kitchen – including the counters and sink! – came in around $3K, which is pretty dang amazing to me.
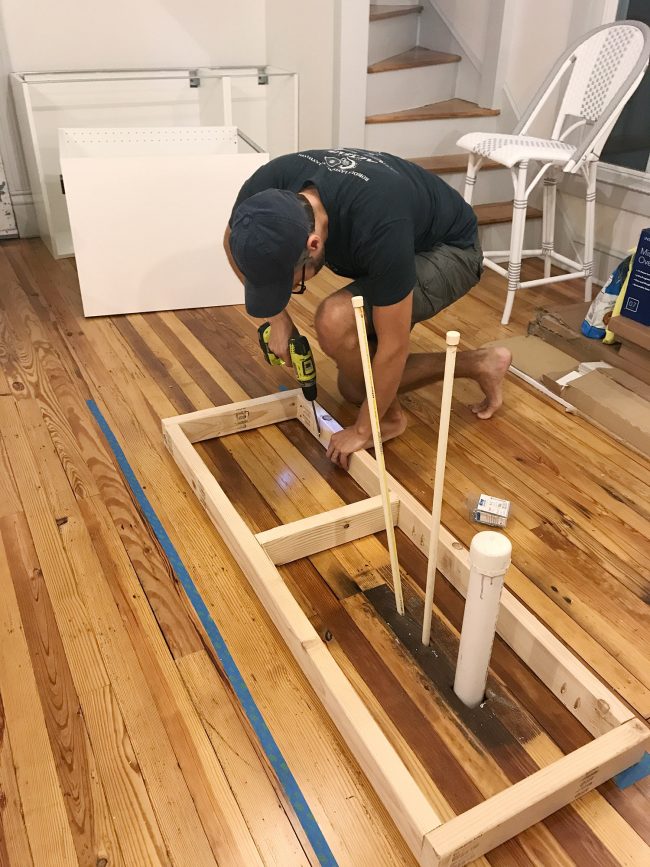
We’re lucky because some Ikea kitchens consist of 25+ cabinets and we only had 8 in here to assemble (and it helped that we had an extra long weekend thanks to those two additional days off of school for the kids). It also helped that we went pretty simple with the layout and the cabinet fronts since we want the pink stove and the pretty old architectural details in here (like the back staircase and the old glass-paned doors) to be the stars.
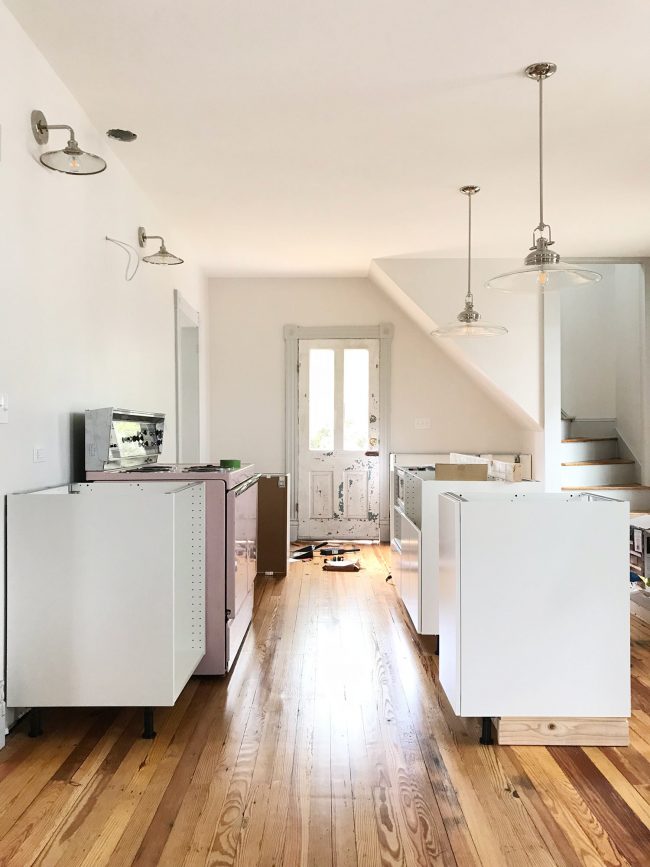
Speaking of that back door, yes we’re going to eventually paint it. We love the blue chippy door to the mudroom, which you can see in the video, but the back door just seems to look dirtier as the kitchen comes together more. And yes, we have to weatherstrip it because there’s a small gap. The light bounces off the floor and creates what looks like a much wider gap than the actual sliver of space under there, so we get “OMG CAN AN ANIMAL GET IN THERE?!” comments surprisingly often, but in reality it’s definitely not animal-sized. If it was, the whole weatherstripping thing would have been waaaay higher on the to-do list. Ha!
Getting back to the topic of kitchen assembly time, the fastest part was the counters by far. We measured ten times before we cut each one, and we taped them off to lessen the likelihood of splintering from the circular saw (which worked!). Lo and behold, we didn’t mess up a single cut! Each of the four counters we sliced and diced fit like a glove. We still have to screw them into place and seal them (and figure out the entire island – so there’s THAT) but we’re super relieved that our first go at cutting our own counters wasn’t too much trouble. Note: For more info about how we planned this kitchen, what exact items we ordered, and why the heck we chose butcher block, this post has all of those details for ya!
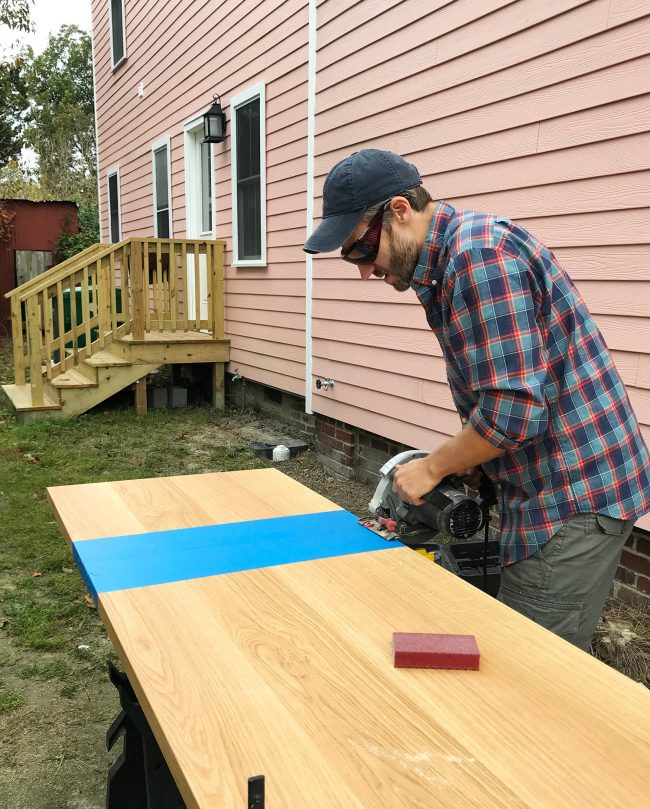
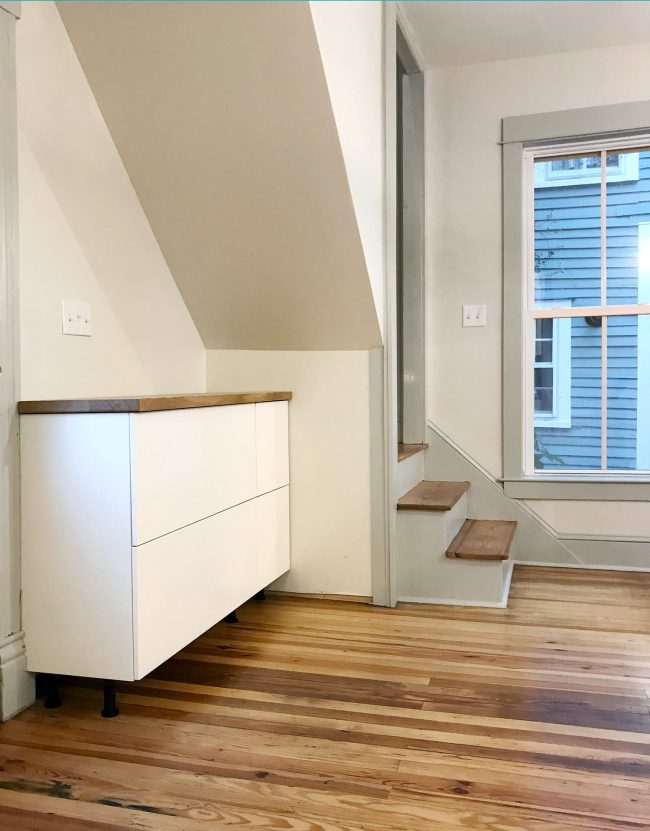
And as for the color of our butcher block, we got so lucky! It’s really close to the heart pine floor color, and we think when we seal them we’ll be even closer (they look a bit drier and less shiny than the floors right now, but only slightly).
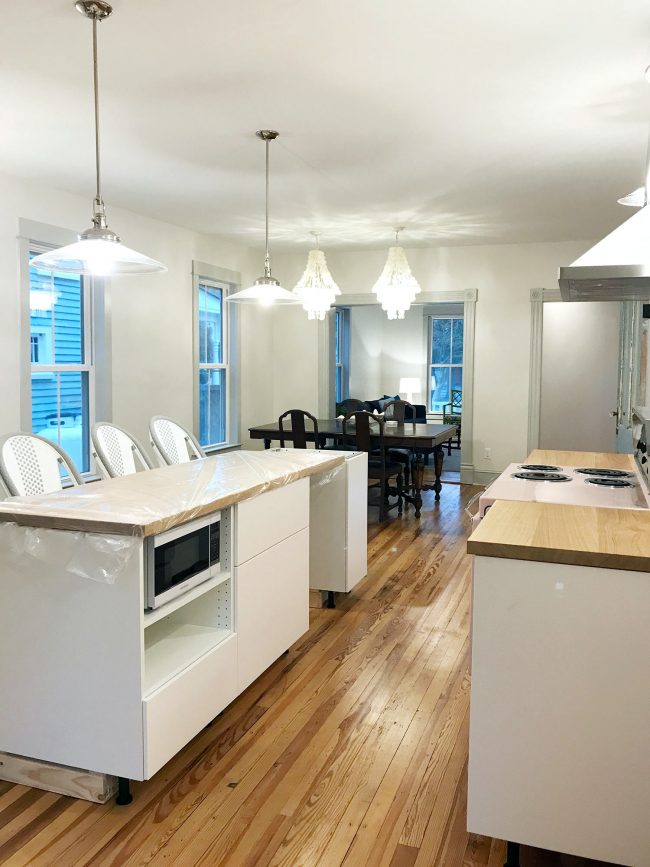
So that, my friends, is what we’ve been up to at the beach house. Oh and the kitchen table came with those chairs from craigslist (the whole thing was $65 and the table has super cool legs that you can’t really see here) but we’re going to be switching the free chairs out for white ones since that feels like a super dark spot in the kitchen right now. And those chandeliers will be lowered around 10″ (they were installed higher so people wouldn’t run into them and break them while the house was being put back together & the floors were getting refinished). And we need a dishwasher. And a drawer for that space below the microwave. And a much bigger island counter with a sink in it. And art. And lots of stuff. But look, we have a half-functional kitchen!!!
A few other things we checked off the list were that I got to run around scraping stickers off all of the windows with a razor and then I cleaned them all (so SHINNNNY! – please sing that like the crab in Moana). I also got crazy with the spackle and basically filled every single ding and dent I could find (if you look super closely in the video you might see some of my patches that I have to sand and paint the next time we’re there). When the hood went up there was a little ding in the ceiling, so I wasted no time hopping up on the counter to fill that baby. PARKOUR!
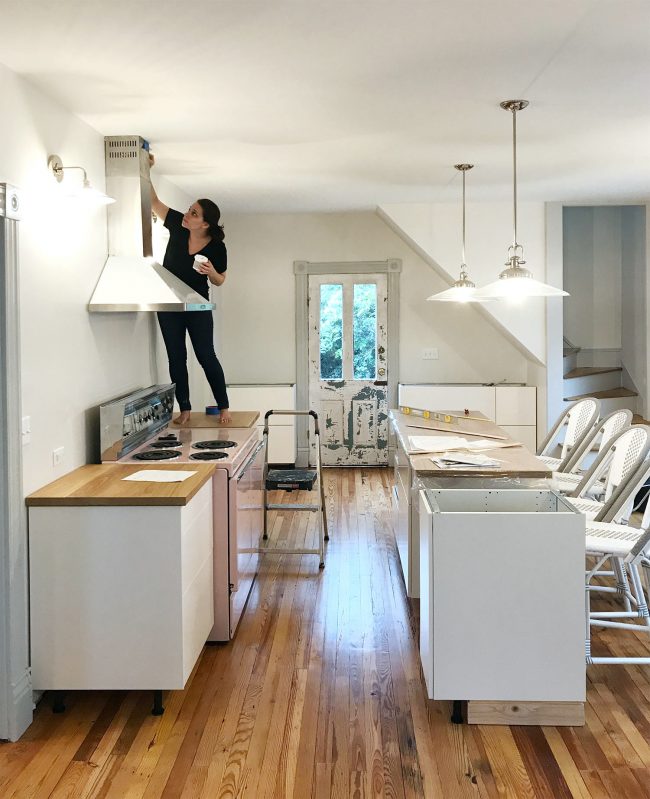
I’ll leave you guys with this shot of the kitchen from the door, which is such a welcome change! No more pile of Ikea boxes sitting on the floor, mocking us and making us question our sanity/ability/time management skills.
And since we promised a big ol’ mood board full of sources, here’s the one we shared a couple of weeks ago along with with our new additions added below:

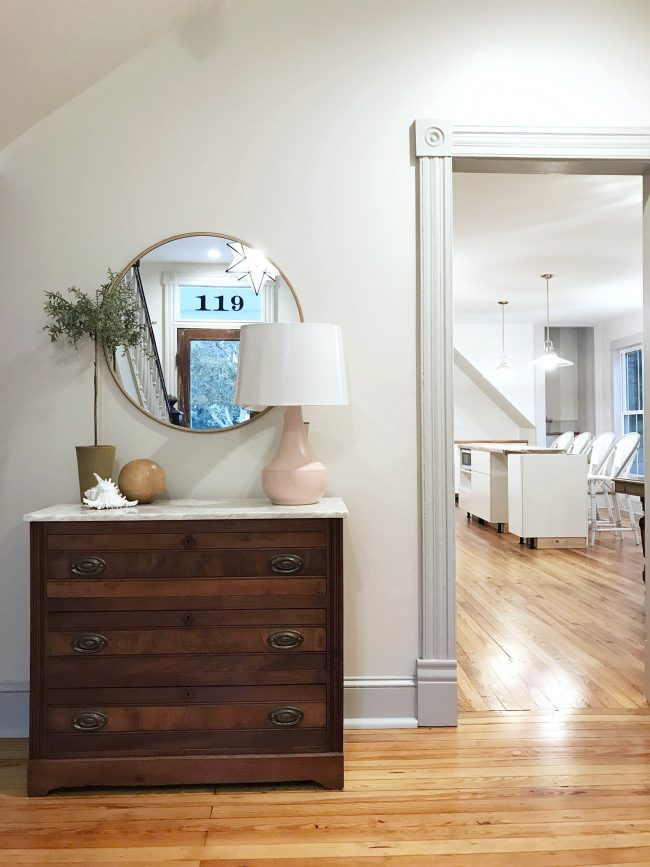
1. Living Room Art / 2. Kitchen Stool (similar) / 3. Chair Version of Kitchen Stools / 4. Front Bedroom Art / 5. Walls (SW White Heron) / 6. Downstairs Trim (SW Stone Isle) / 7. Upstairs Trim (SW Pure White) / 8. Tub & Pocket Doors (SW Riverway) / 9. Foyer Mirror / 10. Hall Bath Tile / 11. Hall Bath Vanity / 12. Downstairs Bath Mirror / 13. Downstairs Bath Vanity / 14. Master Bath Mirror / 15. Master Bedding / 16. Master Bedside Lamps / 17. Master Bedroom Art / 18. Master Bath Tile / 19. Master Bath Accent Tile / 20. Master Nightstands / 21. Hall Bedding

22. Leather Ottomans / 23. Hall Bedroom Art / 24. Extra-Long Waffle Shower Curtain / 25. Downstairs Bath Art / 26. Glass Shower Pane / 27. Pink Downstairs Lamps / 28. Hall Bedroom Blanket / 29. Front Bedroom Blanket / 30. Blue Front Bedroom Lamps / 31. Kitchen Counters / 32. Wood Benches / 33. Front Bedroom Pillow / 34. Kitchen Cabinets / 35. Front Bedroom Rug / 36. Living Room Rug / 37. Middle Bedroom Rug
And for anyone looking for lighting sources, here’s our mood board with that info:
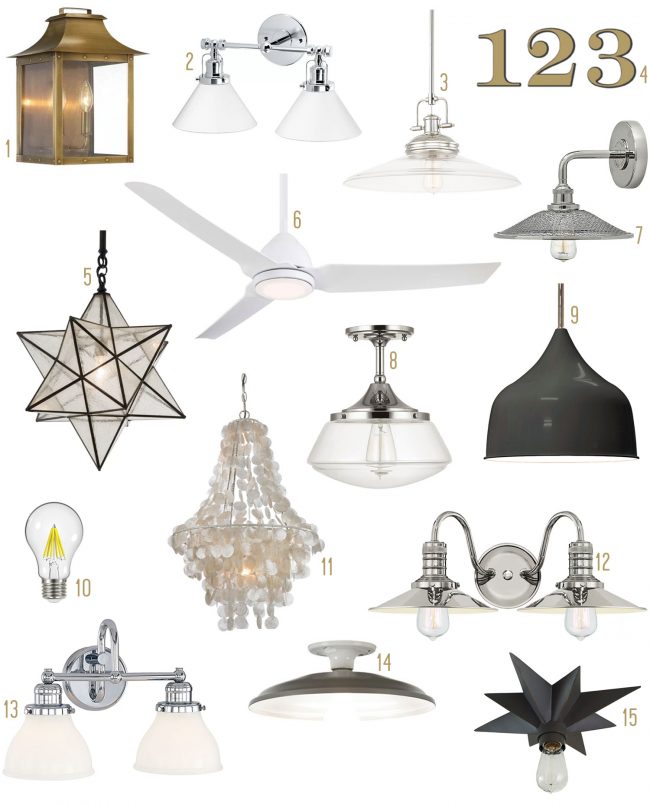
1. Front Porch / 2. Downstairs Bath / 3. Kitchen Island / 4. Porch Numbers 5. Foyer (similar) / 6. Bedrooms / 7. Kitchen Sconces / 8. Living & Master Bath 9. Mudroom / 10. Clear, Soft White LED Bulbs / 11. Dining / 12. Master Bath 13. Hall Bath / 14. Hallway & Small Upstairs Rooms / 15. Under Stairs
And in perhaps the craziest news of all, on November 5th we got a completely unseasonably warm 70-degree day, so we actually all went to the beach and went swimming!

It was so crazy. The water felt perfectly refreshing! Of course now we’re back at home and this morning it was 40 degrees so bah humbug.
Psst – You can see more of our beach house adventure here (it’s a category full of posts about the entire process, which started over a year ago).
*This post contains affiliate links*
