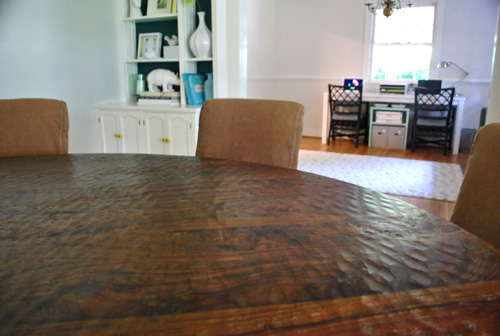
Remember how we envisioned modern and cheerful green leather parsons chairs around a chunky wood table from pretty much the moment we moved in? And how we decided that dyed-green slipcovers were pretty much the same thing when we found chairs for $25 and slipcovers for $23? Well, we were wrong. I dyed two of the chairs green and they were just not “it” (even if we altered the shade of green, we just knew it was the wrong way to go for us as soon as we saw these babies):
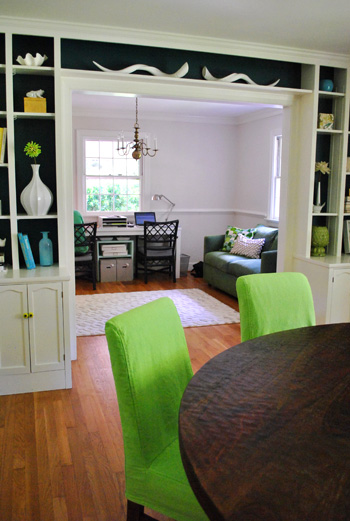
Especially considering that there would be seven or eight of them around the table at all times (and we have the bold built-ins going on in the background and dreams of chic patterned curtains, a huge cut out opening to the kitchen, a giant chandelier above the table, etc). It suddenly dawned on me that of all the things in the room that there were going to be there, the chairs were not the things that I wanted everyone to be staring at. In fact, I decided that I wanted the chairs to blend in. To become best supporting actors items to a few other things that we’d love to be the stars (namely the built-ins, the bold patterned curtains, and the showstopping chandelier that we can’t wait to bring in).
But let’s rewind to two of the four colors that we considered before we reached for the dye at all. First we thought long and hard about whether we wanted to dye them in the first place. We mentioned that the off-white tone of the covers looked dingy in contrast to the glossy white trim and built-in shelving, but even so we still wanted to live with them a while before doing anything rash.
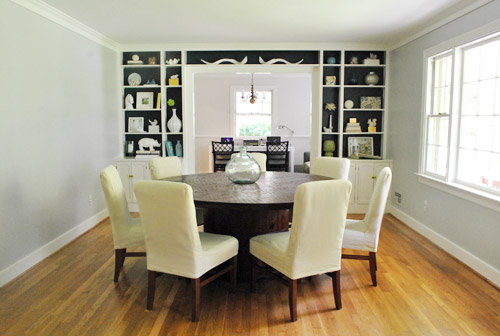
So we did. And we definitely didn’t like the clashy off-white tone any better after the weeks ticked by. It was time for action.
Next we considered trying to somehow bleach them white. That way they wouldn’t look dingy and would tie right into the white trim and those white built-in shelves. But the more we thought about one of our major goals (for this house to be kid-proof and not make us into uptight fearful hosts) we realized that even though white slipcovers can be bleached they’d still show dirt more on a daily basis. Even dark denim could leave a blue tint behind on them (which is something that we never thought of, but some light googling brought to our attention). And if something a little darker could hide a bit more dirt (resulting in less frequent washings and kid-related heartburn) we’d take it. Function first. Plus we felt like white covers would stop the eye and call attention to themselves since they’d be so contrast-y next to the table (which wouldn’t fulfill the blend-right-in goal that I’d eventually come to reach anyway).
So it was back to the green chair idea that John and I thought would be just the ticket (and later learned… not so much). I’m actually a dye novice. In fact I’ve only dyed one thing before (besides my hair throughout middle school and high school- yes I once was a blonde). That thing that I’ve dyed? Oh yeah, it was my wedding dress (so I could wear it again, like to other weddings):

I can’t believe I had the guts but it worked out so I guess I have a soft spot for dye. It’s a great, easy, and affordable way to breath new life into something you wouldn’t wear otherwise. I’ve dyed everything including shirts, sweaters, and even jeans! It hasn’t let me down yet.
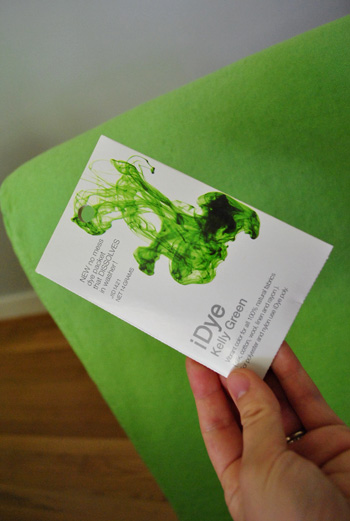
Anyway, here’s how I dyed those two slipcovers just in case you’re about to take the d-y-e plunge. It was actually really easy thanks to the type that I used this time. A bunch of readers and even a few relatives recommended iDye (we found it at JoAnn). It was under $3 for each pack (and I could use each pack to dye two slipcovers at once). It’s meant for natural fibers like linen and cotton and silk (jackpot: our slipcovers are linen and cotton). When it came to picking the color, there were a ton to choose from (which is soooo much nicer than just one tone of green or blue, which is the case with a few other dye brands). In fact there were at least five different green tones (green, olive, kelly green, emerald, chartreuse, etc) so we narrowed it down to these two:
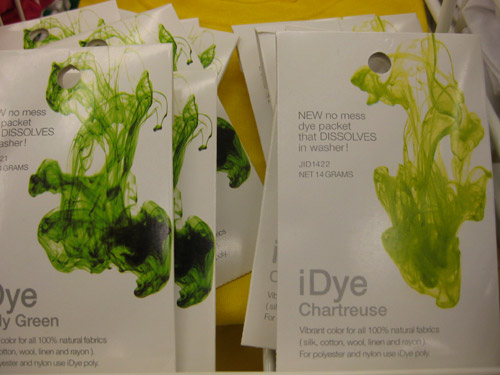
We liked that chartreuse would be modern and fun, but worried that it might end up looking a little too neon and highlighter-ish. And we liked that kelly green would probably be a bit more green and less yellow, so we ultimately decided it was the way to go for that apple green look that I wanted from day one.
Although there were some simple directions on the pack, I’m waaaaay too neurotic to settle for those. So I went to their site for a lot more instruction (aka: hand holding). The fact that this dye worked with front loading washers was a huuuuge perk for me. And it was simple. Burger could have done it if he could reach the dryer buttons.
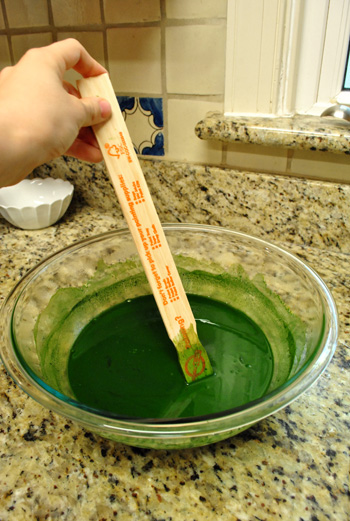
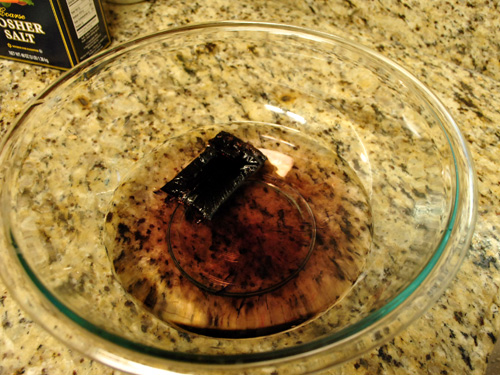
First I put two cups of hottest-possible-from-the-tap water into a big bowl. Then I dropped in the dissolving dye envelope from the dye kit. And I stirred it up.
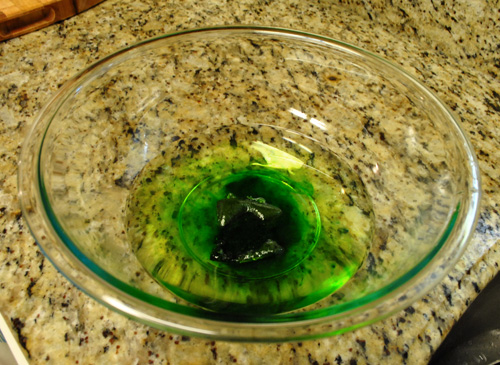
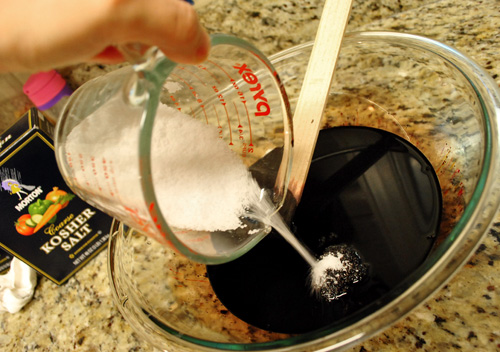
Then I added one cup of salt (since that’s what they recommended on the dye site for cotton & linen fabrics, which is what the slipcovers are).
Then I stirred again. Oh and I used a paint stick.
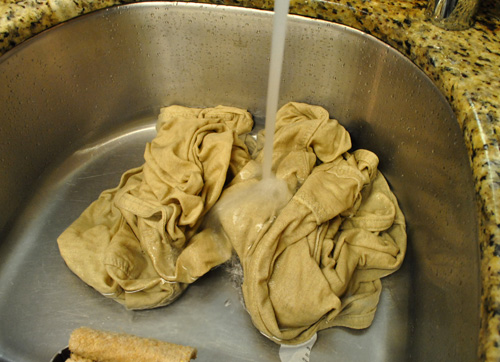
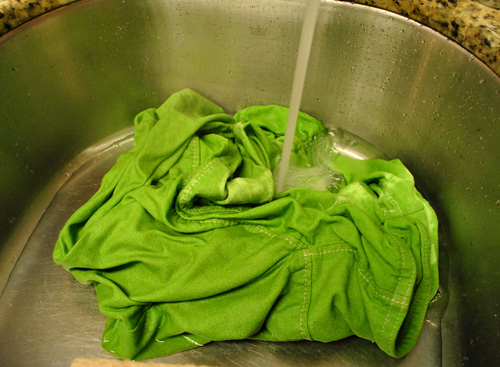
The next step was to pre-wet two slipcovers before adding anything to our front loader (this shot shows how not-white the slipcovers were – sort of oat-meal-ish in person).
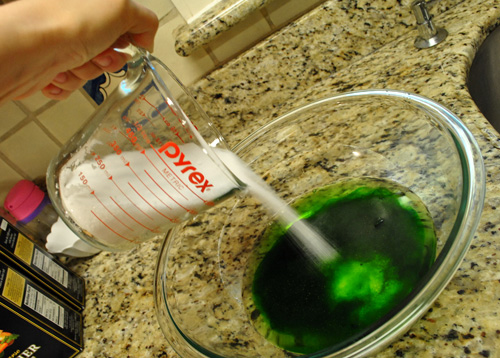
Then came the heart-stopping step. Pouring my bowl of hot water and dye and salt into the bottom of our front loading washer. Is it weird that it made me a little queasy?
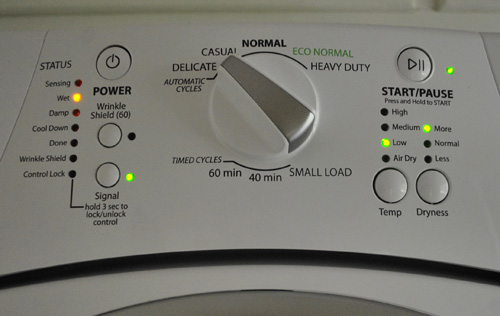
Then I tossed the pre-wet slipcovers into the washer and started things up right away. The dye instructions on the site said to wash them in hot water and mentioned that adding an extra rinse cycle would help the color develop more. So I set it on “heavy duty” (which used hot water) and clicked the “extra rinse” button before hitting start.

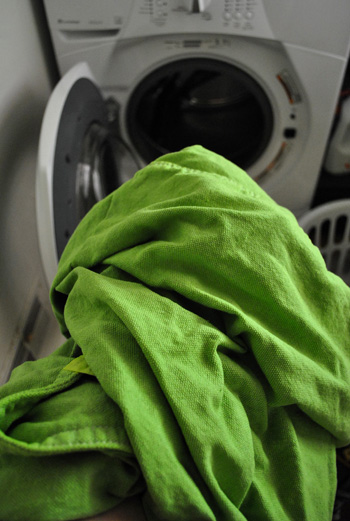
About an hour later things were looking pretty green! Happily they were super even and there weren’t any streaks or dark spots (which was my worry). They looked like green slipcovers you’d buy in a store. Sidenote: how much fun would a store completely devoted to slipcovers be? I’m picturing roaming aisles of every color and shape imaginable. Like the big wall of flip flops at Old Navy.
Oh but before I could take them out and dry them, I did one last wash with cold water and a bit of mild detergent (as recommended by the dye site) which basically entailed clicking it to “normal” (and making sure it was cold water) and adding a smidge of Seventh Generation detergent. The second wash with cold water locked in the color and rinsed out any excess dye. Then I dried the covers on delicate (low heat) so they didn’t take too much of a beating since they were originally dry clean only and I didn’t want to press my luck (like I did here).
As for the color that they came out vs. the color on the pack, I thought it was a pretty good representation. My vision was flawed, but the kelly green pack really did produce a nice kelly green-ish (or apple green-ish) color.
Sadly it just wasn’t “the one.” Onward!
The fourth (and final!) color that we contemplated was good old fashioned mocha. Or as the dye pack called it: brown. We went back to JoAnn and stared at about twenty options and it just seemed like the best way to go. They’d hold up to stains and fall back nicely to let other items in the room be the stars. And the contrast of a chunky wood table and upholstered chairs is a sweet little casual choice (we worried the room would look too formal with eight wood chairs pulled around a matching wood table). So even though it would be brown covers with a brown table we knew the plush chairs vs. hard carved table would be a nice pairing. And by going with the same tone as the table they’d slip in and have less of a “hiya-we’re-a-whole-bunch-of-chairs-so-look-at-us!” vibe (which would have been an issue with green, off-white, or white in the end).
When it came to the actual dying process, again it was the same dealio. Except I used a brown pack to dye two slipcovers at a time instead of a kelly green one.
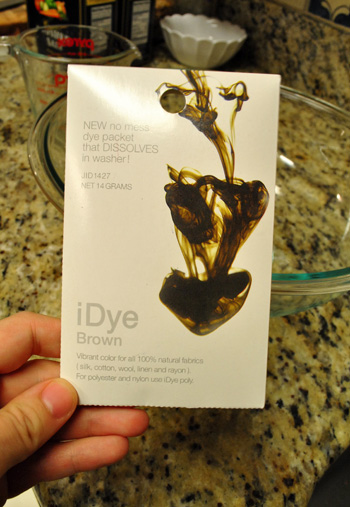
In went the dissolving pack into two cups of hot water…
… followed by a cup of salt…
… which was then mixed and tossed into the wash with two pre-wet slipcovers. One hot wash and one cold one later, I had yummy mocha covers to enjoy. Oh and it’s worth noting that many fabrics take to dye better than the most-likely-synthetic stitching (which often remains the color it always was). Luckily, white stitching with the mocha = cool with us.
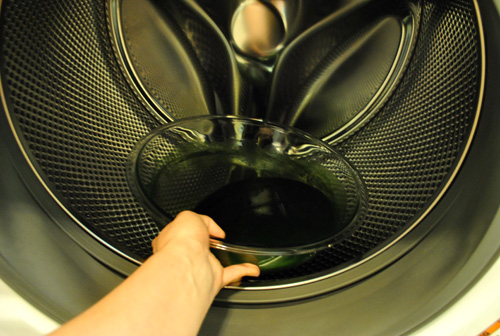
Once again our covers came out looking completely even and didn’t have any dark or light spots or streaking. And after the warm and cold wash the color was set (the color doesn’t rub off at all or anything, even if you’re wet and you sit on the chairs). Oh but one quick note about cleaning your washer after you’re done dying everything: mine was sparkly clean (after one extra rinse cycle as advised by the iDye folks) except for the rubber ring that’s right next to the door, so I just ran a few paper towels across it until they were no longer slightly tinted brown.
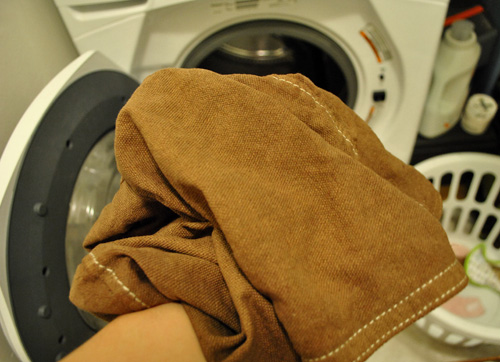
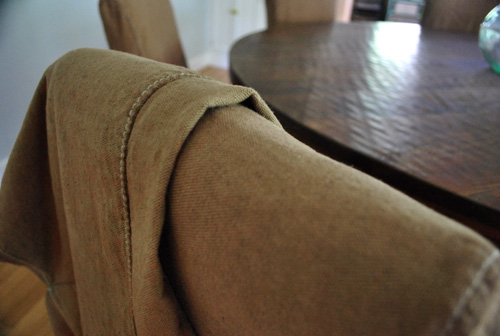
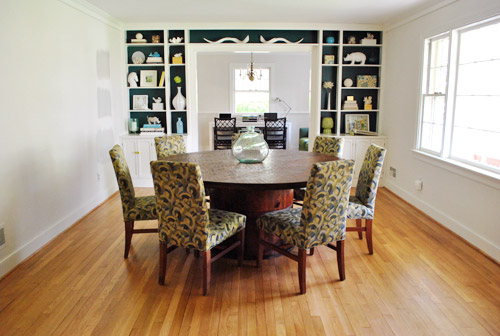
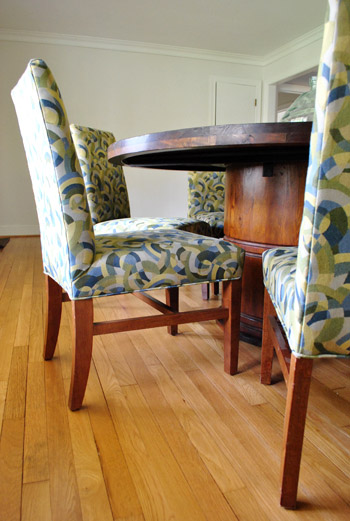
Ta da (don’t mind the wrinkles, I let them sit in the dryer far too long before tossing them on the chairs and quickly snapping these pics this morning):
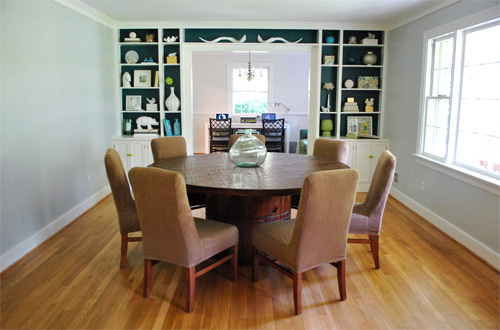

We love how they tuck right into the room (no more of that look-at-all-the-chairs thing is going on) and how they don’t blend too much thanks to the subtle variation in color and of course the hard vs. soft thing thanks to the carved table and the fabric slipcovers:
Most of all I think we’ll love how much dirt they’ll hide when compared to lighter slipcovers.
What about those two “extra” slipcovers that we dyed green (remember we got ten even though we only have eight chairs thanks to John’s genius suggestion since he worried about dye issues)? Well, we figured we had nothing to lose by trying to overdye them with brown (thinking they’d probably turn out a muddy olive tone, but it was worth a shot).
In a sweeeet turn of dye-related events, the brown totally took over and produced the identical color to the other brown covers (even with the green dye under it). So we have two extra brown covers on hand in case something catastrophic (sharpie, scissors, blood…) happens to any of the eight everyday covers that we have. Oh happy dye day.
In the end, it all came down to some basic math. Bold built-ins + patterned future curtains + a large view into the office + a large future chandelier/pendant + a large future punched out view into the kitchen + bright chairs = too ca-razy. So we’re down with brown. And we’re excited to let things like the built-ins and the future curtains/light fixture steal the show. Speaking of which, check out the designer fabric we snagged at a deep discount thanks to a slight imperfection that we can work around:
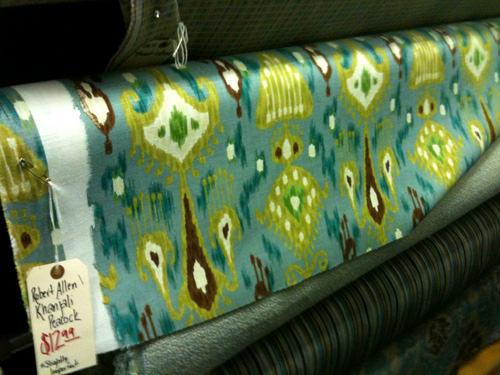
We love that it has brown tones (to tie into the table and chairs), white tones (to tie into the trim and built-in shelving), deep teal tones (which relate to the back of the built-ins) and pops of cheerful apple green (if it wasn’t right for the chairs, at least I’ll get it in the curtains). So it’s safe to say that we’re excited to get down to curtain making business soon. But most of all, we’re thankful that our chairs don’t look like this anymore:
Hallelujah. Oh and when it comes to the whole chair budget breakdown, here we go:
- Each chair: $25 (for a total of $200 spent for eight of them)
- Failed painting supplies: $10
- Each slipcover: $23 (for a total of $232 spent for ten of them)
- Six iDye packets from JoAnn (one green one and five brown ones): $18
- Total cost per chair: $57.50 (which also includes two spare slipcovers)
Have you guys dyed something around the house? Curtains? Pillow covers? Cloth napkins? Or are you a dye virgin who dreams of giving it a shot? I’d love to hear what you’ve been up to (or what you’ve been dyeing to do – har har).
Psst- We’ve had some pretty weird adventures with our $25 chairs. Here’s the post where we found them and here’s the post where I tried to paint one, and here’s the post about finding and shrinking the slipcovers.
Update: Check out how our dining room is coming together thanks to those curtains that we finally made here. Woot.

Melanie says
I feel like some sort of rare creature because… I LOATHE ikat. It’s just all so obnoxiously busy to me, and I catch myself making a face any time I see it! What is wraaawng with me?
That being said, the chairs turned out great and the fabric has great colors that will go nicely in that room. You’re having a lot of dining room luck so far, aren’t ya’?!?
YoungHouseLove says
Haha, yes. We’re waiting for our luck to run out any second now. Hah. As for Ikat, it’s definitely not for everyone so don’t feel bad!
xo,
s
liz tsang says
Not one Rachel Zoe reference to the “idye” name!?
This looks fantastic – I cannot wait to see it all put together! When do you guys plan on opening up that wall into the kitchen? And are you putting up french doors to the office or just leaving it open?
YoungHouseLove says
Oh man I was giggling about the Rachael Zoe “I Die” thing the whole time I bought it. Talk about a missed blogging opportunity! Forgive me! As for the opening to the office, we still dream of adding french doors someday (for the architecture, and so the gaze is directed into the kitchen and the living room beyond (instead of our office). Someday…
xo,
s
Maria says
Hi!
You’re post could not come at a better time for me as I’ve been trying to find the perfect drapery solution and have been contemplating dying too. It just so happens that I was weighing which dye to use myself and was considering the idye product too, but it’s a little scary taking the plunge and maybe ruining the perfect white drapes I finally found. But thanks to your post, I’m going to go for it.
Thanks YHL!
Erin says
Sorry if this has been answered already, but where is the fabric from?
YoungHouseLove says
It was from a local fabric place called U-Fab but it’s called Robert Allen Khanjali Peacock if that helps locate some online. Good luck!
xo,
s
Steph H. says
I just about screamed when I saw that fabric. It is just what my sister needs in her house to help tone down her bright green kitchen! Where did you find it??
YoungHouseLove says
That was from a local fabric place called U-Fab but it’s called Robert Allen Khanjali Peacock if that helps locate some online. Good luck!
xo,
s
Colleen says
I think that you made the right call. Looks nice!
Sheesham Furniture says
I was a little aprehensive when I saw the pack of brown dye but I must say brown was an eventual winner. Reall good choice. I didn’t mind the green too much but agree that it may have been too much on all eight chairs.
Room looks great.
Emily says
I appreciate all the work you put into that project. Musta been a true labor of love!
Kim says
oh I’m so happy the green chairs were abandoned. I have been biting my tongue (keyboard?) for months being so skeptical of the green chairs! This has turned out just great and teaches me to trust that I will love your result in the end just as I always do!
emilymarion says
The mocha chairs look like expensive suede!!! Very beautiful. I was excited to read this post because I’ve been “dye-ing” to dye curtains for our guest bedroom. So glad they have a variety of colors now!!!
tracy says
I’m totally trying this with our slip covers for our Ikea Parson-ish chairs. We bought them years ago and just like Ikea is known to do, they slightly changed the dimensions of their chairs so the new slip covers don’t fit our old chairs. Our slip covers are a brick reddish color that don’t work (and haven’t for 4 years!) new dining room. I’ve just lived with them but now thanks to you guys I don’t have to anymore! I’m trying it this weekend! THANKS!! I’ll let you know how it goes. :-)
Laura Bellamy says
Your chairs look great. Isn’t it funny how the “dirt” and “cleanablity/camoflage” issue comes when you have children? I am slowly converting any high-use surfaces to some sort of dirt color. Colors come in the decor such as curtains. Works good with 5 boys but I hear cute little 1-year-old girls aren’t as messy. Hee hee. Thanks for taking the time to post all this. It is inspiring. Because of you I am now painting my 100+ year-old piano. Eeeek. I probably feel the same way you did when you dyed your wedding dress. So far it looks great in onyx (a brownish black) Love the covered chairs.
Liz says
Great choice on the curtain fabric – I have the same as my dining room curtains! Those curtains get so many compliments, and I love that they are slightly more traditional than some of the other crazy ikats out there. (PS – I just stitch-witcheryed them, still going strong after 1 year).
Pamela says
Hi Sherry,
I have dark chocolate faux-leather parsons chairs (w/dark chocolate wood legs) that sit at my round dining room table (glass top/dark chocolate open-design wood base). I have a monster (in a good way-lol) creamy-color drum-shade light fixture from CB2 above the table, & the glass table top is subtly decorated in creams/whites/apple greens/crystal. One day I had an epiphany & decided to add some flair to the dark chairs & “relocated” some beautiful creamy-color decorative pillows from my master/guest bedroom (they sit upright against the back of the chairs – maybe 8″ below the tops of the chairs). Each pillow is different in texture & design (3 are square/1 is round, also), but since they’re all neutral creamy colors, it looks fabulous! It took the parsons chairs to a new level & totally changed the look of the setup/room. Pillows are from Stein Mart/Hobby Lobby…love that they easily glam up the dark, simply-designed chairs, & are easily removed/switched around/changed out. The master/guest bedrooms never got their pillows back. :)
Just thought you might like that idea for your parsons chairs if you decide to pull in some extra flavor for them at some point. Your curtain material is sooo pretty!
YoungHouseLove says
Ooh that sounds pretty! I definitely think adding some flavor to the table as the room comes together (be it some greenery in the middle, a runner, some colorful placesettings, etc) will definitely be fun!
xo,
s
Katie Truelove says
Wow! The new(est;) color looks great!! I probably would have given up after one dye so it’s cool to see that you perservered and came out with an awesome product:)
Jenny says
I have to confess, I had my doubts about the bright green chairs in the dining room, and am glad you went with something in a more earthy tone to play off of the jewel colors, but I think a dark olive would’ve been much nice- play off of the bluish tinge in the gray walls and act as a toned down version of some of your lime accessories- without the reddish/pink undertones from the current mocha. Regardless, I’m glad you like it, and can’t wait to see it all pull together!
Carter says
I am loving the fabric for your curtains! Where did you find it?
YoungHouseLove says
It’s from a local store called U-Fab here in Richmond. It’s called Khanjali Peacock by Robert Allen if that helps though.
xo,
s
Jennifer says
I think the chairs look great and I love that fabric! I might have to try to dye something in the near future.
Carrie says
I know you’ve already solved your slipcover dilemma but I wondered if you ever checked out bemz.com for slipcovers??? They fit different models of Ikea furniture. They’re a little pricey but there are so many fabric choices!
And I think the brown is definitely the right choice! Looks so much more cohesive, especially since its one of the first things you see after walking in the front door. Can’t wait to see those curtains! Za za zing!!!
YoungHouseLove says
Oh yeah they’re so much fun! Love that site.
xo,
s
Erica says
I love it! Dying is so much fun! I hand dye the nursing covers I make, http://www.monpetitcoverlets.com! It adds a whole other world and design medium to a designer! Welcome to the world of dye! The possibilities are endless!
alg says
I can’t believe you dyed your wedding dress — look at the huevos on Sherry!!!
It looks fantastic, btw…
I can’t wait to try iDye on my upcoming tie-dye project!!!!!! Just couldn’t get psyched to use the same old RIT colors… bO-ring!
Jaimie says
I tried dyeing our offwhite sheets brown in our front loading washer with Rit. Did not come out well at all. The color is very uneven, especially on the fitted sheet, with red and blue spots all over…. I think I didn’t dissolve the dye enough before pouring it in. I want to see if I can salvage them by redyeing them a dark brown. Maybe I’ll try this brand since you had such great results.
YoungHouseLove says
Oh yeah the key was dissolving the dye beforehand (as per the instructions) with the hot water and salt. Hope it helps!
xo,
s
justy says
Looks great! I love white trim but chair legs…no no!
Kay says
Hang on to those new dye skills and the next time you’re tempted to toss out faded black cotton pants, refresh them with a packet of dye. I kept a frequently-worn pair looking pretty good for 5 years that way. I only got rid of them when I discovered that dye wouldn’t reverse weight gain. :-(
lizzie says
well, I’m definitely in the minority, but I LOVED the green slipcovers much better than the brown. they really looked smashing against the bookcase and next to the brown table. They looked modern and fun without being loud and garish. I think brown is a safe choice but not nearly as interesting.
Autumn @ Fallfordesign.com says
I love the apple green. It’s perfect for the bright colors that are through out the house!
carolinaheartstrings says
That mocha color is perfect. They look like they are a soft suede material now. Wonderful.
Londen says
Loving the mocha!! It’s coming together, I can see the end result.
Mitchie says
Wow this looks really great you get instant new chair covers by just adding the iDye and wash it. I would love to try this out. thanks for the tips. great job!
Monica says
Isabella and Max Rooms has a GREAT tutorial for making and lining drapes. http://isabellaandmaxrooms.blogspot.com/ You should check it out. I’ve used it to make drapes for my dining room and living room and I really feel like a professional seamstress now(which is def not reality!)! It is super easy, even for a novice. Good luck, the house looks great!
Monica
YoungHouseLove says
Thanks for the link! Off to check it out…
xo,
s
Katy says
Sorry that I did not read through all 6 pages of comments to see if this was already answered…not sorry enough to just go ahead and ask though. (heh) Where do you find slightly imperfect designer fabrics?? Or…what would I google to see if I could find a similar vendor in my local area (Detroit)?
YoungHouseLove says
I just check out a few local fabric stores from time to time (we found this at U-Fab here in Richmond, just by checking the Yellow Pages for stores and checking them out). Hope it helps!
xo,
s
Katie says
In the words of one of my favorite Real Housewives I LOVE LOVE LOVE the mocha color! You have such an eye for the right mixture of colors, accessories, etc.
Ali says
The mocha looks great! I have to say, I am still terrified of dye, but it was still fun reading your experience. :)
kim says
wow…i was totally diggin that green…love it with that flower in the vase on the built-in…well shux…
Chelsea & Kyle says
Excellent work! The green wasn’t perfect but the brown is working for you.
I have been thinking about dying a cotton bridesmaids dress and I think you have given me the courage to try it!
That table rocks by the way! Such a cool and unique piece.
Julie W says
Just a note about your curtain fabric. On my computer it looks satiny. If it is satiny then I would not so it unless you want to drop kick Oh Brother out the door. Satin is a very hard fabric to sew because it slides around so much and is near impossible ,for me at least, to get a straight line. Two years ago I made my little girl a fairy princess costume for Halloween and made her little jacket out of purple and yellow satin. It was a complete nightmare, I had to redo so many seams, then the fabric would fray, then the fabric would slip, pins wouldn’t stay put. Complete and utter nightmare! By no means am I an expert seamstress but I’m not a novice either. By the end of Halloween night the bottom half of her jacket had come off because the fabric had frayed so much it just slipped right through the seams. I threw it in the trash as soon as we got home because I couldn’t stand to look at it anymore. She still has her layered tulle skirt though, very cute.
Julie W says
I would not sew it I mean.
YoungHouseLove says
Thanks for the tips! It’s cotton-ish (just looks like it has a sheen in the pic) so I’m still on the fence. We’ll have to see where I end up…
xo,
s
Diana says
I Love the chairs! From the photos they look like a wonderful brown suede!
Beatrice says
The chairs look great. I definitely think the green was too bright, but the brown looks beautiful. I used the idye to make a British flag pillow and loved working with it. Will be using it soon for another project.
Dana says
Love the apple green and the color of your wedding dress. I am not sure if I would have the guts to do either.
ronda w says
The brown is very nice, I like it much better than the green. I am anxious to see the curtains!
Belinda says
Looks great, guys! Love the Mocha chairs – and can’t wait to see the room with the curtains, arts and lighting!
Kristi @ Addicted 2 Decorating says
I admit, I was disappointed to see the mocha chairs, right up until I saw that AWESOME FABRIC!!! I can’t wait to see it on your window. And since you’re going with a bold, colorful pattern on the window,the mocha chairs make complete sense. Now get to sewing those curtains!!! :)
Kimberly says
I can’t wait to see the dining room after it is finished. Everything you’re describing sounds like its gonna be awesome. The mocha slipcovers blends well with the room too!
Ange says
Yay! Sherry I think the dye gods love you! I wasn’t a fan of the plain covers, & although that green was so pretty, you’re right it wasn’t right for your space. Love the mocha. Until you said it, I hadn’t even realised what the eye would be drawn to in that way, but now that table & chairs just says; “hey I’m the functional piece here if you need me but look at all this cool stuff around me!” I love the bold fabric,can’t wait to see more. Makes me want to find something to dye now…
Helly says
I wasn’t a big fan of the apple green idea, scrolling down I was really hoping you had gone with a deep aubergine for the slip covers. But seeing the curtain fabric I can see how the mocha will blend. Good dyeing – I have only dyed using the boil in a pot method, maybe I will try the washing machine next time.
meagan says
Hey guys!
Haven’t been around in a little bit so just stopped in to get caught up on my YHL reading! Things are looking fantastic in the house, must admit though, I preferred the creamy and kelly green color on the chairs in comparison to the mocha!!!!Sorry! I know white-ish chairs aren’t very practical but they looked sooo nice!
Hope you are doing well and enjoying your garden,
all the best
Meagan, row house nest
Jessica from Australia says
Sorry guys, I feel this one was definitely a miss.
I immensley dislike the brown chairs. They looked better off-white. And the brown chairs with the grey walls? Uh oh.
LOVE what you’ve done with the rest of your house, so I’m sad and disappointed to see this outcome….
:-( Hope to see more of your more fabulous projects soon! :-)
diana says
I only had time to go through the “legs”comments at the beginning, and now I think you need to do this: add a section on the site where every trusted reader can add a post. And the name of the section is “what sherry and john MUST do in their home otherwise they’ll lose their talent and revenue”.
Sorry, I really don’t mean to be mean to those opinionated commenters, but I’ve seen it once and again, projects that you’ve posted about when planning, halfway and then finished, and I’ve learned to REALLY trust you. Jeez, a lot of caps are locked now!
Jackie says
I am marveling over how u washed and dried that dry clean only fabric…..I can’t believe it didn’t shrink or get wonky….did u do a test run first? It really didn’t shrink?? I have ikea slip covers on my parson chairs and always dry clean them but would love to toss in wash instead.
YoungHouseLove says
Oh yeah they totally shrunk! But they were too lose when we got them so they shrunk to fit and that must have been the max shrinkage because they didn’t shrink any more when I dyed them. Here’s a post about it: https://www.younghouselove.com/2011/05/giving-them-the-slip/
Hope it helps!
xo,
s