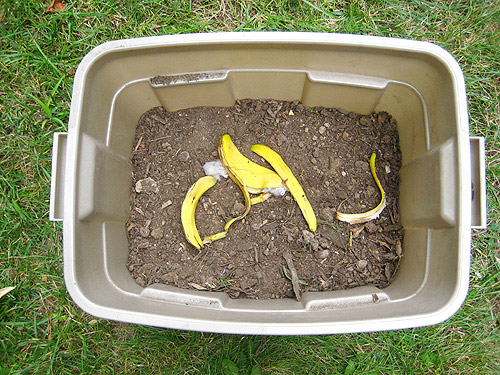
Ever since we started composting back in 2008 at our old house, we’ve enjoyed doing it (snaps for free fertilizer, reusing “trash,” and getting some subtle encouragement to eat more compost-able foods). But our composting adventures have been somewhat limited by the size of the DIY compost container that we made 3 years ago (we did eventually make a second bin, but it’s nothing like those bigger composting systems that we’ve seen at stores or in DIY magazines).
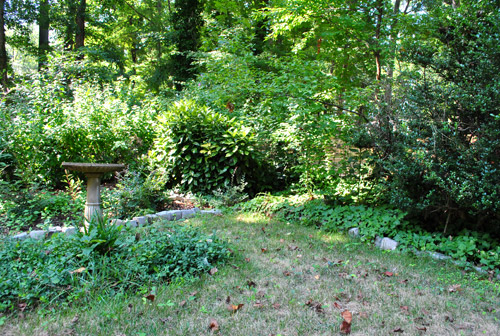
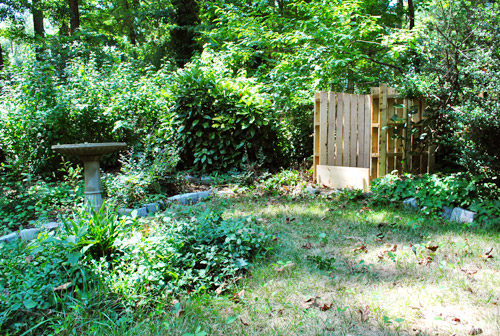
Even back in 2008 when we created our little bin, I initially wanted to make a more “legit” system out of shipping pallets (like I read about here and here) but hunting down and transporting a bunch of bulky pallets was a bit more than I was ready to sign up for. So I figured starting off with a bin and later graduating to something more built-in might be the way to go. And now just three short (ok, loong) years later, thanks to our patio supplies having arrived on pallets, I finally had my excuse to upgrade our compost system. It just took us a few months to decide where we wanted our new bin to sit. We finally agreed on this corner:
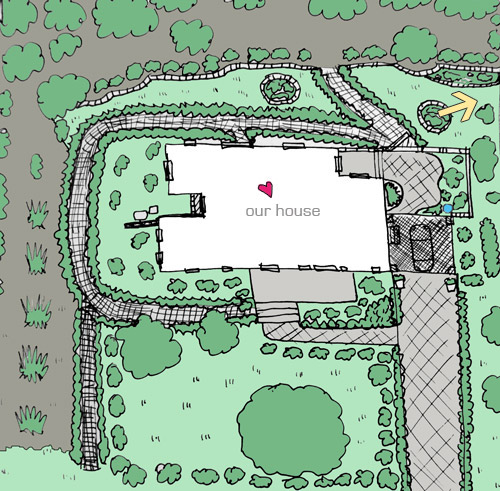
In case you need a clearer reference point, here’s that little not-at-all-to-scale map of our yard (the house is way too big and the almost-an-acre yard is much too small) that Sherry whipped up (marked with an arrow where we added our little “compost station”):
We picked that spot because:
- it was fairly hidden from view
- it didn’t disrupt the landscape very much (i.e. it wasn’t in the middle of the grass or anything)
- it was convenient enough to get to without being right against the house (we know compost isn’t supposed to smell – and our old bin never did – but we didn’t want to risk getting whiffs of nature’s miracle at work if this system was any different).
- the only “landscaping” that we’d be sacrificing was some ivy and a few weeds (how will we ever live with ourselves?)
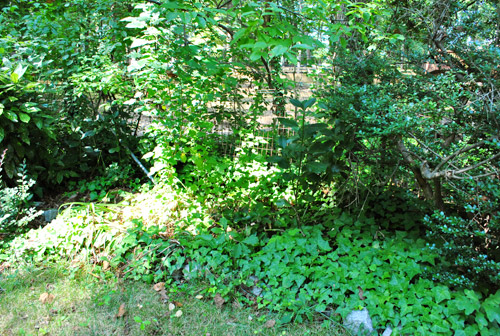
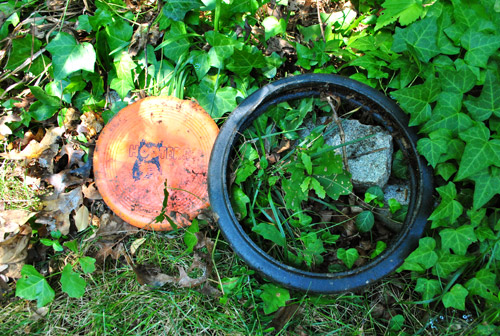
One perk to losing some of the ivy is that I uncovered some unexpected treasures in the process, like this ancient Hooters frisbee and a random plastic tire. Looks like this upgraded composting system is already paying off in major free-stuff dividends.
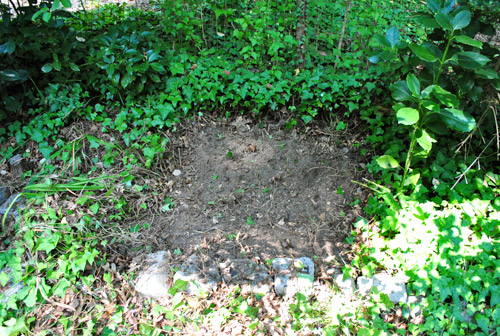
After a bit more work with my shovel and rake, I was eventually left with this clearing. Some of the online instructions that I googled around for suggested putting an extra pallet down for your base, while I read others who complained that a pallet on the ground made turning the compost a big ol’ pain (picture pitchfork tongs or shovels getting stuck between the slats). Some others even suggested a slanted base to help collect the tea (the nutrient-rich “run off” from your compost pile), but I just opted to keep things simple and make my life easy – at least for now. So this flat square of dirt did the trick:
With my area cleared, I gathered my supplies:
- Three shipping pallets (which I was thrilled to finally move out of our basement)
- A few 2″ wood screws
- Electric screwdriver
- Work gloves
- Shovel
Fortunately these were all things we already owned, so our project cost rang in at a big fat goose egg. Even better than a free project? The whole thing only took me about 20 minutes (not counting photo-snapping time). Which was a nice unexpected surprise. Remember, I go into all small projects expecting them to take forever and throw me ten curve balls so I don’t get my quick-project hopes dashed by an obstacle or two (which I’ve learned are par for the DIY course). So yeah, it was awesome that this quick and easy project really was quick and easy.
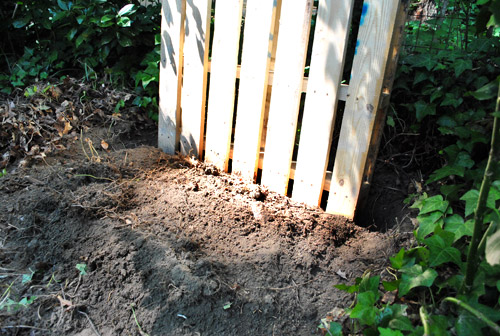
First I dug a small trench (about 4″ deep) at the back of the compost area so that my pallet had a little groove to stand in while I secured the other sides:
Then I put the second pallet next to it to create one side:
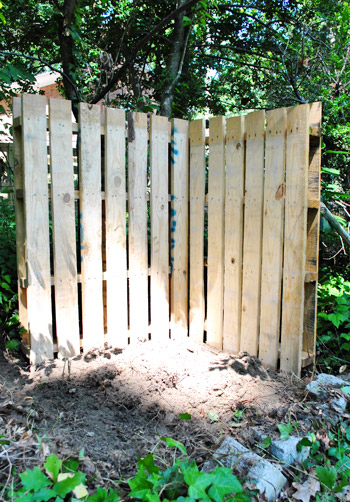
Notice how the side with the more closely-spaced slats faces in (otherwise we’d get lots of compost spilling through). But that doesn’t mean you should use a completely solid piece of wood (the slatted pallets help air circulate, which helps the decomposing process while also keeping odor down).
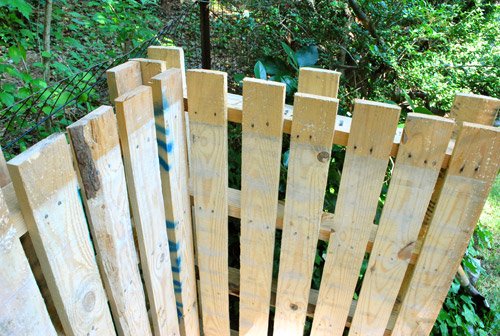
To secure the pallets together, I just drilled three screws (one in the top, middle, and bottom) to connect the two pallets. Some tutorials that I read called for zip ties instead, which I’m not surprised to hear (they, like duct tape, can accomplish almost anything). I just had screws on hand, and since that was another recommended method I went for it. I also enjoy projects a little more when I get to break out my power tools (I can almost feel Sherry rolling her eyes at this sentence). The funny thing is that the pallets were practically sturdy enough to stay together on their own so the screws kinda felt like a formality, but they were nice “insurance” so I’m glad I took a moment to add them (and say hi to my drill).
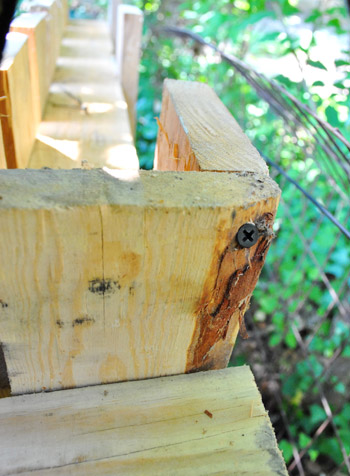
Then I rinsed and repeated the whole joining shebang with the third pallet on the other side.
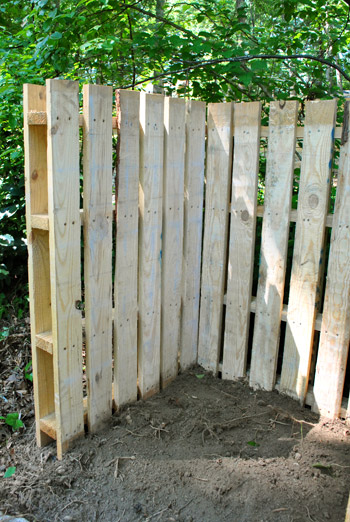
Then, um… ta-dah? That was pretty much it. Some of the instructions that I read included using a fourth pallet to create a hinged door in the front (I guess a fifth if you added an extra pallet on the bottom). I wasn’t inclined to do this because (1) that seemed more complicated than I wanted to get into – at least off the bat, and (2) I didn’t have any hinges on hand. Initially I was just going to leave my bin open-sided and not stress if my pile started to migrate a bit beyond its three borders…
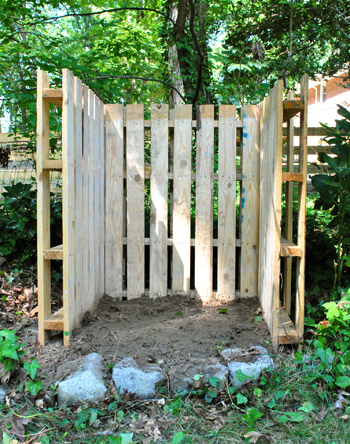
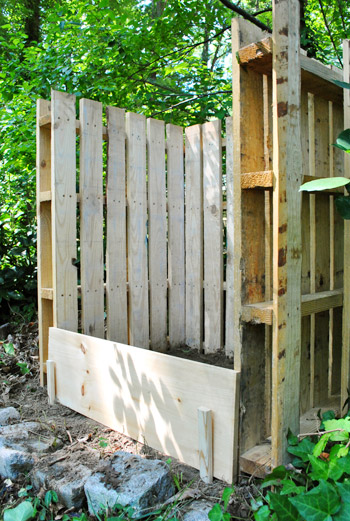
… but I realized it probably wasn’t the best idea in practice, especially since it was on a slight slope and one big rain could wash our pile-o-decomposition into the yard. Gross. So I improvised a bit and found a nearly-perfectly-sized piece of scrap wood that could act as a fourth wall (with the help of two leftover wood stakes). It stays in place just fine and can easily be picked up when it’s time to turn our pile (or grab a big heaping batch of nurtrient-rich soil when it’s ready).
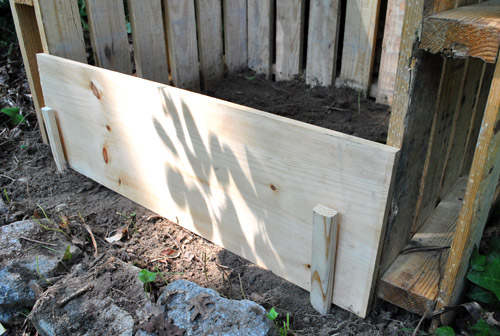
As the pile grows, I’m thinking I could easily upgrade my system with a few more boards stacked up or a taller piece of wood with taller stakes or poles to hold them flush against the pallets. But this’ll do for now:
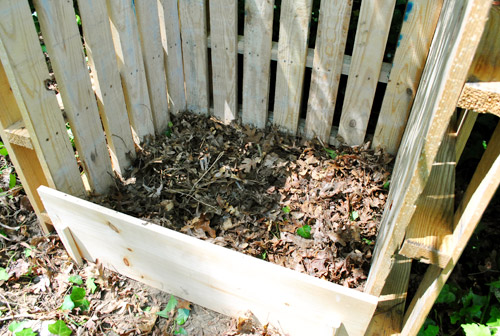
And to kick off the competition composition, I threw in a layer of nice brown leaves from the backyard. Ooooh. Ahhh.
Now we’re the first to admit that we’re still kind of novices at this whole composting thing. Even after three years of doing it. I’ve thrown out references like “turn the pile” as if I know what we’re supposed to do (and how often and why) but I’m really just going off of tidbits that we’ve picked up online. When it came to our old system we just stirred things when we tossed in a pile o’ stuff (we had a lidded plastic container that we kept under the sink for compost scraps and emptied that into the bin twice a week or so). And we printed out a list of compostable stuff and taped that to the inside of our under-the-sink door near the compost container so we could consult that if we didn’t know if something could be added. So admittedly I’m not quite Captain Compost yet (so if anyone has any pointers or resources for us, we’re all ears). The good news about compost is that it seems to just do its own thing for the most part (you can read about a few of our experiences with it over the years here, here, here, and here). We’ve never had any issues with smell or anything, so it’s a pretty painless auto-pilot process.
Oh, and I should mention that if anyone is hesitant about using wood that might be chemically-treated (like pallets) for their bin, you can limit your use of the resulting compost to non-edible plants (i.e. use it in your flowerbeds, not in an herb or veggie garden). That’s definitely what we’ll be doing just in case. We’re a bit late in the season to have much usable compost this year anyway (darn, no accidental pumpkin growing for me this Halloween) but hopefully next year we’ll have more free fertilizer than we’ll know what to do with. And maybe some of that ivy will have grown around the pallets to help it “blend” in a bit more. You know, so we end up with a charming secret garden compost situation. Of course we could also stain or paint the palettes to help them blend in (dark green, brown, gray, etc). We’ll keep you posted.
Do any of you have a pallet compost bin (or other composting system) going on at your place? How has it been working out? Anything you think we should know as we start this new chapter in our composting lives? Has anyone else accidentally grown a pumpkin? That’s my crowning composting achievement thus far.

ashley says
Just read your link to your accidental pumpkin. I lived in Zambia for 2 years and pumpkin leaves are actually a wonderful edible green. They cook it down with groundnuts (peanuts) and it is quite delicious, my favorite Zambian food actually. And, coincidentally, the name of the dish is called chiwawa…yes, pronounced just like the breed of dog as Burger.
YoungHouseLove says
Haha- too funny! Burger is honored.
xo,
s
Colleen says
We totally have accidental Pumpkins this year! Can’t wait to see what kind they are!
Danielle says
We “accidentally” grew a watermelon and two squash plants in our compost pile this year. (Actually, only the first squash was accidental, but after we saw how it thrived we decided to deliberately plant a few more things in there!)
Jessika says
We have an earth machine composter. It works well because most of the smell is contained, it composts FAST, and it has a little door on the bottom to pull out ready-to-go compost. Previously, I had the wire composts (where you pretty much just take some form of garden fencing and make about a 3′ diameter loop. Those forms never worked well for me because they took SO long to compost anything.
Sometime in the next decade, I’m thinking of getting a worm bin (maybe as a project with future kids?). Have you seen those? Incredibly neat.
YoungHouseLove says
Yes! I think I saw one on TV and was sort of scared but fascinated. Tell us how you like it if you get one!
xo,
s
Jessika says
(oh, and I forgot to mention that I totally scored the earthmachine composter on sale at a recycling store. So super cheap. Extra bonus points!)
Sarah says
This has been on my to-do list all summer… I saw the ones with hinged doors also – I like the idea of only doing three sides though. We did start a compost pile that is just kind of in the back corner of our lawn – this way woudl be easy to pallet-around it. Now to actually find some pallets that woudl work…
Kate (Bread & Chocolate) says
Pallets also make great raised planting beds, if you’re dealing with a small outdoor space. I used wine crates last spring. Any kind of repurposed container makes a great home for plants!
http://bread-n-chocolate.blogspot.com/2011/04/straight-from-crate-how-does-your.html
YoungHouseLove says
Cute!
xo,
s
Valerie says
In case you want more info on composting (and worms) http://squirmyb.wordpress.com/ a blog devoted to composting (and worms). Great job on the compost bin!
YoungHouseLove says
Thanks so much!
xo,
s
Julie @ There and Back Again says
I think that system looks great! The wood makes it look really natural. I had an accidental cucumber-growing experience similar to your pumpkin one once, but the funniest part was that there was a small tree right next to my compost heap and the cucumber vine actually grew up the trunk and into the lower branches. I came out one morning to two cucumbers hanging out of the tree!
eb572 says
I love composting! I use a 3 layered stacking bin with a hinged top. Very effective. Yes, pitchforking it to turn it is a lot of work, but fun in a back-to-nature kind of way. Oh hello, Mr. Earthworm and your one million squirmy friends!
As an urban composter in a warm climate (Los Angeles) I have had experience with rats. Our compost is exclusively vegetarian, but in summer and early fall, hungry vermin will come looking for apple cores and black bananas. Burying the green waste under brown waste is a way to combat this, but we generate kitchen waste a lot faster than brown leaves around here. I just don’t add fruit or veggies in summer now. Worm bins are a solution as well. We also composted our Christmas tree this year!
Lauren says
My husband and I live in downtown Chicago so composting is out for us unfortunately. But my elementary school was big on composting all of our lunch scraps which in turn got my dad really excited about composting. He’s OBSESSED with his compost pile. He like takes people out back to show it to them. And then they are all like “Ok yes you’re right, it IS a very nice compost bin, now would you like to buy some girlscout cookies?”
YoungHouseLove says
Haha- too funny!
xo,
s
Thomas says
I work in the warehousing biz, so I know a thing or two about pallets. You shouldn’t have a problem with chemicals. From the pics, it looks like you have Grade A (ie- good quality) Recycled pallets (how else would you have blue spray paint on the INSIDE of the slats on the top). Basically, that’s Logistics Nerd-speak for “I don’t see any indication of chemical treatment, but they probably are heat treated.” Heat treatment isn’t an issue, just helps sterilize them from rodent/insects in case they’re going to be used for food distribution. Long/short- I’d drop that stuff all over the tomatoes next summer and not think twice about serving a home made bruschetta. Enjoy!
YoungHouseLove says
Yayyyy! Thanks so much for the info Thomas!
xo,
s
Amber says
We actually have a pretty impressive pumpkin vine growing this year from the pile where we throw our compostables. Excited as the ones we planted in the garden didn’t fare well this year!
Erin says
We used to have a pallet compost bin (with the hinged door, but after we did a little rearranging in the yard (and got rid of a hideous propane tank) we had a great view of our dilapidated bin (which took a beating when we got smart and tried to use a Kabota to stir the pile), so we upgraded and moved the bin. I love our new bin (which I wrote about here: http://www.theimpatientgardener.com/2010/04/compost-bin-redo.html).
Composting is easy unless you’re looking to be super efficient at it. All this stuff wants to break down and will do a fine job of it on it’s own. If you want to get a little fancier with it, just remember, more browns than greens, layer and turn on occasion, and keep it as moist as a rung-out sponge. Stir when it’s not producing heat. Let it be when it’s smokin’ … that means you’re doing it right!
Here’s another post I did on it in which I offer my little secret to heat up a compost pile (which mine usually needs in spring when it’s full of just browns — leaves– and I’m short on greens. http://www.theimpatientgardener.com/2011/05/giving-compost-little-help.html
Angela S. says
Hey! That’s the exact compost ‘bin’ my husband built us when we moved into our new house. The only ‘problem’ we’re having is it’s my 6 year old sons job to take the compost out every morning and he doesn’t like to get near the pile so he throws it from 5 feet back and we wind up with a trail of compost that i have to shovel back into the pile. We also throw all our grass clipping on there and it makes for great compost!
Celia says
We planted morning glories around our compost bin one year, and now it gets covered in the vines and pretty flowers every summer!
YoungHouseLove says
Sounds so pretty!
xo,
s
Becky@OrganizingMadeFun says
Our city gives out FREE composting bins on a regular basis. The only requirement is that you have to take the class to go with it – which is probably best since the class tells you how to use it! But, I have yet to get to the class as it hasn’t been at a convenient time. Also, I’m curious, being the city-dwellers we are, if it has to be in the sun or some place like that? It makes locating it a bit more tricky in our yard!
Becky B.
http://www.organizingmadefun.com
Organizing Made Fun
YoungHouseLove says
Anyone know? Ours is sort of in partial sun/shade.
xo,
s
heather says
Ours is in almost complete shade and it’s doing absolutely fine. It might break down slower but we have had no issues.
Erin says
Sun helps, to be sure, and generally speaking, the more sun, the better, but like I said before, this stuff wants to break down, and it will do it all by itself. Keeping it in sun just speeds things up a bit but if it’s in the shade it will decompose as well. Mine’s in a dappled shade location because I’m not wasting a good sunny spot on a compost bin!
Rhiana says
We have been composting for about 5 years. Our city actually provides compost bins for anyone that wants one. Ours has 4 sides and a lid which helps for the whole wildlife issue. I think the one you just built would be fantastic for leaves, grass clippings, and shredding! We don’t put meat scraps in the composted, we give it to the dog!
Thanks for the post, I think we might build one for our fall clean up for leaves and such!
Sabrina says
I am going to retry composting. I made the rubbermaid bins just like you guys did last year. Followed everything they said to add and not to add. One day I opened to dump and a giant swarm of flies flew up at my face, the whole things was crawling with maggots and it was a hot mess. I don’t know what went wrong :(
Sarah @ The Strength of Faith says
My husband I just moved into our house about five months ago and were using the “throw the compost in a pile on the ground method” – which really gave the turkeys something to eat and the birds something to sunbathe on. Major fail. But some family members of ours bought us a bin (pictures/descriptions here – http://www.thestrengthoffaith.com/2011/07/composting.html) and we love it!
Pamela B says
We just moved into our first house this spring, so I’m thrilled to finally have a compost bin in the backyard. Our only problem so far though is bears – they visit our neighbourhood daily in the spring and I’m afraid our bin is going to be an attractant even though it doesn’t smell (at least to us!) Any ideas for sturdy bear proof compost bins? I have yet to find anything that robust to keep them out.
YoungHouseLove says
We’ve heard that not putting meat scraps in can greatly reduce animals being interested in your compost. Hope it helps!
xo,
s
Jill says
Hope it’s pretty strong w/ the storm we’re supposed to be getting this weekend!!
YoungHouseLove says
Haha- I think John made it nice and solid. Here’s hoping poor Burger stays dry though. He hates when he can’t go outside every half-hour. Haha.
xo,
s
Roma says
Hi Sherry! This is my first time ever commenting on a blog (and this comment has nothing to do with composting, but I wasn’t sure how else to contact you guys – way to go on the composting, btw). Anyway, I saw this duvet on SALE at Pottery Barn and immediately thought of your quest for a new duvet and your love of bees! http://www.potterybarn.com/products/bee-embroidered-duvet-cover-sham/?pkey=csale-duvets-shams
Just wanted to pass it along in case you liked it too!
YoungHouseLove says
Aw thanks so much! It’s so sweet!
xo,
s
Sally C. says
Beware of that ivy! We had a compost pile at our house in Ohio and the ivy growing all around the house really LOVED to grow in the compost pile. It became a super-plant…took over the pile and started spreading. You might want to think of a way to create a barrier on the three sides so it can’t invade your good work!
YoungHouseLove says
Thanks for the warning Sally!
xo,
s
Amanda- Hip House Girl says
I second the “beware of ivy”. Ivy in my opinion is nasty stuff. A much better creeping plant is Virginia Creeper. It dies back in the winter (Ivy doesn’t die until the lower layers get shaded out by the new stuff, so it becomes this big nasty pile of dead leaves and shoots which spiders and other critters love). V C is also better if you want stuff to grow on the side of any structures- it doesn’t do the structural damage that Ivy does.
YoungHouseLove says
Thanks for the info Amanda!
xo,
s
Krystle @ ColorTransformedFamily says
I wish we had enough yard to compost. Our little townhouse doesn’t give us that luxury but I am going to have to check out how you composted in bins. There is space in back for those and how cool would it be to have your own mulch!
Sarah says
Will you be keeping us posted, or will you be keeping us (com)posted?
(I’m sorry–I just had to share the bad joke/pun.) Great job, guys!
YoungHouseLove says
Bwahaha. Comment of the day goes to Sarah- for being awesomely cheesy.
xo,
s
Alanna says
i DIY’ed a compost bin out of a plastic garbage can with a lockking lid. it was super easy… just drill several holes on the sides and bottom for ventilation/drainage and then add your ingredients. it’s very easy to mix too… just make sure the lid is locked securely and then tilt the can to the side and give it a roll. the garbage can also had wheels on the bottom, so i can move the bin around with me when i garden.
Gina says
We had a neighbor 4 doors down that threw all food (meat,bread,cerealas well as the produce), yard AND Dog waste in their fenced-in garden…GeeRoss…she claimed you don’t need a separate pile…
I passed on her offer of veggies..and I was sure her house was the reason I saw a rat run in to her sewer drain in the street.
Thank goodness her house is for sale
Rachel Tatem says
That’s awesome. I have wanted to make a compost pile but I haven’t yet. I’ll have to steal some ideas
alg says
This is excellent — I can’t wait until we have the space!
And lovelovelove the accidental pumpkin. IMHO, the story is worth the lost compost :)
Kayla says
I know you guys said you searched for resources online, but I’m guessing these didn’t come up for you. I work at the MN Pollution Control Agency and we have these Web resources for composting. We are currently updating them, but it has simple to follow steps and tips for getting the most out of your compost (along with solutions to common problems).
http://www.pca.state.mn.us/bkzq753
http://www.reduce.org/compost
As for some of the comments about critters, you should be okay as long as you avoid putting meat, dairy and eggs into your compost pile. These are items that can be added in commercial systems, but are no good for backyard composting.
Kayla says
The link in this post should be: http://www.pca.state.mn.us/nwqh59b. Sorry for the mix up.
YoungHouseLove says
Thanks Kayla!
xo,
s
Jamie says
My mom composted when we were growing up! I would love to start a compost pile and garden after I am a stay at home mom next year. Where did y’all get those pallets?
YoungHouseLove says
They were delivered with our patio supplies (all of the pavers and rocks were stacked on them).
xo,
s
Amanda- Hip House Girl says
We don’t compost at our house, but we participate in the city’s “yard waste” program. It’s a special can that is only for branches, leaves, weeds, and kitchen scraps. You can then go buy compost from them by the truckload, which is kind of cool. But it would be even cooler to just do it ourselves for free, so we’ll have to look into it some more.
My parents are into composting, and without fail every time I visit home my dad lifts up the pile and insists I stick my hand in there to feel how hot it is (a sign that it’s “working”). He’s pretty proud, so I always humor him. :)
Susan says
I have a few tips for you about determining when compost is ready to use. If you use compost when it is too “hot” (nitrogen-rich — not in temperature) it can burn your plants. It should be cured for a few months before use. Your old compost bin would be perfect for this. Drill small holes all around the bin to allow the compost to breathe. Put the compost from your pallet system into the bin (maybe tucked behind it). When it’s cured, just carry the bin into the yard! Easy-peasy. How to tell if it’s cured? Two easy ways: 1) put a handful of compost into an old jar with a lid, add three times as much water, shake, let sit 3 days, open, sniff. If it smells rotten, it needs to cure longer. 2) Plant some lettuce seeds in the compost (leave the lid off). Lettuce seeds can be a bit delicate, so if they sprout, you’re good to go.
YoungHouseLove says
Thanks so much for the tips Susan!
xo,
s
Amy K @ Chestnut Tree Lane says
I also live in SouthWestern Ontario, and I am so thankful for those city green bins… they make cleaning out the fridge a breeze! My neighbor has a huge compost bin in his backyard – and I never catch a whiff of it. What we do get are mice. Everytime he turns the compost for the fall or spring the mice take off running… into my house. *cry*
But um… no smell comes from it. I think mice might nest there, because it is warm and sheltered under all those leaves… and the apple cores are a nice benefit.
Katy Widrick says
Thank you so much for the update! I used your tutorial to make my own plastic bin compost, but we’re quickly outgrowing it — I’m sending this to my husband now to see if he can work something similar into our new deck design.
Sarah B says
We just built our own compost pile as well, though we used landscaping 4x4s that match the raised gardens we built a few years ago. Also three sided, but with just one 4×4 to rein it in (ours is on level ground though). We honestly don’t really know what we’re doing. I just felt bad throwing the vegetable scraps in the trash. As far as I’m concerned, if the pile never turns to great fertilizer, it’ll decompose eventually, and that’s good enough for me. :) It’s trial and error in the process without much research. We’ll see what happens!
Joanne says
My father was a big composter and we have a few compost bins. We put eggshells, corn husks any vegetable peelings in there. After it rains, the rain water seeps out the bottom of the compost bin to the adjacent garden and this garden grows the most unbelievale huge vegetables from the nutrients from the compost pile. They were bigger than the other vegetables in the adjacent garden beds.
The compost the bin makes is what we use for our garden beds the following spring. The soil is the most lovely, nutrient enriched soil you could imagine.
Good luck, sounds like fun.
Jess says
I’m so glad you guys posted this- great timing! My husband and I were talking about composting again last night (the house we previously rented already had a compost pile built) but we didn’t know how to go about building one. He gets pallets from work all the time. Woot!
Mikal says
Love, love that you are promoting composting! I am a compost educator for our area and teach backyard and worm composting classes. We compost at home and have worm bins in our office. It really can be as simple (or difficult) as you want to make it. If any of your readers are interested in making a pallet bin, check with your local landfill or re-use centers. We sell our pallets for $2 each…get 4 of them and you have a pretty incredible compost bin for $8! Most of them are in pretty good condition…just might have a broken or missing board that you can fix by buying an extra pallet.
YoungHouseLove says
Love that tip! Thanks for sharing Mikal!
xo,
s
Wintry Mix says
I love that you didn’t make this more complicated than it needed to be. It actually reminds me a lot of the composting system we had on our huge garden/small farm when I was growing up, which was just three sides of wood nailed together to make a giant open enclosure. It worked great!
Also, I think taking that ivy you just dug up and training it to grow on the compost exterior wall would be perfect.
Maureen says
I have wanted to do this for years, but am in constant debate with myself over where to place it in the yard. For now, I throw our scraps into the field behind our house. I feel like I am feeding animals that way. LOL I don’t know whether or not to just continue with what I am doing or go ahead with the bin. If I do go ahead with it though, I am lucky to be able to have pallets available through my job. Happy Composting guys! :)
Megan says
My dad is a super composter and has bins spread out around his 80 plus acres of land (well, reasonably speaking, they arenot EVERYWHERE!). He has a black round barrel that he can spin and rotate plus cattle panels to create a square similar to what you made. I used to give him all of our scraps of food but we finally made our own. We had an old dog crate (a large one) in our backyard and we took the top off to create a space for everything to go. We put all fruit and veggie scraps, grass clippings, leaves, coffee grounds, and egg shells in there. I can’t wait to start enjoying some of it on my plants. My husband turns it over every time he puts grass in there and then he’ll hide the stuff on top with more grass. It’s like a huge lasagna – grass, food scraps, grass, food scraps… I was once worried about the dogs getting into it but they haven’t yet. They’ve tried a few times but we put everything in the center of the pile and once covered up with grass, it’s not a big problem.
Just a thought about your old bins – you could turn them into worm bins. We did that with the second grades I taught and they loved collecting things and bring them in. You can order a small worm online that’s great at doing a fast job (and they reproduce quickly). We kept in our classroom and it never smelled!
YoungHouseLove says
Ooh never thought about that. Thanks for the idea. We’ll have to see how brave we are…
xo,
s
Nancy says
Be careful. My daughter’s Westie dog ate something from the neighbor’s compost heap and became very ill. Had to spend a couple of days in vet hospital on antibiotics and IV. The organisms from the compose attacked her liver. Not sure if the neighbor was following good compose procedures.
YoungHouseLove says
Thanks for the tip! Burger shows no interest thus far, but we’ll definitely keep an eye on him.
xo,
s
Amy says
It looks great, but I’m waiting to see it with a few thins coats of ORB! ;)
Jen says
We have two compost bins side-by-side; as another commenter mentioned it’s a seasonal system, so we’re adding to one while the other breaks down and then gets used, then we switch. Works great. We built our bins out of reclaimed materials from our house renos, plus some chain link fencing.
The only animal products we put in are eggshells; if you go this route I recommend you crush them as they take longer to break down than other things. I also tear up the cartons and throw them in, too. I gave up on adding leaves, as they take a long time, so they get their own pile elsewhere. Our bins are under big trees so in the summer we water it from time to time, and every time I dump our compost bucket I fill it with water and make compost soup first!
One last thing: we put grass from the mower in but we don’t put weeds in. The compost has to get piping hot to kill the seeds, and if it doesn’t… Well, that lovely fertilizer becomes a gardener’s nightmare! Luckily we have yard waste pickup in our area, so they do get composted elsewhere.
We had some rogue tomato plants this year….
Mikal says
Have you tried leaving your leaves on the grass and running over them with your mower with a mulching blade? That will break the leaves down into smaller particles, speeding the decomposition process. Then, you can combine those leaves that include the grass clippings into your compost bin. Plus, you get a pretty great carbon/nitrogen mix!
Pam the Goatherd says
I’ve got a huge compost pile that includes all the waste hay and goat poop that piles up in the goat pens during the winter. I do have problems with groundhogs getting into the veggie scraps that I put into the pile. One year I had some ground bees build a nest in my pile, which a skunk then came in an ate. That was an interesting experience!
Right now I’ve got a half dozen “squash” plants growing in my compost pile. There are a couple that sort of look like a cross between pumpkin and acorn. There are some that are a zucchini variety – one is yellow. And then there is one that grows giant cucumbery looking things that have a harder shell.
The best surprise pumpkin that grew in my compost was some of those mini pumpkins. I had enough of those one year to send to my daughter’s 5th grade class for painting and decorating at Halloween. They loved it!
LH says
We have a pallet compost bin that we made for Earth Day a few years ago. We put metal stakes into the ground at each inner corner to provide support before screwing the sides together, as well as chicken wire lining the inside to keep things in but still allow are circulation. Our pallets were set to they are short & long instead of tall. For access, we did a hinged pallet door. It’s a single bin right, but we’ve always intended to make it a double door model for easier rotation & turning.
Alison says
John & Sherry – Unrelated to this post… but I was thinking about you two this weekend! My husband and I were working on a small yard work project and when a few stressful moments came up – we found ourselves bickering. This is pretty common for us when it comes to home related projects (we are both pretty opinionated people, with different tastes!). The two of you seem to have a great working relationship. Do you ever experience different opinions/approaches on projects? How do you handle? Do you approach all projects together at a team or does one person take the lead each time? Do you ever have “high tension” projects that cause bickering? How do you handle? What has been the toughest project (one you most disagreed on, etc.) you’ve ever had to work on together?
Thanks again for a fantastic blog! You inspire me regularly!!
YoungHouseLove says
Oh yeah, we can fight like the best of them. Haha. I’m Italian! We just have a “full agreement agreement” – meaning we don’t buy or do anything unless we’re both on board. Sure we fight if one of us wants to do something but the other doesn’t but we don’t do it or buy it (since that would lead to a lot more resentment in the long run). What usually happens over time is that we end up with a solution we both love and we’re happy we held out. As for tensions running high during projects, that can definitely throw you for a loop, but we try to remember we’re a team so we’re not against each other, we’re against whatever obstacle will pop up. Putting on some music and working with full bellies can do wonders on crabbiness. Haha.
xo,
s
Aubrey says
My husband and I compost and built our own tumbler that we absolutely love! http://buildegg.com/bewp/?p=127
It is so simple and makes turning the pile super easy. We started out with a compost pile that we turned with a pitchfork and realized that was too much work for us! In the house, we use a mini compost bin that eliminates the smell (http://www.amazon.com/Exaco-Trading-MR-ECO-Compost/dp/B004FYY080/ref=sr_1_1?ie=UTF8&qid=1314034431&sr=8-1) and uses compostable bags. We are also in the process of setting up the rain barrel that we have that will eventually collect with gutters we are installing on the back of our house! Composting is awesome! =)