Ever since we started composting back in 2008 at our old house, we’ve enjoyed doing it (snaps for free fertilizer, reusing “trash,” and getting some subtle encouragement to eat more compost-able foods). But our composting adventures have been somewhat limited by the size of the DIY compost container that we made 3 years ago (we did eventually make a second bin, but it’s nothing like those bigger composting systems that we’ve seen at stores or in DIY magazines).
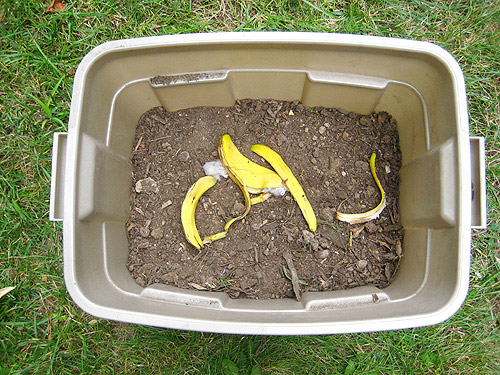
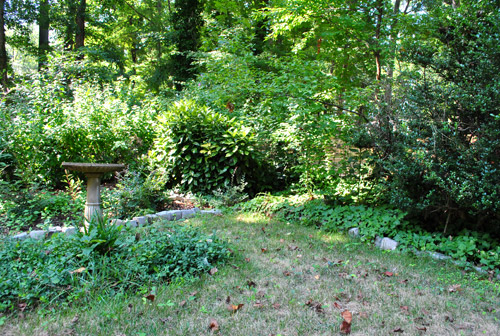
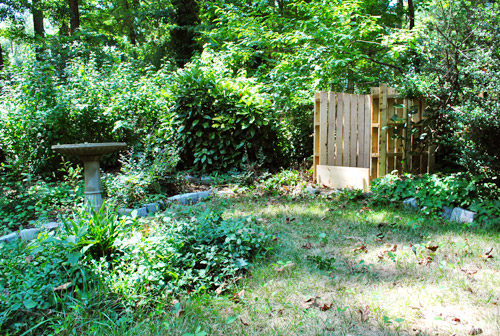
Even back in 2008 when we created our little bin, I initially wanted to make a more “legit” system out of shipping pallets (like I read about here and here) but hunting down and transporting a bunch of bulky pallets was a bit more than I was ready to sign up for. So I figured starting off with a bin and later graduating to something more built-in might be the way to go. And now just three short (ok, loong) years later, thanks to our patio supplies having arrived on pallets, I finally had my excuse to upgrade our compost system. It just took us a few months to decide where we wanted our new bin to sit. We finally agreed on this corner:
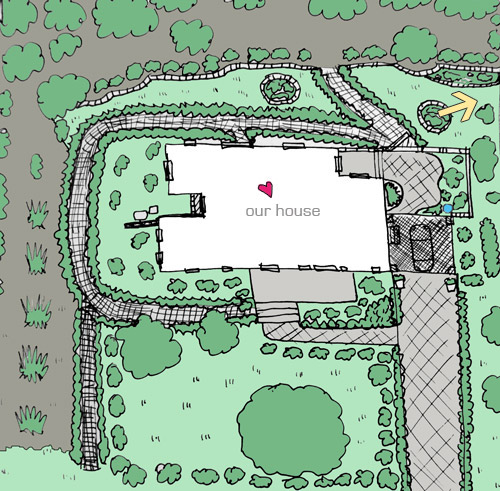
In case you need a clearer reference point, here’s that little not-at-all-to-scale map of our yard (the house is way too big and the almost-an-acre yard is much too small) that Sherry whipped up (marked with an arrow where we added our little “compost station”):
We picked that spot because:
- it was fairly hidden from view
- it didn’t disrupt the landscape very much (i.e. it wasn’t in the middle of the grass or anything)
- it was convenient enough to get to without being right against the house (we know compost isn’t supposed to smell – and our old bin never did – but we didn’t want to risk getting whiffs of nature’s miracle at work if this system was any different).
- the only “landscaping” that we’d be sacrificing was some ivy and a few weeds (how will we ever live with ourselves?)
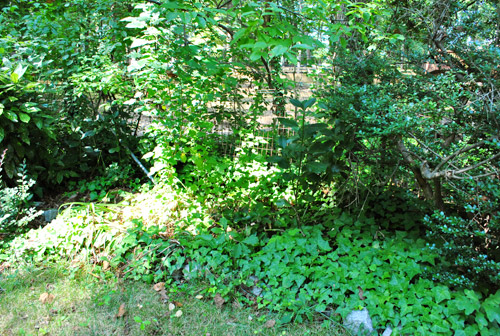
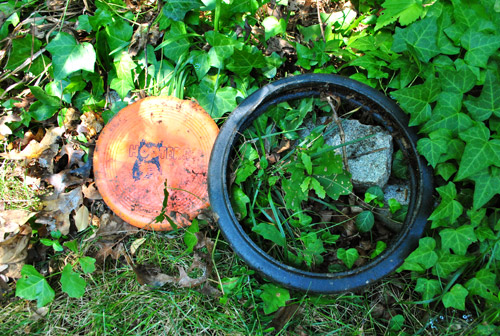
One perk to losing some of the ivy is that I uncovered some unexpected treasures in the process, like this ancient Hooters frisbee and a random plastic tire. Looks like this upgraded composting system is already paying off in major free-stuff dividends.
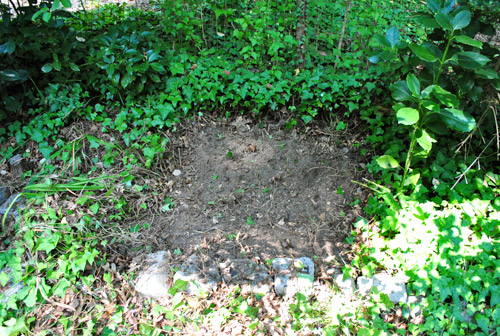
After a bit more work with my shovel and rake, I was eventually left with this clearing. Some of the online instructions that I googled around for suggested putting an extra pallet down for your base, while I read others who complained that a pallet on the ground made turning the compost a big ol’ pain (picture pitchfork tongs or shovels getting stuck between the slats). Some others even suggested a slanted base to help collect the tea (the nutrient-rich “run off” from your compost pile), but I just opted to keep things simple and make my life easy – at least for now. So this flat square of dirt did the trick:
With my area cleared, I gathered my supplies:
- Three shipping pallets (which I was thrilled to finally move out of our basement)
- A few 2″ wood screws
- Electric screwdriver
- Work gloves
- Shovel
Fortunately these were all things we already owned, so our project cost rang in at a big fat goose egg. Even better than a free project? The whole thing only took me about 20 minutes (not counting photo-snapping time). Which was a nice unexpected surprise. Remember, I go into all small projects expecting them to take forever and throw me ten curve balls so I don’t get my quick-project hopes dashed by an obstacle or two (which I’ve learned are par for the DIY course). So yeah, it was awesome that this quick and easy project really was quick and easy.
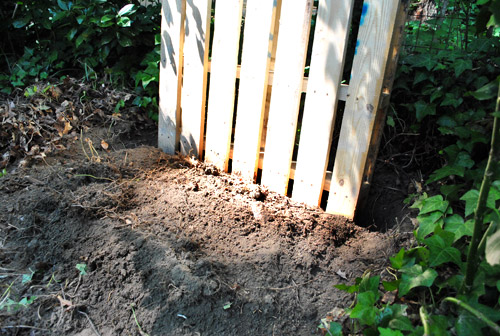
First I dug a small trench (about 4″ deep) at the back of the compost area so that my pallet had a little groove to stand in while I secured the other sides:
Then I put the second pallet next to it to create one side:
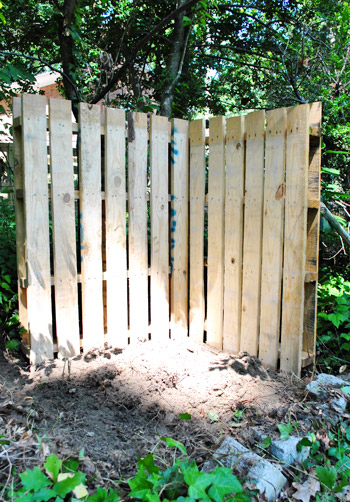
Notice how the side with the more closely-spaced slats faces in (otherwise we’d get lots of compost spilling through). But that doesn’t mean you should use a completely solid piece of wood (the slatted pallets help air circulate, which helps the decomposing process while also keeping odor down).
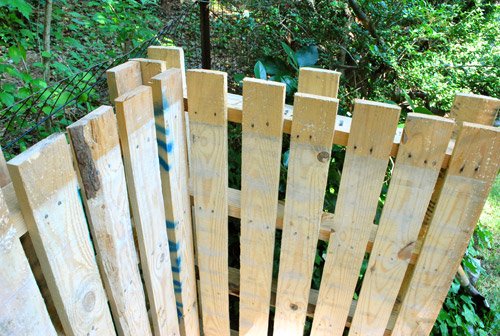
To secure the pallets together, I just drilled three screws (one in the top, middle, and bottom) to connect the two pallets. Some tutorials that I read called for zip ties instead, which I’m not surprised to hear (they, like duct tape, can accomplish almost anything). I just had screws on hand, and since that was another recommended method I went for it. I also enjoy projects a little more when I get to break out my power tools (I can almost feel Sherry rolling her eyes at this sentence). The funny thing is that the pallets were practically sturdy enough to stay together on their own so the screws kinda felt like a formality, but they were nice “insurance” so I’m glad I took a moment to add them (and say hi to my drill).
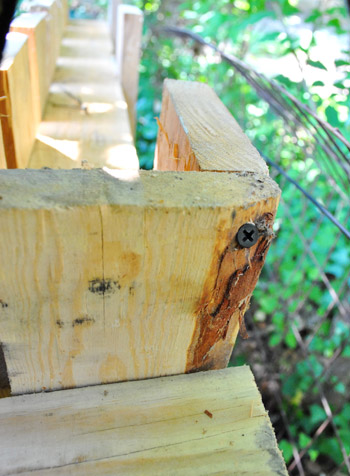
Then I rinsed and repeated the whole joining shebang with the third pallet on the other side.
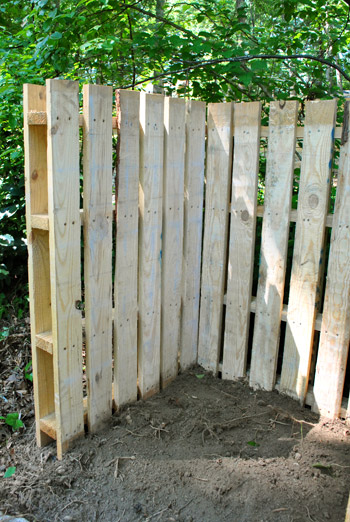
Then, um… ta-dah? That was pretty much it. Some of the instructions that I read included using a fourth pallet to create a hinged door in the front (I guess a fifth if you added an extra pallet on the bottom). I wasn’t inclined to do this because (1) that seemed more complicated than I wanted to get into – at least off the bat, and (2) I didn’t have any hinges on hand. Initially I was just going to leave my bin open-sided and not stress if my pile started to migrate a bit beyond its three borders…
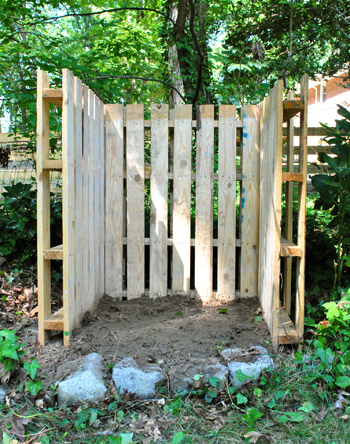
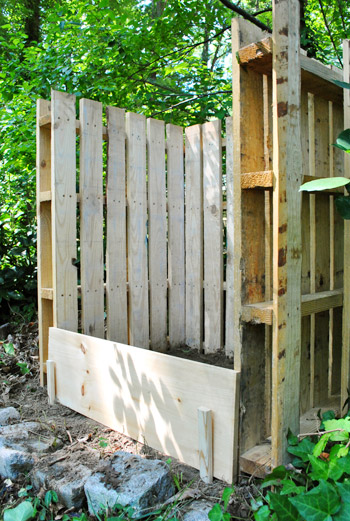
… but I realized it probably wasn’t the best idea in practice, especially since it was on a slight slope and one big rain could wash our pile-o-decomposition into the yard. Gross. So I improvised a bit and found a nearly-perfectly-sized piece of scrap wood that could act as a fourth wall (with the help of two leftover wood stakes). It stays in place just fine and can easily be picked up when it’s time to turn our pile (or grab a big heaping batch of nurtrient-rich soil when it’s ready).
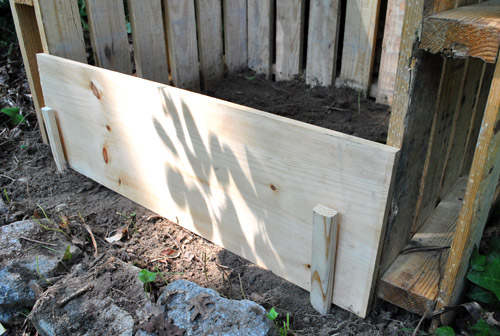
As the pile grows, I’m thinking I could easily upgrade my system with a few more boards stacked up or a taller piece of wood with taller stakes or poles to hold them flush against the pallets. But this’ll do for now:
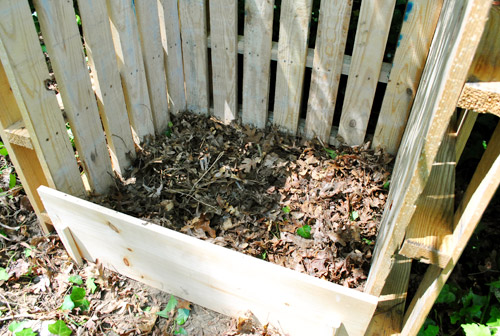
And to kick off the competition composition, I threw in a layer of nice brown leaves from the backyard. Ooooh. Ahhh.
Now we’re the first to admit that we’re still kind of novices at this whole composting thing. Even after three years of doing it. I’ve thrown out references like “turn the pile” as if I know what we’re supposed to do (and how often and why) but I’m really just going off of tidbits that we’ve picked up online. When it came to our old system we just stirred things when we tossed in a pile o’ stuff (we had a lidded plastic container that we kept under the sink for compost scraps and emptied that into the bin twice a week or so). And we printed out a list of compostable stuff and taped that to the inside of our under-the-sink door near the compost container so we could consult that if we didn’t know if something could be added. So admittedly I’m not quite Captain Compost yet (so if anyone has any pointers or resources for us, we’re all ears). The good news about compost is that it seems to just do its own thing for the most part (you can read about a few of our experiences with it over the years here, here, here, and here). We’ve never had any issues with smell or anything, so it’s a pretty painless auto-pilot process.
Oh, and I should mention that if anyone is hesitant about using wood that might be chemically-treated (like pallets) for their bin, you can limit your use of the resulting compost to non-edible plants (i.e. use it in your flowerbeds, not in an herb or veggie garden). That’s definitely what we’ll be doing just in case. We’re a bit late in the season to have much usable compost this year anyway (darn, no accidental pumpkin growing for me this Halloween) but hopefully next year we’ll have more free fertilizer than we’ll know what to do with. And maybe some of that ivy will have grown around the pallets to help it “blend” in a bit more. You know, so we end up with a charming secret garden compost situation. Of course we could also stain or paint the palettes to help them blend in (dark green, brown, gray, etc). We’ll keep you posted.
Do any of you have a pallet compost bin (or other composting system) going on at your place? How has it been working out? Anything you think we should know as we start this new chapter in our composting lives? Has anyone else accidentally grown a pumpkin? That’s my crowning composting achievement thus far.

Michele Jacobs says
We had a surprise pumpkin plant (no full pumpkin) last year! I was really hoping to get another one this year since it was such fun to watch grow
Erika says
Your setup looks (and hopefully works) great! I’m a renter, but luckily I talked the landlady into letting me put a composter in the back yard – just a commercial one that I got at a discount from the town (Earth machine). I haven’t tried to harvest soil from it yet, but I definitely will before the winter comes. Right now there is a tomato plant growing out of one of the holes in the side. No fruit yet, but hopefully it’ll happen. I’ve also grown some other accidental tomatoes and delicata squash, though I didn’t know it was a hard/winter squash until halfway through the summer after I had picked and cooked it like a zucchini. Both were tasty!
Alison says
Thanks Sherry!! I appreicate your honestly as always! Food and music are GREAT piece of advice!!!
Andrea says
Someone asked whether compost bins attract critters (like mice or worse). So far (three months in) ours hasn’t, but we heard that a good way to help keep it that way is adding dog hair when you brush your dog. Critters smell the dog and skeedaddle! (a great way to get rid of fur balls we take off our lab, too!)
YoungHouseLove says
That’s so smart Andrea!
xo,
s
lizo says
We built a compost system out of pallets about three years ago. We “borrowed” some pallets from behind a big box store. Our bin has four walls and a hinged lid, with a stick to hold the lid open (like a car hood). We made a brick “patio” for the base out of bricks we dug up while building our chicken run. We lined the pallets with chicken wore to keep rats out.
We also made a hole in the side of one wall for the chickens to get Into the compost. They eat everything! it’s actually quite amazing. We have six people in our house and the chickens eat all the scraps we put in the compost & turn it into excellent fertilizer!
Katie @ ktmade blog says
Thanks for the composting post. I think it’s great to encourage folks to do it, and you guys have such a big and loyal readership that I’m sure some people have been inspired to start their own. We’re in a situation where we can’t have one right now, but I can’t wait until we’re able to have our own. Is that a weird thing to not be able to wait for? Well, even so, it’s the truth. :)
rachel says
composting is super addicting! we started with a bin, then built one similar to yours. now we have an 8 foot long, 3 section with hinged top & sliding front door deluxe composting station! LOVE not wasting leaves, grass, food, dead plants, etc. and my garden loves it, too!
(and i’ve seen the composting toilets- the trail near my house has 2 of them. interesting, but not likely to be in our home anytime soon!)
Barbara H. says
Thanks for all the good information in the post and the comments. Just a friendly warning about ivy – it will probably get very excited about sending tendrils into this wonderful new source of nutrition. It doesn’t take very long for it to get ideas about taking over the world and you definitely don’t want it climbing your trees.
YoungHouseLove says
Thanks Barbara! We’ll keep a keen eye on it. Haha. You hear that ivy? We’re watching you!
xo,
s
Erin Echols says
This is how we built our compost bin out of wood from a pallet. http://echolshome.tumblr.com/post/7176969149/free-and-recycled-compost-bin
YoungHouseLove says
That looks great! Love the lid!
xo,
s
Mel Heth says
When my husband and I moved in together, we couldn’t bear to get rid of our separate composters, so now we own 3. A worm composter, a tumbler composter and one that looks like an upside-down trash can. I’ve found that it’s key to keep your pile moist. As soon as it dries out, the breakdown process seems to seize. And I also found it very helpful to buy a bag of compost starter at Lowe’s. It’s sort of just looks like dirt, but apparently it’s full of the good munching micro-organisms you need to break everything down. I definitely felt like it sped up the process.
Cindy says
Seems we are contemplating the same home projects at the same time…my husband was just saying we needed a compost corner.
Just painted our front door as well – a bright cheery blue color.
http://sothecooksaid.blogspot.com/2011/08/front-door-makeover.html
Laura says
Any suggestions about how to handle an ant infestation in a compost pile? I re-created your plastic bin compost bin and ended up with quite the ant farm by the end of the spring. Thanks!
YoungHouseLove says
Hmm, does anyone have any tips for Laura? Wish we could help!
xo,
s
Lindsey says
Love this! We have the perfect place to do something like this in our yard. Great post.
Kim@Floraplant Design says
Growing up my parents and gradparents were big time composters. By the end of the summer we would have watermelons, squash, you name it… if there were seeds it would be growing. It’s amazing the things you don’t try to grow always’grow’, and plants I tend to babysit (orchids) don’t give me the time of day. Hummmm, those little plant brains, never know what they are thinking.
Amber McGinnis says
Not worried about wild animals getting into your compost?
YoungHouseLove says
Nah, scroll back through the comments for lots of tips on that (mainly don’t put meat scraps in, which we don’t- we give those to Burger and compost veg and fruit stuff along with dryer lint, etc). Of course if some crazy animals infiltrate we’ll adapt our system and share all the deets!
xo,
s
Casey says
We use two trash cans that were left behind by previous tenants. They have holes that were drilled in them for ventilation, and the lid keeps vermin (and our dog) out of trouble! They’re easy to stir too. We’ll use one this year, and switch it up in January!
Our only issue is finding a bug-free counter-top compost holder. Fruit flies = gross. The reused tupperware container ain’t cutting it, we may have to spring for a ‘real’ one from Amazon (like this one: http://www.amazon.com/Norpro-Stainless-Steel-Compost-Keeper/dp/B000OV55XM/ref=sr_1_1?s=home-garden&ie=UTF8&qid=1314038661&sr=1-1)
Angie says
This post kind of takes me back into my childhood – my grandparents always had a composter as long as they could care for themselves. My aunt also composts, and she actually grows pumpkins on hers.
Connie says
Dear John & Sherry how is Clara today? Please tell her she has a bunch of devoted fans up here in French Canada (Montreal). We are a family of ten and all of us (well, the 6 six gals really) simply adore her. Such a lovely voice, we love her little bits of chatter, she is always so serious when speaking. I can’t tell you the number of times the girls have played that bit with John showing her the laundry room light, so adorable.
Enjoy your blog regularly up here and always get a kick outta Burger, what a cutie(nobody calls him a cutie but me,but my guys think he’s a nice little tyke, their word not mine)
A bientôt!
YoungHouseLove says
Haha, thanks Connie! Burger and Clara both send their love! Right now Clara’s actually trying to nap (not going so well) and Burger is outside chasing something (chipmunk? squirrel? salamander? not sure!).
xo,
s
Brittnee says
Well we tried it, but I accidently bought a size larger lid for our bin and it rained one day… The bin overflowed with water and brought out the smelly compost with it. :(
Wendy says
When our compost is ready for the garden we sift it through a home made sifter. It sounds difficult but it is actually very easy. We made a 2 x 4 frame about 3 feet square and covered it with 1/2″ hardware cloth (wire mesh). It sits over our wheelbarrow with the hardware cloth side down. We use gloves and push the compost through. It makes beautiful soil for the garden. It also gets rid of any plastic etc. that may have been thrown out with the scraps. Good luck composting!
Kacie says
This is sooo useful! We are pretty new composters and I’m going to be putting this bin on the list to make!
Kacie
http://www.acollectionofpassions.com/
Liz says
My fiance built a compost system for our backyard (it’s basically like three of your pallet composters all right next to each other). He’s done a lot of research and this is what we’ve found (I may be repeating stuff- so forgive me). 1. Cut up your compostables small (especially during the winter)- it will decompose faster. 2. You’ll want to turn and wet down your pile often (we do it about once every two weeks)- it not only encourages the microorganisms, but also prevents the pile from getting too hot (really large and hot piles can literally ignite!) 3. Get a compost thermometer. This isn’t necessary, but it will tell you if you’re at a high enough temperature to actually break stuff down- plus I thought it was neat to see how the temperatures rise and fall. Have fun :-)
YoungHouseLove says
Thanks for the tips Liz!
xo,
s
Jenna says
Love the new compost! We have two on the outside of the garden that we rotate in the dirt every year. We don’t do anything special with it but throw in scraps of food. It also is just made out of chicken wire which seems to do the trick. It might not look as nice, but with a yellow electric fence around the whole garden anything would look a little better! Also, two years ago we threw our old pumpkin (not carved) into the compost and the following year we had about 15 good sized pumpkins! We were shocked & happy that we didn’t have to buy any. Happy composting!!!!!
Jen @ The Decor Scene says
I accidently grow a pumpkin two years ago. But it wasn’t my fault at all….it was that squirrel that kept eating our Halloween pumpkin. I guess he buried some of the seeds for himself for the winter, but I guess he didn’t come back for them, because the following year we had a small pumpkin vine growing in our front garden bed. But it never produced pumpkins. :( But it was fun to watch the vine grow and then we finaly putting it out because we were worried it was going to do something to our other plants.
Lisa says
I’ve been composting for about 3yrs now and would like to recommend a two compartment system. If you add two more pallets: one along the back and one at 90 degrees to the new back piece. Picture it as a sideways “E”. The idea is to put your compost on one side and then when you turn it, you just move it with a pitchfork or shovel to the other side. This makes it so much easier than just trying to stir it up, especially if you wind up with a big pile like I did. I turn the pile once a week and water it just to keep it moist. You don’t want or need to get it soaking wet. This may seem like a lot of work, but the beautiful thing about composting is that even if I get a little lazy and skip a week or two, it’s still working without my help. However, with this method I’ve been able to get great compost in as little as three weeks! Also, it helps if your carbon (green) to nitrogen (brown) ratio is about 25-30:1. If you have too much green, the decomposition slows down and if you have too much brown, the compost starts to smell. Hope this helps and happy composting! Love your blog!
YoungHouseLove says
Thanks for the tip Lisa! We had two bins going with our other system so we wonder if it’s only a matter of time before we want another bin with our new pallet system.
xo,
s
Ami says
The timing on this post was nothing short of perfecto! I’ve been reading your blog for a few months and went through all of your previous posts on composting. Last night I was dumping coffee grounds out of the reusable filter from the coffee maker and thought, ‘Darn that would have been great for a compost pile.’ And a light bulb went off. I told my husband right then I want to start on one ASAP. So, next weekend we are all over it. Then last night I had a dream about building a compost bin! And you guys were in it! What the heck!!?? Can u believe that? Guess I’m spending too much time on blogs, but can’t help it this blog is my new fave! Thanks for all your great information and inspiration.
Katie says
I really want to start a compost bin in our backyard but my husband is convinced that we’ll have raccoons and other vermin over-taking our backyard (we have woods behind our house with lots of deer and other critters). So I’m definitely interested to see how yours is with attracting animals. Keep us posted! Also, random side note question…now that Clara is officially a big girl, what kind of car seat did you get for her? I’m always curious to hear what other people use…is that weird? Quite possibly :) She is such a tiny little thing…my daughter loves watching her videos and I always smile at her skinny little legs…she must not weigh much at all…just a little peanut-so adorable :)
YoungHouseLove says
We got her a Britax Roundabout thanks to a big sale on diapers.com.
xo,
s
AmandaonMaui says
Our compost bin is made of pallets, but unfortunatley they are 4 tall sides which makes turning the piles pretty impossible without a step stool of sorts (which I don’t have) so they’ve never been turned. I have been trying to put newspaper in to create the balance of brown to green waste, but there’s always more green waste than brown waste since mostly what goes in there is kitchen scraps. We have two bins so that one is the old bin which is finishing, and one is the bin in progress.
Lindsey says
I haven’t read all the comments, but beware of critters coming in to your open compost bin and eating your goodies! There is nothing like going to throw something in there and being met by Mr. Raccoon.
YoungHouseLove says
Since we don’t toss meat or dairy scraps we think we’ll be ok! We’ll definitely keep everyone posted if we make some raccoon friends!
xo,
s
Rebecca @This Nest is Best says
We are currently rocking the two-trash-bin composting system. But, I would love to upgrade to one that you are able to rotate. We’ve been very tempted to pick up an upcycled one at our Co-op, but haven’t bit the bullet quite yet! If our yard were larger, a built in system like this would be great, but we just don’t have the space!
Wendy says
Before my parents moved, they were passionate composters.
Things I’ve learned from them that you might (or not) find valuable:
*Freeze your veggie scraps (it helps them to break down faster) and then dump the frozen veg mix into the pile. (We had a plastic grocery bag that we added to growing up, and once a week one of us dumped it in the back.)
*Have a pile for each year. Things decompose at various rates, and so in order to keep things moving along in their own state- Mom and Dad had about 5 piles in the back yard. They’d add “stuff” (e.g. natural decomposing agents) to help the process as needed.
*I’d vote for keeping the pile(s) open. Compost gives off heat as things break down. As a result, our compost pile was the local maternity ward for deer!
Seriously, the momma deer would give birth and hang out with their fawns in/around the compost pile- as it was soft and warm. We received the treat of watching these beautiful creatures each spring/summer/fall with their young families!
*Communicate! Mom and Dad sometimes needed help with that to keep things going- who added what, who took from which pile, etc. But, with one pile this might not be a need. :-)
*We never put fruit in the compost, as we were told it wasn’t good, but… maybe that has changed.
*Enjoy! There are few things as rewarding as using your own mulch for your garden, and knowing where it came from! :-)
YoungHouseLove says
Thanks for all the tips Wendy! Amazing that you got to see deer giving birth in/near your compost pile! Wow.
xo,
s
Allie says
I know this is totally weird (and stalker-ish?), but Ruelala has boutique right now that has some artwork that seemed to be right up your alley (the bumblebee print and the clothespin print, to be exact). I just couldn’t pass up the opportunity to let you know! Love the blog!!!
YoungHouseLove says
No way- thanks for the tip!
xo,
s
Bonny says
we use a system similar to this, but have two bins sitting side by side to allow for the one bin to mellow without adding any new material to it (great for finishing off the compost). Also if there is a lot of wildlife around you may consider figuring out a lid to prevent unwanted visitors scattoring your compost around the yard… (the elk used to tear my pile apart to eat the fruit and veggie peels).
egg shells are ok to use if you rinse them first, and crunch them up into the pile, never compost meat in it! Oh and we also have a piece of PVC pipe with holes drilled in it that we lay diagonally across the bin from top to bottom, which we then bury. this allows for more air to get into the middle of the pile. This combined with frequent turning keeps the smell down (aerobic composting, vs anaerobic composting…)
Jessica says
Before your compost gets filled up, I recommend splitting into 3 sections (for different stages of decomposition) because it makes it easier to get to the good stuff once it’s ready.
I wish we had done that with our shipping pallet compost bin!
YoungHouseLove says
Thanks for the tip Jessica!
xo,
s
Stacey says
This has nothing to do with this post, but just saw YHL as one of 7 blogs listed on the Foundry Q&A regarding where Foundry members get their design inspiration! WAY TO GO!!!
YoungHouseLove says
No way… that’s awesome. Wow- thanks for the heads up!
xo,
s
Jessica says
What a coincidence that you wrote a post on composting! Just yesterday I was checking out the ABC (Australia) Open Projects website and they had a video on composting. Very cute old couple who made a beautiful video to teach us all how to compost. They have the most awesome compost heap & garden! I know I’ll be setting my compost up VERY soon. Hopefully you can see the video:
http://open.abc.net.au/projects/whadyaknow-73lr8in/contributions/composing-compost-32dj6kv
YoungHouseLove says
Love it! She’s so cute- and her accent is awesome.
xo,
s
Jenny says
I grew up with my grandpa, who is a hardcore composter. Nothing so fancy as this: ours were just two piles in the backyard, leaning against wire fencing. I know they did compost fruit/veg stuff, but it never smelled, or attracted flies. I know animals got in a couple times…but our neighborhood was plagued by flower-eating deer, and birdseed-eating squirrels…so obviously there were more important problems to consider.
By the by, if you ever have the deer problem, apparently squirting rotten eggs on everything keeps them away….gross.
Brooke S. says
I’ve had a bin like yours with the pallets before, but it does require turning and my husband is not the best at that. So after we moved we got 2 tumbler bins and they work great cause it is easier to turn them, but they don’t get the same oxygen circulation and don’t make as good of compost for that reason. I kinda miss the old pallet ones!
We grew a TON of accidental spaghetti squash this year and unfortunately, pitched a bunch thinking they were a inedible weird zucchini pumpkin hybrids, but did save a bunch once we came to our senses and they were AWESOME! Good luck with the composting!
Heather says
Did you know that you guys were featured in theFoundary’s survey, as an answer choice for the question “Where do you find inspiration for home décor and design?” …obviously I picked you :)
YoungHouseLove says
Wahoo! That’s beyond exciting. Thanks so much for the heads up (and for picking us,shucks, we’re blushing).
xo,
s
Lara says
I convinced my hubby to compost several years ago. Our bin is part pallets, part rabbit wire. (We have several doggies who like to eat ‘treats’ from the compost bin.) I keep growing accidental potatoes – especially this year when DH made me a raised bed and we used the compost to fill it. I do think it’s missing something – my tomatoes have not produced ANYthing yet! We do toss lime into the compost a couple of times a year – maybe that’s what’s messing with the balance.
Vicky says
Hi,
Please give us an update on how this goes, I’m interested to know if you start having critter problems, since there’s going to be yummy-smelling food scraps for them.
YoungHouseLove says
Will do! With our last system we didn’t have any issues, and we hear that avoiding dairy and meat keeps them at bay, so we hope it works for this system too! Either way we’ll keep you posted!
xo,
s
Liz says
We have two Garden Gourmets on the roof of our NYC apartment building; it’s been a great building socializer, and is easy, non-smelly, and provides great fertilizer for the communal tomato plants! Also, NY state does a great rebate program that makes it super-affordable… yay composting!
Shannon Hoving says
Love that compost tea, but I never seem to have enough of it. So I started brewing manure tea in a 50-gallon drum. My roses and perennials love it. (Wouldn’t use it on a vegetable garden, though.) Some women spend their money on designer handbags; I spend mine on a burlap sack of cow doody, cause I’m classy like that…
Erin says
I work in the private club industry and we recently showcased a club in Florida that composts on a large scale. By saving all of the lawn clippings from the golf courses to scraps from the kitchens, the Broken Sound Club in Boca Raton, FL will save thousands of dollars help create economic and environmental sustainability for the club. Interesting article!
http://www.usga.org/news/2011/April/The-Greening-Of-Broken-Sound-Club/
YoungHouseLove says
Love it! Thanks for the link. So interesting.
xo,
s
MelissaG says
I’ve never looked into the pallet type system but I’m curious as to why one would want one so tall? I dabbled, shall I say, in composting. It was way to far back in my yard and we just weren’t bringing things back consistently. I’m going to try again maybe next year. The most serious composter I knew had a “usable” pile and an “in progress” pile. She just used metal fencing (not sure what that is, stronger than chicken wirer but along the same lines). I think compost has a wonderful earthy smell too! It never attracted bugs (well maybe crawling ones). It only attracted animals if she didn’t rinse her egg shells properly. Anyway, to each their own but I was wondering what the benefit was of having such a tall structure??
YoungHouseLove says
Hi Melissa,
I can’t answer exactly why you’d want one so tall, but I’ll admit this is taller than I necessarily would’ve chosen – but it’s the only way the pallets fit in that space (if I laid them the long way they would’ve bumped into the stone border the previous owners left us). But who knows – maybe we’ll create quite the pile someday and really appreciate the extra height!
-John
MelissaG says
Thanks…looks great, I was just wondering if there was another reason. Kuddos for using what you have on hand and making it work. And look good.
C Redmond says
Hope my comments aren’t repeats since I only read thru half of them (too many for keep going).
I live in Ontario and yes, the green bin program is great. However, I have my own compost pile and just use the municipal pick-up for items that I avoid in my pile (meat or bones, wax paper or paper coffee cups).
A couple of thoughts- this is really dependant on where you live and the critters that call it home but we’ve only ever attracted raccoons to our pile. Cats are carnivorous and don’t dig in ours since it’s only vegetative matter. The raccoons I don’t mind so much, they don’t drag it all over the yard, they just mess it up while looking for something tasty. I welcome the help turning the pile- I just scoop any stray stuff back into the pile- less work than turning. But it’s not a common occurrence, they turn over the municipal green bin more often and those dudes can open the lock on it.
A tip once you get going- you may want to double up your bin by adding 2 more pallets on the side (giving you a 3 sided bin with a pallet in the middle acting as a divider). b/c you continually add to the pile, the finished compost is mixed with unfinished- having a pile to retire while it finishes the job and still having a spot to dump fresh stuff is easier.
Kymberly L says
We have a ‘ruff neck’ (I think it’s called) trash can with a lid that I found on freecycle :) i driled a ton of holes all over it (fun) for air flow. Whenever it needs a tumble I give it a roll on its side. HAPPY COMPOSTING!
Bea says
Oh la laaaa! the composter how to!
The exact post that Google pointed at me and my first encounter with this blog!!!!
Time flies!
erika says
This looks pretty easy to do, i may tackle this challenge pretty soon!
On another note , the Nikon lens you have to the left >>>>
Have you used it or heard good reviews, it’s reasonably priced and I’m in search of a new one… Just wondering :)
Thanks!
YoungHouseLove says
We use it a lot for pics with Clara (it’s a very close angle lens that gives you lots of bokeh and it’s awesome for moving kids without a ton of light – less blur). We really like it, although it’s not so much for getting far away things (Clara petting an animal at the zoo = other lens, to fit it all in, but Clara alone doing something cute like “brushing her hair” = perfect). Hope it helps!
xo,
s
Amy G says
We made something surprisingly similar. Here is a little “heads-up” from our experience: we did not close off the front either. Then, as the days went on, we wondered why things weren’t looking as we thought they should. After discussions where various wild animals were the main focus and nighttime motion cameras were laughed about, we saw OUR OWN DOGS rooting around in the yuck! Granted labs are bigger than your furry friend, but we began to worry about what they had been ingesting. A friend that runs a doggie-day-care worried with us about extensive dog-hospital stays. The moral is, you may want to make a higher front to detract animals. Especially with a youngin’ running around, one may not want to attract animals such as raccoons. Just sayin’.
YoungHouseLove says
Thanks for the tip Amy G! The compost area is located outside of the fenced in area that Burger and Clara play in (Clara always with supervision of course) but we’re definitely planning to use a larger piece of wood to block the compost when the pile gets bigger so it’s not accessible to the bean or the burgs!
xo,
s