When Real Simple asked us to whip up a DIY holiday gift idea for their site, Sherry did her Elaine from Seinfeld dance (which is only slightly better than her ugly cry) and we excitedly put together a quick tutorial for creating a seasonal welcome mat to slide under someone’s Christmas tree… which they can then slide under their front door.
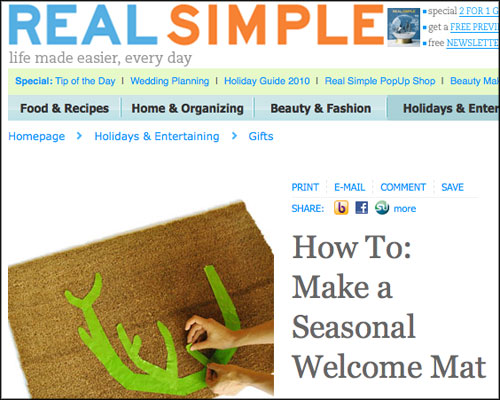
You can check out the full how-to details for making this buck-ish beauty over on RealSimple.com (here’s the first page and here’s the second page). It’s basically an easy project involving a cheap Ikea doormat, some painters tape, some outdoor-approved (or enamel) spray paint, and about ten minutes of your time.
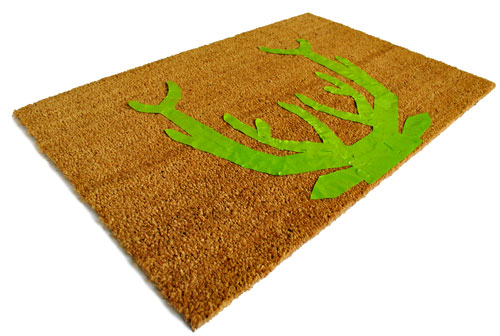
And when the dust spray paint haze clears, you’re left with a little something like this:
As long as you use good quality indoor/outdoor approved spray paint it should be 100% fixed in place once it’s dry (since it’s made to get rained and snowed on outside, there should be no worries about painted footprints in the house). A lot of “professional” welcome mats are actually spray painted, so these will wear out over time like most mats do – but it’s a fairly standard treatment when it comes to buying any mats with designs on them from the store. Using something that specifically says “enamel spray paint” will give you one of the most durable and long-lasting results since that’s the good stuff, but the spray paint that we used was outdoor approved (although it didn’t specifically say “enamel” on the label) and it has held up really well so far (we actually made ours a few months ago because the Real Simple “due date” was November 1st).
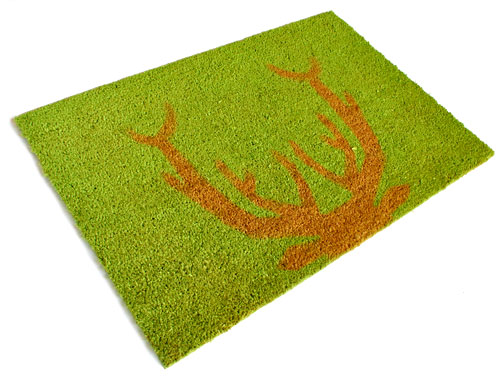
Anyway, our big secret is that we actually made a second DIY welcome mat- you know, in case the first one was a bust. So we thought we’d share the alternate one here (which we also liked, but didn’t love quite as much as our deer friend). It uses the same basic technique as the reindeer antler version, but it requires less taping time and a bit more spray painting time. Oh, and we used a big round mat for this attempt, also from Ikea.
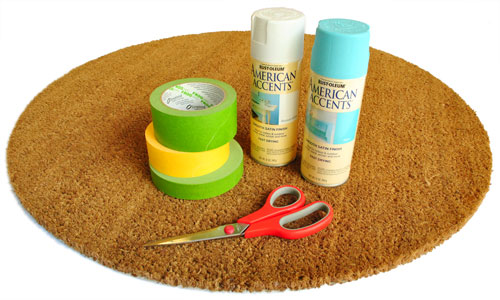
We were going for a snowglobe effect on this one, which meant creating white snowflakes on an icy blue background. So after spraying the entire mat with a couple of coats of white paint (and letting it dry, obviously) we cut our painters tape to create various-sized asterisk shapes all over the mat. They’re not the most intricate snowflakes in the world, but we wanted to keep it simple (since that seems to be a key term over at Real Simple).
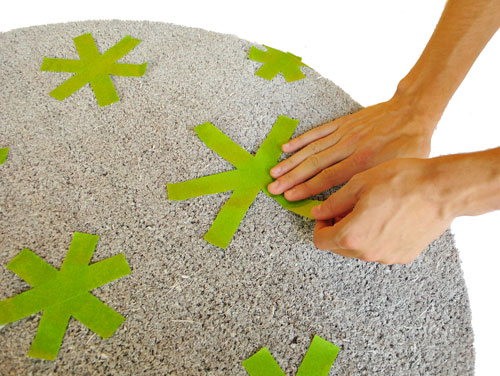
With the tape firmly pressed down, we applied another couple of coats of blue spray paint all over the entire mat, let that dry, and then peeled up our tape to reveal this little ditty:
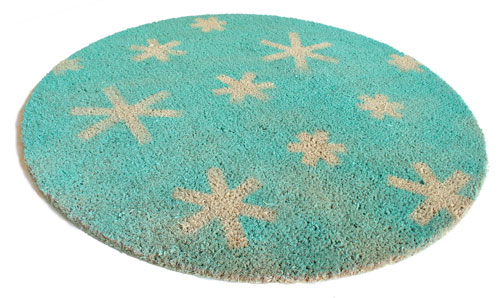
I’ll admit that we didn’t get the blue coat to go on as evenly as we wanted. We had to stop about a coat early because some of our painters tape was starting to peel up a little (which we feared would result in less-than-crisp snowflake edges). The good news is that the tape-lifting side effect isn’t normal, it’s something that we caused by unsticking and re-sticking our asterisks too many times while taking process shots and changing their configurations (we didn’t have that issue with the antler one). So you can easily avoid that problem by leaving your tape asterisks right where you stick them the first time (or removing them, tossing that less-sticky tape, and starting over with fresh tape). You can also always start all over again if you don’t like the initial results (just spray the whole thing with white paint again, wait for that to dry, and asterisk it again for an easy do-over).
So that was our little DIY doormat adventure. When we were brainstorming handmade gift ideas, we figured a doormat is a pretty universal present. It might sound strange at first, but most of your friends and family members have some kind of a door, right? Plus we think it would be a fun gift idea to go put it on someone’s porch for them (and leave a note so they know who it’s from). Has anyone else taken on a doormat project? Sherry loves this homemade house number version by that crafty countess Martha Stewart.
Update: You can check out all of our favorite holiday decor finds here – many of which are under $15!

Jenn L @ Peas and Crayons says
Hooray Real Simple and IKEA! Making life cute and afforable! =)
The blue one is my favorite!!!! <3 ok I really just love them both =)
xoXOxo
bridget b. says
y’all are so creative, that reindeer looks great. but how come the first thing i thought when i saw the green tape was “how is a cactus seasonal?” haha.
Taylor says
This is SO cute and I can totally see it working for every holiday! Plus it will be inexpensive enough that my bf can’t complain about the cost of my excessive holiday cheer.
Thanks guys!
P.S. Stop by and enter my giftcard giveaway! http://trimmedandtaylored.blogspot.com/2010/12/giveaway-in-wonderland.html
Kaitlin says
TYPO ALERT! On your baby center post, the title says “Seven gift IEAS…” instead of IDEAS. Just thought you’d want to know!
YoungHouseLove says
Thanks so much Kaitlin!
xo,
s
Amanda C says
Thanks so much for the great gift idea! I have been totally clueless about what to get my boyfriend’s sister-in-law (we draw names for Christmas). A beautiful new matt will be a perfect addition for their new house! Love your blog and all of the wonderful, creative ideas! :)
The Bella Life says
What the cute! This is such a great idea. I can never bring myself to spend more than $10 on a front door mat. This definitely stays within my guidelines. ;)
-Camberley
Lizzy says
I too had no idea what the first one was until you said antlers. I see it now… der…..
Cute idea.
Do you think it’s ok to use the cheap spray paint?
(Please don’t answer that – I’m being cheeky)
Lorie Moynihan-Broedel says
I LOVE IT!!
Kiran says
A simple, cheap yet personalized holiday gift! I even love the snowflakes idea :)
annabelvita says
Hiya, love these ideas. Will you be making the house number one for the new casa? (and would you hide the number if you posted it here?)
I enjoyed your babycenter post because I was thinking of asking for some tools for Christmas! I mainly wanted the kreg jig – is there one you’d recommend? I tried to research it but got boggled!
YoungHouseLove says
Hey Annabelvita,
I do LOVE that Martha project. A friend of mine actually made one a while back and it looked so good (and lasted over a year before wearing down from all the foot traffic). But since we wouldn’t share our house number on the ol’ blog, that usually means that we pass on doing projects that involve it – we’d hate to share a big blurred out mat as an after:)
As for the Kreg Jig, John has the most basic version, so if yo go to kregtools.com it should have something that lists where they’re available and maybe you can go to the shop nearest you and ask to see the starting model? Hope it helps!
xo,
s
David says
Creativity at its peak. I need to do this to all of my mats…:P
Julie says
Oh my goodnessssss, the deer one would be an absolutely perfect gift for my mom and stepdad!! I LOOOOOVE IT. Thanks a bunch! :)
KellyD says
I have had that plain Ikea mat for awhile and it is all worn out and discolored now. I was planning to throw it out, but maybe I can dust it off and give it a second life with some paint?? worth a cheap try :)
Allison says
Is that the “trampa” mat from ikea? According to the website, it’s $8.99, more than double what you said. Where do I get a $4 one?
http://www.ikea.com/us/en/catalog/products/20052187
YoungHouseLove says
Maybe it’s an in store only one? Lots of things aren’t available on ikea.com that are sold in stores. Although that “Trampa” pic looks like the one. Maybe they sell a smaller or thinner one that’s less (they do that with sheepskins). Or maybe it was one of those doorbuster deals (sometimes they mark things down but we don’t remember there being a “new low price” or “sale” sign)? Hope it helps!
xo,
s
Allison says
Thanks! I’m thinking of making the deer antlers one as a dirty santa gift for my family. I think even my cousin(who’s a big deer hunter and really hard to shop for) would like it. Of course, I might as well make one for myself!
YoungHouseLove says
Good luck!
xo,
s
Elizabeth says
Thanks to your inspiration, I’m making a holiday mat design too!
And documenting it on my blog: http://clementineandclover.wordpress.com/2010/12/11/the-temperatures-right-for-this-diy-project/
YoungHouseLove says
Awesome! Good luck!
xo,
s
Elizabeth says
OK, here’s how my mat turned out: http://clementineandclover.wordpress.com/2010/12/13/a-diy-holiday-doormat-project-the-results/
I feel like tape for a design with detail is HARD to work with…next time I’ll try paper (if doing a detailed design)!
Thanks again for the inspiration!
YoungHouseLove says
Wow! I’m amazed at the detail of your design! And can definitely see how tackling it with tape was a pain in the arse! But it looks amazing!
xo,
s
Sarah says
(making my way through old posts) love this idea. Man, I have GOT to get to IKEA!