The wall is down (more here). Drywall is up (more here). Time for trim.
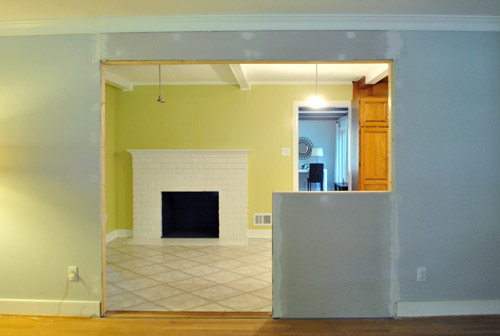
I actually kinda enjoy doing trim. Despite it requiring lots of focus and attention to detail, it’s very satisfying to see all of those rough edges turn into crisp white borders. But before I could get to trim, I actually had to take care of the ledge on our half wall and the door jambs first.
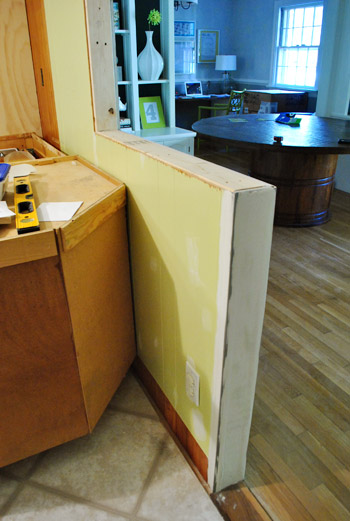
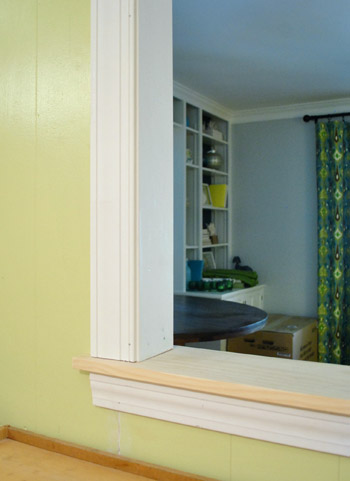
Our neighbors recently had a similar wall opening project done in their house (these guys), and we really liked how they treated their half-walls with a wood platform on top and trim beneath to dress it up a bit. It looks really finished and balanced and is also a great place to set stuff out when entertaining (like a few small dishes of nuts or candy or some pre poured drinks). So we bought this basic plank of pine that’s eight inches wide and four feet long to use for the top ledge.
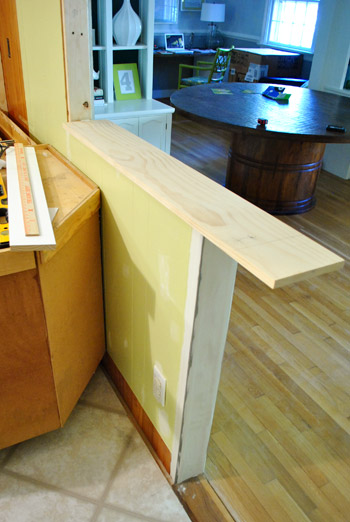
Obviously it needs to fit a bit better than that. On one end we just sliced it a bit shorter, but on the other we actually wanted to notch it over the wall so in the end it would have the same amount of overhang on each side (we had to factor in that it would have to extend beyond the trim on the inside angle, so it’ll look crazy long until we add that a bit further down the page). So we both measured and marked the wood (twice, to avoid any weird little mistakes)…
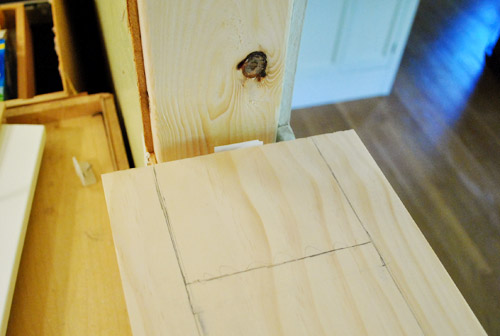
…and I ran outside to make the cuts in our driveway (using a jigsaw to cut the notch and a miter saw to get a straight edge on the other end).
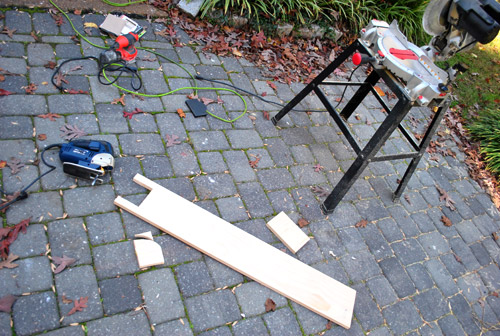
Before installing it, I also sanded down all of the edges to make them a bit softer. No one wants to slice their arm on a sharp corner walking through our new opening now do they?

Fit-wise, we got lucky. Perfect on the first try. This was either a very good omen for the rest of my trim cutting, or a sign that it can only go downhill from here. See how it looks oddly long here? That’s just because there’s no trim on either side, which will end with just a slight overhang of the ledge under it to ground it like many of the windows in our house.
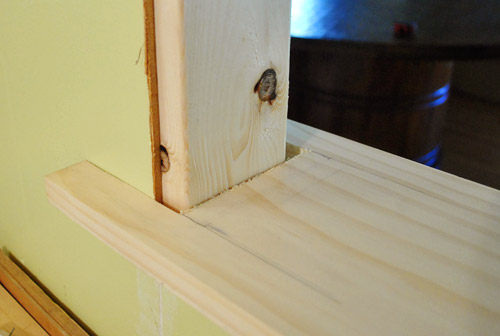
With a couple of nails on either end, we hammered that guy right into the frame and it was set (we’ll eventually prime and paint it white like the trim). Then we could begin to set the door jamb in on top of it.
Fortunately our doorway was a standard jamb width of 4 5/8″ so I could rely on this pre-packaged door jamb kit they sell at Lowe’s for about $18. Well, not completely. It was meant for a normal-sized doorway (aka a 3ft opening) so I had to buy another $6 side piece to help extend my top jamb.
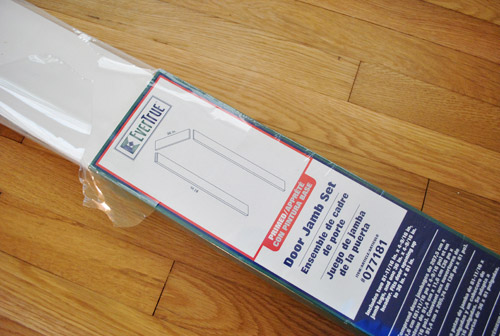
The reason you install a jamb over the wood that frames the opening is because the jamb is wider so it covers the sides of the drywall and paneling so that once the trim is added the entire opening is seamless and sealed (so you can’t peer beyond the wood framing piece from the side and see the side of the drywall).
The instructions said to assemble the jamb first and then lean it into the doorway as one piece. That didn’t seem very practical given our unique situation (aka: our uniquely sized opening), so we hung each jamb piece separately and it worked out really well. I cut the short side of the doorway first then together we held it in place and nailed it in with some finishing nails.
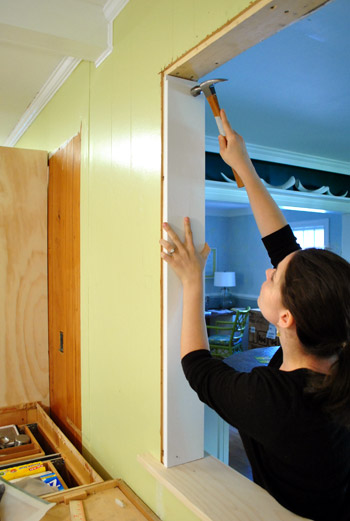
Then we slid in the short side of the top jamb and hammered again. It was finally starting to look kinda like a doorway. And trim would definitely seal the deal.
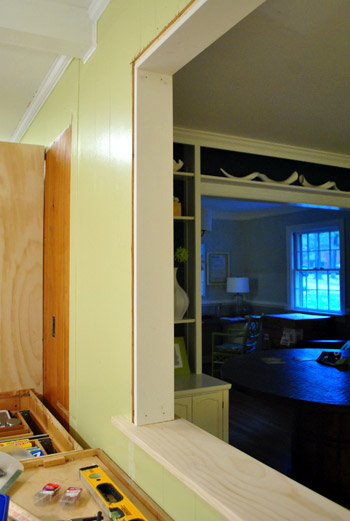
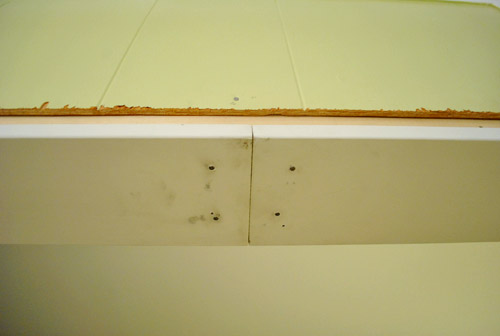
Here’s where we had to line up the two pieces of the top jamb. Ideally we’d love to have one piece, but we couldn’t find a 92″ piece. Fortunately caulk and paint will make this look pretty darn seamless. Especially since I took a minute to sink every finishing nail’s head into the jamb with a nail punch (it’s a cheap little manual tool explained more here).
With the top on and the other side hammered in place, the jamb was officially done. So with that and the ledge checked off of our list, we could officially turn our attention to the trim.
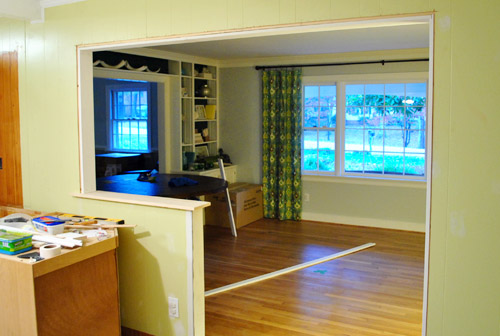
I’m not gonna go into crazy step-by-step trim installation here (you can read all about that when we re-trimmed our old bathroom). As usual it involved lots of measuring, cutting it on an angle with my miter saw, and hammering it carefully into place (using a nail punch to manually sink the finish nails to keep the trim ding-proof). This happened on all three sides of the doorway, in both the kitchen and dining room sides of the opening.
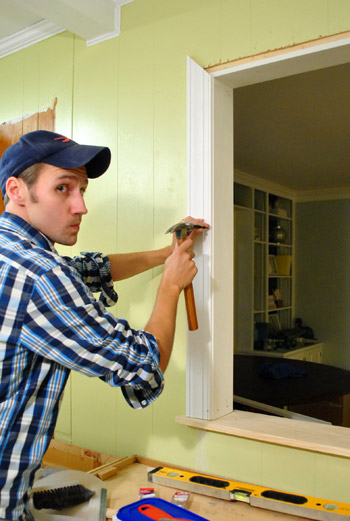
We also added some slightly smaller trim under the ledge to beef it up a little bit because:
- we had seen our neighbors treat their half-walls this way and liked how it looked
- the big picture window in the dining room along with many other windows in our house are treated the same way (with a ledge on the bottom that’s grounded by some slightly smaller trim)
In addition to installing trim around both sides of the doorway, we also had to reinstall a bunch of baseboard that had to come out during demo. Fortunately enough of it was intact enough that I didn’t have to buy anything new. Some the paint got scraped off during the removal and rehanging process, but once everything is caulked and painted again no one should be the wiser.
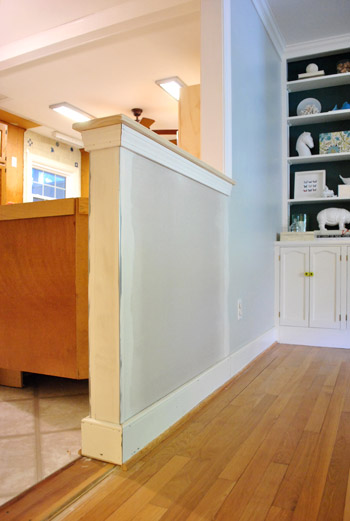
Some of this baseboard and quarter round may have to come up again when we do the floor, so we left some of it unfinished (like the quarter round where the transition will go after it’s added). But we tried to complete most of it so that it looks as polished as possible during our construction phase (which will last the next couple of months).
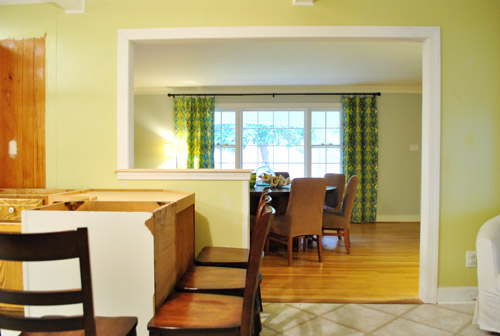
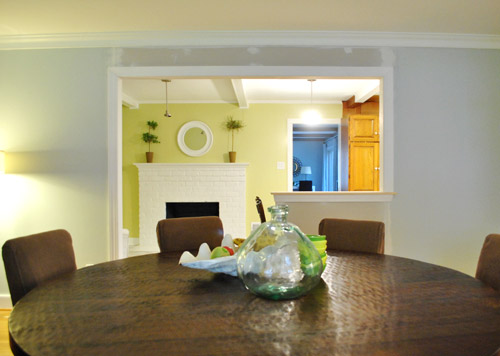
So here’s the room from both sides with the finished trim. Definitely looking more doorway-like, eh? Remember we’ll be painting the wood ledge white like the trim so it’s more integrated.
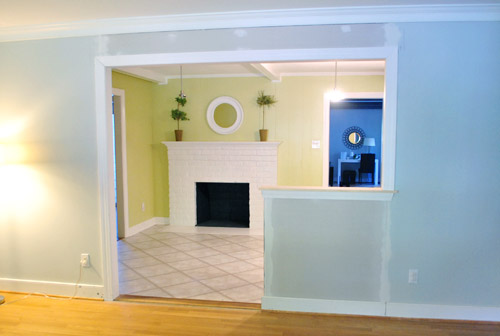
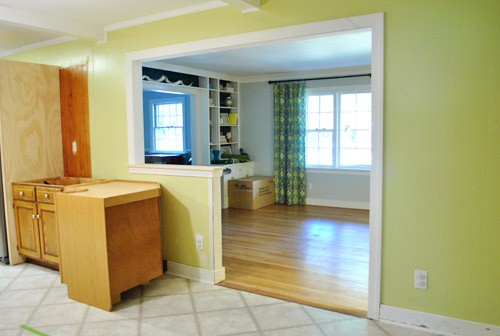
Now to make it look a bit more like a kitchen and dining room, we’ve moved furniture back in! Although the chairs in the kitchen are just placeholders (we’ll get some counter-height stools that are a bit lighter looking – maybe even acrylic or something to keep things from feeling too heavy or wood-riddled). So excuse the chaos and busyness of things that are out of place and soon-to-be changed (it’s a lot crazier and busier than it’ll look in the end).
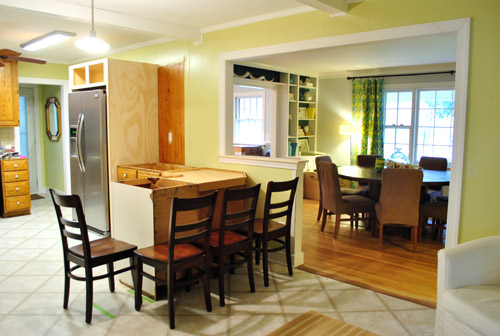
Of course there are still missing counters, walls, and trim that need to be painted, kitchen cabinets that need to be painted, and we have a million other kitchen updates to do (lighting, flooring, backsplash, yadda yadda yadda).
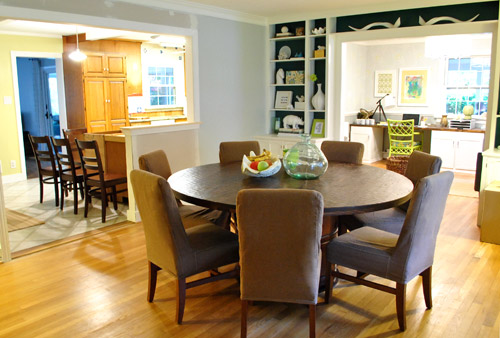
You might also notice that we acquired our last cabinet for the peninsula. Woot. See him there on the end? Guess how much it cost? Rhymes with “dero zollars.”
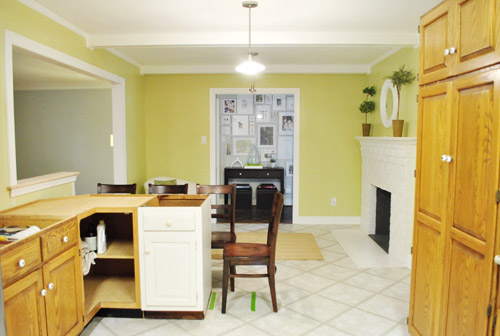
It’s from the ReStore, and no we didn’t steal it. When I told the guy I was looking for an 18″ base cabinet, he said they had one out back I could have for free. Apparently the donor left them outside where they endured a light rainstorm before the ReStore noticed them. So even though they hadn’t gotten damaged, it was against their policy to sell them. So why not take it home and give it a try? We gave it a couple of days in the carport/sunroom to ensure that it had aired out and wasn’t damp or anything. Then we looked it over and it checked out a-okay (no water damage/mold, etc). And the bonus? It’s the closest match to our existing cabinet doors and drawers that we’ve seen (the doors and drawer are beveled so they’re half-sunk, making them the same thickness as all of our half-sunk doors and drawers).
Oh and see the tape lines in the pic above? The first one marked where the peninsula would end and the second one marks where the 12″ counter overhang will end- so we can try to picture it as the rest of the room comes together.
Here are a few more shots to show you how much the opening is a game-changer around here. Even with full chaos going on, it’s such a difference. It’s so nice to have more daylight in the kitchen thanks to the opening. And once we paint the cabinets and install our new white counters it’ll be even lighter in there (with mocha cork floors to ground things).
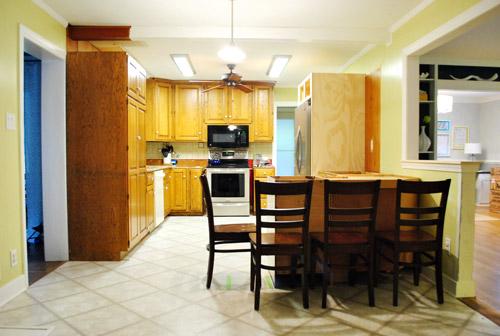
Here’s a shot through the opening now that there’s trim and the table is back and we re-hung the curtains. We love how the opening lines up so well with our big picture window in there.
Here’s the other direction. Now we can enjoy the fireplace from the dining room.
Here’s another shot looking past the dining room into the office. Ignore the abundance of odd items on the dining table (a faux clam fruit bowl, a stack of serving bowls, and a big clear vase) and the big box and floor lamp near the curtains on the right (they’re not permanent of course – just need to add a big chandelier over the table and install the new dishwasher in the box). So it looks crazier than it eventually will when things are settled.
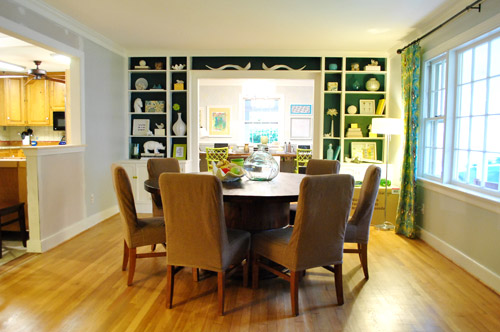
Here’s that room from the other direction (still need to add a big buffet with some large art over it and a nice sized rug to anchor the entryway area (among other things).
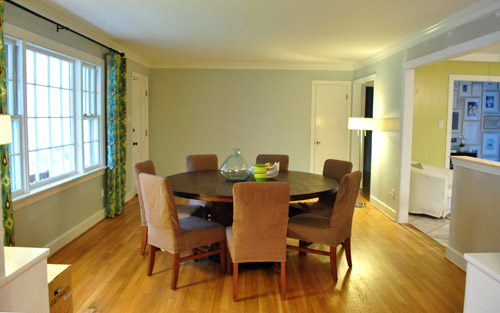
One of the coolest “bonus views” that we gained was the peekaboo into the hallway frame wall all the way from the office. It’s so nice to see the sunny avocado kitchen framing the view.
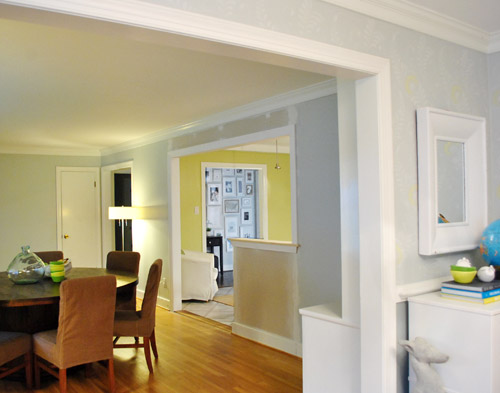
We sadly didn’t manage to get any photos of Burger running through the new doorway (the little guy was a blur), but here’s Clara loving the new route.
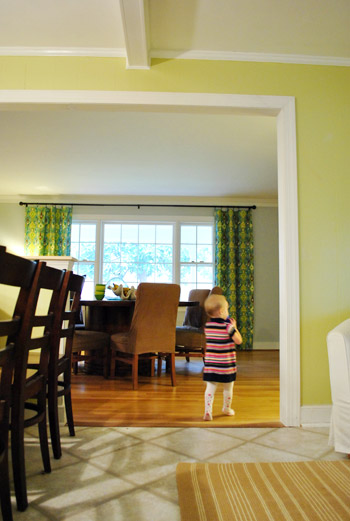
She’s such a quick adapter. She just sees something new, smiles, and tries it out. A day later it’s old hat. Like it’s always been there. Although we’d argue that it should have always been there anyway. Burger is completely used to the new flow too. He cuts through there all the time.
Oh and since we always love taking a look back, here are some older shots from similar angles to some of the ones above taken right after we moved in last December:
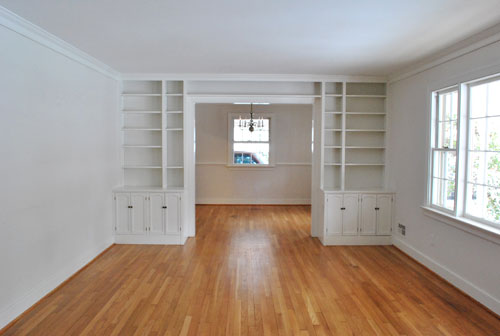
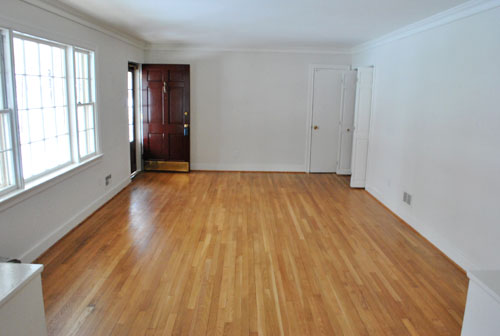
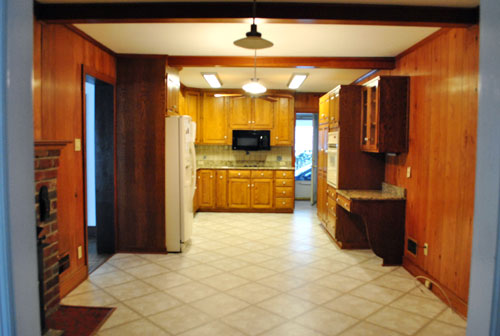
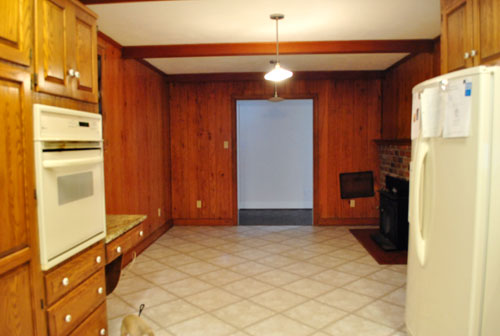
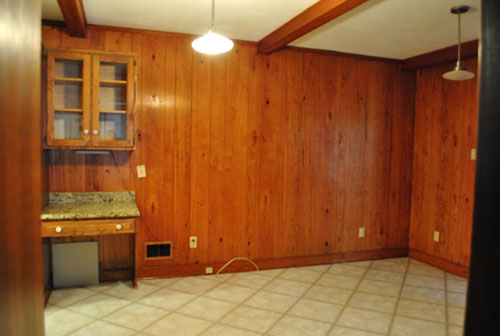
What a difference eleven months can make, huh? Still have lots to do, but it’s getting there one day at a time.
Oh and when it comes to costs, finishing the entire opening ourselves was $90 (that includes doing drywall, adding door jambs and the ledge, and adding trim on both sides of the opening). It would have been $250 to pay the contractor to do that stuff, so we’re thrilled that we could take it from here…
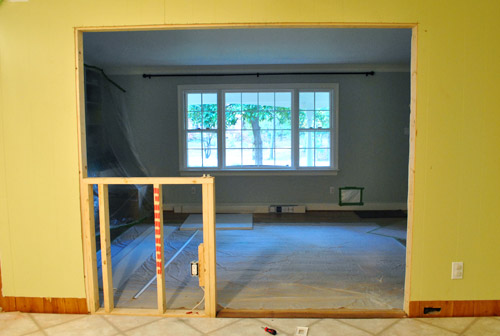
… and save 160 big ones.
What did you guys do this weekend? Any other door jam, ledge, and trim stuff going on? Any standing around and gazing lovingly at a new doorway? There was a fair amount of that going on here.

Jyl says
It looks Amaaaaaazing, Petersiks! I’d be standing and staring with pride too. Way to go! I’m so excited to see more progress!
Jen says
Wow guys, it looks amazing! Totally changes the feel of the dinning room. I love it!
Katherine Victoria says
Seeing is Believing! What a difference. I have a 1940s house with an almost identical kitchen set up with the picture window/doorway. Maybe some day we’ll get the gumption to do a cabinet/flooring/appliance overhaul like yourselves. Can’t wait to see the final product.
PS Clara is too cute!
Seriously Sassy Mama says
Wow, it is all coming together!
Rachel Tatem says
Wow it looks great!
Jordan@the2seasons says
Wow huge difference. It looks great! This is so fun to watch the process thanks for sharing.
Reenie says
WOW….what a difference. Looks weird now looking at all the dark paneling in the kitchen. You’ve come a long way…in a short amount of time =)
LisaOK says
Wow! It looks great. I’m super impressed and super jealous!
Photojenic says
I really didn’t like where you were going with this in the beginning. Half wall? Peninsula? Half wall? (I have issues with them obviously.)
Can I just say that it’s looks totally AMAZEBALLS! Better yet, you’ve given me inspiration to trim out the stupid half walls that I’ve struggled with the last 11 years. Yay!
YoungHouseLove says
Aw thanks Photojenic! A lot of times when we’re in the middle of something we have no idea where we’re going either! Haha. Or we can picture it but know that we sound crazy and no one at home can picture it with us. Haha. But eventually it usually comes together! Or we tweak things as we go and they evolve into a better plan (remember our island, then banquette idea? so glad we kept changing stuff as we went!).
xo,
s
Vonda says
It looks great! Isn’t is amazing how cutting a huge opening in a wall can change up the look and feel? I am loving what you’re doing with the kitchen.
Hmm, what did I do this wkend? I painted our huge kitchen this weekend – BenMoore Cement Gray and love it! Now to stencil it. I also got around to planting 130 bulbs and 36 pansies. I haven’t done that much in a weekend in a LONG time and my backache proves it!
YoungHouseLove says
Wow- that’s awesome! We have some bulbs that we intend to plant but I worry we’re going to miss the season since we’re so busy with kitchen stuff. Don’t you wish there was a pause button for gaining some extra hours sometimes?
xo,
s
Kristen says
It looks awesome!! I can’t believe what a big difference that opening has made to your home. You guys did a wonderful job with the trim.
Liz says
Yay. It looks like it was always meant to be that way!
Erin @ One Project at a Time says
The natural light is amazing, it must be so nice to have all your rooms open up into each other now.
I made a pair of capiz chandeliers this weekend for our master bathroom. I was really nervous, but I’m thrilled with how they turned out! http://oneprojectatatime.blogspot.com/2011/11/how-to-make-capiz-chandelier.html
YoungHouseLove says
So gorgeous! LOVE that you DIYed them!
xo,
s
sallie says
wowee! i’m totally living vicariously through y’all right now. i’m strangly excited about all this. my husband must be glad i’m getting my thrills from your projects and not starting my own…..yet.
Ashley says
It looks absolutely fantastic!
Question – I’m just wondering why you didn’t paint before reinstalling the baseboard and trim? Although I suppose you guys are cutting in pros so it doesn’t make that big of a diff!
YoungHouseLove says
We figure that once we place the pantry in its absolute final place (we have to demo some tile to do it since it sticks out a little now) then we’d rather paint everything all at once so we can get all the paint out and get it done in one step. We’ll still probably have to touch things up later, but doing that soon will hopefully make the room look less crazy (that unpainted part of the ceiling beam over the pantry = crazy).
xo,
s
Samantha says
I have to admit the entire time I was kinda “weird gap above a half wall” but now I’m totally “team half wall”!! It looks so good with all the furniture in place! I can see it! I can see it!
YoungHouseLove says
Yay! I knew our biggest challenge would be explaining the half-wall without the cabinets and chairs in place- but I was hoping once we shared these pics with the placeholder chairs and the peninsula in place it would come together for folks!
xo,
s
Laura C in Indy says
LOVE IT! Great job on the trim. Love everything you’ve done.
diana says
Marvelous! What I love the most? Hard to make a pick…How you can see from the office to the hallway and from the dining room til the living room? Or how the fireplace takes its place? Or how the dining room curtains show though the opening and lift the appearance of the kitchen? I can’t choose, but I also can’t wait to see art on the side of the fridge built in, to have something to rest the gaze on when seated at the peninsula… And you know what? Now the kitchen has truly instated its status as the heart of the house, as it should be!
Corie says
VERY nice! I can really see it all coming together now! Your kitchen seems so much more centrally located and your house seems so much more spacious and flow-y now. It’s like you added square footage or something by taking a hunk of wall away. Like an illusion…. you’re like magicians! ;) Well done.
beth in dc says
Such progress!
A question you might have been asked before: You have several different floorings going on throughout the house, including blonde wood to dark parquet to wide planks in the bedroom and soon cork (which is a wonderful choice!) Do you think staining them all dark will make it seem cohesive, or do you plan to replace the parquet?
YoungHouseLove says
Yup, we have a plan to refinish all the wood floors to a similar tone to the new cork so the whole house feels more cohesive. Someday!
xo,
s
Lisa says
For a future post, could you please lay a piece of plywood (or drywall or even cardboard) on the peninsula cabinets and take a few pics, so we could visualize, even better, the future countertop with overhang? Really anxious to see the full effect of that peninsula! (and too impatient to wait for the actual countertops!) Thanks!
YoungHouseLove says
We’d love to do that in a future post if we get a moment! Might not be able to get a big enough plank of wood home ourselves (small car) but perhaps we can do something in photoshop! The counters should be installed in a few weeks so we hopefully won’t have to wait as long as we thought for the real result!
xo,
s
Lisa says
A few weeks?! Awesome, I thought it would be longer than that before counters went in! You guys are making SUCH great progress! Soooo exciting!
YoungHouseLove says
Assuming things don’t get all jammed up due to the impending holiday- which is definitely a possibility… guess I shouldn’t count my chickens!
xo,
s
Robin @ Our Semi Organic Life says
Way to start the week! Love the crisp new corners you’ve got there!
Digger says
That is incredible!!! This weekend… I wrote some posts about finding myself and a letter to my boys. After this though… I’m wanting to tackle a wall and get all dirty!! I’ll let you know. :)
Fouzia says
Ahhhhhh, crazy in loooove with the bonus view. Bet when you guys see it, it has you grinning ear to ear too. ;). It all looks so amazing! Super excited for you guys and inspired by you guys as well!
Laura says
The opening looks great, looks like a completely different house! Congrats!
I did two (very small, decorative) DIY projects this weekend, and kept exclaiming to my husband “don’t you just feel soooo YoungHouseLove right now?!” He was all “yes, yes, you’re a genius, you’re very creative, please don’t point that staple gun at me” :)
YoungHouseLove says
Bwahahahahahahah. Totally sounds like John.
xo,
s
Michelle M. says
This weekend I did a little makeover myself…my dog’s crate. Check it if you want! I’d be so honored for you to read my blog! You two are an inspiration!
http://ourdogdillan.blogspot.com/
YoungHouseLove says
Haha- I love it! Lucky Dillan!
xo,
s
Kelly Gross says
This looks great!We did something similar in our home between the kitchen and the family room- it lets the spaces (and people) talk to eachother :)
Amy L. says
Wow!!!!!!!!!
Haley H. says
My Favorite view is the one from the front door, looking into the dining room and seeing the new doorway on the left and the office beyond. It really integrates the dining room into the rest of the house, and makes it less stuffy-more modern day. Homes now-a-days are being built without formal sitting and dining areas, so when it’s time to re-sell down the road (if ever) you all will be right on trend. Well done. I love your blog!
Blythe says
Did you think about doing “spotlights” over each of the bookcases in the dining room when you install the chandelier? That would really make the built-ins pop! This all looks FANTASTIC, btw…
YoungHouseLove says
Ooh, that would be gorgeous! Someday!
xo,
s
Jordan G @ The Happy Homebodies says
That looks SO good! What a difference. I can’t wait to see how you two put the whole kitchen together. It’s going to be great!
We spent the weekend painting our big brick fireplace. We went with white paint, and then we beefed up our mantle with some cedar planks that we stained mahogany. It’s SO much better. I read your post about painting brick before we got started!
http://www.thehappyhomebodies.com/2011/11/weekend-project-fireplace-facelift.html
YoungHouseLove says
Looks so good! Love how you finished off the sides. So genius!
xo,
s
Andrea says
Alternate title for this post: We be Jambing!
YoungHouseLove says
Haha. Nice.
xo,
s
Monica says
You guys – it’s gorgeous. I can see it all coming together now and the kitchen looks like the heart of the house (not just that room in the middle where you cook!) Kudos for having the guts and the vision.
Josh says
I love it! I’m beyond impressed with how your vision is turning into an amazing reality. Have you considered skylights in the kitchen?
YoungHouseLove says
Oh how we’d love to add them someday down the line! Although we do think once we paint the cabinets and get the new light counters (along with new lighting) that it’ll be nice and bright in there!
xo,
s
Devon @ Green House, Good Life says
Or a solar tube? We have two in our kitchen and love them. They provide tons of light, so we don’t need to turn on lights until it’s dark out. (It’s not so relevant for you guys, but in really hot climates, solar tubes are also a lot better than skylights for keeping heat out.)
By the way, I’ve recently started reading The Daily Green , and they have a really similar heart icon thingie like yours.
YoungHouseLove says
That’s so funny! Someone else tweeted us to say they stole our heart! We laughed since the heart is hardly own-able and I’m sure they have no idea who we are. Haha. Love the idea of the solartube though!
xo,
s
Elisabeth says
Hallo Sherry and John!
Oh happy day, your weekend-work looks so great!I see
you dancing on “Clara day!
Elisabeth
Jenny says
You guys!!! The place is looking unreal. Soooo pretty. What an insanely fantastic house you guys are creating. Love love love.
PS. John — great octopus gift!
Jenny
http://www.simcoestreet.blogspot.com
Sarah C says
I hate to burst your savings bubble, but I think you may have miscalculated the $210 figure. In last week’s post the bid listed was only $250 more to include drywall, jambs, & trim. So that means $160 savings, which is still pretty awesome. Plus we readers get to see more of the DIY goodness happening at Casa Petersik, which makes up for the $50 miscalculation :)
YoungHouseLove says
Oh yes- you’re right! Good catch! Off to fix it.
xo,
s
Kirsty {a safe mooring} says
Oh em gee it looks amaaaaaaazing! It’s incredible how something as seemingly insignificant as adding a bit of trim can suddenly transform a funny-looking Tetris square cut out of a wall into the most breezy, natural opening – the trim immediately makes perfect sense out of the whole thing. I am *so* excited about the rest of this project.
Laura says
You guys are brilliant. I absolutely love it! I’m really enjoying watching this kitchen renovation happen. Am I remembering correctly that you’re considering concrete countertops? If so, I really hope you do them so we can learn how for our house :-)
YoungHouseLove says
Sadly, concrete was a bust for the kitchen (but we hope to work with it for an outdoor table someday). More on that here: https://www.younghouselove.com/2011/10/counter-conclusions/
xo,
s
Megan says
Looks great! Bet it feels like a whole new house! I know ours did when we knocked down a wall. This weekend we did a 6 month photo shoot and hit up a holiday parade (http://www.balancinghome.com/2011/11/weekend-wrap-up-photo-shoot-and-parades.html). Then the hubs took advantage of the nice weather and cleaned out the gutters and caulked. Neccessary, but not exciting. Not a whole lot of DIY this weekend.
YoungHouseLove says
So cute! Clara had the same pink tutu bathing suit when she was that small!
xo,
s
Melanie says
I read your blog all the time and I love it! However, I have never commented. But I just had to make my first comment today and tell you how amazing everything is looking! I can’t believe what a difference it has made opening that wall up. Can’t wait to see more!
Melanie
YoungHouseLove says
Aw thanks Melanie! So glad you’re enjoying it!
xo,
s
Jennifer (iffles) says
You guys, this looks SO GOOD! I’m so excited for you! We tore down a wall at the end of last year to make our extremely tiny kitchen into just a small kitchen and it made SUCH a huge difference… and what we did isn’t nearly as game-changing as this. LOVE IT!
Amy says
I am way too eager for you to paint your cabinets in your kitchen!!! Cannot wait to see white cabinets in there :)
Wom-mom Ethne says
When we took out our wall and put the kitchen island in, I stared through lovingly from all angles at all times of day, including middle of the night if I was up. So awesome. Old hat now as you say. Only drawback to the island – the kids have knocked their beans on the island while running around it on occasion. Sometimes you gotta learn from experience.
Teri says
It looks fantastic! Maybe I missed a post about this, but did you get a new ceramic dog? Yay!
YoungHouseLove says
He’s our concrete dog. We still miss our ceramic one, but we’ve had a concrete one for just as long. Sad that our pack went from two to one, but at least we still have one!
xo,
s
Mercedes says
I love how the opening is looking! Personally, I installed new wood laminate flooring in my livingroom/dinging room. And I am in LOVE! Though I still have a little bit of painting and a lot of trim work to do (shoe, chair and crown molding)the room is really coming together and I couldn’t be happier! (that is until I redo my hole in the wall kitchen….)
Andrea Hubbell says
You guys! Your space is looking amazing!!! What a difference. You’re going to be ready for more AHP photos in no time! :)
YoungHouseLove says
Wahooooo! We were just thinking about how different it would be if you came back! Maybe in the spring once the kitchen is hopefully fully completed and accessorized and a few of the other rooms are tweaked a bit more!
xo,
s
mp says
It looks great! Get on 460W and come on down to Victoria to help me fix my hot mess of a kitchen! (It’s going to be a total gut job, thanks to the cheap 70s construction — the owners did NOT go to the Horsepen Road cabinet shop yours did.)
Sherry, I’ve been meaning to tell you how much I love your ikat curtains!
YoungHouseLove says
Aw thanks mp. Be right over! Haha.
xo,
s
Casey says
Are you going to widen the doorway into the living room beside the fireplace? I know when you first moved in you mentioned it was in the plans. What about the one opposite the front door leading down the hall. I think that was another you mentioned??? The photos don’t capture that space so I can’t see how wide they are. Obviously you got the big one you were craving the most and I LOOOOOOOVE it. Let that natural light pour in, baby! Celebrate mini-milestones! SO awesome!!!!!!!
YoungHouseLove says
I would love to widen that doorway but we have learned it’s a big expensive project since that’s a super thick brick wall (it used to be the back wall of our house before the addition so it’s a big can of worms). Someday we’d love to though!
xo,
s
Bailey says
Love the doorway! Have you thought about staining that bare piece of pine the same way you did your desk instead of painting it white? I think it would really pop against the white trim, tie with your dining room table, your new floors, and your office desk! Just a thought! Gorgeous either way!
YoungHouseLove says
We did think about that a bit but love the idea of going white with it so it ties into other trim around other doorways nearby and even things like the fireplace mantel!
xo,
s