So our built-in wall-to-wall desk already made some good progress this week with the painting and making-taller of our cabinets. But something was missing.
Yes, remember the view from before?
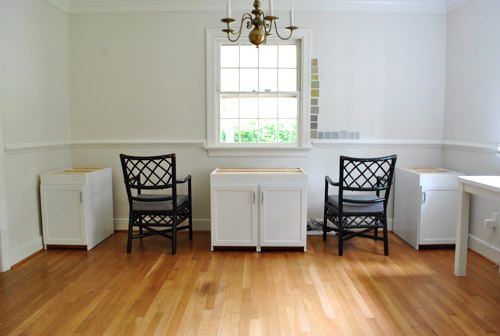
Yes, we were devoid a counter (aka, the desk top). John and I were actually quite indecisive about what to do when it came to that part. And whatever we did, we needed about thirteen feet of it (a length that we learned most kitchen counter suppliers wouldn’t even deliver since 12 feet was usually the max before you ended up with a seam). At first we considered ordering a legit kitchen counter top (maybe butcher block, maybe silestone, maybe this from Ikea – although they would all have a seam). I think after having saved so much with our $6 cabinets we thought that maybe the top could be our splurge.
But, then again, we’re not very good splurgers. Also, I was leaning towards something white (to keep things light, and to tie into the top of the nearby built-ins in the dining room) but John was Mr. Hesitant about white overload (and worried that the white tone of the counter could clash with the white of the cabinet). I know, it’s shocking to hear a guy worry about clashing white tones (especially when he usually can’t tell one white paint chip from another) but he can own it. In short, we were stuck.
But after seeing this DIY-ed desk that Aubrey and Lindsay built, John won we both realized that wood was the way to go.
We’ve always loved the combo of white and deep wood (we did something similar but flipped when it came to refinishing Clara’s dresser), so why not? And rather than “matching” a white counter to the tops of the built-ins in the dining room, we thought referencing the rich wood tabletop in there could really look great.
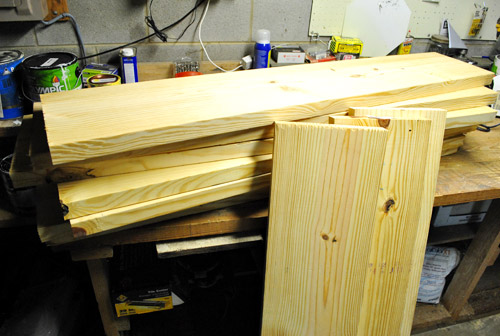
So with the “rich wood finish” decision made, we tracked down our materials. We wanted something thicker than the 3/4″ console table top (just to stay proportionate with the four chunky cabinets below and the thirteen foot length), so we picked up some 2 x 10″ untreated framing lumber. It was as thick as one of those jumbo cutting boards and I walked around the store talking lovingly to it, which was completely embarrassing but I could. not. help. it.
While there we had the guy at Home Depot cut a bunch of eight foot pieces in half so we could fit them in the car (it would also make maneuvering them at home much easier). And this is the most exciting thing. Total cost: $27.30. Yup, it came to less than a dollar a square foot (which is a heckova lot cheaper than most other countertop options, even butcher block or laminate from Ikea).
So with everything home, we did a rough layout on the floor of our basement workshop to figure out which pieces had the nicest edges (for the front lip) and which ones should be hidden in the back. We didn’t have 13 feet of floor space to work with, hence the overlapped look.
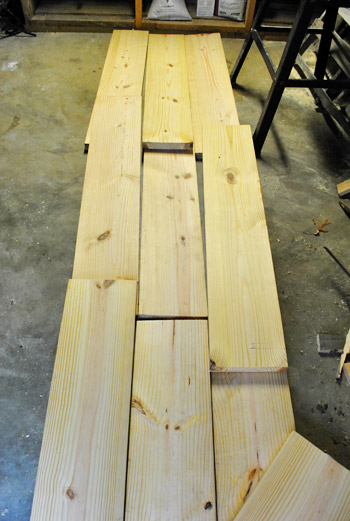
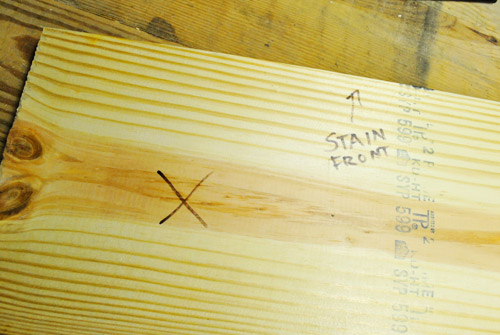
Since I was going to do the staining, John helped me label the back of each piece with clear directions so I didn’t end up staining the wrong side. The X meant “don’t stain this side” and STAIN FRONT meant, well, “stain the front edge” since it would show on the outer boards if it was a front board.
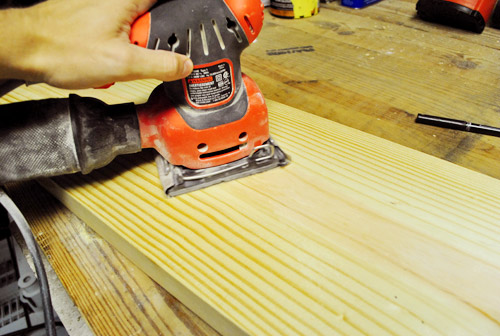
John’s duty (besides cutting a few end pieces to size) was sanding (since I still had memories of my vibrating hand from sanding the cabinets in the priming step of the process). John used the same cheerful little mouse sander to go over each piece thoroughly with some coarse 60 grit sandpaper first (to smooth out any big imperfections) and then went over things again with some finer 150 grit paper afterwards – just to give it an even smoother finish.
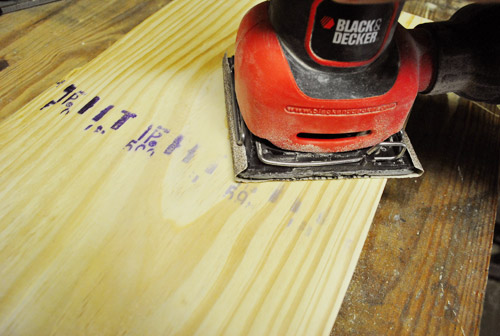
One potential challenge with lumber like this is the prints and stamps that come on them. We ended up using only the sides without marks, but if that weren’t the case we could’ve just used some extra sanding elbow grease to buff out the ink. But thankfully the other sides were just fine.
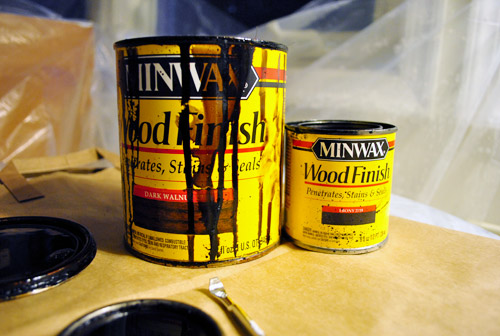
With everything sanded, we brought the boards into the sealed-off sunroom so I could stain them. We decided to use stain we already had on hand (leftover from the console project, actually I think it was from another project before that one) and ultimately decided to use the dark walnut and not mix in any of the ebony this time. Although we had done a combo of the two for the console, we weren’t really going for that same weathered / distressed look. Instead, we were trying emulate the deep, rich finish of our dining table.
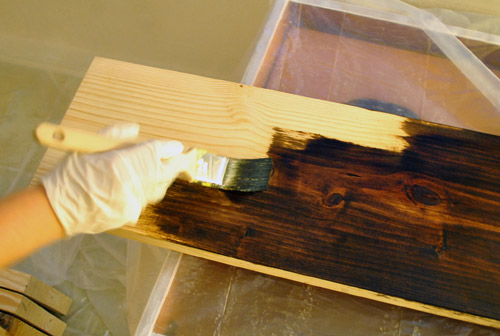
So as usual, I brushed on a coat of the stain with a paintbrush (and a mysterious gloved hand)…
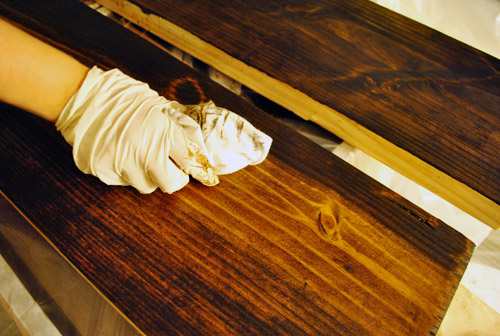
…and then wiped it off with a rag after letting it soak in a for about a minute.
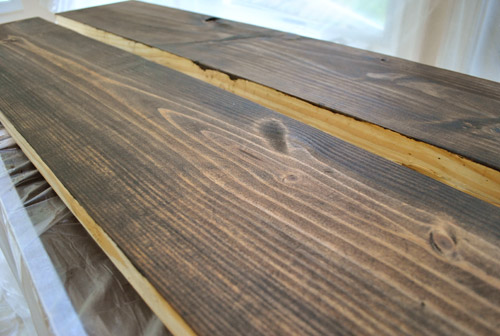
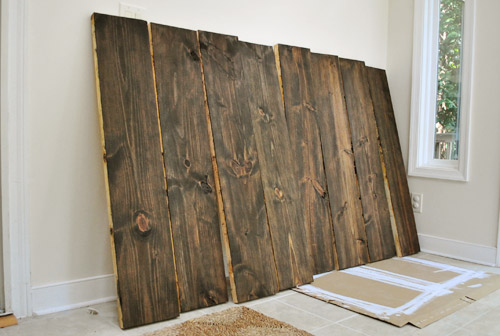
Once they dried overnight, we were left with these beauts (I did the staining at night and shot these after photos in the morning, hence the different look/undertones – you’ll see the actual finished look later in the post though).
John’s original plan for building the counter was to recreate his process for the console top, just on a larger scale. That meant using his beloved Kreg jig to screw the boards into one another side-by-side so they became larger sections that he could then piece together on top of the base cabinets. But after going to town with his jig on a few boards, he realized these heftier boards weren’t gonna jive with that plan – especially when he had a seam straddling two cabinets. You can’t tell from this picture, but this set up was a bit wobbly. And a wobbly desktop (or something uneven that made our laptops wobbly) wasn’t the goal.
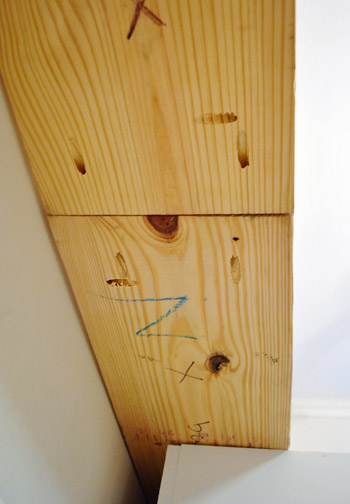
So he adjusted his approach to focus on screwing the boards to the cabinets first, and then to each other wherever necessary (for added support). It wasn’t a bad alternative, it just meant a lot more cramming his body into the base cabinets to drill screws up into the bottom of the counter planks while I leaned on things to keep them in place from above.
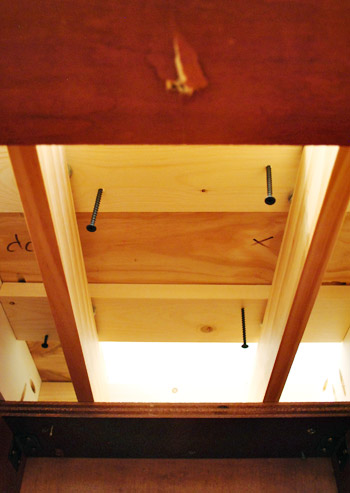
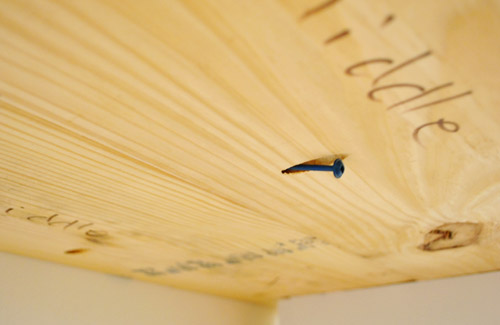
True to form, wherever he could, John used his pre-drilled pocket holes to secure the pieces to one another for added strength (did I mention the man loves his jig?).
Perhaps our favorite discovery of the day was realizing that our camera tripod could double as a great jack-substitute to keep the boards level while John screwed them together (this was a lot more precise than me standing there and trying to hold them at a consistent height). They make a good counter-building team, John and his trusty tripod.
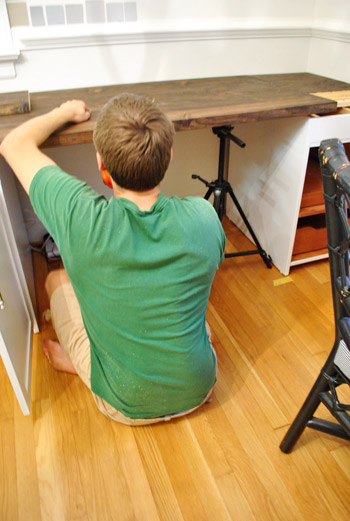
The brevity at which I’m recounting this process makes it seem like it was fast and easy. It wasn’t. You know we like to keep it real, so the counter install (not counting a few hours of sanding/staining) took us the better part of an evening – maybe around four hours? And it was relatively exhausting, especially to poor John who was doing the bulk of the lifting and contorting himself into the base cabinets to drill. The most frustrating part was realizing that our boards, like most, weren’t all perfectly straight. So we had to do our best to counteract/deal with the whole slightly warped thing (once we screwed them down/together in a few places they seemed to level out, but it took some finessing to make sure the tops stayed level as we went).
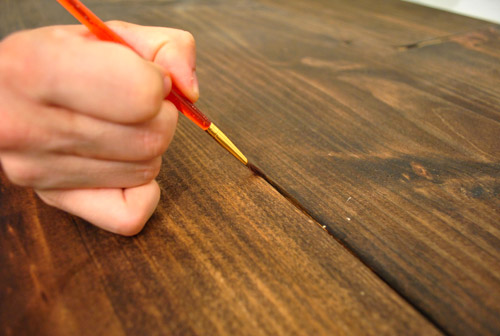
But eventually it got done. Though it did teach us a lesson in staining: be sure to stain about a centimeter over each edge, even if you don’t think it’ll be visible, since some of the tiny cracks between where the boards met revealed slivers of unstained wood. Luckily it was nothing a little stain touch-up with a small brush couldn’t fix (I dabbed it in there and then wiped the seam with a rag to blend it).
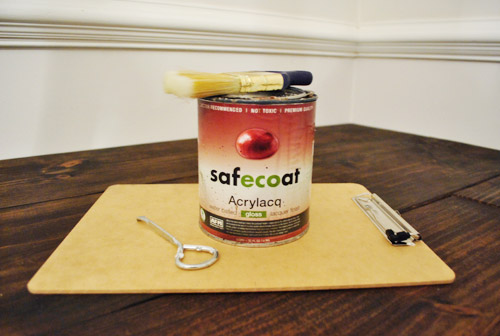
With the touch-ups dry, I later added three thin coats of our favorite non-toxic low-VOC poly alternative (Safecoat Acrlacq). This is the can that we originally bought for our bathroom vanity project over a year and a half ago and it’s still going strong (we use it for almost everything).
The Safecoat seal will not only protect the finish and add lots of long-tern durability, but it also gives the wood a richer glossy look – just like our nearby dining table.
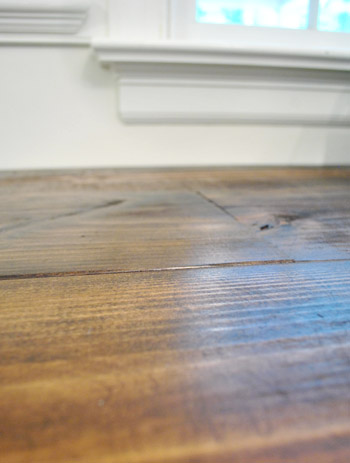
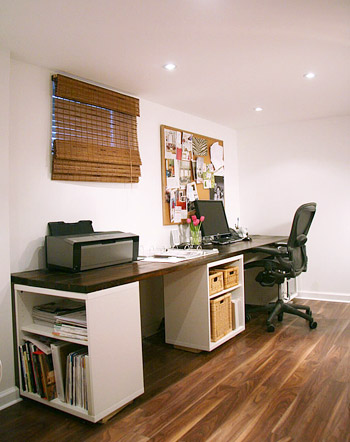
Once we’d given the whole thing 24 hours to dry, it was time to take her for a spin. This is what our new desktop looked like empty…
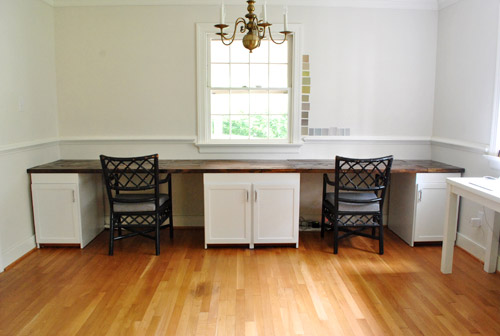
…and here she is with some “styling” (come on, do you know me at all? I love to put a bunch of stuff on newly completed projects – just to help us get a sense of what it might look like when it’s in use). Of course everything was just shoved there in four minutes so it’s safe to say that nothing is permanent and I obviously want some larger art to actually hang on the wall (which we still have to paint, hence the swatches) and a bunch of other things will likely change/evolve as we actually get into using our new desk.
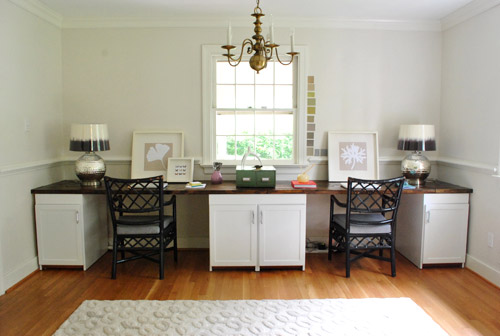
And yes, I borrowed the lamps from the console table in the living room and added some fun shades that I spotted at Target (they still have the wrapping on them, which is why they’re so shiny). But eventually we’ll have to grab two more lamp bases for in here (where we might keep the two-toned shades – we’ll see).
We’re so happy with how the office looks from the dining room. The wood top ties right into the wood table and doesn’t look weird with the white topped built-ins in the foreground. Whew.
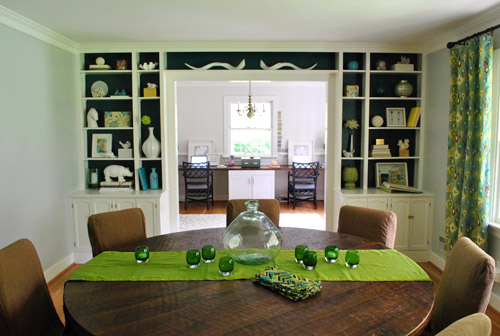
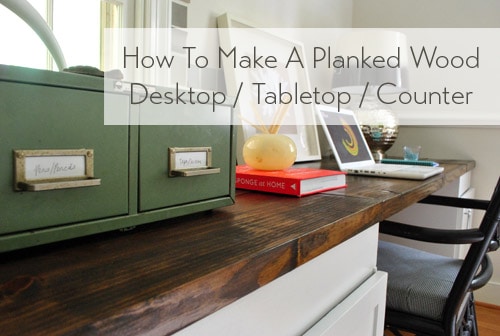
And the chunky wood top is such a rich counterpart to the white cabinets, we really couldn’t be happier. Oh and see that vintage green library box (found for $4 at a thrift store a while back)? That’s our new drawer system for pens, pencils, tape, and scissors – so the file cabinets are full of larger things (like the shredder, some storage boxes, etc). So far it’s all really functional- so I owe you a photo of the insides of those cabinets once we’re more settled in.
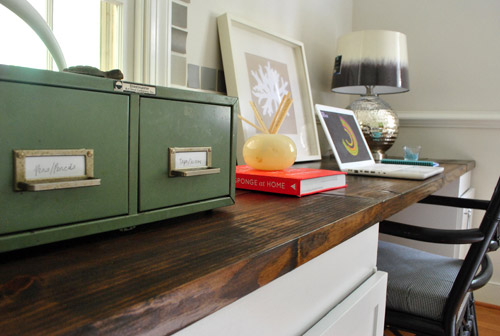
Oh and as for writing things down atop a wood plank counter, there are a few seams, but they’re four feet apart and the boards are nice and thick. We also generally use notebooks and notepads anyway, so getting bumps and lines when we write isn’t an issue. In fact in the square foot of counter space to the right of each of our laptops there’s not a single seam cutting through – so any pad or piece of paper could be written on easily without any seam-conflicts. Which is a nice accident because we just laid the boards in a staggered zig-zag pattern and they happened to fall without any seams to the right of our computers. Holla.
Overall, the current setup (although the “styling” is ever so un-permanent)…

… is definitely an update from the old office setup (you can read more about the floor-planning process here). Only now do we realize how cramped that desk really was:
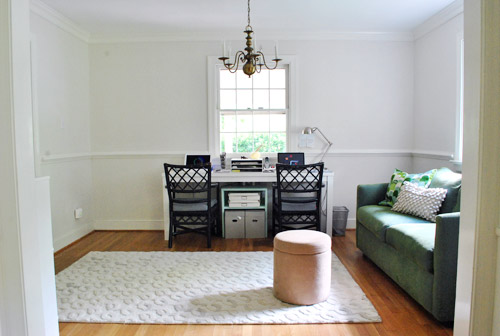
Of course we’re not 100% done with things. We still want to put some sort of molding around the bottom and sides of the cabs to give them a more built-in look. Plus we’re still not sure if we’re gonna stick with the shiny silver hardware finish that came with the cabinets (of course I’ve thought about ORB, but don’t know if that’ll look too matchy with the black glass pulls on the file cabinet nearby- I’ll keep you posted though). Even with those little things still on the to-do list, our budget’s looking pretty darn good for the ol’ wall to wall built-in desk project:
- Cabinets (from Habitat For Humanity ReStore): $6.30
- Kilz Clean Start No-VOC Primer$0 (leftover from painting the kitchen paneling, but it would be around $20 to buy for those wondering)
- Electric sander & sandpaper: $0 (already owned, but would be around $25 to buy)
- Benjamin Moore Advance paint (in Decorators White, satin): $40 (thanks to 10% off haggling/begging)
- Pre-primed & unprimed wood to build up cabinets (from Home Depot): $51
- Framing lumber for counter (from Home Depot): $27.30
- Stain & poly for top: $0 (already owned, but would be about $8 and $20 respectively if you didn’t have any)
- TOTAL: $124.60
We’re psyched, especially since a white laminate counter from Ikea that would span the 13′ length would be around $125 on its own (not counting any cabinetry, paint, etc). But of course just like any upgrade, our new desk is making the rest of the room look terrible. Haha. We need wall paint. And window treatments. And to actually update the chipped navy chairs that we grabbed for $35 a while back. And art. And a chair for the corner. And a lighting upgrade. And about a million other things. But thinking about everything at once gives me hives. One step at a time is the mantra these days.
Has anyone else out there gone with a wood topped something (be it a desk, dresser, kitchen counter, etc)? Do you do things backwards (like build a desk before you paint the walls)? Do you find it hard to resist stroking and talking lovingly to lumber at the home improvement center? I gotta get a handle on that.
Psst- To follow our desk makeove from the beginning, here’s the post about office floor planning, the post about finding our $6 cabinets, the one about other places we looked, the post about sanding and priming the cabinets, and the post about painting and building up the cabinets before adding the countertop.

xin says
Somehow I had a feeling that you will use a dark wood top. Yeah! It’s absolutely stunning! Now that’s done, you can quickly finish the rest of the office. Cannot wait to see which color you will use on the wall! And are those chairs going to stay navy blue? Oh, this is more exciting than doing a room myself. Probably it’s because I won’t have to do anything myself, but just sit tight and enjoy!
Good luck! Excellent job as always!
YoungHouseLove says
Haha, I don’t know if quick is the word (most of our rooms take years to come together – haha, we’re not good at rushed decisions), but we definitely have big plans. And we’d love to paint those too dark chairs and reupholster them among a ton of other things!
xo,
s
SingleMama says
That looks amazing!! Since there is a straight shot from the dining area to the office, does that mean the office always has to be picked up? I would fail in that area!
YoungHouseLove says
We’re planning to add a set of french doors between the office and dining room someday! But as of now, I’ll probably use the toss-clutter-into-the-cabinets-to-hide-it technique. Haha.
xo
s
Marcy says
WOW!! I love the view from the dinning room – it all flows together really well.
Kris says
Good choice on the wood and staining it dark. I also use a wood top for my desk but it’s a 3’x’6 piece of pine.
You two should consider getting a different vehicle so you can fit the bigger/longer stuff in! Although I bet it curbs your spending at times :)
YoungHouseLove says
Haha, yeah our little car saves us gas money and curbs shopping sprees. Hah.
xo,
s
heather says
Couldn’t you just imagine burgers ears flapping in the wind?
http://richmond.craigslist.org/cto/2588124915.html
YoungHouseLove says
Haha, I dunno. We’re pretty proud to be a one car family with a small vehicle. We can always rent a Home Depot truck for $19 when we need to haul stuff (or borrow bigger cars from the fam).
xo,
s
heather says
Haha obviously. Totally joking around. If you were to get a truck that one would not be it. That’s more like mullet and rad t-shirt with the arms cut off. I can just see burger with a spiked collar now.
YoungHouseLove says
Haha, he might love sniffing around in the back of that truck for old crackers…
xo,
s
Megan Mack says
Sherry and John, this is amazing. I would love to see a picture of the table top long wise. So that we can see how the wood/stain looks and how all the pieces fit together and how that looks. I don’t know that I’m even making sense but I’d love to see a table top finished photo! Amazing work!
YoungHouseLove says
We’ll try to work a picture like that into our next desk post for sure! They’re basically staggered like our console table top, but since it’s made of wider rich toned planks the seams aren’t very noticeable, which is nice.
xo,
s
Becca says
Looks great! Have you thought about painting the chairs? Maybe the color that you used for the back of the shelves in the dining room? On that thought, Have you thought about painting the office walls a lighter shade of that color you used for the back of the shelves in the dining room? I think it would flow nicely
YoungHouseLove says
Oh yes, that’s in our list of stuff to do at the bottom! Those are just the dark chipped color they came in (for $35 a pop) but we can’t wait to lighten them up and use new fabric on the seats.
xo,
s
Melissa S. says
I was picturing a lighter blue shade in the office room too. I like some of those olive-y paint chips you have stuck around the window, in and of their own, but I don’t see them jiving with the nearby grellow kitchen all that well.
Some of the turquoise pieces you have in the dining room built-ins caught my eye… maybe a lighter version of that.
I really look forward to seeing how paint transforms this room – it will really make that gorgeous desk pop!
emma says
cute! one question – how are you dealing with power cords for laptops? is there one of those secret holes somewhere in the desktop for the cable to slip through, or do they charge somewhere else? That’s always an elusive item in desk clutter reduction… how to organize those dang cords!
YoungHouseLove says
We actually have to drill two small round holes behind each computer (where those frames are leaning). We haven’t gotten around to it yet, so everything just plugs in and the cord goes around the front but it’s uuggggly, so we better break out the drill…
xo,
s
Cheryl says
I love the two tone desk look! I did the same thing to my desk (http://zodirowe.blogspot.com/search/label/Desk).I find myself petting and cooing at my desk, even after having it a few months. True love never dies.
I know your To Do list is a mile long but you two are making great progress and your home looks fabulous already!
YoungHouseLove says
Haha, you’re so right about true furniture love. It never dies!
xo,
s
lisa says
love it! i also love how the counter also matches the dining room table color in teh other room.:)
Hillary says
I love it! We went with a wood-topped white dresser for our daughter’s nursery and my dad handmade her crib and stained the top side rails to match the dresser. It’s such a beautiful contrast and looks much more “custom.”
Hillary says
This turned out to be such an awesome project! I don’t think I could DIY that countertop but I love the final look and it’s dreamy when seen from your dining room.
Kristal says
This is amazing! One of my favorite projects so far in your new house. Love the wood top with the white cabinets and how it ties together so well with the dining room. Awesome!
holly says
that looks so pretty! i bet your work will be even more enjoyable now that you have such a great space to do it. i can’t wait to see what you do next.
as far as overhead lighting goes, i saw a cute project recently that is right up your alley: a paint chip chandelier! check it: http://www.heygorg.com/2011/09/diy-paint-swatch-chandelier.html
YoungHouseLove says
So cute!
xo,
s
sanam says
Good choice on the wood top- I think it ties in so perfectly with your dining area! Beautiful work :0)
Reenie says
LOVE it. I love the 2-toned look. I painted my desk red and left the top wood and restained it.
I vote for apple green chairs too!
You can prob sell your chandy on craigslist if you don’t end up keeping it. They are selling like hotcakes ;)
kelly says
It looks great! We did a wooden desk top for 2 that spanned just 12 feet. It was great and served us well for many years. We also made ours out of pine and my only suggestion for you that come from experience (and one that you probably do not want to hear cause it is all together now …)is that you might want to seal the under side as well as the edges of all of the pieces cause wood expands and contracts and to keep that smooth surface smooth for years to come you are going to want to keep the wood from soaking up moisture or drying and cracking. OR you could have a piece of beveled glass cut that spans the entire length of the desk that might provide the smooth work surface no matter what the wood underneath decides to do. But like I said, it looks great… makes me miss our old desk.
YoungHouseLove says
Thanks for the tip! I bet I can sneak under the desk and poly most of it (it slides in and out from the wall).
xo,
s
Lauren @ chezerbey says
Maybe this has already been mentioned, but I was going to chime in with something similar (and only b/c it happened to us), but careful with putting a laptop over a seam between boards. We keep ours on our dining room table (over a seam between the table and extension leaf) and the heat from the laptop eventually caused the wood below to shrink.
YoungHouseLove says
Woah- thanks so much for the tip! We’ll be sure to keep them off the seams or put some heat protecting item under them!
xo,
s
Lindsey says
I love this! The wood countertops look so nice against the white cabinets.
Emily Elizabeth says
Are you going to be able to move the desk, or take it apart, when you need to paint the walls, or are you just going to paint above the chair rail? I could definitely see some great board and batten in that room, but again, you’d have to move the desk. It also occurred to me that the desk would need to be moved in order to refinish the floor someday.
YoungHouseLove says
We can slide the counter away from the wall, so I’ll be able to get in there. We’re planning to paint all the walls (below the chair rail too). As for board and batten, I thought about that a lot for under the rail but thought it might be too weird with just a few inches of it behind the desk so we might save that for another room!
xo,
s
Jessi E says
I love it-great job!
Maggie says
ZOMG this looks amazeballs! Kudos!
Erin G. says
Gosh, I love it. Absolutely love it. Maybe a stencil on each of the cabit doors with the blue paint that was used in the dining room built ins?
YoungHouseLove says
I think we’ll wait for the rest of the room to come together since once we add art and window treatments and wall paint we might love the clean white cabinets!
xo,
s
Lindsey d. says
You mentioned in earlier comments possibly painting the current chandelier. I’m throwing in my vote for bumblebee yellow to tie into the couple of yellow items on the bookshelves. I love the shape of it, but at 6′ tall, I understand the head bumping issue. No way to raise it by removing a few links from the chain?
YoungHouseLove says
MMm, I do love yellow. Always another possibility! And yes, we definitely can raise it up pretty easily – just haven’t gotten around to it yet. Haha. We’re all over the place.
xo,
s
Courtney says
Wow! It looks awesome! I think this and the console table are my two favourite things you guys have done. Seriously, fantastic!
BTW, I see you already have your copy of Design*sponge at Home! My copy is being shipped as we speak – so excited!
YoungHouseLove says
It’s so good! You’re going to love it!
xo,
s
Evin says
What a great project! I love the rich hue of the wood top and the crisp white of the cabinets. Inspiring. I went a similar route for my desk and picked up a large piece of wood at the hardware store that they cut to the right size (less than $5) then wrapped it in PVC/oilcloth as I use the table for paperwork, computer work, and crafts so it can be wiped down with a damp cloth. It also doubles as extra buffet space during parties. It isn’t ideal, but it was affordable, functional, and rests on footlockers we needed to stow someplace so it all worked out. I wish I could have gone the stained wood route, but in the end the oilcloth was just a cheaper and quicker solution. It also meant that fabrics would glide easily across the surface without snag when sewing. But I am totally tucking this post in a safe spot for when I get to create my next desk!
Loren says
This looks seriously great! I’ve never been a big fan of the ‘dark wood + white’ but you are quickly changing my mind. The dark counter really pulls the room together and looks great from the dining room.
P.S. Everytime you post a dining room photo I double check to make sure I can still see the wall where the new doorway will be. I keep expecting you guys to sneak it in on us. (Or at least carefully crop it out of the photos until you can write about it)
YoungHouseLove says
Sadly that doorway is taking forever! We need permits and a licensed pro to help since it’s a load bearing wall. Someday though!
xo,
s
Nadia Milagros says
Oh. My. Gosh! This is exactly what I’ve been trying to talk the hubs into building for our built in desk. It would be replacing a yucky laminate thing! Yay! Off to email this to him and add it to his honey-do list! Would you ever consider putting a glass top on it for ease of writing? It’s something i was thinking about, but it’s kind of pricy.
YoungHouseLove says
We’re just suckers for the wood top, so I think we like it sans glass (getting one long 13′ piece also might be impossible so it would add a seam). As for writing, we use notebooks and notepads which work really well! Yes, I tested them out, haha. I’m weird.
xo,
s
Nadia Milagros says
Ya, I agree! If the youngsters say no glass, I feel sonmuch better saying no glass!!! Haha, your guy’s opinions are like gospel in my house! Haha!
Katie says
I LOVE your new desktop. This is such a thrifty solution and it looks amazing!
Yvonne says
Love the desk and the library box. I recently redid our old, ugly metal filing cabinet. For the labels I pulled out the cheapo photo paper and had fund with different fonts for each label. Everyone loves it.
Karen J says
Looks great! Now, when are the double-fireplace and doorway insertion projects going to happen? And what are you going to do with your old desk? It might be great in the play room. I always had an “art center” set up for my kids with candy jars of pencils, pens and markers on top. It still gets a ton of use even though they are 5 and 9 now.
Does the wider space of wood above the cabinet doors look bare to you or does my eye just need to adjust to the desktop?
YoungHouseLove says
In person that doesn’t bother us, but if it did we’d just add a faux drawer front to that area. As for the doorway and double fireplace stuff, that’s major structural stuff that calls for permits and a licensed pro (those are load-bearing things) so sadly it’s taking forever! If I could snap my fingers and have it done you know I would. Haha. I’m impatient too! But it might be a while. Not that we don’t have 500 other things on our to-do list anyway…
xo,
s
Jessica says
AMAZEBALLS!!
Kate says
i LOVE it! the only thing i was wondering is…won’t it be difficult to write on paper with those cracks? i hate it when the pen breaks through the paper! otherwise, i think it looks fantastic! i can’t wait to see what color you choose.
YoungHouseLove says
We use notepads and notebooks instead of just loose pieces of paper, so there shouldn’t be any issues. I tested it out by writing a love letter to the desk. Haha. Really, I’m the crazy person who does these things.
xo,
s
Kate says
haha! that is hilarious! the things you do when you’re in love…
Leah says
This looks so awesome!! It’s a mini version of what I work at!
However, I gotta say, I can’t believe the chandelier hasn’t been attacked with a can of ORB yet!! ;) I see that in a future post…
(says the person with a front door that has a nickel door handle and shiny bronze lock on her front door…it’s really classy)
YoungHouseLove says
I know right?
xo,
s
Tia says
Great job! It turned out very professional looking and I love the contrast between the white base and the dark top.
I’m sure that you’ve said it before, but what type of jig is John using for setting up the screw holes to attach the boards? I know a certain someone who would love just such a tool.
YoungHouseLove says
It’s just a simple Kreg Jig. The basic one on their site. Hope it helps!
xo,
s
MamaGigi says
I love it. It looks built in which is fantastic. I’m inspired to try it in our newly built out garage (must convince husband first).
I’m guessing Clara doesn’t have a mama panic thing right now? Or did you do this project while she slept? I can’t imagine getting anything done with the babe in the house that would require any time at all since he’s at the stage of needing to be touching me allthetime.
YoungHouseLove says
We did all of this after she was in bed. We’re night and weekend project-ers. Haha. During the day I’m a momma and John works on posts/photos/comments or John’s a stay at home dad and I work on that stuff. It’s a juggling act for sure. Haha.
xo,
s
Sarah says
You guys are so talented and I love seeing what you come up with…thank you for being so awesome :)
Barb says
I haven’t read the comments today yet…but may I suggest that you spray paint the green library card drawer!!!! I know it is somewhat of an antique…or fast becoming one, but it might look better a brighter color. Perhaps ORB it, my friend.Possibilities are limitless. I’m just sayin’……..
You can do what you want with it. Remember…I am also one that thinks you need to iron the ribbon thing in Clara’s closet. Did you ever put that back up?
Just a suggestion. What are your thoughts? Love you dearly!!!
B.
YoungHouseLove says
Oh man I love that beat up green box, but I’m definitely open to adding lots of color with art, repainting the chairs, window treatments, etc. As for the ribbon chandy, not hung yet. Haha. It’s on the list!
xo,
s
Courtney Horvath says
This looks fabulous!! I absolutely love the contrast between the white cabinets and the dark wood. Great job! In your expert opinion, would this method work for a kitchen counter? I need to re-do my countertops and would love to have wood at a DIY price! Could you set a glass right on it without leaving a watermark? Thanks!!
YoungHouseLove says
Oh yeah, since it’s sealed you can drip water on it and everything.
xo,
s
Stefanie says
I love how you guys always flawlessly pull off mixing modern/contemporary with some cozy and rustic – I love doing this in my own home so it always gives me warm fuzzies when I see it elsewhere!
Ashley @ The Hillside Home says
Looks great, you guys. I love the look of the white cabinets and dark wood top. I am working on my great room right now which has one couch, 2 large chairs, and 3 pieces of furniture–it is so hard deciding what to do with each piece! How to coordinate but not having them look all matchy-matchy! You guys are really great at that. Teach me your ways! Haha. Hopefully it just takes time and I will get the hang of it. :)
Grace says
It looks AWESOME! I can’t wait to see how the whole room pulls together – you must be so happy with all that extra space to work!
Dawn K. says
This makes me SO excited to work on our DIY desk this weekend.
We bought IKEA cabinets (Akurums) for our bases, and we got 3 planks cut to our length (10’10”). We also saw that desk on Pinterest, and are staining our top as well.
We only have an orbital sander, and I’ve read in the blogosphere that it can create patterns in our wood. Do you have any suggestions? Will we be ok to use it, or should I spring for a different sander?
YoungHouseLove says
I would give it a try on a test piece (maybe the back) and use it if it works and get a mouse sander (for about $20) if it leaves marks. Hope it helps!
xo,
s
Jennifer S. says
Beautiful. We just did something similar with our kitchen counter tops! Ikea butcher block was out of stock so, we used a beautiful piece of Red Oak and followed a similar process. It’s awesome. Love the lamp shades too!
ruthy says
I LOVE this project…I kinda want to bug my husband to build me a desk now! I got a vintage one for free at an estate sale, but I love how wide and spacious the top is…after he built our kitchen table, I think I can get him to build me a smaller version of your desk!
Kim D says
LOVE IT!!!! I have been so excited watching this project evolve. I will start working from home soon and would love to do this in my office. I live in a 1 1/2 story cape and think this would work great with the sloped walls on either side and the window in the middle, like yours.
Kim says
Looks great!!
How are you working the cord situation?
YoungHouseLove says
We’re gonna drill small holes behind each computer (sort of back where the frames are resting) since they’ll be blocked by the computers but handy (now everything is plugged around the front, which is sooo ugly! haha).
xo,
s
Skye @ Neathering Our Fest says
I think the dark stained countertop is perfection! I’m glad you guys decided on that. I can’t wait to see what else you come up with for the room!
MS says
GORGEOUS. anything else could not have looked this good. virtual high-fives all around!
Kate Battle says
Were the corners of your walls pretty square or did you have to make cuts to get the countertop into the corners of the room? Or maybe it doesn’t go all the way to the wall? close up pictures of the top please!
YoungHouseLove says
John made tiny cuts to match everything up with the wall, but they were actually pretty square. It looks really flush actually! We’ll have to add a bunch more detail and from-the-top photos to our next post!
xo,
s
Ariel says
Love, love, love it! And I think it will look even better if y’all remove the chair rail.
Kevin says
Maybe you don’t write with pen/pencil much, but I would think the seams would be hard to deal with from that perspective. Have you run into that at all?
YoungHouseLove says
We write on notebooks and pads, so it’s all good. They’re thick enough to cushion things. No lines or wobbles or anything.
xo,
s