Mission: Finish installing crown molding around the rest of the house (with the nursery done, we still had the guest room, the playroom, and the hallway on our list). Status: Complete. And thanks to the magic of the internet, something that took us about two weeks on and off, will appear to have been done in two seconds. Behold. Yep, as I mentioned in this post about hanging crown in Clara’s nursery, it ignited a burning desire to install crown in the other main areas of our house that were oddly missing it (our bedroom had it but the other bedrooms didn’t, one hallway had it but the other one that was connected to it
Fab Freebie: Finnishing Touches
*** This giveaway is now closed – see who won below! *** And our randomly selected winner of $500 to FinnStyle is… Erika (who just finished with all four of her kids having the stomach flu and is praying it never comes back). Congrats on your prize! Nope, that’s not a typo up there, the double-N is for FinnStyle – whose site is full of sleek, bold, and colorful pieces that are commonly associated with Scandinavian designers (everything from home accessories and bedding to dinnerware and clothing). And if you’re like us, what pops out most are the iconic Marimekko pieces that populate much of the site. So if you ever wanted to get your
How To Box Out Curvy Porch Columns
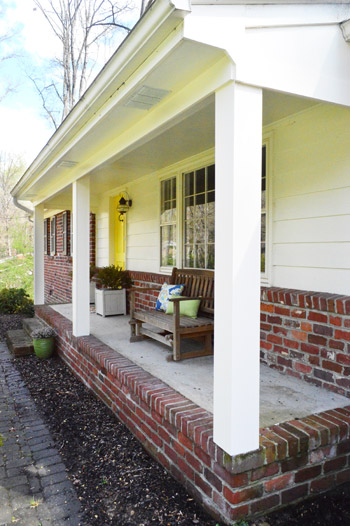
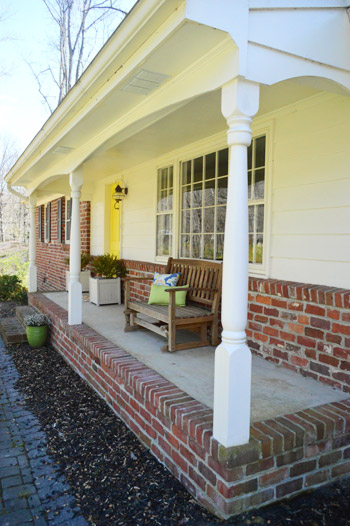
And I’m calling this bad boy done. Commence the rejoicing! And to recap why we wanted to box those columns in: the carport has 4 columns that are already chunky and square, so up until this point the house had a split personality with 3 curvy columns in the mix boxed in square columns are more true to a mid-century ranch, so we wanted to get back to that (many other ranches in our neighborhood have ’em already) Back to finishing things up. After getting this far within one afternoon we had high expectations for how quickly the finishing touches would go. I mean, how long could finishing one column, caulking the seams, and painting
A Graphic Mid Century Living Room Makeover
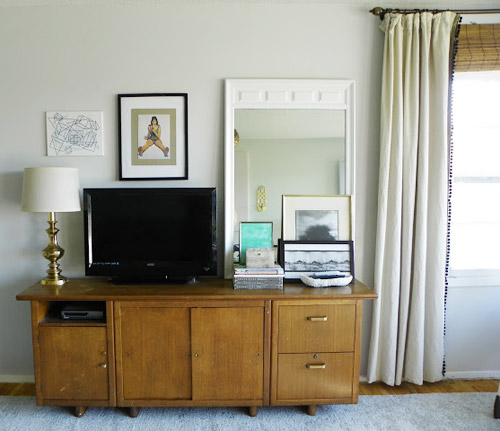
When Katie sent us pictures of her living room makeover, we couldn’t get over the difference between the before and the after. Here’s her letter: Hi guys! I just wanted to share my living room redesign with you. When we first laid eyes on our house, the living room (well the whole house) was definitely not our style. So among a few other major events since we moved (like having baby boy #3 last summer) it felt great to paint the room, switch out the lighting, and find some great pieces via Craigslist and garage sales. The drapes are from [my son] Isaac’s nursery with some pom pom trim added. I’m also loving my new canvas (from Surface
Removing Scalloped Porch Trim & Fixing Porch Columns
We’ve been talking about streamlining (buh-bye scallop) and beefing up the porch (namely those columns) ever since we moved in back in 2010. And it’s finally warming up enough for us to tackle an outdoor project after a long winter – seriously, we were still getting snow a few weeks ago. Most of the ranches in our neighborhood either have chunky square columns or a more traditional colonial style. We prefer the former, but inherited the latter. Along with a curved scallop header that isn’t exactly our style either. Our first house had an issue with a scalloped header too, which Sherry tackled back in 2008 (one of her most exhausting projects to date –
Fab Freebie: Sharing The Love
***This giveaway is now closed – see who won below!*** Over the last few days, the special referral account we set up has grown from $100 to over $300. And we’re about to turn it over to our winner… Crystal Anderson (who says she needs wall art “like no one’s business.”) Congrats! Last spring we curated a sale on Joss & Main, and we were psyched when they invited us back again this year – and agreed to a special perk for you guys (more on that in a sec). Getting the opportunity to reopen a little virtual decor store of sorts over there is always fun, and although we didn’t set the prices ourselves,
Fab Freebie: April Tools
***This giveaway is now closed – see who won below!*** Well the lucky April fool, er, person who’s getting the $500 gift card to the home improvement store of their choosing – all thanks to Hometalk! – is… Rebecca (who says she and her husband really need a router table to change out some non-functional kitchen cabinets). Congrats! Nope, this isn’t a joke. Someone somewhere in the world is gonna win $500 this week, and it’s all thanks to Hometalk. It’s a free community where DIYers and pros can exchange projects and advice, which makes it a great spot to discover new ideas (everything from major remodels to easy cleaning tips pop up). The photo-centric
The Amazing Renovation Of A 1938 Cottage Near Lake Michigan
Before we dive into an incredible house transformation from Erin, Sherry just shared a little Easter-related DIY project that she whipped up for Clara over on Young House Life, so feel free to pop over there for the details (there’s a sneak peek below): But now back to Erin’s awesome makeover. Since both of our homes have had standard eight foot ceilings, Sherry and I have always fantasized about chopping off the roof and reattaching it just a couple of feet higher. So imagine how captivated we were by the story of a couple who pretty much lived out our dream – and crammed in some awesome room makeovers in the process. Here’s Erin’s letter:
Our $200 Marble Fireplace Makeover
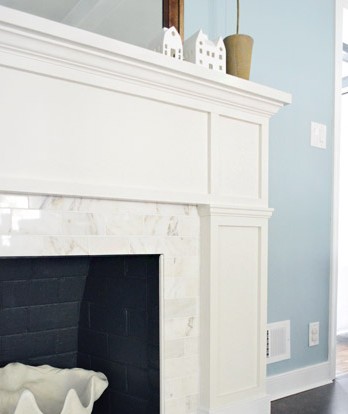
We can officially stick a fork in it, guys. Well, Sherry actually stuck an oversized fauz clam shell in it, but that’s doesn’t roll off the tongue quite as well. Either way, the fireplace makeover is complete. To back up a smidge, you saw us devise a plan for this little refacing makeover, add some marble subway tile and then build out around it. Reminder: fireplace code is different in every area (and requirements vary if it’s wood burning or if it has a gas insert, etc) so it’s a good idea to check that before going nuts on your fireplace. Our fireplace is non-working (we’d love to add a gas insert and even double-side
Fab Freebie: Something Fishy
***This giveaway is no longer accepting entries – see who won below!*** Our random winner of a full house window cleaning is… Christy U (who would also love to outsource getting her car detailed this spring cleaning season). Congrats! Spring means lots of things: sunshine, flowers, and – oh yeah – cleaning. I don’t mind some forms of cleaning, but I won’t pretend that I like washing windows. Luckily (well, lucky for one of you) the window-lovin’ people at Fish Window Cleaning are gonna help you ring in the season with a full house window cleaning! That means the inside and outside of all of your windows & windowsills (they’ll even remove and clean your
How To Build A Fireplace Mantel
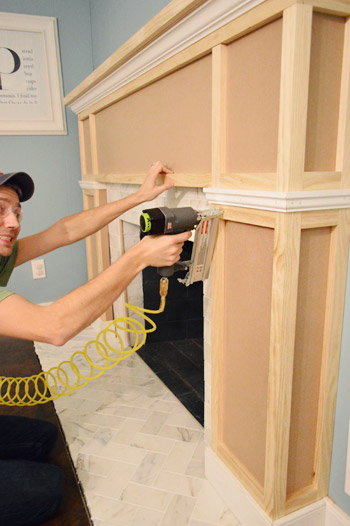
Ready for more progress on the fireplace? Good, ’cause there’s been lots. Last you saw, we had tiled the hearth and part of the surround with marble subway tile. That was the easy step. Well, at least the more straightforward step. Because our next assignment – building out the rest of the frame – involved the addition of a lot more materials. Let’s start with the MDF frame. We decided to work with MDF for the first time since it’s lighter, cheaper, and smoother than wood would be (plus it’s now sold without formaldehyde and it’s FSC certified). A 4ft x 8ft panel cost nearly $35, but the good news is that we only needed
An Amazing Big Boy Room With Patterned Wallpaper
Psst- We usually only post once on Friday, but Sherry will be back with a random little “bonus post” for ya in a few hours. We always get requests for cool kid rooms, and since we have a girl bean, and shared her recent big-girl-room evolution, we thought it would be fun to share the sweet big boy room that Jesse whipped up for her son. Here’s her letter: Hi Sherry & John! My little boy is officially now a “big boy” (hold on while I wipe a tear…). So I redid his room according to his “wish list” which included: lots and lots of colors (I mean color galore), a place for all his
- « Previous Page
- 1
- …
- 45
- 46
- 47
- 48
- 49
- …
- 112
- Next Page »
