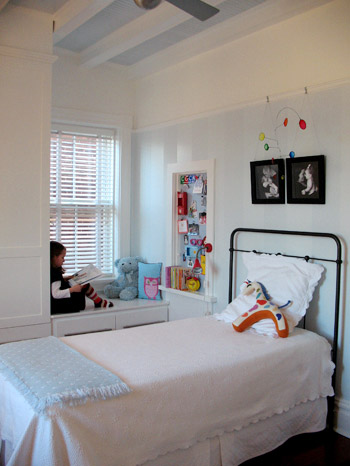
When I was growing up and my parents would take us to open houses for fun, my little sister and I always picked the most interesting room as “ours”: the one with the secret compartment, the one with the biggest windows, etc. If we were to tour Kristin’s house, I’m sure the attic they transformed into their daughter Ella’s bedroom would take the cake by a landslide… and quickly turn into a big fight between my sister and I about who had “dibs.” Here’s Kristin’s letter all about it: Hi guys! I’ve been torn for a while about which project to submit, but I’m going to go with my daughter Ella’s room because a) the
How To Build A Wood Range Hood Cover
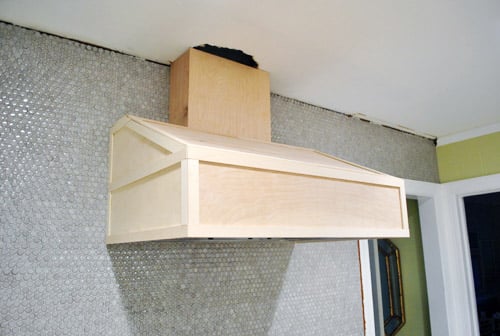
Even though I’m sure you figured we’d just grow to love the look of our crazy exposed hood (“oooh, it’s so unfinished chic”) we were ready to get this hood-covering train in motion. Oh and as for the height of the range hood, we just followed the manufacturer’s recommendations (the JennAir website offered a range and we went right in the middle of that range at 34″ above the counter). As for the hood cover, the first thing we did was use photoshop to mock up two different options to figure out what we thought would look best. This was our original thought, since it looks most like a lot of the hoods in our
The Latest On The Book
We’ve dropped a few mentions of working on the book lately, so we figured it was about time for another post about the process. Our post two months ago mostly covered the journey to getting the book deal and the beginning stages of writing, but now we’re really in the weeds of things so there’s definitely more to share… and we don’t have to use pics of Burger to illustrate it this time! Sorry Burger. At the time of our last book post two months back, we had turned in our 160-ish page completed outline and were beginning to coordinate the design process with our publisher. If you recall, the book is a compilation of 250-some
How To Hang A Range Hood
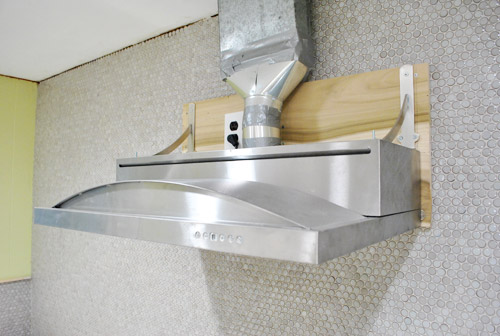
“How’s it hanging?” That was the big question last week. Not in the “Hey, how ya doing?” sense of things, but more in the “Um, how are we gonna hang this $60 hood we found on Craigslist” kind of way. Sherry talked last week about how we planned to encase it in a DIY’d wood cover (see inspiration pics back on last week’s post). Both of us were so excited about (1) the price tag and (2) the final look that we didn’t really think through the middle part: actually installing the darn thing. So yeah… #planningfail? Here was our challenge (beyond just not having any of the installation materials or instruction): this is an
How To Stencil Fabric Chairs
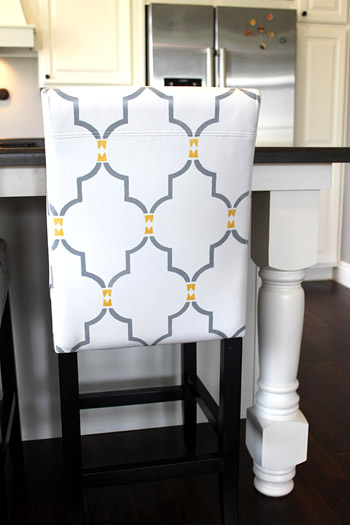
The soft spot we have for stencil projects has certainly grown since our office undertaking, but this one by Amy at The Casablanca Transformation would probably win over even the most skeptical stencil fans. And it actually sounds doable in well under fourteen hours! Score. Here’s her letter: No matter how many decorating projects I do in my lifetime this one will surely go down in history as one of my all time best! I am so happy I had the idea and even happier that I dared to try! Here is the plain white leather bar stool before: And the after! I used a stencil from cuttingedgestencils.com and the paint is from turtlefeathers.net and
How To Hang A Pendant Light In The Closet
Looks like I’ve once again been wrangled into one of Sherry’s schemes. This time it’s her “Dude, Get On That Already” challenge (apparently the “dude” applies to me also) where she’s trying to actually do something with some of the items that we’ve been collecting hoarding in our spare room. It’s a use it or lose it challenge if you will (well, more like a use it or donate/craigslist it challenge). This week’s victim: the light fixture that we rescued from a thrift store in Delaware nearly an entire year ago for a mere $19. That guy just sat on the floor of the playroom since then, and it was high time we actually allowed
Our Picture Storage Solution: Yearly Photo Books
We’re working on hanging our new pendant lights so we’ll be back to share those pics in the morning. In the meantime, let’s talk about something people ask about all the time: photo storage. Ever since seeing Katie Bower’s family photo book two summers ago, we’ve been drinking the photo book Kool-Aid – starting with our very first Family “Yearbook” that we made last summer (you can read about that here). And now that another year has wrapped up, well, let’s just say this arrived last week: It’s one big glossy photo book stuffed to the gills with all of our family photos from 2011. Except the perk is that while it has around 600
The Real J-Boom
First off, in kitchen progress news, all of the chaotic electrical work has been completed! In just five hours actually. Woot. So we’re cleaning things up, taking pics, doing some pendant hunting, and writing a big ol’ post about it for you guys on Monday. But apparently when Sherry shared “The Real $herdog” on Tuesday there were a bunch of requests for a John version. Color me surprised (I honestly thought Burger and Clara would get mentioned before I would). And since I don’t really have a cool street name like Sherry, she has suggested that I use “J-Boom” for the time being. It’s a little too close for comfort to a certain busty Jersey
Stenciling A Bedroom Wall
Even though we’ve been embracing a clean-lined and colorful aesthetic lately, we can definitely appreciate all sorts of styles. And we’ve still got a soft spot for the warm, layered neutrals that we filled our first house with. So when Rhoda sent over this redo of her sister Renee’s room, it was like a shot of wow to a part of our design brain that we hadn’t exercised in a while. And we kinda want to curl up in what looks like a SUPER comfortable bed. Here’s Rhoda’s letter: Hi, Sherry & John! Just wanted to share my latest project: a redo of my sister’s bedroom suite. It’s a big space that had not been
How To Grout Penny Tile
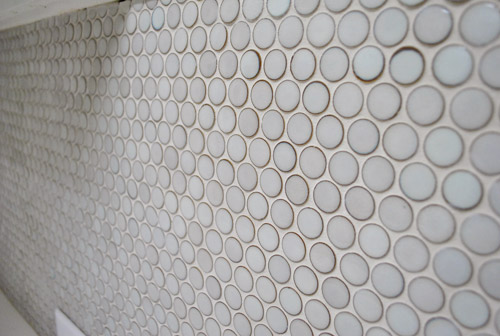
Let’s talk about grout, because with our penny rounds finally all installed, grout was next on the agenda. It has a way of taking things from in-progress to looks-completely-finished-oh-thank-goodness. Observe: So here’s how we got there. First I have a little “materials shot” for ya: Bucket of clean water Putty knife & another bucket to mix grout in Paper towels because, well, grout is messy Sanded grout (from The Tile Shop, $19 with discount) – ours is the Mobe Pearl color Rubber float (from Home Depot, $2) Flexible Grout Admixture (from The Tile Shop, $17 with discount) – this reduces grout shrinking and cracking Sponge. Woot! Oh and we used leftover rosin paper from Home
Fab Freebie: Tool’s In Session
***This giveaway is no longer accepting entries – see who won below!*** And the random winner of lots of goodies from Liquid-Plumr is… Maria (who is actually applying for her PhD in global health diplomacy right now – a self declared “nerdfest”). Congrats! Raise your hand if you’d like a $150 gift card to Home Depot and a 145-piece tool set? Okay, hands down. We can’t see you anyways. But one of you is going to score those supplies along with two of Liquid-Plumr’s latest clog-busting products. It’s all part of their Tool School, which puts Toolbelt Diva Norma Vally behind the teacher’s desk and includes how-to videos like the one below. Enroll now and
How To Print Kid Drawings On Fabric
Okay, okay – so we’re taking a breather from our usual kitchen-related reader redesigns to share a super cool project on a smaller scale. Well, if you call a project that involves 120 hand-drawn monsters a “small” undertaking. Now I’ve got your curiosity piqued, eh? I’ll let Jen explain: My son Daniel is a prolific artist and I wanted to showcase some of his sketches and decided that I would do so on a duvet cover. He designs his own Pokemon, complete wtih names, types, and evolutions and he chose those for the project. Here are his design sheets: I photographed each chosen design. Then in Photoshop I erased all extra marks around the edge,
- « Previous Page
- 1
- …
- 64
- 65
- 66
- 67
- 68
- …
- 112
- Next Page »
