Work continues on our big opening between the kitchen and the dining room which I still forget exists until I stumble into the room in the morning only to feel the sun shining in and break out in song and dance. No really, I do. It’s like a Disney movie around here. So while we deal with door jambs (and trim and a wooden ledge for the half-wall) we thought we’d introduce you to the latest member of our family. It feels like it’s been forever since I’ve added to my brood of white ceramic animals, so imagine my delight when John surprised me with this fine tentacled specimen: Apparently I mentioned that I was
Knocking Out A Wall To Make A Large Cased Opening
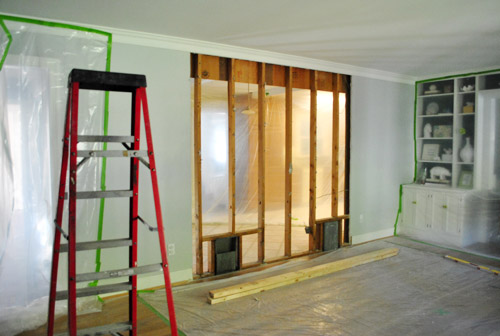
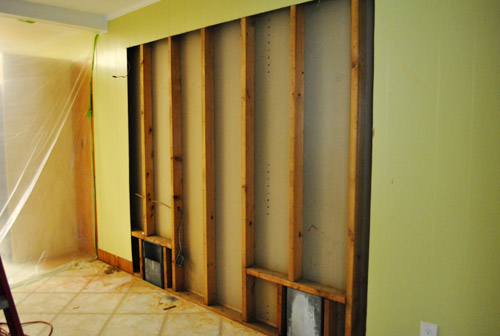
After 330 days of living in darkness, we can fiiiinally see daylight in our kitchen. And it’s nothing short of ahhhhhmazing. This whole process took Licensed Contractor Steve and Right Hand Woman Tara almost seven hours of work (more on why we needed them, how we found them, and permit stuff here). Meanwhile John, Clara, and Burger hunkered down at his sister’s house to avoid the chaos and I stayed home to answer questions, offer up snacks/drinks, spy, drool, and live vicariously through them. They were amazing and we couldn’t be happier with the admittedly-still-very-raw but super-exciting-in-that-we-might-not-sleep-tonight result! Here’s how it all went down. Literally. Of course this is completely over-simplified (and obviously isn’t a
Opening The Kitchen Wall To Make A Doorway
Other potential titles for this post: Holy Schnikies I (Almost) See The Light The Sweetest Sound = A Power Saw Best Day Ever!!!! This post could be called a tease but I like to consider it a keeping-you-posted thing. So many folks are wondering what’s going on around here, so a picture’s worth a thousand words, right? More pics and deets later! Psst- To anyone wondering about the vents, there’s more info on how we’ve dealt with those here. As for the electrical wire, ours guy’s coming out to get on that.
We’re Opening The Kitchen Wall Up!
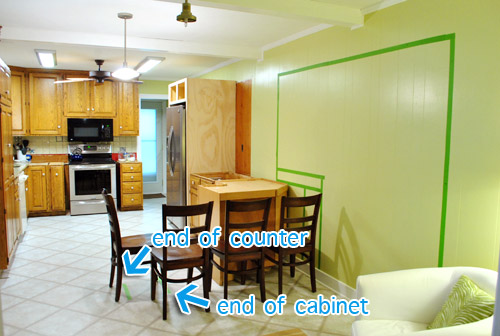
This is it. The big wall-opening week (aka: w.o.w). So… woot! The first order of business is to share a few details that we’ve been asked about a bunch: how we went about picking a contractor how we’ve dealt with permits how we planned out the exact spot for the opening (would hate to knock everything down, only to wish we had shifted it a little to the left or the right) First, here’s why we need a contractor: we love DIY as much as the next guy, but there are some things that we’re happy to leave to the pros, especially when it comes to the structural integrity of our house. We’re no strangers
How To Pick A New Siding Color
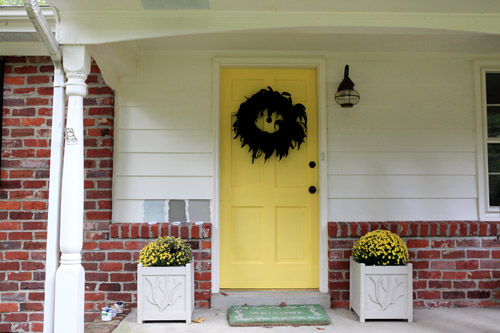
Duuude. We painted our house. Clarification: we painted a few tiny test swatches. The creamy color wasn’t exactly hurting our eyes, but there are a few gorgeous homes in our neighborhood with gray hardboard siding + brick and we love the look, so we decided to give a few swatches a try. Having such a light creamy color on the hardboard siding (it’s solid wood) and all of the trim isn’t doing the trim any favors (it’s not popping at all since it’s all the same color). And the pairing of the light cream with the darker richer brick is sort of jarring – like it’s two houses. So we thought by going with a
38 Homemade Christmas Ornament Projects
It’s Wednesday the 2nd… so it’s time to share this season’s (completely unofficial) Pinterest Challenge (not sponsored by Pinterest or anyone else, just dreamed up by Katie to make us stop pinning and start doing). I actually tackled ornaments (since the winter edition of our little Pinterest Challenge won’t be until January), which I mentioned last Wednesday when Katie, Ana, Erin and I issued our little get-off-our-bums-and-make-something challenge. I know, I know – it’s not even Thanksgiving yet. I’m one of those one-holiday-at-a-time peeps too. But it was actually oddly satisfying to feel so “prepared” for the upcoming holiday season. And I’m kind of in love with all the happy little ornaments I squeezed out.
Using Secondhand Cabinets For A Kitchen Renovation
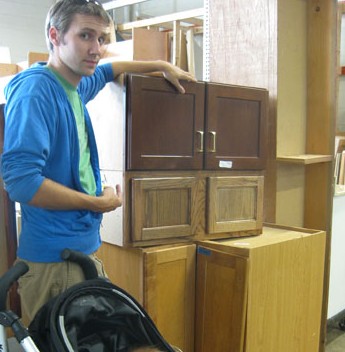
We knew we weren’t likely to find $1 cabinets again (like we did for the office built-ins) but we couldn’t resist checking out the Habitat For Humanity ReStore for the four cabinets that we need to create the peninsula and build in the microwave/fridge (we’re able to reuse the 36″ cabinet that used to live where the stove now sits, so that saved us some major money). The good news is that we found three out of the four we needed! And only spent $90 total. Yup, we got a corner base cabinet for the peninsula for $50 and two upper cabinets (one for over the fridge and one slightly taller one for over the
Bowers In Da House
I promised more Bower visit deets on Wednesday when we dorkily spilled the beans that Katie B and I had been together in a series of photos that can only be described as awkwaaaard (get to the root of that joke here). You know we love a good Bower Visit Breakdown (like this one, this one, this one, and this one of yore). But before we get to all the stuff we did together, we’ll share the little video that we made for ya. Because KB and I always get the same few questions: how did you guys meet? are you real friends or just blog friends? how long have you been friends? what were
How To Compare Counter Options And Pick One
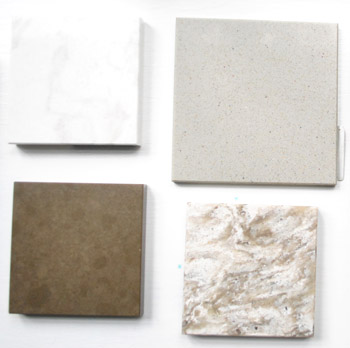
We’re inching right along in the kitchen (wish we could share kitchen updates every day but we’re doing this thing real-time). Which brings us to our latest decision: the new counters that we’ll be going with. We’ve been debating possibilities for weeks (there are a junkload of options out there with pros and cons to each one). And ten people would probably make ten different decisions, so it can feel especially hard to hone in on the “right” thing since there are so many variables. So here’s how we landed on the choice that we like best for our kitchen/family/life. But first the thing we’re sad about: although we had high hopes of DIYing concrete
Hanging A Gallery Wall Of Frames In The Home Office
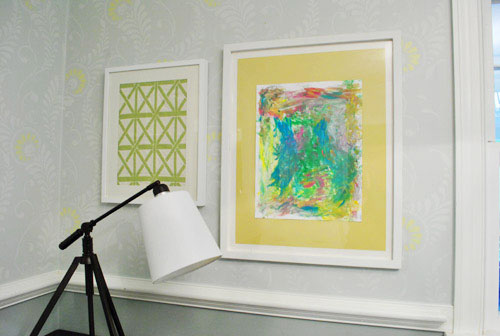
This art wall makes us so happy – and we didn’t overthink it (to the point of what-should-we-frame paralysis – which can happen if we’re not careful). Although we did talk about a few other options and eliminate them based on certain factors, such as: one giant piece of art on each side of the window = too symmetrical for our taste, and too repetitive with the big rectangular window in the middle (so it would look like three big boxes) open shelving = too much shelving since there are two walls of it thanks to the dining room built-ins (it would be shelving with more shelving beyond it) mirrors = too much, since we
It’s baaaack…
Yup, Katie B (and Will & Jeremy) drove up to VA to pay us a visit this past weekend. Sneaky little Bowers. And among other things, we posed in the yard holding big white signs. You know, the usual. We’ll share more what-we-did details a little later in the week, but for now we’re here to issue the second ever Pinterest Challenge (it’s not actually sponsored or endorsed by Pinterest – we’re just obsessed fans). My Pinterest addiction runs deep (as you know from this heartfelt post of yore), so a few months back when Katie called me to say that she thought we should challenge ourselves to make one thing each season that’s inspired
Digging Up A Dated Row Of Bushes
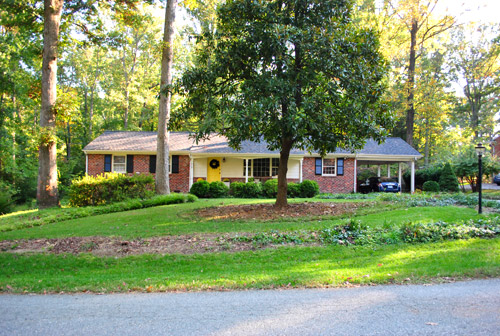
We did it! Over the course of two nice long Clara naps (and with a little help from a friend) we managed to open up our front yard in what we like to call “Phase Two Of Ten Million” when it comes to slowly transforming our front yard. Why so many phases? Well it started out looking like this: Much like our first house’s yard, we figure it’ll take a few years of tweaks to get it where we want it, so this phase was just about clearing things out for a you-can-actually-see-the-house-now effect (Phase One was limbing up the magnolia). In short: we dug up/transplanted/removed a ton of bushes (with the help of a
- « Previous Page
- 1
- …
- 51
- 52
- 53
- 54
- 55
- …
- 123
- Next Page »
