Deck plans completed? Check. Permit acquired? Check. Materials scheduled to arrive this week? Check. But one thing still stands in the way of this project moving forward: the old rotting balcony.
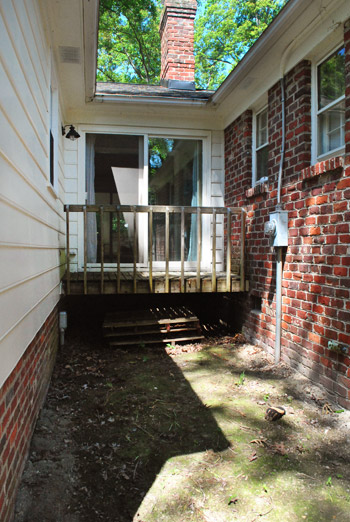
We attacked this assignment very methodically. I laid out a bunch of tools (crowbar, sledgehammer, power drill). I lugged over my ladder (for easy climbing up and over the side). I had music playing (see the ceramic pig on the windowsill?). I had Sherry on standby (she was inside watching Clara but ready to lend a hand/take pics at a moments notice). You know, the works. I figured it’d be a very careful process of prying off boards and observing how this previous structure was created, so that I might learn something for my new deck.
Well, methodical quickly went out the window and my demo “technique” rapidly turned into this:
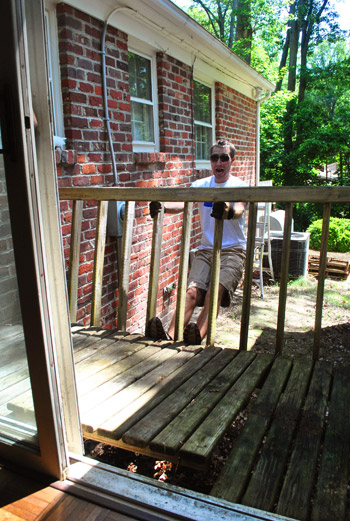
So I pretty much just pulled and pushed back and forth on the railing until the whole outside edge of the balcony started to twist off from the two ledger boards affixed to either side of the house (so it wasn’t scratching the house, just grinding against those ledger boards flanking each side that I’d also be removing).
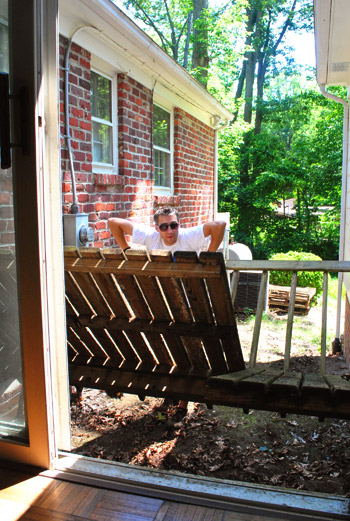
Before long, the entire thing had flipped over and completely pulled off the house. What you see below is the underside of the balcony floor (the top of the railing has twisted over to be on the ground).
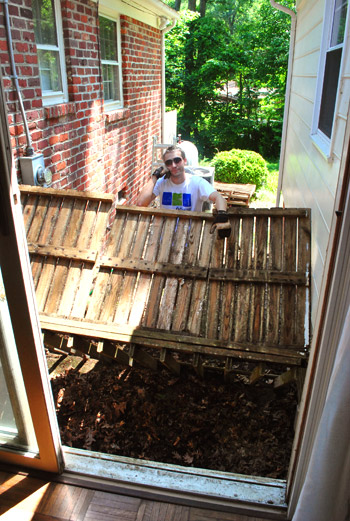
Once the bulk of the structure was out of the way (which took all of 15 minutes – no tools required), my task turned to removing the various boards that had attached it to the house.
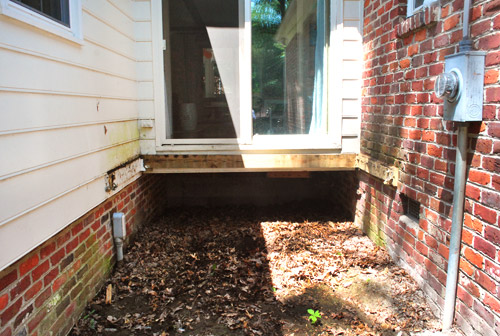
There was this ledger board that was bolted into the brick on one side…
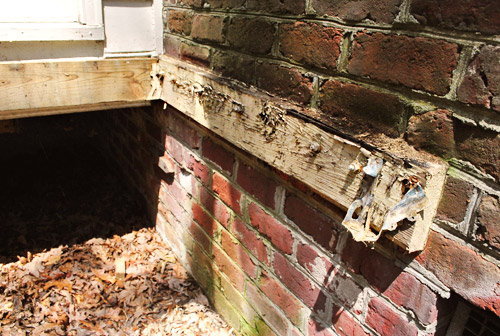
…and this other one that seemed to be just nailed into the siding. From what I’ve been reading, this isn’t recommended. For one, you’re apparently supposed to remove any siding that’s in the way so you can attach the ledger boards directly to the home’s rim board. If I’m losing you on any of these terms, this is a helpful chart that has helped me keep things straight.
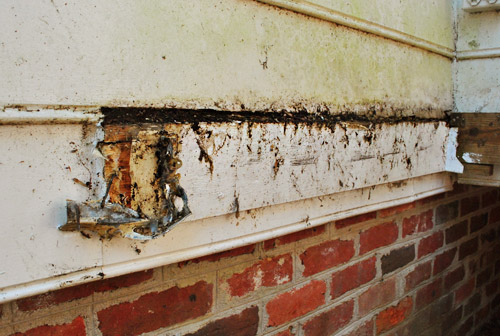
The other thing that I’ll do differently is install some metal flashing to help keep water from rotting away at the house. This previous installation didn’t have that, so the board and the piece of wood siding were both pretty rotted. But I was able to clear both away…
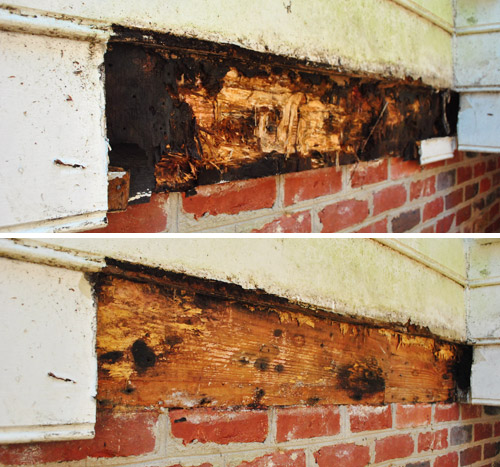
… to expose the rim board of the house.
Thankfully the new deck will run where that entire bottom strip of wood siding lives (the part that’s good and not rotted to the left of the part above), so it will be coming out. Which means I can reuse it for some of the rotten part above the missing siding strip that you see here. In other words, we’ll be reusing good wood siding that needs to come out anyway. And we’ll be adding metal flashing this time- so none of that nasty rot will plague us again.
Oh, and here’s the progress shot that we shared on Thursday.
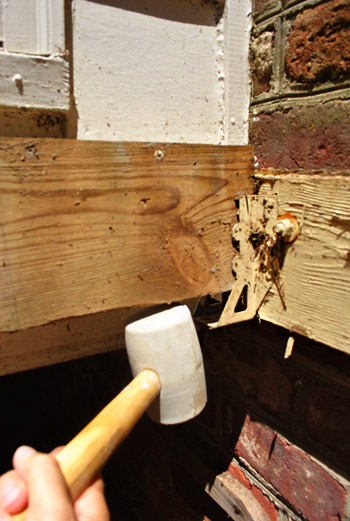
This is me tapping the joist loose that sat closest to the house (the other joist came down with the railing). It just sat in the metal hangar, so all it took was a light nudge with the rubber mallet to get it out. No giant sledgehammer required (darn).
In order to remove the ledger board from the house, I broke out my wrench to loosen the hex nuts that kept it screwed tightly into the brick. You can see here that flashing wasn’t used and that this board too has seen better days.
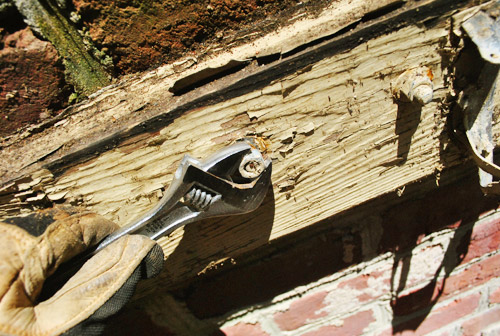
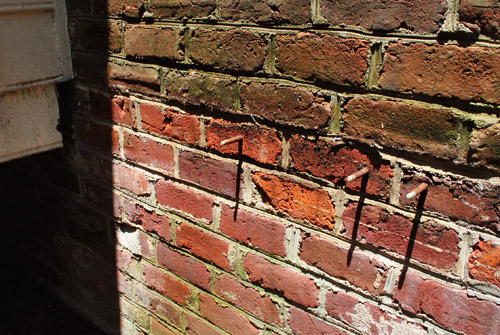
Once I got it removed, you can see the bolts that are still set in the brick. I’m leaving those in for now. If I can’t reuse them, at least maybe I can get some tips for my new bolts by removing them once all of my materials have arrived.
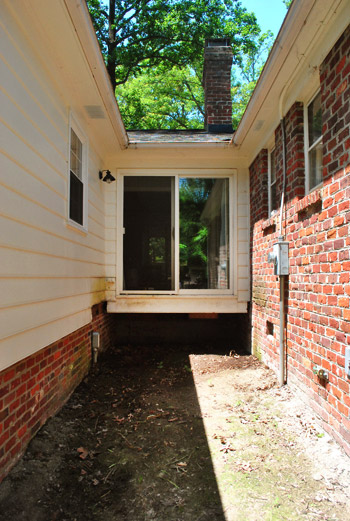
But anyways, by this point the whole balcony was officially gone. Well, actually it’s officially sitting in a trash pile behind where I stood to take this picture. But we’re not thinking about that yet. Let’s just focus on the progress for now. That and our sliding door to nowhere.
I’m a bit anxious / excited to actually start construction. Materials should all be here within the next few days and I’ve got my dad scheduled to come help us get started later in the week. He built the deck on the house that I grew up in, so we thought it’d be helpful to have him around. Hope he doesn’t mind that we demoed without him! So by this time next week we should at least have enough going on back there to report back to you guys. We wish we could say we’ll be back with finished deck pics in three days – but HGTV, we’re not. Haha. We’ll definitely be tackling this project in stages – probably over the next few weeks. But you know we’ll keep you posted! And hopefully by sharing each stage of the process with pics and details it might help other folks out there who are planning to dive into deck-building someday.
Has anyone else demolished something lately? Or do you have a great demolition story? Were you ever surprised by how something was constructed – like a deck floor that flips up when you tug on the railing or rotten wood due to missing flashing?

Ellen Kerkow says
Best demo story: we were taking down old lathe and plaster in our first house- the first of many, many demo jobs. My husband and dad were very carefully breaking the plaster and then removing the lathe nail by nail, which was quickly becoming slow and tedious. Around noon a friend of my husband’s showed up to help. He grabbed our biggest crowbar (aptly named “the wrecking bar”), swung it into the nearest wall just below the ceiling, and pulled down all the way to the floor, breaking all the lathe in the stud bay and raining all the plaster down on the floor. He had a full wall demoed in about 10 minutes. We were all impressed- especially my dad, who still talks about that day, even 10 years later.
YoungHouseLove says
I picture your friend walking in like some super hero and saying “Step aside” in some deep voice. Sounds awesome!
-John
Brianna says
Ah!! Crazytown! I’m so excited to see how it turns out!
Katie H. says
I just noticed that you listed Drop Dead Healthy on the right side of your blog as something you’re digging right now. I’m currently reading it, and it’s FANTASTIC! I keep reading sections aloud to my husband–“Babe, you have to hear this!” Or “This guy is hilarious!”
Have you read A Year of Living Biblically? That’s the first one I read by A.J. Jacobs, and convinced my book club to read it as well.
YoungHouseLove says
Yep! And The Know-It-All is really good too. That’s the first one of his I read and I’ve been hooked every since.
-John
heather says
Hahaha oh deck demo. You’ve seen it before, but to anyone who hasn’t – here’s the video of our deck removal (It couldn’t get much easier than that. Haha.
http://www.youtube.com/watch?feature=player_embedded&v=nI8BnvHE7Yc#t=0s
Oh, and on the other side of our house we also have a slider to nowhere; unfortunately I don’t have the video uploaded from back in the day of the other deck demo but it was kind of awesome (tractor, chain, pulling).
As far as that rot in the photo above, you likely already have but if you have a room/basement below the side with rot I would go and check that wall directly below it as you could have had water infiltration seeping behind the brick and into your house causing mold.
YoungHouseLove says
Yep, it doesn’t get much easier than that!
-John
Tyler says
Recently put in Laminate wood flooring, in place of old tattered carpet… which meant ripping the old stuff out including the trim. I expected nice level concrete underneath and nice even walls, but what I found was NOT helpful. Ceramic tile that left gouges in the concrete that of course needed to be patched and leveled, and walls that were uneven which meant we had to be creative in the install of the flooring. all in all it turned out great! its amazing what new floor, trim, and paint did to the house!
YoungHouseLove says
Sounds like a lot of work but so happy it came out so well Tyler! Glad you were able to make it work!
xo,
s
Jess G says
Woo, I actually get to help demo a deck on Saturday. Although I’m a bit scared, this sucker is a second story and has really seen better days. Hubs will be tethering me to the house, thats for sure!
YoungHouseLove says
Ack- good luck Jess!
xo,
s
Bill says
Wow, good thing that deck is gone, it was built completely wrong, unsafe and not to code. Is that really 2×4’s for joists, at roughtly 24″ centers?!?! You should burn that thing. And don’t reuse the old hardward. Start from scratch with the correct material. Good luck.
YoungHouseLove says
Oh yeah, it’s all in a freecycle pile – we ordered new lumber for our project!
xo,
s
Mandy says
I am so glad you are doing this, we are hoping to do ours this year. Will be watching closely as you tackle the job :)