Yesterday you saw Day Numero Uno of what I lovingly call “Operation Granny Chic.” Mission: update my Granny’s bathroom over three whirlwind days. So with all of the prep work done, our day-by-day play-by-play continues with painting and new floors. Except for one minor step that stood in our way…
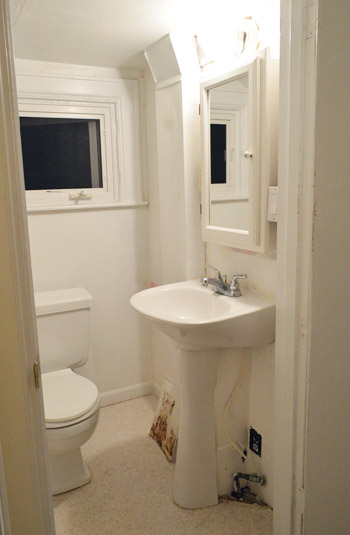
Notice that giant rust spot on the air duct near the floor? Since there’s no way paint would fix that on its own (it would bleed right through), we slapped some Rustoleum on that puppy before breaking out the paint cans. It was amazing how one fast coat worked like a charm.
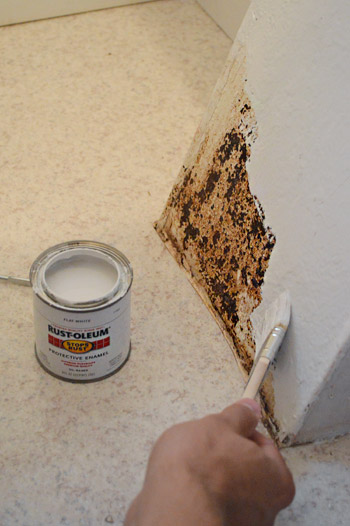
The paint color we chose for the room is “Hint of Violet” by Benjamin Moore, which is a soft violet with some subtle gray undertones. Granny is such a colorful person (and often wears purple) so we knew had to do something cheery for her, but since the room is so small we didn’t want anything that would knock you over the head or make the space feel more cramped than it already is, so the plan was to bring in more pops of bolder color with the accessories, window fabric, etc.
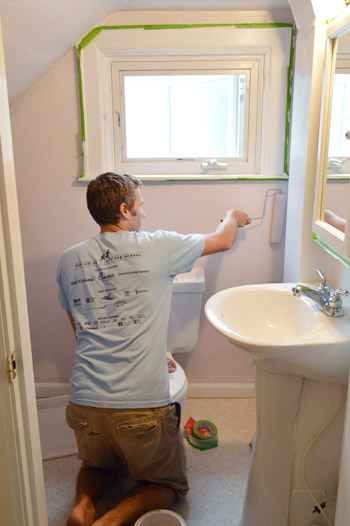
The new wall color went on in two quick coats, including the slanted ceiling (in small spaces like bathrooms we love doing the ceiling the same color as the walls since it feels less chopped up and more open), so by lunch we were ready to tackle the floor.
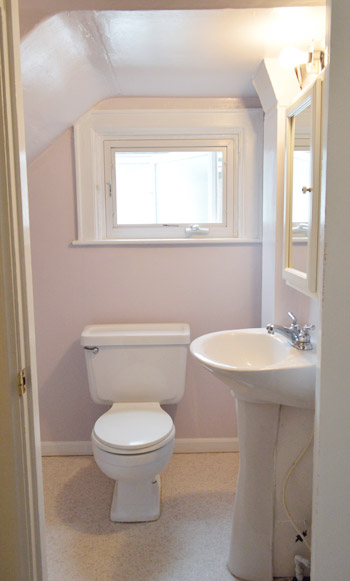
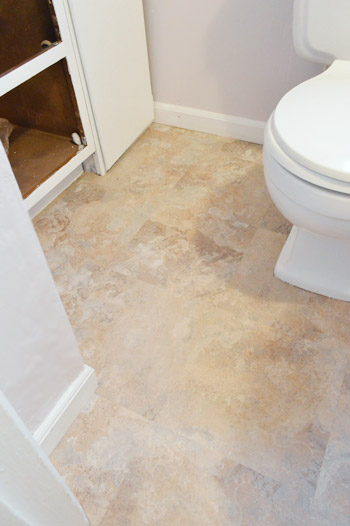
Oh the floor. The existing floor was one of those old sheets of laminate. It was actually in decent shape considering it’s age and it was neutral enough to not offend. But Granny (who doesn’t ask for much specifically) wanted a new, more updated floor in the form of those individual vinyl tiles with a lot more texture, so that was a must for our to-do list.
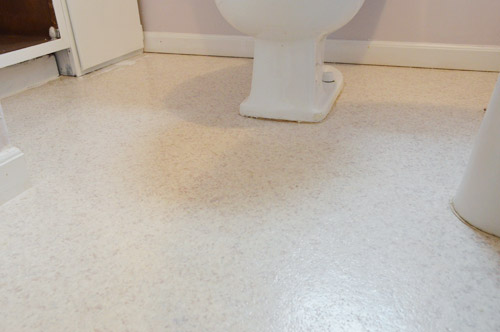
We would’ve loved to give Granny some kick-butt hex tile or something else with a vintage vibe, but given the time and money constraints of the project we had one obvious option: those vinyl stick tiles that Granny had requested. Plus my parents suggested that we not risk any major plumbing issues – which would grind our makeover to an immediate halt – by attempting a sink or toilet removal considering the age of the pipes in this older home, so we were happy to oblige.
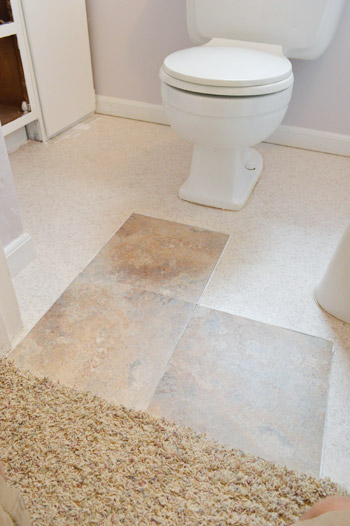
Sherry and I actually installed vinyl tiles about 6 years ago in our old kitchen, so we were a little rusty but we were quick to find our groove. The nice thing about this type of flooring is that it goes down super easy, doesn’t necessitate a wet saw or any sort of thinset/grout, and is über affordable (we got these from Home Depot for 99-cents per tile). The key is to make sure each tile is set very (very very) snugly against the others so you don’t get any seams, so we really pressed each tile firmly into the edge of the previous tile before sticking it down.
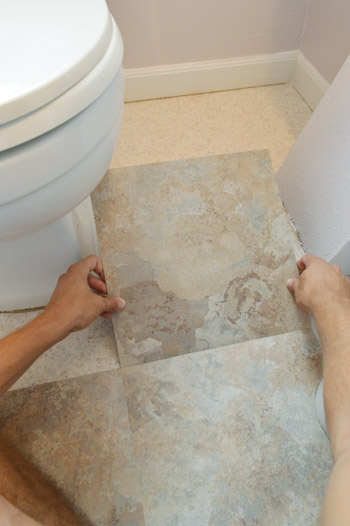
The other thing I love about these guys is that they’re crazy easy to cut. All it takes is a quick score with a utility knife and then it (I can’t believe I’m about to make a Legally Blonde reference) bends and snaps. Though unlike Elle Woods, it then breaks apart.
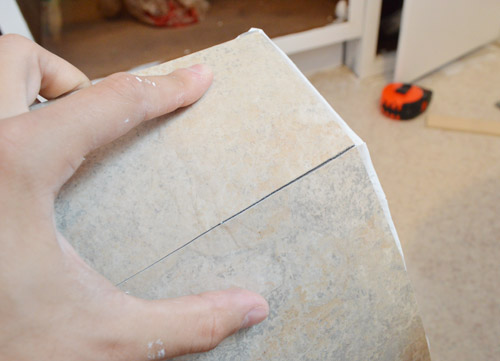
Granny’s itty bitty bathroom would’ve been a cinch to complete except that there were so. many. dang. edges. to cut. It’s not the hardest task – just time consuming. Again, since I was advised not to remove the sink or toilet – I had to cut around them (but we left Granny a bunch of spare tiles to bridge any potential gaps in case the toilet is eventually replaced). I started each cut by making a paper template. Typically I’d use a stiffer paper like cardstock, but Granny just had a spiral notebook handy – so I taped it into place and used my knife to cut right along the edge of (in this case) the toilet.
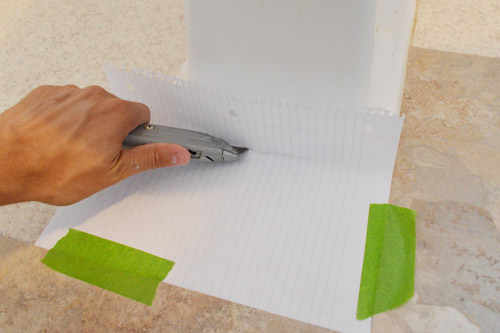
Gorgeous, no?
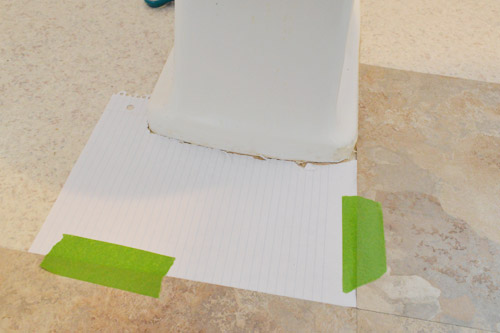
Then I taped my template on the to-be-cut tile and slowly sliced along the edge of the template.
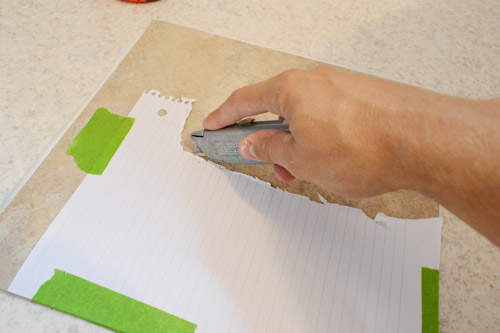
Once I bent-and-snapped out the section that would interfere with the toilet – and did a test placement with the protective backing still on – it was ready to be stuck down. Voila:
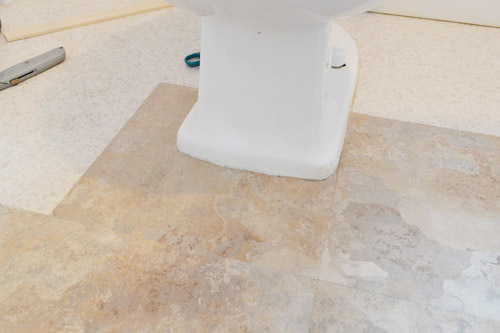
By the end of about 23 tiles and 4 hours it was completely done. And it was definitely a huge upgrade from the old sheet o’ vinyl that was there before. Again, if we had the luxury of time I would’ve loved to remove the sink and toilet to go under them (so for those of you at home who do, I’d recommend it), but leaving Granny seven spare tiles was the next best thing – so if she ever has a plumber replace the toilet or sink, she can fix any gaps if either fixture happens to have a smaller footprint.
It was amazing how much the new flooring updated the room… especially in person since it has some great texture. And it looks pretty darn good with those soft violet walls.
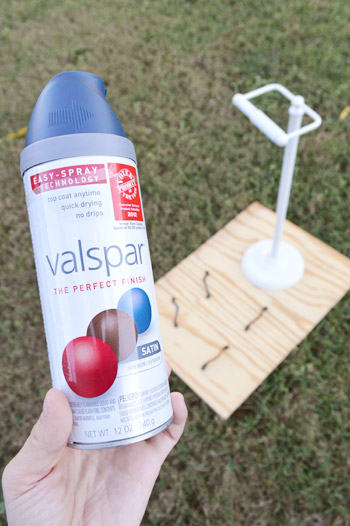
With the paint and flooring done, most of our major projects were checked off for the day, so it was just on to prepping a few more finishing touches – like breathing some new life into some of Granny’s old cabinet hardware (which we think was added sometime in the 80s or 90s, but had since peeled a bit). Enter Valspar’s Indigo Streamer in Satin to the rescue (it looks kind of bright here, but it’s a true deep navy in person).
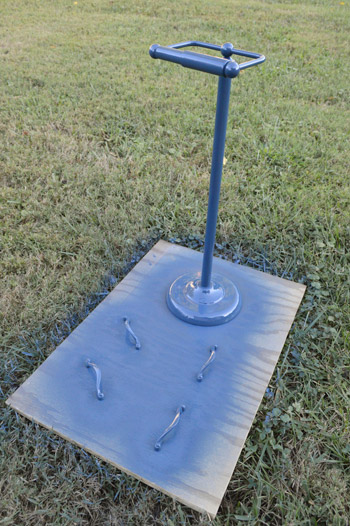
First we sanded them smooth and then it was spray-time. We had originally hoped to replace Granny’s cabinet hardware with some new shiny chrome versions, but the existing holes weren’t a standard size. That ended up being a blessing in disguise because not only did we get to reuse what she had, but we also got to make them a fun and less expected color. Navy definitely beats worn-and-peeling brass and adds tons of interest to an old white toilet paper holder.
So with our spray painted items drying outside for the evening, the room was looking like this by the end of Day 2 (pardon the terrible picture, it was late at night, so the floor looks Frito-orange and you can hardly see the voilet color on the walls).
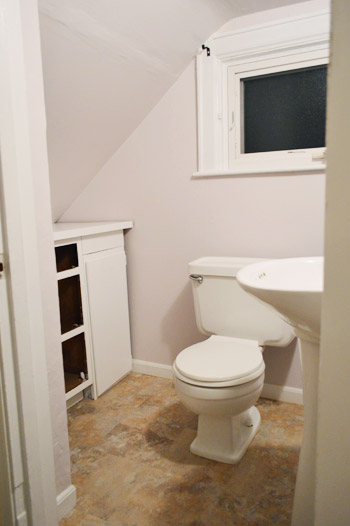
Oh but we were able to tackle a few other minor items in preparation for Day 3’s big reveal – like giving Granny a playful blue glass knob on her medicine cabinet, and hanging a towel ring into some existing holes on the duct (we worried hanging something on the duct might be a bad call, but Granny said it used to hang there for years and since my dad also said it shouldn’t be an issue, we used the old holes that were there and plugged them up with a shiny new towel ring).
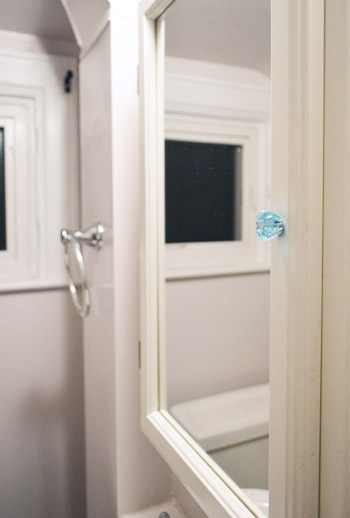
Oh yeah, and we replaced a couple of her outlets – including the burned one on the floor – so they were all new and white and up to today’s safety standards (an electrician had looked a them prior to our little makeover to ensure they were nice & safe before we messed with them).
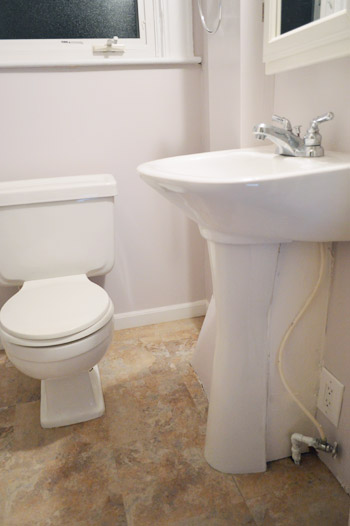
Isn’t this little problem area by her sink already looking worlds better? That was definitely one of the more satisfying views of Day 2. Although for some reason the soft violet walls are really hard to see in these late night shots.
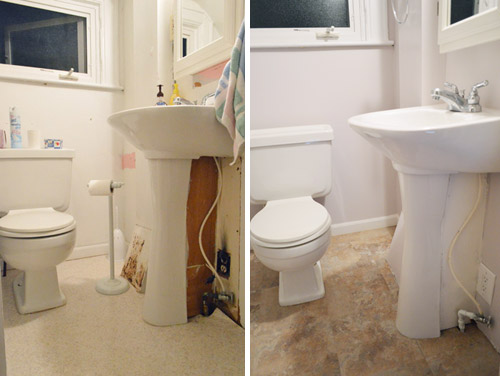
Happily after a day of painting, changing up the flooring, and doing a few little updates to get a jump on things, our to-do list was looking like this:
Brainstorm colors & go shopping for accessories (Day 1)Spackle/sand/caulk everything to prep the room for paint (Day 1)Rebuild the cabinets a bit so they look more balanced (Day 1)Prime and paint the cabinets for a more updated and open look (Day 1 & 2)Paint the entire room, including the ceiling (Day 2)Fix a few issues, like a rusted duct and an old dingy corner below the sink (Day 2)Redo the floors, which were that old sheet laminate stuff (Day 2)Revive some hardware/accessories with a fresh finish (Day 2)- Make & hang curtains to add some charm (Day 3)
- Bring in some meaningful art (Day 3)
- Add some functional/personal accessories to finish things off (Day 3)
- Reveal the whole shebang for Granny (Day 3)
We’ll have all of the official before & afters in tomorrow’s post about our final day of upgrading the room and – the best part – video and photos of us revealing it to Granny. We’ll also have a full budget breakdown for you (we just have some receipt-math and photo-uploading to do). In the meantime, is anyone else out there using peel & stick tiles for a super affordable upgrade? Did you make paper templates too? Or did you use some other method to size them?

Kristen | Popcorn on the Stove says
It’s looking great – like an entirely different room! She’s lucky to have you two :)
Mona O | Renters In Love says
Wow, you guys are fast! I’m loving the blue.
Caitlin @ Hardly Housewives says
Operation Granny Chic. LOVE it! We have a little half bath in need of a makeover and so this is great inspiration!
Amanda C says
Ahhh you guys are the best! Since we bought our house in February, I have been dying to update the floor in our small master bath, which is also sheet laminate (they redid everything else, but left that – why?!). But other more important projects have taken priority. Never even heard of these peel and stick tiles, but think I will give them a shot until we can afford to get the floor we really want!
Amanda C says
Did you guys use any caulking around the base of the toilet to really seal off the tiles?
YoungHouseLove says
You’re not supposed to caulk all the way around a toilet so that you know if it’s leaking (you want the water to come out so you can see it, instead of secretly collecting under the toilet until it falls through the floor after years of rot). Sometimes we caulk around the front and leave the back open so you can see leaks back there, but in this case it looked finished enough not to caulk it at all, so we left it well enough alone. Hope it helps!
xo
s
Pam the Goatherd says
I didn’t know that about not caulking all the way around the toilet. Our potty has caulk all the way around. We’re going to be re-doing the floor in there as soon as I can find the flooring that I want. Guess I’ll be peeling that caulk off…
Annie says
Yeah, we just had to tear out the floor/subflooring and replace joists that had rotted from a leaky toilet and bad caulk job. The floor literally caved in. You don’t want that hassle… So gross!
gia says
woww
Cassie says
looks awesome! I LOVE the color of the walls. I want to paint my daughter’s room and this is something I could easily see her loving but not hitting us in the face when we walk in!
katie says
My husband and I doing renovations in our condo. What we didn’t realize when we bought the place was that it was one of the most expensive condos in the whole community. So while we are doing the renos we don’t want to spend a lot of money. Our kitchen has been a big hurdle as the floors are currently peel and stick but UGLY. We are going to put peel and stick right on top but in black and white checkered on in a diamond pattern. I hope it works out okay I am really nervous about it, but it is not worth the money to put in the floors I really want to have. Black 6X12 tile done in a herringbone style. Oh well.
Megan A. says
You two are so sweet to re-do Granny’s bathroom. Can’t wait to see Day 3!
Chelsea @ Riding Escalators says
So fun! Loving the wall color and floor tiles! I can’t wait to see the video reveal tomorrow!
Deborah says
Looks great so far. Can’t wait until tomorrow to see it all put together!
Liz E. says
Love the progress so far! I live in Huntington, too–want to make over another bathroom while you’re here? (haha, just kidding) =)
I’m sure your Granny is so grateful for you both! Excited to see the reveal tomorrow!
YoungHouseLove says
Haha, maybe next time Liz!
xo
s
Kathy says
Loving this reno, because Granny’s bathroom is about the same tiny size as our half bath and I am having a bugger of a time trying to figure out how to redesign that space!
The previous owners in our house did peal & stick tiles as well, but def did not do a great job cutting them down.. there are gaps around every corner in the bathroom and adjacent laundry room!
Wendy says
OMG – thank you for that tip on how to cut the stick-on tile! I’m using that in my laundry room right now and could not figure out how in the world to make the cuts! Duh! that makes all the sense in the world now! I’ve just been trying to eye it – and not doing a very good job of it! Any suggestions for how to fill in tiny areas when the walls are evidently not straight? I’ve basically got maybe a half a centimeter left in one area between the tiles and the wall and I can’t cut the tiles small enough to make a piece fit.
YoungHouseLove says
Hmm, that’s tough. Can you use a pencil to draw a thin line on the tile and use an x-acto knife to cut off that sliver and stick it into the sliver? It might be the best way to hold everything together (you could use quarter round or caulk to bridge the gap too, but tile shoved in there might keep stuff in place a bit better so you don’t end up with cracks down the line).
xo
s
Sara says
So glad you did this post! My husband and I want to redo our bathroom floors, small downstairs closet and small laundry room using peel and stick vinyl tiles. We don’t plan to live in our house forever so we don’t want to sink a ton of money in by putting down expensive flooring, but the yucky vinyl floor really needs to go. (It’s bad.) If you have any tips to share on how to replace a tile floor cheaply (the previous owners put down this big, thin ceramic tiles and many of them have cracked. Underneath the tiles is the grate that tiles go on (I don’t know the technical term) and that is glued on top of the original vinyl flooring.) Help!
Sara says
May I also add that this icky tile floor cover our entryway hallway, another small hallway and the kitchen and breakfast nook? We’re talking a massive area of ceramic tile. Would we have to break up all the tiles and pull up the grates (somehow) and put down flooring that way? I don’t see any other way to do it because when we bought our new dishwasher, it barely went in over the tile (since it’s tile on top of other flooring.)
YoungHouseLove says
Yes, I think you would have to do that. Good luck!
xo
s
YoungHouseLove says
Hmm, it sounds like you’ll have to remove those tiles if you want to tile over them since they have cracked (you want your base to be level and even). Then once they’re out, try to make sure the ground is flat (they sell self leveling things like concrete which can help) before applying anything new. Hope it helps!
xo
s
Stacy says
I love the wall color! We used these exact floor tiles in our half bath that has that yellow tile that you have in your guest bath :)
Jennifer says
Looking good you guys! I’ve used those exact tiles in 3 bathrooms, 1 half bath and 1 laundry room…2 houses. Love them. Super cheap, super easy, and stay down! Paper templates all the way!!
{plum} says
love the wall color!
some washi tape wrapped around the flexible tubing {stripes, if you will} might look nice! :)
YoungHouseLove says
Such a cute idea!
xo
s
Ellen says
In our downstairs bathroom renovation, we used vinyl tiles that look like wood planks! They are awesome! http://www.kellyandellen.org/house/2010/06/downstairs-bathroom-after/
YoungHouseLove says
That’s really cool!
xo
s
Nancy says
I have used these peel and stick tiles in a powder room and a kitchen and they work and look terrific.
YoungHouseLove says
So glad!
xo
s
Karen F says
very pretty so far! I’m sure the accessories will take it to “wow” (based on the ones you showed yesterday).
Maybe I missed this, but what color did you do the cabinets? Same as the wall color? Also, did you need to paint the trim as well, or did you get lucky and it was good enough to leave as is?
YoungHouseLove says
Sorry about that! Those were white (Decorators White by Benjamin Moore in their Advance finish since we had that on hand from painting our office cabinets). We also brushed that over the white trim to brighten it up!
xo
s
Jess @ Little House. Big Heart. says
I love that wall color. It’s so soft and pretty. It would be great in a little girls room!
Did you do anything special to the existing linoleum before applying the peel and stick?
YoungHouseLove says
We just swept it to make sure it was clean and then wiped it down one more time to ensure there wasn’t any caulk or sawdust sticking to it. Hope it helps!
xo
s
Michelle Kersey says
Looks like a sweet bathroom! Can’t wait to see day 3! You sure know how to keep a girl hanging!
I was debating on doing peel and stick tiles in the basement laundry room, but my dad is recommending me to do sheet linoleum. :-\ I was hoping to DIY it though LOL.
Sherri says
We just bought some peel and stick tiles for the laundry/utility room in the basement. It has an old laminate floor and being in the basement with the drain, etc. we thought it was the best option. We only completed the section under the washer and dryer but looking forward to seeing the rest of the floor.
Jenny @ We G Three says
What a sweet thing to do for your granny! I missed the Bathroom Bootcamp yesterday, but I’m all caught up now.
I have to say, I LOVE the idea of violet + navy + white! My daughter actually has a dress from Target in these colors (with a bolder violet) in an ikat print. Right up your alley, YHL, and ever since I bought it, I’ve been obsessed with that color combo.
If you hadn’t already bought the fabric, I’d say the window is just dying for a roman shade in a wide navy & white stripe. Regardless, I can’t wait to see the finished result!
SherriMc says
Nice job! I have a den in my 50’s ranch that originally was a garage. Whoever did the make-do makeover did not level the concrete floor, just covered it with an institutional tile. I’d love a different look, thought about options, and saw some amazing 12 x 12 vinyl tiles that look like wood! We have wood in the rest of the house, but in this room wood or even laminate could be real maintenance issues (wet dogs, don’t ask). The vinyl tile seems like the answer, for both price and do-ability.
Dayla says
SherriMc-
We have the same 50’s ranch, the same den & the same uneven floor! We’re thinking of using some self-leveling concrete and then doing radiant heat in floor… However, that project is a couple years down the road. I’ve been thinking Vinyl Peel & Stick will get me through until the bank account is major project ready!
Morgen says
I love your reuse of the hardware! The color is awesome and it keeps a little of the history of the bathroom :)
Can’t wait to see the end result!
Julie says
We just finished laying down some peel and stick in our bathroom. We are doing a major overhaul though and have so far replaced the tub and surround, toilet, flooring, sink and faucet. Almost done!
We were going to originally put down real tile but as this is our only bathroom and we have never tiled a floor before, we were nervous of being without a toilet for a week. lol
Enter the fancy Tilemaster peel and stick from Home Depot. It was about $2 a sq. ft. but you can actually space it out and grout it! I sold on that and we were able to slowly put it down on the floor over a week or so. Which with a 5 month old has been awesome. Just the grouting left to do!
YoungHouseLove says
That’s awesome!
xo
s
Ashley@AttemptsAtDomestication says
I love the wall color! It’s so pretty!
John @ Our Home from Scratch says
Huge improvement! Nice!
Ginny @ goofymonkeys says
Wow – such a huge change already! The stick-on floor tiles are a great solution and I’m glad to see that you painted that wood piece behind the sink.
I’m looking forward to Day 3 & the final reveal!
Shannon Summers says
I have a feeling you two will be getting a TV show one day. I know I would watch it.
paintergal says
Not sure if you covered this already, but what is that wood piece behind the pedestal sink?
YoungHouseLove says
That was added to hide some unsightly pipes and other stuff back there, so since Granny preferred to leave that in place, we just painted it so it would blend in with the pedestal base of the sink.
xo
s
Tara says
I am totally showing my husband the peel-and-stick tiles when he gets home! I would love to do a new floor in our laundry room and that might be just the right thing.
Did you save any of the wallpaper to do something cute with? Our house had a ton of wallpaper when we moved in and I saved swatches from each room and framed them to keep a little of the history of our home (it was built in 1923).
YoungHouseLove says
Alas, it was all gone when we arrived, but I think Granny was beyond happy to see it go! Haha.
xo
s
Amber says
I don’t know if you have answered this already…but, how do the stick and peel tiles hold up to moisture? Can any thing get under them once they are put down? This could be a good solution for our home improvement budget.
YoungHouseLove says
They’re great with moisture (ideal for a kitchen or bathroom or laundry room, etc) but of course you don’t want to put them in a room that floods or anything (enough water can probably get under anything). Hope it helps!
xo
s
Reenie says
Lookin’ good.
Bend & Snap… love it!! “Legally Blonde” is a movie I’ll watch every time it’s on.
Crystal @ 29 Rue House says
Looking good! You actually make me want to go buy some of those peel and stick (by making it look so easy) just to hide the hideous gold and brown laminate we have in our kitchen rather than wait for a bigger budget.
nancyo says
I love your Granny makeover.
I love taking vintage chairs and refinishing them or reenforcing them (they tend to get woobly with age).
Do you have any other Granny projects in store?
YoungHouseLove says
We’d love to tackle another project someday if Granny will have us ;)
xo
s
Lindsay @ Me, Ed and Pea says
This is just the sort of face lift we’ve given our two bathrooms. It’s amazing the changes you can make with not that much money and lot of elbow grease.
Monika says
A couple of questions – I know those tiles could be grouted for a look that is even more like tile and more water proof. Would you recommend one way over the other for any reason? Also, can these tiles be laid staggered or do they look better aligned?
YoungHouseLove says
It’s really all about what you’re going for. With our time constraints, adding grout to the mix would have busted our timeline, but if you’re doing it at home and want to try that, it’s definitely something you could opt to do. You can lay them staggered, on a diagonal, or all aligned like we did – it’s just about what effect you prefer. Hope it helps!
xo
s
Monika says
Diagonal… Oooooohhh… thanks Sherry!
YoungHouseLove says
Sure! Good luck! We did diagonal in our first kitchen and really liked it.
xo
s
Heather W says
I love that you did the tiles because I have been wanting to do those in my kids bathroom. I have two questions though first my kids bathroom has a sheet of laminate down now but from when they were babies in the tub it has started to come up so I think we should just remove it so, can you put these tiles straight down on the subfloor? or do I need to put something else down first and second how do you know where to start your flooring? It looks like in the pic that you started from the left of the door frame or did you center it from the door? Make sense? Thank you.
YoungHouseLove says
Oh yes, I think they’d be good right onto a subfloor as long as it’s flat (you want whatever you’re applying them to to be flat and not bumpy so they stick). Yes, we started in the left of the door frame since we just laid them out and figured out what looked best (and required fewer cuts) before sticking them down for real. Hope it helps!
xo
s
Heather W says
It does! Thanks so much!
Erin says
We redid the flooring with stick-on tiles in the kitchen of our second floor apartment (the whole building is a 3 flat). The original flooring was in really rough shape, so we had to tear all of that up and then place the new linoleum down, but it worked well and the floors are still in great shape! We were also surprised at how not difficult it was to cut the tiles, although cutting around things was TOUGH (we had a lot of old wall trim and corners to cut around). Once you get going though, like you said, you get the hang of it.
Granny’s floors look great, and I LOVE the new paint! Even in those later night pictures where you can’t see the color quite as well, you can see that the vibe of the room is so much softer and more relaxing when compared to the before pic. Can’t wait to see the final product!
Catherine says
This is such a fun project to follow! I am always imagining the cute, fun things I would do at my in-laws house if they would just ask ;) Can’t wait to see that purple in the daylight pics. I bet it is lovely!
Morgan O. says
I am loving this update. I put vinyl tile in my bathroom when I fixed it up three years ago and wish I had tried the paper template and box cutter approach. Instead, I ended up botching a good bit of the fix up, and now the floor is looking pretty darn bad. It’s in need of a little sprucing. So using this tutorial for the next time. Thanks, guys! Can’t wait to see the finished granny bath. :)
Joelle says
Looking good! I love the color – it’s almost the same as what I have in the entryway.
I’ve used the peel and stick tiles for floors and they come out great. Most recently, I used them inside the kitchen cabinets, in place of shelf paper. It’s a bit more work, but they look great and don’t come off like shelf paper. Still easy to wipe down if necessary. I used paper templates as well, but I just used the paper backings from the tiles. Once you’ve placed a few whole tiles, you have plenty of paper to use as templates.
YoungHouseLove says
So smart!
xo
s
Stephanie @ Legally Blinde says
Well done, guys! I’m really loving these bathroom bootcamp posts. I am so excited for the reveal post!!
Suesan says
I have used the peel-and-stick tiles in the bathroom that you can grout between. It was awesome and I didn’t have to worry about water getting in between the tiles, since we also sealed the grout. I’ve also used the 18″ square peel-and-stick slate looking tiles in the kitchen and in a laundry room. The bigger size looked gorgeous and it was a very comfortable floor to walk on. The biggest thing I’ve learned is to make sure your floor underneath is level and to fill any crack. I like to do a skim coat before doing the tile if there is any question about the smoothness of the sub floor.
Granny’s bathroom is looking great!
YoungHouseLove says
Great tips!
xo
s
Casey says
Looking good! Can’t wait to see the reveal! It’s crazy how easy those peel and stick tiles are to use/install. I always put them on the bottom of under-sink cabinets. Even when we lived in an apartment, it was a super cheap and easy way to make that space in the kitchen and bathroom feel fresh and clean and new-ish (and also protect the cabinet from any water issues). Actually on that note, we put a new kitchen in our house a few years ago and didn’t do this, because the brand new cabinets were plenty fresh and clean on their own—and then within I think two months we ended up with a leak from the garbage disposal that left lasting damage. So now it’s my policy to peel and stick it no matter what. :)
YoungHouseLove says
Oh no! Such a smart tip!
xo
s
Bridget says
Granny’s little bathroom is so cute! I almost thought it was cute before too, because it definitely reminds me of the add-on bathroom in my great-grandparents’ old farmhouse in Iowa. So it was cute in a nostalgic way. :)
Bernie says
I love the LOOK of the peel and stick tiles, but we’ve had bad luck with them. After a few years the adhesive managed to “weep” up between what we thought were very tight seams. Looks messy, hard to clean, and everything sticks to it. ICK. I also think it is easier to take the toilet out, and re-seat it with a new wax ring after you put the floor down without having do do fancy cuts. Oh well, to each his own. Your granny is very lucky!
jeannette says
people with good taste aren’t famous for being so kind. i’ll keep coming back.