Who’s ready for the big bathroom reveal?
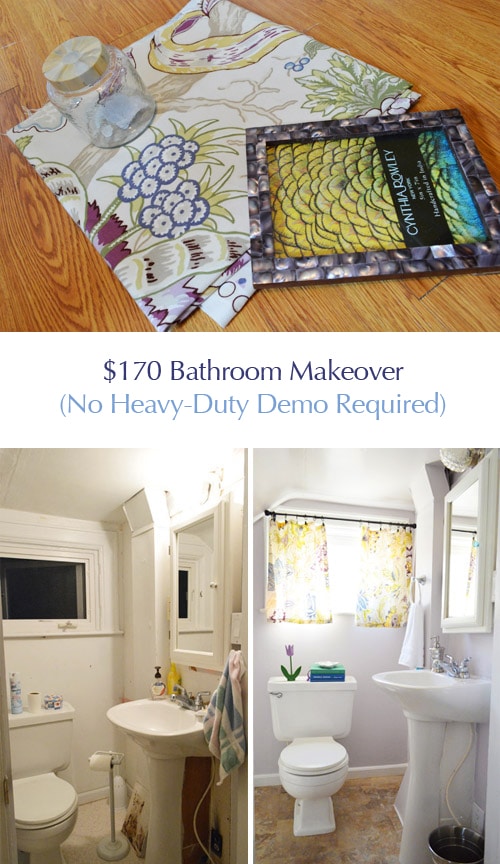
As we mentioned in Monday’s post, there are almost always three main steps to room makeovers (some of which take forever and a day, and some that are done fast and furiously, like this bathroom blitz):
- prep/planning (brainstorming, picking a color palette, going shopping, priming, sanding, spackling)
- bigger upgrades (painting walls, refinishing or painting cabinets, laying new flooring, etc)
- finishing touches (curtains, new hardware, art, accessories – all the things that add “you” to the space)
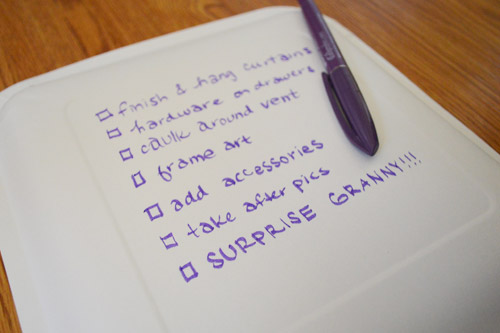
So Day Three (see Day One and Day two here and here) was all about those finishing touches. Here’s how it all went down (and yes, I was writing on the back of a paper plate with a calligraphy marker – gotta use whatcha got, haha).
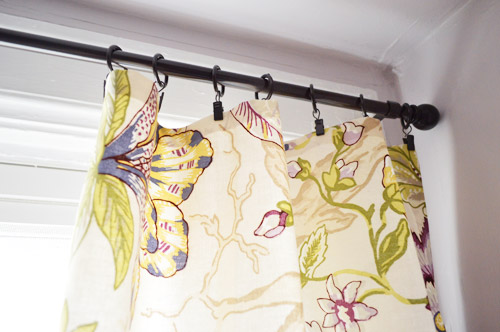
Ta-daaa! It took about an hour to make some custom curtains for Granny’s window thanks to some designer fabric (made by Braemore, if that helps) that we scored at a deep discount (at U-Fab in Richmond on our way out of town) and some no-sew hem tape.
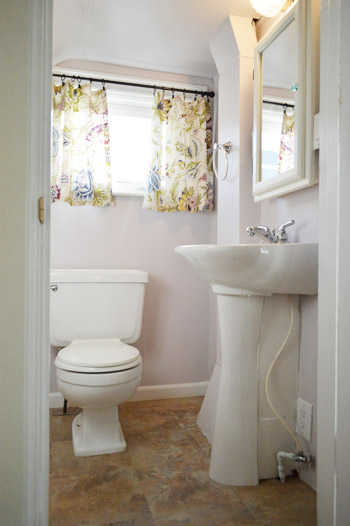
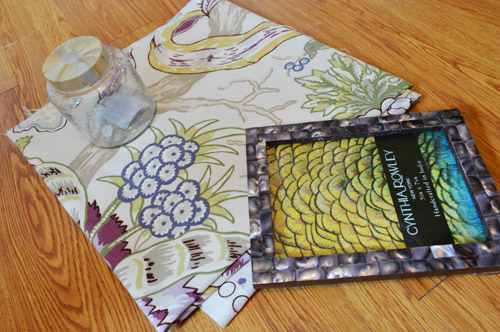
I just measured the window to see how long I wanted them (a few inches below the bottom of the window trim felt best) so I cut two rectangles of fabric that were 29″ long (the length that I just measured plus two inches to allow for hemming) and 31″ wide (to give them enough fabric to feel drapey and full when they were hanging up there). Here’s a better shot of the fabric to jog your memory (it’s hard to photograph it in front of the window).
Once they were hemmed on all sides (using this method), they were 27″ x 29″ (my target size after accounting for those extra 2″ in each direction that would be used by the hem). Then it was as simple as hanging a curtain rod from Target and using some ring-clips (also from Target) to hold up my little fabric rectangles.
Here’s a close up of the pretty fabric. Something about it just screamed “Granny” to us. It’s so happy and sweet.
Oh and just when we thought we were done with the caulk on Day 1, we decided that one seam (where the front of the vent met the new flooring) could look a lot more polished with a smidge of caulk) so I made a video for you guys that might help you get a nice clean caulk line:
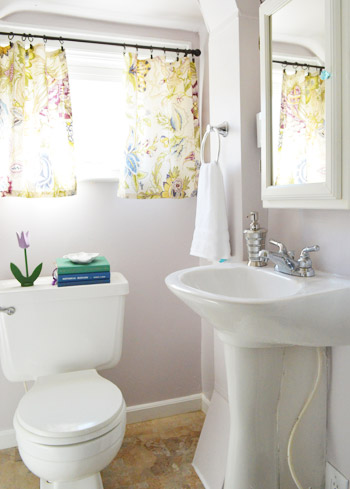
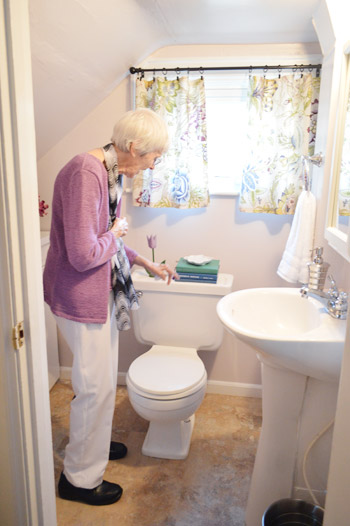
Then came the fun part: accessorizing tiiiime, baby. In came a lot of items that Granny already had (in colors that we pulled from the curtains like emerald, navy, and violet).
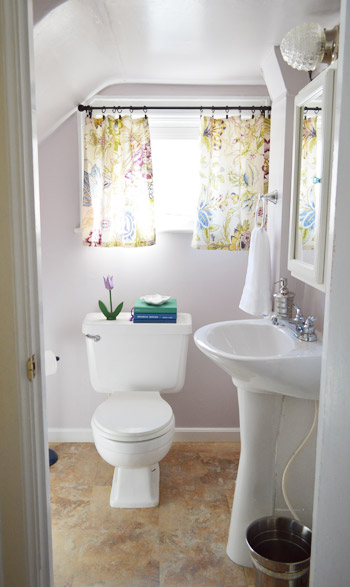
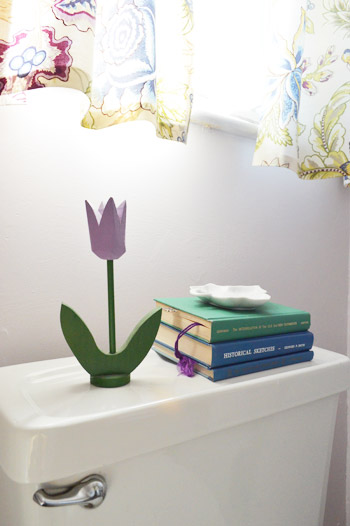
We even grabbed some fresh flowers from the nearby grocery store and plopped them into a vase that Granny already had. And see that wooden tulip on the toilet? Papa actually made that for Granny years ago, so we loved working it into our little room reveal. It’s the simple things, right? Speaking of those, how is it that a once-white-now-navy toilet paper holder can be so cute? It’s just one of those little upgrades that makes something feel a lot more fun than just going with a basic store-bought version. Note: For some reason the floor looks Snooki-tan orange in some of these shots, so the one below is the most accurate.
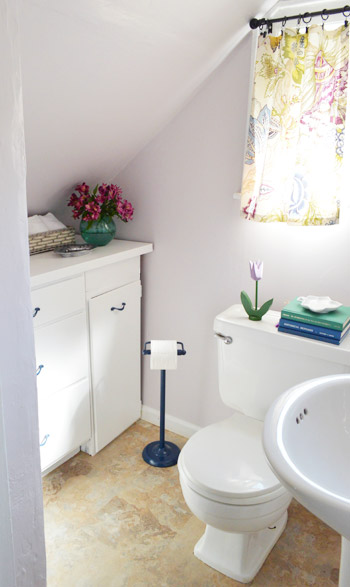
Here’s a straight shot of the cabinets with their navy hardware on them (we wish we had enough time to make a false-drawer on the top right – maybe next time we’re in town…).
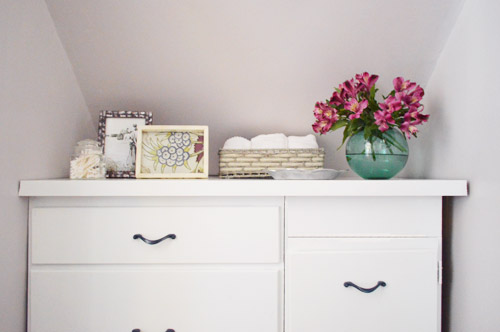
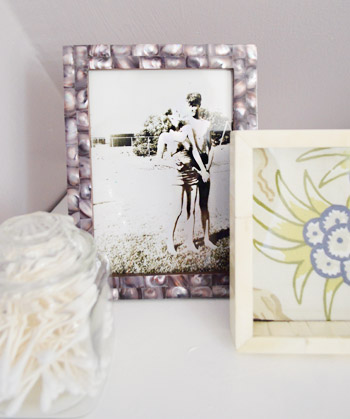
We mentioned that we wanted to bring in some meaningful art, so this is actually a picture of Granny and Papa when they were younger that we shared back in this post. We loved it so much that we got it printed as a 5 x 7 for our new purple frame from HomeGoods. Next to it, I also framed a scrap of extra fabric. Printed or patterned fabric behind glass = free art (and Granny can always switch it out for a picture if the mood strikes).
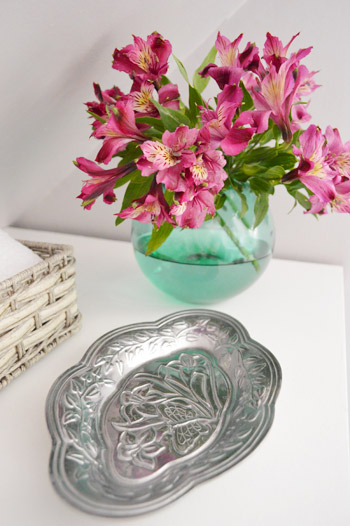
This pretty silver tray was already Granny’s, just like the sweet green vase. She has so many awesome things around the house that it was fun getting to showcase some of them in the room reveal – especially since she really seemed to love seeing them in there among some new things like a basket of extra hand towels, the flowers, and the frames.
In such a tiny room, we really wanted it to feel cheerful, so while some folks might think it’s crazy to stack bold green and blue hardcover books on the back of the toilet, we really wanted to add color and use things Granny already had around.
The funny thing is that the colorful books were probably her favorite part along with that meaningful little wooden flower that was made for her by her husband so many years ago. Aww.
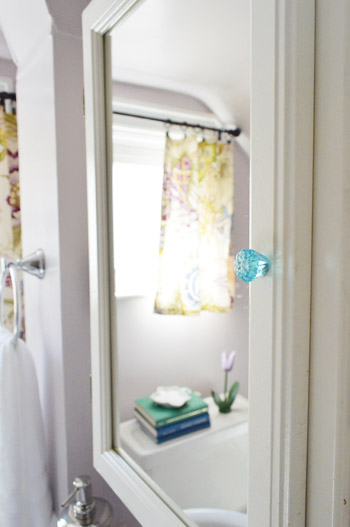
She even noticed the little things, like the small blue knob that we added to her medicine cabinet.
And we can’t forget how rough things were looking when we arrived, so here’s a flash back to the sink area before… and after we worked a little magic.
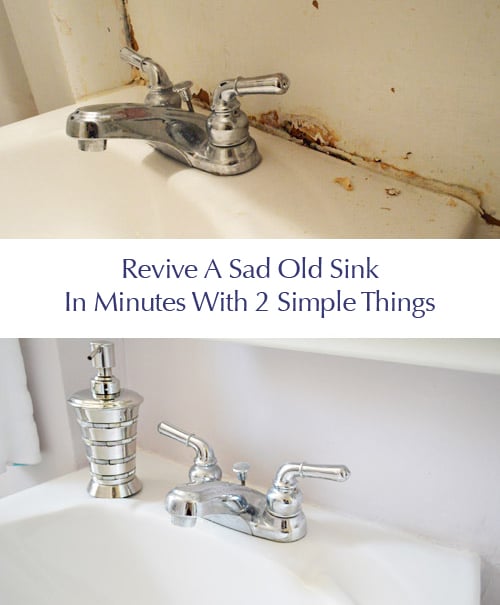
It was a really simple update. We just cut out that old caulk, re-caulked, and painted the wall behind it. Is caulk not the MVP of DIY, or what?
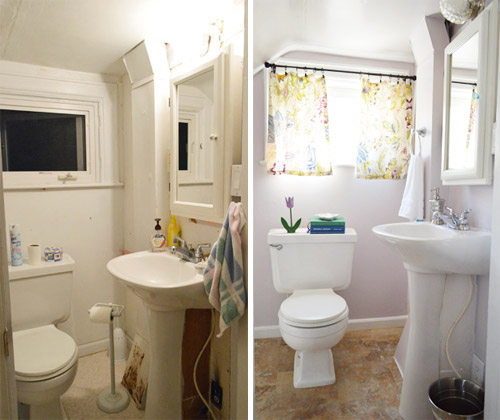
And here’s that shot of a few of the other more challenging issues in the room next to a final shot of the space. It’s amazing what a few days of work can do, huh?
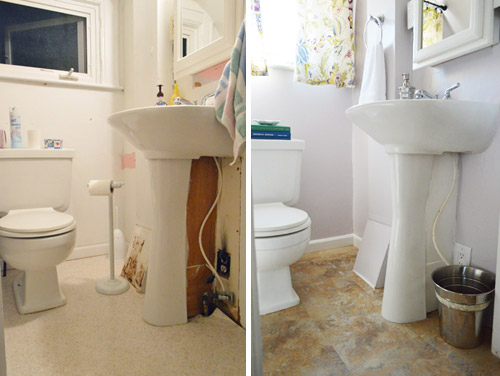
It was pretty darn satisfying to see our to-do list all crossed off:
Brainstorm colors & go shopping for accessories (Day 1)Spackle/sand/caulk everything to prep the room for paint (Day 1)Rebuild the cabinets a bit so they look more balanced (Day 1)Prime and paint the cabinets for a more updated and open look (Day 1 & 2)Paint the entire room, including the ceiling (Day 2)Fix a few issues, like a rusted duct and an old dingy corner below the sink (Day 2)Redo the floors, which were that old sheet laminate stuff (Day 2)Revive some hardware/accessories with a fresh finish (Day 2)Make & hang curtains to add some charm (Day 3)Bring in some meaningful art (Day 3)Add some functional/meaningful accessories to finish things off (Day 3)- Reveal the whole shebang for Granny (Day 3)
So that’s the story of jumping at the chance to redo Granny’s bathroom in three days and on a nice modest budget. Is it weird that we’re in love with this tiny room now? As in, we joked about bringing an air mattress in the next time we came to visit and sleeping in there. Yup, weird.
Oh and we did happen to capture the big reveal on tape, but before we get to that, here’s a little budget breakdown for ya:
- 2 quarts of paint, “Hint of Violet” in Benjmain Moore’s Aura in Satin (a gallon would have been too much/pricier, so we went for two quarts): $40
- Zinsser’s Smart Prime & Benjamin Moore’s Advance Paint in Decorators White for the cabinet: $0 (already owned from this project)
- 30 vinyl stick tiles from Home Depot: $30
- 1 yard of fabric for curtains from U-fab: $15
- Curtain rod and ring hooks from Target: $18
- Wood for cabinet, new outlets, and outlet covers from Home Depot: $10
- Valspar Indigo Stream spray paint from Lowe’s: $4
- Trash can, towel bar, soap pump, frames, basket, and hand towels from HomeGoods: $45
- Blue knob for medicine cabinet: $1.50
- Flowers from Kroger: $6
- Books, wood flower, green vase, toilet paper holder, tray, glass jar for cotton swabs: $0 (these were already Granny’s)
- Spackle, caulk, paint supplies, hem tape: $0 (already owned, and carted with us so we had them on hand)
- TOTAL: $169.50
Not bad for a new floor, upgraded cabinets, freshly painted walls, new curtains, fresh-looking hardware, and getting to say good riddance to rust and peeling caulk, right? But enough money chit-chat, let’s move on to something priceless. Here’s Granny’s awesome reaction:
The funniest part is that we didn’t coerce her to wear that sweater to match the room, she just happened to have it on! We loved that. And we loved that she loved the room even more.
We were so happy to get to do something so fun for one of the sweetest women on the planet.

Then we hopped back in the car, and drove home with smiles on our faces.

What about you guys? Have you ever gotten an opportunity to help someone else with their space? Did they promise not to peek or were they in on the action with you? We actually loved that Granny gave us free reign and avoided that hallway so she wouldn’t see what was going on. And we’re so glad that she liked the result.

Christina C says
So totally sweet! Granny’s reaction is amazing. Made my day.
KarenH. says
Wow, what a pretty little bathroom make over! I loved seeing the stills of Granny reacting to the change (can’t see the video til I get home–I use my phone’s bandwidth at work :)
You really surprised me; when I first saw the painted toilet paper holder, my reaction was “HATE!!!” But in the context of the entire room, I liked it quite a bit. My favorite part was the picture of Granny and Papa. ::tearsnif:::
Kim says
You two are such thoughtful grandkids. You will always have a social place in her heart no doubt.
I was wondering about the outlet pre-renovation…..did it have some HOT wiring? Looks like it smoked a bit. From the ‘after’ photo, you must have fixed that for her too altho I didn’t notice it on your list. Good work!
Kim says
Sorry, that should have read special place in her heart. <3
YoungHouseLove says
Something Granny had plugged in at some point had burned out and damaged the outlet. It was still active, so we turned off the power to that room and replaced it with a new outlet so she wouldn’t have to worry about it anymore.
-John
Joy says
The room turned out so wonderful… the reveal made me tear up! so sweet. you guys are awesome.
Reghan says
It turned out so amazing! Bright and cheerful and love that you added things she already had. I actually had tears in my eyes watching the reveal. Something so easy for you guys to do that brings so much joy to someone you love :)
Colleen P. says
You know, the room is absolutely lovely, but the best accessory in that room is your Granny’s smile-that is a GREAT smile!
YoungHouseLove says
Agreed!
-John
Springfield Custom Home Builder says
Wow! What a wonderful thing you did for your grandmother. The bathroom turned out great–it’s so often the attention to those small details that really complete the room, such as the caulking.
Nicole says
The reveal was great! I’m so glad you guys did this “little” job for granny. I’m always nervous around rust and things that might show though repairs, I’m never sure how to handle them. Look at that, you just painted it with rustoleum, and called it a show. Even the back of the sink would have thrown me off, but not you guys. You tackled it with all the right tricks, and it looks wonderful. The end result looks so good, especially with all the nice accessories. And if granny was any cuter, I wouldn’t be able to handle it. Thanks!
YoungHouseLove says
Aw, thanks Nicole!
xo
s
Elizabeth@ Food Ramblings says
The pictures of granny are so sweet and gave me goosebumps!!
Kim says
Just when I think I can’t love you guys anymore than I do, I suddenly do!!!
Stephanie says
This post put such a smile on my face- and made me wanna call my Granny!
Cathy says
Really cute, I love the video! Great job!
I love that fabric too and used it to ModPodge a filing cabinet recently!
(http://www.cathygreeninteriors.com/2012/06/filing-cabinet-makeover/)
YoungHouseLove says
So cute!!
xo
s
Jen R. says
I’m glad I’m not the only one crying! Great job!
JoDi says
Your Granny is adorable! So glad you made over her bathroom to be as fresh and pretty as she is!
Michelle says
love it, just love it. You guys are fab. Just wanted to let you know.
YoungHouseLove says
Aw thanks Michelle!
xo
s
Liz says
I love this makeover! It’s such a cute and cheery space just like her (from what I can tell.) The hubby and I can’t wait to buy our first place and start DIYing it up (is that a word? It is now!) Most of the houses her are really outdated (ie: UGLY!) and we are just itching to make one our own. Thanks for all your inspiration.
Kati says
Granny & Papa–that’s what my paternal grandparents were called, too! You’re the first ones I’ve heard of who also called their grandparents Granny & Papa! I makes me so happy to see their names together! (And, BTW, great bathroom makeover!)
Abby says
What a beautiful thing to do for your Granny!
Lauren says
What a lovely thing to do. And your granny is obviously a very chic woman – look at that sweater and scarf! Beautiful!
Amber Michael says
Thanks for sharing this story! You did an amazing job and she is such a cutie pie!!
Megan says
This made me cry and smile at the same time. So glad you could make her day.
Marie says
Your granny is the friggin cutest!!!
Jen W says
Oh man, the picture with the three of you and Granny’s joy… TEARS! So good.
Sharyn says
What a labor of love! This made my day.
Lauren L says
Um ok that video totally made me cry! Makes me excited to be a sweet Granny myself one day :) You guys did an amazing job on the bathroom, and for so little money! Color me impressed :)
Jen says
You work magic in any space you touch. Thank you so much for sharing the thought out and details process. I adore the fresh colors you selected, they are a bit unexpected and turned out fantastic! Love. It. All!
And sweet granny, I could just hug her!
xo!
Jen
Trude says
Granny is adorable!! What a lovely thing to do. That soft violet turned out lovely on the walls, and the fabric for the curtains is so pretty!
Kathy says
My favorite post to date. Precious.
chrissa says
The bathroom is lovely, but what touched me, was your Granny’s smile. She’s just lovely.
It made broke my heart and made me cry she’s so beautiful.
I love you Petersiks. Your posts make me so happy. Thank you.
YoungHouseLove says
Aw, you’re so sweet! Our aunt went to visit her and showed her the post on the blog and Granny loved reading all the kind comments!
xo,
s
Selina@CreativeJuicesDecor says
Oh my word, Grannies smile in the last picture is PRICELESS!! I love that! YES, I have had the opportunity to do something special for my brother. His wife left him and he had to find a new home (after moving out into a mobile home for a while!) Finally this year he was able to buy a home that needed some TLC. I told him to give me 150.00 and I would thrift shop for him and come over one weekend and makeover his home (I live 5 hours away from him) I came over one weekend and fixed the entire thing up! It was SOOOO much fun and I hoped I blessed him after being so burned. This is the post: http://www.creativejuicesdecor.com/2011/06/before-and-after-my-brothers-home.html
YoungHouseLove says
Such a fun idea!
xo,
s
Susan Winters says
That was delightful! I know I’m going to be looking at our tiny bathroom for the next few days with improvements in mind. I know it’s a rental apartment but we’ve lived here for 6 years and plan to stay for many more so it’s time to get serious about color for the walls and new caulking for the tub. You’ve inspired me to go a little further in designing a finished space instead of just temporary fixes. Thanks : )
Alicia says
Did I miss the name of the fabric? I think it would be perfect for a project I’m working on!
YoungHouseLove says
It’s by Braemore from a local outlet but we sadly don’t know the name!
xo,
s
Kelli says
I’m so sad that I missed you being in town… someday I will buy you dinner when you’re in Huntington. I am (obviously) behind on my blog reading.
YoungHouseLove says
Aw you’re so sweet Kelli!
xo,
s
Laura says
How wonderful! I loved this whole process. WV is very close to my heart since it’s where my parents grew up/met/went to college/got married, where I went to college, and where all of my extended family lives! I got so teary watching your Granny’s reaction when she finally saw the finished product. Imagine how loved she will feel every time she walks into that beautiful little room. Nice work, folks. =) Hugs and kisses from NYC.
ashley says
I’m doing some blog-reading catch-up and I just read this. Um, Granny is precious! I was just grinning like a kid through the video. She seems like such a wonderful lady!
And the bathroom makeover is pretty great too :)
Monica says
You guys are simply amazing!! Inside & out!
Claudia says
What a sweet thing to do for your Granny! And the room’s so pretty too.
And maybe a little tip for the caulking: my dad relied on dish soap for caulking. He always had a little plate or bowl with dish soap next to him and dipped his finger in it before he pulled it along the caulk line. That way it got really smooth and the excess caulk didn’t stick to his fingers as much.
YoungHouseLove says
Love that tip!
xo,
s
Amy says
Oh my gosh! Your “Caulking Cleanly” tutorial completely revolutionized my caulking confidence! I’ve caulked a few places in my bath areas and I found it hard, had to start over a few times and had general anxiety about it (I’m a bit of a perfectionist).
Well, we have a beautiful 2nd bathroom with warm travertine tile floors, a gleaming white tub with Kohler rainbath fixtures, and bright white subway tile shower enclosure around the tub but after stripping the partially molded caulk about a year and a half ago (contractor used either a cheap brand or wrong type), I had caulk anxiety about messing it up with a gooey mess!
I followed your video (I learn so much from video tutorials) and now my bath looks gorgeous and professional and we can now bathe and shower in there! I am really looking forward to quitting showers in the tiny guest bath and enjoying long soaks in my pretty tub! Thank you!
Ema says
Tears! You guys are awesome, the room looked great, and Granny’s reaction was so cool to watch!
Christina W. says
I dunno how I missed this in September, but a tear just totally rolled down my cheek from your granny’s reaction. I want to hug her!
Phyllis says
This fellow West Virginian loves that you were so helpful to your granny! It looks great!
Susan Gray says
That was precious…what a good idea to do for a relative you love!
Lizzie says
That is such a great job on a small budget! Sherry, you look so cute- love that top on you and I can see where Clara gets that fantastic smily personality ( Granny!)
Katie says
Your granny is so adorable! The reveal brought happy tears to my eyes!
Andrew C. says
This was really cool. I’m new to your blog and just started going through some of your posts on the Projects tab. I also couldn’t help but let you know that I also live in Huntington, WV. The house looks very similar to types of houses in the Westmoreland neighborhood that my grandmother lives in. These posts are giving me lots of ideas for the house my wife and I just bought. I look forward to reading more of your posts!