Just when you thought we were done with backyards (we shared the duplex backyards last week) we’re back with yet another… backyard! And this beach house backyard has been a long time coming, and it started out in an incredibly lackluster state – so we’re excited to show you what we did back there. It might be one of our favorite updates to date – especially since this backyard is really small but it all feels super functional and useful for our family – we’re out there all the time! And it’s about 1000% better than where we started.
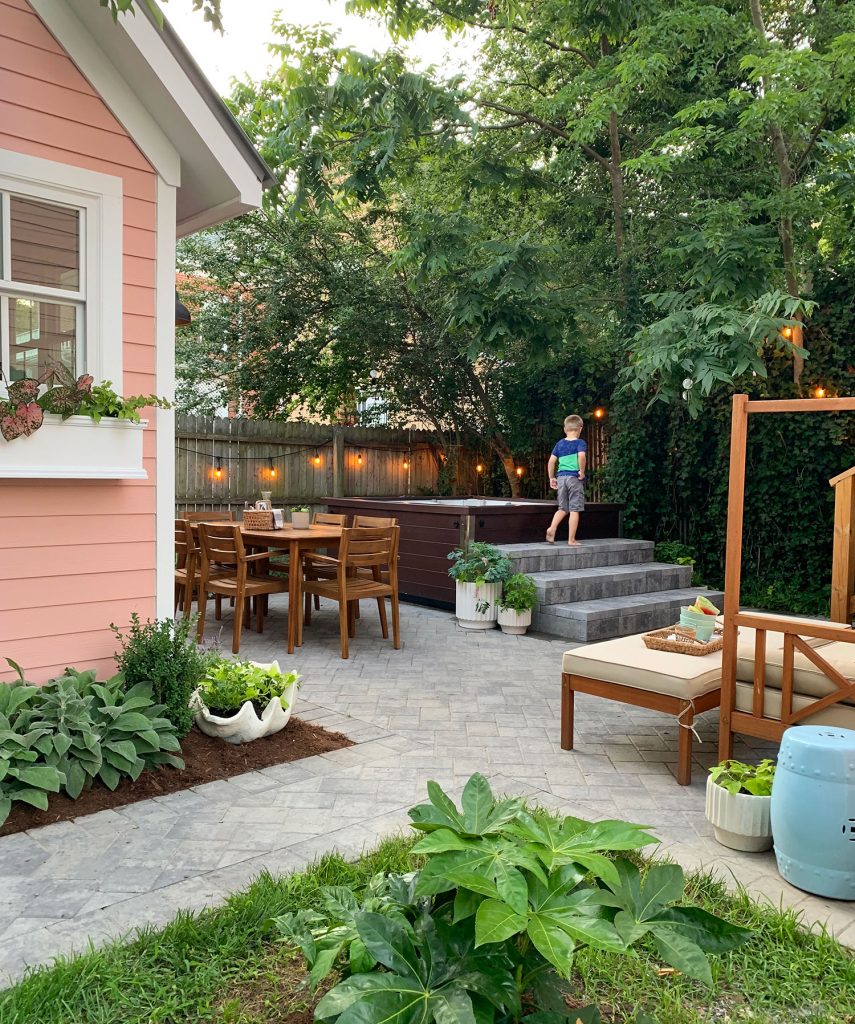
There’s a lot to see because we squeezed in SO MUCH into a relatively small space. And surprise! That actually turned out to be the key to creating this cozy and private-feeling area for our family (despite being closely surrounded by neighbors on all sides). But first, let’s flashback to October 2016 and the overgrown jungle we had just purchased. Gulp.
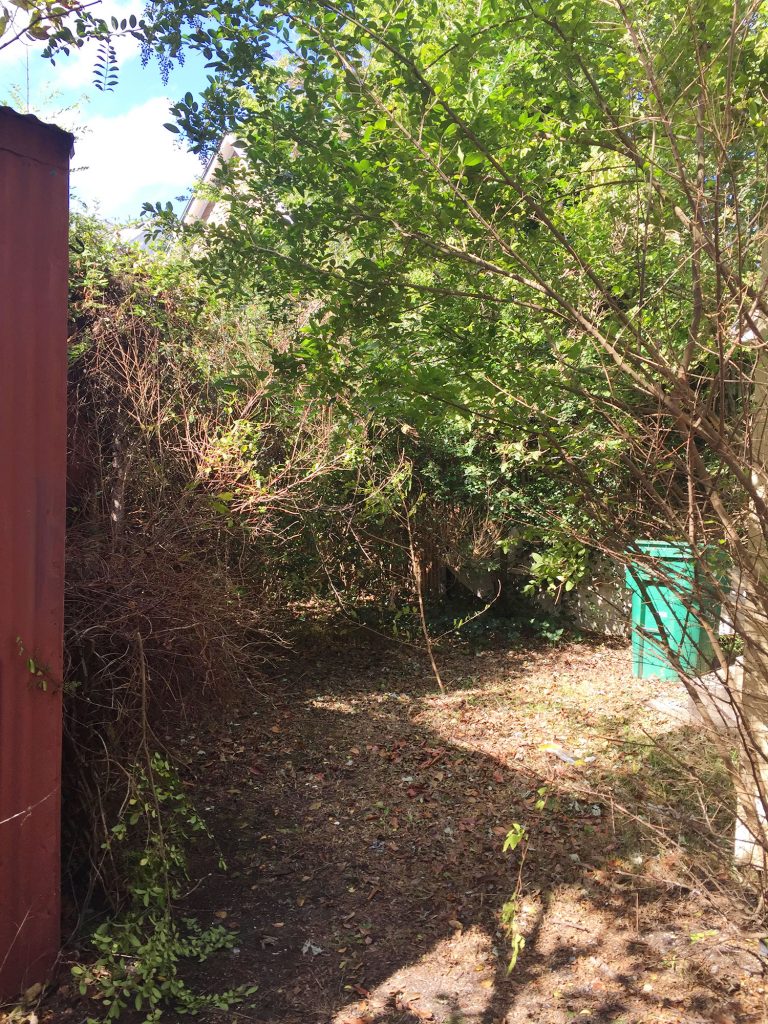
The next photo is taken just a few weeks later, right after we cleared some of the brush and weeds. It’s also the project that gave me the worst case of poison ivy of my life. #memories
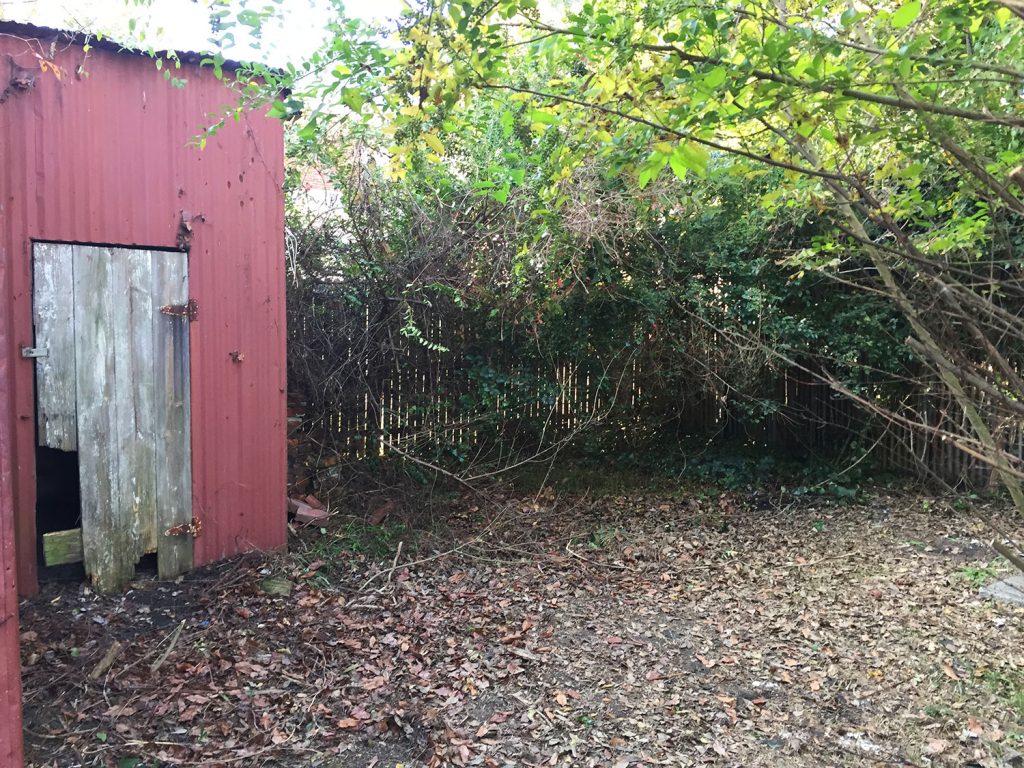
So yes, this backyard and I got off to a rocky start. But all is forgiven now because it has become one of our absolute favorite places in the world. No joke. We are out here basically every night that we are in Cape Charles.
The end result is also made sweeter by the fact that we had to wait for it longer than originally planned. Our original schedule was to tackle this in the fall of 2017, once our contractor Sean finished the inside of the house. But a new little project distracted all of us (ahem, the duplex!) and we back-burnered the beach house backyard. So for our first few months of staying in the otherwise finished beach house, this was our view out the back door:
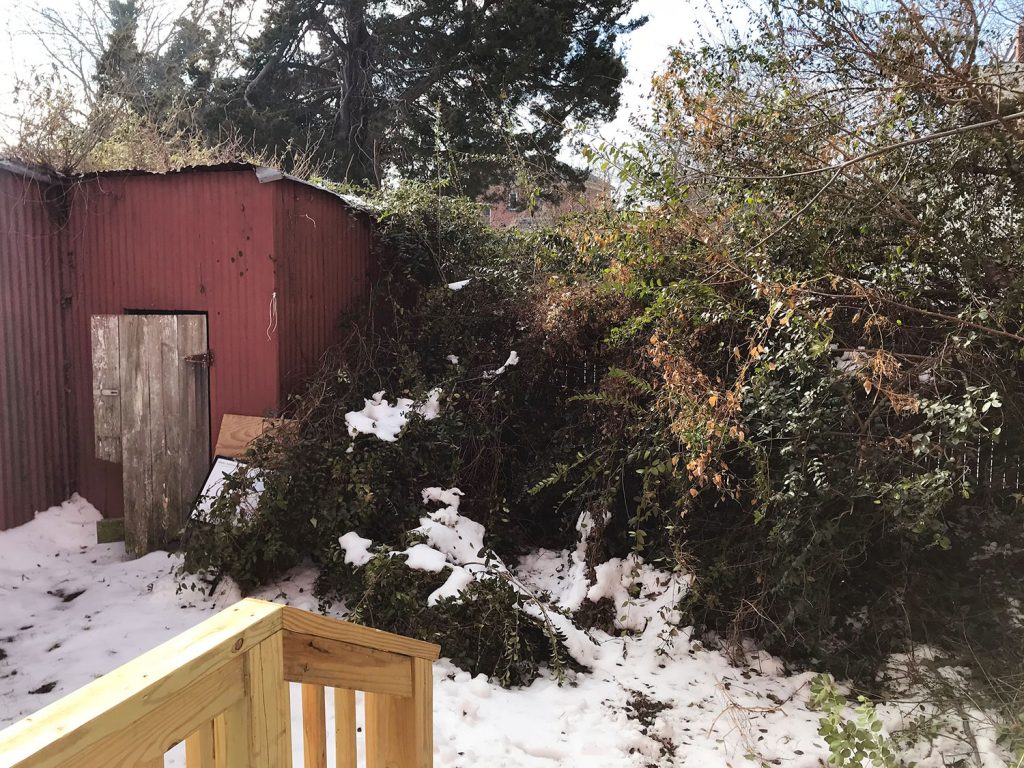
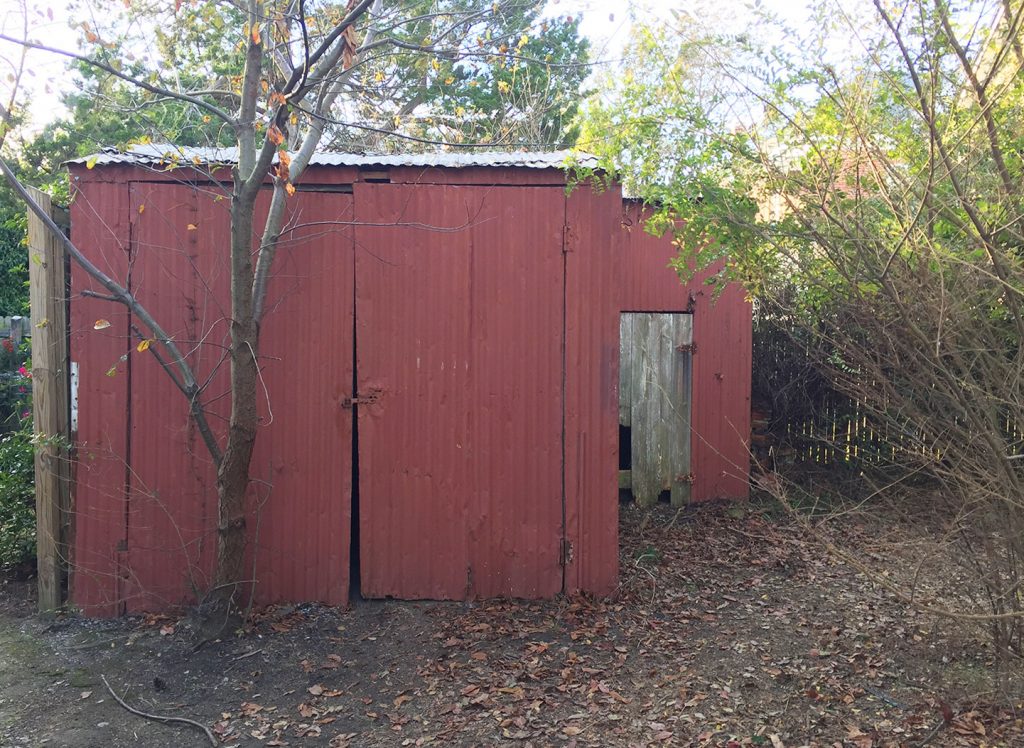
When the town delayed our duplex plans in early 2018, we briefly returned attention to this area. Sean and his guys cleared out the overgrown vegetation along with the old, rusted, metal shed and we began planning a new one. You may remember hearing Sherry and I debate/argue about the new shed on our podcast around that time. You can hear the details of the disagreement in this episode, but here’s short version: the old shed had been built about two feet onto our neighbors’ property line AND any new structure was required to be set back two feet from that now-closer-than-we-originally-thought property line.
So our new shed would have to encroach four more feet into our yard than the last one had. Sherry didn’t like that and argued for no shed, but I thought one was necessary (are you surprised?) to house all of the sandy stuff like beach chairs and umbrellas and floats that we were dragging into the house for the first summer without it. I’m like the Oprah of backyard sheds. To every yard I’m basically like “you get a shed! you get a shed! you get a shed!” Spoiler: I was right – Sherry even admits it on camera in the video later in this post.
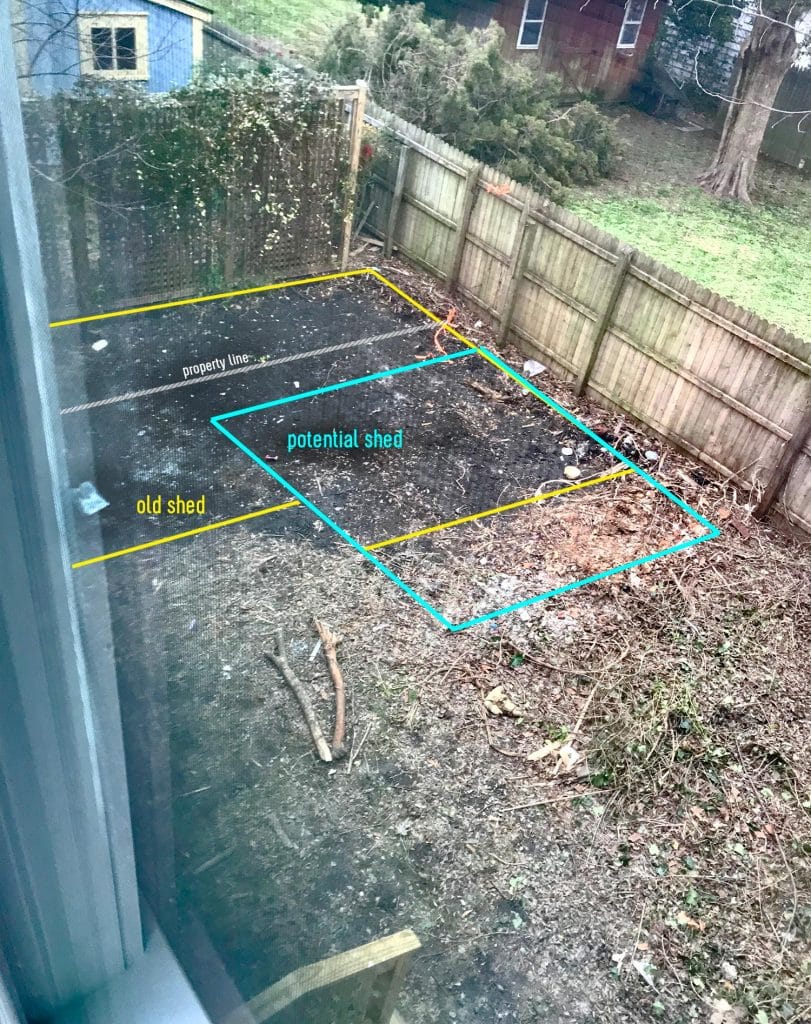
BUT ANYWAYS… by the time we agreed on something, the duplex delays had been resolved and the crew was full steam ahead over there. Meaning this backyard got left in the dust – or, more literally, the mud – for nearly a year.
Having an incomplete muddy backyard for our first summer in Cape Charles wasn’t the worst thing ever, but it was a noticeable rain on our proverbial parade. Because when there was an actual rain (or just a bunch of wet sandy kids coming back from the beach and using the outdoor shower) there was an actual parade of mud into the house even after they showered – cause there was mud between the outdoor shower and the back door. So it made us even more excited to complete this space.
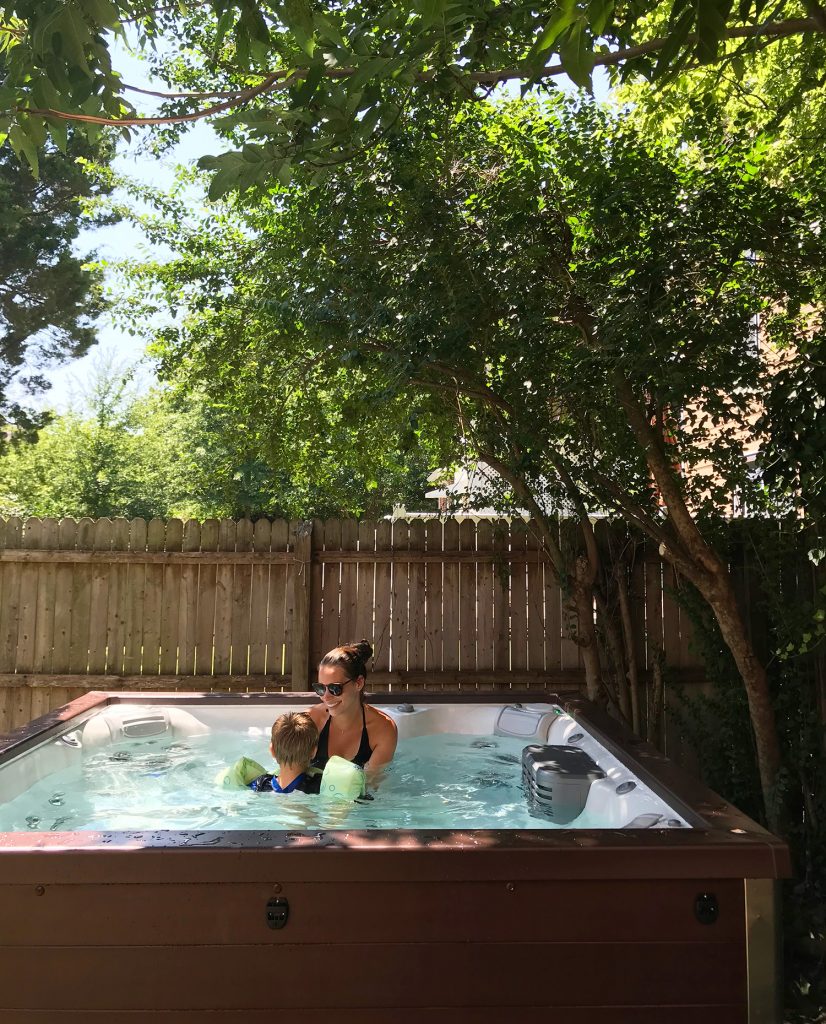
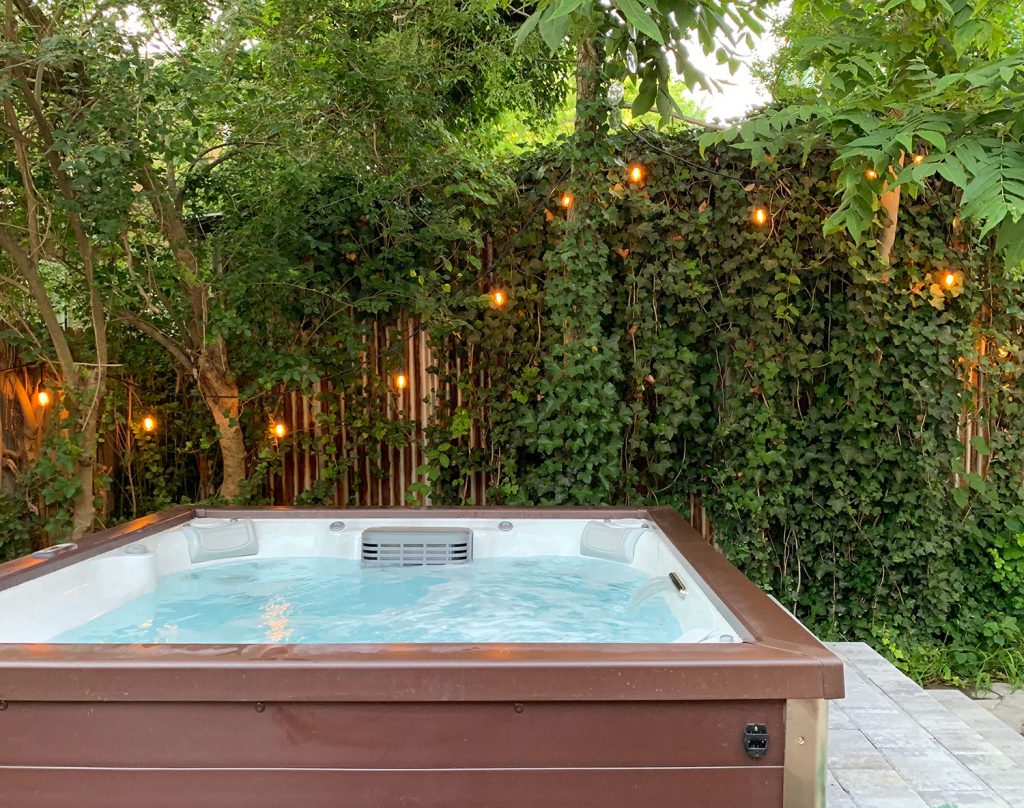
We temporarily satisfied that appetite later that summer in the form of the hot tub we bought in August. Sherry (Lover of Hot Water, First Of Her Name) always wanted one, and I think it was also another way for us to make lemonade out of the limbo that the yard was stuck in. You’ve probably seen pics of it like this on Instagram, and there’s a reason why they’ve always been cropped like this.
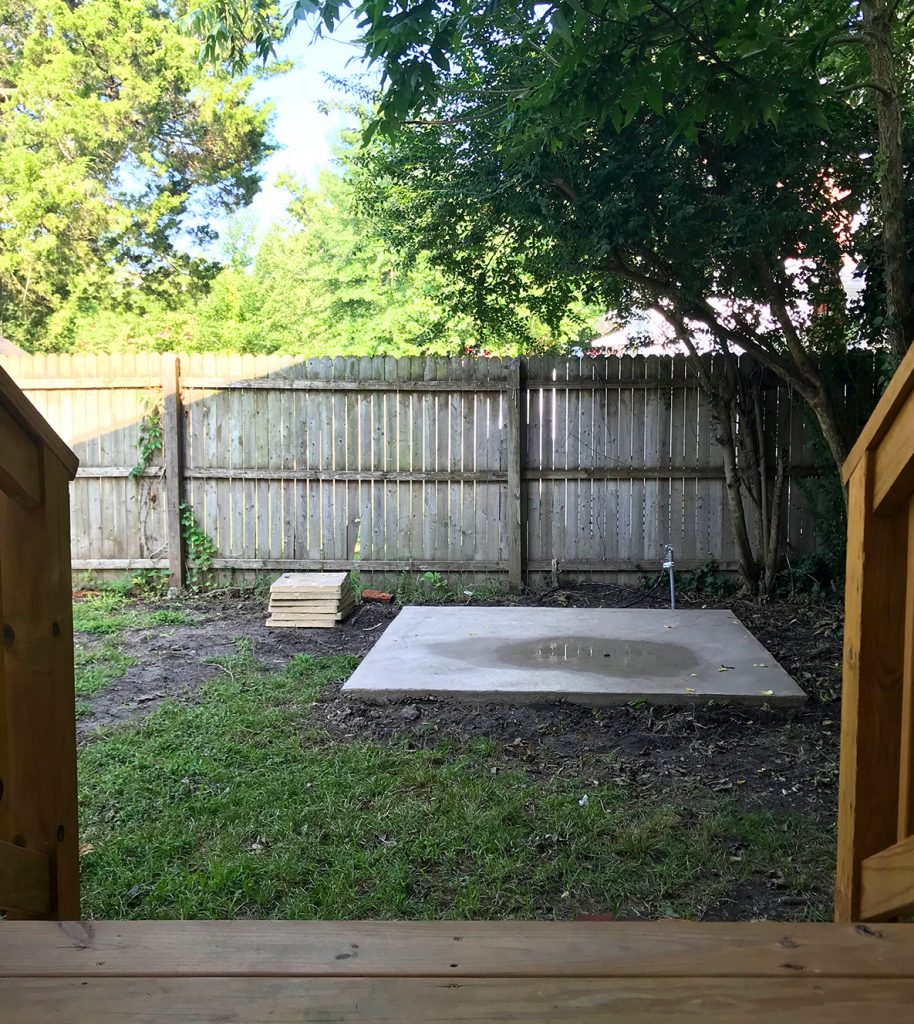
The yard around the hot tub was just a grassy, muddy mess. We threw down a few large pavers to create a relatively mud-free walk to and from the hot tub, but it was – shall we say – subpar. I don’t even have any pictures of it. But here’s one from right before the hot tub was delivered to give you an idea. That’s the concrete pad we had poured for it to sit on.
So while the hot tub allowed us to enjoy the backyard, it also made us even more impatient to finish the rest of it. So earlier this year – once the crew was done on the inside of the duplex – we finally got to work on the backyards of the beach house AND the duplex somewhat simultaneously. It was kind of a whirlwind, but we were able to get some cost efficiencies by bundling the projects together (basically 3 sheds and 3 patios all at once – which saved us some money because we got to bulk order materials like stone and hardiplank and negotiate thanks to sheer shed volume).
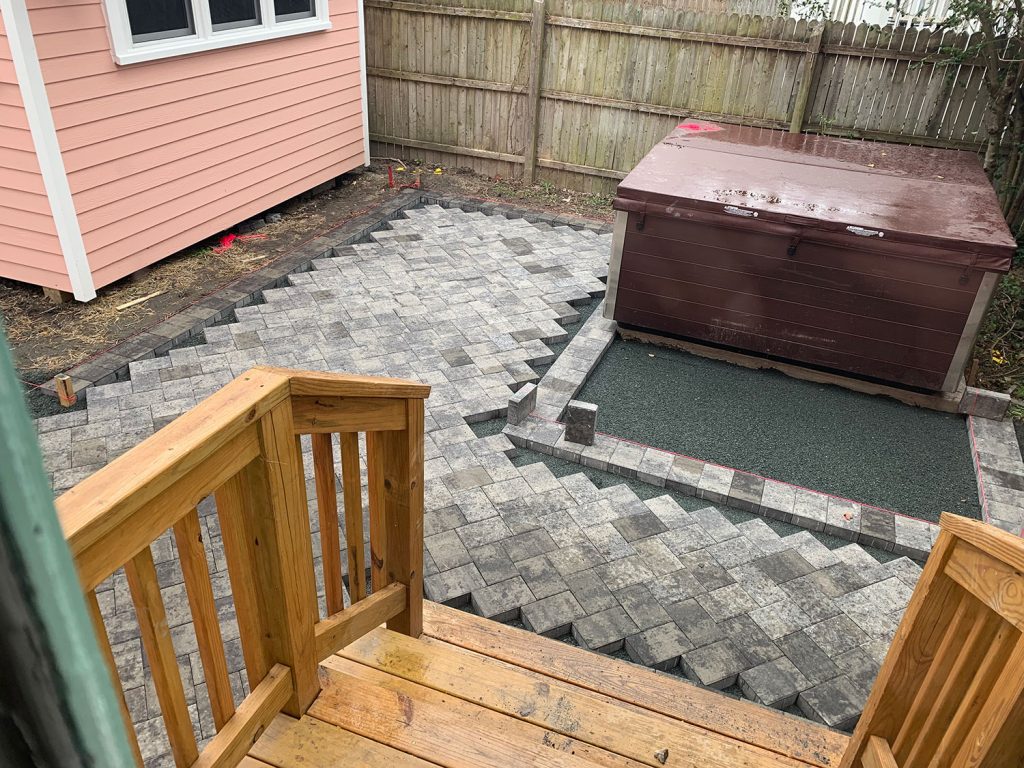
I wish I had more progress photos, but we didn’t catch a whole lot of “in between” stages on our visits out to Cape Charles. But just like the duplex sheds, this one was custom built in place by Sean’s crew – using the same Hardiplank siding, the same pink paint color as the house (Mellow Coral by Sherwin Williams), and even the same tin roof that we’ve got on the main house. And I know it sounds counter-intuitive, but that was actually cheaper to have this custom built than to have a pre-built one of the same size trucked in.
Here’s what the area looked like back in March, after the patio crew was done and it was now up to Sherry and I to turn it into something inviting and cozy.
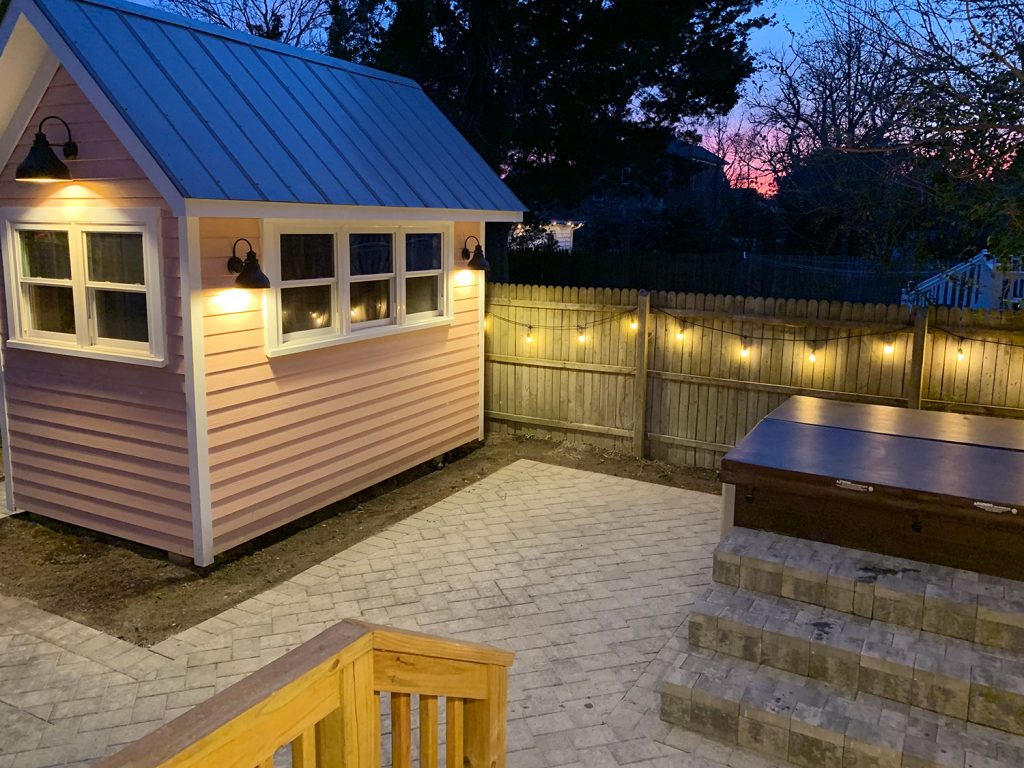
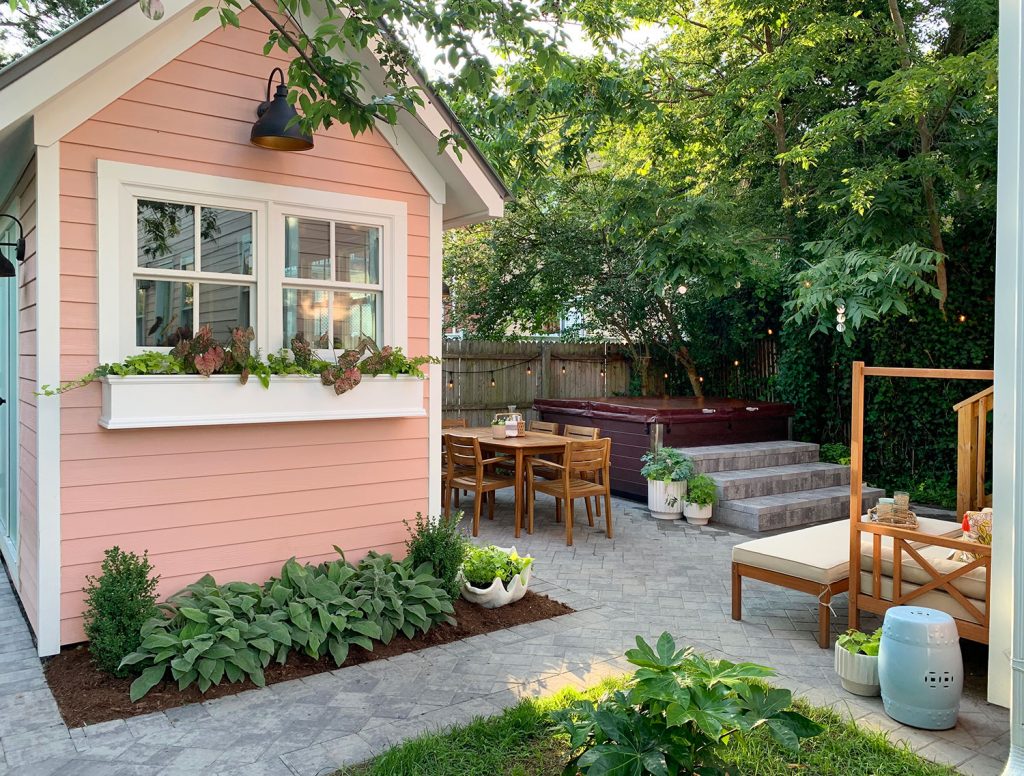
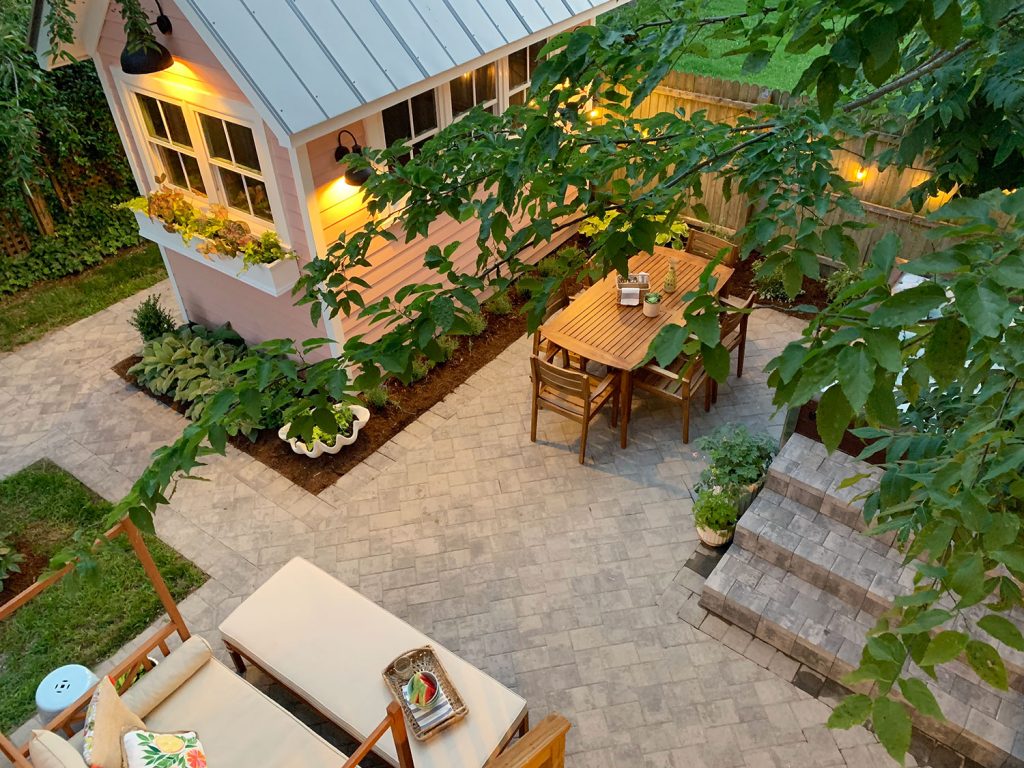
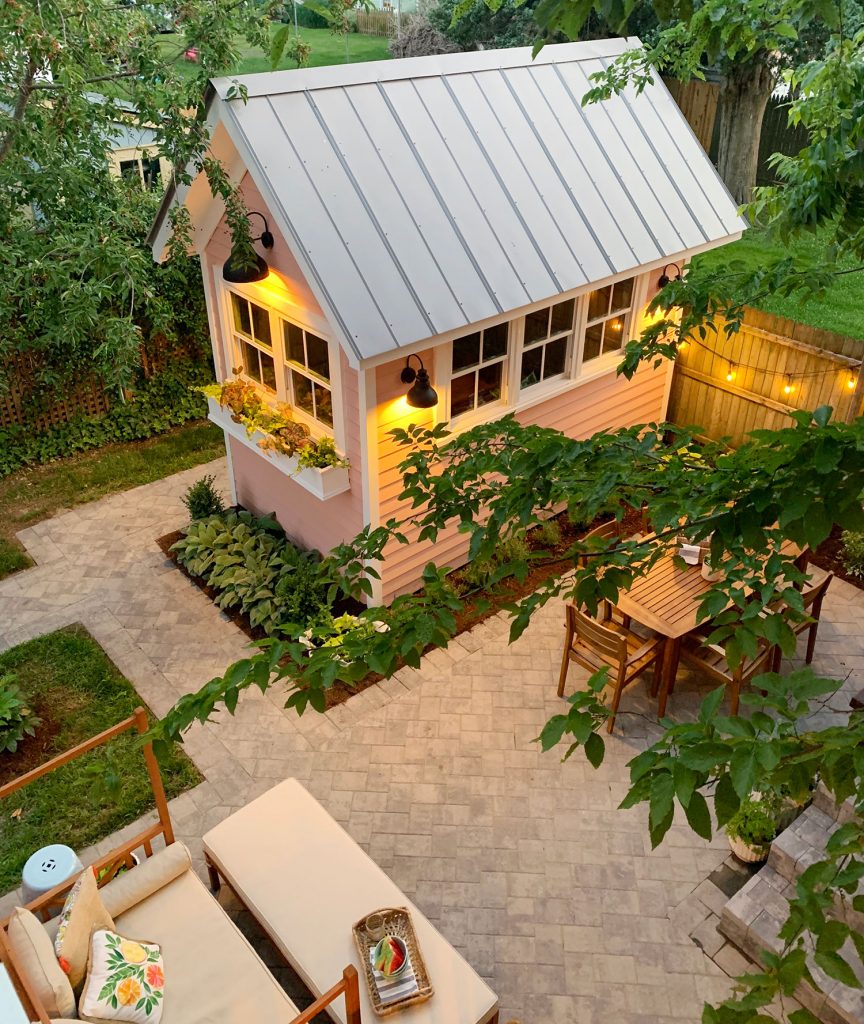
And thanks to a few strategic furnishings and a lot of greenery, here we are today! Our little backyard beach house oasis…
So now that you’ve seen how we got here, let me point out some of the details and decisions behind what we did – and why it works so well for us. Let’s start with my pride and joy: the shed. Well, not the red rusted out shed below – the new one. Remember how I said the old shed was built 2-feet over our property line? That tree is effectively the end of our property.
We were initially annoyed by the setback rules for the new shed, since it created a 4-foot wide “dead zone” with the property line shifting 2′ over and the shed having to be placed two more feet to the right of our property line. But then we realized we could make the unconventional choice of putting the shed doors on THAT side of the shed…
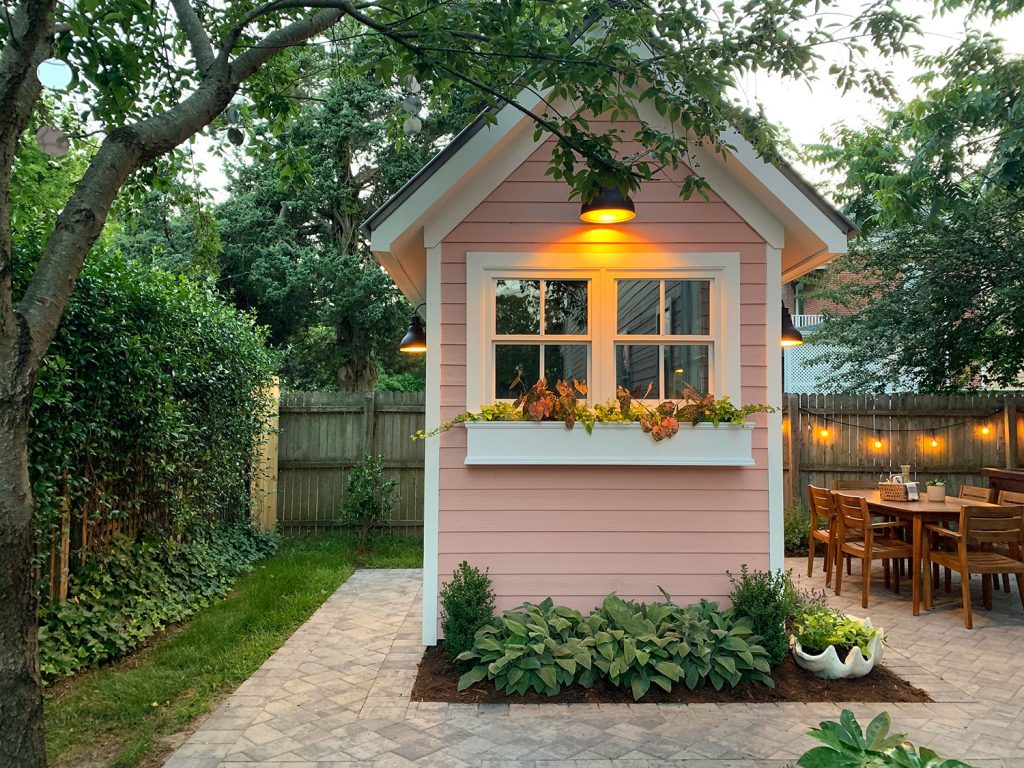
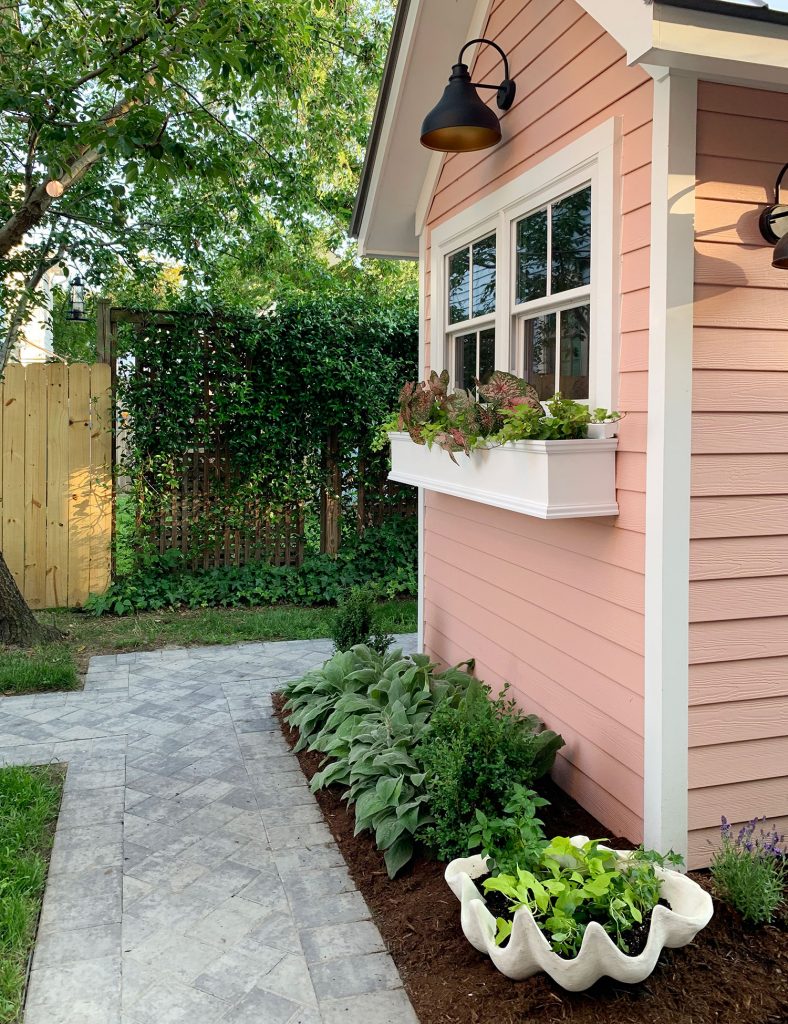
It not only made use of that “dead zone” because we realized we could just add a paver path along the 2′ shed setback strip of our property (so the shed no longer felt oddly pushed to the right), and it also meant that we didn’t have to account for door swing clearance on the patio side of the shed, which would’ve prevented us from having a dining table out there. Plus we could focus on making the more visible sides of the shed pretty to look at (like adding a big window box on the front, for example). They call me The Shed Whisperer. Just kidding nobody calls me that.
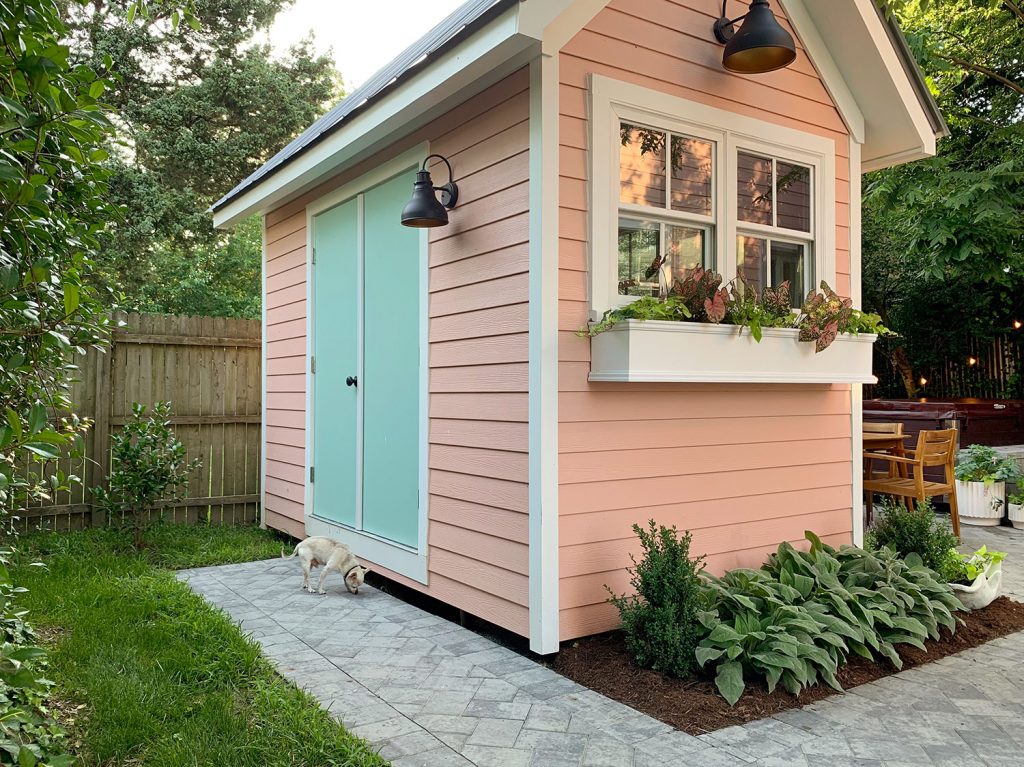
I’ll show you the inside of the shed once it’s not a disaster pile, but trust me that it has been a game changer storage-wise. We have no garage or basement or anything at the beach house, so until now all of our tools, yard equipment, beach gear, etc has been stuffed inside in various places. So it has been HUGE to be able to keep all of that messy stuff out of the house now.
The shed is 7′ x 11′, which is kind of a weird size – but we chose it precisely to fill the space (it leaves us enough room for everything else we planned back there, but is still large enough to create some privacy and contribute to the cozy, nestled feeling we wanted).
Speaking of privacy, Sean also added that little section of fence for our neighbors since their existing one wasn’t completely enclosed. It couldn’t be as tall as the lattice fencing due to a large tree limb that we all agreed we wanted to keep, but now both of our dogs can roam free in our respective yards and eventually the new section of fencing will weather to be the same color as the existing stuff so it’ll blend right in.
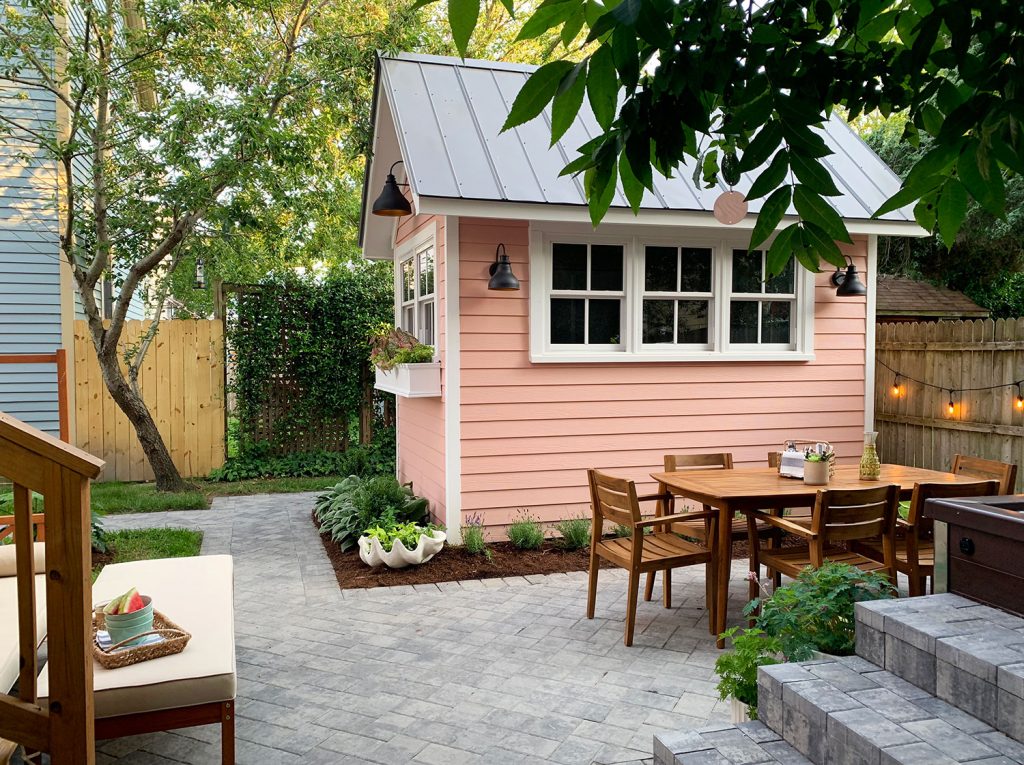
It’s also the same height as the fencing on the right of the shed in the shot above, so it should feel nicely balanced once it darkens in color over time.
The other big feature we added (and perhaps the other “elephant in the room”) is not the hot tub itself, but the hot tub STEPS. The Jacuzzi came with some basic plastic steps that we used all last year, but they were small, low, and a little unstable. So we knew we wanted something more permanent and substantial, and boy did we get it. Ha!
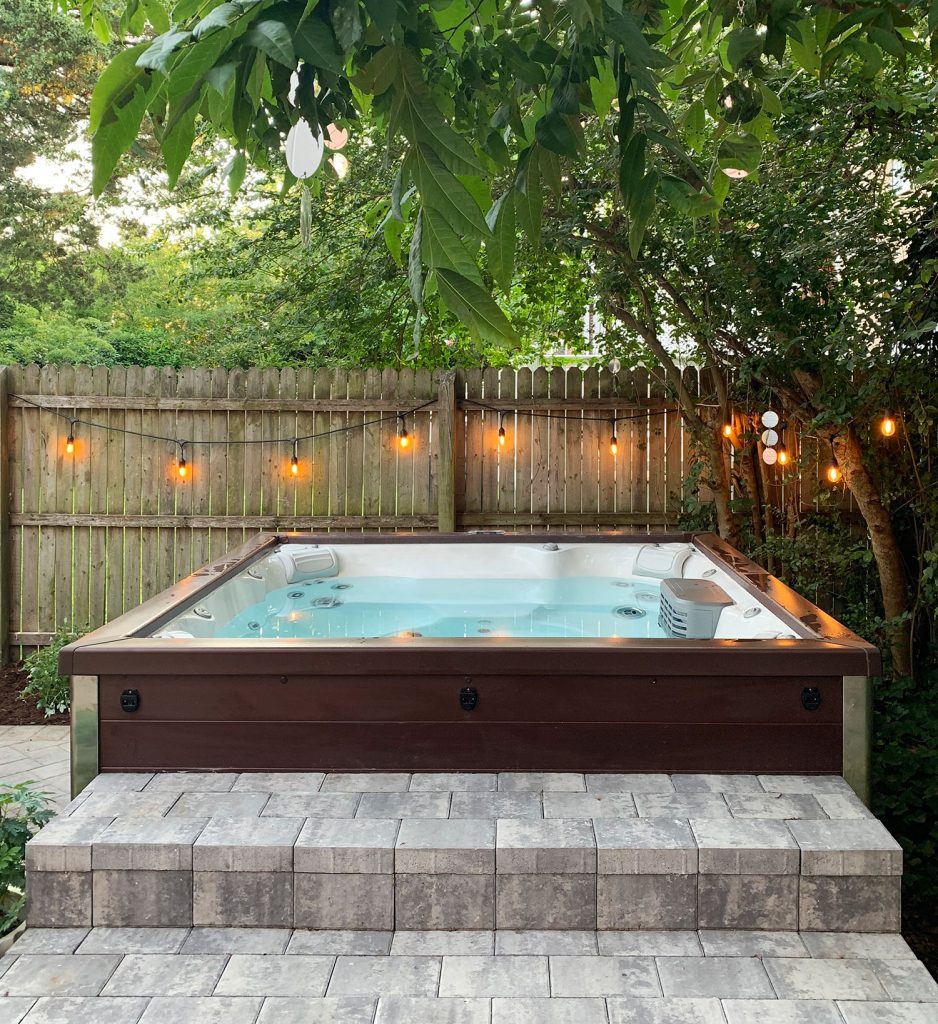
The crew who did the patio made these wide stone steps using a cinder block base covered with the same affordable pavers (they’re adhered in place over the cinderblock). The steps not only provide a much easier entry into the hot tub itself, but they also act as a convenient place to set your drink while you’re in the water and, better yet, even create additional seating. Sherry describes them like having a console table/bench right outside the hot tub and it’s true – we set a ton of stuff down on them, sit on them, etc.
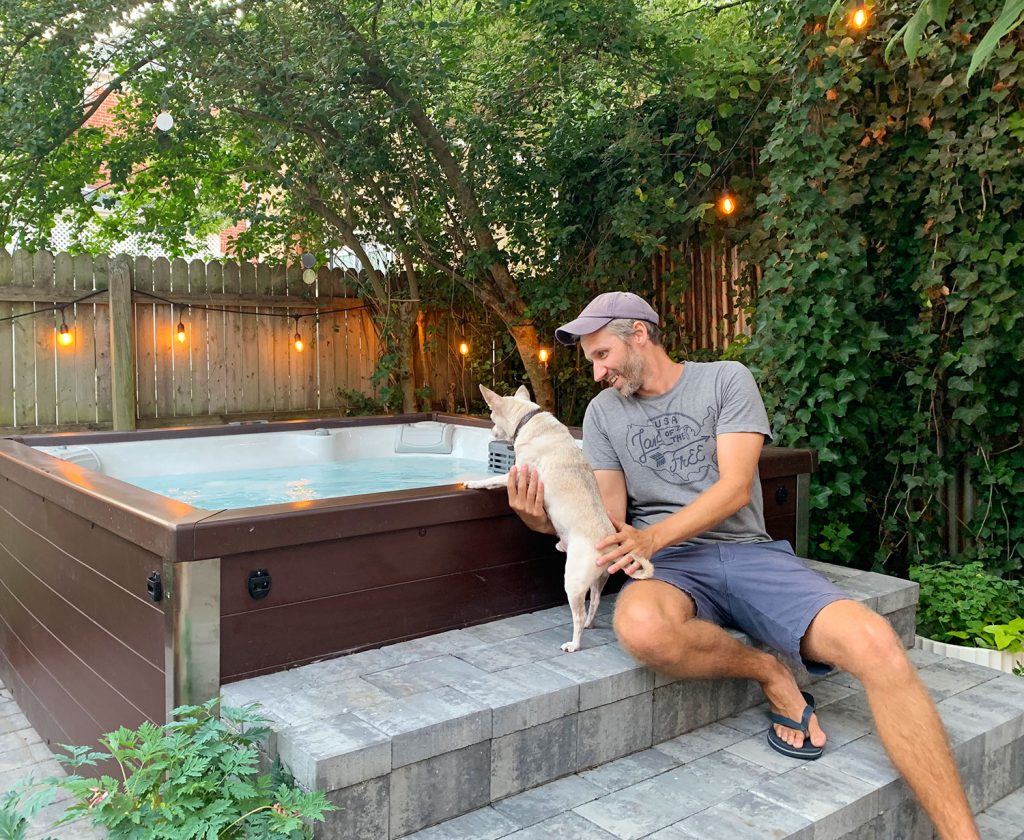
These stairs are actually one of the shadiest spots throughout the day so they’ve become one of the more popular spots for our kids to hang out. They’ve probably eaten more snacks and meals there than at the table! And I know we’ll be so grateful for them when we have people over for a 4th of July cookout next week! Flexible extra seating and space to set things down = jackpot.
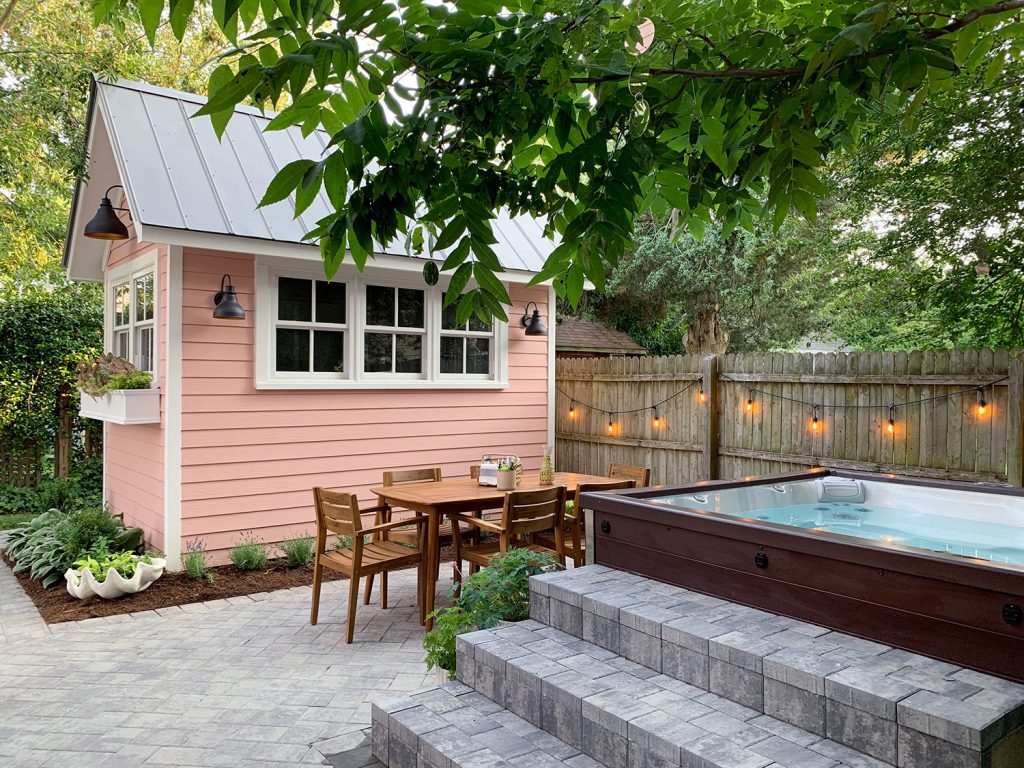
As for the dining area, we just wanted something that could seat 6 people but still fit in that pretty small space between and shed and the hot tub, and this 7-piece set was such a great buy (it’s even lower now because it’s a “Special Buy” – just $561 for seven pieces!). We paid $100 more and still thought it was an awesome deal because we saw it over here for $800 something!
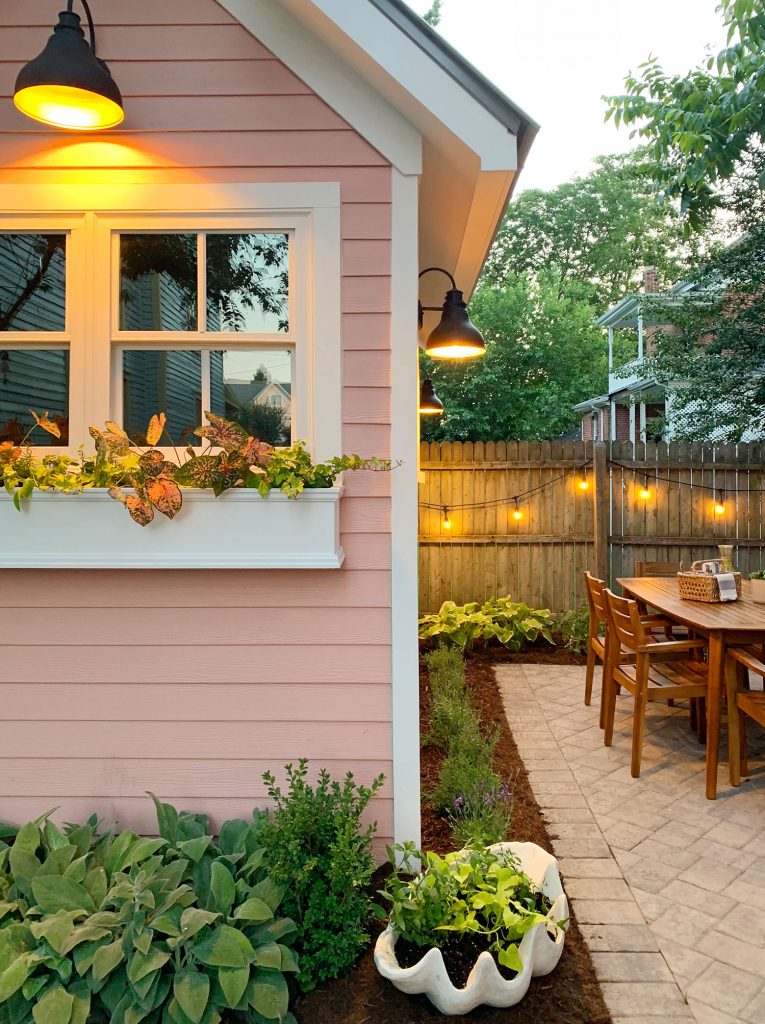
I also have to point out a surprisingly beloved feature that is a complete fluke. See all that ivy? That’s our other neighbors’ old, rusty, metal shed (also built 2 feet onto our property – just like our shed had been shoved over on the other side). We originally hated it, but now it adds SO MUCH to the nestled-in-greenery vibe back here that we’re hoping our neighbors don’t replace it anytime soon.
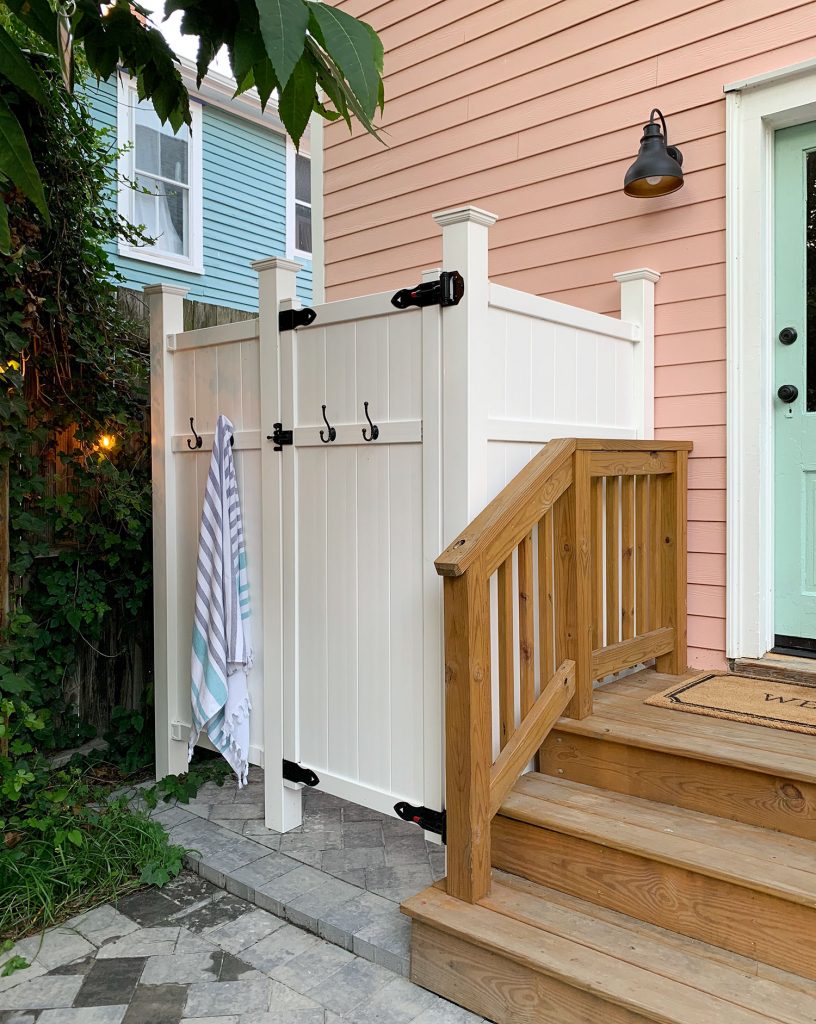
Right across from the hot tub is our outdoor shower. Our contractor installed the same vinyl outdoor shower kit that he put in over at the duplex and it’s quickly becoming the most used shower in the entire house. We recently had to cut down some ivy that was encroaching on the house too much, but we’re eager for it to grow over the shower a little bit more because there’s something weirdly satisfying about having greenery in your shower.
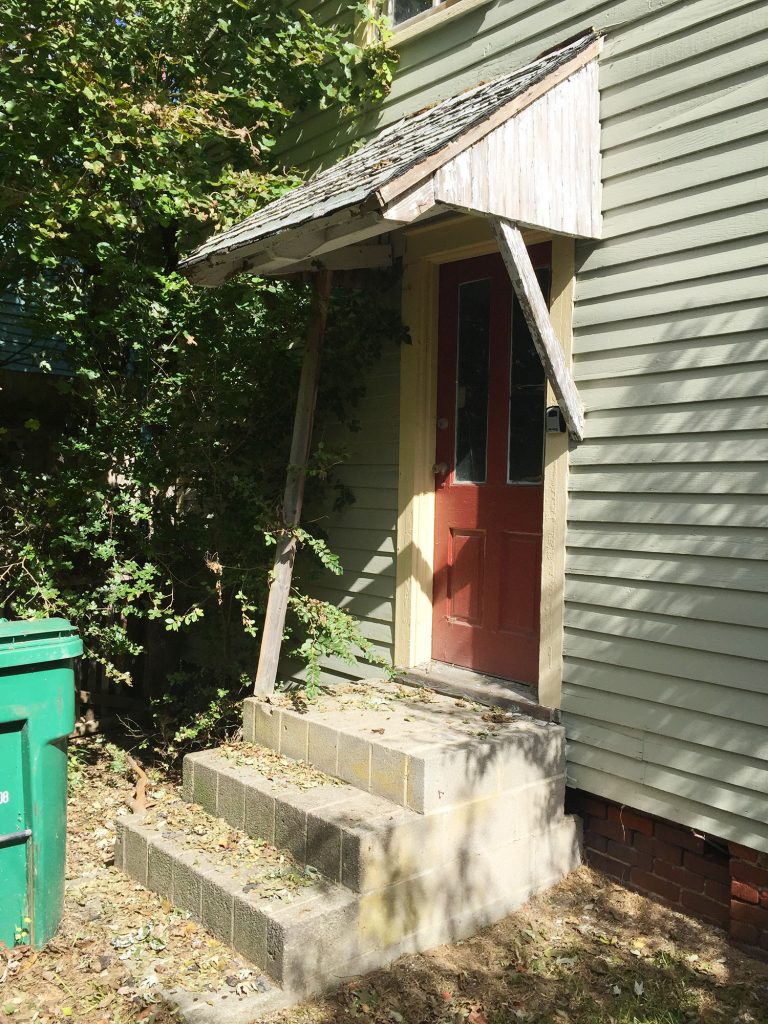
Oh, and this is what that same area looked like when we bought the house – complete with a not-so-safe-looking awning that we tore off ourselves. But the back door is still the same one, Sherry just repainted it a cheerful new color (SW Pale Patina – the same color as the duplex shutters and the doors to our pink shed).
While I take full credit for the shed (I also take full credit for my modesty) – I will give Sherry her due for the little lounge area she carved out in that spot next to the back stairs. We originally considered a planting bed there, but Sherry realized if we extended the patio all the way to the house, there’d be room for one of the functions the back yard lacked: a place to recline, kick your feet up, dry off in the sun after hot-tubbing, read a book, snuggle the dog, whatever.
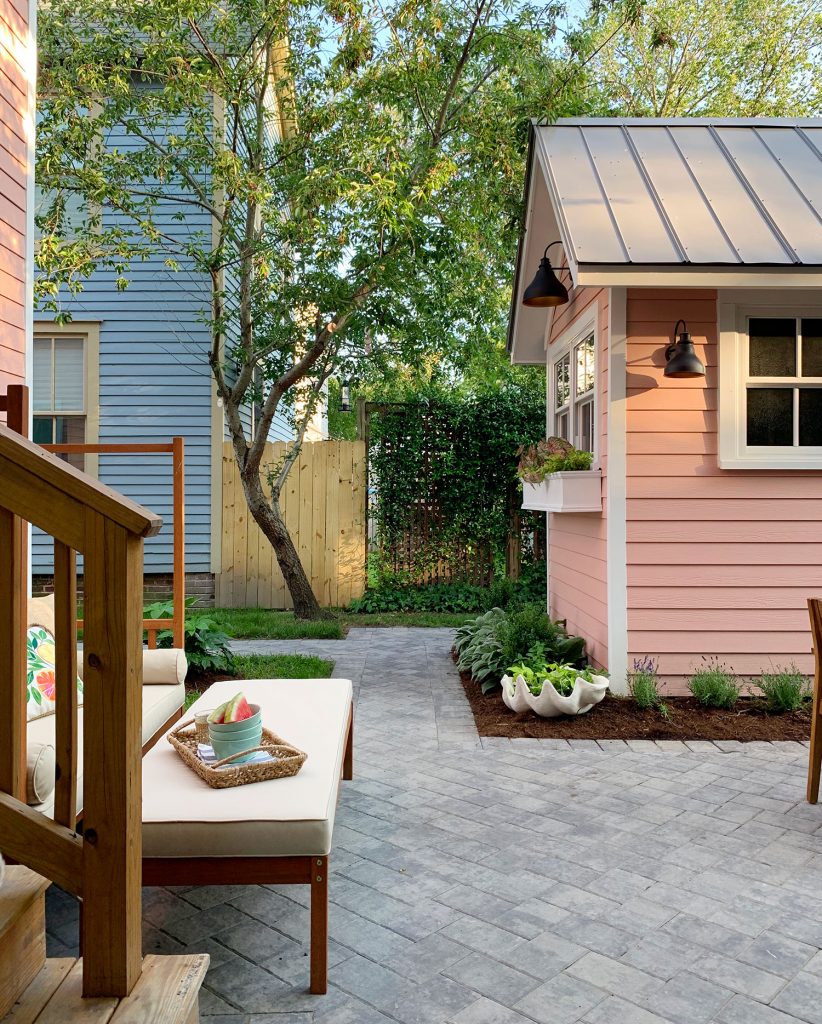
She kept telling me she wanted something like two lounge chairs side-by-side, almost like you’d find on a pool deck. But we actually had a lot of trouble hunting down something that wouldn’t stick out too far into the walkway. But eventually Sherry stumbled on this lounge set and it’s been PERFECT (we got it on Amazon, but now only the bench is there for some reason – but we did find that one on Ebay). It has been perfect, not only in size, but it’s also super flexible. The bench can be pushed in to create essentially a big outdoor bed, or pushed out to become a foot rest, extra seating, or even a little coffee table.
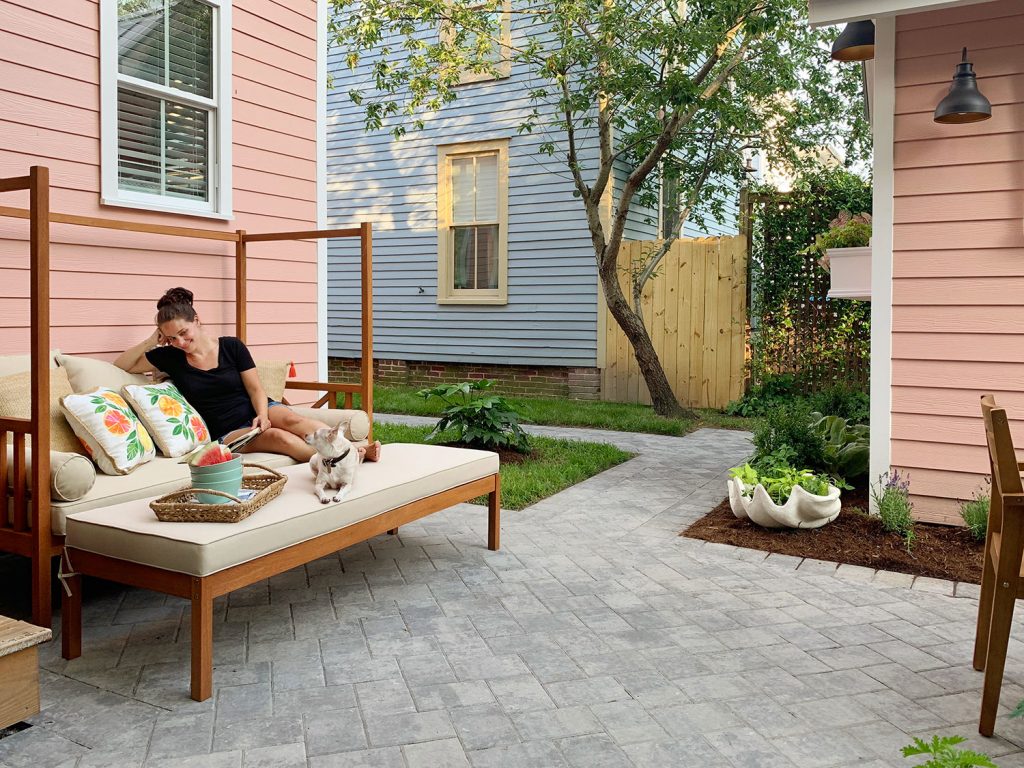
The listing photo shows it with a fabric canopy draped over the top rails (and inexplicably, a rain chain???) but none of that is actually included. So we originally planned to cut off the posts, but they’ve kinda grown on us. The house provides plenty of shade so we’re thinking maybe some string lights around it? Or some outdoor curtains for effect – like this $4000 version but less intense maybe?
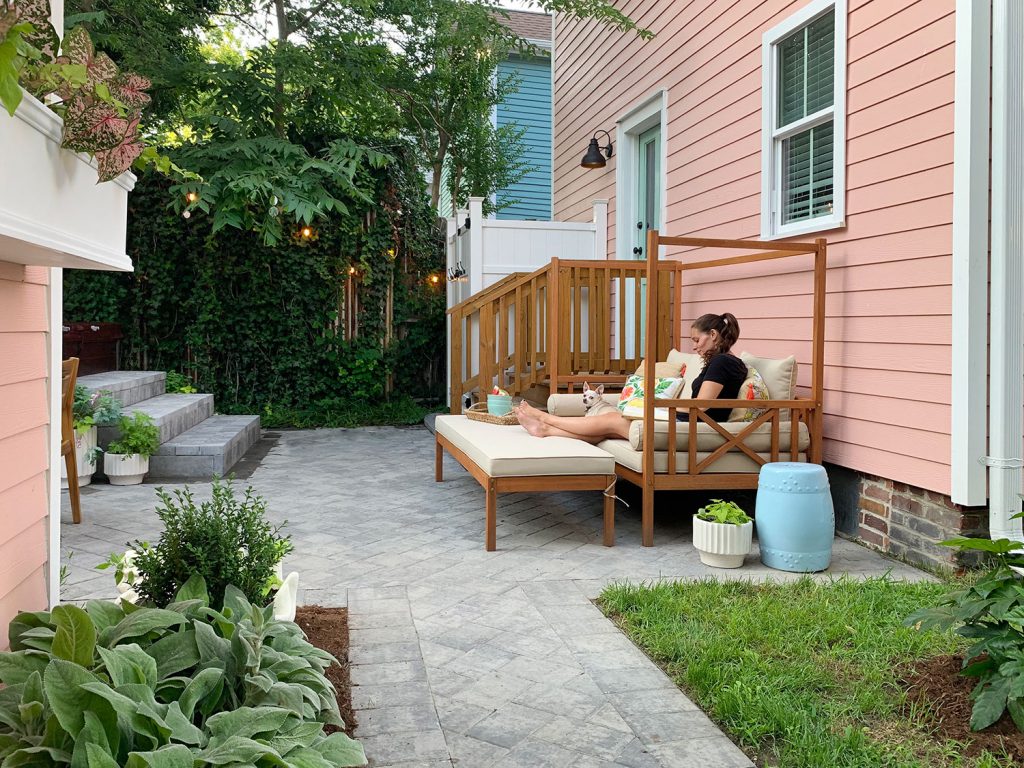
And I suppose we should talk a little bit about the plantings and greenery, even though they’re something we’re still kinda winging. Some of this was stuff we planted earlier this spring (like the boxwoods and lamb’s ear in front of the shed that has already doubled in size!) and some literally went in this past Sunday, so time will tell how things grow/survive.
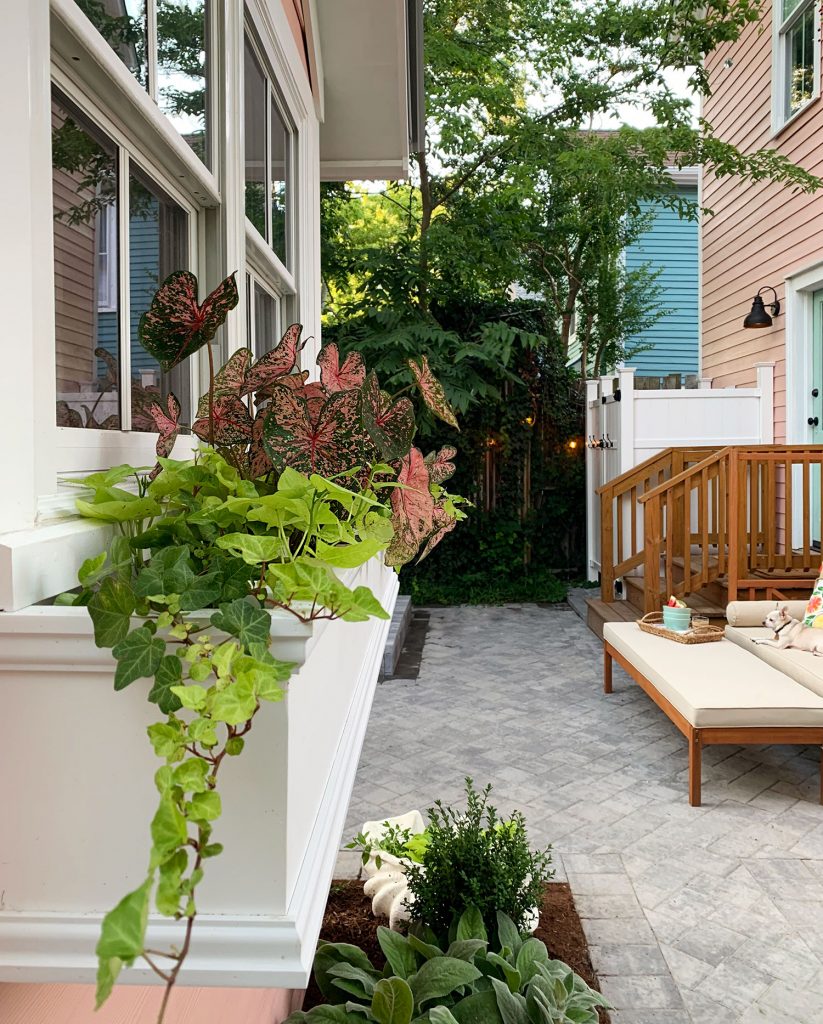
We’re most excited to see how the window box fills in. Sherry found this perfect-sized box and my nephew and I hung in last month. It comes with a cool self-watering system that would be an easy DIY, but I’ll get into that in next week’s email newsletter. We basically filled it with elephant’s ear (for height), sweet potato vine (for trailing) and some rosemary (for mosquito prevention).
Speaking of which, we tried to work in some other mosquito-repellant varieties throughout the yard – like the lavender along the shed, mint in that giant clam shell planter (here’s a similar giant clam shell). Ours is an old accessory Sherry has owned for like 7 years (remember it in our last house’s fireplace?). We also added citronella and peppermint plants in the white pots by the hot tub. We’re not sure how much it’ll actually do to ward off mosquitos, but we figured it was worth a shot.

Sherry also shot this quick video (only 2 minutes!) if you want to get a better sense of how it feels to walk around the space at dusk – or if you just feel like your day would be incomplete without a Limp Bizkit reference.
NOTE: If you’re viewing this post in a feed reader, you may need to click through to see the video. You can also watch it here on YouTube.
And I’ll leave you with one last before & after as I wrap this puppy up. This was the view down our side yard when we bought the house (ours was the tree-covered one on the right side).
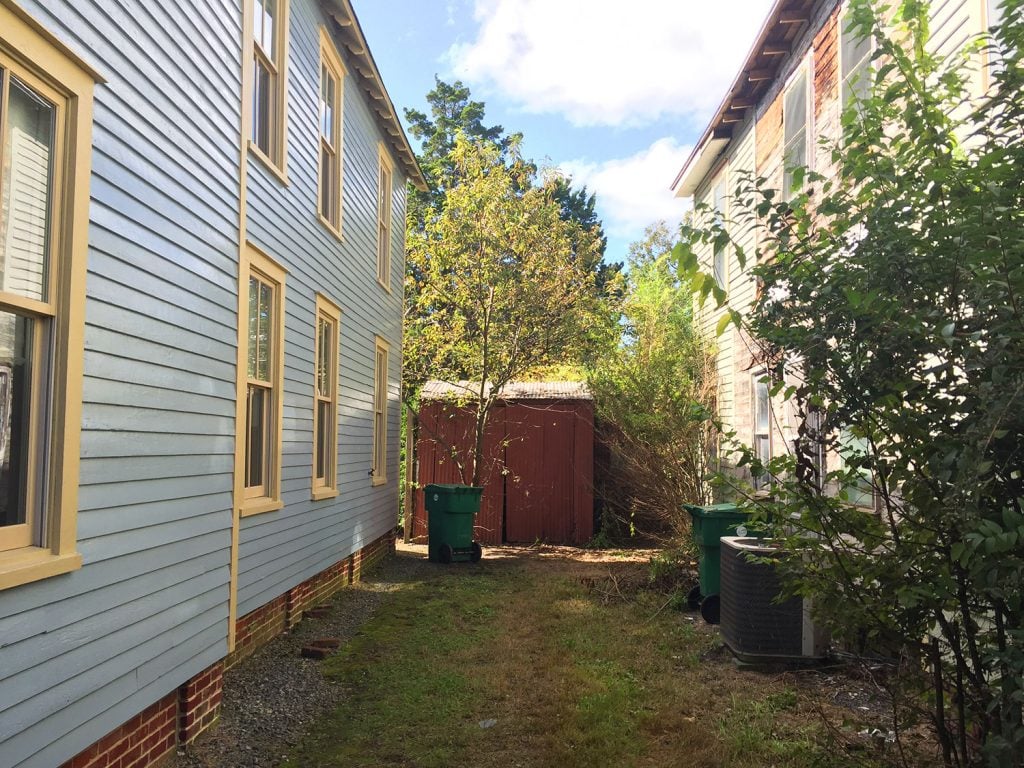
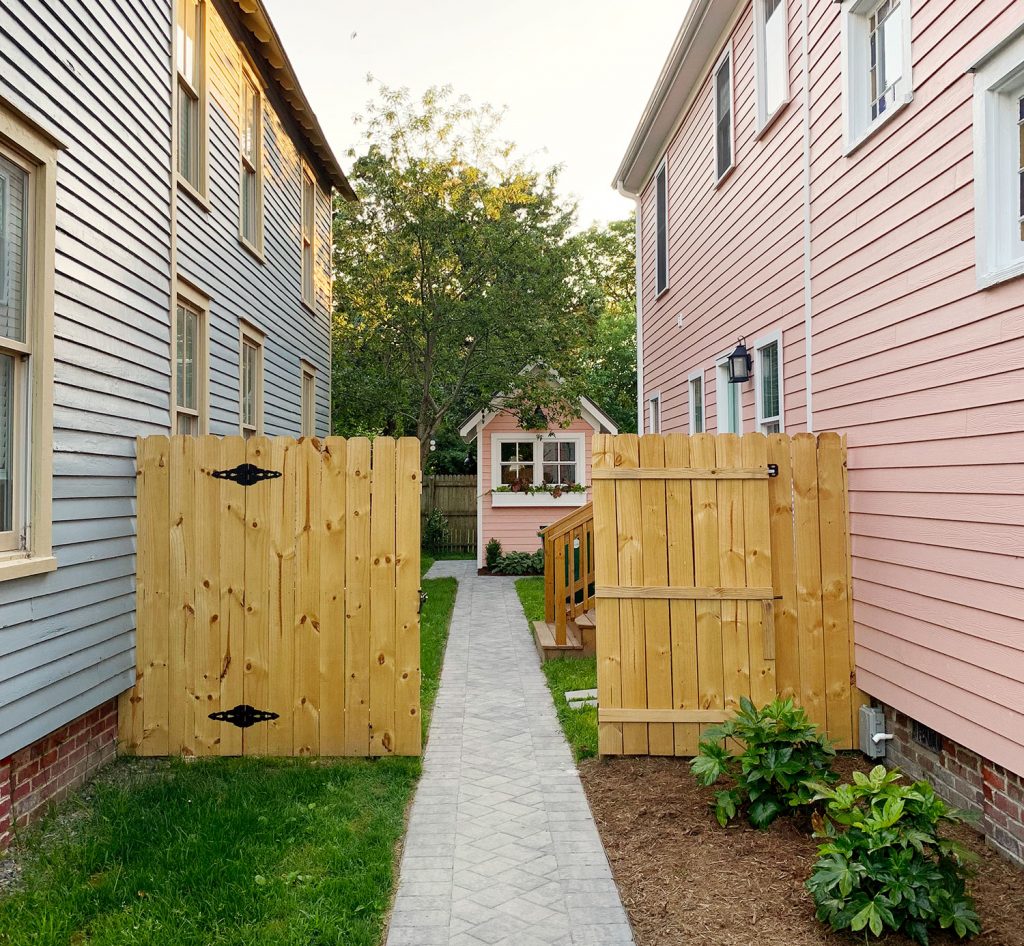
And here’s that view today. The fence is also new and matches the ones that both of our neighbors already have in their side yards. It gives us some privacy, allows our dog Burger to be loose in the backyard, and offers a sweet little peek down towards the shed when it’s open. It also swings to be double-wide when needed (future planning for parking a golf cart back there). We love that our neighbors on both sides have the same one so from the street it all looks nicely cohesive – once ours weathers to be that darker brown/gray color it’ll be great.
So we hope you guys enjoyed that tour around the beach house backyard. I feel like I didn’t even come close to capturing how happy this space makes us, especially since it feels like the beach house is finally complete*.
*Okay, not really. We’re already realizing this summer that there are some areas inside that could work harder or more efficiently for us (the kids need a crafting spot pronto, because the dining table is always buried in paper scraps and markers). Plus there’s the whole issue of the interior of the shed… which I may or may not have filled our car with lumber to remedy. More of these shed-shelves are on the horizon…
P.S. To see more before & afters of the beach house, and read about fixing it up, here’s a category with 35 posts that cover the entire renovation.
*This post contains affiliate links
