You know that part in a movie where the dorky girl rips off her glasses and throws on some makeup and suddenly she’s a bombshell? Well, our deck has already tossed its spectacles aside (i.e. we stripped off the old finish) and now it’s time for some lipstick (i.e. stain). We’re not exactly aiming for bombshell status here, but we’d settle for – I dunno – sexy librarian? I think I’m getting lost in my own analogy.
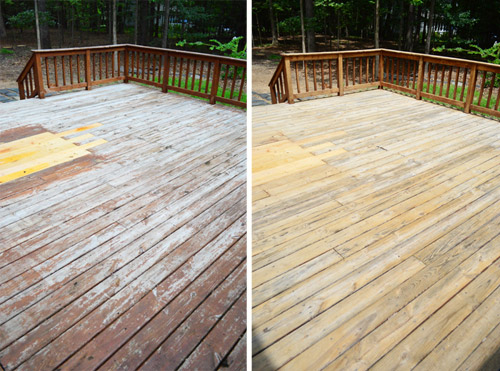
The gist is that with our deck boards cleaned, we could finally apply a new protective finish. After some discussion, we decided to use a semi-transparent stain. Both of us prefer that look over something completely solid, but we didn’t want to go as light as the toner that we used on our last deck since we thought a deeper brown tone would look nice with this brick facade. We also wanted to loosely match the previous deck finish since we didn’t strip areas that were in decent shape, like the smaller vertical rails or the lattice around the outside. And we decided to stick with Olympic Maximum Stain + Sealant because we’d had a good experience with it on our last deck (we chose it for that project last year after many folks recommended it to us). Plus, they had a color called “Russet” that looked to be a pretty spot-on match to our existing color (we brought home their color booklet and held it up against the deck railing to pick the best match).
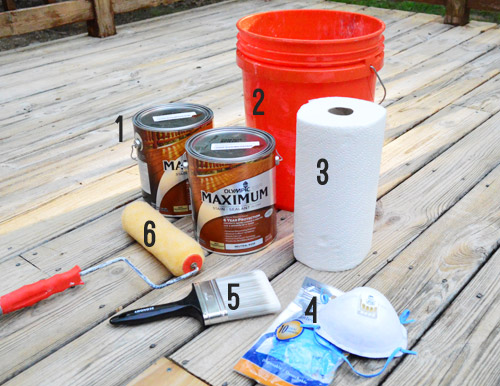
Here are the supplies we gathered for the task:
- Olympic Maximum Semi-Transparent Stain – we ended up needing 4 gallons for our behemoth 676 square foot deck, totaling $148
- Bucket – to pour stain into for easy roller dipping
- Paper Towels – since stain be messy, y’all
- Gloves & Mask – since stain be messy and stinky
- Wide Brush – for back-brushing (more on that later) and to get smaller areas like railings
- High-Nap Roller on A Pole – we chose a 3/4″ nap
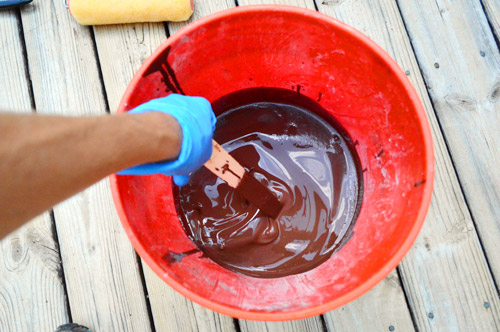
The bucket is also useful when your job takes more than one gallon because you can help eliminate color inconsistencies. Just like with paint, combining all of your tinted materials at the start of a job means you won’t be surprised by a noticeable color change if one gallon is a slightly different hue than the one before it. We mixed two gallons at first and then added each subsequent gallon as our bucket level got low. I half expected Augustus Gloop to surface for air when I stirred it, but no such luck.
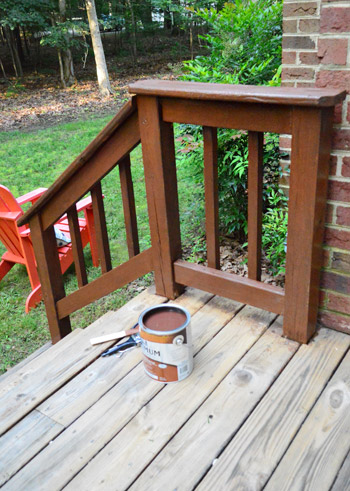
I’ll admit I was a little nervous about having trusted the stain swatch to match the old finish. We could’ve gotten a small test pot of stain to be sure before going all in on multiple gallons but Sherry was feeling confident. But we did decide to start in a low-risk area – the railing hidden on the far side of sunroom – just to be sure. Once again the lady-wife wowed me with her luck, and it matched the un-stripped-already-mocha railings perfectly. We stripped the top and the wider railing slats, so those have been re-stained in this shot, but the skinny ones are the old color. Can’t even tell the difference, huh?
Here’s another railing that we tackled next – and this time I remembered to take a before picture of it. I had attempted to strip this railing but it didn’t come off as well as I had hoped. But the coat of stain did a great job of covering up my spotting strip-job. Once it fully dried (it’s still wet here) it had absorbed and looked even better. Almost like new.
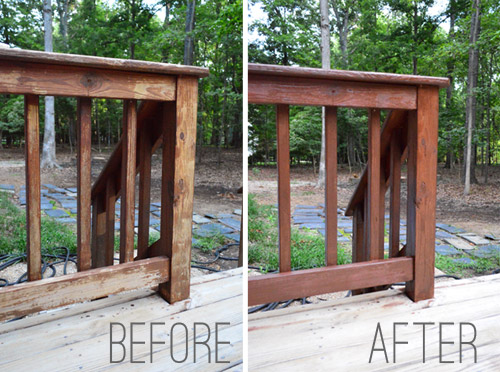
Since we had started our little test-run on the railings, we decided to go ahead and finish those first. It also made sense because we could work while standing on the deck, rather than having to wait for it to dry. It was tedious work, but with both of us plugging away at it (Clara was with my parents) we knocked all of the railings – both the outside, inside, and tops – in about two hours.
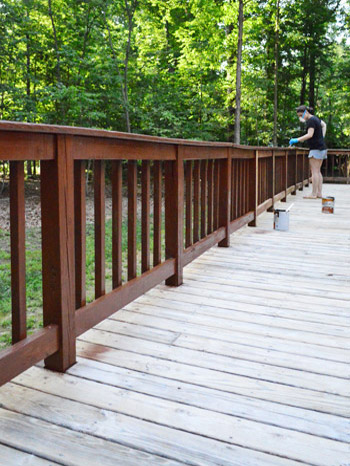
We would’ve kept going but (1) it was 10am and Sherry had to put up the morning post and (2) the sun was starting to creep over the trees. This is another product they advise against using in direct sunlight because it dries too fast and can create visible lines where a freshly stained area meets an already-started-to-dry area. Since the sun was only going to get more direct for the next few hours, we knew moving on to the floorboards would have to wait. But at least the railings were starting to look sexier. Let’s just say she’s almost all that at this point.
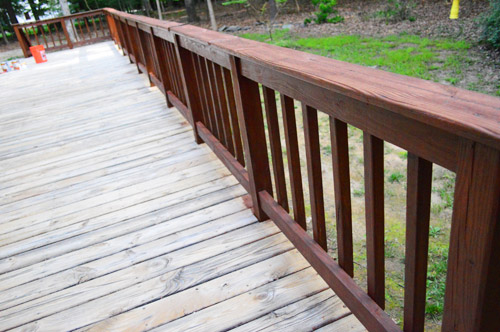
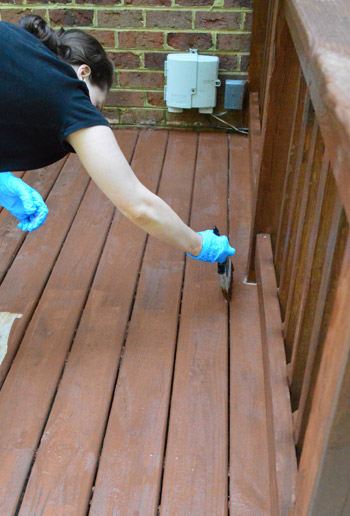
Around 4:30 the sun dropped down enough on the other side of the house that the light had finally crept off the deck floor. Clara was back home and napping, so we had anywhere from 30 to 90 minutes to tackle as much as we could as a two-person team before she woke up and threatened to slip and slide through our work zone. Because we were working fast we didn’t pick up the camera much, but the basic process involved me dipping my roller and liberally applying stain to a small area. I didn’t want to go too big at any time because we’d need to be able to reach any wet stain for the next step…
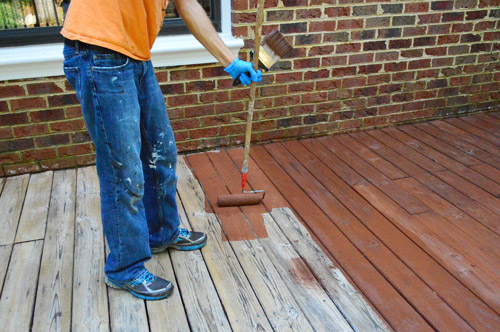
…which was back-brushing. If you remember from our last staining job, going back over the wet areas with a brush helps to even out any puddles (which could cause darker stain spots) and also works the stain into the wood better. Since we were working with older more weathered wood it was also an important step to make sure we got coverage in any small cracks. Plus, the roller didn’t do a good job of getting those between-the-board creases, so Sherry did each of those by hand along with back-brushing the top of each board that I rolled.
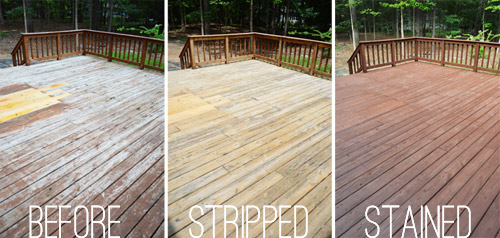
With over 650 square feet of deck to do, it was not a fast job. We got almost halfway done before Clara woke up and, rather than leave the deck half stained (and risk a big overlap line wherever we had left off) I continued on my own until the rest of the deck was done. Which conveniently was also about when it was too dark to see what I was doing anymore (so it was about a four hour job with two people for the majority of the time and me flying solo in the end). Here’s a full side-by-side of our process, which really shows how much better it looks. I’d say we achieved sexy librarian.
When we brought our furniture back out we were happy to see that the table could be placed right on the spot where the patched boards meet the old ones, so it’s not noticeable at all. The only problem? It’s looking like a larger deck calls for some more furniture.
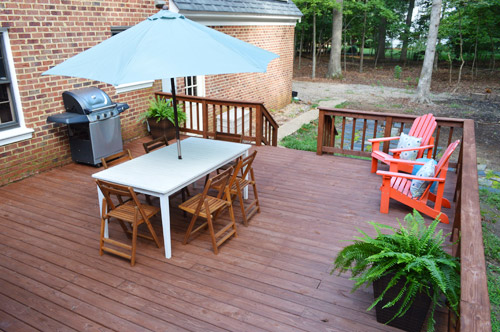
A few planters from Target along with a clearanced umbrella from Home Depot are making it feel a little less sparse in the meantime…
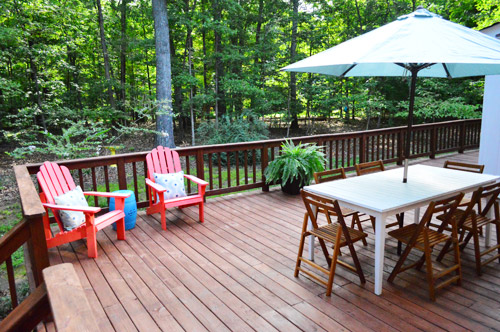
… but we think some craigslist and end-of-season sale-hunting is in our future. Especially since the entire other end of the deck is completely bare.
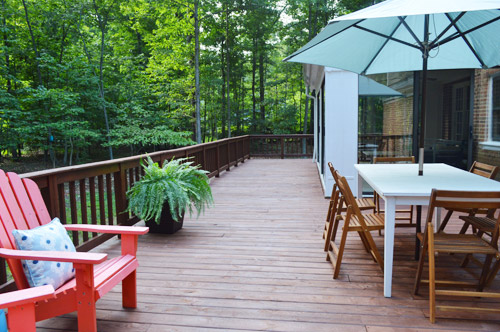
But that, my friends, is a mission for another day. For now we’re just happy to be done spraying, scrubbing, rinsing, rolling, and brushing this baby, which leaves us more time for playing, relaxing and eating on it instead. And I gotta say, as good as painting the walls of a room can feel, refreshing a 676 square foot deck feels even better. Especially when this used to be the view:
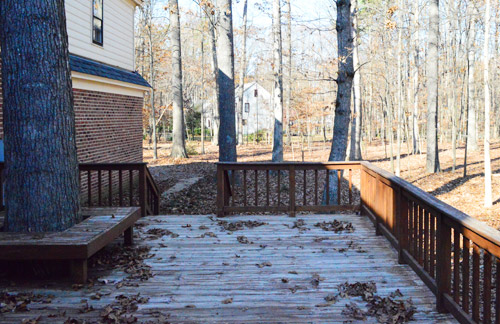
You should see us out there wolf whistling at it. You can also read how we later added custom gates to our deck to keep the dog from getting out!

JoAnne says
FABULOUS deck! Your DIY mojo is incredible – you guys are like the energizer bunny!
Lisa E says
Looks really nice! Such a difference and I’m sure a huge sigh of relief. We had a deck on our last house and The railing IS a lot of work and ours was MUCH smaller than yours, so kudos for you to getting it all done so quickly! Question: Would you please consider taking a pic of the deck on the other side of the sunroom? I ask because I was going to suggest something for the narrow space, thinking it ended at the end of the sunroom. However, I went and looked at your floor plan and saw that it wrapped around it. It’s unclear, however, just how wide the deck is on that side. Is it as wide as it is as the narrow part on the back side?
YoungHouseLove says
Aw, thanks Lisa! You’re always so sweet. It’s around 8′ on the side you can see in these pics, and only about 5′ on the wrap around portion that leads to the side yard. I think you can see it in this outdoor tour video: https://www.younghouselove.com/2013/08/outdoor-tour-2013/
xo
s
Ginny says
Where is the table from?
Thanks!!
YoungHouseLove says
That was from World Market last year on clearance. If you hunt one down definitely put a coat of poly on the top (we did that and it has really protected it since we heard it can warp and peel without it).
xo
s
Annie says
Your deck looks fantastic! We just painted our house (siding) SW Dapper Tan (6144) with the trim SW Moderate White (6140) and shutters/doors SW Tricorn Black (6258). The next project is to stain the deck. My husband has already cleaned it, so it is ready for some stain. I am impressed with the product y’all used and think I will go with the same. Any recommendations on a color? I have such a hard time figuring out what would look good together. I had to solicit help for the house colors too. =)
YoungHouseLove says
Hmm, I would just bring home the color book and see what you like. There are like 40 choices in the pamphlet! We’re really happy with ours (Russet) and our house has white trim, tannish-gray siding, red brick, and black shutters.
xo
s
Lilly says
Love the general She’s All That analogy! As a DIYer I say I spend most of my weekends looking like Rachel Leigh Cook in the first part that movie – paint splattered men’s shirt and glasses to the max, no yellow jeep to be found. The deck turned out awesome!
Cut N Crown says
Wow – what a difference! Great job!
http://www.cutncown.com
Peggy says
I am GREEN with envy. So jealous! It looks amazing. Nice work.
Emily says
Looks great! And a good bit easier than having to build the darn thing, eh John?
YoungHouseLove says
COMPLETELY.
Thank goodness.
-John
Laura C says
Great job, you two. I’ve been looking at fixer-upper weekend houses and this gives me hope for some of the unloved decks I’ve seen. I thought a few would have to be re-built entirely, but this makes me think otherwise.
Sarah says
Wowza! Enjoy.
Annie R says
Beautiful!! I love it! I think a bench with planters would work down there- or maybe a game table? (Like checkers?).
Question- is that stripper for paint too? I have a porch railing that we tried to reprint that the previous owners told us was done in latex, but it was really oil so now half of the paint has come off. Ideas??
YoungHouseLove says
Thanks Annie! I think it said it worked on paint and stain, but I’d check the label just to be sure.
xo
s
Camilla @ Something Is Done says
I love your beautiful forested backyard, and that deck is the perfect place to enjoy it. We don’t have as much lush greenery here in Southern California, and boy I miss it (I grew up in Toronto). It’s almost like camping right in your backyard. Kinda jealous!
cottage Katie says
What a deck! And what a project refinishing this deck! All the hard work certainly paid off because that is one fantastic backyard deck! Good thing there is some summer left to actually enjoy it :)
Leisa says
Hi guys, the new deck is looking FAB with a capital F!
If you are looking for some furniture, I can highly recommend a free-standing hammock. (It’s a metal frame with a padded sling bed that hangs on the frame).
We had one on our giant two-level deck in NZ and i loved it. It sure beat carrying our sofa out onto the deck every sunny day.
It was just big enough for me and my love to snuggle up together and have an afternoon snooze in the sun. Bliss.
Aahh how I miss it (from my tiny tiny flat with no garden in grey London).
They are great because you can just remove the padded sling when the weather is iffy.
Would sit perfectly in that long space by the sunroom.
Your future selves are already thanking me. And they are welcome.
Xx
YoungHouseLove says
That sounds like so much fun!
xo
s
Leisa says
Or how amazing would this be…
http://www.artrss.net/poolside-daybeds-altea-design-daybed-from-varaschin/
Like the egg-chair mothership.
YoungHouseLove says
Now that’s the way to do it up! I love it.
xo
s
Mamaw says
Deck looks wonderful! Good job, y’all…
Caitlin says
Your deck is almost exactly twice the square footage of my entire apartment. Have you thought about renting the other half of it out? It’d spare you the effort of furnishing it :)
YoungHouseLove says
Yessss. Come live with us! I think if you bring a little plastic tent you should have the rain thing solved and be all set.
xo
s
Emily @ Life on Food says
Looks amazing. Kind of makes me want to give up my porch for a deck.
MIRANDA WILLIAMS says
Gorgeous! I love the transformation and so jealous of your deck! If I were your neighbor, I’d be finding/creating reasons to come over just to hang out on that beauty. You guys are such an inspiration! We currently are renting (hubby is military so we move all.the.time) but cant wait to have an oasis like this when we finally can buy a place. I’m dreaming of building my own deck furniture someday or getting my hands dirty with some sort of renovation around the house and my husband blames you. Just so you know… in case you get a disturbing email in several years from an annoyed husband who is being forced to help strip and stain a deck. :)
Lauren says
It looks awesome! I am quite jealous! Great job!
Larissa says
Definitely planning on doing this to our not so huge deck next summer. Thanks for the step by step!
And just a heads up, seems to be a grammar error in this sentence: “It was tedious work, but with both of us plugging away it (Clara was with my parents) we knocked all of the railings – both the outside, inside, and tops – in about two hours.” missing ‘at’ before ‘it’ ahead of the brackets :)
YoungHouseLove says
Thanks Larissa!
xo
s
Kirsten says
You guys get so much done – and done so well – it boggles my mind. Thanks for the constant inspiration. Love it!!!!!
Jennifer I. says
I have house and deck envy! We are getting on to staining our deck this weekend, so I’ve been paying attention to your deck staining skillz (with a “z”!). You guys seriously MOVE. SO. FAST. on house projects, it’s amazing. We’re 2 years into our house and have done floors, paint, windows, ceilings but there is still SO. MUCH!
Bailey says
Wow, what a fabulously large deck!! Definitely looks sexy now!
xox
Bailey
http://akabailey.blogspot.com
sarah @makingitmyhome.blogspot.com says
looks great!
twelvedaysold says
Holy cow, when you said the square footage of the deck I realized “That’s larger than our apartment!” It IS a huge deck! I mean, our apartment is kind of small but if it was a deck it would definitely be huge :) It looks beautiful!
Cameron says
It looks like a whole new deck! Love it!
Cheerful Homemaker says
Railings are the worst to paint! We gave our back porch a fresh coat of paint back in May and railings are exhausting to do. So many tiny spaces!
Hilary says
Wow the deck turned out awesome!! Definitely sexy librarian status :)
gwen, The Makerista says
What a lot of hard work! It looks really great though, and I’m sure you enjoy being out there now a bit more!
Megan @ The Brick Bungalow says
What an improvement! We just completed our deck (http://thebrickbungalow.blogspot.com/search/label/deck%20construction) and have yet to seal it. It looks great as it but our concrete patio could definitely use some cleaning up (you can see where everything sits for an extended period of time due to dirt build up…yuck!).
Stacia Reagan says
Awesome job guys! I love the color Russet and that stain holds up really well. I am up in Wa with heavy rain, lots of snow and very warm summers. I stained our front fence (that gets full sun all day during summer, plus hit with the sprinkler system, and snow thrown from the plows in winter) 8 years ago and the stain is still holding strong. I think yours will easily last as long. Great work!
Heather says
Awesome job! Looks brand new! We have a much smaller deck, but I have faith in your process!!! Thanks!
Kathy says
It looks wonderful and is so huge! My current home is 900 sq ft. I’m looking forward to your furniture shopping finds! In my world that’s almost a whole houseful of furniture.
I read the comments and am amazed that so many people mentioned yellow chairs. I read every post and have even started reading from the beginning…and yes, I remember the chairs now that they’ve been mentioned but that’s it. I think it’s a tribute that you two make people feel so comfortable that they obviously feel that they have visited!
Then…sage. Pinterest says to burn sage sticks and no bugs. It’s true. We’ve done it all summer…not a bug nor a ghost has been seen!
And Amanda…librarians and the homeless. I’ll bet most folks don’t know the social issues that librarians deal with everyday. Bless you.
YoungHouseLove says
Aw thanks Kathy! I love the sage tip – will have to try it!
xo
s
Colette says
Awesome transformation! I’d give anything to have half of your energy. When do you guys have time to eat?
YoungHouseLove says
Aw thanks Colette! Somehow we cram eating and even some sleeping in there – along with a pretty impressive amount of evening TV. Haha!
xo
s
Kate says
You mentioned getting the post up which made me so curious again about your posting time. What makes you pick 10:30 as the time to put the post up? (especially opposed to midnight, or first thing in the morning?) I love how consistent you are and love knowing the backstory on business decisions like that? Do share!
YoungHouseLove says
That posting schedule just gives us enough time to finish any last minute stuff as opposed to posting at night or first thing in the morning. Sometimes we write entire posts when we wake up (or at least add photos and links while proofreading it them). Actually, in the case of this deck, we shot all of the after pics in the morning and then could upload them – just in time for a post at 10.
xo
s
betty says
hey there! I usually don’t like asking you these questions, because I know you have plenty else to do.. but I bought a house last year and both the front porch and back deck need some new stain. the boards aren’t in bad condition, just the stain. the back deck is currently a red ‘brickish’ color and the front porch looked like it was about the same color. I have yellow siding/black shutters/red door, the front porch has white columns/balusters and the back deck balusters are the same color as the boards. I HATE BRICK RED. I usually don’t love red at all, but love my front door. is there any colors you think would go better than what I have right now? I was thinking something greyish since I have LOTS of grey pavers that hold in my front flower beds. I would LOVE your opinion!
YoungHouseLove says
Oh yeah, something gray-ish or even just chocolate brown sounds like it would layer in there gorgeously (brown = such a neutral since it’s the color of mulch beds, which most people have somewhere).
xo
s
betty says
awesome, thanks! I actually put black mulch in my flower beds :) but now you’ve got me thinking!
Christa says
I love the way this turned out! Question: It’s hard to tell from the picture… is there a noticeable difference between the part that was new wood and the part that was the original decking? We recently added on to our deck, so it’s about 50/50 old and new wood. I’m wondering if stain would work for us?
YoungHouseLove says
There’s a very slight difference, but since we staggered the boards and bleached/cleaned everything before staining if you don’t know it’s there (and know to look for it) I don’t think you’d ever notice it. Hope it helps!
xo
s
Sassafras says
BAM!!!! UBER sexy librarian!!!! Ka-Wowser!!!
MaryJo says
I see a deck rug in your future!
Sarah says
Can we get a picture from the yard please!? Before and After are the best! :)
YoungHouseLove says
I’ll have to snap some for the next post for ya!
xo
s
Steph says
Your deck stripping and restaining posts are EXACTLY what I needed to read this week! I attempted to clean and power wash earlier this summer, which gave me the look your deck had before you stripped it, so going to get me some stripper and clean it up good!
Tirsa says
Deck looks great guys! I was scrolling down hoping to see the yellow chairs somewhere in the picture (I loooove yellow). too bad they didn’t go with this deck. Can’t wait to see how you finish it off, though.
Lynn @ Our Useful Hands says
Awww it’s so purdy! I’m getting more of a super smart classy sassy librarian.
My best, Lynn
Anna says
Hey Sherry and John!
I love this blog and have been a regular reader for about 3 years now! You guys have truly inspired some amazing DIY projects over here at our house! I was wondering if you’ve ever considered or looked into adding new windows into a home? Not replacing old ones- adding all new ones to bring in more light? We are considering buying a home and the lighting isn’t great and I think if we added an extra window or two it would do the trick. It is a brick home, which I’m sure would be a bit tricky-er, but we would be willing to hire someone, just curious if you know anything about that?
YoungHouseLove says
We haven’t tackled that but it sounds like an awesome idea! I bet you could get a few free estimates from a contractor or window company and just see if it’s affordable and discuss ideas with them. Sounds exciting!
xo
s
Anna says
Thanks Sherry!
I also wanted to tell you guys that the deck looks amazing!!
YoungHouseLove says
Thanks Anna!
xo
s
foobella says
That deck looks fantastic. I think my husband and I used the same color on our deck. We used leftover stain from my parent’s deck.
good job!
Hannah C. says
Speaking of end-of-season sales, I just saw that Pier1 is offering an additional 20% off already marked down clearance both in store and online. I didn’t look too long, but there seemed to be a few pages on outdoor clearance items. Thought I’d pass along the info :) Love how its coming together!
YoungHouseLove says
Thanks so much!!
xo
s
Rita says
You did a great job! A four hours of work are worth it, it brings back the life of your deck. I think it’s time for me to do some deck repainting :).
Emily says
We just moved in to our first house, and feel like the deck needs a little facelife. The existing finish is worn in some places, but not terrible. We’d like to just throw another coat of stain on it and skip the whole stripping step. Any thoughts on the efficacy of that? Did you guys stain over any parts that hadn’t been stripped? Any issues with it sticking or peeling later? We’re pretty sure the existing finish is semi-transparent stain, and we’d be happy with more of that, in the same or slightly darker color.
YoungHouseLove says
I think I’d at least clean it even if you don’t strip it. The can should tell you what prep it requires to stick, but I think the wood should be clean and dry so there’s not any peeling later. Good luck!
xo
s