No? Me either. But it’s coming. Slowly but surely. After tackling the area to the right of the porch, next on the ol’ to-do list was:
- the area to the left of the porch
- the side lot next to our house (a giant valley full of moist soil that we want to naturalize into a pretty forest)
But before we get to the planting bed next to the porch, we wanted to share this gorgeous sight courtesy of the side lot:
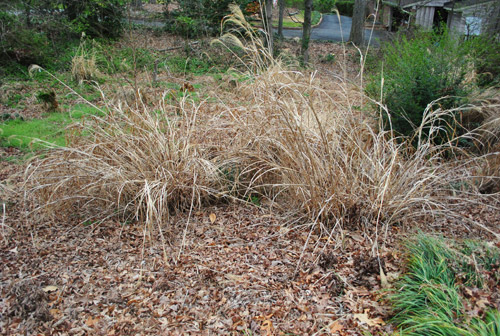
Just kidding. Unless by gorgeous we mean just-one-reason-we-hang-our-heads-in-shame-when-neighbors-walk-by. Those are old clumps of grasses that we were told to cut back each March so it’ll grow in nice and fresh and clean this year. Early April is the new March, right? We were a little late…
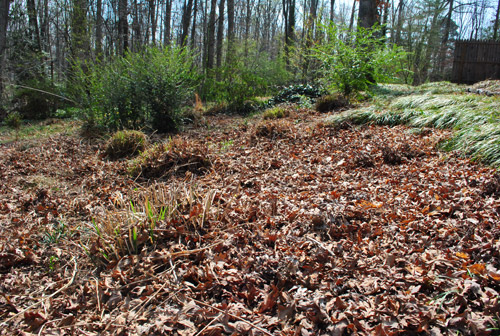
But we finally got ‘er done. And now the wild and crazy side lot next to our house looks like this:
But let’s back up and view our little leaf garden from the street, shall we? This is an area that we’d love to naturalize with a charming little “orchard” of pretty trees and ground cover and grasses and anything else that’ll make it feel sort of woodsy and sweet (and not like a place we have to mow or weed or rake). You can see what the cut back grasses look like now (there are four blue arrows pointing to them) so hopefully when they spring up and fill in (they get about 4-5 feet tall) it’ll feel more woodsy on that side. And see the thing I circled on the left? That’s a new tree.
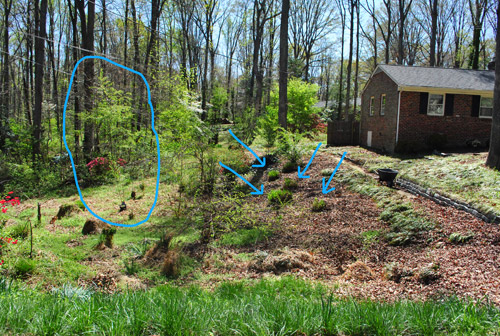
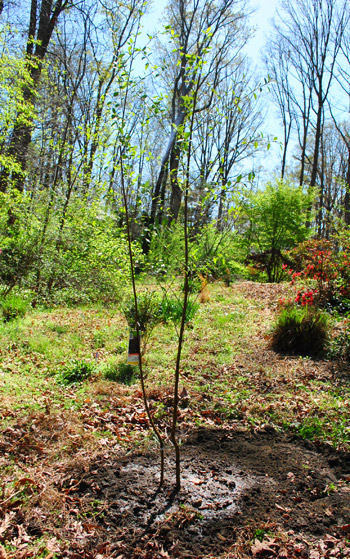
Yup, the first step to naturalizing our ridiculously unattractive side yard is to add trees that will thrive down in this moist valley of our property. Thankfully the certified landscape designer we had over (more on that here) recommended a slew of trees that would do well, one of which was the River Birch. So when we saw them on sale at Home Depot for $19, we grabbed one (using a $5 off coupon that we got for being in their gardening club – which is free, so just sign up to get random coupons).
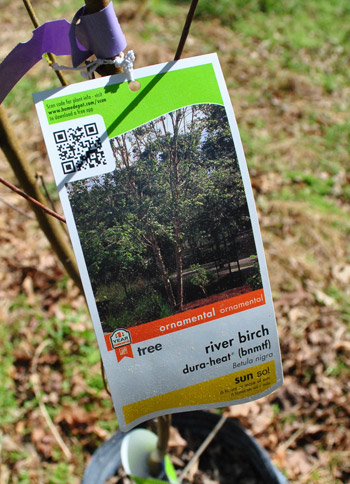
We followed the planting directions on the label and crossed our fingers that this guy would be the first step to woodsing-up the side lot full of weeds, leaves, and various other odds and ends (not to scare anyone, but we did find a pretty respectably sized snake down here once).
But that guy was nowhere to be found this time around. So let’s skip over to the garden bed to the left of the front porch. It definitely wasn’t looking so hot covered in leaves, missing some shrubs, and sporting more of that ubiquitous liriope:
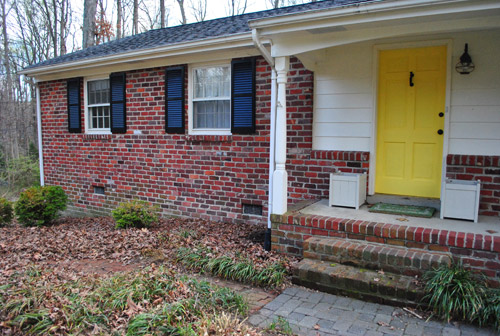
So we raked out the leaves…
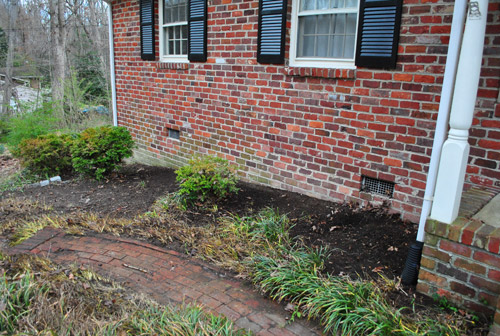
And dug out the liriope…
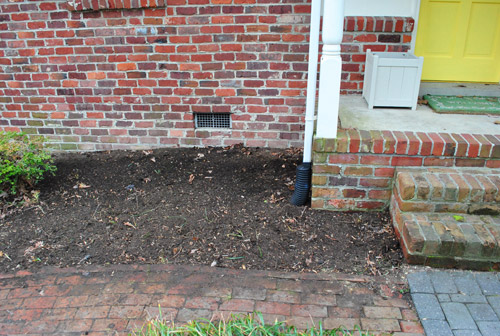
… and planted this otto luyken laurel, which we mentioned here.
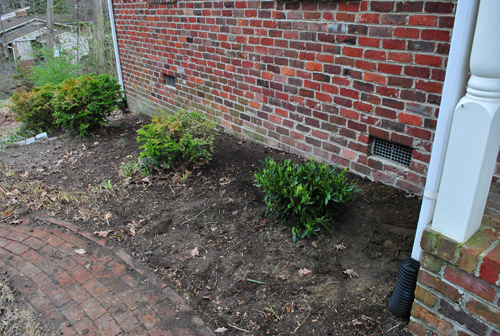
We learned that middle bush wasn’t doing too well from the certified landscape expert – so we dug it up and transplanted it to the more “wild” part of our side yard that we’re trying to naturalize so it’s out of the spotlight. This is John’s tired face:

Then we had a nice bare-ish bed to work with:
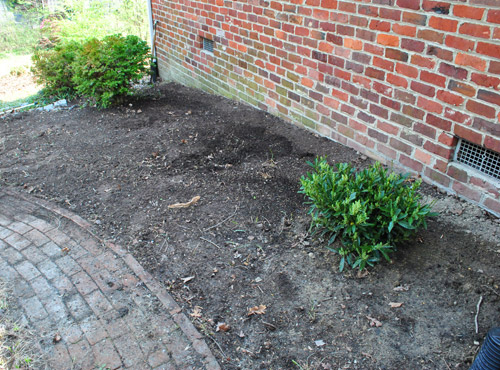
Here it is from the other side. This area is a lot larger than the bed on the right side of the porch. It’s about 20 feet long and the depth ranges from 7 to 11 feet.
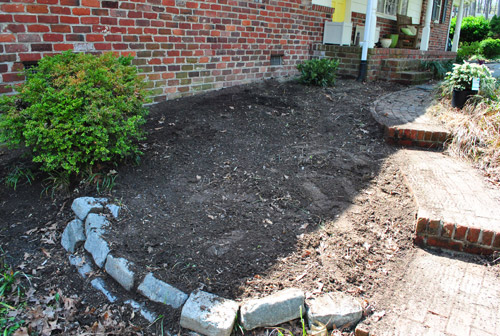
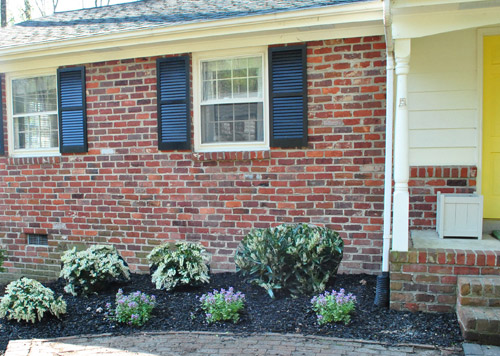
We opted to go with a group of plants that we chose for the garden on the right of the porch for balance and because we knew they’d work in partial shade (this side of the house gets the same amount of light). So in came the same purple flowering plants called Garden Variagated Dead Nettle that we added to the other side of the garden (they’re the mounding variety as opposed to the spreading kind, and they only get 6-8″ wide and tall, so they shouldn’t overwhelm our little garden). We also added three more Dwarf Pieris Japonica Variagated shrubs like we used on the other side, (they only grow to be 2 feet tall by 2 feet wide). They’re covered in little white flowers in the spring and are pretty leafy shrubs for the rest of the time. They also work in part shade and we planted these guys around our first house’s perimeter and they did great.
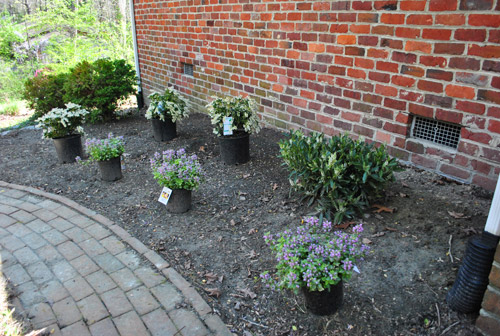
Why did we get three of each type? Well, lots of landscaping experts recommend odd numbers over even ones, and clustering a few similar plants together can give them more presence.
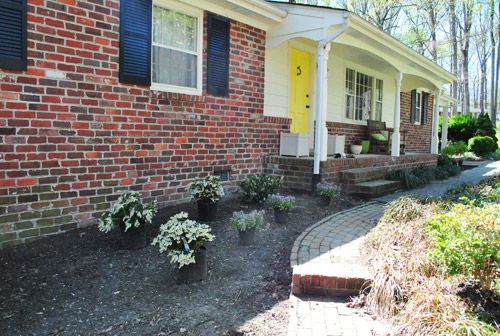
So we grabbed three of each, spaced them according to the directions on the tag (and in a way that we thought would look balanced once they reach their mature size), and then it was time to dig.
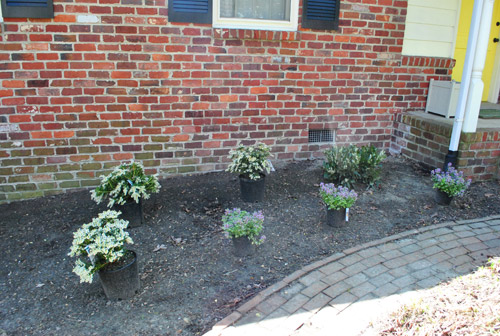
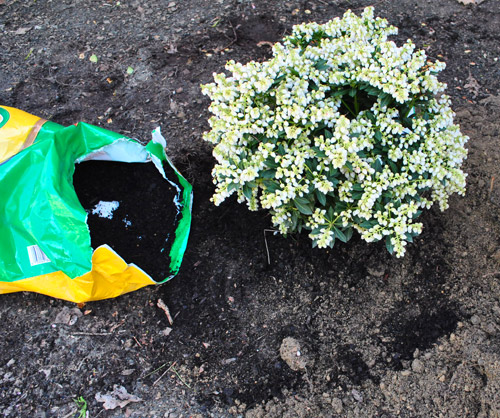
We just follow the recommendations on the tag for each one when it comes to how big of a hole to dig and what sort of nutrients or soil we add to the hole while planting them.
A few hours later, we had this going on.
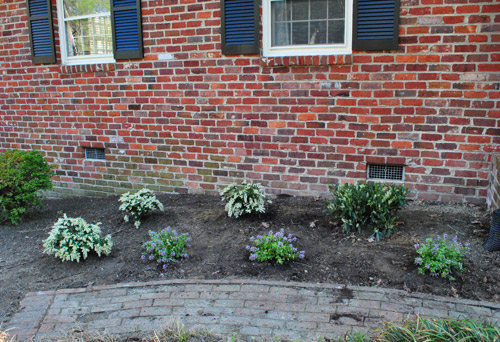
Once again since these photos aren’t an aerial view, it’s hard to see how much space there is between everything and the house and between each other (but it’s 3-4 feet in all instances). That spacing allows for plenty of filling in without worrying that our little garden bed will be a crowded mess in a few years.
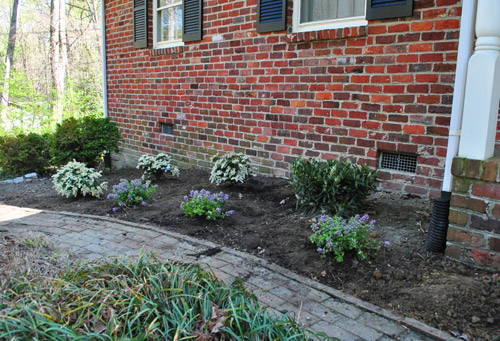
They might not seem like much, but we’re in love with these shrubs. I know that sounds like an overstatement, but just like we mentioned here we really learned our lesson about buying cheap placeholder stuff instead of holding out for things we really love and placing them thoughtfully so they all thrive and look good for years to come.
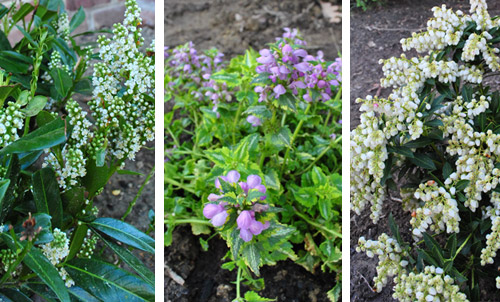
From left to right in this pic above, you can see our otto luyken laurel (more on that here), our Garden Variagated Dead Nettle, and our Dwarf Pieris Japonica Variagated. We love that they all get covered in tiny blooms in the spring (and the nettle will continue flowering into the summer). So of course there’s more of this larger bed to tackle beyond this area in front of the house, but our arms are happy to take a little breather. We did polish things off with some mulch to keep moisture in and weeds out. So it looks nice and finished… to a point (and then the mulch stops and there are no plants, haha – we’ll get there).
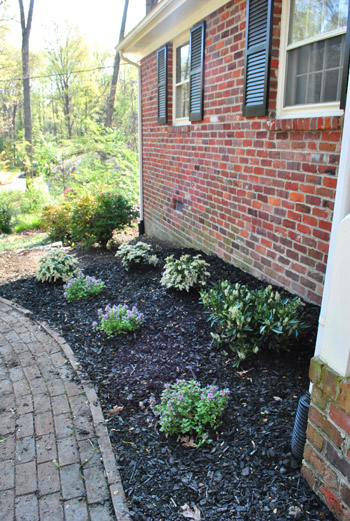
So here’s a reminder of what that area looked like before about six hours of raking, clearing, planning, digging, and mulching:

And here’s that area mostly completed (we’ll polish off that smaller zone on the far left once our arms recover and we come up with the right plants to get ‘er done):
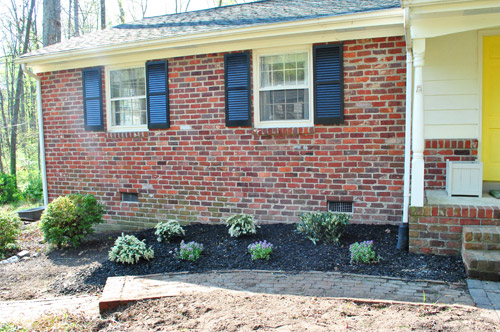
Oh and just for fun, here’s what it should look like when things grow in, thanks to the magic of photoshop. This should be everything’s full size:
We think it looks nice and clean without dwarfing our one-story house (larger bushes and trees can make a ranch look really squat by growing up near the windows, crowding things, and basically cutting the facade in half). So we’re psyched to have checked off a few to-dos on our huge list (mentioned here) but still have a bunch of outdoor endeavors before we can say this house has curb appeal without rolling our eyes ironically. And I’d share a pic from the curb, but we’re actually starting a few other projects near the path and the mailbox and around the yard, which make things look a little worse before they get better so a wide shot right now wouldn’t look so hot. So stay tuned for those details in a future Petersiks Vs. Wild post.
In the meantime, what are you planting? Are there a million outdoor projects in process at your house without much completion going on yet? Sometimes I feel so scattered, but it helps to remember that we’re inching towards something that’s going to make a huge difference from the curb. Just have a few other zones to attend to before things all start coming together…
Psst- We’ve become a Hunger Games household. More on that over on Young House Life.

Emily says
Looks great! You make it look so easy!
Justine says
Po-tay-to, po-tah-to. Just a query from across the pond, in Blighty. Over here we call the edge of the road area the ‘kerb’, so we say ‘kerb appeal’; ‘curb’ is used as another word for restraining or controlling. Just wondering whether ‘kerb’ is ever used in the US?
YoungHouseLove says
Interesting! I’ve never seen it spelled that way and have always used “curb” for both uses.
-John
Kate @ zMOMbie says
It’s really getting there! Wish I could say the same about ours… One of these days I’ll get to working on the “comb-over” of greenery/grass that we have up front.
Lara V says
I love how you photoshopped the pic to see what grown plants would look like!!! Look forward to getting your email everyday announcing a new post!!! I don’t comment very much, but I read every single day!!!!
YoungHouseLove says
Aw, thanks Lara!
xo,
s
Heather says
You are going to love the river birch! We planted three last year, and they are fast growing and provide such bright, vibrant leaves. As they age, the trunks get more and more textured, which will help add more interest to your “wilderness” area. Good luck with all of your landscaping projects!
Erica Hyatt says
Love River Birch trees! We had one that in our backyard that was about 3-4 yrs old until this past summer. Our summer was brutal and it didn’t make it. :(
Judy says
I have a question about your kitchen remodel. I’ve recently started remodeling my own kitchen and I’m unsure what the natural “order” of things should be. I’ve removed the wall cabinets and have repaired the wall where they hung. In what order should the following work be done:
* install base cabinets;
* install subway tile all the way to the ceiling like y’all did with your penny tile;
* install shelves on the tile like y’all did;
* remove/replace fluorescent light;
* remove/replace track lighting;
* remove/replace sink
I’m not getting new appliances or new flooring. I know that the chronology may seem to be common sense, but I’m just tired of trying to figure it all out!
YoungHouseLove says
I think it really depends! There can be many factors to make the order of those things change. You always want to install cabinets, then counters, then backsplash in that order, and then shelves will be installed over the tile. But the sink and lighting stuff sounds like it could happen at any stage depending on how you feel.
xo,
s
Sarah J. says
oh, this is so fun! my hubby & I just bought a ranch (we get the keys next week) and i’m so excited to rip out overgrown bushes and plant something else. so i’m loving all your tips! thanks!
JoDi says
As I was reaching the end of the post, I was thinking how much I wished I could see how it would look in a couple of years after things fill in and BAM! Photoshop to the rescue! LOL So glad you are as impatient as I am!
It all looks great. I really need to look for some of those dead nettles. I have several pieris japonica (the normal sized ones) alresdy and LOVE them. We had them at the home I grew up in too, and I’ve always thought they are so beautiful and graceful!
Alisa O says
I just planted our veggie garden! I’m pretty excited because after a week, everything is still alive which has to be some new record for us (we have a mole problem and poor soil). I have a question for you (and any other dog owners that might be reading the comments)- do you have to do research on what kind of plants are safe for Burger? Our beagle lady munches on every thing in the backyard and it terrifies me that she’ll eat something we planted that’s not safe for her. Because of that, we’ve stuck to just trying to get the grass to grown besides the veggies (after a ridiculously expensive mistake of a planting attempt right when we bought the house and didn’t know how sandy our soil was so we lost everything. swoooosh- that would be the sound of $300 going down the drain. ugh.). Epically long comment? sorry!
YoungHouseLove says
Ooh I would definitely do research about what plants aren’t pet safe. It’s pretty easy to google. Burger only eats food (never so much as nibbles on grass or leaves or berries) so it’s not something we pay attention to (we used to when he was a puppy before we knew if he’d eat things but he is much more interested in hunting bugs and stealing snacks from his sister- haha).
xo,
s
Erin says
We had a river birch at our last house and we loved it! :)
YoungHouseLove says
Yay!
xo,
s
Rosie says
River Birch are so popular with landscapers now–many are planted in our neighborhood fairly close to houses. I think yours is a good distance from your home. About 30 years ago, my husband dug one up in the woods and we planted it near our patio about 15′ from our back door in the July heat and drought of Indiana. We watered that sucker constantly and amazingly it survived. We enjoyed the beautiful bark and breezy shade it provided for about 15 years, but sadly it grew to be a monster having many catkins (or whatever things came off of it several times in the spring). We also endured aphids showering us and since Japanese Beetles loved it, their poop covered everything on our patio in June. It became so large, it was expensive to spray each year. We finally had to remove it because it had become so “dirty” while one branch towered over our roof as well. I must say as dirty and messy as it was, I miss its grace. I only wish we had planted it in the corner of our large yard. Enjoy yours!
YoungHouseLove says
Aw thanks Rosie!
xo,
s
Kath says
Sweet shirt John :)
Emily says
Did anyone else sing the title to the tune of Can You Feel The Love Tonight?
YoungHouseLove says
Haha, I did!
xo,
s
Ali says
looks like your brick could use a pressure washing:)
YoungHouseLove says
Haha, amen! Should add that to the list!
xo,
s
Alexis says
I just scrolled through the comments to see if I was asking a repeat question, but I think I’m the first with this one! I like the color of the mulch you used. You mentioned that you got the darkest mulch that Home Depot sells. We went to Home Depot yesterday and were trying to determine which one that was. So many to choose from! The darkest at our store was black mulch, but that wasn’t what you had right? Do you remember what it was called and what it was made of? Thanks! You have inspired us to begin tackling our own wild jungle here in NJ- one garden at a time.
YoungHouseLove says
Maybe it was just brown mulch? Don’t think it was black since that sounds really dark! Haha. Wish we remembered the brand but we spread it out and trashed the bags. It was on sale for something like three for 7 or 8 bucks I think? Maybe that helps?
xo,
s
Monica says
Hi Sherry and John!
The garden looks awesome!
Quick question for you all.. how will the plants look in the fall and winter when they are no longer blossoming? I live in the northwest and I’m looking for some plants that will look good year round, considering we don’t get a lot of those beautiful sunshiny days!
Also, do you put anything else above the mulch or just leave it how it is? It looks great just the way it is, but I was just curious!!
Thanks so much!
YoungHouseLove says
They will all keep their leaves in our zone, but I believe that varies by area, so you might want to ask at a nursery what things will do in your area. As for the mulch, that’s the top layer we apply and just leave it. Good luck!
xo,
s
jessica@fourgenerationsoneroof says
I love your yellow front door!!!! That comment about the side yard was funny :) The new plantings are going to look so good when they are all bloomed and full. Looks great :)
Penny Smith says
I hope your river birch grows faster than ours! 3 years, and it is still a stick of a tree in our front yard! Still alive, but geez, they grow slow!!
Julia Kent says
Hi guys! I recently found your blog and LOVE it. A question – what colour/brand/kind of mulch are you using? I really like it and would like to use something similar for my gardens. Thanks!
YoungHouseLove says
We just grab the darkest kind of wood mulch at Home Depot (I think it’s on sale for three bags for $9 or something?).
xo,
s
Julia Kent says
I’m sorry – just saw the answer to this question above!
YoungHouseLove says
No worries!
xo,
s
renee says
Hey Youngsters-
How did you guesstimate how much mulch you needed for your front landscaping? I have the hardest time figuring that out. Thanks!
YoungHouseLove says
We were terrible! We just bought as many bags as we could fit, laid them down, and then based on how much they covered, we went back and got the rest. Trial and error! Haha.
xo,
s