Digging is right up there with the Kardashians for me. As in, I’m getting tired of it (What? I’m a guy – we don’t like those shows). I knew there’d be a lot of it involved in DIYing our patio (digging, not Kardashians), but I think I got a false sense of confidence after all of that liriope came up relatively easily last week.
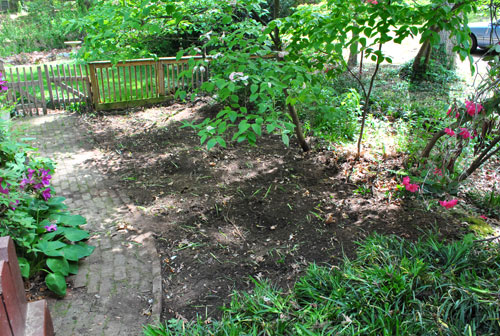
Next up was removing the brick path which, based on the looseness of some bricks on the edge, I said to Sherry “shouldn’t be that bad.” At least I can pinpoint the very moment I jinxed myself. Do you hear that? It’s the sound of the universe laughing at me.
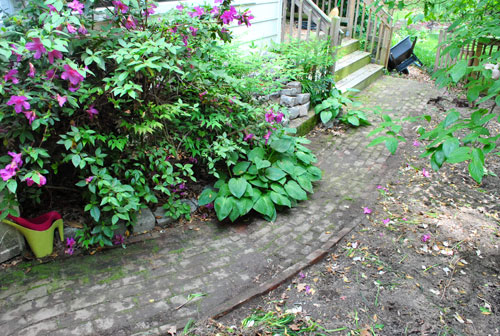
As Sherry mentioned yesterday, it came up pretty easily at first because the first half of them were just laid in sand. So I only had to find the edge of a brick with my shovel, give it a little pry and rows of brick would come loose at once… further luring me into that dangerous “this’ll be easy” mentality.
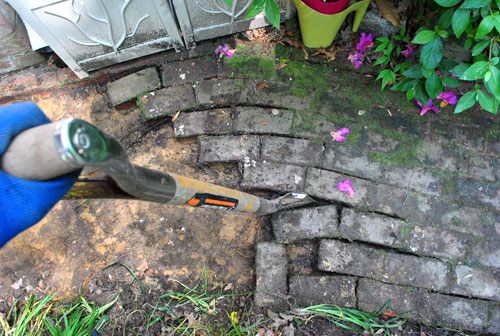
Then I hit a roadblock. And by hit I literally mean hit. And by roadblock I mean concrete. Suddenly I discovered that the second half of the bricks were set in some sort of mortar. It wasn’t that bad at first. It just took a couple of good whacks with my sledgehammer to get the bricks loose, but from there it was just as simple as prying them out with my shovel again.
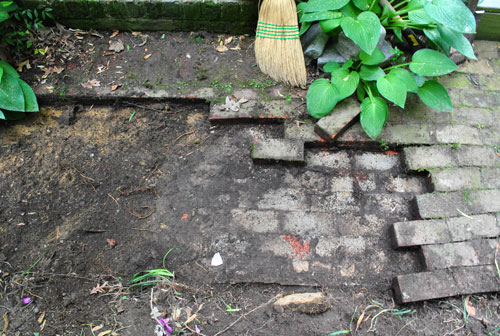
By the time I had removed all of the bricks – aka prying them all loose, knocking some with the sledgehammer and carrying them away by hand (to the carport, where I neatly stacked them for use in a later project) I was pretty darn exhausted. And I still had about ten feet of concrete that had to come out. In the words of the always hilarious Liz Lemon: nards.
With my energy gone, so was most of my confidence. I whined to Sherry that I’d probably need to rent the demolition hammer that helped me bust out the floor of our old bathroom (which Sherry then relayed to Katie B who she was jabbering with on the phone with while attempting to cut fabric in the hopes of making a birthday quilt for the sleeping bean). But knowing that driving to and spending money at the Home Depot Rental Center wasn’t necessarily the easier solution, I mustered enough strength to give the concrete a few good whacks with the ol’ sledgehammer.
Miraculously, it shattered.
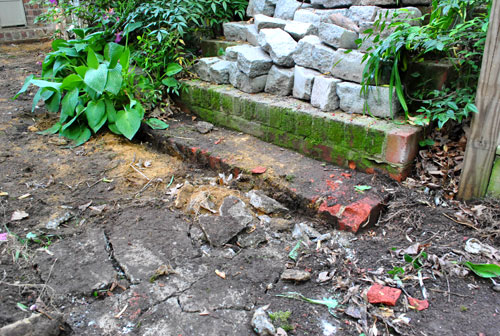
With that moment of good luck came another burst of energy, so I kept smashing away at it, making good progress for a while.
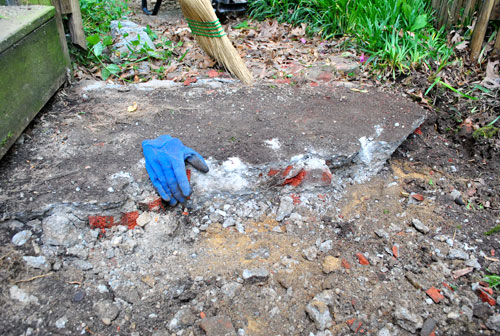
Then I started to notice that the concrete was getting thicker and thicker as I went. They must have used it to level out a much more dramatically sloped area beneath it. What had started off as easily-breakable inch-thick concrete was now about 6″ thick. Hence the creepy blue glove photo that Sherry shared yesterday:
As I later confessed to Sherry, to psych myself up / amuse myself I started to sling insults at the concrete as I swung away. I’m not very good at smack talk, so it quickly turned to weird geeky chants like “By the hammer of Thor!” (clearly I’ve been watching too many Thor commercials lately). Off in the distance I thought I caught a squirrel laughing at me. Glad to entertain the woodland creatures, I pressed on with my chanting and swinging. Either way it worked, and by the end of the day all of the concrete was out. Sherry snort-laughed at the insanity of my method, but hey, whatever works.
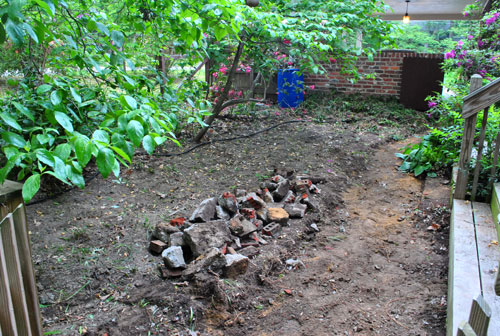
Okay, technically it was “out” but not removed. I saved the hauling of the shattered debris for the next day (right now it’s hidden in the back corner of our property behind some trees, although we might haul it to the dump a little later on – you know, when I have more energy).
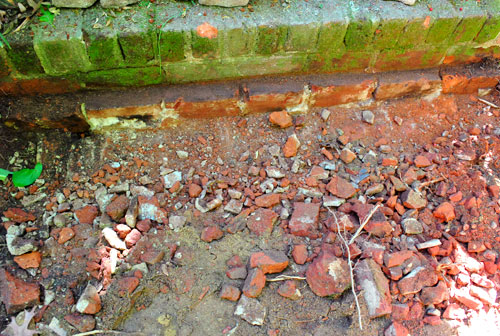
Sadly my sledgehammer slinging days were not over. The bottom step of that pesky old unusable brick staircase (next to the wooden steps that are now used) was about two inches too high so it too had to be busted up so as not to interfere with the perimeter of our paver patio. I’ll spare you the gritty details on this one, but let’s just say that my second less-exhausted day of sledgehammering meant that old brick looked like pebbles by the time I was done. That’s right, Thor worked it out:
With my proverbial slate officially clean (read: no more liriope and bricks), we could now more formally start laying the foundation for the patio. I’m following the instructions from this series of Lowe’s videos about recommended patio installation btw (along with the advice of some local experts who lay paver patios both commercially and residentially, who agreed with every step from the video), so this clip covers most of what was ahead of me (unfortunately, it involved more digging).
The next steps would require about $40 worth of new supplies, like wood stakes, line levels, nylon mason string and a hand tamper – along with some already owned items like gloves, a yard stick/ruler, scissors, a marker, and a shovel.
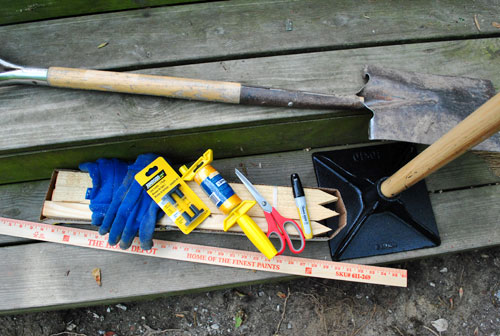
Fortunately I got a respite from all of my digging since the next task was staking out the patio area so I’d know how deep to dig in all areas. We had already marked the boundaries with our hose when it came to the desired perimeter (straight on most sides but gently curved on that back perimeter like our old patio was in our first house). So I drove in some wood stakes at key corners and turns (I learned I should drive them in deeply since I’d soon find myself digging out a lot of the dirt around them).
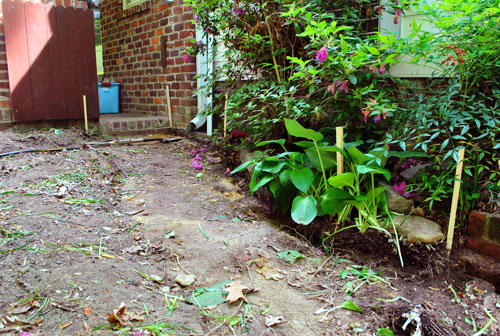
Next came marking things off with string. The key objective being to mark where the top of your pavers should eventually sit while making sure things are level. Well, actually making sure things slope gradually away from the house (to stave off any water-collecting-around-the-foundation-issues). So just as the video showed, I used my line level to tie the string between two stakes (and ensure that it was 100% level).
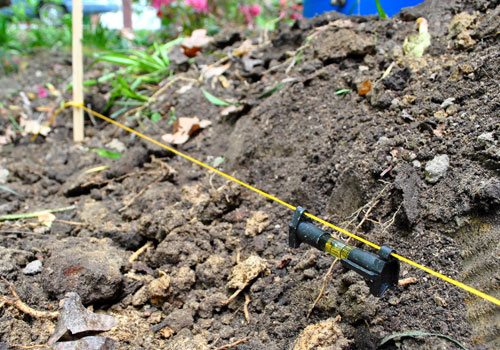
Then based on how far apart the stakes were (these were 6 feet) I marked off where I should lower my string to in order to meet the general rule mentioned in the video (that a patio should slope down one inch for every four feet). To save on string slash effort, I just moved my strings rather than tying on a second one.
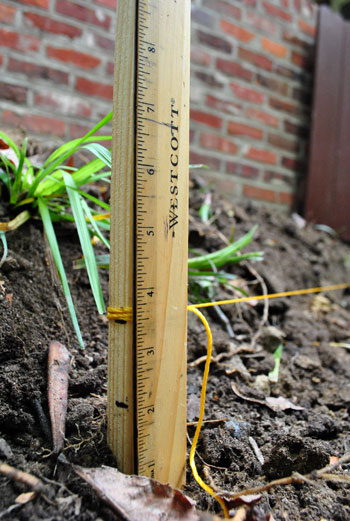
The whole string process took longer than I expected. The video fooled me into thinking it was a cinch because they were doing a square patio on a flat surface. I was doing a gently curved patio on an already sloped surface. Plus, I had pre-existing features that I had to line up with three of the four sides: the carport at the top, the deck stairs on the side and the fence at the bottom. And the area already sloped towards the house, so I was fighting the pre-existing terrain to create something that would later slope away from it.
But eventually I got all of my strings tied, my slopes going away from the house, and everything lined up the way it needed to be.
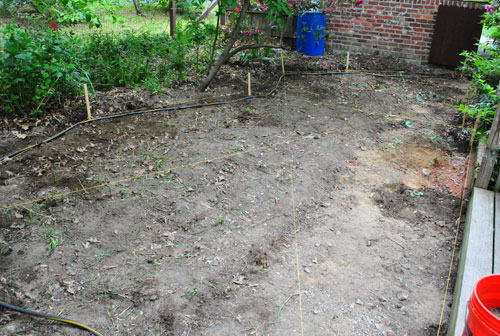
The video didn’t mention tying strings anywhere but the perimeter, but having seen Nicole’s DIY patio photos I opted to do some across the patio area too. This not only helped me check the diagonal slope as well as the perimeter slope, but also would give me some reference points across the middle while I was digging. After all, what good is a patio that’s perfect on the edges but bulges or sinks in the middle?
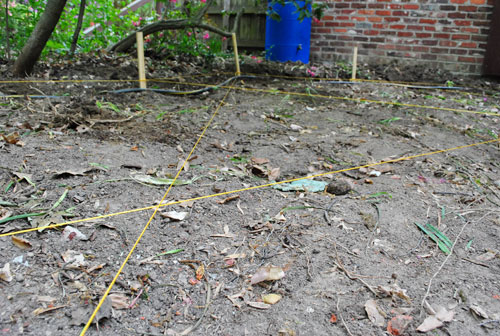
Oh, and if you don’t have a line level – you can always enlist a helpful chihuahua to double-check the slope of your lines.

Okay, clearly Burger isn’t smart enough to actually help with this project (besides peeing near my work area and licking my muddy face). He’s just trying to crush a bug with his neck in that photo. I recommend the line level (a two-pack was like $3) even though it’s far less amusing than a crazy bug-hunting chihuahua.
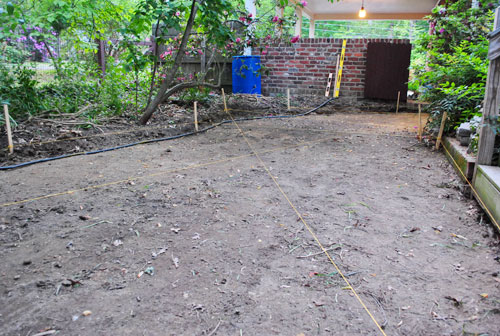
I have no “during” photos of the next part because it was basically a bunch of digging, measuring, digging, hauling dirt, digging, rubbing my aching back, digging, sitting down for water breaks, digging, begging for Sherry to bring me an insane number of granola bars for “fuel”, digging, barely working up the nerve to get up again, digging, checking things with a level, digging, cutting out roots, and yes – more digging. It took me one and half days (about six hours in total) to get the whole area nearly seven inches lower than my nylon strings (6 3/8″ to be exact, which leaves room for 3″ of gravel, 1″ of sand, and 2 3/8″ of paver to make everything nice and flush again). By the end, it looked like this (there’s kind of an archeological dig site vibe going on, right?):
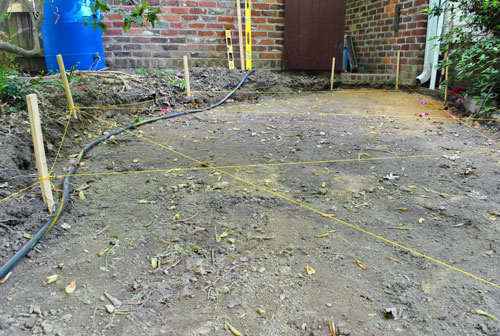
Oh, and when I was done digging I went over the whole thing one last time with a level to make sure I still had the right slope going on across the whole thing. After that, a vigorous round of tamping with the hand tamper ensued (yes, the word vigorous is the best I can do at making it sound like fun). It was not. I fully realize that renting a plate compactor would be the less laborious route, but frankly I’ve heard mixed reviews about how easy it is to use and I knew it would require removing all of my middle guide strings (which I consult so frequently that I’d never want to be without them for fear of a huge sunken spot in the middle of the patio that will collect water and debris for decades to come). Plus, what’s a little more manual labor at this point? My back didn’t exactly agree but after a few hours of serious tamping (and just one blister) the dirt was compacted within a centimeter of its life. And can I just tell you that it’s nice to put that step behind me?
My apologies if this post sounds a tad whiny. Just trying to keep it real as my lady likes to say. Fake Chipper John says: it was lots of good old fashioned sweaty fun. Keeping It Real John says: holy crap that was waaaay more exhausing than I expected, and it took waaaay longer than I thought it would. But it’s done and I’m psyched to have lived to tell the tale. Now we just have an insane amount of gravel and sand to layer into that leveled and tamped hole followed by some pavers. Although I’m sure I’m oversimlifying that step too. Haha. But to prove that I still have my sense of humor intact, I wanted to share the warning that came on the new wheelbarrow tire that I had to buy (our old one got punctured last year somehow at the old house).
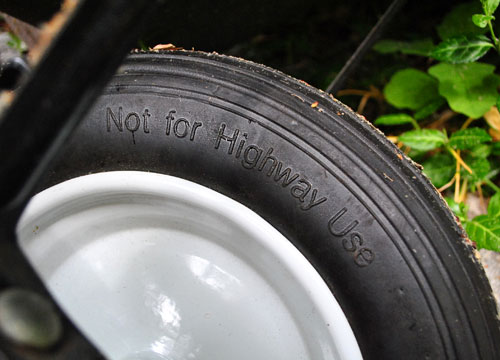
So if anyone had plans to take their wheelbarrow for a spin down I-95, you might want to work on a plan B.
And might I suggest that plan B involves helping me haul and level all of the gravel and sand that got delivered yesterday morning? Doesn’t hurt to ask, right? Oh well, I guess it’s time to put on my tough guy pants (my Thor pants?) and get back to work. More details soon…

Kristen @ Popcorn on the Stove says
This is so exciting! I love the picture of Burger helping check that the slope of the lines haha.
Cait @ Hernando House says
I love that picture, too! Too funny.
Also, phew thanks John! I was just thinking about taking my wheelbarrow for a spin down I-95, glad I read your warning! ;)
Cassie says
The chipper Cassie says, “Wow, looks great John! Super progress!” The real Cassie says, “Holy crap. That looks exhuasting and I’m sooo glad I didn’t have to do that!” LOL!
Amanda @ Our Humble A{Bowe}d says
Okay, at least you’ve made progress. The level area is definitely looking more patio-ish, so great work, John. Can’t wait to see what you do!
I’m really hoping to talk Ben into ripping up our uneven patio to pour a new concrete one. Our starting point isn’t as lovely as yours: http://ourhumbleabowed.wordpress.com/2011/05/03/back-yard-grievances/
ALittleBite says
Wow, that sounds like a LOT of work. Glad you came out of it alive!
Melody says
I am SOOO impressed! It looks amazing!
Shreya says
I’m constantly amazed at how the two you work so diligently and lovingly on your home!
Looking forward to seeing the rest of the DIY patio process.
Corrie says
John, I can’t tell you how incredibly helpful this post was! It was so great to see all your pictures and your methodology/explanation behind all your steps. I have to admit, this was more helpful than watching This Old House ;o)
We just moved into our first house 2 weeks ago, and knew going into it that we would be putting in a small patio at some point because we need to regrade the landscape away from our 88 yr old house. There are 2 narrow walkways that go from our driveway to our back door and completely slope toward the house. During a heavy rain last week we had about 2-3 inches of water sitting underneath our back door (we couldn’t even see our door mat!) which resulted in water seeping in the basement. Needless to say, looks like we will be putting that patio sooner than we thought! With us being in the early planning stages, I’m so glad to have you guys a few steps ahead to follow along. :o)
Georgia Rowe says
Im gonna have to take my wheelbarrow back to the shop now! damn
You have done an ace job there, just think of the new muscles you will have now! its good for us readers and even better for sherry! twit twoooooo ;) ha
Emily kidd says
I love the Thor thing! I totally do the same thing, well maybe not Thor, but Definatly bust out into a few song and a quick dance to keep my spirits up!
Heidi M. says
I just snort-laughed when you said Sherry snort-laughed. It’s contagious. Great job, John!
You da man says
I see a downspout that looks like it may empty out on to the patio, you may want to put a pipe under the patio to run that water away from the house and patio. Just a suggestion, this is my favorite project to date, great job and keep the pictures coming.
YoungHouseLove says
Thanks for the suggestion! We plan to ask a local pro about what he’d recommend before going any further! We definitely don’t want runoff drowning our poor patio whenever it rains…
xo,
s
CJ @ STC.com says
I definitely agree! I just went to a home inspection for my mom’s home she is purchasing, and our home inspector went into great detail about how important it is for downspouts to not empty near concrete/foundation, so I’m assuming it would be just as important not to have it empty out on to your patio! From what I took from it, it seems like the biggest scare is during the winter when cold rainwater can freeze up and expand your foundation area. That would be awful to see after all of the work you guys have done!
And about the plate compactor — John, you could have totally rocked it easily! I work at a True Value in the Just Ask Rental department and I’ll admit, I’m the first to worry about using a larger piece of equipment… but a plate compactor (at least the brand we rent, which is Bomag) is by far the easiest piece of equipment to run! I have to test and service them each time a customer rents them out. They are VERY heavy but not as hard as they look to use! Just be careful with the throttle :)
I LOVE that you guys are doing this project. I can’t wait to see it finished! Keep up the great work!
Devon @ Green House, Good Life says
That’s always how it works, huh? These things are never less exhausting or take less time than expected….
Elizabeth says
Shew! I am exhausted and all I did was read about all the work! Great job and good luck with the rest of the job! Thor would be proud…
Rebecca @ the lil house that could says
We just had our stamped concrete patio poured yesterday (YAY!) and god bless you John. I watched them do this whole leveling and digging out process and it looked insanely tedious. From the where our patio meets our house to the far edge there is an 8 inch drop. This is my first patio experience ever, so until yesterday I had no clue what it entailed! Now I am well aware of the whole stringey-leveling process!
Elisa @ What the Vita says
Wow I got tired after reading this! Yard work is ALWAYS backbreaking. My back still hurts just thinking about the two days we spent installing our sod in our backyard…:)
I am so thrilled you guys are working on this because we’ve been wanting to tackle our patio but haven’t… this will be a BIGGGG help!!
Ellen says
That video tutorial is great! I’m sending Kelly to them when he decides he wants to create a patio in our backyard.
Brenna says
For some reason, yard projects are always way more involved than you think they should be. It’s like, I want a patio, so I’ll lay some pavers. Why can’t it just be that simple?
My weekends are currently spent installing new rock garden beds and I feel your (back) pain. For what it’s worth, you’re doing a great job and it looks fantastic.
Erin says
i was thinking the same thing reading this post! As a novice homeowner, i had NO IDEA that this much work would go into creating a patio space. Thank you for sharing your project and very informative post with us!
PS – The stakes and string are perfect for a game of chinese jump rope. I wonder if John played a few games in between Thor imitations :)
leah says
That is going to look amazing! I am pretty jealous actually, I really would love a larger patio. Can’t wait to see how it turns out.
Larissa says
i helped my boyfriend with a small area of pavers,and being the one digging, i say good job it is very hard work!
Sarah says
Having just broken ground for our new vegetable plot (digging, hauling soil/manure, digging some more, turning over soil, hoeing) you have my sympathy. I’m tired, and I didn’t even have to level/measure/demolish anything. House and garden projects always look easier in the videos…
Barb says
John:
Just want you to know that I kind of giggled through this post as we have “been there” also. I say we….yet my husband did the hard work and I did the “Sherry support” role. But….YES, it cost more than we thought, or let me say, WANTED… and it took way more time than we planned.
But you have got to do it right the first time or you will be repairing it constantly.
So sit back, pop a few ALEVE…and “get her done!!!” You will love it in the end.
Keep posting…we’ll keep giggling… and once again…”BEEN THERE…DONE THAT!!!” I might add……..more than once!
Carry On!
Smiling and giggling because I know you hurt.
B.
C Redmond says
Good work, Thor! That is a ton of back-breaking work- glad that part is done for you, although you may need to get yourself some industrial (read: working girl quality) knee pads for the laying of the stone. Yikes, what a big job- you will be so proud when you’ve finished your patio, though.
I have to admit to liking the original brick path and the ‘stairway to nowhere’- I love the moss growing on it. And the flowering shrubs look lovely- spring is dragging it’s heels here in Ontario~sigh~
But to create a beautiful, more usual space, I can see why you are doing all this back-breaking work…. well almost- if I had to do this myself, I’d have to learn to make the best of it. Best of luck with the rest of your project.
Nette @ This Dusty House says
I think a little whining is an important part of the whole process!
This post is really making me look forward to the time when we finally get around to demoing the concrete pad the previous owners of our house thought was a good idea for a front yard.
Ashleigh says
This post brings back too many bad memories. Due to bad advice, we dug down, carted the dirt to other areas of our yard, then brought it back since we had to build a retaining wall. My husband and I completely understand your back pain! It’s so worth it though in the long run…more so than paying someone to do it.
Sarah says
Go John, go! It’ll all be worth it this summer when you kick back on your new patio with a beer (lemonade?).
YoungHouseLove says
Haha, you know him too well. No beer for John but lots and lots of lemonade, sweet tea, and soda will be enjoyed I’m sure.
xo,
s
shannon says
Wow. It’s too bad the supplies cost so much given ALL that work you have to do! Very impressive, though.
Hang on to your wooden stakes, string, and line levels–you’ll need them for building your fence! Always nice to know things can be reused.
LOVE that photo of Burger. Priceless!
Rachel says
you guys rock!! i love your blog!
Beatrice says
It’s INSANE that you are doing this alone, John.
Tricia says
Poor John…i know exactly how you feel…lol!!
i decided that we would do a similar project 3 years ago over the memorial day long weekend. 2 days for the project and 2 to rest and relax…hahaha!! try 6 days – that weekend and the next!! i had blisters for days and every inch of my body hurt!! good luck with the rest of the project! can’t wait to see the finished results!
Dianne says
My daughter was taking out her patio and found that swinging the sledgehammer just to hard for her…she went and got a bowling ball and started dropping it..worked like a charm…
YoungHouseLove says
Hilarious. Whatever works!
xo,
s
Robin @ our semi organic life says
As Liz Lemon would say: Narf.
Wow I kept thinking the whole area would be smaller in my mind but I bet after all that work you don’t think so! What’d you do with all the dug up soil?
YoungHouseLove says
A lot of it got offset to parts of the ground that were too low (since it sloped towards the house John basically moved a lot of dirt to change the slope to be away from the house and hauled the excess dirt to the back corner of our lot (it’s wooded so there’s a low pile of soil hidden back there for future gardening projects).
xo,
s
Justine says
This post is a great demonstration that no matter how daunting thing look if you just start doing them they will eventually get done. You’ve inspired me to take on a few projects that I’ve been a little “scared” of….
Robin says
All of the above accolades plus simply, “You’re awesome!” That’s a lot of work! I hope that every minute you spend building that patio is rewarded ten thousandfold in your enjoyment of it.
Brandy says
So, when are you going to take a drive down the I-95 to fix up my back yard? I’ll make some cookies….
YoungHouseLove says
Haha, we’ll be there in about five days judging by our wheelbarrow’s top speed.
xo,
s
susan says
Go John, go John, go John……susan
Reenie says
WOW!!! You the man John!!! Love the pic of Burger :)
Elizabeth says
Holy crap thats a lot of work! Nards….
Maggie says
glad to see you “tied one on!” haha. string humor. good luck John!
Nina says
Looking good!
Your wheelbarrow comment at the end made me think to share a simple solution I found to flat wheelbarrow tires. I found an old wheelbarrow in the neighbor’s trash (yes, I dumpster dove) last week and it was in perfectly usable condition except for a flat tire with a lot of cracks in it. Fortunately, my dad helped me fill the tire with foam so now it’s good as new, solid and never requires airing up. The biggest plus was that it was totally free (not that a new wheel would have been very expensive, but still)!
YoungHouseLove says
Wow-what a smart fix! Love it.
xo,
s
cafenoHut says
I am waiting the result excitedly. I am sure that it will be gorgeous.
Van says
That’s a lot of work, but you’re doing great!
still in time…
Jennifer B. says
I have to say, the parts about Thor made me laugh out loud! My husband would be doing the exact same thing! hahaha.Great job so far!
Jennifer B.
Stephanie says
The photo of Burger is killing me. LIMBO!
CandiL says
I was thinking about making a patio along the back side of my house(single mom of a 5yo and 2yo)DIY style…I think I’ve changed my mind…until the boy’s are big enough to do it for me anyway!! I didn’t think it was quite that huge of a deal!! Thanks for this post!!
I can’t wait to see it when it’s done…it’s going to look amazing!! And then I will be jealous!!
Christa M says
So do you think you’ll be putting in a patio on the other side between the original house and the addition? :)
It’s coming along nicely and I look forward to (as I am sure you do too even more so than me) the finished product!
Since the carport is right off of the kitchen, do you think you’ll use that half wall as a buffet for the bean’s party? Is it even wide enough? I think it would be a great use of that space if it’s depth is wide enough and it’s not too tall for the shorties.
YoungHouseLove says
As for the other side of the house, we don’t think we’ll do more pavers over there but you never know (we might have a ton of them leftover or something). We do have a lot of excess brick along with plans of tackling a deck at some point though, so who knows where we’ll end up. Should be fun once we put this patio project to bed. As for the carport half-wall, it’s only as deep as a brick and a bit too tall for a buffet but we love that it’s there providing some nice privacy from the street.
xo,
s
Kim says
We have plans to re-lay a badly laid brick patio in our backyard. Now I know why it wasn’t perfect-this looks incredibly difficult! I think we might hire someone to do this. We are in our 40’s-work like this can now have days/weeks of back repercussions!
Jen A says
I have found it rather amusing that this post, being John’s most recent, is about attacking concrete, using a sledgehammer, and hauling dirt. Sherry’s last post was about painting four finials white.
John, I’d say you drew the short straw! :o)
YoungHouseLove says
Haha, totally. Thor gets all the hard stuff.
xo,
s
Rachael says
the hubs and I are wanting to do exactly this… so i forwarded him the post.. his response “Holy crap… we’re paying someone!” lol Thanks for YOUR hard work John, you’ve saved me!!! :-D
Lori @ Richmond, BABY! says
Great work! It looks professional! I know you’ll feel great satisfaction each time you use the patio in the future. Be sure to have a large margarita out there when all is said and done!
Erin says
I admire your efforts! I once spent every weekend digging out our side yard when we lived in DC with the intention of turning it into a lively brick patio and retaining wall….well, I got the digging out done, and then realized that I am nowhere near savvy enough to build a retaining wall, so I dug into my pockets and paid a pro to finish the job up for me – fo rway nmore than I had hope to spend, but it was DONE in 3 days! Here’s a link to one of my blog posts that shows the finished produch – wish I had taken a before pic! http://heidishappyhome.blogspot.com/2010/12/little-bit-of-nostalgiapart-1.html
YoungHouseLove says
Wow that looks amazing! What a nice place to relax.
xo,
s