Digging is right up there with the Kardashians for me. As in, I’m getting tired of it (What? I’m a guy – we don’t like those shows). I knew there’d be a lot of it involved in DIYing our patio (digging, not Kardashians), but I think I got a false sense of confidence after all of that liriope came up relatively easily last week.
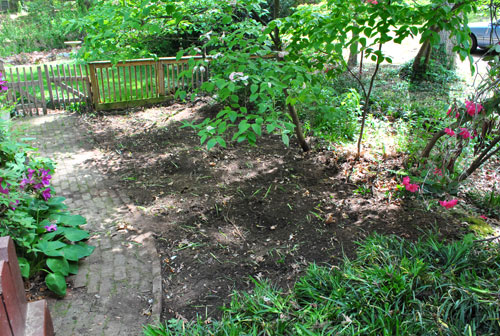
Next up was removing the brick path which, based on the looseness of some bricks on the edge, I said to Sherry “shouldn’t be that bad.” At least I can pinpoint the very moment I jinxed myself. Do you hear that? It’s the sound of the universe laughing at me.
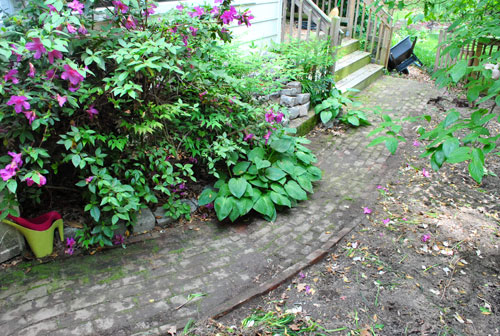
As Sherry mentioned yesterday, it came up pretty easily at first because the first half of them were just laid in sand. So I only had to find the edge of a brick with my shovel, give it a little pry and rows of brick would come loose at once… further luring me into that dangerous “this’ll be easy” mentality.
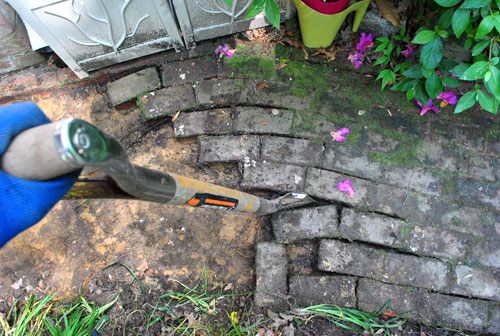
Then I hit a roadblock. And by hit I literally mean hit. And by roadblock I mean concrete. Suddenly I discovered that the second half of the bricks were set in some sort of mortar. It wasn’t that bad at first. It just took a couple of good whacks with my sledgehammer to get the bricks loose, but from there it was just as simple as prying them out with my shovel again.
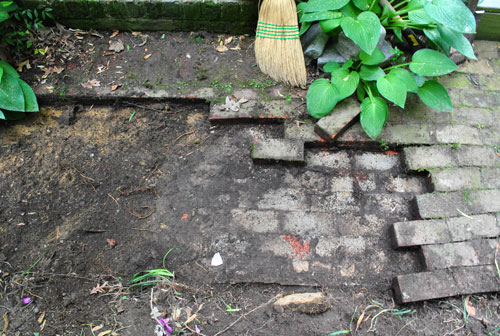
By the time I had removed all of the bricks – aka prying them all loose, knocking some with the sledgehammer and carrying them away by hand (to the carport, where I neatly stacked them for use in a later project) I was pretty darn exhausted. And I still had about ten feet of concrete that had to come out. In the words of the always hilarious Liz Lemon: nards.
With my energy gone, so was most of my confidence. I whined to Sherry that I’d probably need to rent the demolition hammer that helped me bust out the floor of our old bathroom (which Sherry then relayed to Katie B who she was jabbering with on the phone with while attempting to cut fabric in the hopes of making a birthday quilt for the sleeping bean). But knowing that driving to and spending money at the Home Depot Rental Center wasn’t necessarily the easier solution, I mustered enough strength to give the concrete a few good whacks with the ol’ sledgehammer.
Miraculously, it shattered.
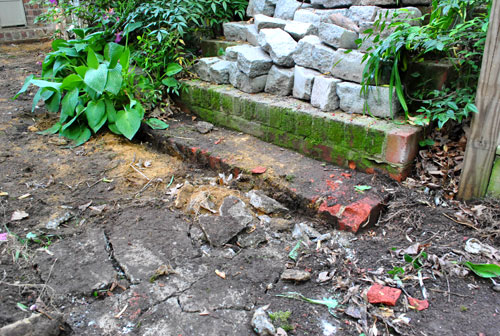
With that moment of good luck came another burst of energy, so I kept smashing away at it, making good progress for a while.
Then I started to notice that the concrete was getting thicker and thicker as I went. They must have used it to level out a much more dramatically sloped area beneath it. What had started off as easily-breakable inch-thick concrete was now about 6″ thick. Hence the creepy blue glove photo that Sherry shared yesterday:
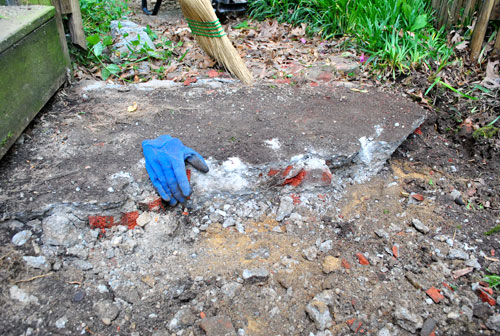
As I later confessed to Sherry, to psych myself up / amuse myself I started to sling insults at the concrete as I swung away. I’m not very good at smack talk, so it quickly turned to weird geeky chants like “By the hammer of Thor!” (clearly I’ve been watching too many Thor commercials lately). Off in the distance I thought I caught a squirrel laughing at me. Glad to entertain the woodland creatures, I pressed on with my chanting and swinging. Either way it worked, and by the end of the day all of the concrete was out. Sherry snort-laughed at the insanity of my method, but hey, whatever works.
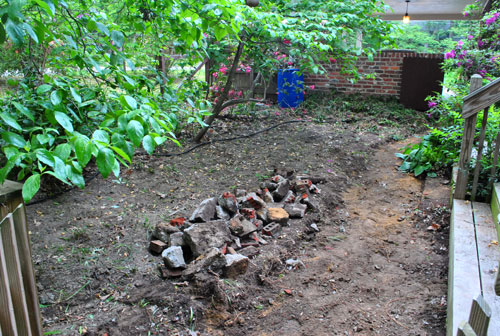
Okay, technically it was “out” but not removed. I saved the hauling of the shattered debris for the next day (right now it’s hidden in the back corner of our property behind some trees, although we might haul it to the dump a little later on – you know, when I have more energy).
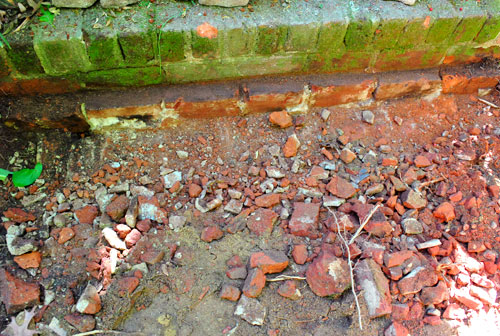
Sadly my sledgehammer slinging days were not over. The bottom step of that pesky old unusable brick staircase (next to the wooden steps that are now used) was about two inches too high so it too had to be busted up so as not to interfere with the perimeter of our paver patio. I’ll spare you the gritty details on this one, but let’s just say that my second less-exhausted day of sledgehammering meant that old brick looked like pebbles by the time I was done. That’s right, Thor worked it out:
With my proverbial slate officially clean (read: no more liriope and bricks), we could now more formally start laying the foundation for the patio. I’m following the instructions from this series of Lowe’s videos about recommended patio installation btw (along with the advice of some local experts who lay paver patios both commercially and residentially, who agreed with every step from the video), so this clip covers most of what was ahead of me (unfortunately, it involved more digging).
The next steps would require about $40 worth of new supplies, like wood stakes, line levels, nylon mason string and a hand tamper – along with some already owned items like gloves, a yard stick/ruler, scissors, a marker, and a shovel.
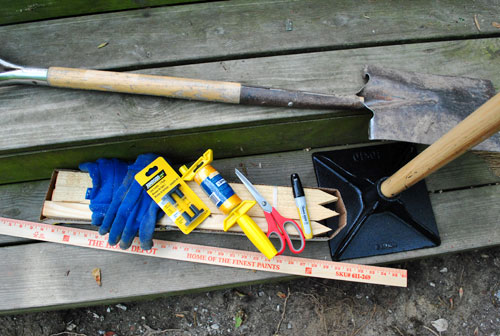
Fortunately I got a respite from all of my digging since the next task was staking out the patio area so I’d know how deep to dig in all areas. We had already marked the boundaries with our hose when it came to the desired perimeter (straight on most sides but gently curved on that back perimeter like our old patio was in our first house). So I drove in some wood stakes at key corners and turns (I learned I should drive them in deeply since I’d soon find myself digging out a lot of the dirt around them).
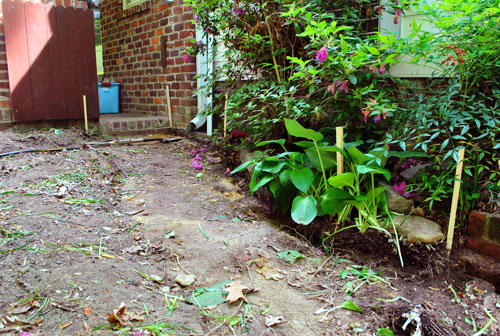
Next came marking things off with string. The key objective being to mark where the top of your pavers should eventually sit while making sure things are level. Well, actually making sure things slope gradually away from the house (to stave off any water-collecting-around-the-foundation-issues). So just as the video showed, I used my line level to tie the string between two stakes (and ensure that it was 100% level).
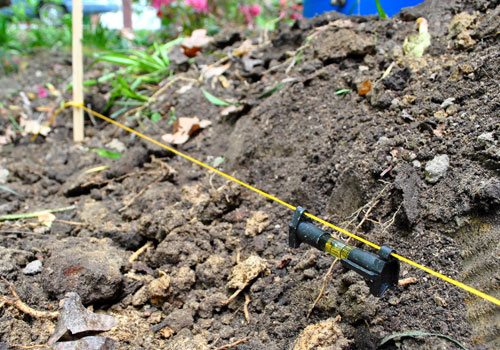
Then based on how far apart the stakes were (these were 6 feet) I marked off where I should lower my string to in order to meet the general rule mentioned in the video (that a patio should slope down one inch for every four feet). To save on string slash effort, I just moved my strings rather than tying on a second one.
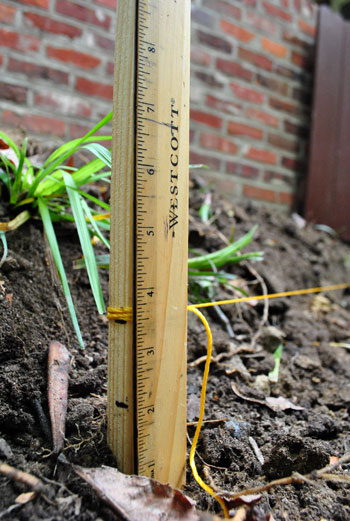
The whole string process took longer than I expected. The video fooled me into thinking it was a cinch because they were doing a square patio on a flat surface. I was doing a gently curved patio on an already sloped surface. Plus, I had pre-existing features that I had to line up with three of the four sides: the carport at the top, the deck stairs on the side and the fence at the bottom. And the area already sloped towards the house, so I was fighting the pre-existing terrain to create something that would later slope away from it.
But eventually I got all of my strings tied, my slopes going away from the house, and everything lined up the way it needed to be.
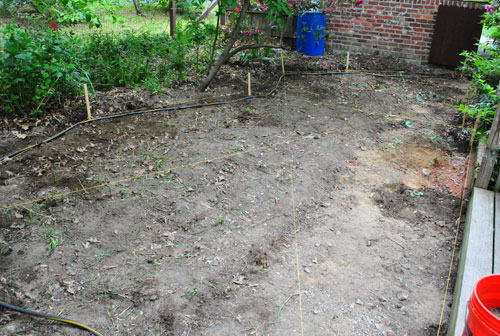
The video didn’t mention tying strings anywhere but the perimeter, but having seen Nicole’s DIY patio photos I opted to do some across the patio area too. This not only helped me check the diagonal slope as well as the perimeter slope, but also would give me some reference points across the middle while I was digging. After all, what good is a patio that’s perfect on the edges but bulges or sinks in the middle?
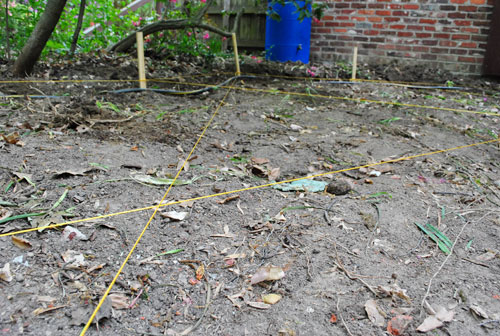
Oh, and if you don’t have a line level – you can always enlist a helpful chihuahua to double-check the slope of your lines.

Okay, clearly Burger isn’t smart enough to actually help with this project (besides peeing near my work area and licking my muddy face). He’s just trying to crush a bug with his neck in that photo. I recommend the line level (a two-pack was like $3) even though it’s far less amusing than a crazy bug-hunting chihuahua.
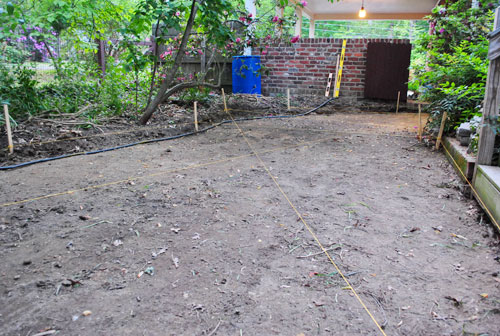
I have no “during” photos of the next part because it was basically a bunch of digging, measuring, digging, hauling dirt, digging, rubbing my aching back, digging, sitting down for water breaks, digging, begging for Sherry to bring me an insane number of granola bars for “fuel”, digging, barely working up the nerve to get up again, digging, checking things with a level, digging, cutting out roots, and yes – more digging. It took me one and half days (about six hours in total) to get the whole area nearly seven inches lower than my nylon strings (6 3/8″ to be exact, which leaves room for 3″ of gravel, 1″ of sand, and 2 3/8″ of paver to make everything nice and flush again). By the end, it looked like this (there’s kind of an archeological dig site vibe going on, right?):
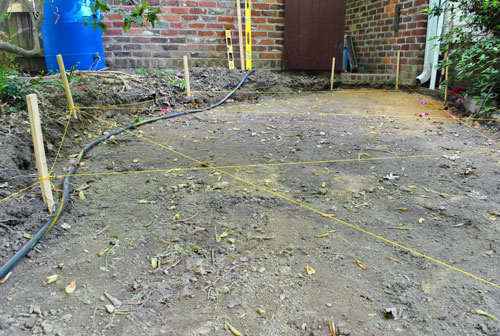
Oh, and when I was done digging I went over the whole thing one last time with a level to make sure I still had the right slope going on across the whole thing. After that, a vigorous round of tamping with the hand tamper ensued (yes, the word vigorous is the best I can do at making it sound like fun). It was not. I fully realize that renting a plate compactor would be the less laborious route, but frankly I’ve heard mixed reviews about how easy it is to use and I knew it would require removing all of my middle guide strings (which I consult so frequently that I’d never want to be without them for fear of a huge sunken spot in the middle of the patio that will collect water and debris for decades to come). Plus, what’s a little more manual labor at this point? My back didn’t exactly agree but after a few hours of serious tamping (and just one blister) the dirt was compacted within a centimeter of its life. And can I just tell you that it’s nice to put that step behind me?
My apologies if this post sounds a tad whiny. Just trying to keep it real as my lady likes to say. Fake Chipper John says: it was lots of good old fashioned sweaty fun. Keeping It Real John says: holy crap that was waaaay more exhausing than I expected, and it took waaaay longer than I thought it would. But it’s done and I’m psyched to have lived to tell the tale. Now we just have an insane amount of gravel and sand to layer into that leveled and tamped hole followed by some pavers. Although I’m sure I’m oversimlifying that step too. Haha. But to prove that I still have my sense of humor intact, I wanted to share the warning that came on the new wheelbarrow tire that I had to buy (our old one got punctured last year somehow at the old house).
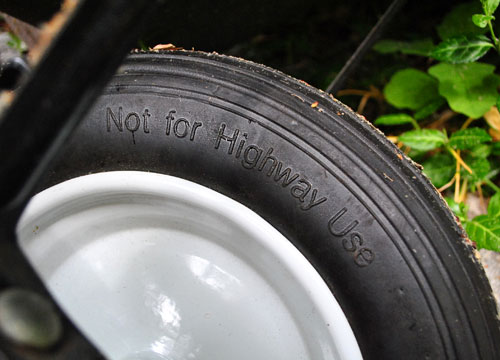
So if anyone had plans to take their wheelbarrow for a spin down I-95, you might want to work on a plan B.
And might I suggest that plan B involves helping me haul and level all of the gravel and sand that got delivered yesterday morning? Doesn’t hurt to ask, right? Oh well, I guess it’s time to put on my tough guy pants (my Thor pants?) and get back to work. More details soon…

Wom-mom Ethne says
My back aches for you. Can’t wait to see it all!
Ashley @ Spite or Flight says
We’ve been talking about doing something similar in our backyard… But now I’m kind of afraid, haha. I bet it’s going to look amazing when you guys are finished with it — good job!
Amy L. says
I don’t think it came off as whiny, but I do think I felt my back start to get sore the more I read. :) My husband laid a patio 6 summers ago. All of the dirt he dug out lived under a tree on the side of our house for 12 months until we posted free fill on craigslist (DUH for us not doing it sooner). The day he laid the bricks had to be the hottest summer day we have ever had since we moved out to WI, then we had some sort of weird hail storm. All totally worth it though, we love our outdoor dining room and it’s a great memory.
Jess says
my advice? rent a bobcat. makes the gravel and sand part much easier on the back. kudos on the progress so far. my husband and i put a paver patio in our back yard. Let’s just say we started in july and it wasn’t finished until november. they make it look soooo easy in all of the videos, but it is a huge undertaking! good luck!
chrissielynn says
we’ve been toying with a patio in our backyard for two years now, i keep telling my husband “how easy it will be” after watching video tutorials, but now you’ve let us in on the reality of it… i don’t think i’ll show him this post;)
great job and thanks for the honesty… i’m sure it’s going to look fabulous!
heather says
After reading that – my back hurts for you, Thor. That’s some serious beating.
Sara B says
I like these reality posts. It’s good to hear how hard it really was. :)
Good work!
Kim @ girlevolving says
Seriously impressive! You deserve all the granola bars!
Jannell says
Hey, here’s a little tip I learned from the architect I used to work for about laying out patios/foundations, etc. Instead of using strings/line level and moving them around to get a level line you do this:
* Get two 2-3′ sections of clear hose and attach them to either ends of a garden hose. (hardware stores sell little clamps for the ends so it can screw into the hose end)
* Then you fill the hose up with water until there is some visible in both clear ends.
* attach one clear end to one of the stakes, then hold the other end next to it parallel and adjust until the water lines match up- mark that line on each tube.
* now work your way around the stakes, holding the clear hose to it and adjusting until the water is at the line you marked- it’s level, so mark it on the stake.
* Once all the stakes are marked, you have a level base line to work down from, so it’s easy to calc. the slope from one end to the other and just adjust how much you measure down. Then you can quickly tie strings on as guides.
We used this method when we regraded our lawn, driveway and patio- a total time saver cause you don’t have to keep running back and forth to check the line level! One tip to keep in mind though- hold your thumb over the end of the hose as your walking around, otherwise you’re liking to send the water shooting out the other end and you’ll have to start over!
YoungHouseLove says
That’s clever! I’ve never heard of that! Thanks for sharing.
xo,
s
Megan says
Clara had better be thinking of an equally awesome Father’s Day gift since you are working so hard to get that patio done for her party! (*Hint Hint*) :)
Anne says
We put in a paver walkway and patio last summer and let me tell you…bravo for attempting to do this in such a short amount of time. I am sure you will succeed. Ours, however, took almost 2 months due to very poor planning and several issues. Plus we were doing it in 90 degree heat. It was awful but I am so happy we did it.
Just a few tips. Not sure if I missed this in the post but you might want to do a guide line that is square to your other patio or fence. That way you don’t lay a ton of bricks and realize you are going at a crazy diagonal. Also it is good to start laying in the middle, kind of like tile.
Another thing. I assume you will be putting sand in between the pavers to set them. If so, keep some extra sand because it will settle over time. We are having to put more sand on ours this spring because some has completely washed away.
I hope this helps and good luck! Can’t wait to see the result!
Amanda @ Heart Tree Home says
Wow, John. Kudos to you.
We are having a paver patio put in as we speak, and there have been 4 guys working for 3 days straight so far with huge machines and everythinng. We’d love to have DIY’ed, but we have 3 doorwalls on opposite sides of the house which are ~4 ft off the ground… That’s a little out of our skillset :-p
You will enjoy it so much more though now that you built it with your own hands!
Melissa @ HOUSEography says
Great work you guys. That is a crazy amount of work. At leas the paver laying process is easier than stone because you have no cutting, matching, etc. Can’t wait to see the finished product!
Laura says
You guys are amazing, and I try to check in once a day during the week, though rarely comment. This patio post has to be my favorite to date. Thanks, Thor (:O) for the stepping up and doing the hard work. I bet I’m not the only one who loved this post.
Looks great so far!
Hugs from still-really-cold-Poland
~Laura
Stephanie Phillips says
John, this was a funny read! And we were totally laughing WITH you, not AT you… ;)
I saw the buffet suggestion and I think you should DIY a wooden bar that can be set over the 1/2 wall to use for parties! That would be awesome!
YoungHouseLove says
That would be really fun! Unfortunately it’s a bit too high we think, but we’re going to go stand out there to see. Here’s hoping I grew last night!
xo,
s
Sarah says
Major props to you, John, for all that hard work! When I did my patio, I was soooo glad I had a plate compactor. It was so easy after all that manual digging! A little encouragement for you: I found the gravel and sand step to be so much easier compared to the digging and leveling ground step, even though it’s still a little hard on the ol’ back. The pavers were the most fun… probably because I enjoy patterns. For me, the patio project had some of the highest satisfaction levels of any home work I’ve done! Keep it up! It’ll be so worth it in the end!
YoungHouseLove says
Just read that aloud to John. And he’s smiling. Yay!
xo,
s
courtney says
i hear your pain. my hubs just finished our pation {have not blogged it yet but it’s coming} and he was OVER IT by the time he finished digging, tamping, laying stone….but he is in love with his own work now. hang in there.
Amanda- Hip House Girl says
I can relate! I had an area that was sloped the wrong way too, so it was a lot of moving dirt from point A to point B. Unfortunately when I finished I somehow had one corner that was too low (I know because I set my metal garden shed on it) but as it was almost winter and I was SICK of that project, I just shoved an extra brick under there for now to make the shed square. Ahh, my half-A ways. I’ll fix it this summer I promise!
Your patio is going to look soooo awesome. It’s funny how much work a photo of a flat, level (or appropriately sloped) area of dirt represents.
Paula W says
A great reminder of why landscapers are expensive! Looking forward to the end result though!
Janet says
haha Thor pants! Love it! :)
Lynette says
Who needs a level when you have a Burger? Love that pic of him! What a great “helper”.
Can’t wait to see the finished patio….
Brittany says
My husband is not as interested as I am in all the house-related stuff, but I called and read him your ‘hammer of Thor’ comment and he cracked up. He said you sound like an okay guy, which is really saying something. He’s not easily superhero impressed. : )
Anne @its a Baltimore Life says
Oh I so do not envy yall at all! We undertook the same project almost two years ago in our backyard. After getting quotes to build a paver patio off our deck for over $10K we decided to do it ourselves. 2009 happened to be a very rainy and wet spring/summer and we both work full time so it took us about 5 months of steady weekend work. It was the hardest, backbreaking, most frustrating project we have done. We tried to use the string and level method but our patio was over 400 square feet and it just wasnt working. In the end we ended up leveling and tamping in sections kinda like when you are working with concrete. I have to say we love our patio but even two years has not healed all that pain…it was hard!!
GOOD LUCK!!!
Kate says
Please tell me there was cursing while he was doing this. Even “keeping it real John” sounds too positive. If I was doing this project, I’m sure a few curse words would come out, and I know I’d have to tell my husband to keep it quiet out of fear of the neighbors hearing his cursing. Haha.
Such hard work, but it’ll look sooo nice!
YoungHouseLove says
There was muttering. Lots of under the breath stuff. I couldn’t exactly make out any four letter words but I would bet money they were in there. Haha.
xo,
s
Katy M says
After such a fantastic detailed post on the patio I feel silly asking, but can you tell me how you got the tire replaced on your wheelbarrow? Ours is flat and I am at a loss as to who could replace the tire. A local tire shop?
YoungHouseLove says
We noticed they sold wheelbarrow wheels of a few sizes at Home Depot so I brought in my old one and matched it up to a new one that would fit.
-John
Lauren says
Sherry, You married right, my friend.
YoungHouseLove says
I thank my lucky stars for my own personal Thor every day.
xo,
s
Wrenaria says
Aw, Sherry has her very own Thor. I’m impressed John did all this without a bit of help. Amazing.
Looking forward to the end result. (Though probably not as much as you are!)
Susan says
I’m exhausted just reading this! Wow, what a lot of work! It’s gonna look great, though!
Ashley says
My other half & I just tackled a 9×8 patio on Monday. I know that sounds tiny compared to yours, but my arms are still sore from all of the digging, pulling roots, leveling, etc.! His house is an old farmhouse so we wanted a simple & basic patio, and boy were we grateful when we started the job! He will be so impressed when I show him the work you’re doing. It is going to look GREAT, and kudos to John!
Rebecca says
Now you know you’ll never kill anybody. It’s too much work to bury the body.
YoungHouseLove says
Seriously!
xo,
s
Jennifer C. says
John you are the patio DIY KING!
Jessica says
Good luck with the remainder of the patio process. we put in a 12 x 15 patio 2 summers ago and it was way more work then we ever envisioned. It is so rewarding once it is completed – and this summer it will have a new purpose – holding our 7-month-old’s baby pool! Cant wait to see the finished photos!
Amber says
First off, the Thor comment literally made me LOL. Secondly, we have just bought a new house and plan to do the patio ourselves… I’ll definitely be showing my husband your posts to see if he’s up to it!
Thanks for sharing, as always :)
Jen @ The Decor Scene says
Awesome job John!!!! But since we are keeping it real, I’m so glad we hired someone to do ours. LOL! Just sayin’. ;) But in the end you guys are going to love this patio and enjoy many of memories out there. Have a nice cold beer (or whatever you might drink) John. Can’t wait to see it finished. It’s going to look amazing!!!
sarah says
I’m a girl and I do my very best to pretend the trashy Kardashians don’t exist.
LOVE the no-highway warning. Hilarious.
Jen G. says
Good lord, I’m exhausted just reading this! Can’t wait to see what it looks like in the end (and glad I’m not doing any of this work!).
Ashley @ DesignBuildLove.co says
looks like tons of work, but it’s going to look beautiful! Go John!!! :) PS- that picture of Burger trying to crush a bug with his neck is hilarious!!! At first, I just thought he was being all crafty, and spy-like trying to “weave” he’s way through the laser beams (aka- twine)! :)
Keep up the hard work!
Chelsea says
Gosh! It seems like to so much hard work, I’m sure it will pay off though. I also don’t think I could ever talk my husband into doing any of it!
Amanda Wells says
I have to admit, that doesn’t look fun at all… yikes.
http://www.amandadovewells.com/?p=364
Lonely Wife Project says
Wow! Your DIY work never ceases to amaze me.
Rhonda says
Oh yeah, I can dig it!
Do you know the equation for determining Actual Project Duration (APD) based on Estimated Project Duration (EPD)?
Double the EPD and up the unit by one. So, if EPD = 1 hour, then APD = 2 days. EPD = 4 weeks; APD = 8 months. Etc.
That means your EPD of 2 days would be APD of 4 weeks.
Yikes! The good news is that, by this equation, it sounds like you’re way ahead of schedule – congratulations!
(Project Time Estimation courtesy of my FIL, who was a man of many projects.)
Comtemplating my own backyard project. I’d rather read about yours. :)
YoungHouseLove says
Haha, hilarious.
xo,
s
Gracie says
That’s really funny!! Rhonda should get the comment of the day award!
YoungHouseLove says
Done! Comment of the day has hereby been awarded to Rhonda.
xo,
s
Sara says
Looks awesome! Had to laugh at the last pic. Growing up, my family had a very long (~.25 mile) driveway, and my mom used to tie the garbage can to the back of the car to take it to the road for collection. One day she forgot and headed down the road at 50 mph with the big green garbage can tied to the back!
Briel K. says
Just think John, with all this hard work you’re doing you don’t need to actually work out while you are doing this project. All the hauling and digging are work out enough! I think Sherry may owe you some back massages as well! :) haha
caitlin says
this is honestly a project I was planning on tackling this summer… with some trepidation. Thanks so much for sharing your experiences… hopefully it will make mine a little easier.
You mentioned renting a plate leveler… did you also consider one of those hand-pushed rolling things?
My area is small so I would probably go with a tamper anyway, but I was just curious.
YoungHouseLove says
We’re not sure what a hand pushed rolling thing is so I guess that answers whether we considered it or not. Haha. All the pros we chatted up said plate compactor or hand tamper so John opted to “go manual” if you will. Haha.
xo,
s
Suzanne says
It’s another type of manual soil compactor, kinda like a barrel on it’s side that rolls.
But… what… J didn’t rent a ride-on-viibratory-roller? Yeah, that might be toooo much fun. lol
YoungHouseLove says
Ooooh. Haha.
xo,
s
Jenn says
good for you!! that is a boat-load of work. hopefully it does go smoothly from here-on-out (not trying to jinx you!)
my favourite line of the whole post was
“Oh well, I guess it’s time to put on my tough guy pants (my Thor pants?) and get back to work”
hilarious. i’m so glad i read all the way to the end!
good luck :)
Patrick C. says
Oh man, this whole patio series is giving me the shivers reminding me of our oh-so-similar experience putting in a concrete paver patio at our house last summer. I had estimated it as a “two-weekend job” – first weekend digging up what was there, second weekend putting the new patio in. Seems logical, right? ;o)
It ended up taking us pretty much the entire summer, although to be fair we have a much shorter summer up here in New York than you do down there. We even went so far as to hire help to finish the job in time for a late-summer party, and the help we hired missed the deadline too! After the whole ordeal, “two-weekend job” is now our shorthand for “job whose expense and level of effort we are probably vastly underestimating”.
We went through the same sticker shock you did over the way the extras (gravel and sand and delivery and edging and stakes… and… and… and…) end up costing more than the pavers themselves, and also got a “fun” surprise over what was under the existing patio (in our case, it was layer after layer of blacktop followed by a layer of flagstone). And not to be a downer, but even after the challenges of excavation, the hardest part of the project was still ahead of us. I couldn’t believe how much work it was to haul and spread and tamp the gravel!
All in all, even though we didn’t get much use out of the patio last summer, it was well worth the effort. Isn’t it great to look forward to that little burst of manly pride every time you enjoy the patio for years to come, knowing that it’s the product of your own labor?
L says
John, thank you for a) sharing your work phases, and b) showing the pictures.
Having done more than a little shovel-slinging in my day (dug out, re-stacked, and backfilled a leaning retaining wall along my driveway) I don’t think you whined enough. What you did is HARD WORK.
Congratulations on surviving, and thanks for letting us all “watch”! Can’t wait to see the rest of the job and especially the finished patio!
Dana L. says
Nice work, John. The wheelbarrow wheel warning made me literally laugh out loud. Like, a lot. Must have tickled my funny bone because my fiance was in the other room wondering what all the laughing was about. I showed him and he was amused, but not as much as I was. He said, “Maybe if I was obsessed with Young House Love like you are, I would think it was funnier.” Could be true, but I think my amusement about that was totally independent of my obsession with you guys. ;)
Radhika Paruchuri says
An unrelated comment here, I found your comforter on another blog site!
http://www.twigandthistle.com/blog/2011/04/diy-mothers-day-door-hanger-2011/
YoungHouseLove says
Too funny. Love it!
xo,
s
Amy says
I’m planning out a patio as well and I also checked out Nicole’s photos! Thanks for the video link, tat will be helpful. Good luck, John on finishing up! And Burger is too cute!