One more thing can be crossed off the ol’ nursery to-do list! Changing table? Check!
I remember before Clara was born a co-worker told me that changing tables were unnecessary since you usually end up changing the kid wherever is most convenient – like on the floor or the nearest piece of furniture – rather than going through the formality of walking all the way to the nursery. This was after we had already bought & refinished Clara’s changing table/dresser so the comment stuck with me, thinking I’d fallen into some first-time parent booby trap.
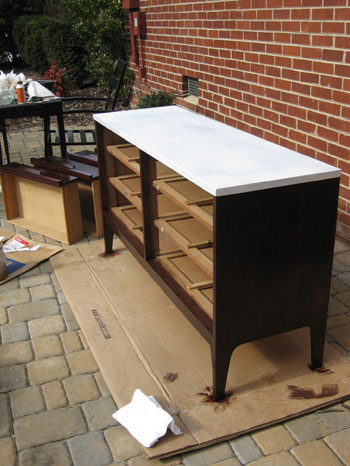
Surprisingly enough, we used Clara’s changing table religiously. Maybe because our house was small or because it was all one level. If we were at home she got changed on that table. And that routine stuck with us even when we moved to our second house, which was twice as big (but still a one level ranch).
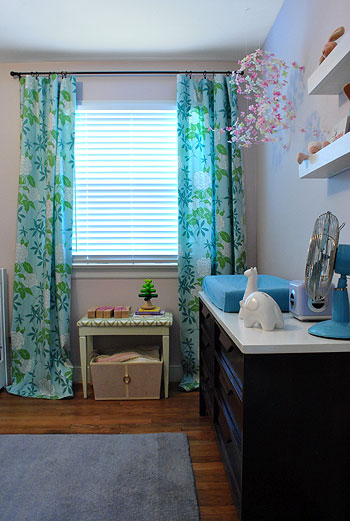
Stairs might be a diaper changing game changer, though. So in this house we plan to keep some changing supplies downstairs for convenience. Anything to make your I-have-a-newborn routine easier, right?
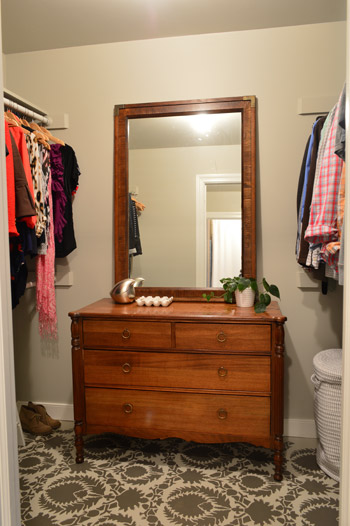
We offhandedly mentioned when we started the nursery that we were considering using my dad’s old dresser that’s currently in our closet, which could double as a changing table. It’s not a permanent closet solution for us (we’ll eventually add a built-in closet system), and we kinda liked the story of our son having his grandfather’s 50-year-old dresser. But after completing the built-ins we realized that the eight drawers of storage they afforded us were awesome, and it was probably overkill to add four more on the other side of the room – especially when some sort of open, easy-access toy & game storage would be more useful for us over there.
So we scratched our heads for a little bit, and then we broke down our criteria:
- It needed a wide and flat surface to accommodate our changing pad (at least 15″ wide)
- It needed to have open storage mixed in with the possibility of adding a few bins or baskets to hide diapering stuff for a fleeting period of time
- It most likely needed to be wide (around 60″) to make sense on that long empty wall, while grounding the large bike prints that we planned to hang over it. Sort of like the storage cubbies in the photo below from our last sunroom…
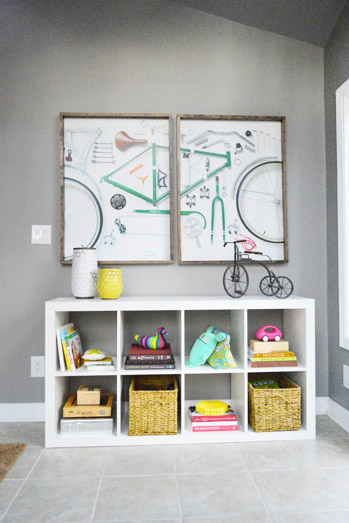
It was literally looking at that photo above (we were checking to see how closely we had hung the prints together) that we had our A-HA! Why not the Expedit? It met all of our criteria and wasn’t serving a permanent function in its current home in our office (where we someday dream of adding an L-shaped file-storage area along with a floating desk/meeting table). And yes, this all happened right right as the news of the Expedit’s demise (or reincarnation?) hit the web – so it was sort of an all-signs-point-to-Expedit moment.
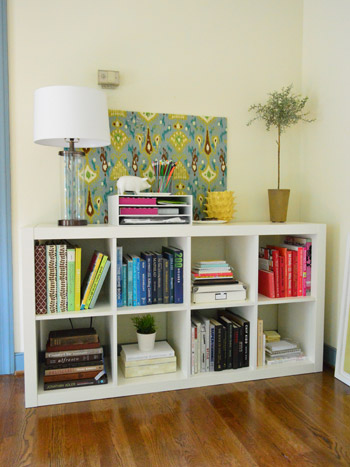
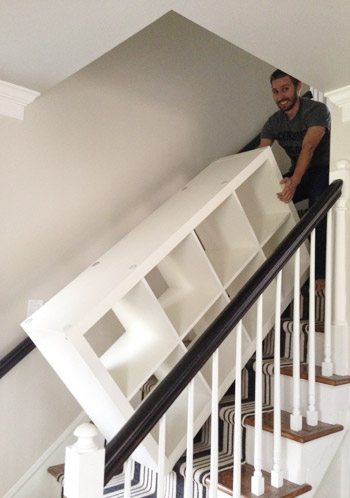
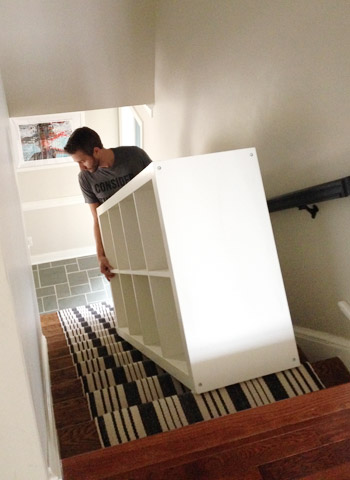
We unloaded everything (contributing more to the disaster that is our office) and I dragged it upstairs to see if the nursery should be its new home. And I say “drag” literally because I didn’t feel comfortable asking Miss Preggers to lift it. It was heavier than I remembered!
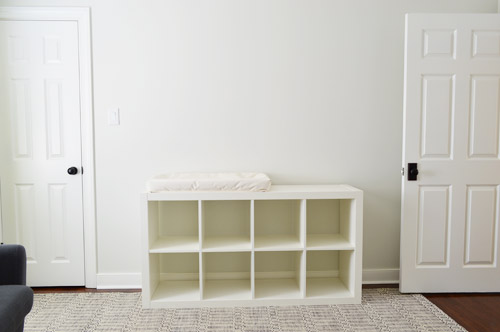
We put it in place on the wall opposite the built-ins and well, it was a bit underwhelming. Granted, it was very very empty and even the changing pad would eventually get a colorful cover. But it wasn’t a compelling case for the Expedit.
We leaned the bike art up to see if that helped, which it did, but we still felt like something needed to be done to make the Expedit a little more upgraded and not as blendy with the wall, rug, and doors.
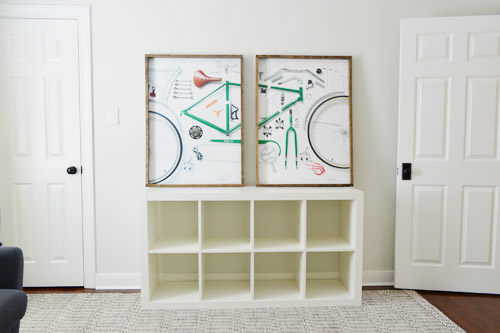
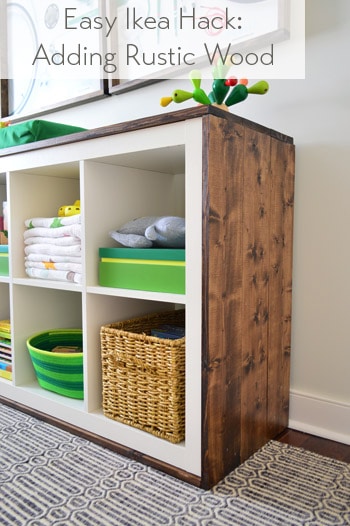
So we had an idea. A hack, if you will. To add some contrast, and sort of nod to Clara’s white-and-wood changing table, we decided to wrap the outside of the Expedit with stained wood. This would also tie it into my homemade bike art frames, as well as the wood-topped built-ins across the room. You know, kinda like this…
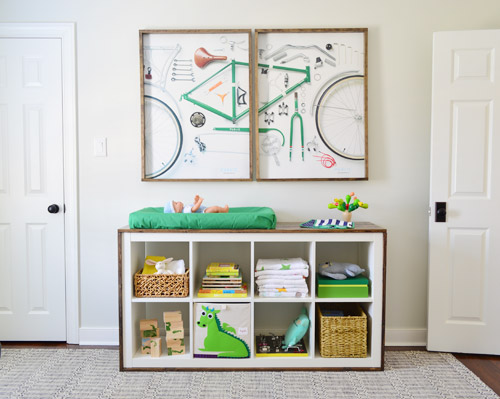
That’s not Photoshop above (I wish I was that good!) – it’s the real after. I thought it would help for you to see that before I dove into the How-To part of the post. So let’s rewind to that, which started with me dragging the Expedit back out to the garage.
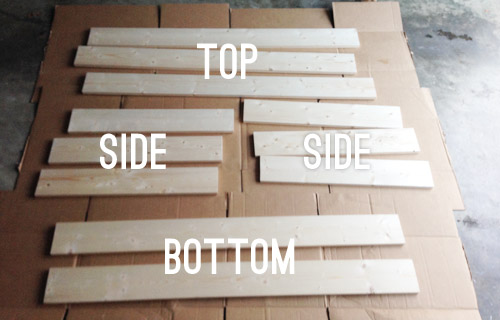
Our measurements revealed that three 1 x 6″ boards would be wide enough to cover the Expedit, leaving about a 1/2″ of an overhang on each side. This was nice because it would give the changing pad a bit more surface to sit on (it was the exact width of the original Expedit). We bought basic whitewood because it’s the same stuff we used to make our living room console table, which has held up great for the past few years, and the price was right ($5 for a 6 foot piece). We also wanted a slightly rustic wood look, like we achieved with the console table.
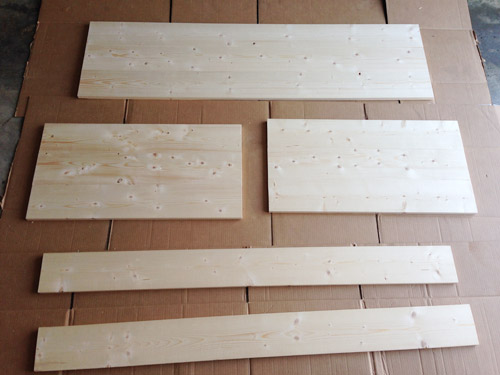
Here are all of the pieces once they were cut to size at home on our miter saw.
To attach the boards into big panels, I used my Kreg Jig to create pocket holes and then I could join each set of 3 side-by-side. It’s the same technique I used for the console top, so you can read more about it here. Note: I often make two holes if they’re going to be hidden when using the Kreg, just so if my first attempt at joining doesn’t line up perfectly, I can try again without having to break out the drill again.
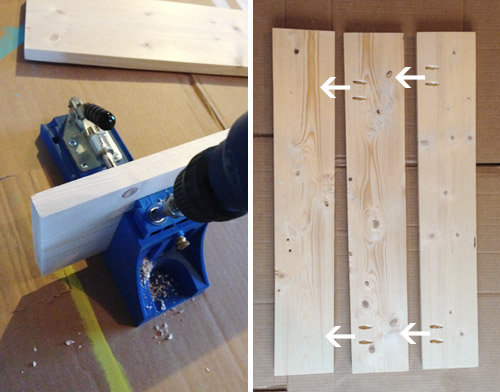
Here are the finished boards all joined together. It’s also after I gave them a quick sanding to soften the edges and any ridges between the boards. I only bought two pieces for the bottom since no one will ever see the missing middle piece – so that explains why those are hanging out by themselves at the bottom of this shot.
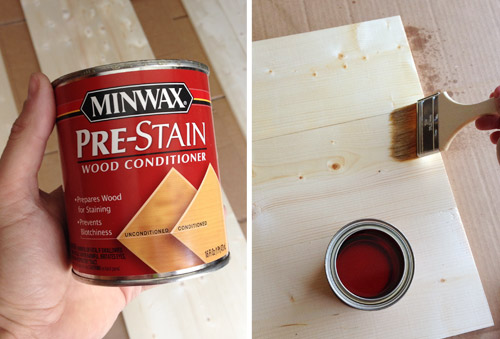
Before staining, we decided to take wood conditioner for a spin. Its job is to “prepare” the wood for staining, reduce unevenness/blotchiness, and enhance the color. This small can was $6, so it’s not much of a “risk” – and richer and more even results sounded good to us. It goes on much like stain – you brush or wipe it on, let it penetrate for a few minutes (I gave it 15), and then wipe off the excess. You just have to be sure to stain within 2 hours of the application.
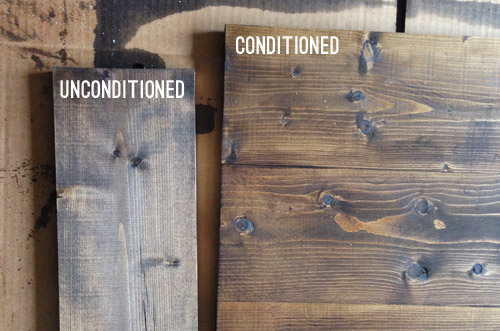
We used the same Minwax Dark Walnut stain that we’ve used elsewhere in the room for consistency (like on the counters of the built-ins and the bike art frames) and only needed one coat. For demonstration purposes, I stained a piece of unconditioned scrap wood (it’s the same exact type of wood, just a leftover piece) to see if there was a difference in using the conditioner. Both Sherry and I were pretty surprised by the comparison. I definitely felt the stain soak in more on the conditioned wood during application, and the color is noticeably richer/warmer on the conditioned wood.
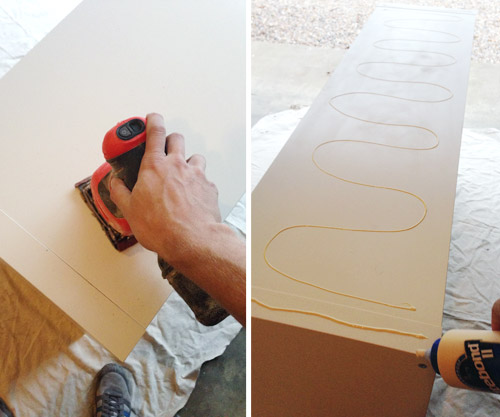
When the stain and my two coats of Safecoat Acrylaq were dry (that’s our favorite poly alternative because it’s non-toxic and locks in any potential fumes or offgasing) I could finally begin attaching these wooden panels to the Expedit. I decided to go with a simple wood-glue-and-nails system, so that I wouldn’t have screw heads to hide after the fact. I prepped the Expedit surface by roughing it up a bit with sandpaper and then applying a bunch of wood glue.
Then I used my nail gun to secure them in place with some 1.75″ brad nails (thank goodness for the thick frame on the Expedit).
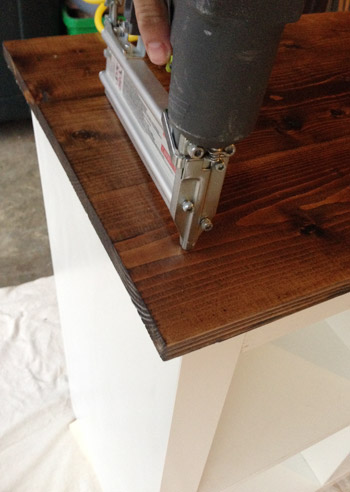
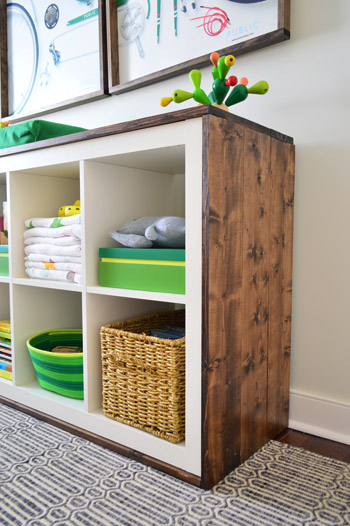
Then I did the same with the sides for sort of a waterfall-edge effect.
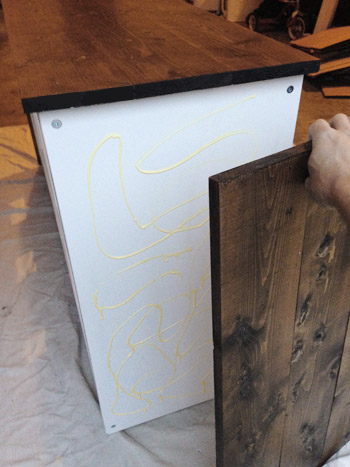
I let those dry overnight before attempting to flip the piece over and attach the bottom pieces. You can see how I just put them on either end in this shot, since that middle slice will never be seen.
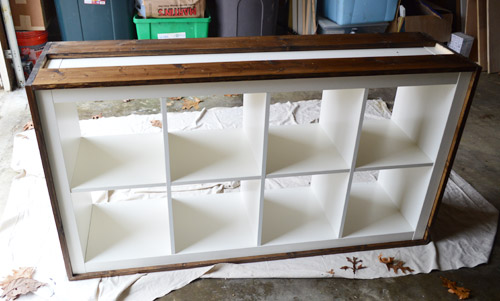
After letting everything dry for a couple of days, I dragged it back upstairs and started on the next step – adding legs and casters. Sherry and I thought two of these chunky $5 casters from Home Depot would be a nice touch, while some stationery legs (made from 2 x 2″ pine and Kregged to the back and middle) would keep it from rolling around mid-diaper-change.
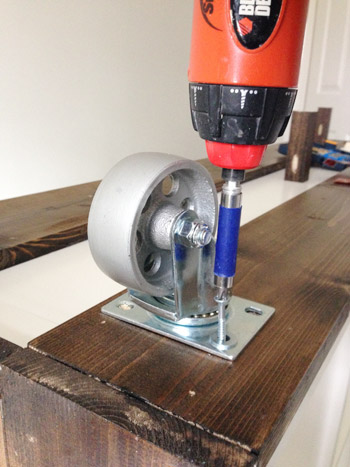
If you’re scratching your head about where the casters were on the after picture, well, they weren’t there. Because we decided they weren’t right for this application. The height they added made the changing pad uncomfortably high (we thought we’d like that added height, but it was a good deal higher than the changing pad height that we were used to in Clara’s room) plus it would’ve meant the art above it would have to hang even higher than the doorway tops, which we thought would look off.
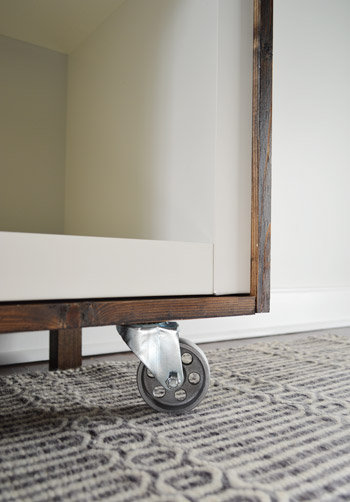
But we really liked the look of it, so we wanted to share the idea in case it worked better for someone else’s application…
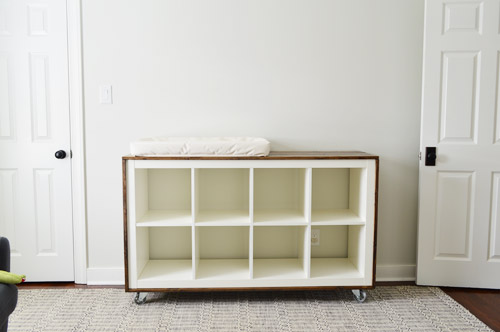
It was just a matter of unscrewing a few things to get back to the sitting-straight-on-the-floor look (which also has the benefit of not creating a spot for dust and toys to collect). Then Sherry helped me hang the art and fill the shelves.
Update: There have been a few questions about the height of the changing station. The Expedit itself is 31″ and the wood frame added a few more inches, and the pad itself sits on top of the dresser, so the baby is around 34″ from the ground on the Expedit with the pad on it. Clara’s dresser with the pad on it was around 33″ from the ground – so that range seems to be what we prefer.

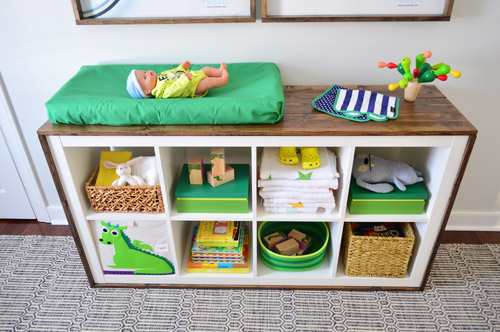
The stuff on the shelves is mostly placeholder items (another bin or basket for diapering supplies will definitely end up in the mix). In fact they’ve already been tweaked a little in the rest of the photos in this post. But you hopefully get the idea of how this’ll function for us.
It’s nice to have some concealed storage, plus some open toys and books that he can easily access. The 3 Sprouts dragon box was a gift from Sherry’s friend Cat during Clara’s dragon-loving days that Clara brought in and said was for her brother because he likes green (yes, Sherry melted into a puddle). Who knew those bins were perfectly sized for an Expedit? Apparently Clara did.
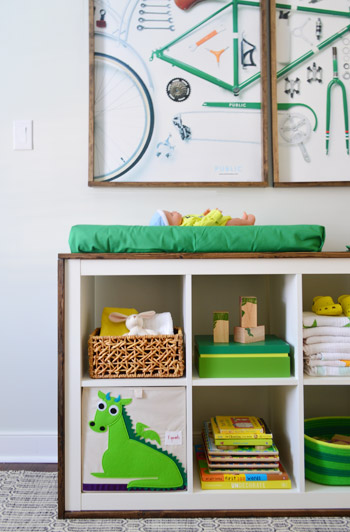
We might need to get a few more large baskets to house diapers and wipes more easily, but other than that, this changing area has shaped up quite nicely. Well, except for the fact that the changing pad cover is just leftover fabric that Sherry tucked around it – so we have to buy/make a real cover soon.
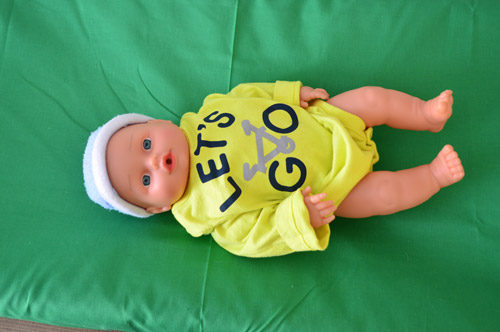
The funniest part of this entire endeavor was when Clara brought in a baby onesie from a to-be-washed pile in the guest bedroom and said Barnacle wanted to wear it while we took his picture. Apparently we have an accidental tradition of dressing up not-real-babies in the nursery before the real baby arrives, since this happened in Clara’s crib after we set it up.
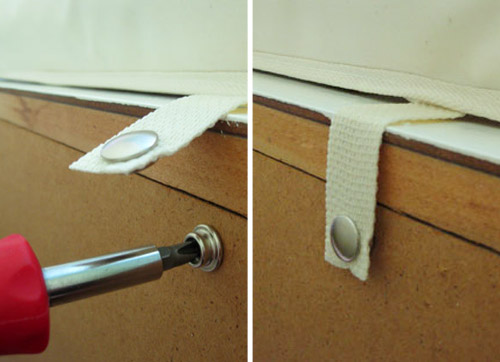
Oh and for anyone wondering how the changing pad is secured in place, it’s the same one we used for Clara, and it has two over-sized snaps on the back that attach to snaps that get screwed into the furniture or wall from the back. These are pics from making Clara’s dresser (which you read more about here) but we were easily able to remove them and screw them into the back edge of the Expedit.
We’ve also used heavy duty 3M command velcro to adhere the bike art firmly to the wall beyond the screws-into-studs/anchors hanging method that we used. So the little guy shouldn’t able to knock it off the wall or even pull it off (not that he’ll ever be unsupervised up there anyway). We did joke that it could get peed on, but the slick poster board material will hopefully work in our favor. We also have a hilarious tiny tent-like item that was a gift for keeping the spray at bay, if you will.
We’re really happy with how this little upgrade turned out, and we’re hoping it has some lasting value as toy and book storage when Barnacle gets older. I’m already picturing it stuffed with bins of legos. And the cost of our update was around $45 – the wood was $39 and the wood conditioner was $6 – since we already owned the stain and returned the casters (you can add $15 to cover those if you don’t have ’em).
The nursery is feeling much more complete now that we’ve dealt with that formerly empty wall. And Sherry’s putting the finishing touches on her mobile project for over the crib (this is just a photoshopped version of what she’s going for), so she’ll be back with those details in the next few days. It’s amazing how much more homey a room feels without two big blank walls staring back at you.
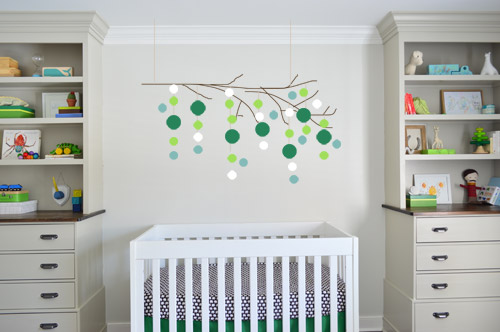
Aaaaaand I just realized the fun part of diaper changing is pretty much over. It only gets uglier from here. Speaking of which, we haven’t forgotten that we need to add a place for dirty diapers (we’ve had luck with this method for Clara, so we might go that route again). How’s that for a note to leave off on?
Do you guys use changing tables, or are you bed/floor/random-other-spot folks? Have you done anything fun to an Expedit lately? It’s amazing how many hacks there are. Can you believe Ikea’s retiring them (or at least tweaking and renaming them)? Will the new name stick, or will we all still call them Expedits?
PS: Wanna see another fun furniture hack? Check out this cool paint pattern we added to a thrift store desk.
Update – Wanna know where we got something in our house or what paint colors we used? Just click on this button:


Jace says
Add me to team “it needs legs!!” Nice DIY though, its refreshing!
Bryan Couchman says
This is totally random but Gap stole that Let’s Go bike graphic from me. Please don’t support them…in fact, please spread the word! http://dribbble.com/shots/221065-Let-s-Go-tee?list=show
On a brighter note, my wife loves your blog and I think it’s pretty sweet as well. Thanks!
YoungHouseLove says
NO WAY! That’s terrible, Bryan. Thanks so much for telling us. I hope you’ve contacted them – that doesn’t seem right at all.
xo
s
Justine says
OMG this is awesome! You are so genius, this makes it look so custom.
When I lived in a one level, smaller apartment, I used the changing table much more than I do now, in a two story house. It’s just that much more work lugging him up and down for a diaper change so many times a day. I just have a little wire basket with some diapers and wipes and cream that works perfect for changing him on the main level (usually just on the floor, sometimes on the couch if I’m feeling daring ;))
Jen in Texas says
We actually DID do an Expedit change-over this past week! We have a lot of Expedit pieces – nine to be exact. Most of them we acquired in Germany for our homeschool/craft room and are white. The rest are the brown/black color and make up our daughter’s room.
In our next home we need one of those white pieces to play nicely with some dark brown library shelves so I decided to paint it a denim blue. After much googling and many references to your blog I did a credible job of turning a white 1×5 TV stand into a blue 1×5 window seat!
YoungHouseLove says
That sounds awesome Jen! I’d love to see pics!
xo
s
Jojo A. says
We have two 1×4 expedit shelves for storage in our guys room and they are perfect! One is right by our dresser (with changing pad on too) and the too cubbies house diapers and pastes etc. we use the top drawer for cloth diapers. There are bins at target that fit PERFECTLY and I know ikea sells some meant to fit the spaces as well.
Also…the “pee-pee tee-pees” to prevent the spray…don’t work. We were given some too and they were more trouble than they were worth!! Just go fast or toss a cloth wipe over the area. Our guy is 11 months now and the “getting peed on phase” is thankfully pretty short lived! :)
YoungHouseLove says
Thanks Jojo!
xo
s
Jen in Texas says
Funny about what height is comfortable for people, I am 5’4″ and my husband is 5’6″ and we used a dining room buffet for our changing table, so it was much higher and we loved it. You guys have plenty of experience in the diapering department so I’m sure that your carefully thought out design will work for you. To each their own!
Susan says
Love the table!
We use Fuzzibunz and love the Diaper Dekor Plus for storing dirty dipes! Its totally chintzy, but works really well at holding in all odors, it easily fits the planetwise pail liners, and perfectly holds a two-day supply!
Good luck!
YoungHouseLove says
Thanks for the tip Susan!
xo
s
Rochelle says
Love what you’ve done in the nursery–heck, the whole house! About diaper changing, when we lived in a 2-story, we set up a hand-me-down pack and play on the first floor. We used it for naps the first few months (helped her adjust to the noise of the household and her 2-year old brother), diaper changes, and storing a few extra onesies, etc. so I didn’t have to dash up and down the stairs. Later we graduated to a diaper changing basket. We kept the essentials there along with a fold-up changing pad. My older son loved to fetch the basket and hand me things during the diaper change, wherever we ended up. (Usually the floor so he could easily help with the baby). In any case, you may want to keep a step stool handy near the diaper changing expedit so that Clara can help, and watch, with ease. :-)
YoungHouseLove says
Thanks for the tip Rochelle!
xo
s
Kate C says
So many people say that the changing table isn’t necessary, but we’re like you guys in that we use it for every single change. Her room is the first room off of the living space, in a small one story ranch, so it’s not like it’s a difficult proposal to get to the table. Ours is a dresser with the pad on top, just like you did with Clara. Cloth diapers and wipes in a drawer, hanging wet bag on the wall next to the door. For us, it’s practical, always used, and really rounds out the room.
Love the expedit, by the way! I think I’ll borrow the idea for turning one into a window bench :-)
Brenda Turner says
Love, love, love the expedite hack. Beautiful and useful. I always use wood conditioner and that small can will last you a good long time.
My baby will be 21 in a few short weeks so I have been out of the diapering game for quite some time but when I was in it I always used the changing table. I think it really matters if you use cloth or disposables. You have such a great system of baby containment, rinsing and storing of your cloth nappies that it would be more work for you to change your little guy at other places in the home. Just my thoughts. Best of luck to you both!
YoungHouseLove says
Totally makes sense Brenda!
xo
s
Kari says
I would be careful with having artwork that low with a baby boy… We learned the hard way that baby boys sometimes pee during diaper changes and that pee can go into framed artwork close by…
YoungHouseLove says
Oh yes, John mentioned that in the post. We’re going to have some fun with that I think. Although lots of helpful mommas have tossed out tips like washcloths and wipes to block the spray ;)
xo
s
Leah says
You all rock! It looks fantastic, the wood on the sides really makes the perfect touch. Random question: Sherry- when is your due date? Congrats! I’m prego too, my baby will here in August. I love looking through your past blog entries for nursery decor ideas, etc. :D
YoungHouseLove says
Thanks Leah! I’m due in the middle of April so we have around 7 more weeks left. Ahhhh! So excited to meet this little guy.
xo
s
melissa van Herksen says
wow, it looks amazing. Gave me a great idea for our nursery…that i need to get started on soon. we have a june baby! i was wondering on the height. i am almost 6 ft tall and my husband is 6’4″…might be a little short, no? what do you think?
YoungHouseLove says
We added an update in the post about that for ya! I’m 5’2″ and John’s 6′ and we seem to prefer the 33″-34″ range (that’s this one and the one we used for Clara) but it might just be what we’re used to, so other folks might like something higher. With the casters it was around 38″ tall and even tall John thought that felt awkwardly high- but again, it might just be what we’re used to. You can always add legs or casters if yours feels low though!
xo
s
Sally says
Love it! What a fabulous idea. I love the look of stained wood next to a bright white – everything pops! The room is looking amazing:)
Karen @PaperFancy says
I look the look of the new changing table/bookcase! Does anyone use those stinky Diaper Genies anymore? My kids are 12 and 15 and we used one of those. Loved the long strand of smelly ‘sausages’ when you cleaned it. : )
YoungHouseLove says
I remember when my youngest brother was born we had one of those (he’s 11 years younger than I am, so I liked to play momma, but I rarely changed a diaper and I remember being scared of that contraption – haha!).
xo
s
Julianne says
Looks awesome! We have a few of these IKEA shelves and have been trying to decide what to do with them, as their tops have gotten quite scuffed up over the years. This is a great update….love it! Looks much more upscale and classy. When I saw what you did with your diapers pails, I thought…another genius move! We just used the good old diaper genie, which was not really convenient, at all. Makes me almost want to have another one, just so I can incorporate your touches! ;O)
ExtraordinarilyEmma says
I just want to say thank you for sharing your cloth diapering experience. My husband and I are embarking on trying for a baby and I have always wanted to use cloth diapers and your post was so encouraging and helped my husband understand a bit more! I am a new reader and and just love reading it and learning from your experience.
YoungHouseLove says
So glad to hear that Emma!
xo
s
Suzanne says
We used a traditional changing table for our daughter. Then it was used as a shelving unit in her closet until her sister was born. It went back to being a changing table. When daughter #2 was done with diapers, the table went back to being used as shelving in her closet. It was then passed down to my niece and is still being used today as a shelving unit. Twenty-one years later that thing is still being used!
PS – Love your house and your blog!
YoungHouseLove says
That’s amazing! Keep the changing table streak going!
xo
s
Amy says
Beautiful! I just moved my 8 year old’s Expedit upright to make room for more of a play space. As the front was a little dinged up too, you might consider adding that middle board on the bottom so you can flip it around/stand it upright in the future and not have to worry about matching boards/stains. Thanks again for another great project!
YoungHouseLove says
Great tip Amy!
xo
s
Rachel K says
Yup, same thing here. My Mom keeps saying we will never use our changing table (which is actually just a desk) and we’ve used it religiously since our little bear was born.
Since we also don’t have a ‘real’ changing table, I’m not sure if others have mentioned this, but we use non-skid grippy rug pads underneath the changing pad to keep it in place so it doesn’t move around on us.
YoungHouseLove says
Smart!
xo
s
Brittany says
Love love love that changing table idea! We have everything upstairs in our baby’s room and I find that I always go upstairs to change him instead of having a spot downstairs as well. Nice to just keep everything in one spot (and get the exercise of going up & down stairs!). Also, just a suggestion for a change pad…I got one of these Keekaroo Peanut Changers and LOVE it. It is so easy to clean as opposed to the fabric covered changers. It seems expensive, but definitely worth the investment and will last through all of our future children! Love the blog!
http://www.keekaroo.com/peanutdiaperchanger.html
YoungHouseLove says
You’re the second person to recommend those. Looks awesome!
xo
s
Kelly says
Neat hack!
I was sad to read that Ikea is discontinuing the Expedit line as we use it throughout our house (including the nursery)!
Miranda says
We always use the changing table (pad on dresser) too. It was just a preference thing in the beginnning. Now at almost 10 months, if we were to change her on the floor/bed/etc, it would be a battle to keep her from trying to roll over and crawl away! At least on the changing pad, I can keep her in one place :)
Carrie says
Just wanted to say you both have created a wonderful space for you son to enjoy!
I’m a relatively new reader, and while I have enjoyed every post I’ve read, this is my favorite so far! The green is a fabulous choice–so bright and appealing. And the Expedit hack… there’s an Ikea up the street–I want to skip out on work and get started on a similar project!
I’m saving my favorite for last– the bike art! My husband and I are cyclists-do you have a post about that piece that I could check out?
Thanks! Truly enjoying your blog.
YoungHouseLove says
Thanks so much Carrie! Here’s that post for you: https://www.younghouselove.com/2013/01/my-most-favoritest-art-ever/
xo
s
Allison / Joy and Ivy says
Wow this transformation is amazing! I never would you have thought to outline the bookcase like that but I absolutely love it!!
Michelle says
I think this is my favorite Expedit project ever. Nice work John!
I loved our dresser/changing table for my son and we used it until he started potty training, but we could only use it for about the first 6 months with my daughter because she was just too wiggly! It was nice though to just remove the changing pad when we stopped using it, instead of removing (or not using) an entire piece of furniture.
Also, your changing pad doesn’t look like it has this problem, but on ours the straps had to go through holes on the fabric cover, so every time it got dirty I’d have to detach it from the dresser and take it all apart. Eventually I started using flannel receiving blankets as “covers” for the changing pad cover (http://1.bp.blogspot.com/-NKUCfc86aSI/TkYK6YCDGII/AAAAAAAAEB8/d1iGae82i2s/s1600/110804_136.JPG). So much easier! And it gave me a use for the stockpile of receiving blankets we were gifted before my son was born. I never really knew what to do with those anyway…
YoungHouseLove says
Great tip!
xo
s
Li says
Could you guys do a post on what you decided to reuse from Clara vs what to replace (either by making it or buying it)? I don’t remember her changing pad cover or crib skirt or bedding being all that feminine vs masculine but I think I’ve read you plan to replace those items. What had been the deciding force behind changing some of those gender neutral items you might reuse but plan to replace/upgrade?
YoungHouseLove says
That would be fun! We mentioned in this post that it’s just a piece of fabric tossed on the changing pad, so we’re planning to buy/make a real cover. And we blogged about making the new crib skirt and getting the bedding here. Clara’s changing pad cover, crib skirt, and bedding were all in the blue-green color palette, so it probably could have worked, but it was looking a little worn (some stains on the changing pad, a small hole in one of the sheets, etc) so we just thought something new would be nice. We’re reusing a lot of bigger items though (the crib, the mattress, the changing pad itself, a lot of toys/puzzles/books, unisex clothes, our cloth diaper stash, the monitor, etc). Will have to see if we can work in a post about that!
xo
s
Emily K says
I want to “third” the Keekaroo Peanut diaper changer! It is my favorite nursery item (with the runner-up being the Ubbi diaper pail with our cloth diapers – http://ubbiworld.com/product_diaper_pail.php)!
I am really writing though to ask what you plan to keep in those adorable green tri-colored wooden boxes from Target. Just after you showed them last week, I ran to Target ASAP with my 40% Cartwheel coupon and grabbed one bigger green one and a smaller blue one for my 11-month-old son’s room. I am finding myself wanting more of them while they’re on such a good sale, but I still haven’t figured out what to store in them! Ack! Thank you :)
YoungHouseLove says
I have some markers and crayons in one and some random small blocks and building things in another one. I think they’d be good for any small items kids collect (ex: wooden coins, dominoes, small puzzles, etc).
xo
s
vvachula says
From a graphic standpoint, the frame you put on the shelf unit echos the frames of the prints perfectly. It looks awesome!
Janelle says
I love this hack!!! What a beautiful changing table. I may have to steal this idea.
Susan says
Ha! the peepee teepee. Love those! http://www.uncommongoods.com/product/pee-pee-teepees
Carrie says
I would really love to see a picture of what you mean by “L shaped files and a floating desk.” Sounds awesome!!
YoungHouseLove says
We’d love to share our office plans as soon as we’re wrapped up with things in the nursery! We have been plotting a few things lately!
xo
s
Jenny says
I saw that you got several suggestions for keeping the spray at bay and am not sure if anyone suggested this yet, but we keep those thin baby washcloths in a basket on our changing table for our little boy. The tent things don’t work, unfortunately… they make for a huge mess! Haha! But washcloths are just big enough to not fall off of that area and will absorb all of the liquid. Then you don’t have to waste a wipe or new diaper and can just toss it in the wash. My husband has also figured out another method to know when you’re about to get attacked… if it’s half mast or more than there is a high likelihood of spray… if its not then you’re good to go. It’s proven about 99% accurate!
YoungHouseLove says
Thanks for the tip Jenny!
xo
s
Krysti says
I am loving the direction this room is going. We have a changing pad on top of an antique dresser in our little guy’s room that only gets used at night – we’re in a 2 story, so we also have a little basket tucked away downstairs so we can change him without hauling upstairs all the time.
Side note: your description of the diaper change stage as a “fleeting moment” gives this first time mom in the trenches of diaper changes some hope for the future. :) I can almost imagine it….
YoungHouseLove says
Haha! It’s amazing how fast it ends up in the rear view mirror. They really do grow up in a split second. We can’t believe in a few months our baby girl is going to be four!
xo
s
Laura says
We are expecting our first in May and I have been wondering about our changing table. Sidenote: it seems like we are living parallel lives sometimes: we bought a new house in July, put in hardwoods in September, had to get some trees limbed and/or removed, etc. I’d love input from John and Sherry and their practical, creative, and thoughtful readers. We have been planning to use an old low dresser we have for the changing table, but the dresser is only 13 inches deep, while our changing pad is 16.25 inches deep. I’ve been thinking that the dresser will sit out from the wall about 2-3 inches so that the extra length of the changing pad spills over the back (and against the wall) rather than over the front. Does this seem like a bad idea? I feel like it’s unnecessary to buy a new piece of furniture just for this purpose, when we have this one at the ready, but I certainly don’t want to do anything that could be potentially unsafe for my little guy. Any thoughts?
YoungHouseLove says
I would think that would work- maybe just try it out and even consider adding a little piece of wood (that could easily be removed later) to extend the back temporarily if it helps the pad feel more level/supported? Or you could grab another changing pad (ours is only 15″ wide, so it’s slightly less overhang-y). You’re right that 2-3 inches is not much and most furniture pieces aren’t flush to the wall anyway (baseboard is there, along with outlets/plugs behind furniture, etc) so you’ll probably be just fine!
xo
s
Laura says
Great idea! Thanks Sherry!
Trude says
It looks so great! The stained wood really ties in with all the other details in the room. I bet it’d be cute with small paperclip legs too. And I’m amazed at the difference the conditioner made.
Jessica w says
I love this, it is so chic and simple yet functional!
Debra says
I haven’t read through all the comments so maybe you guys already have gotten this tip, but while I was at Target this week I noticed that they have some really cute macrame/woven bins and and other storage that perfectly match your baby boy’s nursery color scheme and style. And, right now they’re on sale (at least at my Target)!
So I was really excited to come home and send you the specific links, but it looks like they’re not online, which must mean they only sell them in the store. Which makes this comment less exciting than it would have been. :) But it might be worth checking out. They were in the storage section, near the kids’ storage items. My favorites were the emerald and light green striped cloth woven baskets and a green geometric wire “trash can” with a linen colored cloth liner. (I put “trash can” in quotes because to me it looked like an awesome laundry hamper!)
YoungHouseLove says
Thanks for the tip Debra!
xo
s
Debra says
Also, these bins are great:
http://www.target.com/p/room-essentials-green-ombre-16in-large-linen-tote-s-3-large/-/A-14227765#prodSlot=medium_4_30
I have some in the magenta color way for my baby girl’s nursery. Not super heavy duty, but perfect for storing things like cloth diapers, baby’s dirty laundry, blankets, etc. I love mine and you really can’t beat the price for their size and cuteness factor!
YoungHouseLove says
Thanks so much for the tip!
xo
s
Lauren says
Love this! Such a simple, yet high impact hack! Being 5’11” though…I would definitely want those legs! No counter ever seems high enough for me!! ;)
Question – did you think about angling the corners at 45 to eliminate the seams?
YoungHouseLove says
We did think about a miter but worried that if we were even a hair short with one of the boards and they didn’t match up perfectly (we’d have 12 cuts to get perfect) there would be messy old wood putty going on to bridge the gap, so we just went with a regular 90 deegree corner instead.
xo
s
Leah says
LOVE THIS. If I had a miter saw or a Kreg jig or a house, I would be all over it.
Dani says
I haven’t had a chance to read the 8 pages of comments so I dont know if this have been covered or not (sorry, I go away for a few days and have to catch up on my internetz, it’s horrible!)…
RE “we plan to keep some changing supplies downstairs for convenience” – try a picnic basket! You can fill one side with a few diapers and the other side with various lotions and baby miscellany. It looks neat, and it’s super easy to move around (and even Clara could run and grab it for you if you need a hand, its a good job for super helpful big brothers and sisters).
YoungHouseLove says
Great tip Dani!
xo
s
veronica says
I had no idea they were retiring the expedit at IKEA :( I turned ours into a window bench by adding mdf & foam, plus baskets for my daughter’s never ending doll collection.
You can see it here if you’re curious: http://chaosinmycasa.blogspot.com/2012/10/diy-window-bench.html
PS, I love the wood wrap idea. It looks great! People always told me that changing tables were unnecessary, but I totally disagree. I used ours all the time for diaper changes plus toweling my daughter off and dressing her after her baths. I can’t imagine not having one when she was a baby.
YoungHouseLove says
So charming! I love how that came out!
xo
s
Pixie Ronn says
Love this idea! Going to give it a go!
http://pixieronn.blogspot.co.uk/
Minnie says
Love the update to the shelves!
Josh R says
I’m not sure if you guys have mentioned this before, but did you guys get to meet the former owners of the house? I’m interested to know if they follow your blog or if they would sometime in the future see the changes that you’ve made. I’d like to know if they’d like what you’ve done with the place being that it was so dated before. Just curious..
Btw, Love your blog! And not to mention all the free giveaways! Woot Woot!
YoungHouseLove says
We’d love to blog all about that if it happens! We did that with our first house (and also met the old owners of our second house). It was awesome to hear from them and learn more about the house’s history.
xo
s
annie says
we don’t have a changing table mostly because we don’t have room for one. our little guy doesn’t even have his own room (oh the joys of small space living). so we just set up a station at the end of our bed. the first night we brought him home and changed him, he promptly peed right over his head, past the pad and onto our bedding. so awesome. but we never bought the “tents” either. as soon as i take the diaper off, i put a wipe over him and then do a quick swap with the diaper. i also use a wipe or a wash cloth in the bath, too – the kid’s got range! i usually take him into the bedroom for every change cause it’s about 5 steps away, so its easy and nice to have everything in one place. i used to have a stash of stuff in the front room, too, but it was just kind of a pain to refill since the bedroom is so close. when we DO finally get him his own room, i’ll probably do what you guys did and convert a desk/shelf/dresser to be functional later. ok that was a really long comment. enjoy.
also – side note – i started cloth diapering in part because of your (very helpful and informative) post on cloth diapering clara. so thanks for that!
YoungHouseLove says
You’re so sweet Annie! So glad you’re enjoying cloth diapers!
xo
s
Nora says
Looks great! I’m always surprised when I see American changing tables. They are usually square over here (Germany) and you change your baby with his feet facing you, not sideways. Would be so hard for me to get used to a sideways diaper change…but of course, it’s just habits :)
YoungHouseLove says
Isn’t that funny?! Someone else said that and I can’t imagine changing someone with their feet towards me. So funny how our habits work out!
xo
s
Dani says
In Australia 90% of them have you standing at the feet… But with boys, that can be dangerous!
Deidre says
Great idea!! Really gives the Expedit a finished and custom look.
Meghan says
When our daughter was born we lived in a two-story for the first four months and we did have a little caddy that we kept diaper changing stuff in downstairs (her room was up). We used it a lot but we just changed her on the floor or couch – didn’t have a big station or anything. But then we moved I to a one-story and we haven’t used it since.
Question: what size screw did you use to kreg your 1×6’s together? We wNt to do something similar but we’re afraid a short screw won’t hold them together well and a long screw will poke through the other side. Thanks!!
YoungHouseLove says
It was just one of the stock ones – I think an inch and a quarter?
-John