*Thanks so much for all of the kind words and the love that you guys shared after yesterday’s post. It was so touching to read all of your stories and memories.
A few weeks ago when Clara saw a canopy hanging over her friend’s bed, she was immediately in LOVE. As in, she put in a request for “daddy and mommy to build a canopy with a hammer and some blankets” for her right that second. Not surprisingly, we were in. Just not for the whole hammering blankets thing…
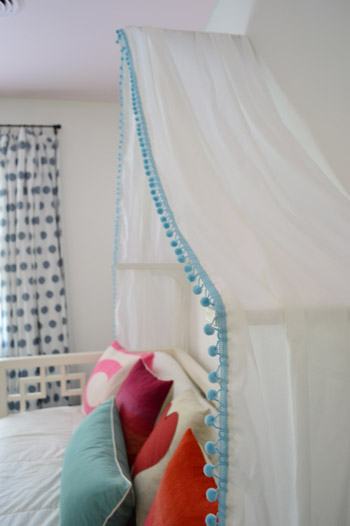
We love that it’s something she requested and that it adds more playful personality to her room, Heck, it just might get her excited enough to sleep in her daybed (yes, she’s still happily snoozing in her crib, but seems closer to making the switch every day).
So the first thing we did was grab some spare fabric that we had in my stash, not for color, but just to see if the shape that we liked most (something like this) would work, and to figure out how many yards we’d need. Oh yeah, and the first planning stages of this happened before we painted her room/closet/ceiling, but then we realized we should do that before hanging the canopy, so room-painting jumped the line.
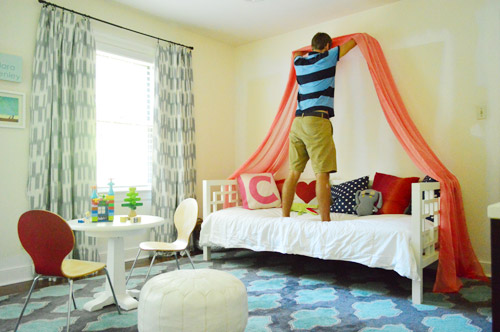
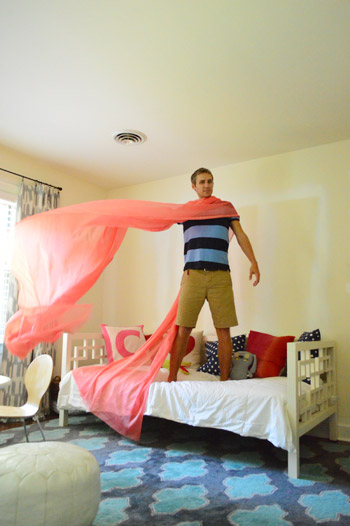
Next, John made like Superman. Because, you know, that helps during any project.
The next day right before we hit up the fabric store I remembered we had some old sheer curtains that John could hold up so we could get a better idea of how white would look. With so much pattern in the rug and the curtains along with the art that we’re planning to rehang from her last nursery/playroom, we thought white with some colored ticking or fringe would probably be the best choice for a playful but not too circus-y canopy that would hopefully work in her room for a while, even if other colors/accessories change with Clara’s taste as she grows.
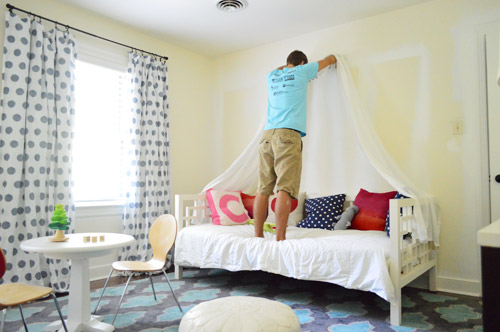
We liked how the white sheers looked but they were a little bland without any trim (which further confirmed that we needed to grab something colorful and fun to accent them) and they were a little short on each side. So we used them as a placeholder and measured how much more yardage we’d need to create a similar canopy that’s long enough to drape fully over each side of the bed. The magic number = six yards.
We scored bigtime at Hancock, getting all six yards of washable cotton/poly blend fabric for $20.94 thanks to a 50% off coupon that I found on their website (they just scanned my phone). We also found enough turquoise pompom trim to line the entire outside edge (another six yards) for some added flair. Clara was actually the one to point it out slash pet it first (my girl!) so that sealed the deal. Well, that and the 60% off markdown (it came to $9.54 for all of it). I was especially excited about the pom pom trim since seeing this canopy with pink poms. I think it just adds so much fun-factor.
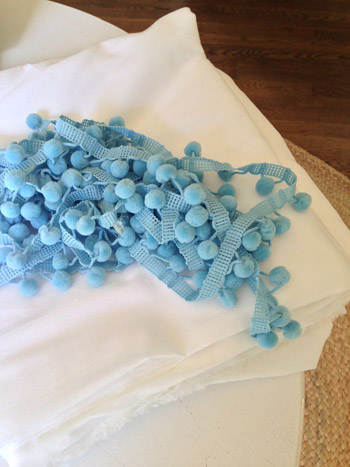
After washing my fabric (that way it’s all pre-shrunk and ready to go) I hemmed in on all four sides. I actually did a double hem – folding it over and sewing it once, and then folding it again and sewing the edge one more time, just for a completely finished look on the inside so there’s nothing stringy hanging out since we figured you’d see the inside of the canopy while laying in bed.
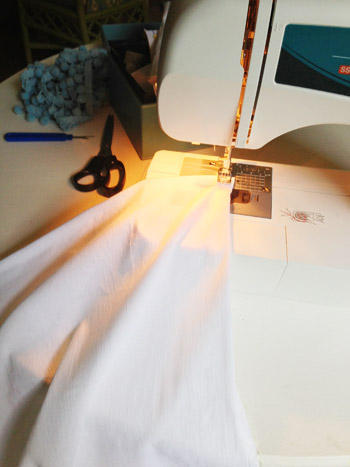
Let me tell you… double hemming a giant 18 x 4′ sheet of fabric on all sides takes quite a while – at least for a #reluctantseamstress like me. But I sort of got in the zone, especially on those two 18′ long sides, and just plugged away until it was done. Afterwards I used my iphone calculator to determine that I completed 88 feet of sewing since it was 44 feet around, twice, which was oddly satisfying. It’s like learning how many hot dogs can circle the Earth’s equator.
Next was the fun part… adding the pom pom trim. I just sewed that to the front side of the canopy along the entire 18′ edge.
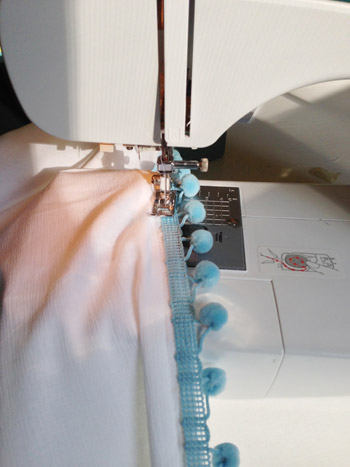
All told, it probably took me about four hours (again, I’m a terrible sewer, so I’m sure someone else could whip this out in an hour). But I’m in love. The fun pom-poms tie into the colors in the rug and the curtains (a ton of her to-be-hung art is that color too) as well as being super fun for Clara to gaze up at.
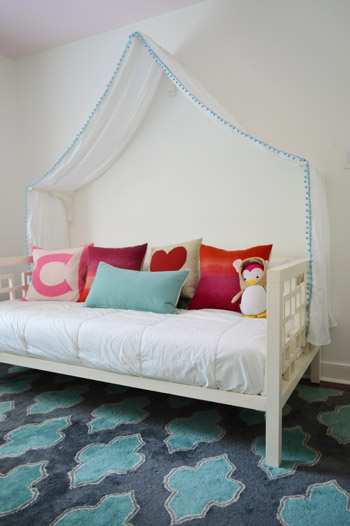
As for how we hung it, we actually used the same decorative wooden brackets that we used in our kitchen. Remember we removed these two extra brackets? Well, we reused those and bought one more from Home Depot and painted it. They were only 9.5″ deep and we wanted the fabric to billow out a bit more, so we cut some scrap wood to create 17″ slats…
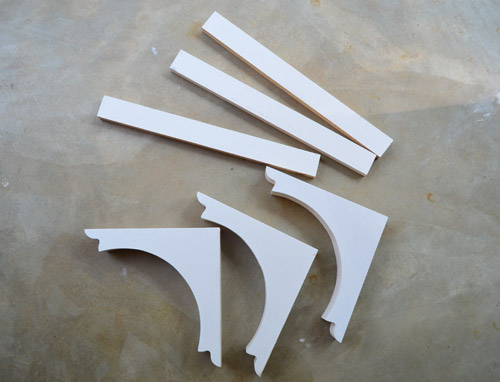
… that we nailed into the top of the brackets to make them all one piece. Then we just hung them on the wall with two screw and anchor sets for each one (the back of the brackets have two holes to slip onto screw heads so they stay firmly in place).

The worry-wart mom in me is glad that Clara can’t possibly jump on the bed high enough to bash her head on the top one, and we thought a bunch about where to place those side brackets so they wouldn’t be in the way. Putting them down too low would mean that we might lean back and get caught in the canopy during story time, so by placing them about 32 inches above the top of the mattress, they keep the canopy out of our way for reading, snuggling and animal-wrestling (don’t ask). And since they’re lined up with the arms of the bed there will never be someone leaning back or jumping in that area like they might towards the inside of the bed. Well, at least we hope not.
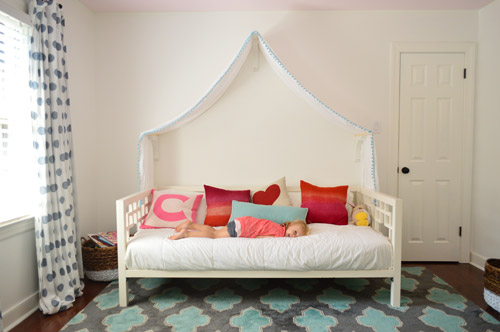
The large flap of fabric is just resting on the brackets for now, but I was planning to use strips of velcro to hold it in place (maybe just along the top and it can just drape over the two side brackets?) but Clara has been so gentle with it – just gazing up at it, softly running her finger delicately over the pom-poms – that I think I’m going to do the lazy mom thing and say “it works for now, and if it gets yanked or drives me nuts I’ll add velcro later.”
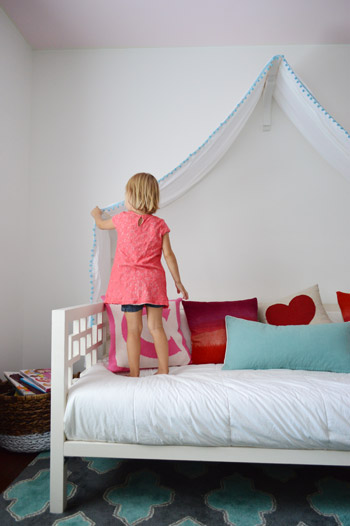
She’s blurry here, but this photo most accurately catches her love of her canopy. This girl is smitten.
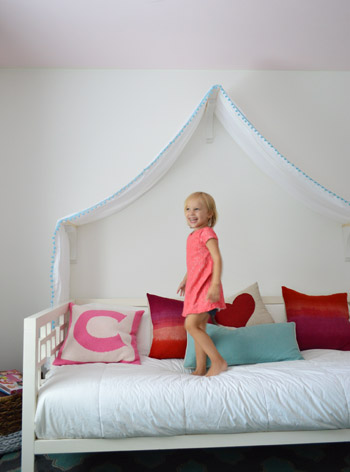
We’re not quite done with that wall. Along with wanting to add some chunky crown molding around the top of the room we also think it would be fun to hang a mirror or some art or a 3D paper mache collection of animals or something to break up the white triangle under the canopy, but the jury is still out on where we’ll land. Just for fun I stuck this Target mirror in there thanks to my good friend Photoshop, but who knows where we’ll end up. I’m thinking something like this could be really fun too.
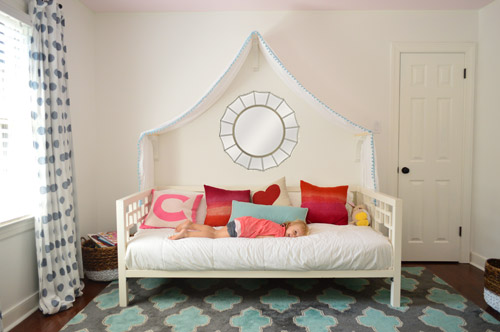
In the meantime I’m loving that our canopy’s made of kid-friendly fabric that’s washable and that it was a not-too-complicated project – but most of all I love that it makes Clara so dang happy. This morning I overheard her telling Burger that he had to wear “a crown and a wand to come into my room because it’s for royal sleepovers.” Don’t think Burger’s quite sold on the idea of wearing anything on his head just yet…
Update – Wanna know where we got something in our house or what paint colors we used? Just click on this button:


kate says
Too cute – once T gets in a big girl bed, I might have to do one for her, too.
And, at the mention of “royal sleepovers” I know have the Sofia the First “We’re at.a.royal.sleep.over.a.royal.sleep.over” rap/song thing stuck in my head. Gaaahhhh make it stop!
YoungHouseLove says
That’s totally where she got that term! It’s in my head too!
xo
s
Anele @ Success Along the Weigh says
That is super cute and kudos on the sewing job! I would’ve ended up cursing and stapling the trim. (Kid friendly with pokey staples, right?) It looks like she is in love and in the end, that makes the 4 hours worth it! :)
Elizabeth A says
Too cute!! Have to pin this for my daughter’s 5th birthday (we redo the kids rooms at 5, 10, and 15 years old).
melinda @ love melinda says
That’s a great idea to redo rooms at those ages! Their tastes change so much!
Kristin @ Little Corbin Hill says
Oh, I’m in love with that pom pom trim *sigh*
Ann says
Just wondering–had you thought about making it come out a little further? I’m not sure it would be feasible/safe with the brackets, but right now it looks somewhat shallow.
YoungHouseLove says
Thanks Ann! Someone else said that too! We can switch out the slats of wood on top of the brackets to make it stick out more (the fabric is 4′ wide, so there’s lots of play) but we worried it would look like three prongs sticking out of the wall really far. But who knows, we might love that look, so we’ll have to give it a try – maybe just by resting deeper slats on top to test it out!
xo,
s
Annabel Vita says
OOh! What about deeper slats of wood with sparkly drawer knobs on the end?
YoungHouseLove says
That’s a fun idea! They have some cute ones at Hobby Lobby!
xo
s
Amy says
Very cute canopy. I’ve never seen one like that. I’m not sure what your canopy width was, but if you took used your fabric right off the bolt (about 44 inches) and didn’t make your six yard cut any narrower, then you shouldn’t have had to hem it at all along the sides. Only the part that’s been cut needs to be hemmed. (Some fabrics have printing along the selvage, but it doesn’t look like yours did.) As for hemming, one good trick (for future reference) is to set your machine to as long a stitch as possible at low tension. Then use your machine’s seam allowance guide to sew, say, a half inch (or whatever you want). Then use the stitch you made as a guide for pressing. After you press, pull that bobbin thread and it should come right out without having to unpick (because you used low tension and a long stitch). For a six yard length, I would probably stop and start the guide stitch every foot or so to make pulling easier. Then pin and sew your top stitch. This method works well on cotton fabrics but not so much on sheers, silks, or any type of delicate fabric. But it’s a fast and easy way to get a nice uniform hem. It works especially well for double hems. You can press and then press again and just sew once. Or press twice and pin your fringe and sew once. You waste a little thread, but thread is cheap enough.
Love your book.
YoungHouseLove says
Thanks for all the tips Amy!
xo
s
Cheryl says
Use one or two thumbtacks on the top bracket rather than Velcro. You would still be able to remove it for washing but wouldn’t have to permanently affix Velcro to either the fabric or the bracket.
Royal sleepovers sound like fun!
YoungHouseLove says
Thanks Cheryl! I worried if someone yanked on it then if it was pinned it would rip. Do you think it would just hold without ripping if it got tugged?
xo
s
Cheryl says
You can tell I’ve never had small children – that thought never crossed my mind! It probably would be fine unless full body weight was involved.
If rambunctious play or jumping on the bed could happen then you might feel safer with Velcro (too much work involved to have it rip anytime soon).
I would probably use a self-adhesive strip on top of the bracket and a few sew-on dots on the fabric (the fabric looks wider than the bracket and that would allow you to gather it loosely).
YoungHouseLove says
Love that. Thanks Cheryl!
xo
s
melinda @ love melinda says
That is so sweet! A perfect addition to her room.
I’ve been sewing since I was in 5th grade and I still stink… :)
Nicole says
I really like the fabric and the pom pom trim but for me the shape is off. I guess I think of canopies as soft and billowy and something you can retreat under. I agree with a previous commenter who said they liked the shape and drape of the fabric you were holding up as a test better.
Gabi Barrick says
Great job, Sherry! I know firsthand what a pain it is to pass that much fabric through a machine! Yay for sticking with it and it looks so cute!
Just a sewing tip – you can always use your iron to press your fabric up once, then fold it up and iron it again, and THEN pass it through the sewing machine (just one time) – should save you time and thread. :)
YoungHouseLove says
Thanks for the tip Gabi! For some reason when I iron I have a harder time keeping my hem straight than on a machine (maybe the little foot pedal on the machine grips it more and it’s easier to keep a steady line?) so I worried if I ironed it and then hemmed it could be wiggly or something. Will have to refine my ironing skills as well! Haha!
xo
s
Gabi Barrick says
Haha! Darn those wiggly hems!
I keep a little squirt bottle with water and dampen the fabric as I iron, which really helps to set those hems – pins help, too. (Although pins get on my nerves so if I can skip them, I do).
The good thing about a project like this is it doesn’t have to be perfect – the billowy-ness (helloooo made up word) would hide any little imperfections or wiggly hems. Regardless – it looks super cute and fun and you and the sewing machine are still friends. Success!
RA says
Old sew and sews ;D have been known to make a template from a manila folder. Use a metal ruler or other straight edge and a sharp cutting tool to make a clean straight edge on the folder. Then use a pencil or pen to mark your fold lines, say for instance 1/2 inch and one inch from the straightened folder edge. Place your template on the fabric, turning your fabric cut edge back to the desired width and press. The folder will be “tucked” into the fabric. Once you have your first edge pressed evenly the second fold will pretty much fall into place by itself. That is, unless you are using a very slippery synthetic.
Hope this makes sense. Also, if you have a lot of pressing to do you may want to make more than one template.
YoungHouseLove says
Thanks for the tips RA!
xo
s
Kristen @ LoveK Blog says
Love the canopy! It’s so fun for Clara, and it’s obvious that she loves it!
Kenzie S says
I love how the canopy turned out, and the trim is too cute!
JLY says
Royal Sleepover, huh? Someone is a Sophia fan :) Did she rap the “royal sleepover” part?
Every princess needs one of these. My son wants a ship in his room. We’re still working on that one…
YoungHouseLove says
Oh man, it was so funny to overhear because I immediately got that song in my head.
xo
s
Hilary says
That is just too darn cute!
Needle little Balance says
Good job, Sherry! Kudos for sewing and conquering your sewing machine! You´ll see that every time you sew it will get a little easier. *promise* I had my fingers crossed for some turquoise because of the rug and also like the new pillow combo. I still think that white walls in a kid´s room are great because not every little girl´s room has to look like Barbie´s dreamhouse. Especially not for the cool ‘dangerous’ bugs loving girls ;)
Mary | Lemon Grove Blog says
That is SO dang cute – y’all nailed it! Love the pic of Clara with the new canopy, it looks like she’s a fan! ;)
Laurel M. says
You did a great job! I love love love the trim! What a good way to make an easy canopy, it won’t get in the way or have to be pulled back in the morning, more like art on the wall. I have to admit to you, I was troubled when I read that you’re a terrible sewer because the word that came out of my mouth in my head was SEWER…like the potty pipes…but don’t worry, my brain fixed it quick and then I shamed myself for having such a dirty mind! You are a fine SEAMSTRESS!
YoungHouseLove says
Hilarious! I’m not a very good pipe that removes bile and waste either!
xo
s
Laura M says
Fun and and beautiful!
Emily says
I love that she knew you two could build it for her… because that’s what her parents do! There was no getting out of that one!
lauren says
Love it! You guys are such great parents to really listen to what she wants for her little space and follow through.
I actually really like it without the mirror. Plus, does that kid ever jump on the bed? Seems like a head bashing waiting to happen…
YoungHouseLove says
Yeah, I think I’m leaning towards the paper mache animals thing or something non-shattery… just in case…
xo
s
Elaine - visual meringue says
Adorable! Such a sweet canopy. Great job :)
Lisa says
Tiny time-saving tip to cut down on your sewing time: Instead of sewing it twice, get out your iron. Fold it over once, iron it, then fold it over again. THEN sew. Only 44 feet next time!
I am always so in awe of how you guys manage to redecorate entire rooms without breaking out a sewing machine! I just made a new duvet cover for my son’s room that we are in the middle of re-doing; it was miles and miles of sewing. And so very un-exciting.
I love Clara’s new room, by the way! I adore the blue!
YoungHouseLove says
Thanks for the tip Lisa!
xo
s
Kelly says
Ooo! I love the idea of hanging paper mache animals above the bed. You could even paint them in fun (not-true-to-nature) colors like these: http://www.pinterest.com/pin/245798092132451918/
YoungHouseLove says
Those. Are. Awesome.
xo
s
Brenda says
Wow, those are amazing!
Liz says
I’m always impressed by people with sewing skills (I’m serious). My grandmother, mother, and I could never do any type of sewing, knitting, or crocheting to save our lives. For some reason my sister had an interest in sewing when she was in elementary school, so my mom paid for her to take private lessons. She made pillows, stuffed animals, and everything – so impressive to us haha! I love the canopy, it’s so cute! :) I am sure Clara loves it that you can make her such personalized items!
Megan says
Adorable! I’m totally on board with the suggestions about decorating the space within the canopy. A mini gallery wall would be precious and easy to switch out if you rearrange over time. Also, there are some really amazing decals out there if your wall allows for them (ours are too textured). I’m not typically a fan of decals, but for something like this, it would be a great way to add some non-permanent playfulness! :-)
YoungHouseLove says
Another blogger I love just used gold heart decals on her daughters wall and it was so cute! http://www.inthefunlane.com/2013/08/wrens-mini-room-makeover.html
xo
s
Sandra T says
OMG! That armoire in that room! I’m officially gone!
Mary Cole says
I have a pretty off topic question. My daughter drink whole organic milk (Horizon) and I also drink a latte every morning (I remember you do too). I’m just wondering if your whole family drinks organic because I did the math and we are spending a TON on milk every month. Though now that we drink organic milk I feel funny picking up a plastic jug even for myself. Do you find it cheaper anywhere? We are paying about 4.50 a half gallon
YoungHouseLove says
We all drink organic milk, but at Kroger it’s not too bad (maybe $3.50 or $4?). Anyone have tips for Mary Cole to find it cheaper? Sometimes there are Horizon coupons too.
xo
s
Mary Cole says
I am always searching for coupons with no luck! We all switched over when she turned one. $3? Wow that would be awesome! Maybe we should look around for a costco or something.
Savannah says
Not sure if you have one in your area but I get my organic milk from Waldbaums. I buy their brand I think it’s called Green Way. $5.99 for a gallon.
Megan says
Adorable! Totally agree about decorating the space within the canopy. Instead of a large mirror… didn’t you have some cute butterfly ones in your first house? Would be neat to have them flying out from behind the bed!
YoungHouseLove says
Someone else mentioned those too! I’ll have to dig them out!
xo
s
Megan says
Oops! My comments got split in two??? Sorry for blowin’ ya up!
haverwench says
[puzzled] What happened to Clara’s pink-and-red bedspread? And the curtains with the fabric she picked out herself? They’re still there in the first picture, but then overnight they got swapped for polka dots. I know you had to ditch the pink rug because of shedding, but did the room have to lose all its pink and red on that account?
YoungHouseLove says
The original curtains seemed to clash with the new rug a bit more, and since Clara asked to use the blue rug in there, thankfully she was down with the switch. We have lots of curtain-less rooms (the dining room, kitchen, living room, spare room, and office) so we’re sure the old curtains will find a new place to live though! The blanket gets snuggled it in her crib and on the sofa downstairs, so it gets around. While she definitely lost pink/red in some areas, she still has her pillows, her red play-table chairs, and now has a pink closet along with a pink ceiling, so it’s definitely still represented. We’re so glad she’s happy with her room.
xo
s
Jennifer says
This is just darling and Clara’s face is just priceless : ]
Cristy says
Great job! I’m inspired!
I think it would look super cute if you painted a pretty ‘C’ in that space… Maybe give it a swirly circle around to fancy it up!
YoungHouseLove says
That’s a fun idea too!
xo
s
Lauren says
Aw you guys, you are such sweet parents for doing these projects for your girl :)
And so I debated back and forth for about 10 minutes whether or not to ask this question, because I can’t stand how people have been feeling the need to comment here lately commenting negatively on everything you do and say. I am so NOT in that camp! I think you guys are great.
But I do want to ask, how come you guys decided to make the canopy like you did… like a wall decor piece instead of a canopy; something that can envelop the bed / Clara can drape around herself, etc.?
I mean I honestly think of stuff like this when I think of a canopy: https://www.google.com/search?site=&tbm=isch&source=hp&biw=1280&bih=909&q=bed+canopy&oq=bed+canopy&gs_l=img.3..0l10.1541.2435.0.2747.10.8.0.0.0.0.281.1091.2j3j2.7.0….0…1ac.1.26.img..6.4.394.z1rJGPKSNNw
Thanks for listening :)
YoungHouseLove says
Aw thanks Lauren, you’re so sweet. The funny thing is her friend’s canopy is sort of tented like the one we made, so I think we had that shape on the brain and thought she might get all tangled in lots of tulle. When we were trying to finalize the way we’d hang it, John and I just looked at a lot of canopy shapes online and we both liked the one we linked to in the post the most (this one) so we modeled ours pretty closely after that. We’ve debated making the brackets deeper so it would stick out from the wall more (the fabric width is 4′ so it could come out a lot further and “envelop” the bed more – we just worried it could look too sticky-outy from the wall if it was much deeper with three prongs sticking out a few feet each – but we might just try laying deeper slats on the brackets just to envision it). Who knows, we might love it!
xo
s
Kathy says
Agree, and I can understand the safety concerns with a little one. But I think you can tack and staple it to the wall to alleviate that. It just needs more bulk. I actually preferred the one where John was holding the curtain and the fabric draped down the back of the bed. Perhaps you could paint the back as someone suggested, or drape and staple folds of fabric back there to soften. Good Start though!
Lauren says
OK phew, I’m glad you guys didn’t think I was being annoyingly contrary! I think when you’re dealing with a canopy, and a little girl (those creatures tend to love big whimsical treats in their very own rooms!), too sticky-outy is not too big a worry, LOL :) Plus you would barely notice the prongs because of the billowing of the fabric.
I know this one has a circle top, but I think you could get the same effect with prongs! http://24.media.tumblr.com/tumblr_ll2su2ghVK1qdwkufo1_400.jpg
…I think I might be so into this because I was SO all about having a canopy over my bed when I was little, and my mom just wasn’t into it… she thought they were too frou-frou. Paging Dr. Freud, LOL!
YoungHouseLove says
Haha! You’re cracking me up Lauren! We saw that canopy while googling too, I think we we’re more drawn to the fabric not hanging so much (at least for this age we’d love for it not to distract Clara from actually sleeping) but who knows where we’ll end up!
xo
s
Alicia says
Looks great! I had a mosquito net over my daybed when I was younger and I loved it! I eventually glue-gunned little pink/purple/blue flowers all over that were glow in the dark. It was much more subtle than it sounds but it definitely added an extra element of fun!
Peggy McKee says
Smart of you to have pre-shrunk the fabric.
IMHO it’s also worth pre-shrinking the trim, especially if it contains cotton. A lingerie bag works well for this. If the trim isn’t pre-shrunk it may make the edge gather a bit after washing–no biggie in most cases–and ironing will usually flatten it.
YoungHouseLove says
Never even thought of that. Great tip Peggy!
xo
s
Chanelle says
As always, this is great! I think my daughter would love something like this. Like you, I am a terrible sewer and don’t sew often because of it. Where do you store your machine and sew? Since it takes me forever to get anything done, my crap tends to sit around where ever I plop my machine until I’m done. Needless to say, its not working.
YoungHouseLove says
I store it in the guest room closet and sew on the kitchen table but I’d love to eventually have a desk in the guest room for sewing up there (it gets such pretty light).
xo
s
Annie says
Sherry, the most important two lessons I learned in sewing curtains are the effects of volume and drapiness. You’ve got the drapiness with the thickness of the fabric here, but volume is what kicks it up a notch to the next level from grad student basic furnishing to grownup dressed room. If you got another length of fabric and extended that top bar you’ve have a really lush, pillowy drapey feeling going on. Think of how much difference it made when you added extra fabric to your half-panel curtain in the big room in your last house. I found it when I had cheaped out on a single panel for each of two windows framing a dresser. When we staged the house for sale I kept my fancy curtains and put up cheaper home made curtains, two panels per window. They looked better than my xpensive ones due to the way more fabric hangs. Cue sad face. And we’re not talking heavy provincial swags here, these were graphic modern prints in a MCM room. It’s just that volume= good with hanging fabric.
Also, did you consider taking them to the floor and hanging or painting a backing within the triangle it creates? My daughter’s canopy is definitely nothing that will take her past age ten, but I figure why not have fun?
Andplusalso, if you are nervous about folding the hem as you sew, pressing the double fold will help and you’ll only have to sew once. Have you thought if taking sewing lessons? You could partner with some local crafty blogger and use it for blog content.
YoungHouseLove says
Thanks Annie for all the tips! Love the info about volume, and we did think taking them to the floor could be fun, but after looking at a lot of canopy designs we fell the hardest for the one we mentioned in the post (this one) so we just modeled ours after that one pretty closely. There are definitely lovely canopies that go to the ground too though! And I’d love to take a sewing class and a photography class – both are on my list!
xo
s
Suzanne says
Do you think the difference from the inspiration pic is possibly the black? Yours seems to be floating, while the inspiration seems more intentional and grounded. If you know what I mean?
YoungHouseLove says
That’s possible! I think we also liked the look of the white canopy with the pink pom poms (the other link in that paragraph) for a softer look, and the blue trim pops a bit – albeit more subtly than the black). I generally think the whole thing will evolve as we add art and possibly some twinkle lights, etc.
xo
s
Annie says
Does the fabric on that one stop a foot above the ground? From that pic you can’t see.
I did wonder after I posted this if you hadn’t accounted for shrinkage when you measured? That’s easy to fix, just grab some more fabric when you’re getting the second drop and have a seam lying on one of the hooks. Minimal wastage, high water mark curtains solved.
YoungHouseLove says
Oh yes, we accounted for shrinkage so we were aiming for the draping to stop at the end of the daybed on each side (although I realized after I took these pics that it was slightly longer on the left side just from my placement of the panel so I pulled it more to the right so it all met the bottom of the daybed). With four floor length curtain panels on the adjoined wall, we thought two more to-the-ground things might be too much for one room. We can’t tell if that inspiration pic had curtains to the ground but I think we liked that it looked clean and nothing was clearly dangling from the side, so that inspired us to not have ours pool or anything :)
xo
s
Emily @ Life on Food says
I always wanted a canopy when I was little..I probably still do. Love the pom poms
Sandra T says
There’s so much to love in this post, don’t know where to start! The canopy turned out beautiful, kudos for conquering Oh Brother! I know that Clara’s love of it makes your millennium. And please! Superman John?! YES!! In his lovely updated coral cape! A superhero for the masses!! You guys make my day! :D
Jenn says
Fraying edges are why I have a serger, but before that I used a trick my mom taught me. You set your machine to zigzag but instead of keeping the stitch entirely on the fabric you let it fall off.
Here’s a tutorial that shows it way better than I could ever describe it:
http://www.themotherhuddle.com/how-to-finish-seams-with-a-sewing-machine/
YoungHouseLove says
Thanks for the tip! I always wonder if a serger would be fun to play with!
xo
s
LARY@Inspiration Nook says
So pretty! Her face is priceless :)
Andrea says
Papier Mache animals. That’s my vote. No question!!
Brittany says
so cute!!!!!
Jamie says
Hi! So cute.
Long time reader, first time commenter. :) I thought of you guys when I read my Houzz.com email today. Thanks for your inspiration and humor!
http://www.houzz.com/ideabooks/17398713/list?utm_source=Houzz&utm_campaign=u354&utm_medium=email&utm_content=gallery3
YoungHouseLove says
Hilarious! I love it.
xo
s
Donita says
Love the new Royal look!! Great job mama! (Daddy, too!)
Kristina says
Darling with a capitol D! Adding some of these baby animal pictures seems like something Clara would like.
http://www.theanimalprintshop.com/baby-bobcat-close-up/
I can’t even choose which ones I like most!!
YoungHouseLove says
I’m such a fan of that shop!
xo
s
Akiyo says
I love how the pompom trim adds that extra bit of interest and covers the ends of the bracket tops! Her room is coming together so beautifully! It kind of sort of makes me want to try for a daughter so I can add girly touches to our home. ;)
Shannon [Our Home Notebook] says
Such a sweet addition – I love how much she loves it! And I think I need some pom pom fringe in my life.
Ashley S says
In a lot of the in-progress painting photos, I see what looks like you’ve boxed tall areas off with white paint (visible behind the daybed in the photo where John’s demo-ing the white curtains). I’m wondering… is there a painting secret to this I’m not aware of?
YoungHouseLove says
That was just where we sprayed the doors (after we ripped out the carpet we leaned them up on the wall and sprayed them).
xo
s
Kristin says
The canopy is beautiful! I ordered similar pom pom trim to add to the curtains in my daughters room yesterday. Now I really can’t wait for it to arrive!
Kismet says
I am loving C’s room and bed.
Not that you asked but I feel that beautiful awesome rug is too dark and heavy for suh a light and airy child’s room. But I know nothing is permanent so will keep watching and see how it plays out.
Beautiful work!
Annie says
I’d do a decal in that spot over her bed. That way no danger of it falling (I’m a worrywart too!).
Pottery barn teen makes great one that aren’t “little kiddie” but aren’t the kind for grown ups either. There’s really great art frame decals which means she could create stuff and change the look!