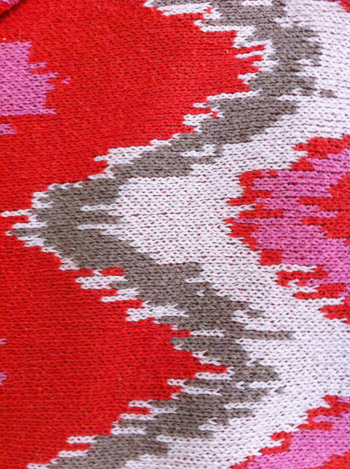
Some people who went for a pattern like this on the daybed might go for something neutral and simple for the windows (like breezy white curtains). Others might pluck one of the colors from the blanket and go for that (bold red cotton panels, taupey-gray velvet ones, etc). We might have been tempted to go with something more neutral and safe if the room wasn’t meant for our color loving kiddo (so the bedding could “be the star”) but since it’s Clara’s new space, and we love kid zones with a few layered patterns and colors, we decided to just go to our favorite local fabric outlet (U-Fab here in Richmond) and see what grabbed us. And by us I mean Clara. It’s her room, after all…
Like a moth to a flame, this happened:
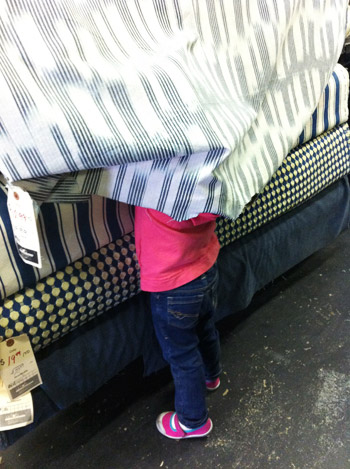
She had some fun playing with a few crazier options (a bright orange one with large coral on it, a dark purple plaid, etc) but this one was definitely something she pointed at a few times – and we thought it actually could work – especially since it has navy and white in it, which are two of the colors we’ve mentioned wanting to add to balance all the pink & red.
In short: Clara’s clearly a decorating genius. Just kidding. The truth is that there are probably a ton of fabric options that could layer nicely into a kids room when it comes to curtains (as long as they’re not too “alpha” they’d fall in line behind the bedding and a bright rug without totally disappearing). But we did like that there was a very very very subtle chevron-ish pattern going on (the blurry linear edges actually reminded us a lot of her daybed blanket). And the price wasn’t too scary…
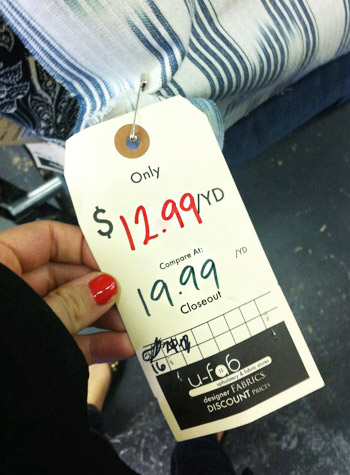
… especially with a store-wide 20% off sale that was being offered on top of that discounted price. So in the end we got just a smidge over ten yards to make four extra long panels for the room, which each broke down to around $25 per panel after the sale.

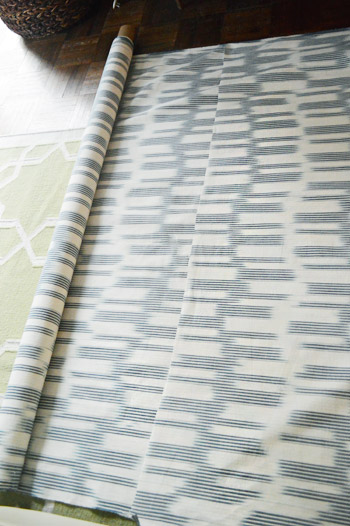
When we got home and tucked Clara in for a nap, I rolled out my bounty and started cutting my four panels from the roll (because let’s be honest she’d yank this every which way while I was trying to measure and cut if I tried to do this while she was awake).
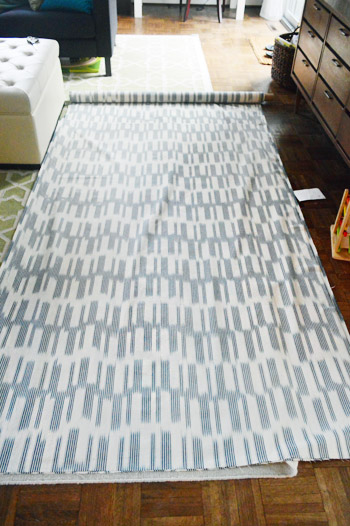
The simplest way for me to measure for panels is just to see how long I want the finished curtain panels to be (ex: 89″ high) and then add two extra inches to the length of each panel to account for the hems on each end that I’ll add. So each of the four panels that I cut was 91″ long and then was hemmed to a finished size of 89″, which might not sound that long but I love hanging my curtains on a rod with rod clips, so those tend to add a little length too. That way the rod can be mounted just a few inches below the ceiling like I like it (we left some extra room for crown molding which we’ll be adding in here down the line). Oh and I use the full width of the bolt for the curtain’s width, which means less cutting, and they’re as thick and full as possible that way.
I’m a fan of using one panel as a template for the others. So once I measured out and cut the first panel, I just placed it on top of the fabric under it and made three more of them in exactly the same size for a grand total of four soon-to-be curtains.
Then I used my trusty hem-tape method, detailed here and here. For over half a decade I’ve used the heavy duty Heat N Bond stuff, and it has not only held up amazingly but it can even be washed, so I’m definitely a fan. I’ve also sewed curtains and actually think the hem-tape ones look crisper and straighter since keeping my stitching straight isn’t as easy as following hem tape with an iron for a nice straight hem. Like so:
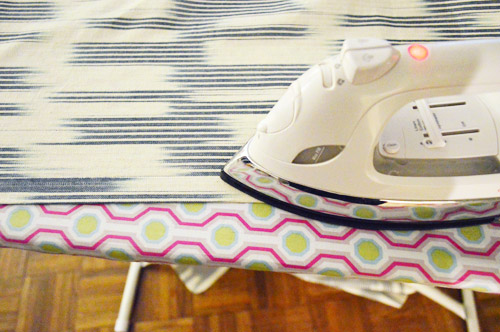
Oh and it always helps to wash your fabric first (before cutting and hemming it) so it’s all pre-shrunk!
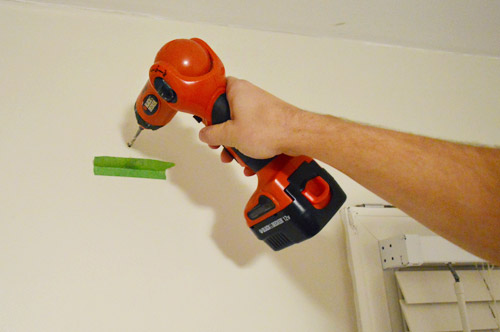
As for the curtain rods and ring clips, we actually had them already (remember we had hung them back here?), we just removed them to paint the room so we could re-hang them at the height of our freshly made curtains. So here’s John’s tricky little tape move for hanging the rods (he folds some painters tape under the hole he’s making so it sticks out like a ledge and catches the drill-crumbs).
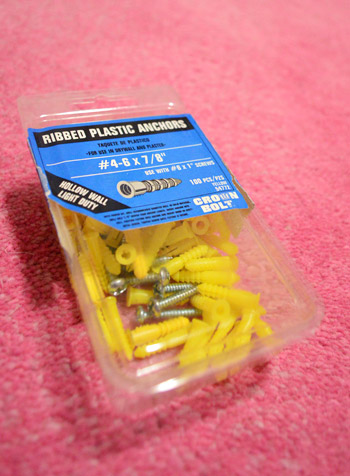
For the detail loving folks, we used these plastic anchors (we like to make sure our rods are held in with more than just a few screws in case a kid hangs on the curtains – which we’ve found results in just the fabric slipping out of the ring-clip’s “mouth” instead of the whole rod banging down on them).
Bada bing, bada boom. Clara done good with her curtain choice, we think. They sort of look black and white in these pics, but they’re really navy in person, and we plan to bring more navy into the room in a bunch of other ways (picture some navy picture frames on the wall, a navy pillow or two on the daybed, maybe even a navy light fixture or ottoman in the middle of the rug). That will “link” the curtains to the rug and the daybed a bit more, so they won’t look as random. Should be fun to inch towards a more finished look. You know how impatient I am…
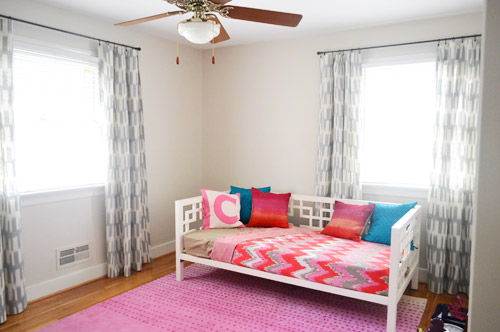
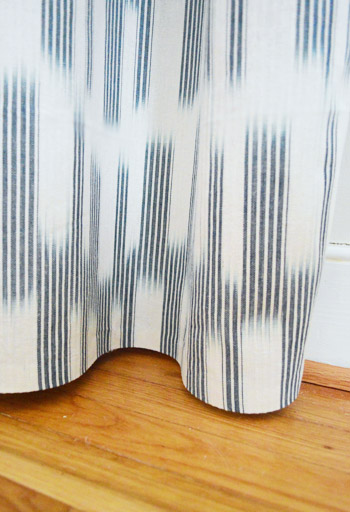
While the room keeps slowly evolving, I’m soaking up the little things. Like the fact that the curtains almost touch the floor but don’t (it keeps them cleaner and helps them hang in a fuller, loopier way). Oh and here’s one more hanging tip: clip the rod rings to the rod and to the fabric and have someone hold them up at different heights until you like the way they hang and then mark the wall and hang them at that height. That way they won’t be dorky short or too long. It definitely beats trying to guess the length of the curtains while hanging a bare rod (if the actual curtains are on the rod they can help you pin down the perfect height).
Oh man, it still feels pretty empty in here (and that old fan practically pokes John in the eye every time we’re in there) but we can actually picture more things being layered in now. Like our kids table and maybe an ottoman to break up all the pink in the rug plus a ton of playful art to add balance. Here’s the ol’ to do list:
paint the room(more on that here)cut down our old den side table to make a play table(more on that here)bring in a dresser (we’d love to find something secondhand)(more on that here)
make/hange some curtains
add a rug(more on that here)
- hang art on the walls along with a few other 3D objects that we have in mind (how’s that for cryptic?)
- install a new light fixture
- refinish or paint Clara’s new dresser (which we got here)
- paint the chairs a bright happy color to go with Clara’s play table
- turn the junked up closet into an actual clothes closet/reading nook
- add crown molding (along with tackling the other un-crown-molding-ed bedrooms on this side of the house)
- add accessories like more pillows, storage bins for toys, etc
Sounds like a good time to me. I know, I’m crazy. Kids rooms are so much fun though! What have you guys been up to? Anyone else making curtains or letting their kids help with fabric or paint choices? Do you use the hook-the-curtains-to-the-rod-and-then-hang-the-rod trick too? It took us a few years to figure that out, but it seems to be a lot more exact that trying to measure curtain length and account for the height of the ring hook and the rod itself (we used to be off by an inch or two after all that calculating and then we’d have to re-hang them again to fix our mistake). Oh well, live and learn!
Psst- The latest roundup of Clara Conversations are up on Young House Life, and let’s just say there are a few gems – at least according to us, her obsessed parents.

Andie Trice says
LOVE! The room is really coming together most awesomely (is that even a word?!).
We’re in the process of putting together our nursery for our first little one. Definitley fun, definitley alot of work. SO many details to consider. Our babe’s room will be the first and only fully planned out room in our house, hoping it’ll be inspiration to move on to the next when the nursery is complete.
Thanks for the constant motivation!
YoungHouseLove says
Aw thanks Andie! Good luck with everything.
xo
s
Stephanie says
I keep noticing the corner of your living room rug is curling up. I once heard that you can weigh it down by attaching a linoleum tile to the underside of the rug to train the corner to lay flat. I’ve never done it, but it may be worth a try.
YoungHouseLove says
So smart!!
xo
s
Kerri says
And I love the new dresser. We too are looking for something like that in which we can paint a gray tone to go with a white bed frame. I can’t wait to see what you do it it! I love her new room!
Carley From @UFab says
We LOVE the curtains. The perfectly balance the room. We can’t wait to see what’s next for this darling space, especially where the moose light fits in. (We have a thing for moose).
Courtney Edmondson says
Where did you move the small art table to? Is it going back by the window? I think that the crayon art I made her will look great next to those curtains ;)
YoungHouseLove says
Those are coming back, the table and chairs just need some work (the table is all scratched up and needs to be painted, we plan to paint the chairs, etc) so they’re in the sunroom awaiting the next step!
xo
s
Reenie says
Seeing the fabric on the bolt… I never would have picked it. But, after seeing them hung ~ they look great.
Joanna @ Our Freaking Budget says
Can’t wait to see the finished room.. I can’t believe how well that fabric works with everything else. I never would have seen that like you can! We’re still in nursery stage for our baby, but her room is VERY lacking in curtains. and oh boy this post is making me antsy to remedy that pronto!
Lauren O. says
These look really great! Quick question for you, do you still use the tape if you need to use double width of fabric (if you wanted the panels to close)? Thanks!
YoungHouseLove says
Hmm, I’ve never tried that. Has anyone tried to connect two panels to make a double width panel with hem tape? The width of upholstery bolts are usually wide enough for it to close without us doubling up (ex: all the curtains in this room can be drawn to close and block the window completely). Hope it helps!
xo
s
Sara Dean says
I vote for a painted stripe on the ceiling! Maybe in yellow?
YoungHouseLove says
Fun!
xo
s
Sara VT says
Clara is a natural! It would be awesome if you had a Burger Drum Shade in Navy from your collection! I could totally see Clara thinking that was cool! Keep up the great inspiration!
YoungHouseLove says
Haha, I am in love with the Burger shade, so it’s definitely going to end up somewhere…
xo
s
Sara says
you should try your hand at some fabric storage bags, you could make them match the curtains.
They require a little more precision than just a straight line, but could be a good next challenge.
YoungHouseLove says
Love that idea!
xo
s
Natalie Royall says
Genious! As I was reading thru your post, when I first saw the fabric… I thought it wasn’t going to work. But then when they are hung at the end of the post… AMAZING!! Go Clara. I have my little girl who is 7months, so these are all great ideas for her next room :)
Cara says
I had to share these after reading your post this morning, thought these might make a nice addition – https://www.jossandmain.com/Pillow-Pairs-under-50-Drew-Pillow-in-Pink-%28Set-of-2%29~EIXG1018~E3071.html
YoungHouseLove says
Cute!
xo
s
kathleen quinn says
My husband and I also had an eyesore of a ceiling fan. We painted it white and used aqua blue duck tape to add slanted stripes and a new light fixture. It came out great. So much cheaper than changing it since it still worked great!
YoungHouseLove says
That’s cute!
xo
s
Kim says
You’ve definitely turned me onto the no-sew curtain train. Here are my bedroom curtains with my awesome fabric I bought at Allegro Fabrics on Etsy: http://web.stagram.com/p/357886912520876531_2771115. (Don’t mind the weird spacing from the rings).
The windows were the weirdest sizes so this really saved the day. I would never tackle sewing, so thanks for helping make it manageable for me. :)
YoungHouseLove says
That’s awesome Kim!
xo
s
Susan D says
I love the idea of adding navy. Have you thought of adding navy sheets for a quick, easy pop to the room?
YoungHouseLove says
Love that idea!
xo
s
Christy says
I love love love that fabric. The layering of patterns is so cherry and happy. Nice eye Clara!
I just wish I could get the other member of my household to be this adventurous. Perhaps its time to just do it and beg for forgiveness rather than ask for permission. :)
karla says
you might want to mention to people that when you cut out fabric that has a pattern to it, that you should lay the first cut out pattern on top of the remaining fabric, so that the patterns match up. that way, if you ever close the drapes, the pattern will continue across the window and not look crooked. depending on the repeat of your fabric panel, sometimes you have buy a little more fabric to make them match.
YoungHouseLove says
Oh yes, great tip Karla!
xo
s
Diane @ Vintage Zest says
I consider myself equal parts sewer and DIYer (mostly because I kinda suck at both), but I’m surprised the hem tape method works better. I’ll definitely try it the next time I have a room to re-curtain!
By the way, I think the hem tape is actually pretty cute too. I wouldn’t have thought to add a cute tape to something that wouldn’t be seen, but I suppose it’s like adding a cute lining to the inside of a skirt. I love if it flips up, so this would be pretty similar and adorable!
Melissa Breau says
LOVE these curtains. Now Clara just has to come over and help me pick out some fabric for curtains for my place…. ;-)
YoungHouseLove says
Haha, we’ll send her right over!
xo
s
Nat says
I’m so jealous of you guys and your local fabric stores! I’m on the prowl for various fabrics for chairs upholstery, pillows, curtains and I turn up nothing decent in my local fabric shops. :( What’s a girl to do when there’s no U-Fab around?
YoungHouseLove says
I would totally shop on maryjos.com if there wasn’t U-Fab. It has a ton of everything and the prices are great!
xo
s
Amber @ Healthy, Wealthy & DIYs says
Loooooove how curtains can really pull a room together!! I love the step-by-step process of a room’s evolvement, and Clara’s big girl room is really coming together!
Iron-on hem tape is such a lifesaver. I couldn’t find inexpensive 100″ white curtains for my living room so I bought 95″ curtains from Target and ripped out the hem on both ends and used iron-on hem tape to make them longer. It can really save a lot of time & money! ;)
Amber
Gina says
So cute! I can’t wait to see how it all comes together. How much did you pay total for that project? I am trying to decide if I should make or buy curtains for our living room. We have a bay window and would need 6 panels!
YoungHouseLove says
They were $25 per panel and we already had the rods and rings, so it was around $100 for the whole thing (four panels).
xo
s
Sarah says
I love the curtain fabric! Who is the designer do you know?
YoungHouseLove says
I wish we knew! The only info we have is what you see on the tag in that pic.
xo
s
Alison lengen says
Love the way it came out! Love the risk!
Claudia says
love the curtains! and I like them to not touch the floor, too, i know they’re supposed to touch and sweep and whatever but I don’t like that! good choice, Clara!
Jeanna Sanchez says
Love the curtains! Go Clara! I am gonna start making over my boys room soon, they chose grey and navy for the color scheme. I thought maybe adding a little orange in the mix would work?? What do you guys think would go with navy and grey?
YoungHouseLove says
That sounds so cute! Love the idea of navy, gray, and orange!
xo
s
Cassondra says
I’m in love! Clara can come to my house any time and decorate to her little hearts content.
Lisa S says
Do you happen to know the name of the fabric? I need to make some curtains for my breakfast room and this would be perfect!
YoungHouseLove says
I’m so sorry, all we know about it is what you see on that tag we photographed for this post.
xo
s
Rebbeca says
I have what’s probably a silly question, but I recently gave up on a hem-tape curtain project because it was so frustrating! How do you make sure that the hem tape actually goes on straight and at the right distance from the edge to make you 1 inch hem? I’m working with a fabric that doesn’t have a geometric pattern or a line to follow and I’m having a terrible time making sure that the hems are straight! I thought this was only a problem when trying to sew a straight line… :)
YoungHouseLove says
I try to cut my panels as straight as possible and then just follow those lines visually with the hem tape. Hope it helps!
xo
s
KathyG says
There are “hem clips” which help keep a straight edge while hemming. But trick my mom taught me is to cut a piece of cardboard, or find something like that that is the width of the hem you want. Then just use it to measure your hem all the way across. I tend to like a deeper hem on my curtains, so I often use the short side of a credit card.
YoungHouseLove says
Really smart!
xo
s
Jennifer says
You can also pull one thread from the side, that will give you a straight line to measure from! It’s a little tedious, but you know you will have a straight line. :)
YoungHouseLove says
Really smart!
xo
s
Krystle @ Color Transformed Family says
I love that ou didn’t take your drapes all the way to the ceiling and that there is a little space at the floor. I did the same thing for our girl’s room and love it. The space at the bottom definitely gives the room a cleaner look and is great for finding toys that are hiding.
Hailey Montoya says
Oh dang I feel lazy, you guys make fast progress! Loving the colors. I never have finished my 4.5 year olds room….now we have a baby due in August and I have to convert it to a shared room/nursery. Here’s to hoping I get some motivation!
Kim Wethe Rily says
Very cute. And I say, “No Fair!” on the rod not pulling out of the wall when kids hang on it. My 6 year old (5 at the time?) hung on our new curtains we put up in our room and the wall anchor ripped right out of our 1950’s plaster wall. However, we didn’t have fabric clips, we have Ikea curtains with big grommets through the top. Another plus for fabric clips! (I still have to spackle and paint that part. :(
YoungHouseLove says
Aw man!
xo
s
Jillian@TheHumbleGourmet says
Such fun! I love the pink/red/navy combo…feminine without being too “girly”.
Amy K says
Sherry,
You mention putting crown moulding in the rooms. We have that (not-so) fantastic popcorn paint effect on our celing. We bought the moulding and started nailing it up but the texture of the paint on the celing would not allow for a smooth clean finish where the top edge of the moulding meets the celing. We were crushed! We definetly want a finished look from our sea blue walls to the white celing but I dont know how to make the moulding flush to the celing (without having to painfully sand the finish off)
Ideas?
YoungHouseLove says
Ooh I would totally caulk the seam so it feels more seamless and looks nice and finished with the ceiling. Hope it helps!
xo
s
Jess says
You guys are sort of blowing my mind over here with how good plain rectangles of fabric look hung with curtain rings. I’m just…how did I ever live without your awesomeness?
Just last night my husband and I were trying to agree on options for pre-made curtains (it’s a scene, man) and just me trying to decide between grommet and pinch pleat hung with rings (a bit too formal). This is the ultimate perfect solution – it’s less formal than pinch pleats and we can go find some wacky fabric we both agree on and make our own curtains AND save money.
Seriously, I feel like I owe you my first child or something…we have A LOT of windows to cover.
Jess says
One more thing: how far apart are you spacing your rings?
YoungHouseLove says
Haha, you’re so sweet Jess! As for the spacing, we use 7 hooks per panel and just space them out equally (one at each end, and the rest at equal increments across the top). I think they work out to be around 7-8″ apart? Hope it helps!
xo
s
Eve says
Love the curtains! And the bedding! I have a similar scheme in mind (red/pink/grey/yellow) for my almost 3 year old’s big girl room transformation based on her pleading for Target’s Hello Kitty bedding (though it is going to kill me to paint over her wall murals that I spent many nights working on). I have my eye on Ikea’s red PS locker cabinet for toys, against pink walls.
What kind of light fixture are you guys considering? My husband just hung your yellow metal strap pendant in our dining room and we love it. I can see that something else in a similar tone in Clara’s room! :)
YoungHouseLove says
We’re not sure what we picture yet, but probably a drum shade with multiple bulbs since we want it to be nice and bright but don’t want a big leggy chandelier or anything (it’s an 8′ ceiling so we don’t have room for something huge). Should be fun to see where we end up!
xo
s
Nat says
Oh man, that mural is gorgeous! Don’t paint over it!!
Helen says
Does Clara need blackout curtains for nap? They really help our toddler!
YoungHouseLove says
We have them in her nursery and we definitely plan to add them to her big girl room if she needs them (we never sewed them onto her original nursery curtains, just clipped them up, so we can always transfer them over if need be).
xo
s
Kimberly Visram says
Love the way it’s coming together! It’s a nice combination of grown up and girly. Can’t wait to see what else you bring in!
Stephanie says
I love how the curtains look in there. The room sure is coming together. Is Clara itching to get in there yet or does she not know yet that it’s her “big girl” room? How do you think she’ll transition to being in a big girl bed and not confined to her crib? My little one is 32 months and climbed out of her crib at 18 months. It was a sad sad day. ;-)
YoungHouseLove says
She loves that room for playing but still prefers sleeping in her crib so we’re not going to force it and we’ll just follow her cues. Hopefully by the time she’s ready it’ll be a nice transition, and we can turn the daybed around or add guards if we fear she’ll wiggle out of the bed. Haha!
xo
s
Eilene says
While I was reading this I thought.. eh…. The curtains are fabulous, but how is it going to go with that bedding? Then I saw the picture of them hung up and said to myself “Holy crap, it works!” – Really. I excitedly thought that.
Everything your family touches turns into decorating gold!
YoungHouseLove says
Aw thanks Eilene!
xo
s
Karly says
I am loving reading about/seeing the progress of this room. Such a great example of how things evolve and don’t always make sense right away without all of the elements added. The curtains really bring the other colours together, and I’m sure everything else you add will too :) Can’t wait to see the rest!
YoungHouseLove says
Aw thanks Karly!
xo
s
Jennifer says
I like the pattern! It looks kind of soft?! Here are my pinch pleat curtains I did for our living room…I definitely go more casual in kids rooms & our play room but these were a fun challenge!
http://www.refreshandrepurpose.blogspot.com/2013/01/pinch-pleat-curtains.html
YoungHouseLove says
Pretty!
xo
s
Mrs M says
Really love it. Very Novogratz-esque (the not being afraid of pattern; it all comes together somehow). Can’t wait to see what you do with the light fixture/fan.
Katie says
I wonder if you could add into the post that this method is only good if you plan the never wash the curtains.
If the curtains might be washed in the future (it’s a good way to get dust out, plus once during an intestinal illness I felt the need to remove splatter), the first step should always be to wash and dry before cutting. If you washed those curtains they could shrink by 5% or more, and end up too short for the window.
YoungHouseLove says
Oh yes, if they’re not preshrunk fabric that’s a great tip! We usually try to wash the fabric before cutting and hemming it, although with the ring clips we have learned that if you push them all the way on (clipping “deeply” if you will) then once you wash them if you need more length you can clip them less deeply right on the edge and they seem to be ok!
xo
s
Katie says
I forgot to mention I LOVE that you hung them closer to the window than the ceiling. So many bloggers hear “high and wide” and hang the curtains at the ceiling, which looks awful.
Mary-Yen says
If only I waited a couple more days before putting up wall shelves, I would have avoided the hassle of moving everything out from underneath them to clean up drywall dust! Such a great trick with the painter’s tape, I’m definitely going to do this when I put up the rest of the shelving. Thanks John and Sherry – the room’s coming along quite nicely!
Amelia says
Just had to say that I’m SO excited for you guys to do crown molding (this sounds strange, but true) – I have wanted to tackle this for a while but have been waiting for my Home Improvement Authoritative Source (you guys!) to do this – I can’t wait to get a clear and honest breakdown of the process (and really trust you two to provide that!).
YoungHouseLove says
Ahhh, we’re nervous but I’m excited too! Hope we can hack it! Haha.
xo
s
Mary | lemongroveblog says
Making progress!! Her room is looking great!
jbhat says
I’m in love with the fabric choice. Gold star for Clara!
jbhat