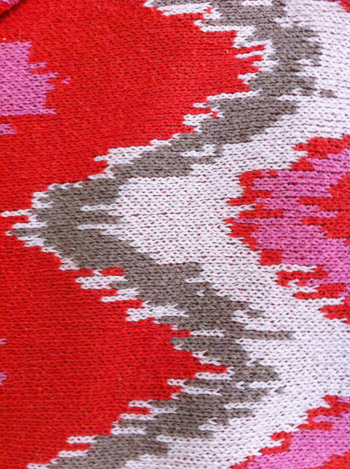
Some people who went for a pattern like this on the daybed might go for something neutral and simple for the windows (like breezy white curtains). Others might pluck one of the colors from the blanket and go for that (bold red cotton panels, taupey-gray velvet ones, etc). We might have been tempted to go with something more neutral and safe if the room wasn’t meant for our color loving kiddo (so the bedding could “be the star”) but since it’s Clara’s new space, and we love kid zones with a few layered patterns and colors, we decided to just go to our favorite local fabric outlet (U-Fab here in Richmond) and see what grabbed us. And by us I mean Clara. It’s her room, after all…
Like a moth to a flame, this happened:
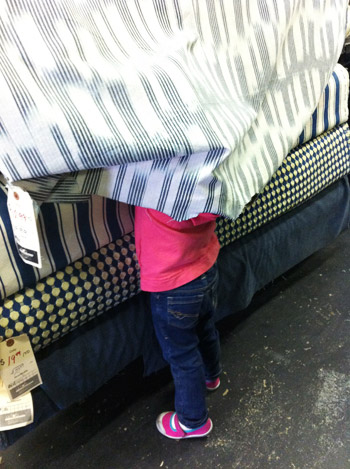
She had some fun playing with a few crazier options (a bright orange one with large coral on it, a dark purple plaid, etc) but this one was definitely something she pointed at a few times – and we thought it actually could work – especially since it has navy and white in it, which are two of the colors we’ve mentioned wanting to add to balance all the pink & red.
In short: Clara’s clearly a decorating genius. Just kidding. The truth is that there are probably a ton of fabric options that could layer nicely into a kids room when it comes to curtains (as long as they’re not too “alpha” they’d fall in line behind the bedding and a bright rug without totally disappearing). But we did like that there was a very very very subtle chevron-ish pattern going on (the blurry linear edges actually reminded us a lot of her daybed blanket). And the price wasn’t too scary…
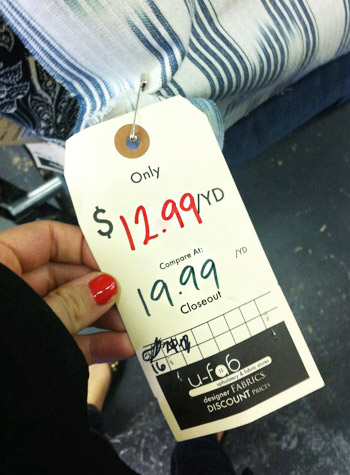
… especially with a store-wide 20% off sale that was being offered on top of that discounted price. So in the end we got just a smidge over ten yards to make four extra long panels for the room, which each broke down to around $25 per panel after the sale.

When we got home and tucked Clara in for a nap, I rolled out my bounty and started cutting my four panels from the roll (because let’s be honest she’d yank this every which way while I was trying to measure and cut if I tried to do this while she was awake).
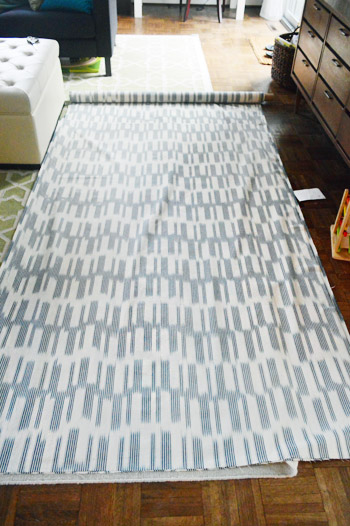
The simplest way for me to measure for panels is just to see how long I want the finished curtain panels to be (ex: 89″ high) and then add two extra inches to the length of each panel to account for the hems on each end that I’ll add. So each of the four panels that I cut was 91″ long and then was hemmed to a finished size of 89″, which might not sound that long but I love hanging my curtains on a rod with rod clips, so those tend to add a little length too. That way the rod can be mounted just a few inches below the ceiling like I like it (we left some extra room for crown molding which we’ll be adding in here down the line). Oh and I use the full width of the bolt for the curtain’s width, which means less cutting, and they’re as thick and full as possible that way.
I’m a fan of using one panel as a template for the others. So once I measured out and cut the first panel, I just placed it on top of the fabric under it and made three more of them in exactly the same size for a grand total of four soon-to-be curtains.
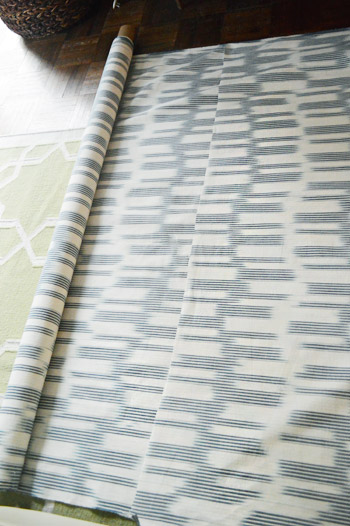
Then I used my trusty hem-tape method, detailed here and here. For over half a decade I’ve used the heavy duty Heat N Bond stuff, and it has not only held up amazingly but it can even be washed, so I’m definitely a fan. I’ve also sewed curtains and actually think the hem-tape ones look crisper and straighter since keeping my stitching straight isn’t as easy as following hem tape with an iron for a nice straight hem. Like so:
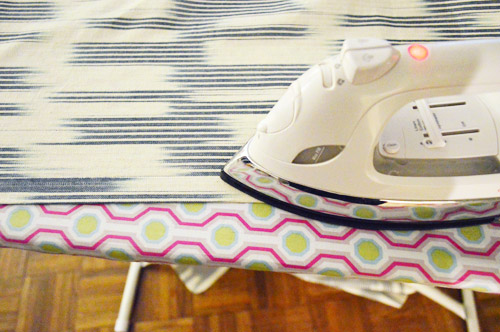
Oh and it always helps to wash your fabric first (before cutting and hemming it) so it’s all pre-shrunk!
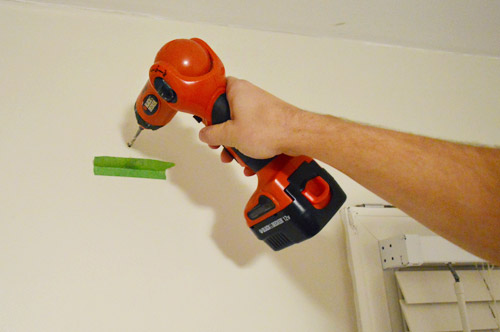
As for the curtain rods and ring clips, we actually had them already (remember we had hung them back here?), we just removed them to paint the room so we could re-hang them at the height of our freshly made curtains. So here’s John’s tricky little tape move for hanging the rods (he folds some painters tape under the hole he’s making so it sticks out like a ledge and catches the drill-crumbs).
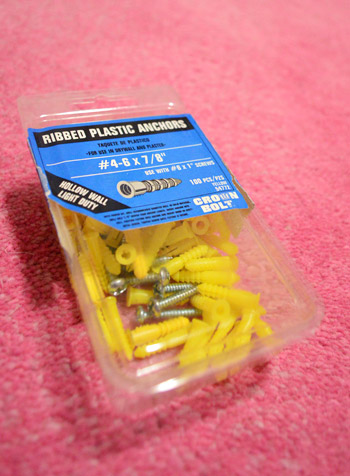
For the detail loving folks, we used these plastic anchors (we like to make sure our rods are held in with more than just a few screws in case a kid hangs on the curtains – which we’ve found results in just the fabric slipping out of the ring-clip’s “mouth” instead of the whole rod banging down on them).
Bada bing, bada boom. Clara done good with her curtain choice, we think. They sort of look black and white in these pics, but they’re really navy in person, and we plan to bring more navy into the room in a bunch of other ways (picture some navy picture frames on the wall, a navy pillow or two on the daybed, maybe even a navy light fixture or ottoman in the middle of the rug). That will “link” the curtains to the rug and the daybed a bit more, so they won’t look as random. Should be fun to inch towards a more finished look. You know how impatient I am…
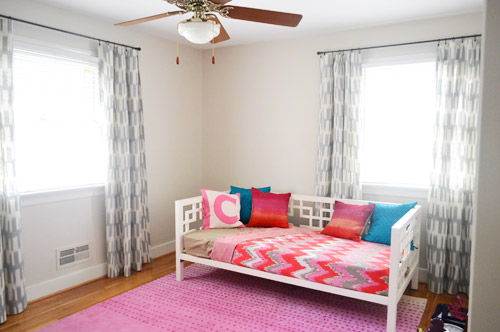
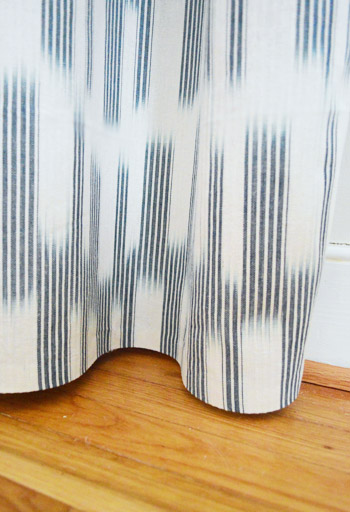
While the room keeps slowly evolving, I’m soaking up the little things. Like the fact that the curtains almost touch the floor but don’t (it keeps them cleaner and helps them hang in a fuller, loopier way). Oh and here’s one more hanging tip: clip the rod rings to the rod and to the fabric and have someone hold them up at different heights until you like the way they hang and then mark the wall and hang them at that height. That way they won’t be dorky short or too long. It definitely beats trying to guess the length of the curtains while hanging a bare rod (if the actual curtains are on the rod they can help you pin down the perfect height).
Oh man, it still feels pretty empty in here (and that old fan practically pokes John in the eye every time we’re in there) but we can actually picture more things being layered in now. Like our kids table and maybe an ottoman to break up all the pink in the rug plus a ton of playful art to add balance. Here’s the ol’ to do list:
paint the room(more on that here)cut down our old den side table to make a play table(more on that here)bring in a dresser (we’d love to find something secondhand)(more on that here)
make/hange some curtains
add a rug(more on that here)
- hang art on the walls along with a few other 3D objects that we have in mind (how’s that for cryptic?)
- install a new light fixture
- refinish or paint Clara’s new dresser (which we got here)
- paint the chairs a bright happy color to go with Clara’s play table
- turn the junked up closet into an actual clothes closet/reading nook
- add crown molding (along with tackling the other un-crown-molding-ed bedrooms on this side of the house)
- add accessories like more pillows, storage bins for toys, etc
Sounds like a good time to me. I know, I’m crazy. Kids rooms are so much fun though! What have you guys been up to? Anyone else making curtains or letting their kids help with fabric or paint choices? Do you use the hook-the-curtains-to-the-rod-and-then-hang-the-rod trick too? It took us a few years to figure that out, but it seems to be a lot more exact that trying to measure curtain length and account for the height of the ring hook and the rod itself (we used to be off by an inch or two after all that calculating and then we’d have to re-hang them again to fix our mistake). Oh well, live and learn!
Psst- The latest roundup of Clara Conversations are up on Young House Life, and let’s just say there are a few gems – at least according to us, her obsessed parents.

Katherine says
I like the curtains but I just don’t get the bedspread- why is it so flat? Are you going to put a comforter inside it or something? It also looks like it’s made out of some kind of jersey material in the first pic of this post- in my experience, jersey never wears well and especially in a kid’s room.
YoungHouseLove says
The blanket is knitted like a needlepoint blanket, which I had growing up (just paired with a sheet set) so thats’s the plan. Of course if she’s cold we’ll add more heft, but she currently sleeps on a fitted drug sheet with one blanket in there and seems to like that :)
xo,
s
Steph says
Great job guys! You’ve inspired me to finally tackle these. I’ve seen you do them so many times. Question for you-in terms of fabric, is this a very lightweight cotton? When I go to the fabric store, there are soooo many different choices. I’m aiming for that flowing, breezy look you have going on. Thanks!
YoungHouseLove says
We like upholstery grade fabric so ask to see that section :)
xo,
s
Sara says
Love the fabric! Do you know the name/maker?
That’s 1 lucky girl :-)
Thanks!
YoungHouseLove says
So sorry there’s nothing on the fabric or bolt, but maybe if you call U-Fab they might know!
xo,
s
Pamela says
I would love to try curtains for my bedroom like this because it seems so easy. The only thing that overwhelms me is that it is a bay window, so there are three separate windows on three different angled walls. Do they make curtain rods for bay windows, or should I just do individual ones?
Thanks!
YoungHouseLove says
Yes certain places sell them! Maybe google for them? Or call JC Penney? Good luck!
xo,
s
Jenny says
They sell them at Lowes, I think they’re about $45. Ikea has ones you can make with bendy corners, too. You can also google “bay window curtain rod DIY.” If you’re handy, you can make them really cheaply from electrical conduit. It’s about $2 a pipe! I’m doing one rod on each of our bay windows with a total of 4 panels on ’em. I got simple brackets for it at Home Depot, too. xox
Emily says
Where did you get the wooden kids chairs that are in the playroom? Thanks.
YoungHouseLove says
They were $8 each from a thrift store in West Virginia!
xo,
s
Jenny says
Love! Curtains seriously make a room, I’m kind of obsessed with them. We are decorating our 2.5 year old sons big boy room–he’s never had his own room! We moved from a teeny city condo to a big house, he got his own room, and a twin bed. He LOVES it. And I’m loving the crazy amounts of yardage I’ve bought to do the whole house. Good choice Clara! xox
YoungHouseLove says
That’s so cute!
xo
s
britney says
Do you know who made the fabric? or what it is called? It looks great and very subtle with the rest of the furnishings
YoungHouseLove says
So sorry, the tag didn’t say anything and the fabric and bolt didn’t either. Maybe try calling U-Fab for that info?
xo
s
Heidi says
Dying over that pattern!!! I tend to be a bit pattern-shy when it comes to curtains but plain while always feels ho-hum. This is a perfect happy medium!
Natalie says
Any more info on that fabric? I don’t have that store where I live, but I wonder if I could find it online or something…
YoungHouseLove says
If you scroll back in the comments I’ve tackled that subject for ya!
xo,
s
robin says
hey guys! long time reader here! i love the curtains and have been looking to see if you say the brand and name of them, but dont see it listed? do you know the name and brand? would love to find something similar for my baby’s nursery.
thanks!!
YoungHouseLove says
Wish we knew the name! The tag and the fabric/bolt themselves didn’t give us any clues. I bet if you call U-Fab they’ll know though!
xo
s
Abbey says
Love how her room is shaping up. ANd she did great with her curtain choice. I have a Q for you both: if we have a really long window width wise (it’s 105″ and not very “tall”) would you recommend going to the floor for curtains or a couple inches under the window??
YoungHouseLove says
Oh yes! Floor to ceiling curtains hung high and wide will make that window appear twice as wide! Really! Mount them 18″ wide on each side and watch the window grow by 2 feet!
xo
s
Erin says
I noticed that one of the windows in Clara’s big girl room is right in the corner. How did you hang the curtains on that window to make it still look so big? I have a window in my bedroom that is right in the corner like that, except even closer to the wall. I’ve been trying to figure out how to hang curtains on it without covering half of it up, since it’s a narrowish window to begin with. Would it look weird if I used half a panel width? And if I do that on one window should I do that on the other, same width but more centered window?
Clara’s room looks great!
YoungHouseLove says
I went as close to the corner with the rod as I could on the corner side and went really wide (like 18″ beyond the window trim) on the other side to “cheat” the window and make it look larger :)
xo
s
Erin says
Love these curtains. I’m looking to make some for our two living room windows but I can’t decide on length. Both windows have something in front of them, a couch and a bookshelf, so long seems ridiculous.. I’m just afraid short curtains will look silly or dated.. But nothing isn’t option for glare and privacy reasons. Any suggestions?
YoungHouseLove says
What about bamboo blinds or roman shades? Both can be awesome!
xo
s
Meghan says
Hi Sherry,
My sister and I traveled from PA to the Richmond area this past weekend for a family party. We stopped at U-Fab and picked up some great fabric to make some no-sew curtains for my living room. We wanted to let you know that there is a great new restaurant a block down from the store called The Cask where our husbands enjoyed a couple of beers and a bread and cheese tray so we could shop at our leisure. It was a win-win! Thanks for the great curtain tutorial. Time to warm up my iron :)
Meghan
YoungHouseLove says
Sounds awesome Meghan! Thanks!
xo
s
Sarah Miller says
Hi! I was wondering what type of fabric you use for all of your curtains! There are so many different types(quilting, home decor, etc) that for someone who has never bought fabric, it can be overwhelming! Help!
YoungHouseLove says
We usually use something thin like a sheer-weight white breezy fabric (cotton or cotton-poly) or something a little thicker for more drapiness (upholstery grade).
xo
s