Quick note: For now we just have lots of rain and a few wind gusts thanks to Hurricane Sandy, but things are supposed to get a bit rougher later today and tomorrow so we expect to be without power for a while (although we’ll post remotely whenever we can). We hope everyone else is staying safe and dry!
Since pegboards are my new favorite thing, you knew I was bound to write another basement organization post that mentions them (along with some other methods to contain/control things like screws and nails) right?
Here’s how I brought some sexy back to the basement (which I recently started to clean up after a yard sale, a bagster pickup, and some yard tool organization).
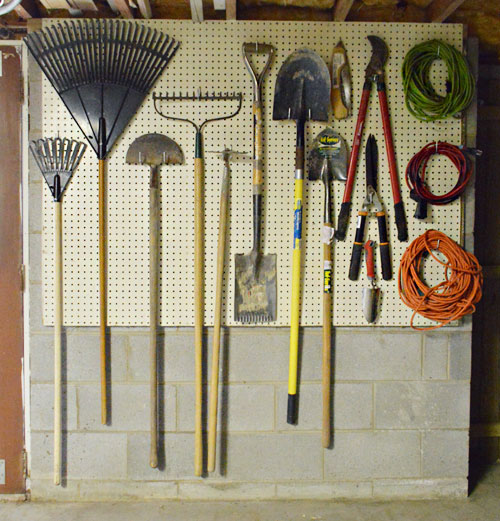
Next up on the organization to-do list were my regular tools. We actually made the decision to relocate most of our tools to the basement after years of being weirdos who stored them in our kitchen drawers. We’ll still keep duplicates of a few popular items – like hammers, nails, and caulk – in our sunroom (where everything’s been living most recently) but having the rest of our arsenal neatly hung/stored in one place (aka: the basement workshop) definitely outweighs the extra trouble of walking down to the basement now and then to get a few things.
So we began this phase of basement org by trucking everything down (i.e. drawers, toolbox, etc) to the basement so I could begin sorting. Forgive the sucky pictures. Sherry was using the camera for another project so I was stuck taking phone pics.
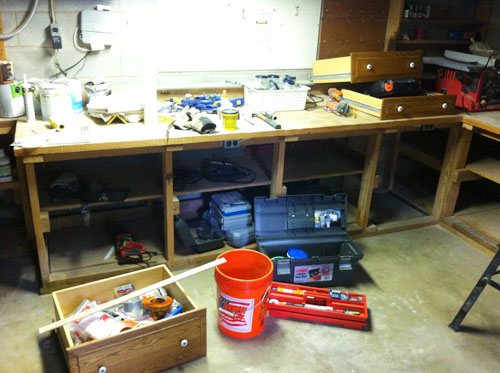
First I spread everything out on the work table to see what I had and how I might categorize everything.
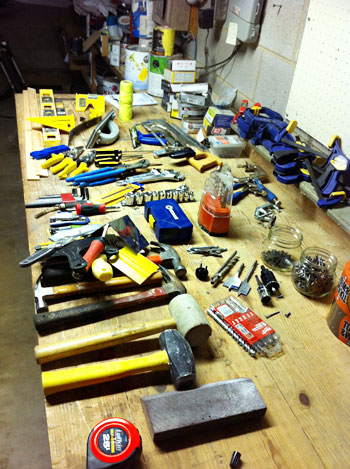
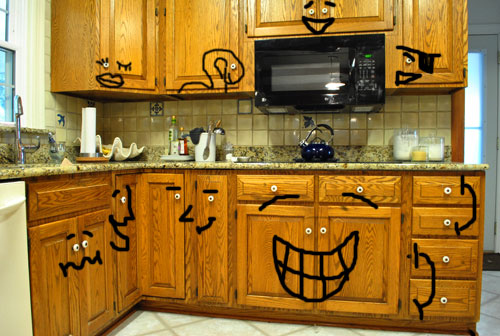
Going through everything was kind of a weird, sentimental walk down memory lane. It was just so funny to see old items that were hanging around after projects from the past, like our old kitchen knobs and the clothespin chandelier that we made.
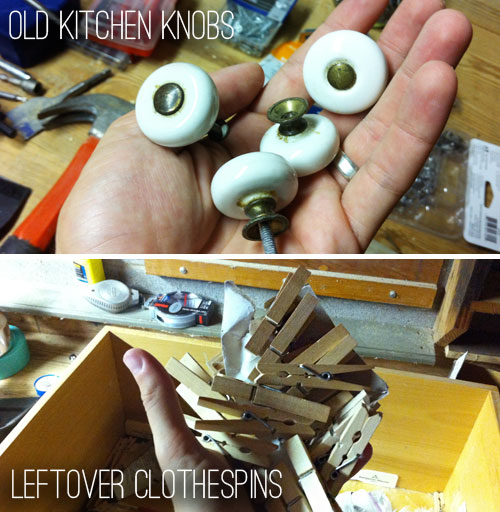
How could we forget those eyeball-ish kitchen knobs?
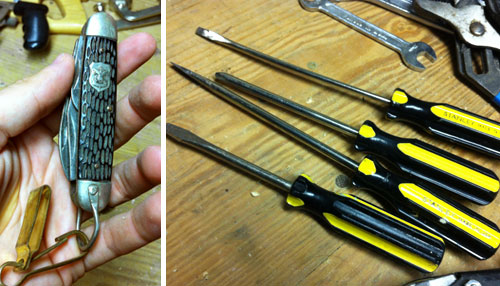
I also found tools with some memories behind them. Like the Boy Scout pocket knife passed down from my Papa (sidebar: I was the first in the line of my male cousins on my mom’s side NOT to become an Eagle Scout. I started and stopped right at Cub Scout. #blacksheep). And there was the first set of screwdrivers that my dad gave me back in high school (at the time I’m sure I accepted them with some sort of angsty “when will I ever use these stupid things??” type of look).
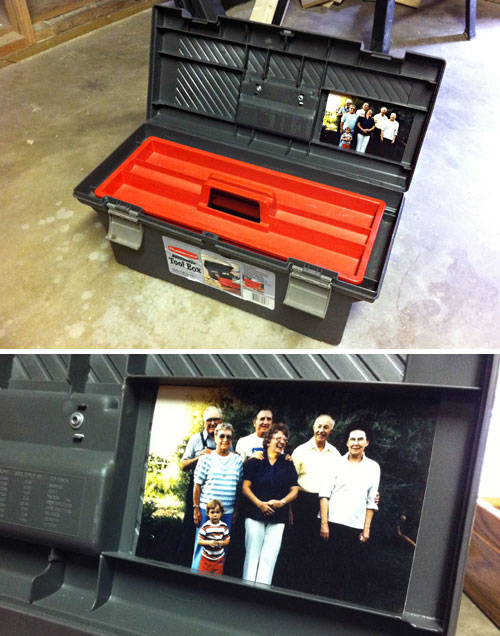
My dad actually gave me those screwdrivers along with the toolbox below, which traveled with me to college and even to New York – although for most of its lifespan it has held a measly three or four tools. But one reason I’ve kept it is because my dad taped a picture of his family inside. The couple on the right is my grandfather Emanuel and his second wife Helen. His first (my dad’s mom) died when my dad was young. She’s the Clara that our bean is named after.
But enough sentimental stuff. On to the pegboard! After a couple of hours (and a trip to Home Depot to buy a set of pegboard hooks) my tools finally looked like they always should have: orderly and ready to go.
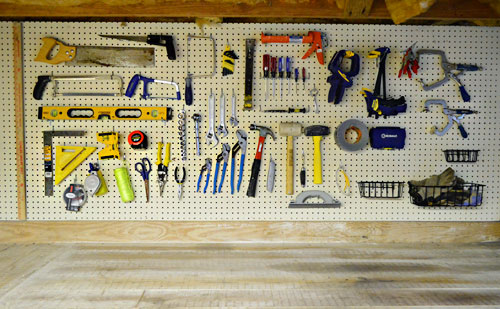
Here’s a couple of closer shots for ya, in case you’re like me and enjoy staring at pegboards full of tools for extended periods of time.
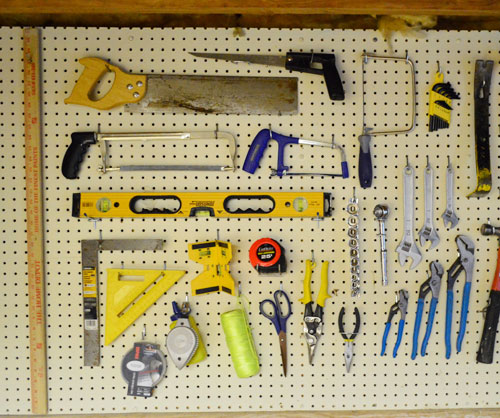
This actually isn’t everything. We decided to keep paint & craft supplies (i.e. glue gun, staple gun, etc) upstairs in the sunroom along with a few other essentials (like picture nails and anchors, along with a hammer and caulk) since we tend to use them more in the house than in the workshop. And I stashed a lot of my project-specific tools in the toolbox (finally it’s getting use!) so I know that’s where to go when I need plumbing or electrical supplies.
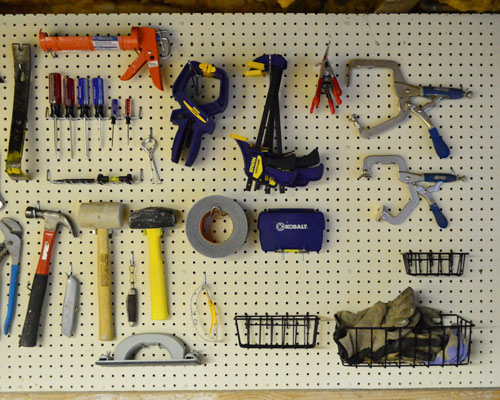
I could stare at those pegboards all day. But then I wouldn’t get any actual work done. And sadly I still had this crazy drawer full of screws, nails, and other hardware that was crying out for help.
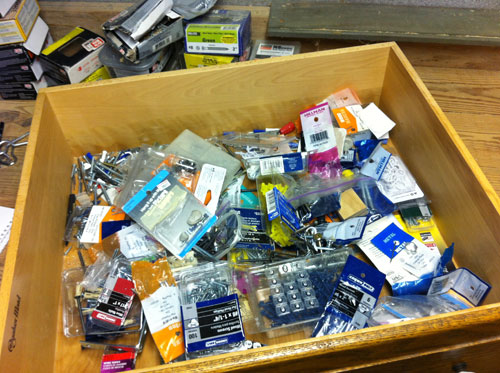
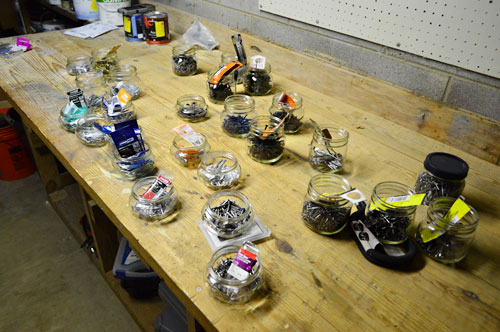
So I used a similar process to sort them. First I spread everything out on the table and started grouping similar items. Then those similar items went into mason jars together.
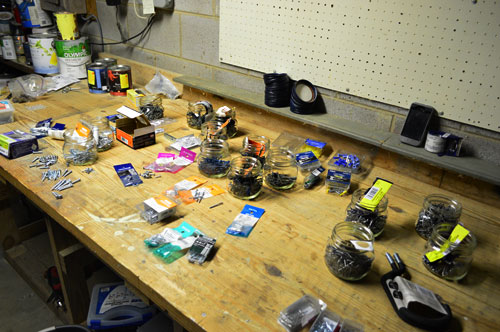
I actually had a bunch of mason jars sitting around from a failed project Sherry tried taking on. She was going to repackage our vacation time capsules into smaller jars… but realized too late that the stout new jars that she bought obscured the items inside too much (so taller mason jars like the ones we used originally actually work best). So the too-short jars got passed down to me after she had already spray painted the silver tops a cool midnight blue color. Lucky me.
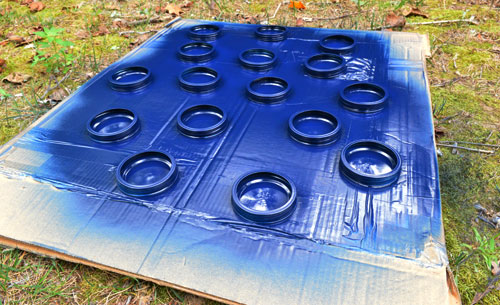
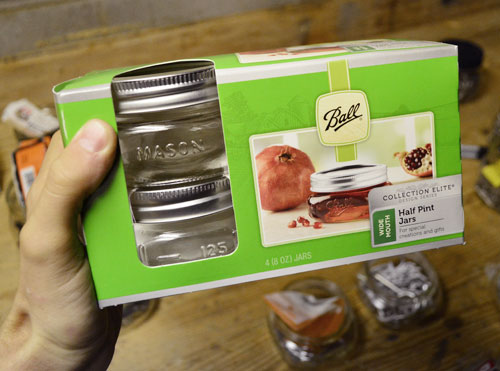
But Sherry’s pint-sized hand-me-downs weren’t quite enough for my sprawling assortment of screws, so I did have to invest in some (even smaller) half-pint jars myself (from JoAnn with a 50% coupon).
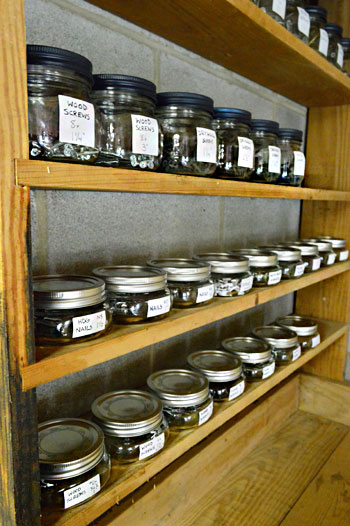
Here’s everything once it had found a jar to call home. Don’t mind the pieces of paper sticking out of them. Those were labels from the hardware packaging that I hung on to so I could remember what was what (since I planned to hand-write my own labels later).
Once everything was labeled and canned, I stuck them up on this shelf that the previous owner had built in above the work surface (don’t mind the edge that looks like it was once on fire – we plan to stain it all soon).
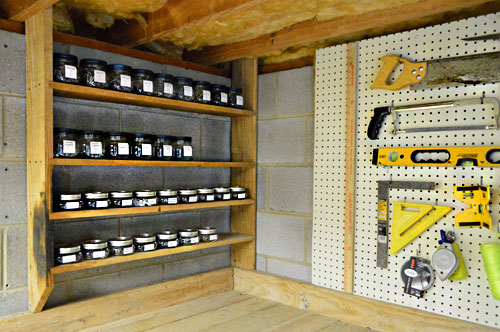
The shelf spacing is a bit much for these tiny cans, but it’s not worth rebuilding the shelves or anything, so I’m just happy they’re here to house my collection.
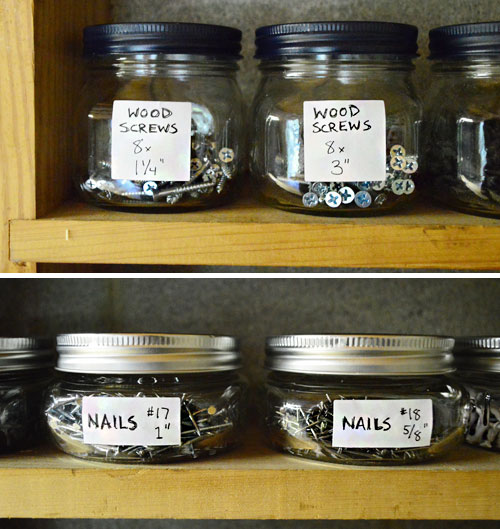
As for the labels, I just bought some 1.5 x 1.5″ square Avery labels at Staples for a few bucks and hand wrote the info on the front. I debated printing them on the computer to make them look slightly fancier, but I figured that was a system I’d never keep up with.
Eventually I hope to take these two projects a step further by painting the pegboards and staining the shelf as I mentioned (along with some other items in the room like the built-in work table). We think that’ll really help pull things together and make it look a little more workshop-swanky as opposed to old-ignored-basement. I don’t think I’m going to go too over-the-top with things in the basement just because I like to be realistic about what’s worth my time and what’s easiest to maintain over time. Which is why I’ve decided to pass on the idea of outlining my tools on the pegboard, since I feel like it’ll just create frustration when I have to add or subtract a tool and don’t want to repaint the whole thing. But who knows, I could change my tune someday (Sherry mentioned chalk outlines since those are easily changed, but we don’t want chalk dust all over our stuff so we later both dismissed that option).
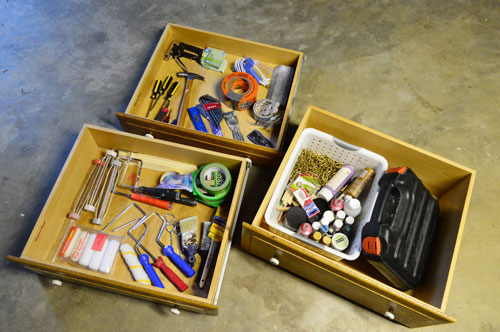
I was just grateful that the drawers I was bringing back upstairs to the sunroom were looking much more clutter free. So these are the items we kept upstairs since we think we’ll use them more up there while the rest makes more sense to keep together in the workshop.
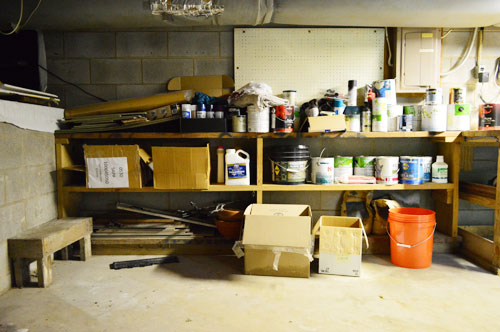
And while my newly organized tools and hardware supply was making me quite confident about how the basement was shaping up, let us be reminded that I still have this to deal with: the wall o’ paint, spray paint, and other buckets. But that’s a project for another day…
Okay, so who has a pegboard obsession? Is anyone else planning to paint and stain things in the basement for a little more of a finished look? Do you have a hard time figuring out which tools should stay out in the garage, basement, or attic and which ones should be inside and easy to grab? I gotta admit that once we spent a few minutes thinking about what we use upstairs vs. what we use in the workshop it really wasn’t too tough to commit to keeping stuff in the areas that make the most sense.
Psst – We finally have our apple picking photos up on Young House Life (spoiler alert: Clara’s life was made when she got to be a worm, well, a caterpillar).

Heather says
We have a basket that is shaped like a star–12 inches tall/wide, and 4 inches between the stars, so we end up with a couple points at the bottom that collect/angle things, like handles. We have a picture hanging kit, two sizes each of flat/philips screwdrivers, a small hammer, 10 ft measuring tape, and a few different sizes/shapes of pliers. Plus the boxes of #8 1 1/2 inch and 1/2 inch screws because they are the ones we use the most, and a box of drywall anchors, plumber’s tape, and a pencil. All in this tiny basket, it takes no more than 15 seconds to dig through and find what we need. It started because I was tired of walking down two flights of stairs on arthritic knees for a hammer or a screw driver, and has just become as nice, small tool kit that gets tucked away easily but is also easily accessible and best of all, looks nice and decorative when not in use.
My parents have one standing tool-dresser with shallow shelves/drawers that holds all the tool including the power tools. But they made an electrical-tools kit and a plumbing-tools kit, because a lot of those are so specialized and when you want those items you probably want them OMGRIGHTNOW. Each of those kits also has a hammer and a couple regular screwdrivers, just in case. At least this is how my mom described it to me, I’m ind of excited to see it!
Anne says
Just so you know how much I love your blog- I’m using very valuable “me time” to catch up on the last couple of weeks of YHL while my 8 week old baby girl naps. :)
I just felt compelled to let you know that you are not alone in your love of gazing at organized tools on pegboard. That’s a good time in my book!
Looks great!
Anne
YoungHouseLove says
Aw thanks Anne! You’re so sweet! Congrats on the little one!
xo,
s
emily says
Awesome job organizing! I so appreciate all of your posts on this subject. Currently I’m trying to organize virtually on my computer, and I was wondering if you have any tips for that. Particularly with photo storage…what do you find is the best way to label photos so that you can access them easily via a search? Sorry this is a bit off topic from this post…Dare I request a new post on virtual organization? ;)
YoungHouseLove says
We love iPhoto since it allows you to make folders and makes things chronological automatically (so our “Family 2012” photo album is always in order without us having to do anything). Hope it helps!
xo
s