First things first. Thanks for being such great sports about our little April Fool’s Day prank (seen here).

Sherry was giggling the entire time she made that crazy nautical themed doggie mood board (at one point Katie Bower called and I actually heard a laugh-snort or two as she shared her little “project”). And it’s safe to say that every single comment – ranging from those of you who fell for it and those of you who knew it was a joke from the first sentence – made her day. Which made mine. Happy wife = happy life. In fact things were so copacetic around here that I was inspired to start my next big build.
I couldn’t dodge it anymore. The time had finally come get started on a behind-the-sofa-Karl console table for our living room. Having more than a padded ottoman in the room will be a big help, but it promises to be a big task. 140 inches big (er, long), to be exact.
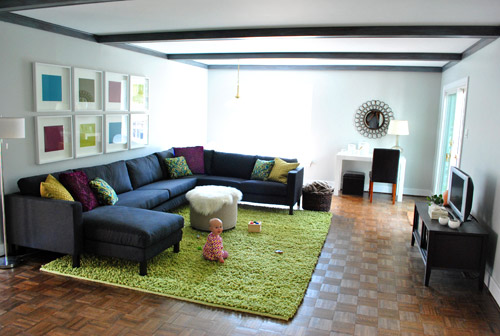
Let me back up for a moment. From the second that Karl arrived, we both agreed that putting a big not-Clara-friendly coffee table (even a round one) would probably be too heavy for the room and might result in more baby bumps and bruises than we were prepared for. And we’ve enjoyed being able to move the ottoman easily to make more room for playing, hosting, and vacuuming – so for us it was definitely the way to go. But we quickly decided that we needed a nice long console table behind the sectional (between it and the wall), to create a solid (and super functional) surface for two table lamps for reading, a spot to drop drinks, a box or basket to stash things like remotes, and more storage and display space for various other living area must-haves (that weren’t exactly hanging out on the non-existent coffee table).
But where does one find a nearly 12 foot long console table (!) to span the entire length of Karl? Um, yeah, nowhere. Unless you want to pay 3K to commission a custom build.
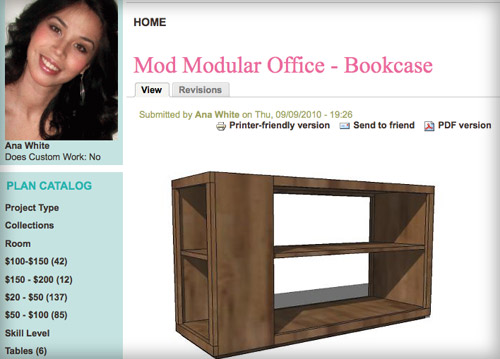
So I spent the last couple of months mustering the energy/confidence/game plan to create a customized DIY solution. We considered just putting a couple of floating shelves up to act as a long “floating console” behind Karl, but figured that left too much unused space underneath (and might not have the homemade weathered look that we wanted in hopes of balancing out more modern things like the green rug and the sleek sectional). So we decided I should build something customized to fit our giant sectional. Something that takes advantage of as much of the space as possible. And that’s when this plan from Wood Wonder Woman (aka: Ana White) caught our eye.
I knew I’d have to build this 140-inch behemoth in multiple pieces since maneuvering 12-ish feet of bookshelf just didn’t sound like a good time. So I hatched a plan to build three 4-foot sections that would be covered by one long “tabletop” for a nice seamless look. And the two end sections could take some serious inspiration from Ana’s bookcase above. Each of my two console table “end pieces” could have those two open shelves on one side (hello bonus storage!) but they wouldn’t need that interior shelf cutting through the entire middle since that wouldn’t be accessible (so we could save some wood, money, and effort by altering the plan a little). My version definitely looked a bit lot rougher when I sketched it out.
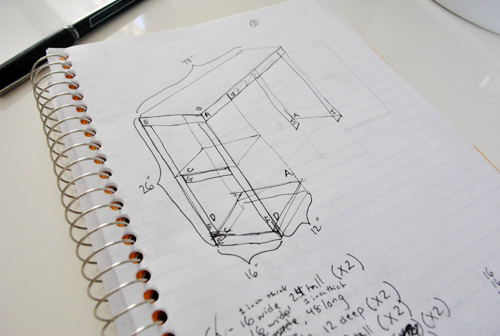
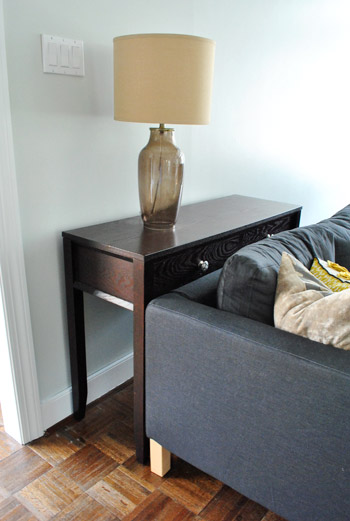
We figured out our measurements by doing a test with our existing console table from the hallway several weeks ago (I originally planned to start this in February… oops). We tucked it behind Karl to see if it was wide enough for a table lamp (it was just barely deep enough with the large sized lamp shade, so we decided to make my version wider – don’t want any head-into-shade issues). We also used the hallway console to see what height would look best (clearly our “test model” was too tall). The new one will sit somewhere slightly above the back edge of the sofa but below the back cushions for a hopefully balanced look with lots of easy-access function.
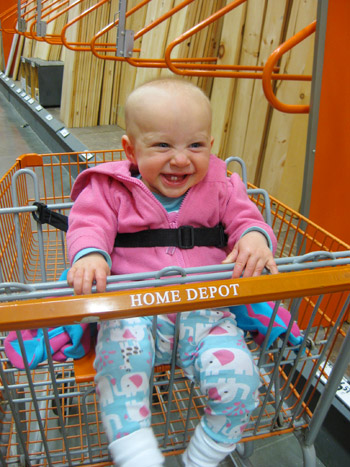
With measurements made and plans sketchily sketched out, we hit up the Home Depot for a bunch of wood – most of which we had them cut to size for us right in the store (for free). It saved us time and enabled us to squeeze everything into the Altima (which definitely wouldn’t have been able to accommodate planks that weren’t cut down). As usual, the happy baby of the group had a blast.
To keep costs down we bought basic white wood for everything except for the 1 x 2″ poplar pieces that we used to trim out the “end” bookshelves that would be seen on each side (no sense using the good wood on parts that would be hidden in the end- and the white wood provided more than enough support/strength/sturdiness). If I were a pro furniture builder I probably would’ve splurged on better wood, but who are we kidding – I’m cheap and this amateur didn’t want the pressure of screwing up the “expensive stuff.”
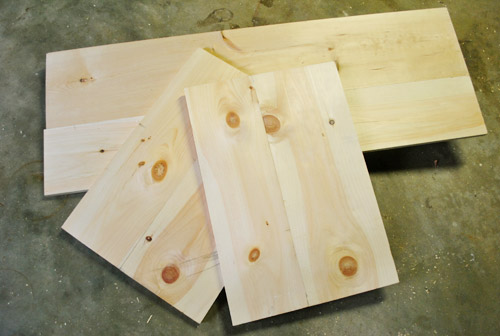
So here was my supply pile for one of the two end pieces. I’ll spare you an exact breakdown because this piece is so specific to our space. And if my drawing above is any indication, I should not go into the business of posting furniture plans. Like ever.
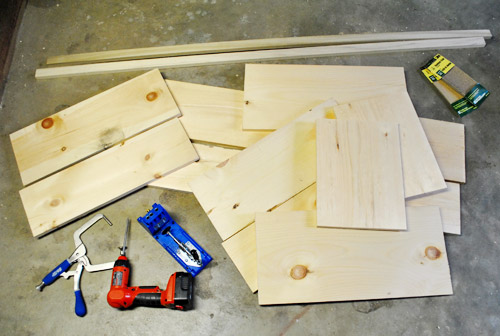
Notice those two semi-thick boards on the far left? Those are a 1 x 8″ and a 1 x 10″ piece that we had them cut to the same length right in the store. We wanted the console to end up about 16″ deep, but the widest board they sold was 12″. So putting two shorter boards side-by-side was our solution, since the boards are actually 7.25″ and 9.25″ wide (so they add up to about 16.5″ when put together – which was pretty much exactly what we were going for). So there’s a tip, even if the sign says that boards are 8″ wide and 10″ wide, they can definitely be substantially smaller.
Anyway, when I got home I rekindled my ongoing love affair with my Kreg Jig for the task of joining the boards.
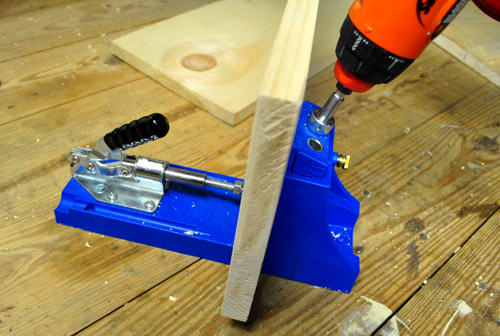
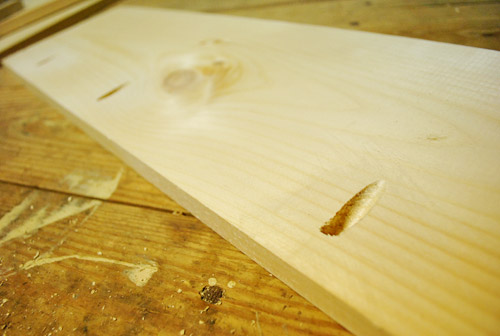
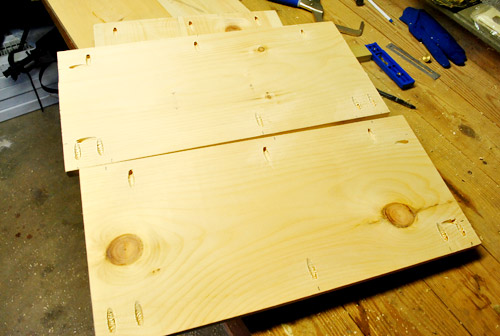
You can read more about what my main man Kreg does in this post, but basically he helps create perfect pocket holes to connect pieces of wood like a pro. They look a little something like this mid-job:
Then I lined everything up and screwed the two pieces together for a super tight hold like this:
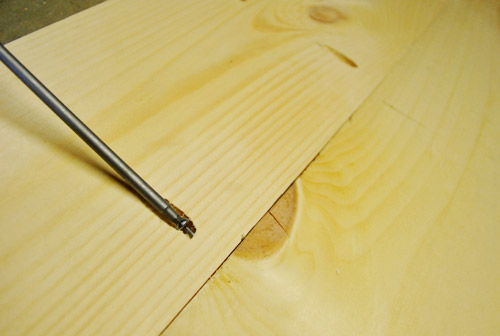
That’s how I ended up with three 1 x 16.5″ planks to form the top and the two sides (aka: wide legs) of the console:
And yes, the top isn’t exactly flush on the left side. But since the whole thing will be covered by a long, separate tabletop in the end, it was only important that things were lined up perfectly on the exposed parts. Actually, since most of this piece will be unseen behind Karl and thanks to the new top that we’ll be adding, it really only had to look pretty on the open shelf end of each end piece that I was building (remember I’m making two end pieces and one middle piece to put together under one long 140″ top for the look of one long 140″ console in the end).
A few more Kreg holes and some meticulous clamping later, I was on to screwing in my first leg (the one that would be hidden on the interior side of this section)…
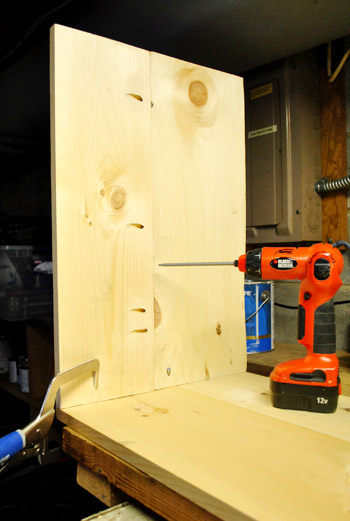
…and adding some 1 x 2″ rails for extra support.
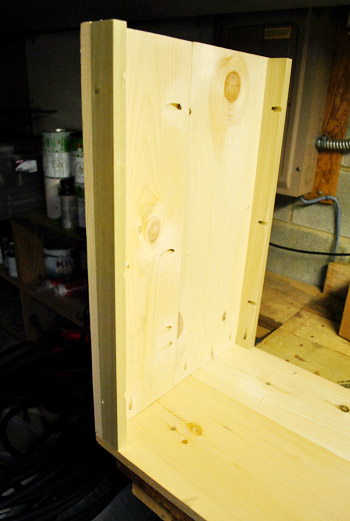
Next up was the bookshelf side. I started with the two sides of the shelf, comprised of two 1 x 12″ boards. Between attaching these to the top and the other leg, plus securing the finishing trim to them at the end, I realized I’d be doing a lot of screwing (that’s what she said). So I had myself a little pilot hole drilling party before attaching anything, just to get that step completely out of the way all at once.
Then my drilling party turned into a screwing party. Um that sounds even worse. But you know what I mean. On went the sides…
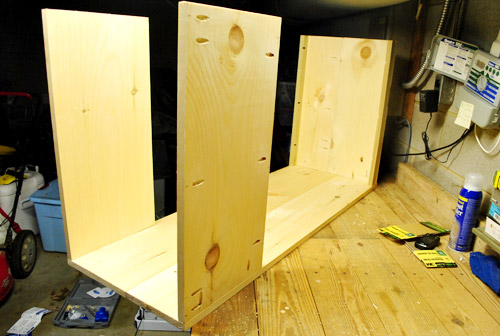
…then the back. Typically I’d put all of these ugly holes on the inside of the shelf, but since Karl will be blocking the entire side off the piece (since it’ll be snugly placed between the back of the sectional and the back wall) I kept the inside of the shelf, pristine (since it’ll be seen). Meanwhile the outside can be all busted up and hole-y, since that will be the hidden part (sandwiched between the sofa and the wall).
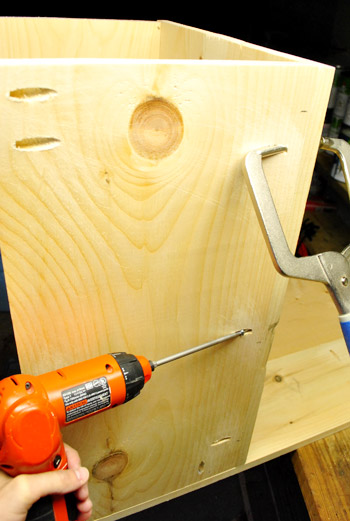
Next up were the two shelves (keep in mind this is all upside for now, so all of these holes will be hidden):
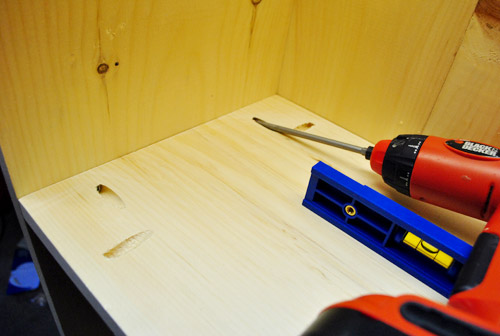
And last up was the trim on the outside to finish things off nicely. I used my miter saw to cut the 1 x 2″ to size and attached them using the holes that I pre-drilled in the sides and shelves. Now is it coming together for ya? I know it’s really confusing to read this step by step play by play, but hopefully now it’s starting to look like my sketch (it’s just upside down in this shot).
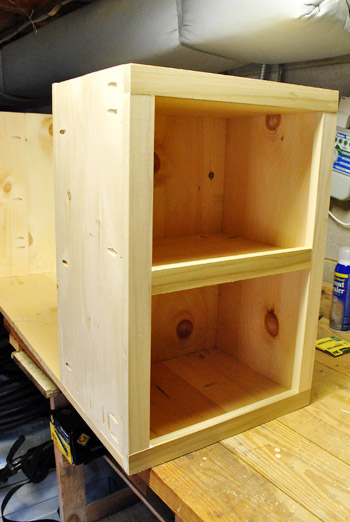
All-in-all, it took me about 1.5 Clara naps (that’s around 2 hours) to get ‘er done. Not all three, just one of my three pieces without the top. She’s not the prettiest thing yet, but I was surprisingly proud about how it turned out and how much less difficult it was than I expected.
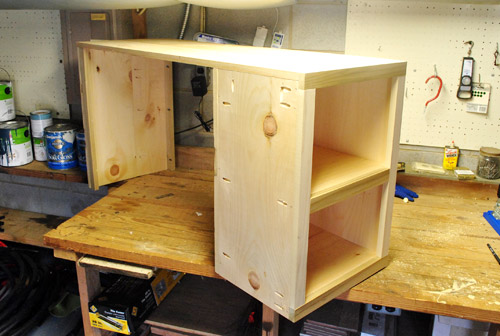
I’ll fess up that the console section that I photographed above was actually the second one that I made (since I need one for each end). I was so focused on not screwing up the first one that I forgot to take pictures. But that one came out really well, as did the second one (and the good news to anyone else who needs to build a console table in three parts is that you get faster as you go).
So since you’ve already seen my second one in the shot above, here’s the first one making its appearance during a test run behind Karl. Oh yeah but in this shot you can see my one “mistake” with my first console creation. Notice how I didn’t think to put all of my holes on the outside of the interior bookcases (which will be seen) my first time arond? Boo. Thank goodness for wood putty.
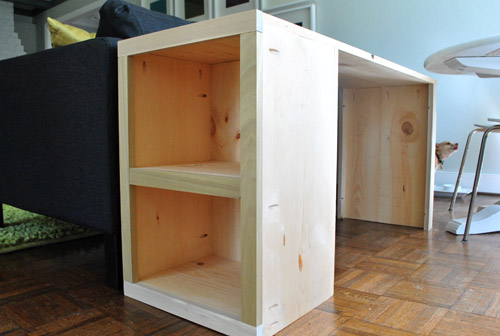
Of course this isn’t the side of Karl that it’ll sit behind eventually (it will go between the back wall with the frames and Karl’s backside), but I was just too lazy to move him out from the wall (he’s a big boy) for this quick test. I mainly just wanted to make sure the height felt right (which it did). When we add the new top it’ll sit just slightly above the sofa back, but below the back cushions just as planned.
And yes, Burger decided this was the perfect moment to eat lunch (despite the traffic jam of furniture going on). He’s not howling in the picture above, just chewing and looking out the window.
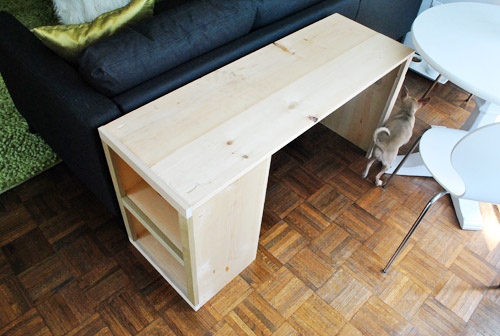
The third / middle piece of the console is actually already mostly built too, I just haven’t finished a few last minute details and snapped any pics yet (and let’s face it, this post is already long enough as it is). But we actually incorporated some storage into it even though it’s going to sit between the two side console pieces that I built. That’s right, it’s top-entry storage. More details soon. I still have the entire “countertop” to tackle as well, but we’ve decided to use some reclaimed wood (aka: slats from the old shipping pallets left in our yard) to inject some rustic beat-up style into this a-bit-too-modern-for-us-at-the-moment living room. As for the rest of the piece, we’re planning to stain it a dark wood tone so it sort of blends/disappears behind Karl. You know, so the more weathered and varied looking top can – in the words of my wife – be the star.
And as for the cost, for the two end pieces and the almost-done middle piece we’ve spent around $65, which doesn’t include the top that we’ll add (but since we’re planning to “recycle” the pallets that we have, we shouldn’t spend much more on this build). We’ll share a full budget breakdown (including stain and all that good stuff) when we’re done.
We’ll post more about the console as our work continues, but for now lets talk shop. Have you guys built anything yourself lately? Did you put some Ana White plans to good use while you were at it? Seriously, that girl can build anything.

cristina s says
http://www.etsy.com/listing/71463703/keep-calm-chihuahua-on-scaled-background
totally reminds me of Burger!
Love the link to Ana!
YoungHouseLove says
Oh my gosh it IS Burger!!
xo,
s
Ted says
If no one mentioned it already, lumber sizes are all standardized, but not at the size listed. Here is a site that shows what the actual measurements are:
http://mistupid.com/homeimpr/lumber.htm
YoungHouseLove says
So interesting!
xo,
s
Lindsay@Tell'er All About It says
Necessity is the master of all invention! We built ourselves a TV stand a few years back:
http://tellerallaboutit.wordpress.com/2010/08/13/eat-your-heart-out-pottery-barn/
It was our first furniture building experiment, but we needed something that held all of our movies/CDs, etc and semi-matched the pieces we already had. It was a fun adventure, but now my hubby wants to break it down and rebuild it – *gasp*…breaks my heart!
Can’t wait to see your finished product!
xoxo,
Lindsay
Future Mama says
Looking good! I may be encouraging my own husband to dust off some of his tools and get to work…
Much love,
Future Mama
http://expectingablessing.blogspot.com/
Meredith says
You built this for a fraction of a fraction of the cost!
http://www.westelm.com/products/modular-bookcase-f988/?pkey=cbookcases-storage-shelves
YoungHouseLove says
Holy cow we did! Except we took out that middle shelf. Love it!
xo,
s
Beckie says
And this is why people leave New York, to have the space to do this! I fell on the floor when you said it took you 2 hours to build one section! Jealous of your wicked planning skills. And that wood hole-drilly-mcthing! If you’ll excuse me I have to head over Ana’s site and see what I can build on my roof!
Laura says
Looks great!! Nice work, John! I can’t wait to see the finished product. :)
Kelly @ View Along the Way says
We built a sofa table very similar to this! Except no super-sweet cabinets on the side. Genius! Here’s ours:
http://viewalongtheway.blogspot.com/2010/09/projects-around-house-sofa-table.html
YoungHouseLove says
Wow- that looks awesome!!
xo,
s
Melissa @ HOUSEography says
I love this! DIY’ing furniture is just the best feeling. I love that you are using the reclaimed wood from the pallet which will provide a great contrast with the sofa and rug. We recently finished our built-ins and we love them!
http://houseography.blogspot.com/2011/03/built-in-bookshelves-reveal.html
YoungHouseLove says
Holy cow Melissa- it’s gorgeous! Not that we had any doubts at all! High five to the hubs!
xo,
s
Stephanie says
Awesome job! I love that you take Clara to Home Depot! My dad was a contractor and would always bring me with him to Home Depot to purchase his supplies. To this day everytime I walk into a Home Depot (which seems to ba A LOT these days- thanks to the inspiration I get from you guys) it reminds me of my childhood!
amy says
I can’t wait to see the final product!
Julie Anne says
John, it’s funny that you got some ribbing for calling whitewood what it is – white wood.
Out here in the Pacific Northwest where lumber is part of our heritage, whitewood is known as spruce, a fast-growing evergreen conifer often used for Christmas trees as it grows, well, fast. And it also grows very symmetrical and conical. Related to pine and fir.
Home improvement stores (big orange and big blue among them) tend to carry a light colored softwood which is categorized as “SPF” – meaning spruce, pine or fir. They are all similar (but not identical). Which one is available depends upon season and other pricing factors. Your light colored wood was additionally labelled as whitewood – so it’s spruce.
Spruce has no natural resistance to insects or water, so it is for indoor use only, and it absorbs stain really fast. if you have any bits and pieces left over, you may wish to do some practicing with your chosen stain – otherwise, maybe try some on the underside of the console(s).
You also received a suggestion that you should have used plywood on the top of the console instead of joining boards. While no-VOC plywood is a good thing to substitute where another ply might be used, your solution of joining two virgin spruce boards to create a large enough console top is easily as green as using no-VOC plywood, due to Spruce’s fast growing time, easy and fast milling (low carbon footprint) and the carbon-based energy requirements of milling and creating any plywood, even greener ply, pretty much cancel each other out. The same amound of plywood also costs more money and fuel to ship due to it’s weight. Indeed, I would give the green win to spruce boards by a nose.
All wood isn’t created equal in the range of green – a spruce board or cottonwood pulp is not an old growth Redwood or the Joshua tree. Spruce is renewable and sustainable.
YoungHouseLove says
So interesting! Thanks for all the info! Off to show John…
xo,
s
Christina says
I’m surprised that you gave up the shelf. Perfect hidden storage space for items you don’t want to access most of the year. The space is there anyway, why not make the most of it? Holiday items, out of season clothing, and decorative bits and bobs that you rotate in and out, stuff like that.
YoungHouseLove says
We actually have a full attic and basement for lots o’ storage along with a few great closets and concealed cabinets, so in the end we thought just making some shelves on each side and a compartment in the middle for everyday items that we’d use all the time worked for us.
xo,
s
Michelle says
Great job! Wish I had those skills. Just wanted to warn that there has been some controversy about the health hazards of wooden pallets, so you might consider looking up some info on that before deciding to bring those into your house.
YoungHouseLove says
Thanks so much for the suggestion Michelle! We’ve actually heard all about that issue (and you know how crazy we are about VOCs and other chemicals) so we’ve done some research about how to “seal” them so they’re 100% safe for our home before we bring them in and live with them. Stay tuned for those details when we get there!
xo,
s
Naomi says
OMG! I totally believed the April fools post! I was so appalled that I didn’t even finish reading and definitely couldn’t comment. =/ In fact I said forget this blog altogether they have gone way off the deep end. Come monday I didn’t check in until late afternoon when I usually read first thing in the morning because I was scared of what I may see. Wow, haha, joke is on me!
Lindsay says
My best friend just used Ana White to make a Farmhouse Bed for her dolls… don’t ask… just check it out here:
http://allisonsgirls.blogspot.com/2011/04/farmhouse-bed-for-nancy-girls.html
YoungHouseLove says
Haha- it’s adorable!
xo,
s
heather says
loooove ana white’s site!…so many great ideas and i’m loving the outdoor furniture :) nice job on the console table!!!!
ps…now i’m starting to think you guys are more like michael and holly from the office instead of pam and jim….haha! kidding!
YoungHouseLove says
Haha- we probably are. We both love a good “that’s what she said” joke.
xo,
s
r8chel says
I love the built-in bookshelves at the ends! And of course the top-entry storage sounds great too. Can’t wait to see the finished product!
Kirsty says
Yippee! I was waiting anxiously to see the first console table post :) I’m so excited to see how it comes together, I really love the whole idea of it. I only wish we could fit a table like that behind our sectional – we have the wrong room shape I think! I’ll be eagerly awaiting more console details and photos :)
Bec says
Great project. Looking forward to seeing the completed product! PS: Clara is the cutest kid on the block. How about those teeth?
Laci Waner says
LOVE the console! My hubby and I have been building fools since we discovered Ana-white.com/knock-off wood! I am a doctor with two kids and a busy, working/traveling husband. I seldom go a day without reading your blog and scouring her site. I desperately needed inspiration for a creative outlet to balance long days in the hospital and clinic (EQ vs IQ). …younghouselove and ana-white…my perfect recipe of creativity mixed with empowerment. Thanks, guys!
Jazmin says
Laci!
Steve is gone all the time, and i do the same! This is my stressed out “wife with no husband” outlet!
katie says
Hey Sherry… did you ever get this mirror? or maybe I made it up that you were hunting it down a while back.
http://www.westelm.com/products/round-coco-mirror-w522/?pkey=cmirrors
YoungHouseLove says
Never got it but love it! The problem is that we have about 100 projects on our to do list so convincing ourselves to spend some of that money on a mirror (albeit a gorgeous and lovely one) is tough. It’s not easy being cheap! Haha.
xo,
s
Mel says
We’ve had the same dilemma, we got our own Karl in Novembe 2009, and since then have been looking for a console table to put behind the arm that stick out into the room for some much needed storage and as a bookshelf, and just to pretty up the back of the arm (lounge back thingo). We’ve searched high and low and when we’ve found something we thought might work, it’s been too wide, or too short. We’ve ummed and ahhhd over what to do, but you’ve inspired me. I’m going to show Mr Mel your post and DIY project, I think he’s up to it, perhaps with some sidekick assistance!
Can’t wait to see yours finished and in situ!
Robin says
The console looks great but OMG! Did you show those little baby teeth off! How cute is she. Love it.
emily says
wow! i love it!
The Nester, Meagan says
TRE impressive John!!!! Okay come build one for me now… That’s what you get for being too good at building stuff!
meagan,
the row house nest
Maureen Rollman says
I love this room! Are you still happy with Karl? We are remodeling our finished basement and need a couch/sectional. We have a 2 year old, a cat, and a large poodle, so we don’t want to spend a ton. Your blog has inspired me to take small steps of improvement in our house.
YoungHouseLove says
Yup, no complaints! So far we love him.
xo,
s
Sherri Remington says
We are completely addicted to Ana White! We have built the King Farmhouse Bed, Rustic benches, step stools and the playhouse with deck. Her plans are SO easy to follow!
Brandan WH says
Wish either me, or my husband, were that handy! It would save us of having to search for the “perfect piece” if we could just build it. Oh, and to have a garage would be nice too… ;0 Great job. It’s going to be fabulous!
Emily C. says
At first, I wasn’t sure how I felt about a shelf behind the couch, er, Karl, but as I read your post and thought about it, I really warmed up to the idea!
My boyfriend has always impressed me with his building know how. He loves to play video games and watch movies with friends, and he has a very small space to do it, but two couches. So instead of trying to fit everyone around the television, he went out and got materials to make the second couch taller. He made new legs that could fold down so that the couch was just slightly taller when he needed it to be, and then he had stadium seating for all of his friends! He’s a keeper, I tell you.
Erin Fowles says
Gorgeous; I love Ana’s site! I love the look of the raw wood, but too risky! My husband just redid the window sills in my son’s room with red oak stained with Minwax Cherry for a naturally red-ish tint. Turned out gorgeous and matches our red oak floors perfectly. Looking good, can’t wait to see the progress! :O)
Sandy says
Yup! My husband and I just finished our first Ana-project: shelves for my little man’s room. They are super cute. I am going to post them in the next few days!
The console table looks awesome! Great job!
Kelly says
Great work John! Can’t wait to see the finished product! I love all of your ideas around the house.
I’ve built not one, but two fireplaces for past and present apts. My old apt had a really long “bowling alley” type wall that was just awkward, so I built a fireplace on that. Lovely focal point. It has traveled from apt to apt and most people think it was built in. But my current studio apt was too small for it, so I built a new corner 8′ tall fireplace. I just LOVE it. I have high ceilings, so it really is a show stopper as you walk into the living room. Of course, these fireplaces are for candles only, but what a way to personalize a space! When I’m completely finished with it, I’ll post a link to my flickr page!
Cheerio!
Kelly :-)
YoungHouseLove says
Sounds awesome. We’d love to see it!
-John
Mary @ stylefyles says
wow you are so talented. I am envious of your skills – can’t wait to see the finished creation!
kitliz @ DIYdiva says
Looking great. This is a post after my own heart, since I’m in the middle of a bathroom vanity building adventure myself. Did you also glue the joints or just screw them?
I’ve got my eye on a Kreg jig, but I’m actually having fun with dowel joints right now. They would be a great option for your console table if you were going to have it out in the open and didn’t want to see the pocket screw holes on the outside or inside.
Here’s my recent dowel-joint how-to (and vanity progress): http://diydiva.net/2011/03/joinery-101-making-dowel-joints/
YoungHouseLove says
Nope, no glue was used – just my Kreg Jig and some screws. But now I’m going to check out your dowel joint how-to! Thanks for posting a link.
-John
JM says
You guys are awesome and all, but I hope you know that the true star of your blog is Burger! Cracks me up how he appears in all of your photos and he’s always stealing the show by doing something hilarious. I laugh out loud every time! Love him! :)
Chris says
With or without your console table, I LOVE your living room. It is bright and cheery and WONDERFUL!
Martina says
Oh gosh I love Ana White and her amazing plans! My partner & I modified her narrow farmhouse table plans to make an incredibly HUGE solid wood table to fill up our dining room (and accommodate our rather large family/dinner parties).
Though we finished the beast over 4 months ago we’re waiting for the snow to disappear before moving it outside for much needed stain and a few coats of poly.
YoungHouseLove says
Wow- looks awesome! Amazing job!
xo,
s
Kristy says
What tools do you recommend I buy as a BEGINNER builder? I realize it might be a bit expensive starting out. I have big plans for tables, consoles, shelves, etc…
YoungHouseLove says
When I was a beginner builder, all I had was a Kreg Jig and a few clamps. I learned from there!
-John