Let’s talk about crack sand. You know we love to save a buck wherever we can. Sometimes to a fault. And as any scrimper knows, sometimes it can bite you in the a-dollar-sign-dollar-sign (a$$). Though I’m not sure we ever expected that we’d wish we had splurged on “the fancy sand”…but that was the case after living with our finished patio for a few weeks.
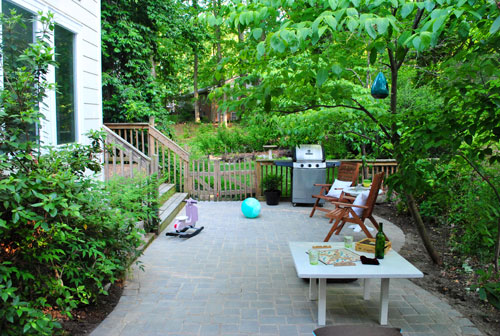
If you recall, we used some leftover paver sand to fill the cracks between the stones instead of spending the $95 that the stoneyard would’ve charged for a delivery of the polymeric stuff (which has some cement-like qualities to help keep it in place and block weeds a little better).
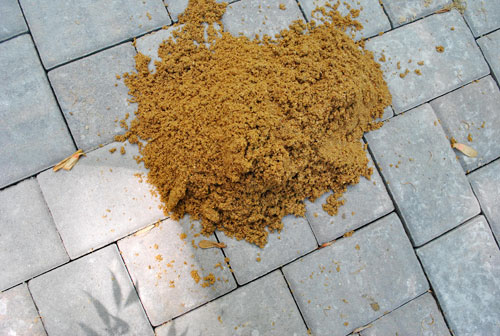
At first the paver sand looked great in those cracks…
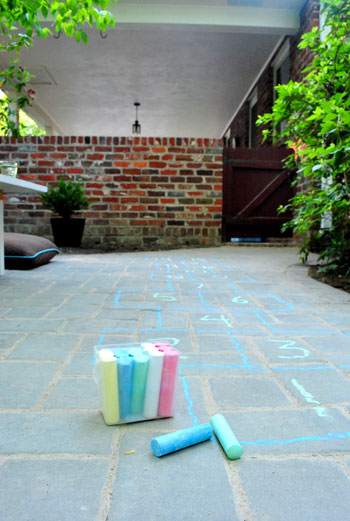
… but after a few weeks and (more importantly) a few rains, I grew increasingly unsatisfied with my crack sanding job (yes, I just very maturely resisted the urge to write “the sand in my crack”). It had washed out in a bunch of places, leaving lots of empty gaps and an inconsistent look that I wasn’t happy with.
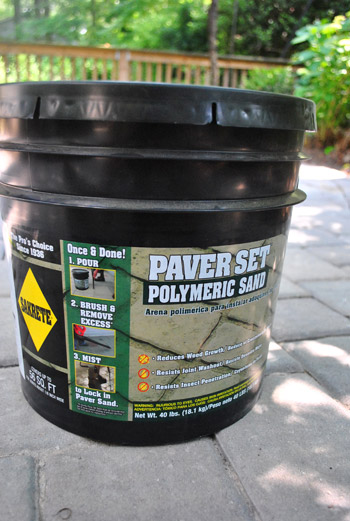
So, we bit the bullet, swallowed our pride, and bought a bucket of polymeric sand at Lowe’s for about $30. It technically should have only been enough to cover about 1/3rd of the patio, but since the cracks still had some regular sand packed into the bottom of ’em, I knew it’d go further (not only did one bucket do the trick, we still have lots leftover in case we ever need to redo it). So at least we didn’t end up spending the full $95 that we were originally quoted.
Applying the sand was tedious to say the least. Just as the directions suggested, I used a ziploc bag with the tip snipped off to pour the sand directly into the cracks… of which there were lots. Did I mention it was tedious? And yes I channeled Duff from Ace of Cakes the whole time (minus the weird facial hair).
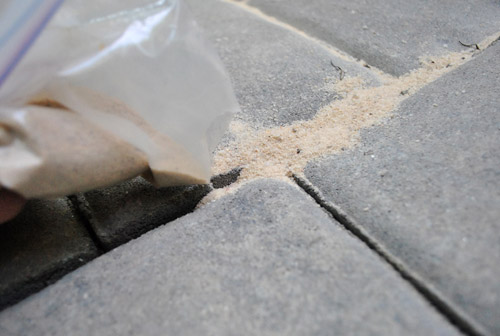
My initial application was way too heavy – which isn’t ideal because once this stuff gets wet it truly is cement-like. So you want to be sure you put the sand only where you want it to stay for the long haul (as in, not on the face of the pavers).
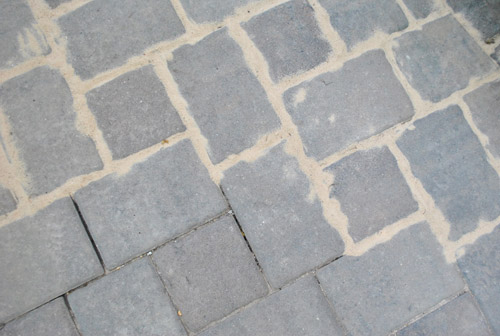
So section-by-section I swept my heavy-handed sand “icing” until it thinned out into something more subtle (the top half of this pic is done, and I hadn’t started on those bottom cracks).
Then in an extra credit bout of nerdiness, after all of the sand was poured and swept, I went over the whole patio with my electric leaf blower on its lowest setting to be sure I got rid of any excess on the surface of the stones. After that I broke out my hose and misted the entire area per the directions (being sure to get everything wet without going overboard and washing things out).
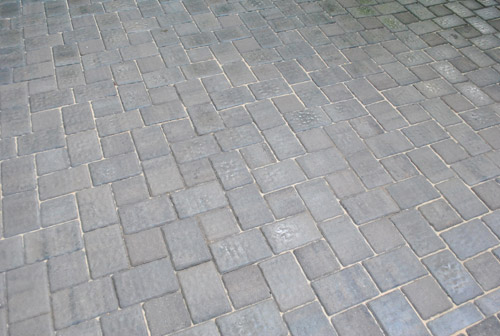
In retrospect I wish I had blown or swept out a smidge more sand before wetting things down so that the “seams” of sand between the pavers were a tiny bit thinner. Guess I’ll add that to my Lessons Learned list. Right under “Use polymeric sand in the first place.” But it’s really not too bad. Kind of charming in that it-looks-like-it’s-been-here-a-while-way (when the seams are free of sand it looks really dorky-new to us, like too-white sneakers on the first day of school).
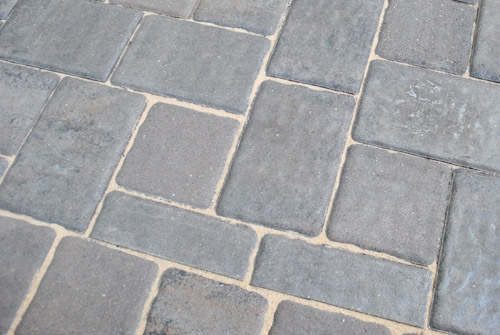
Even though we did save about $60 in the long run, I do wish we’d “splurged” for it during the initial patio laying process. It would’ve saved me lots of time (it took about three passes to get the paver sand looking good during my first attempt, whereas the polymeric stuff took only one) and in the long run I’m confident that the “fancy stuff” will do a much better job when it comes to blocking weeds, ant hills, and all that other unwanted stuff over the next few years.
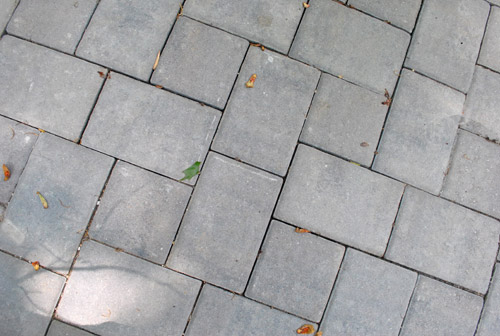
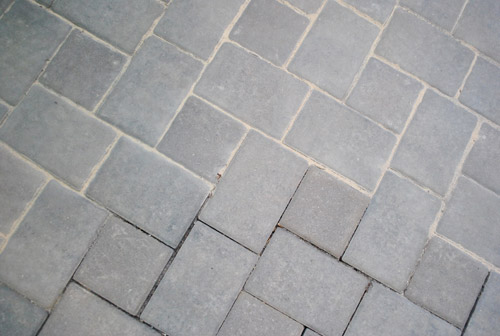
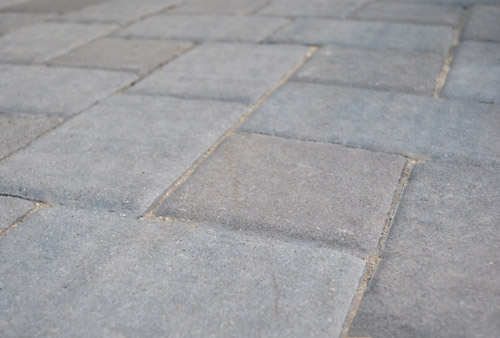
Here’s a shot of the pavers that I snapped yesterday, about a month after putting all the new sand down. We figured we should wait to post about it to see how it stood the test of time (and a few crazy thunderstorms). So far it’s holding up as well as the day I did it. And yes, I’m quite relieved about that. I don’t know that I had another sand application in me if this one didn’t pan out.
Has anyone else learned their lesson the hard way? Or can you think of a time where you wish you had just bucked up and done things right the first time? Basically I’m looking for you guys to make me feel less like I’m the only one who makes these kind of mistakes.
Psst- Want to look back on the entire patio process from beginning to end? Here’s the first post (about planning), the second post (about prepping the area), the third post (about unexpected budget breakage), the fourth post (about further prepping the area), the fifth post (about adding the gravel & sand along with the majority of the pavers), and the big we’re finally done post (complete with a bucketload o’ pics).

Kristin @ Ogo's Love Nest says
Thank you for sharing!!!
Our front pathway has 2 inch gaps between the stones. So annoying and no fun when you’re rocking heels for a night out. Will definitely be trying this!
Kristen @ Popcorn on the Stove says
Bummer about having to re-sand the patio. It ended up looking great, though!
Future Mama says
Totally agree! How tedious, but it looks wonderful!
Much love,
Future Mama
http://expectingablessing.blogspot.com/
Lori and Ethne at wom-mom.com says
I like to call myself thrifty and would have done the SAME THING! WHAT A JOB!!!!
It looks GREAT!
Lori
http://www.wom-mmom.com
Robin @ our semi organic life says
I know that feeling of wishing you’d just gone for the good stuff the first time – too well. I’ve done more than a few projects twice! Don’t worry, you’re still normal.
Cait @ Hernando House says
Good to know aout the polymeric sand! That’s what we’re planning to use for our reclaimed brick patio, and I was wondering if it was worth it.
annabelvita says
The only thing I can think of recently is a really rubbish example… I bought a cheapy recipe book cover for my must-have recipe exercise book, and when it arrived from the internet it was so rubbish that I had to go out and buy a new one anyway (the posher one was barely any extra). The good thing was I now use the cheaper one as a ‘splash guard’ when I’m cooking with the book (I’m a pretty messy cook).
It’s so hard to know though! Because some cheap things ARE ok. That’s one of the reasons I like buying second hand – things were better made and so you can still get quality for cheap.
Kim says
If that is your only mistake, you guys did GREAT, even if it was a pain. We have some old brick that was layed in our backyard without anything at all. The bricks are cool, but such a mess all uneven and weedy. Too hot to tackle now, and not looking forward to all the work. Do you think we could use the same process and sand you used with the pavers?
YoungHouseLove says
I think so! Maybe just read the container to make sure it doesn’t say “not for use with brick” or something. But if it works for pavers I can’t imagine it wouldn’t work with brick…
xo,
s
Laura says
We used similar polymeric sand for our brick patio, and it worked wondefully! You can read about the process here: http://theluckiestinlove.blogspot.com/2011/06/patio-progress.html
Kate Battle says
Do you think this would stop weeds from growing in the cracks in my driveway? Or is that a no no because they have to be able to shift during freeze/thaw??
YoungHouseLove says
Hmm, I’m not sure if it’s made for the cracks in asphalt. Maybe go to Lowe’s and read the container to see what it says? Or ask a pro (or five) there what they think?
xo,
s
Laura says
I was wondering the same thing… but my driveway is that weird aggregate style.
Tia says
Kate – there is special sealant for driveways. You’ll want to make sure you use the right stuff!
Shannon says
My husband just built the Parson’s Desk from Ana White’s plans (http://ana-white.com/2011/05/parson-tower-desk). It looks awesome. Well, it looked awesome. We put a coat of primer and then 3 coats of semi-gloss white paint on it. Then we decided to polyurethane it to give it a real gloss. NOT SO AWESOME. Because polyurethane is meant for stain! Rookie mistake! We looked at each other and wondered how we could be so stupid! Sanded it down last night and am going to repaint today. :) Live and learn (the hard way)!
YoungHouseLove says
Oh man, that totally happened to us a while back. If it helps, we have had great luck with Minwax Water-Based Polycrylic Protective Finish in “Clear Gloss” (applied thinly and evenly it shouldn’t yellow like some others do. And we love SafeCoat Acrylacq even better if you can get your mitts on it (it’s low VOC and non-toxic, we got ours at a local green building store).
xo,
s
Kathryn says
Glad it worked out for you guys! Sometimes boo-boos can be major $$$. $30 and the job is done…I say it’s a bargain!
Mel says
I have a feeling I am going to I wish I would know about this stuff last fall as we putting in a new sidewalk with pavers. Our problem is the ground will be settling for a couple years below it since we had to dig up the front of our house last summer due to a foundation leak.
I will keep paver set on my radar.
Brandan WH says
I didn’t think it looked that bad with the “holes” but I can see how that can get annoying after a while. Great job. I’ll keep these tips in my back pocket as husband and I will be udpating our patio (fingers crossed) before the summer’s over.
Micha says
Shortcuts never really pay (in the long run). You won’t believe the stories people tell about what the Previous Owners of their historic homes used for “quick and cheap fixes” (paint sticks, duct tape, card board, etc. in the weirdest places).
Every once in a while I feel like skipping a step in the whole painting trim process but the reminder of what happens when you don’t do it properly is all over the place (that’s why I am painting every piece of trim in our house). So, yeah, it sucks to have to pay more or do another step but in the end you’ll know that you did it and you did it correctly and it.will.last :o) and you won’t have to do it again next year!
And that’s priceless :o)
Pip says
Reminds me of when we lifted, shifted and relaid pavers from the back to the front of our place. And relaid again. We were trying to save on traffic rated paving stones for the driveway. Tedious! Polymetric sand looks great btw!
my honest answer says
Aw it’s always worth trying out the cheapo option first! Imagine if everytime you did something you went for the pricier version straight away, it would cost a fortune. The money you save trying out cheaper ways more than covers the odd occasion where you have to do something twice.
Annie P says
You should feel like a paving pro. Your patio in comparison to our DIY version is in much better shape (read: level). We also have weeds and ant hills. Dang! We enjoy the heck out of the patio anyway. A few ants and weeds never hurt anyone.
Erika says
I think your sandy cracks look much better.
sorry.
Katie says
After all the talk about sand and cracks, I just about choked on my oatmeal when I read this line, “After that I broke out my hose and misted the entire area…” Nothing starts a Thursday off right than feeling like a third-grader again!
YoungHouseLove says
Haha- how did we both miss that (I proof read this post)???? Haha.
xo,
s
Kelly says
This comment almost made coffee come out my nose. Awesome.
Lindsay says
Thanks for the good laugh this morning!
Donna Huebsch says
Well, there’s nothing like a little crack sand to chap your butt :o) (Sorry, I couldn’t resist.) Rest easy, you’re definitely not the only one who has learned his lesson the hard way – it has happened to us more times than I can count. In fact, I would say that lessons learned the hard way are the ones that really stick with ya.
Amanda @ Our Humble A{Bowe}d says
Oh, I know the feeling. When we remodeled our bathroom, we were smart enough to use higher quality materials, but I wish we would have extended the shower tile to the ceiling: http://ourhumbleabowed.wordpress.com/2010/06/02/its-marble-ous/ I’m blaming is on being pregnant and in a hurry to have a functioning shower again, but we didn’t even think to extend the tile until we remodeled our master bathroom. And the tile isn’t falling apart, so it’s not changing anytime soon. Boo.
Brandy says
I have botched so many jobs, but it has taught me “Be lazy, do it right the first time!”
Amanda B. says
Haha, my Dad has always said “If you want a job done right, ask a lazy man to do it, because he only wants to do it ONCE.” :)
YoungHouseLove says
Haha – I love that!
xo,
s
Devon @ Green House, Good Life says
That’s a great way to think about it, Brandy!
Brandy Erfurth says
LOL, I got tuns of stupid sayings. Guess thats what happens when you work at a old folks home, and spend your day talking with the people who have truly, “Been there, done that”
Bryn says
All my “shoulda, coulda, woulda” moments have happened with finishing…painting, staining, polyurethane sealing, etc…I always think, “Oh, really?!?! Do I REALLY need to sand it with 3 different grits of sandpaper first? I think 1 quick pass will do, thank you”…and everytime, the paint/stain/poly wins…Maybe next time I’ll learn…
Julia @ Chris loves Julia says
I DIYed the Moooi Random light awhile back, just using crochet thread and water-downed glue and corn starch. It has started to sag a little bit in some places and I am STILL holding my breath until I re-do it. I know I have to. I am just trying to find a better, stronger product to use. I heard good things about Stiffy Fabric Stiffener, but GAH, I am still trying to humble myself and get it done.
Chris Loves Julia
Stella says
I DIYed that same pendant using fabric stiffener and crochet thread and it worked great. Once it was completely dry I sprayed it with a very thin coat of polyurethane for extra strength. I live in South Florida and wasn’t sure how long it would last with the added humidity factor, but a year later it’s as strong as ever.
Ted says
Learned lesson the hard way…check.
A year after we moved into our new house, the builder came back out to repair “nail pops”. In new construction after about a year, some of the nails will push back out slightly as the new wood contracts and shrinks. The builder had a clause that they would come out a year after settlement and repair these once. So, in our master bathroom, we had about two dozen…they hammered the nails back in, then spackled the holes and sanded. Great. So, it was my job to go back and repaint the sanded drywall (normally my wife handles painting for a reason). The builder had also left us one quart samples of the standard builder off-white that they had used throughout the house, one of flat and one of semi-gloss. So me thinks, it’s a bathroom with a shower, high traffic, high humidity, should be semi-gloss, right? And without checking either the walls or with my wife (did I mention she’s the painter and I’m the builder and I normally don’t do paint?) I paint over all of the nail pop patches. Looks great…until the paint dries. Then as soon as there is any light, you can immediately tell that the walls were painted with flat and my patches are nice and shiny semi-gloss. *sigh* And the problem is that you can’t just paint flat over semi-gloss…it doesn’t adhere as well and you get an uneven coating and it wears off faster. You need to sand it down and then repaint. Fast forward 3 more years and we’re still living with the blue painter’s tape “measles” that mark each of the nail pops…and a few weeks ago, I finally got around to cleaning up my mess. I spent a few hours over two days sanding down the semi-gloss…then washing the spots clean, then painting two coats of cheap builder off-white. We thought about painting the whole bathroom, but it’s a huge room and we’re in the middle of some other projects around the house and I just wanted the “measles” gone.
Katharine says
Yeah… when we first moved in to our first house, and were total DIY newbies, the kitchen floor looked awful, so we just bought some stick-down tiles and slapped ’em right on top of the old floor. That lasted… oh, a few months, before they started peeling up. We ended up tearing everything out and doing a proper ceramic tile job with the right backerboard and correct number of screws and all the stuff that takes forever and costs a lot. But it was worth it. Going the cheapo route is really not a good idea when it comes to tiling. (If we’d prepped as recommended the first time, and bought higher-quality stick-down tiles, it would have worked better than what we did.)
Anna @ Take the Side Street says
Oooh, boy. I’m the queen of learning (or not learning?) things the hard way. I touched up my red front door and decided to take the red onto the interior side too, but didn’t bother priming and just figured I’d do 5 coats or something. Oops. Oil-based paint underneath… now I have to sand the whole thing down and start over. So you’re in excellent company. ;)
Stacy says
I am confused – is it polymetric or polymeric? And will it ever break down and wash away? Regardless, it looks great from here and I am very impressed with the patience with the ziploc bag technique!
YoungHouseLove says
Sorry it’s polymeric – no T. It’s not supposed to wash away for years (I think the container said just reapply it every 3 years because it’s like cement so it sticks around for a while).
xo,
s
Sarah says
It is so wonderful that you learned and fixed the mistake, it was a great lesson for all. It is also good to know that I am not the only one who messes up “small” home projects only to have to return to them the next weekend. Live and learn, I guess! Thanks for sharing!
skye says
who would have thought that the kind of sand would have made a difference? i would have probably done the same thing you guys did – so don’t feel alone :)
ps – not to get all grammatical on you but john keeps calling it polymeTric sand in the post and it is clearly polymeric sand according to the bucket… just throwin that out there. you can throw it back! :) (unless of course it could be called both… which is highly possible since i was grossly undereducated on the existence of polymeric/polymetric sand before this little paver patio experience)
YoungHouseLove says
So sorry – fixed that pesky T problem.
xo,
s
Amy says
My husband built a double Adirondack chair about 5-6 years ago. He stained and poly-ed it (even using Marine-grade poly) even though I voted for paint, like another outdoor chair we had.
Well, we forgot to cover it one winter and the weather destroyed the chair. The previously painted chair? Still looks great after about 7 years.
So guess what we’re doing this summer? Taking apart the double chair, sanding it and giving it three coats of oil-based exterior paint. D’oh!
Kristin says
Looks good!
Everyone learns lessons like this. We just tend to forget that, in other cases, everything turned out great at the first try :-) . We just bought a new couch (A “Karl” in the same dark grey as yours, but a far smaller version of it) and had to paint the living room as the old wall colors didn’t go with the sofa. We just learned lots of lessons about where paint can drip on (especially when we painted the vaulted ceiling…) and how hard it is to remove when it is fully dried. And that you should, perhaps, check your floor for paint drips earlier. Haha!
By the way, I think you added a “t” to your “polymeric” sand throughout your post :-) .
Shanna says
We used the magic paver lock sand when we did our patio last summer and had to reapply it last fall and then again this spring. What we found out the hard way was if there was any amount of water between the pavers the sand would hang up and then over time and use it would drop down and leave a void. I wish that we would have used just regular sand instead. We have giant pavers edging the whole patio so there is not worry about the edge pavers losing their sand. Oh well, live and learn. Your patio is beautiful. Be sure to keep that bucket of stuff good and dry so you can use it again next spring. ;) It really will turn concrete like if it gets wet, also found that out the hard way.
Cassi says
We have one sore subject in the house and that’s our fireplace mantle.
We didn’t want to spend $300 on a mantle that actually fit the existing mounting stones, so we went with an $80 one from Lowes. We thought, all we have to do is chisel the mounting stones to be about an inch smaller and it’ll slide on like butter. Seemed like a perfect plan! Until… we chiseled and the mounting stones completely cracked and FELL OFF. :(
Almost 3 years later and we still can’t get the mantle mounted without the stones. We’ve spent maybe $150 on different screws and glues, you name it, we’ve tried it! Wish we would have just coughed up the $300 for the right mantle!
Hillary says
I’m almost finished remodeling our basement and I’ve had to do just about everything twice, including framing walls, installing doors, and even painting. Luckily I had an expert do the rough-in plumbing. I’ve even had to go through the permit process twice, thinking I could get by with just a plumbing permit originally. Next time I remodel a basement (which will be, um, NEVER) I’m sure it will be easier.
Wendy says
We totally feel your pain on this one John. After spending countless hours stripping old paint and replastering cracked walls, we selected a less expensive brand of paint in a flat finish for our intricate harlequin paint treatment in our downstairs hallway. (Seen in the link below.)
http://www.oldtownhome.com/2011/6/10/How-To-Create-a-Harlequin-Paint-Treatment-Diamonds-are-a-Girls-Best-Friend/index.aspx
Over time the walls have incurred some scuff marks, and the cheap paint won’t wipe clean. To make matters worse, the touch ups we’ve done don’t match the original color because it’s faded substantially. I kick myself almost daily for not sucking it up and spending a little extra to get a paint that would have held up better over time.
Ana Silva says
Trust me, I have made several of those mistakes in my DIY/ home improvement days. I have learned a little bit but I think it is always bound to happen. One thing I have learned to not skimp on is big house projects like who refinishes your floor for example.
Rebekah says
I read and re-read, is it polymeric or polymetric? I know I am a DIY’er but I don’t want to sound like one when I go asking for this at the store :)
YoungHouseLove says
Sorry, it’s Polymeric. The right spelling is on the tub in the pic!
xo,
s
Tuesday says
This project leaves me forever impressed by your tenacious attitude towards DIY, and makes me dream of the day my neighbour finds your blog, sees this demo and pulls is finger out for the first time in 10yrs and decides to do something about the disaster that is his (annoyingly I have to share it but can’t touch it) driveway…….phew, good job John, as always!
Elizabeth says
What a bummer! And that title reminds me of this funny thing my cousin says whenever anyone is bending over and they have a plumber butt going on, “crack kills!”
Alana says
My husband and I learned from the previous owners’ shortcuts and mistakes on their own DIY projects. Now that are house is over 20 years old and things need up dating, we run into the previous owners’ short cuts all the time. (i.e. cutting a hole in the drywall under the stairs and leaving a support stud cut in half and “unsupported”) we took several trips to Home Depot to fix that one ourselves. I’ve never seen so many “wing it” jobs in one house.
Kevin M says
I did the same thing after adding to our small patio last year. I need to go back over it like you did – thanks for the tips!
Tracey says
I’m hating myself right now for a.) being so anal-retentive as to edit your post and b.) for actually pointing this out, but it’s “polymeric” not “polymetric” sand. Just wanted to give a heads up in case someone goes to Lowe’s asking for it and the employee is like, “huh?” I’ve totally had that happen before where you’re like, SO close to the correct word, but they don’t know what the heck you’re talking about. Sometimes I think they do that just to make you feel like an idiot… Heh.
The patio looks amazing!!! I’m totally jels! We have an old wonky one covered in moss that’s not remotely level and no $$ to fix it. For now, I’m living vicariously on yours… ;D
YoungHouseLove says
Thanks a million! How didn’t either of us catch that?!
xo,
s
r8chel says
Tracey, don’t hate yourself. I was hoping someone else would point it out, because I didn’t want to be the one to bring it up. :)
Isn’t it funny how the addition of one letter makes the word seem like it means “lots of meters” rather than “like a polymer”?
YoungHouseLove says
Haha- the funny thing is that is was consistently misspelled throughout the whole post!
xo,
s
Ames says
Crack sand….ha!
It looks great guys! I am sure it will work this time.
Amanda says
I feel your pain John. I refinished 1200 sq ft of hardwood flooring (meaning *I* sanded, stained, and polyed) and the poly didn’t cure right in two of the rooms. Which means I’m doing the whole dang project over again. I could just leave it but I’m not that person. It has to be done over so it’s done right. /sigh
Amanda says
We’re halfway finished with our paver project-the pool and other fun summer adventures keep getting in our way. But, I’m excited to be learning from your process and now very happy that we went with the polymeric sand from the beginning. Though I have been a little anxious that it was going to get rained on and turn into a big hard rock (ours is in a bag).
By the way, it’s polymeric sand right? Not polymetric? Just thought I’d check for all of other folks like me who’d read your post and freak out at Lowes because they only had polymeric sand and no polymetric :)
YoungHouseLove says
Thanks! All fixed!
xo,
s
Angela says
John, I think you mean “polymeric” sand—as in, like a polymer—instead of “polymetric” sand. Unless, of course, you’re doing some sort of funky paver math that I don’t know about it. :)
Angela says
Ack! Sorry, someone had the same thought above me!
YoungHouseLove says
Sorry- all fixed!
xo,
s
Mallory says
Not that I’m happy for you to have to do everything a second time, I’m glad you posted about your mishap before we did the same!
You guys inspired me to pull up our totally uneven, red brick patio and walkway and lay down something classy and nice like yours. Thankfully we haven’t even started pulling up the old brick so your updated post caught us in time.
Thank you for your mistake! You helped us! :-)
Krysta @ Domestic for Dummies says
Your cracks look great! It’s nice to know you all don’t do everything perfectly the first time. We have a ton of projects we wish we had not cut corners on. You live and learn.
Hannah says
I actually like the new sand better than the old sand. There seemed to be too much of it the first time, that it covered up some of the stone edges, and now it looks much more subtle and the stones stand out. Does the sand come in different colors? Your old sand dried to a grey tone, will this one, too?
YoungHouseLove says
It appears to be the same soft gray color thank goodness! It’s one color fits all so I’m glad it blends.
-John
Erin says
We are more of pretend DIYers. For instance, we are supposed to move into our new home this week, and right now we have someone painting the interior for us. I was calling myself a DIYer and my husband asked, “Why? Because you chose the paint color?!” Yes! But instead of hiring a painting company or a painting crew, some random guy who is helping our “carpenter” who we found on craigslist said that he is a painter (and a pool guy and a plumber…) and gave us a ridiculously low quote to paint our place. And so he’s painting it – SLOWLY. I do not know how we are ever going to move in on Monday. I’m wishing we’d paid more for someone a tad more professional. This guy is doing a good job, however he is slow and it is obvious that he overpromised and will underdeliver.
We also were going to have Lowe’s recarpet our entire place this Saturday. They were going to charge around $250 to tear out and haul away our old carpet and another $650 for pads. SO – here is a bit of DIY – my husband and I (did I mention I’m 32 weeks pregnant) tore out the carpet ourselves, inspected the pads underneath – and realized – hey, we don’t need new pads! This Tuesday I go to Lowe’s to tell them that we’ve finalized our carpet selection (to be installed on Saturday) and I’m feeling smug because I thought our DIY just saved us $900 – and they tell me 1.) they don’t reuse pads and 2.) carpet doesn’t arrive until 2 weeks after you order it. SOooo we have a house with zero carpet, but need to move in on Monday… we learned the hard way that the 7-year-old carpet that we’d just ripped out (that was really only used for 4.5 years as the house has been vacant) probably just needed a really good wash and we are pretty much replacing it with something very similar as we had to go to a warehouse that had carpet instock instead of waiting the two weeks for exactly what we wanted from Lowes.
This is our first home. We’ve already made a few mistakes (probably shouldn’t have gone SO cheap on the painter and carpenter – nice guys, unrealistic and poor time mgmt) and we probably should have known that Lowe’s doesn’t keep millions of carpets in stock – or at least verified before ripping ours out. Oh well… lessons learned.