Let’s talk about crack sand. You know we love to save a buck wherever we can. Sometimes to a fault. And as any scrimper knows, sometimes it can bite you in the a-dollar-sign-dollar-sign (a$$). Though I’m not sure we ever expected that we’d wish we had splurged on “the fancy sand”…but that was the case after living with our finished patio for a few weeks.
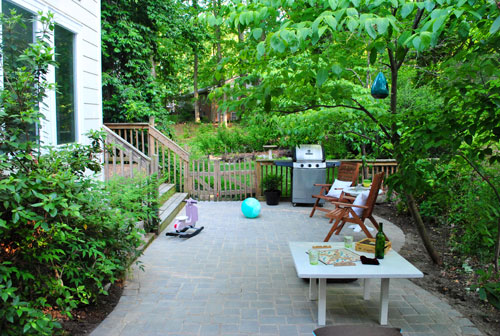
If you recall, we used some leftover paver sand to fill the cracks between the stones instead of spending the $95 that the stoneyard would’ve charged for a delivery of the polymeric stuff (which has some cement-like qualities to help keep it in place and block weeds a little better).
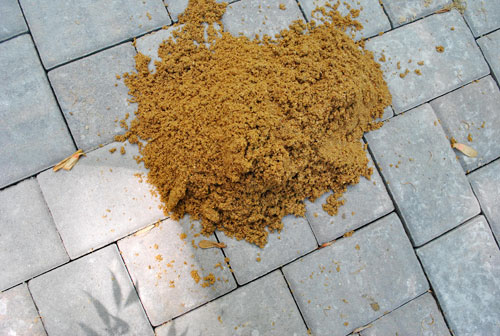
At first the paver sand looked great in those cracks…
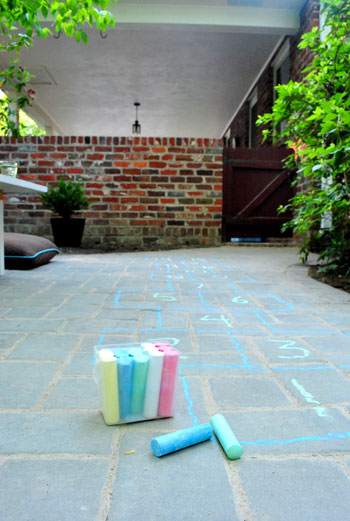
… but after a few weeks and (more importantly) a few rains, I grew increasingly unsatisfied with my crack sanding job (yes, I just very maturely resisted the urge to write “the sand in my crack”). It had washed out in a bunch of places, leaving lots of empty gaps and an inconsistent look that I wasn’t happy with.
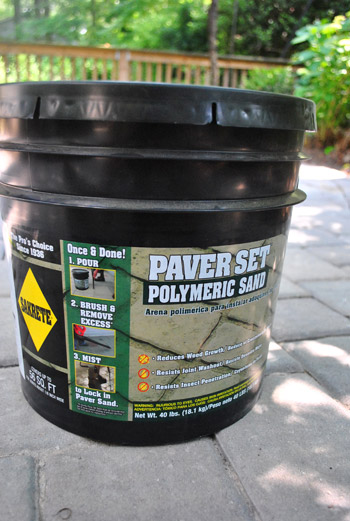
So, we bit the bullet, swallowed our pride, and bought a bucket of polymeric sand at Lowe’s for about $30. It technically should have only been enough to cover about 1/3rd of the patio, but since the cracks still had some regular sand packed into the bottom of ’em, I knew it’d go further (not only did one bucket do the trick, we still have lots leftover in case we ever need to redo it). So at least we didn’t end up spending the full $95 that we were originally quoted.
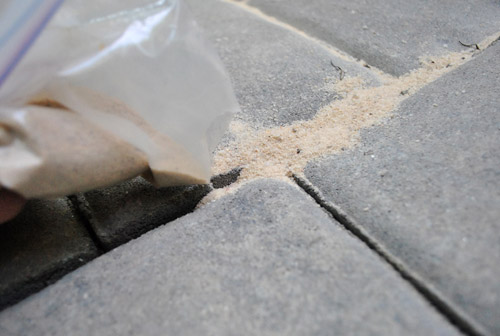
Applying the sand was tedious to say the least. Just as the directions suggested, I used a ziploc bag with the tip snipped off to pour the sand directly into the cracks… of which there were lots. Did I mention it was tedious? And yes I channeled Duff from Ace of Cakes the whole time (minus the weird facial hair).
My initial application was way too heavy – which isn’t ideal because once this stuff gets wet it truly is cement-like. So you want to be sure you put the sand only where you want it to stay for the long haul (as in, not on the face of the pavers).
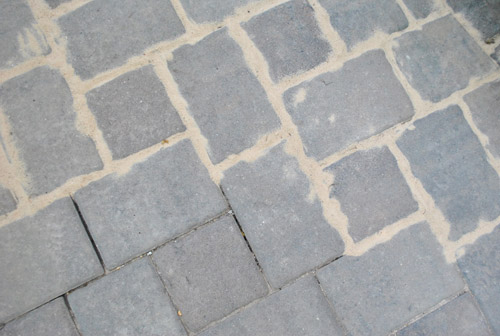
So section-by-section I swept my heavy-handed sand “icing” until it thinned out into something more subtle (the top half of this pic is done, and I hadn’t started on those bottom cracks).
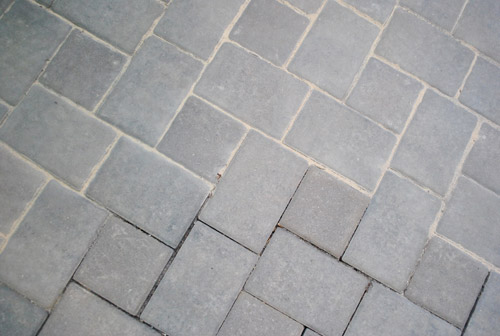
Then in an extra credit bout of nerdiness, after all of the sand was poured and swept, I went over the whole patio with my electric leaf blower on its lowest setting to be sure I got rid of any excess on the surface of the stones. After that I broke out my hose and misted the entire area per the directions (being sure to get everything wet without going overboard and washing things out).
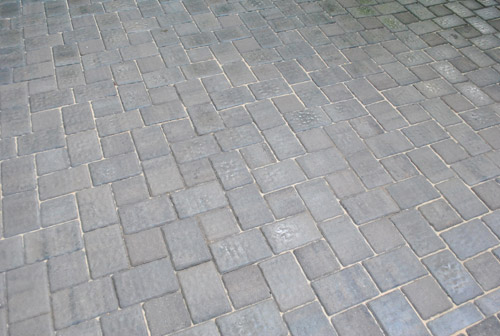
In retrospect I wish I had blown or swept out a smidge more sand before wetting things down so that the “seams” of sand between the pavers were a tiny bit thinner. Guess I’ll add that to my Lessons Learned list. Right under “Use polymeric sand in the first place.” But it’s really not too bad. Kind of charming in that it-looks-like-it’s-been-here-a-while-way (when the seams are free of sand it looks really dorky-new to us, like too-white sneakers on the first day of school).
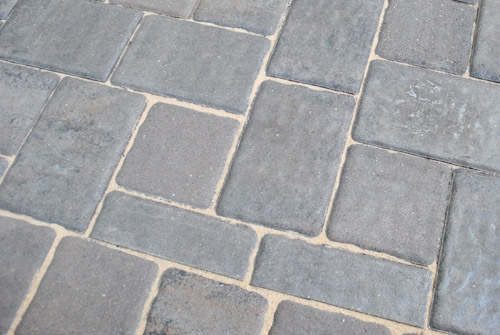
Even though we did save about $60 in the long run, I do wish we’d “splurged” for it during the initial patio laying process. It would’ve saved me lots of time (it took about three passes to get the paver sand looking good during my first attempt, whereas the polymeric stuff took only one) and in the long run I’m confident that the “fancy stuff” will do a much better job when it comes to blocking weeds, ant hills, and all that other unwanted stuff over the next few years.
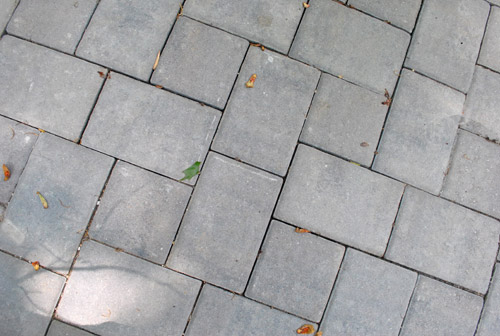
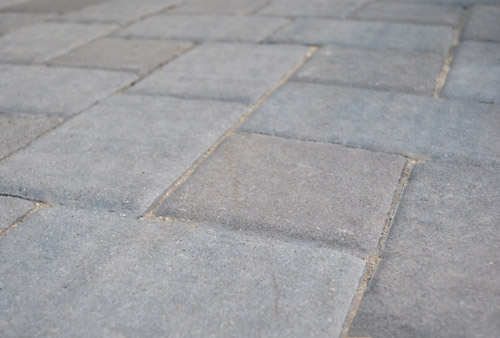
Here’s a shot of the pavers that I snapped yesterday, about a month after putting all the new sand down. We figured we should wait to post about it to see how it stood the test of time (and a few crazy thunderstorms). So far it’s holding up as well as the day I did it. And yes, I’m quite relieved about that. I don’t know that I had another sand application in me if this one didn’t pan out.
Has anyone else learned their lesson the hard way? Or can you think of a time where you wish you had just bucked up and done things right the first time? Basically I’m looking for you guys to make me feel less like I’m the only one who makes these kind of mistakes.
Psst- Want to look back on the entire patio process from beginning to end? Here’s the first post (about planning), the second post (about prepping the area), the third post (about unexpected budget breakage), the fourth post (about further prepping the area), the fifth post (about adding the gravel & sand along with the majority of the pavers), and the big we’re finally done post (complete with a bucketload o’ pics).

Cristy says
I don’t have any ‘do-it-right-the-first-time’ experiences per se, but we (my husband and I) are living the he|| that is our home’s previous owners’ shortcuts. From poorly laid tile to light fixtures installed w/out ceiling electrical boxes (yeah. yikes!) to bathroom remodels with too many problems to list…. yeah… any time I’m even remotely tempted to cut a corner I think about our home’s next owners cursing my name and we shove out the cash or time or both to do it right.
Melissa says
all I can think about right now is that risotto.
My husband makes one that looks just like that (with chicken added) and it is hands down my favorite meal on this earth.
Kris says
John – Do you have a pressure washer and push broom? Pressure wash some of the sand out of the joints. Then take the polymeric sand and just dump some on the pavers. I can’t believe the bucket’s directions said to pour it directly into the cracks. That’s insanely tedious. Push the sand into the cracks with the push broom. Just sweeping with some pressure. Go in all different directions. Once the joints look good, mist it. Don’t take the leaf blower to it, you’ll blow the sand out of the joints. When the joints are nice and hard, sweep pavers to get excess paver sand off. And now you can use the leaf blower.
YoungHouseLove says
Don’t have a pressure washer, but thanks for the tips!
-John
Britt@knewlywifed says
Wow! Tedious would be the word. We are in the process of fixing a patio, so I learn from your mistake! Thanks for sharing!
Sara @ Russet Street Reno says
Yep, I was surprised when you used playground sand just to save $100. Oh well, lesson learned. If it makes you feel better, we used polymeric sand from the get-go on our diy patio and two years later we still need to reapply it and weeds DO grow in between, so it’s not like you wouldn’t have to maintain, anyway.
heather s. says
I agree. I used polymeric sand on my front walkway and due to our usual storms in MI it still came out of the grooves a little over a year later and I get weeds all the time. I’m actually going to redo it later this month.
Annie says
On a rather unrelated-related note, my husband and I re-finished our wood floors (for the first time ever in our lives) using a semi-gloss poly. Reading the directions VERY carefully, it cautioned not to stir it too much or the resulting bubbles will mar the finish. No probs, right? Well, we basically didn’t stir it at all after opening it. The first coat wasn’t a problem, but after the ‘shine’ part of the mix sank to the bottom, we were left with partly cloudy conditions on our entire floor. Not knowing why, these results followed us through three- yes T,H,R,to the double E- coats. Argh. Calling the manufacturer finally solved the nightmare and with one last fresh coat (we bought a new can), we are done, done and done. Woof.
Kelly says
It looks great! Man, I completely understand. Recently I re-furnished some beautiful vintage nightstands and a dresser. I undertook them all at the same time and expected spray varnish to work. Well, that was a bust. Therefore, I needed to strip the varnish I sprayed on and re-varnish it all. Joy. At least they ended up looking great!
Devon @ Green House, Good Life says
My “lessons learned” (or perhaps still not learned?) always seem to be of the “think it all the way through beforehand” variety. Most recently, I’ve spent an hour or two most mornings (before it gets too hot) for the last couple of weeks working on repainting my screened porch, which was the same color as the rest of the exterior (green), which has proven to be really limiting when it comes to decorating (which I just started working on). Days after it was painted the first time, I saw another house that made me realize what we should have done, and I’m still kicking myself for not having had it painted “cashmere” in the first place.
Thanks for the tip about the sand. There’s a patio in my future, too, and I’ll be sure to go polymeric.
Dawn says
We totally copied you on the patio process, just a few weeks behind you. We shopped at Southside Builders’ Supply, after your suggestion, and found pavers we really liked. My husband and son spent the better part of a week building our 10 x 14 patio, and we love it. They did use the polymeric sand, and it looks great after two months. It kind of has an ‘aged’ look to it now—–I really like it. Anyway, thanks for your “help”—-even though you didn’t know you were giving it!!
Rebekah says
Honestly, I don’t know the difference between polymeric and polymetric but I read it on the side of the bucket in your photos above. Truth be told I probably misspelled three things in this post alone!
Christina@smallhousebigplans says
We just went through a similiar experience with our backyard- after a full weekend of work a year ago (and some serious money invested in plants)- we “undid” it all a few weekends ago and brought it back to its orginal state. I guess hindsight is 20/20! The patio looks great with the new sand!
Laura says
I can totally appreciate this post for several reasons. We just moved into a older house where the last owners had made many updates. Most of them appear to be high quality but there were clearly a few low quality fixes that I am finding really annoying- such as where they painted on the edge of the outlet covers and painted over the little metal picture hangers on the wall instead of just removing them first.
The difference between what you did and something lazy like my example is that you worked very hard and did things properly- as best you could tell. Trying to save money is way better than trying to cut corners and not do a proper job. And- you let hundreds (thousands?) of people know about this which may help them prevent or fix the same problem, like me for example. Our new patio (which seems to be generally well done) is made up of brick shaped pavers and weeds are growing up through it like crazy. I may be headed to lowes this weekend for polymetric/polymeric sand. After I pull out the rest of the weeds that is. Thanks.
Samantha Bird says
We also did this same thing a month ago with the regular sand (since we had so much left over from the laying-of-the-bricks) and yeaaaa we ended up spending like $80 on the special crack sand and our patio is like… 1/4 the size of yours. dumb thick bricks.
Hannah says
Hi! I know this is totally unrelated to patios, but I have to show you anyway. The gorgeous curtains in your dining room? I found a chair with the exact fabric!
http://www.urbanoutfitters.com/urban/catalog/productdetail.jsp?itemdescription=true&itemCount=80&startValue=1&selectedProductColor=&sortby=&id=17995671&parentid=A_FURN_FURNITURE&sortProperties=+subCategoryPosition,+product.marketingPriority&navCount=10&navAction=jump&color=&pushId=A_FURN_FURNITURE&popId=APARTMENT&prepushId=&selectedProductSize=
It’s gorgeous, but kinda pricey for something you could re-upholster yourself. Just thought I’d share! :)
YoungHouseLove says
So pretty! What a small world!
xo,
s
gina says
I think these “update” posts are one of the best things on your blog. Our patio project has been postponed until I can settle on a final layout for our backyard and stop adding things(dang old pinterest!) Now, I have another “note” to add to that particular to-do item. Thanks for saving me time and money by updating…and no thanks for introducing me to pinterest which has stolen more of my time than I care to admit and added more projects than I could ever possibly do. :-)
Rhiana says
My hubs put in a laver patio last year. We used the polymeric sand and so far everything has stayed in place and no weeds! I am sorry you had to do it again but I think in the long run you will be really happy with the results. It looks great! And while on the topic of looking great, I love Sherry’s cut! She looks like a super model! So pretty!
Lauren says
Do you know if the polymeric sand has an impact on drainage? Does it let water seep through still or does it run off somewhere else? Our paver patio is old and needs some freshening up (it gets lots of weeds and ant hills, like you mentioned) but it’s right up against our foundation and I don’t want to hinder the rain water from draining to where it should go, instead of into our basement!
YoungHouseLove says
I think it’s absorbent/porous like concrete so it can go in the cracks. We haven’t noticed and drainage differences or anything. Hope it helps!
xo,
s
Jen @ The Decor Scene says
It does let water seep through. Our contractor told us to use this sand once a year to clean and freshen up the pavers. Pour a mound out on the patio and just sweep it over the whole area. Mist the patio and your down. New looking patio. Hope that helps. :)
Cheryl says
I’ve made this mistake (more than once) with paint. The cheapo in me always reaches for cheap spray paint, even though I know it’s better to spend a few extra dollars for the good stuff.
When will I learn? Like annabelvita commented, sometimes it works though, so it’s a gamble!
Lindsay says
We just used this sand last fall on our paver driveway and patio. It’s really important to use this stuff in the north (we’re in freezing Minnesota) where the ground freezes in the winter and pavers will shift and look really awful and uneven in the spring. Our local hardware store said Minnesotans should reapply this sand every 2-3 years.
Be sure you don’t delay – it has to be at least 50 degrees out for it to work. So that makes the cut off about mid-October in the chilly north :) Last year was our first year in our house and we waited until the very last 50 degree day in November and actually had to use a hair dryer to get all the bits of the first snowfall we’d had the week before off the patio so we had a dry surface to work with (8 inches of snow in early November + not having sanded our patio and driveway = awesome)
Rebecca says
Wow! That sorta looked like a pain in the butt! ;)
Ted says
Shouldn’t that be a pain in the crack?
Janette@The2Seasons says
When we were following your patio progress, we were surprised about your choice of sand. I’m glad the replacement is working better.
Suzanne says
Oh, well, now I’m going to have to go admit to my husband we SHOULD have sprung for the fancy sand instead of just using the leftover stuff from the base on OUR patio. Why did I have to show him your blog?!
I read somewhere that you are supposed to blast all the old sand out of the cracks with the hose before putting down the polywhatsit stuff. Obviously you didn’t, so do you think it’s still going to work like it’s supposed to? Because spraying out old sand just to put down new sand sounds like the worst possible way to spend a weekend.
YoungHouseLove says
Well it’s already been a month and we’ve had some pretty major storms so it seems stuck in there for good. John didn’t blast the sand out with a hose since we got crazy thunderstorms and flooding which washed the old sand out in the first place. Haha.
xo,
s
karen says
Woah…i can’t believe you used a ziploc bag! we roughly spread it over the cracks between pavers and did a thorough job sweeping. But i got to say this sand looks way better…it matches the pavers nicely.
Carolyn says
We used Paver Locking Sand from Menards (http://www.menards.com/main/building-materials/concrete-cement-masonry/cement/50lb-paver-locking-sand/p-1408383-c-5648.htm) on our patio last fall and had to apply it again just last week. Maybe we didn’t do a good enough job the first time, or maybe it’s not the ‘real deal’ – just a modified version of your Polymeric Sand. But hopefully yours stays in tact longer than ours. Of course touching up once a year isn’t the end of the world either. Patio looks great guys!
Nette @ This Dusty House says
We still haven’t really learned our lesson, but we have a similar story… we didn’t want to drop the big money to get a laminate counter top for our irregularly shaped kitchen in the basement apartment, so we threw one together with plywood and laminate sheeting. Now, since we had issues with moisture down there, either the laminate expanded or the plywood shrunk because it’s all bubbled and terrible and in desperate need of a re-do before we can rent the unit out. We still won’t be spending the big money, but if our fix doesn’t work, we’ll have to do something!
Your patio still looks great! At least it didn’t settle badly or something!
carrie says
Thanks for sharing – even when it doesn’t work out – especially when it doesn’t work out. We are going to attempt a very similar project and now we will go with the ‘good stuff’ if you wouldn’t have told us this didn’t work then we’d have made the same mistake and for that…a BIG FAT THANKS. as my husband especially doesn’t like to do things twice – though I’d love to see him piping sand into cracks :)
Teresa says
I was taught two things growing up:
1. You get what you pay for.
2. Do it right the first time.
Both of those pieces of advice have proven true as a homeowner, over and over and over again!!
Your patio looks great!
Karen says
Just wanted to let you guys know that I’m having my hardwood floors refinished (the hubs and I pulled up old carpet to find the original hardwoods) by Charles Sanders – who you recommended so long ago. The floors will be finished on Saturday and he has been fantastic. The stain matches PERFECTLY to what was down on the already finished floors in the house. And though he’s never visited, Mr. Sanders said he’s thankful for all the work he’s gotten from your site. Thanks for the recommendation!!!
YoungHouseLove says
Isn’t Mr Sanders amazing! He’s the best. So glad he is working on your floors!
xo,
s
kristen says
just to piggyback – the handyman who gave you the lovely calligraphy poem for your gallery wall has moved to afghanistan for work! i emailed him to get an estimate on new porch railings, and he is unavailable.
he had wonderful things to say about you in his reply, though! nice guy…
YoungHouseLove says
Wow that’s amazing! We were just talking about how nice he was this morning!
xo,
s
Patti says
Oh John, you are so not alone in this one … any homeowner worth his or her salt has made the cheap-o route mistake. Mine are too numerous to mention but one of the worst was using cheap poly for my wood floors, not stirring it first and ending up with tiny bubbles forever sealed in my bedroom flooring. Yes I was burned but I call it a lesson learned, as the song goes.
Lindsay says
Is it Clara picture day? 14 months!!
YoungHouseLove says
Yes! That’s on the agenda for this afternoon. Wahoo! Such a big girl!
xo,
s
Carly says
This is a really helpful post! Our patio was professionally installed a few years ago, but every year we have ants that go crazy digging up the sand for their anthills. I’ve been thinking about resanding but haven’t known (or taken the time) to find out how to go about it. Now, it’ll have to go on our to-do list – thanks!
Callie says
It’s so funny because I actually thought you guys used polymeric sand the first time (did you talk about it in your first post or something?) and I went out and re-did our patio with the magical sand. The previous owners had laid those square gray tiles, but the 1/2″ cracks were full of dirt and always sprouting weeds I’d been endlessly pulling. I LOVE how the polymeric sand has made our patio look so gorgeous and completely eliminated the weed problem!
In terms of implementation – I just poured the sand on in piles, and then carefully swept the sand to be only in the cracks with a fine-bristled house broom. I think that was easier than using a ziploc bag to pour into all the cracks, and I still managed to get all the sand off the stones. About 30 hours after installing, we had a huuuge thunderstorm that flooded our yard, and I was worried that the sand would all float away – but it didn’t put a single dent in the great finish. (It’s been about a month now with no problems – still looks new :) ) So I bet yours will hold up great too! :)
Anyway, so funny that I thought I was copying you guys the first time around. Thanks for the inspiration! ;)
susan says
We have all learned that cheaper isn’t always better. We feel your pain:) BTW how is your back after filling in all those cracks? susan
YoungHouseLove says
Not nearly as sore as when we laid them all! Haha
-John
Lara says
Last fall, I painted our front bathroom. No problem, right? Well, first I had to remove wallpaper and border, then repair the wallboard damage. Those steps were time consuming, but I felt like I did a pretty decent job. Most of the painting went great, but strangely the paint wasn’t sticking in places. I called my husband in to troubleshoot–& guess what I forgot? To wipe down my repaired/sanded areas first! I fixed it the best I could, but it was a yucky mess & such a bummer to stop my painting to work on the walls again.
Looks great now, & I won’t make that mistake when I tackle the master bath this fall.
Your patio looks great, bee tee dubs:)
Gina @ Running to the Kitchen says
Uh yes, we experienced this first hand too when we lived in Florida with the brick pavers around our pool. After the 4th time sweeping sand over them in 2 months we finally splurged. My arms would’ve appreciated just doing it right the first time.
Sarah says
Looks great! You know you read a blog a lot when you dream about it, I guess. Last night I dreamed that a local contractor was trying to sabotage your projects because all your DIY tips were taking business away from him! Ha!
YoungHouseLove says
Haha- too funny!
xo,
s
Paige says
It looks great! We don’t have any outdoor space (womp, womp) but this is good to know for the future.
And on a totally unrelated note, are either of you Harry Potter fans? Planning to see the last movie this weekend?
YoungHouseLove says
We didn’t but we watch them on video! Let us know if it’s good!
xo,
s
Jo @ Let's Face the Music says
John, glad to have this info just in case I need to pass it on to husband who swants to secure everything in concrete. My recent what-else-could-go-wrong incident was a dying matter. Should have followed Sherry’s lead but here’s my story. http://charlieandjo.wordpress.com/2011/07/13/dying-fabric-how-not-to-guide/ Thanks for your post. Jo @ Let’s Face the Music
YoungHouseLove says
Oh man what an ordeal.
xo,
s
Wom-mom Ethne says
Blech. Thant stinks. Looks good after tho. Actually, it’s a really awesome patio and having watched it from beginning to end, I can totally empathize with your crack sand having to be re-done being really annoying. Is it cemented for good or can you blow a little more out now?
ellen says
Hi – could you have tried reversing the shop vac to blow the sand into the cracks? Just a thought. I actually did that once after kitchen demo and got dust everywhere.. yuck. Your patio looks great! When are you having us all over for cocktails? :)
YoungHouseLove says
Never thought about that- could have been fun!
-John
Jen @ The Decor Scene says
We have pavers all around our home and the contractor that did the job for us {because it was WAY to large for us to DIY it}, told us to always use the polymeric sand. When they did the polymeric sand, they just poured a pile out onto the pavers and proceeded to just sweep the whole way around our home. Buy the time they got all the way around, the pile was gone and in the cracks where it should be. They also told us to do this once a year to clean the pavers. I tell you it looks brand new for a little while. And when you do it each year, you don’t really need that much to get the whole paved area done. It does get washed away some over a year, so you might want to apply once a year in the Spring or early Summer to make it look like new again. Love how it turned out for you guys.
Ashley @ DesignBuildLove.co says
total bummer! BUT, at least it’s all done now and it looks fantastic!!!
Nevin says
Your patio looks great! We had someone put in a patio for us a couple of years ago and they did put down the polymeric sand. they dumped it out, then swept it into the cracks. It works though! Yet it has been a couple of years like I said, and after powerwashing it, heavy rains, and just time, we need to apply it again. Like you found out, it’s not hard, just tedious. Hope you all enjoy it as much as we do!! :)
Lauren says
Oh do I have a good one for you. We live in West Texas where for some crazy reason the plumbing is laid into the foundation of the house, leading to what we now lovingly call “slab leaks.” We had a bad one that poured tons of water into our garage and laundry room. Rather than biting the very large bullet and going ahead and getting our house re-piped (water lines and all plumbing re-routed through the walls and ceilings) we paid almost half the cost of a re-pipe to get the leak fixed. Insert jack hammers, wall tear out, torn up floor and $$$$. In the end it bit us in the a$$ when we had two more leaks and had to re-pipe to the tune of $8,000. Just what you want with a baby two months away from making her debut! Live and learn! Your patio does look beautiful.
Rachel Tatem says
Despite the work it looks great!
Kat says
I’m of the spend the money and do it right the first time school. I probably got my “do it right” attitude by watching my dad half-a$$ things all my life and leave them looking awful. BTW the patio looks great!
Jenna says
I live in Las Vegas, thought I could keep grass alive, and totally killed it. My husband said “why don’t we do fake grass” and I disagreed, pleading for the real deal. Lesson learned, don’t try to keep grass alive in a desert unless you have someone put it in for you the “right” way. We ended up having to buy fake grass anyway :(
Carissa says
Hi!
I’m a fairly new reader and I just LOVE your blog :D Thank you both for posting all of your fabulous ideas! Your sand post today reminded me of my husband and I attempting to “fix” our closet storage situation in our very small 720 sq ft apartment (in Vancouver, BC, Canada). After buying three separate systems from the Home Depot (on three different occasions), putting numerous holes in our walls, and completely destroying the system that was already in there, we finally broke down and called in professionals to install custom closets. In the end, the custom closets cost around the same as the Home Depot versions, fit our closets perfectly, and look so much nicer. Lesson learned. The hard way. :)
Hattie says
I feel your pain! I’ve taken the cheap-o route so many times, I really should know better by now. From not wanting to buy primer for a furniture redo (lesson learned after I had to repaint!) to my latest skimping on fabric for pillow covers ( http://littleredroost.blogspot.com/2011/07/get-your-booty-on-floor.html ) and having to get creative with my sewing skills. I think my problem is that the cheap route works great 60 precent of the time, and that encourages me keep trying it. I guess I need to temper my thrift with wisdom!
carolinaheartstrings says
I think it looks wonderful and I totally want a paver patio right off my desk stairs. Ahh maybe some day!