Let’s talk about crack sand. You know we love to save a buck wherever we can. Sometimes to a fault. And as any scrimper knows, sometimes it can bite you in the a-dollar-sign-dollar-sign (a$$). Though I’m not sure we ever expected that we’d wish we had splurged on “the fancy sand”…but that was the case after living with our finished patio for a few weeks.
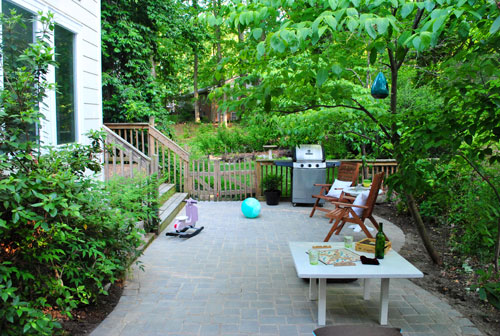
If you recall, we used some leftover paver sand to fill the cracks between the stones instead of spending the $95 that the stoneyard would’ve charged for a delivery of the polymeric stuff (which has some cement-like qualities to help keep it in place and block weeds a little better).
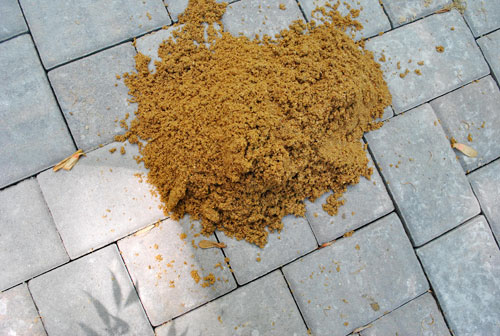
At first the paver sand looked great in those cracks…
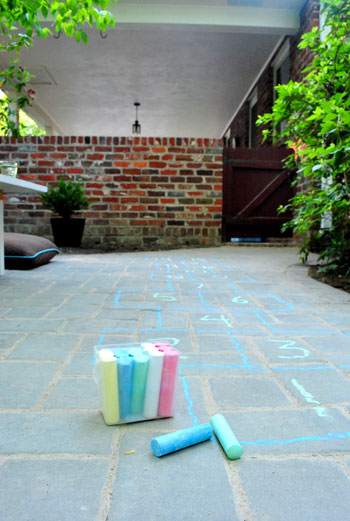
… but after a few weeks and (more importantly) a few rains, I grew increasingly unsatisfied with my crack sanding job (yes, I just very maturely resisted the urge to write “the sand in my crack”). It had washed out in a bunch of places, leaving lots of empty gaps and an inconsistent look that I wasn’t happy with.
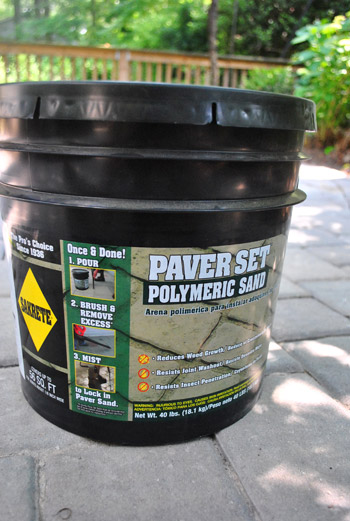
So, we bit the bullet, swallowed our pride, and bought a bucket of polymeric sand at Lowe’s for about $30. It technically should have only been enough to cover about 1/3rd of the patio, but since the cracks still had some regular sand packed into the bottom of ’em, I knew it’d go further (not only did one bucket do the trick, we still have lots leftover in case we ever need to redo it). So at least we didn’t end up spending the full $95 that we were originally quoted.
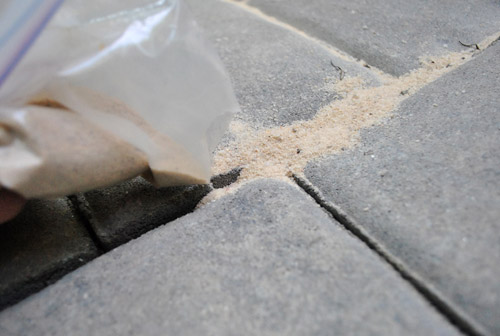
Applying the sand was tedious to say the least. Just as the directions suggested, I used a ziploc bag with the tip snipped off to pour the sand directly into the cracks… of which there were lots. Did I mention it was tedious? And yes I channeled Duff from Ace of Cakes the whole time (minus the weird facial hair).
My initial application was way too heavy – which isn’t ideal because once this stuff gets wet it truly is cement-like. So you want to be sure you put the sand only where you want it to stay for the long haul (as in, not on the face of the pavers).
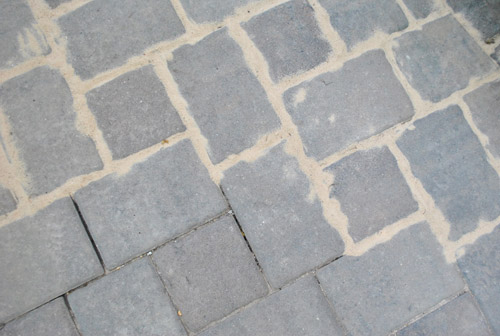
So section-by-section I swept my heavy-handed sand “icing” until it thinned out into something more subtle (the top half of this pic is done, and I hadn’t started on those bottom cracks).
Then in an extra credit bout of nerdiness, after all of the sand was poured and swept, I went over the whole patio with my electric leaf blower on its lowest setting to be sure I got rid of any excess on the surface of the stones. After that I broke out my hose and misted the entire area per the directions (being sure to get everything wet without going overboard and washing things out).
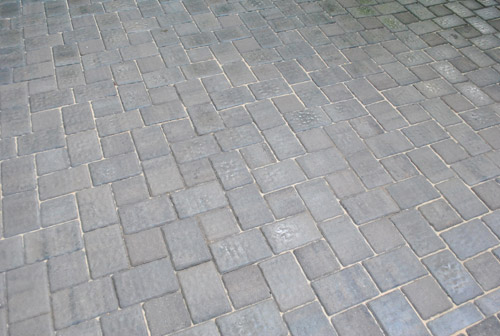
In retrospect I wish I had blown or swept out a smidge more sand before wetting things down so that the “seams” of sand between the pavers were a tiny bit thinner. Guess I’ll add that to my Lessons Learned list. Right under “Use polymeric sand in the first place.” But it’s really not too bad. Kind of charming in that it-looks-like-it’s-been-here-a-while-way (when the seams are free of sand it looks really dorky-new to us, like too-white sneakers on the first day of school).
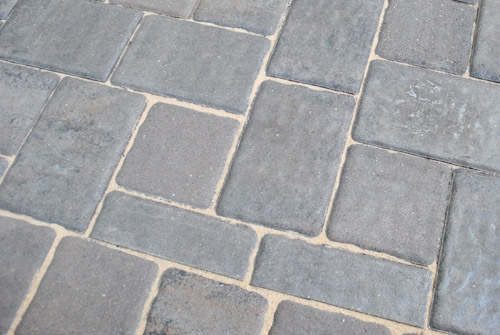
Even though we did save about $60 in the long run, I do wish we’d “splurged” for it during the initial patio laying process. It would’ve saved me lots of time (it took about three passes to get the paver sand looking good during my first attempt, whereas the polymeric stuff took only one) and in the long run I’m confident that the “fancy stuff” will do a much better job when it comes to blocking weeds, ant hills, and all that other unwanted stuff over the next few years.
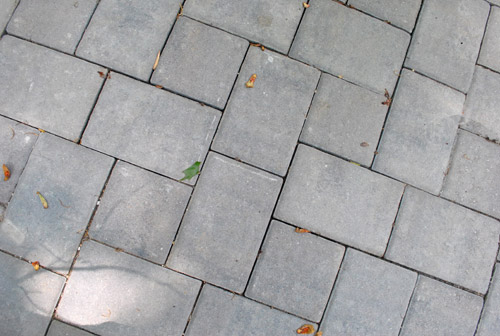
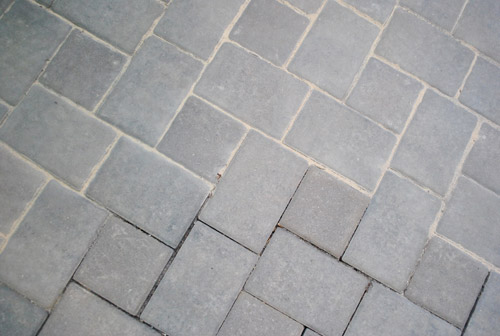
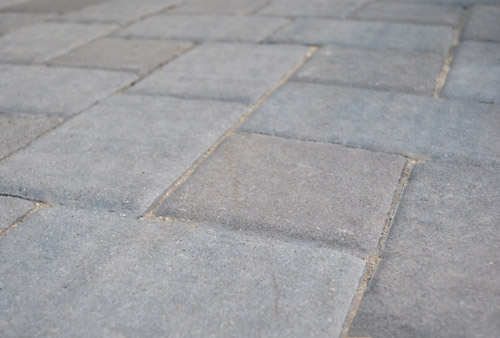
Here’s a shot of the pavers that I snapped yesterday, about a month after putting all the new sand down. We figured we should wait to post about it to see how it stood the test of time (and a few crazy thunderstorms). So far it’s holding up as well as the day I did it. And yes, I’m quite relieved about that. I don’t know that I had another sand application in me if this one didn’t pan out.
Has anyone else learned their lesson the hard way? Or can you think of a time where you wish you had just bucked up and done things right the first time? Basically I’m looking for you guys to make me feel less like I’m the only one who makes these kind of mistakes.
Psst- Want to look back on the entire patio process from beginning to end? Here’s the first post (about planning), the second post (about prepping the area), the third post (about unexpected budget breakage), the fourth post (about further prepping the area), the fifth post (about adding the gravel & sand along with the majority of the pavers), and the big we’re finally done post (complete with a bucketload o’ pics).

cecilly martinez says
I love that you “channeled Duff” he’s so great. Job well done. The patio looks awesome. I can’t wait to have a house of my own and try out some of you guys’ crazy projects!
I’ve always bought laptops on the cheap and always manage to crash them two years into their life. My last laptop I had to do a system restore pretty much every week, bummer. So this last laptop my husband and I splurged. We got it from Newegg, so it was cheap, but top of the line! Never again will we buy bottom dollar laptops, or lappies as we call them.
Nicole says
Is Clara officially walking all around?
YoungHouseLove says
Taking 8-10 steps here or there but still crawling too!
xo,
s
Patricia says
Oh my, we did the exact same thing with our patio. It sure is disappointing when you have swept sand into the paver cracks a billion times. We haven’t gotten up the gumption to try it again with the “good” stuff. It is nice to know that this works.
Kelly says
Wow, they wanted it applied directly into the cracks? That is a lot of work. On TV they always just throw it on and sweep it into the cracks. I just grouted some tile, and tried applying the grout directly to the cracks via ziploc bag, but found it got so smeared around later it just didn’t matter. It is kind of fun to pretend it’s icing in a pastry bag though. http://diynot.tumblr.com/post/7617649628/tiling-the-hearth-setting-the-tile-and-grouting
Julie G says
I think your patio looks fantastic!!! You guys really saved alot of money. I live in the Chicago area and we have gotten quotes of $13 a square foot up to $25. We had the front walkway done 3 years a go and I am starting to see some of the polymeric sand wash away in areas. Not sure what to do. Maybe I can just fill in the spaces?? Not sure if the new will stick to the old stuff.
YoungHouseLove says
I would read the container about reapplying it. Hopefully it’s simple and they lay out those steps for ya!
xo,
s
Tracie @ Gurtler + Home says
You say this is like cement when it gets wet, does that mean that it keeps the stones together once it dries? You know like cement in between bricks?
YoungHouseLove says
I think the stones have to be properly set and not rickety to start with, but it adds stability to make them more solid. Probably can’t hold things in place on it’s own though.
xo,
s
elle C. says
Nope, it’s just you guys who learn your lessons the hard way. The rest of us get it right the first time :)
Even if that WERE true (which obviously it’s not), it would be because you guys take more risks and do more stuff on your own than most people. Plus, you guys work really hard to keep expenses down, so there’s bound to be risks in that sometimes. Even though it can be frustrating sometimes, isn’t the risk what makes it a little more fun and makes you a little more proud and knowledgeable at the end of the day? You’re earning the right to be that annoying old uncle who knows how to do everything and can give unsolicited advice from long stories of your experience – not that I have one of those ;)
One lesson we learned the hard way was when we hired a contractor for the first time to install the plumbing in our freshly gutted bathroom. We didn’t check up on his work within the first day, we just assumed he would do a good job. The guy was about 5’3″ and installed our shower head WAY too low (my husband is 6’3″), plus he didn’t center the shower head! When we asked him to redo it, he said we were too picky and he quit the job shortly after. We learned then to be VERY specific if we ever hire someone and to always check up on their initial work to make sure they’re doing it right.
Erin @ Out on A Limb... says
The patio looks great. I learn things the hard way all the time from DIY to my kids. You guys did a fantastic job.
And, I’m still laughing at your title. Having just gotten home from the beach with a 3 and 5 year old, that title has a whole other meaning, lol.
Have a great day.
Callie says
My husband and I own a landscaping company, and we recently used the polymeric sand on a flagstone walkway in the back yard. It works great if your joints aren’t too big! We learned the hard way that it will crack if there is too much space between the rocks. Your walkway looks great, and I am sure you won’t have a problem with your crack being too big (to continue your pun)! :)
katie says
You are totally not alone! We replaced the light fixture outside next to our front door with a very inexpensive brushed nickel one from Lowe’s. It looked great but 1 year later it is rusty and needs to be replaced.
We also didn’t bother putting down any backer board under the ceramic tile in our hall bathroom (to save time, energy and money) and now 2 years later the grout is cracking terribly due to all the movement from just tiling right on top of the original wood floor. I suppose it’s just a matter of time till the tiles crack as well. Guess we better get crackin’ :) and fix this before we sell our home…haha…
Jenn says
You had me at “crack sand”. Oh, and I thought polymeric was some sort of exercise. Hmmmmm ;)
Unfortunately, I learn MOST of my lessons the hard way, such as: (1)painting a ceiling without a shower cap leaves your hair looking like an 80s, splatter-painted, boy band, t-shirt and (b) sponge painting is never, I repeat NEVER okay. (I was in 8th grade, so that explains that.)
Colleen P. says
I think the dumbest “go cheap” mistake we made was getting free composted soil from the city to fill in a bunch of raised beds we put into our otherwise barren yard. Yes, it was free, but we didn’t realize it was ALL compost, and no dirt; it was like pouring straight concentrated fertilizer onto the plants. Darn near killed all the plants in all the flower beds that we put it into! LOL!
This year we bought several yards of plain old garden soil from a soil company, mixed it in with that compost, and the tomatoes are taller than me! Definitely know what you’re getting, and make sure you use it properly even when it’s cheap or free!
diana says
I love your site. I just laugh when I read your post today. Everyone at the office was wondering why I was laughing at desk.
I have just one question for YoungHouseLove. Can you tell your readers how to get your sponors?
YoungHouseLove says
Blog because you love it, with passion and annoyingly boundless enthusiasm. We’re going on year five of blogging this fall, so it doesn’t happen overnight, but eventually sponsors started contacting us – and 2,000 posts later we can’t believe how far we’ve come!
xo,
s
Jackie Smith says
When we put our hardwood floors in, my husband poly’d them and guess what? It started to peel, but just in random spots, all over the WHOLE downstairs! It was a long few weeks of scraping it all off on our hands and knees. Every once in awhile I still find a little spot of it
Casey says
Ab fab job! The fam and I have recently had our fair share of not-so-good luck with sand, too. Evenly distributing is tedious work.
Kacie says
We are doing our patio this weekend. Thanks for the tips.
Kacie
http://acollectionofpassions.blogspot.com
Courtney says
I feel like I am always doing a “face palm” when I try to save $20 here or there. We are re-wiring our house because the previous owners did wonky things…(bedrooms lights control hallways, etc.) After spending $100 in supplies for new wires and boxes, we found out our home warranty covers that and will send out someone to fix it for us. Here’s the kicker-our deductible is $100…
joyjoy says
I love that you guys keep it real with what works and what doesn’t work for you!
Cheryl says
So my dad and I just laid a patio in my backyard, and we used regular paving sand, too. I am wondering now if I should go over it with polymeric–but I am hesitant because I worry about drainage. If I use polymeric sand, the water will run off versus drain through, yes?
YoungHouseLove says
You can scroll back in the comments for more info on that, but it’s porous so things drain really well with it. Hope it helps!
xo,
s
Gaidig says
Ah, I just saw your response here. That’s great that it’s still porous!
heather says
Lesson learned: I should have BIN’d our wood walls instead of BIN’ing (oil based) just the knots and then priming (water based). It’s common sense not to mix but of course I was like la la land. It was ridiculous and frustrating. Since the paint stayed nice on top of the BIN and soaked in everywhere else. It wasn’t horrible, but it was frustrating.
debbie says
The patio looks great! If I think about the times I DIYed something I later regretted, it’s ’cause I used what I had instead of spending a little extra $$ to do what I really wanted. For example, I wanted to paint an old chandelier a matte black so it looked like iron (instead of nasty brass) but decided to use a glossy black I already had. I also used that paint to paint a picture frame. Both the chandy and the frame would’ve looked much better matte. I think I’m finally learning my lesson!
Jordan says
No way! We used the exact same polymeric sand on our paver walkway seen here. We scored a serious deal at Lowe’s and only paid like $9 for the tub. It was definately tedious work (can’t imagine doing a space the size of your patio)! So far the stuff has held up great and not one weed has been spotted.
YoungHouseLove says
What a steal!
xo,
s
bfish says
Great job on the patio — it’s a wonderful improvement!
Sometimes even good intentions in DIY go awry. Example 1: we had to replace our 80 year old front porch floor, after spending years applying fixes to the original tongue and groove fir. We’d used new fir tongue and groove flooring successfully on a project house we fixed up in our neighborhood. But, we figured this wonderful new product — pressure-treated tongue and groove flooring — would be a step up. Well, it’s shrunk, cupped like crazy, and in general looks pretty pitiful. We also painted it after waiting way longer than the recommended amount of time to cure the wood. Bad attention to detail — our painter who was usually so careful got lazy and recoated the floor the same day. Now paint is peeling in addition to the condition of the wood. We wish we’d gone with the proven product (and painted it ourselves).
Example 2: for the aforementioned project house, my husband built 4 square column light posts with bases, to rest on brick piers with a synthetic stone cap. He primed and painted all wood pieces before assembly and the finished product was also painted with exterior paint. We don’t know the cause or causes of the failure, but some of these beauties are rotting away — such a disappointment!
We do almost everything ourselves and that’s not likely to change, given that a fair number of people we’ve hired have done a half-assed job or if they did a good job, were far too messy (excessive paint drips and the like).
Gayle says
I have experience with polymeric paver sand. Yes…it’s the way to go. I almost posted a reply when you did regular sand, saying you should have spent the dough.
Anyway…just be prepared to top it off again in the future. Let it get rained on numerous times. Live through a winter. I would expect you’ll be topping it off first thing next spring. It’s not as solid and cementitious as the product labels lead you to believe.
Bet you a tenspot…when you give it time and see how it weathers, when you top it off, you will just pour on the surface and obsessively work into the cracks with a stiff bristle broom.
It is good stuff once you get the cracks completely full. You made the right choice in the end.
Jamie says
Hi S & J =) My friend and I DIY’d a paver path in front of my house with tumbled pavers similar to yours about 2 years ago. I, too, used just plain ‘ol paver sand and have sadly needed to add more sand to joints with every passing rainfall (which is ALOT in Oregon!) I was thinking of replacing the plain sand with the polymeric sand also but was wondering if it would crack easily due to the fact that my paver path is not on a level area. It’s a path on a fairly steep-ish (real word??) hill from my front sidewalk to my house entrance. Any thoughts if you think it would still work?? Thanks!
P.S. LOVE the grellow paint in the kitchen and laundry rooms. Wish I had painted my guest room AFTER your post! Grrrr. Lol.
YoungHouseLove says
I think it would crack if the pavers shift or move (it’s not strong enough to hold them in place if they’re not set well, but if they are it’ll add even more stability, even on a hill). Hope it helps!
xo,
s
Beth says
Our worst lesson learned is definitely our kitchen floor. Three years ago (or has it been four?) we added floor heat and tile to our kitchen, which I LOVED until several months later when the tiles started making funny cracking noises whenever we walked on them. Apparently we accidentally used the wrong mortar — the kind for tiles that go on the WALL and not the floor. We’ve been constantly replacing loose tiles for four years. Since they no longer carry that tile, we may have to rip it up and start all over if we replace too many more!!!
YoungHouseLove says
Oh nooo! I hope you don’t have to rip it up!
xo,
s
Aim says
Awesome. That I’ll keep in mind if I ever get to own an awesome house with outside-space!
Bee says
Big, BIG time (albeit sheepish) “YES!” on this one. In fact, I mentioned it in a post yesterday (newbie blog…nothing fancy). I got too eager to pull flooring up in the bathroom before we were able to afford to tile. We absolutely couldn’t let the kids dampen the subflooring during bath time, so we opted for cheap-O vinyl stick downs until we could finish another project and do the bathroom proper justice. Only…we didn’t even do the vinyl tile justice and water seeped through and we had mold damage, undetected, for about two months. Talk about a costly mistake. We’re STILL backtracking from that one (pulling hair out, rending garments, gnashing teeth, sackcloth, ashes, etc.)
Louis Cameron says
Hey John,
I used some leftover play sand to fill in the gaps of our pavers under our firepit and so far, so good (even after rains, hosings, and fires). Do you think you could acheive the same effect as the Polymeric sand by mixing playground sand with something like, a bag of Quickcrete? Might be cheaper than the tub of Polymeric and you could use the leftovers on other projects.
Louis C.
YoungHouseLove says
Yeah I think you definitely could- it would just be a ratio thing (I’d worry if it was too lumpy and firm or too thin that rain washed it out). But with some experimentation it could work I bet!
-John
Gaidig says
I think that because polymeric sand is plastic based (polymer) it is probably much more flexible than concrete, which is what makes it aceptable for this application. If you use concrete, your filled cracks would be prone to cracking with changes in the weather. If they the concrete is too strong to crack, then the pavers will be the thing that cracks.
Heather says
Oh, Paver’s cement…brings back fond memories of…2 weeks ago when we redid our walkway. What a long process that was! Unfortunately, I don’t think my husband got the memo about using plastic bags. But, we got it done, finally!
EndlessBucketList.com (Bryan) says
On the post I’m about to publish over the next few days, regarding my 24ft x 12ft paver patio, we used the polysand right off the bat, but I didn’t use the ziplock method. I basically put the sand in a big pile and used a brush to sweep it diagonal into the cracks. It took a few passes to get it all off but then I also used the leaf-blower trick. I’ll have to send you both a link to the post when it is done.
Did you guys break out the final costs as I know you were probably tracking it? I’m always curious to know how much we are really saving by doing this ourselves instead of hiring someone. It’s a great feeling to know the money saved and how you get so much more enjoyment out of it.
YoungHouseLove says
We’d love to see that post when it’s up! And as for our final cost breakdown we calculated that in original patio reveal post (which you can find by clicking the last link in this post). Just add $30 for sand on top of that final number. Hope it helps!
xo,
s
Gaidig says
Is the polymeric sand still drainable? The fact that pavers are permeable are one of the best things about them. Does the polymeric sand change that, or does it still allow water to percolate through?
YoungHouseLove says
Yup, it’s porous for nice drainage.
xo,
s
Jessica says
I can’t wait to try this on my pavers. Right now I have some weeds, but the big problem I have is the ants. They dig out the sand and use it to make little mounds. I spray, and the stay away for a while, but they always come back.
Can anyone comment on whether or not the ants would be able to dig this up?
Thanks!
YoungHouseLove says
The packaging says it deters ants and anthills, so I think it’ll definitely help.
xo,
s
Jana says
Several years ago, my mother’s day gift (at my request) was a very small area of pavers laid right by the sidewalk going to our front door. I had this brilliant idea to leave about an inch between them and fill up the space with 1″ pieces of slate we had leftover from another project, and where the slate ran short, fill in with elfin thyme.
It looked great at first, but eventually slate pieces went missing and weeds moved in. And weeding where your knuckles have to get their leverage against pavers is no fun, lemme tell ya! And since it’s right by the front door, it needs weeding often.
So I have promised myself that any future pavered area I design will have the smallest cracks possible. And I’m also glad to learn of the existence of poly-whatric sand. So thanks!
Alison says
It’s that fear of mistakes that holds me back–I shouldn’t be such a sissy.
Lauren says
Great tip! Will have to try it, as our patio, which was built about 2 years ago and was once weed free, now has some weeds growing in the cracks.
Niki says
Your post about this made me wonder whether those pesky lines in driveways that always have weeds in them could be filled with polymeric sand to avoid this problem. We pull these weeds every month or so and they seem to come back with a vengeance even worse than the previous month. Do you think it would work???
YoungHouseLove says
I would try it for sure! Seems to work on the patio!
xo,
s
Emmy says
Hi! We have a brick patio and have been battling the weeds since we moved in (ugh!) When I saw this post, I immediately forwarded the link to my husband, who is all about doing the same thing to ours. I was wondering about how long the project took to complete, and how large your patio is? We have 2 little ones who love to be outside every minute of the day, so sometimes it takes some planning to get larger projects done :)
Your patio looks great!
YoungHouseLove says
Our patio is about 350 square feet and it took an afternoon I would say. Hope it helps!
xo,
s
Ryan says
I actually used a brook to sweep it all around “big mistake”. Now my pavers are stained with a white haze.
Any advice to get rid of that?
YoungHouseLove says
Hmm, maybe try buffing them with a wire brush to see if the haze can be rubbed off if you scrub them hard?
xo,
s
Andrea says
I just wondered if you are still liking the polymeric sand since it’s been about a year. I’m putting in a patio next week and need to decide which type of sand to use. any downsides you have found to the polymeric?
YoungHouseLove says
So far no downsides for us. It’s not perfect (still got some weeds – probably growing on top of the sand) and it was a little tedious to put in compared to the regular sand, but overall I’m glad we went that route.
-John
Carolyn says
Thanks so much for sharing this! We just put in a brick/stepping stone path to our front door and just bought more sand to fill the gaps. So glad to know about the polymeric sand – will definitely try it!!!
Andrew says
Too bad Lowe’s doesn’t have it in grey – might have looked better than tan with your grey pavers.
gary dahl says
I used the lowes polymeric sand much like the first person, it wasn’t the first sand. very meticulously cleaned, brushed, blew , misted the deck–came out very nice..but now is turning green,seems to be mold or moss? actually some places in the shade are still not dry–its been weeks. Any similar experiences or suggestions? Thanks for any help
YoungHouseLove says
So strange! We didn’t have this issue. Anyone else have suggestions for Gary?
xo
s