We hoped to have all of the nursery’s extra chunky crown molding painted, cut, hung, caulked, and touched up by the end of the weekend, and we just made it by the skin of our teeth (where did that gross expression come from anyway?).
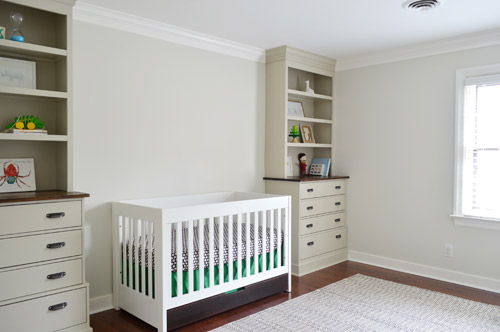
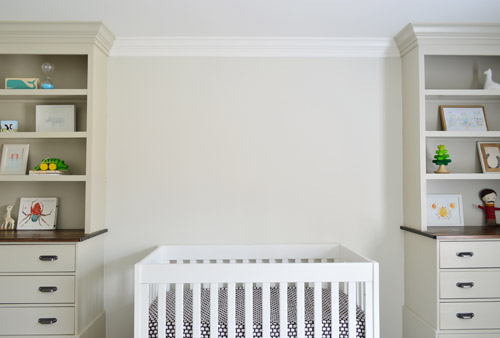
Crown is always one of the those “it’ll be nice” things on a to-do list, and then whenever we add it we’re blown away by how much of a difference it makes. Even the most basic and boxy rooms suddenly look taller and just generally upgraded in a surprisingly significant way. Which we always appreciate since a lot of the rooms in our homes have been devoid of amazing architecture (no extra high ceilings, arched doorways, cool columns, etc). So between the addition of our little corner built-ins, and the new extra chunky crown, this 11 x 13.5′ rectangle of a room is really coming along.
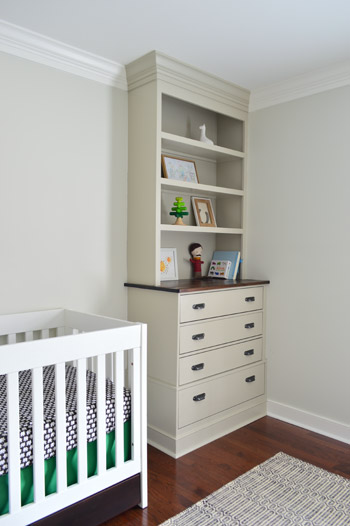
You know, after eight months of looking like this.
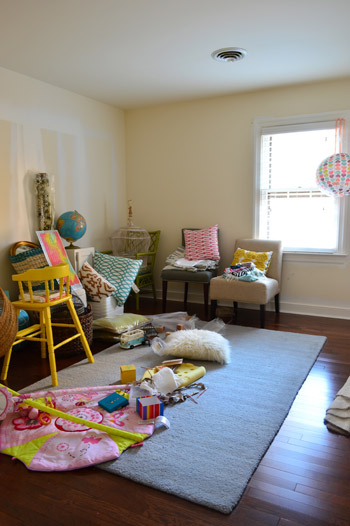
Don’t get me wrong – we still have a long way to go (there are three completely unaddressed walls, and not nearly enough color/fun/personality yet), but this chunky crown molding is a pretty glorious sight. It erased all of those unfinished cracks and crevices and made the room feel so much more polished in a few short days.
As for how we installed it, we followed the same method that we tried out in Clara’s room, which is to use 3 1/4″ baseboard as the first “layer” – and run that around the room first. We used a spacer to drop it an inch and a half down from the ceiling for more of a chunky look, a level to make sure it stayed straight, and we marked our studs with painters tape so we knew just where to fire the nail gun into the wall to hold them up.
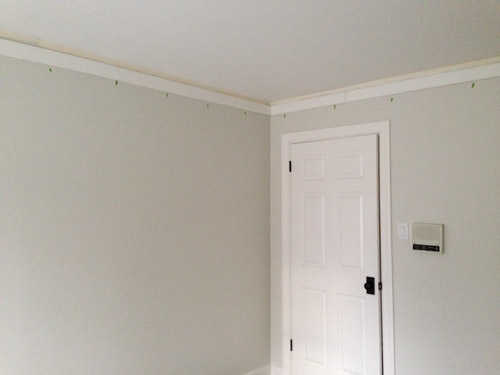
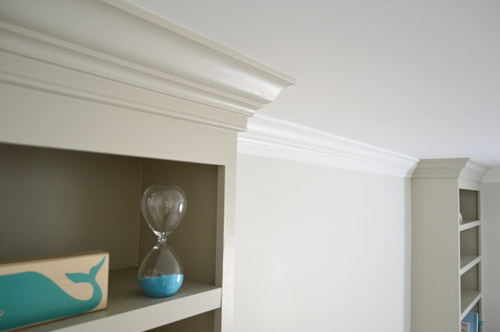
The second “layer” involved hanging actual crown molding (we got nice beefy 4 5/8″ stuff from Home Depot) right over the baseboard, for that extra chunky look. You can see how the left piece has been “crowned” and on the right there’s just baseboard waiting for us to hang crown over it to complete the look. This is how all the crown on the first floor of our house was done, along with the stuff in our master bedroom, so we wanted to keep any new crown that we added looking cohesive.
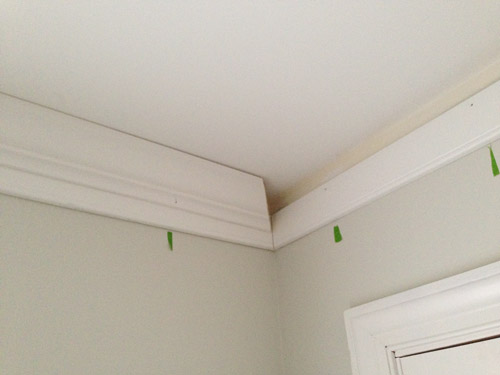
We went with pre-primed baseboard and crown to save ourselves a step, so we just had to lay it out on the floor with a drop cloth and paint it before we hung it. We prefer that to painting it in place because it’s a lot faster, and then we only need touch-ups after hanging it and caulking it. It was funny to paint just a tiny bit of it with the built-in color, and the rest of it white, but we’re really happy with how it all turned out.
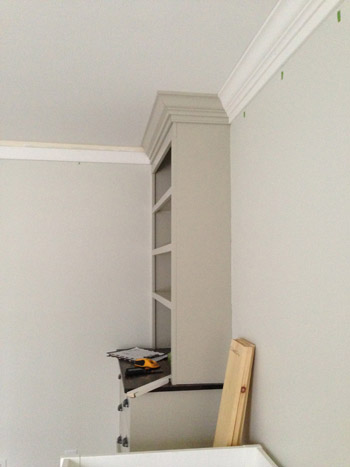
Here’s the crown between the built-ins after it was hung but before we caulked it or did any paint touch ups. See the slightly imperfect wavers of the ceiling above it? Those are nice and finished looking when you squeeze a line of caulk up along that crevice and just drag your finger across it to force it into those small gaps. And if you wipe it fast enough (we apply it about a foot at a time) you can usually get it off the pre-painted ceiling and crown so it’s just in those cracks and there’s no need to touch up the ceiling or crown again for the most part, which is nice.
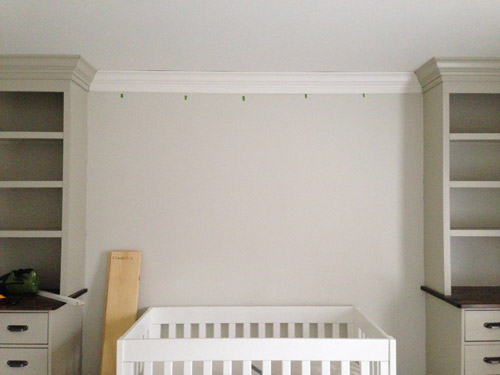
After some final paint touch ups (mostly along the nail marks that we filled with caulk), and removing all of those tape marks for the studs, it gets a lot better looking. Like so:
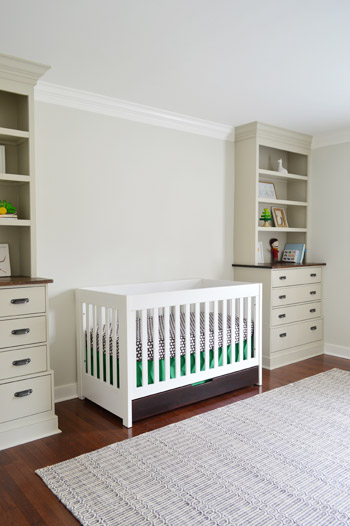
For anyone looking for additional details and photos of this chunkier crown effect using baseboards + molding, you can click here to read about how we installed it in Clara’s room. The cost of hers rung in at $137, and that’s a significantly larger room, so although we can’t find the receipt for this latest trip to Home Depot, we’re guessing it was around $115 to do the nursery. And you’ll want to add a tube or two of caulk and a can of paint to the project cost if you don’t have those on hand already.
I also finally got to dive into the crib bedding arena, which you all know I’ve been excited about thanks to John’s revelation that I wander around the house impersonating Golum and whispering “CRIIIB SKIRT.” Here’s a close up of the sweet little organic crib sheet that I found on sale from Pottery Barn for $9.99 (I think we paid something like $25+ for organic crib sheets before Clara was born, so I’m psyched to see that these have become a lot easier to find & more affordable in the last four years).
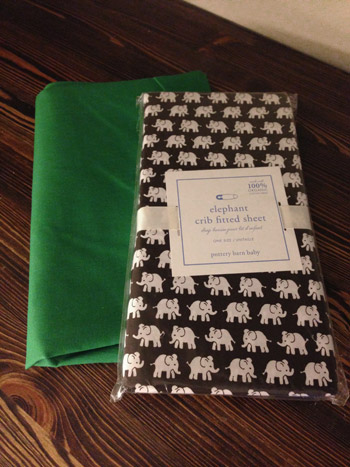
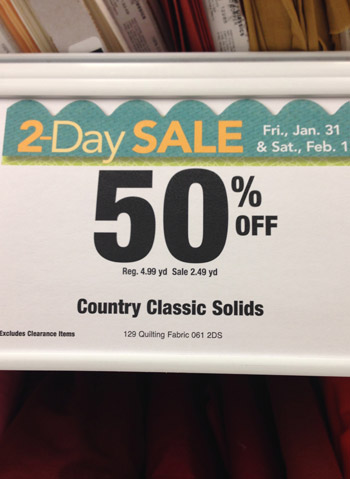
The green rectangle behind that parade of adorable elephants is just 1.5 yards of fabric that I grabbed from JoAnn during one of their 50% off sales. So the grand total for the 1.5 yards of fabric that I needed to make the crib skirt was a wallet-busing $3.73. You know I did The Mom Victory Dance at the checkout, right? For those not in the know, that involves all sorts of ridiculous movements like high fiving your embarrassed husband and waving your hands around like you’ve won the lottery when in fact you have just saved something like $3.50.
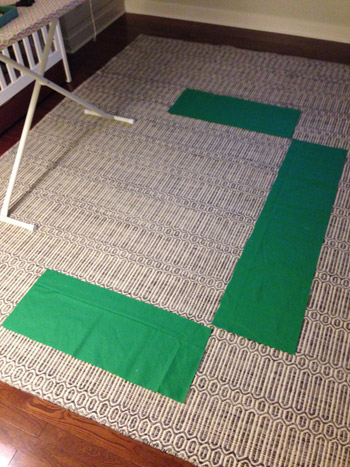
Once at home, I laid out my fabric and cut out three pieces (two sides and a front) which will make up the crib skirt. To get the measurements of those three pieces, I just measured the crib skirt area’s height and width in that section, and then added 3″ to each measurement (to account for 1.5″ hems on each side). So for example, if the measured height for the side panel of the crib was 10 inches, I added three more to make it 13 inches. And if the measured length of that side panel was 28 inches, I added another three inches to make it 31.
Oh and it would be a nice moment for me to mention that if you’re using any fabric with a pattern on it, make sure your three panels all go in the same direction and have the pattern level or centered (so you don’t end up with wonky stripes or something from cutting things in the wrong direction). You might need more yardage for certain patterns or longer crib skirts.
I debated sewing these panels together or just using Heat N’ Bond hem tape, but since the crib skirt that I made for Clara was with Heat N’ Bond, and it held up really well, I figured that was a good choice again – especially since this is more of a tucked away element in the room (for example, I sewed Clara a quilt, but I used hem tape for her crib skirt, since it’s less of a hands-on item).
As far as what materials you’ll need if you’re attempting to make a crib skirt using this method, you’re all set with fabric, hem tape, scissors, and an iron. Oh and some velcro tabs, but we’ll get to that in a minute. First you just need to use hem tape on all four backsides of each of your three panels to hem them for a nice finished look in the front.
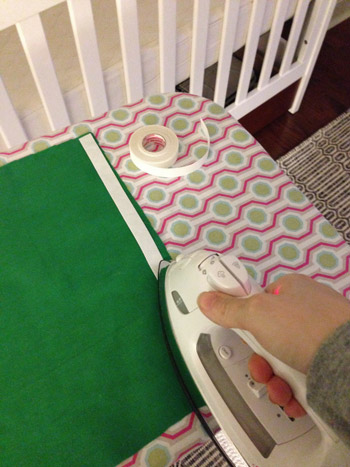
It’s really easy stuff to use, just iron it on, peel off the backing, fold the fabric over, and iron it again to make a hem. The fabric panel on the left of this picture was hemmed on all sides, and the panel on the right was also hemmed all the way around, and then I laid one more strip of hem tape down the side (along the back edge) so that I could join these two panels by ironing it on, peeling the backing, moving the second panel over the first one to overlap them, and then ironing that edge so they were fused together.
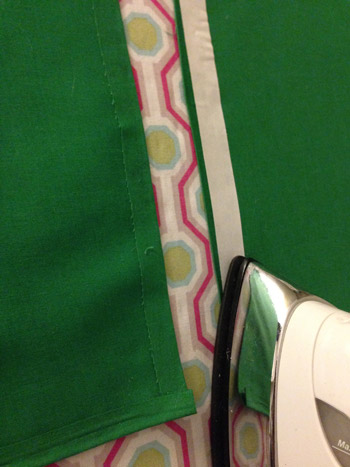
Once you turn it over, you’re left with a nice clean seam in the front of the fabric. And that seam will fall on a corner of our crib (behind one of the legs) so it won’t be seen.
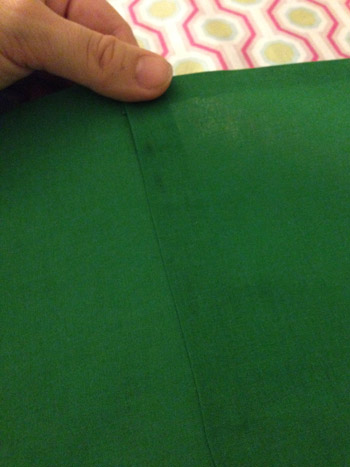
I joined the middle panel to the two end panels this way on both sides and then it was ready to be attached to the crib. I used small velcro tabs around the metal frame of the crib to hold our skirt in place (you can get them at JoAnn or Michael’s which is also where they sell Heat N’ Bond).
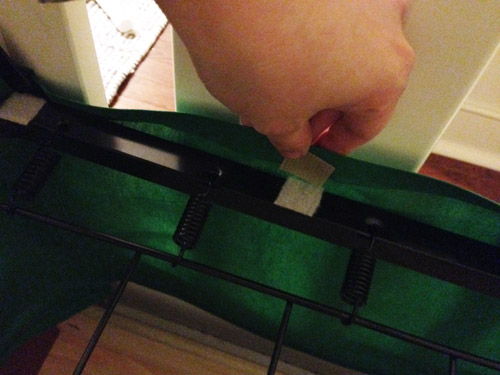
Velcro is a nice option because it makes it easy to remove and wash it if you ever need to (hem tape is washable if you follow the directions and avoid high heat).
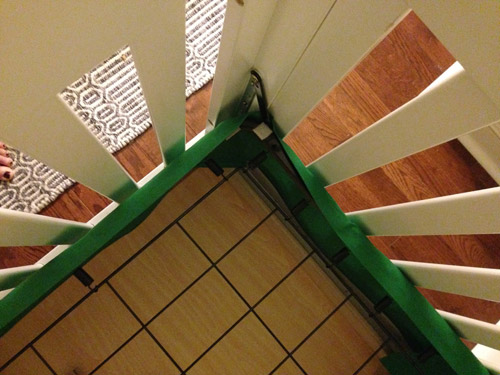
Our crib mattress will be lowered once the little guy is more mobile, so we won’t always need this skirt to bridge the gap between the bottom of the mattress and the drawer, but it’s such a fun little addition. Especially for $3.73.
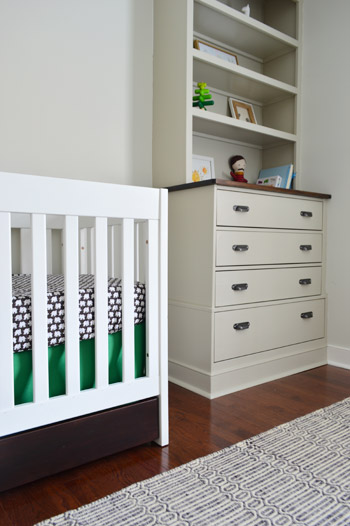
We also used two coats of satin PolyShades gel stain (in Tudor) to make the bottom drawer of the crib a little darker, since it was looking kind of reddish-orange in comparison to the floors and the wood dresser-tops. We thought a hit of darker color would be nice to ground our light-colored crib, and it would also tie into things like the dark hardware on the built-ins, the chocolate elephant crib sheet, and even the oil-rubbed bronze doorknob that leads to his room.
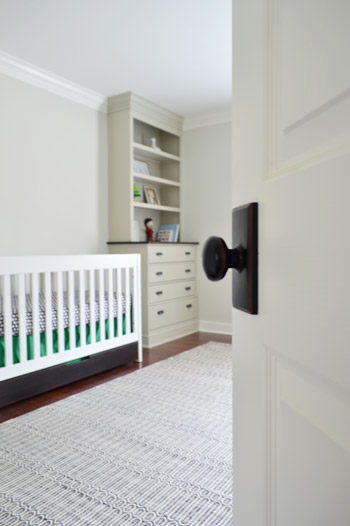
We sealed the PolyShades with two satin coats of Safecoat Acrylacq, which is an awesome non-toxic sealer that keeps things from off-gasing, since Polyshades is low-VOC but not no-VOC.
It’s probably obvious that I just tossed like eight things on the built-in bookcases so they weren’t painfully bare, but I literally gave them four minutes of my time, so I can’t wait to gather some baskets and frames and books and toys and other fun nursery items to fill them in for real. (Shout out to the lone giraffe on the top right shelf). I think they’ll end up being super functional and a nice way to add a lot more fun/color/personality to the room, so I can’t wait to get cracking.
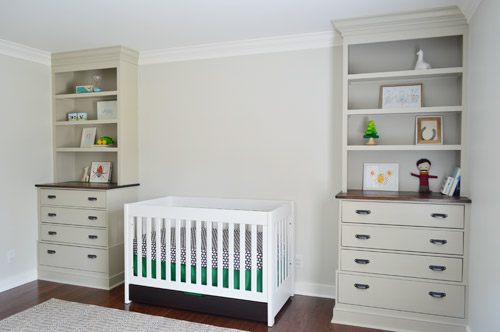
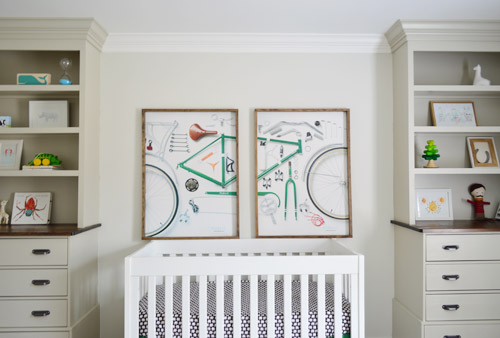
For the space above the crib, we’ve been debating everything from large scale art to some sort of accent like a slatted wall or a giant mobile. We even tried leaning the bike prints up there just to see what they’d look like, but we think they’re better suited for the opposite wall since they look a little busy with the built-ins.
So we’re planning to fill those built-ins “for real” and then see where we end up with that wall. I think we’re leaning towards a really fun large scale mobile – maybe like this but with hits of bold green, black, and white? And maybe another animal instead of birds (Burgers? Or whales since he’s The Barnacle?)…
What did you guys work on this weekend? Do you have any mostly-empty bookcases that you’re ready to go nuts on? Or some bare walls that are begging for some action?
Psst- To see our nursery progress from the very beginning, here’s the planning and rug-buying post, the dresser-sourcing post, the wall and ceiling painting rundown, the first half of built-in building, and the second half of the built-in project.

Jenny says
Another vote for the giant mobile!
Brittany M says
I just LOVE LOVE LOVE!! Now can you come do all that at my house? lol
Have a GREAT week!!
<3Britany
Jedi Mama says
Y’all! WHO thinks to… you know… just buy a couple of cheap dressers and install them as professional built-ins and paint them a shade of gray that makes me delirious with happiness?! Is there anything the two of you CANNOT accomplish with great mastery? Because this could be the crowning glory of all your posts… Well played, Young House. Well played. You’ve set the bar for little boy nurseries high with this one, and I’d like to hang a gold medal around your necks…
YoungHouseLove says
Hahaha, thanks so much Jedi Mama! You’re cracking us up over here.
xo
s
Melissa says
Hi Sherry!
So, this is really off topic, but I thought it would be the fastest way…we are going to buy the Karlstad this weekend! :) We live in Raleigh, which is three hours away from Charlotte (our closest store) and our delivery was quoted at $99 which is awesome BUT we want it sooner. I looked at the box dimensions, but it’s super confusing. Do you remember if the boxes together would fit into an SUV? We have a Pilot and a Matrix– and are just trying to gauge if we can do it on our own. I know you had yours delivered– but was it like one BIG box and a medium one?
YoungHouseLove says
Are you getting the sofa with the add on chaise like we have in our current living room or the sectional? I think the loveseat plus the add on chaise, and maybe the sofa plus the add on chaise might fit in an SUV, but I don’t think the whole u-shaped sectional we had in our last house would fit. Hope it helps!
xo
s
Jennie says
Melissa, if you go to IKEA’s website, you can find the box dimensions for each item. It will be under “product information” near the bottom. Just click on “dimensions, weight, and article numbers” :)
Jennie says
Sorry, just realized you already did this! Good luck with your sofa!
Melissa says
Thank you, thank you! Yes, we are getting it with the chaise :)
YoungHouseLove says
Good luck Melissa! Hope it fits like a glove!
xo
s
Sayward says
I got the L shaped Karl (large couch and chaise) from the as-is section. Since there were no boxes we were able to tetris it all into the back of an SUV with the seats folded down, but it was REALLY tricky and I had to ride the 1/5 hour ride home in the passenger seat cross legged with a cushion shoved at my feet and a cushion on my lap. The lap cushion reached the ceiling and rested against my body and face so all I saw were my tears of laughter soaking the upholstery. We did it, but it’s not for the faint of heart or a high maintenance traveler :)On the plus side, I LOVE the couch. Good luck!!
Sayward says
Oh and it probably goes without saying, but after we got it from the as-is section we had to take the whole thing apart… You definitely couldn’t get the whole couch in there assembled.
Amanda says
Love the skirt and the bed sheet you picked out. It’s super cute + I love animal/zoo theme rooms for little boys (and little girls!). I think you should totally do tiny whales for the mobile. I’m thinking tiny 3D stuff toy ones or something, I’m sure a quick google search could find you some real cute ones to attach to a hand made mobile. A little sweet ode to the name his big sister gave him.
YoungHouseLove says
Another fun idea! Love all the suggestions guys!
xo
s
nicole j says
I think you, John and Clara should get a canvas and make some art for above the crib….would be extra special!;-)
YoungHouseLove says
That’s a fun idea too!
xo
s
kate says
Is is too nosy to ask what kind of mattress you all chose? I am looking for a non-toxic, organic crib mattress and have found them to be pricey. Thanks!
YoungHouseLove says
Here are those details for you Kate: https://www.younghouselove.com/2010/02/nursery-progress-crib-notes/
xo
s
Katie says
I have a question about your crown molding. My husband has added crown to most of the rooms in our house, and a couple of rooms were already done before we moved in. We also installed a car siding ceiling similar to the one you all did on your porch. As the seasons change, we’ve noticed extra space where the joints are coped on the crown molding, or at the seams of the ceiling. The house was built in 1946, so nothing is square, plus we live in the midwest, so we have very cold winters and stuff expands and contracts. My question is, do you guys experience this with your molding, and how do you address it? Do you re-caulk it? We have recaulked in some rooms to have the same thing happen again. It drives me crazy when I see those joints in our otherwise beautiful rooms!
YoungHouseLove says
I would re-caulk it on the coldest day possible (when it’s the most shrunk) so you hopefully will fill those gaps once and for all.
xo
s
Nikki H says
I love the crown molding. And the bright pop of green. And the elephant crib sheet. Pretty much everything y’all have done.
We bought gel stain this weekend so we can get started on our kitchen redo. We also bought granite for the countertops. The mr. is going to try his hand at staining our bathroom cabinet with its builder grade oak before moving on to the kitchen. Keep your fingers crossed.
YoungHouseLove says
Fingers crossed!!
xo
s
Another Leslie says
Not trying to be rude or anything, but I’m really curious why you didn’t paint the built-ins all white (and the crown molding/baseboards.) Wouldn’t it look more cohesive and structurally built in?
YoungHouseLove says
No worries Leslie! Lots of people wondered about that so we addressed it in our last post about them. We’ve seen it done both ways, but here’s a room where it matches the built-ins, which we liked more. We just pictured a white stripe at the top and bottom of them looking funny – kind of like the middles are floating. So we liked the idea of grounding them with same-toned baseboards and elongating them by continuing that color on the crown.
xo
s
Lisa says
Yes, we have empty bookshelves! We purchased some that look like built-ins (it was a cheaper option by purchasing from the scratch & dent section) and they are screaming for attention. We have a set-up similar to yours with bookshelves in the corners, but we have them in our front room with our antique upright piano between them. I know what I’m doing today!
Barbara says
My two cents: I think the bicycle print is better when he’s older. Let him be a baby for a while and stick something adorable up there. They’re little for such a short time.
Kelly says
Oh man! Nurseries are my weakness and yours is turning out just so stinkin’ adorable! Love the color scheme and those BUILT-INS!! Amazing! I may need to have another baby just so I can try to reproduce this look. ;)
Karen says
Hey guys! We bought a similar crib and have found some of the paint has gotten scratched off the top rails after 2+ years of use. Nothing concerning, but something I would like to touch up before it gets used again. Did you have this problem? What would you do to fix it?
YoungHouseLove says
I would bring home swatches to see the white that matches the best and get a small test pot of that and apply it (no-VOC paint is best) and then seal it with a non-toxic choice like Safecoat Acrylacq.
xo
s
kisten says
Would love your nursery for our little guy. I stayed in this weekend and snuggled my one week old baby boy Case since it’s -11 degrees out. Worked on homemade thanks you card, a basket with his foot prints on the lid to hold all his keepsakes and watching a lot of Netflix.
YoungHouseLove says
That sounds awesome!
xo
s
Kelly Lightbeam says
This room is looking awesome! I love how you worked the trim out, with the built-ins having their own colored crown molding. It really makes them stand out.
Have you considered painting the back wall of the bookcases in a contrasting color, like your living room in house #2? I think that would be amazing!
Lovely room, I can’t wait to see more of it ;)
YoungHouseLove says
We like that idea a lot! Just want to load up the bookcases and see what we do between them before deciding on that (don’t want it to end up being a crazy-busy wall with so many elements :)
xo
s
Claire S says
This is just beautiful and I am loving seeing the transformation of the room. I am a little bit on love with those built ins and the bold green – what a lucky little chap he is! xxx
Taylee @ twist me fit says
I love how the nursery is turning out so far! By the way, I’m dying for a recent belly pic. :-)
YoungHouseLove says
Oh man, I’m large and in charge! Will have to work one of those in sometime…
xo
s
Carla says
Ugh, I’m probably the only one who finds these new builtins to be very sterile and awkward. He always does great work, but the color is drab and out of character for you, and I just find them to be overbearing. They don’t make sense. I’m not debating the extra storage, but there were other options. The big gap in the middle with those tower builtins feels very uncomfortable. This is probably one of my least favorite updates. It’s easy getting excited about builtins, and they’ve definitely given me some idea, but the way these were done repels rather than draws in healing energy to this room.
Lisa E says
To each his own I suppose as the majority of us love them! :)
Sandra T says
Um…actually, I’m not a fan either. I’ve been watching to see “where we end up” but I definitely think it is looking like an unusual choice based on Sherry and John’s past paint love! I know we all have different ideas of what we think nurseries should look like and I’ve been trying NOT to say so, but this one doesn’t look “happy” and I’m not sure that a couple of pops of green are going to change that. Sorry, majority!
YoungHouseLove says
No worries Sandra! A few people questioned if Clara’s all-white room would ever have any pattern/fun/color when we started, and now it has evolved to be such a bright and happy room! I agree that a few pops of green won’t change a thing, but we’re just getting started in here, so we have a lot more plans up our sleeve than that ;)
xo
s
Stephanie says
I don’t think the bike prints over the crib are too busy at all! I love them there!
Regardless of where you hang them…tips for hanging pictures/frames/heavy items over a crib safely?
YoungHouseLove says
Thanks Stephanie! We like using heavy duty anchors and even drilling through the frames of heavy things to make sure they’re in there good (that’s how we hung a mirror over Clara’s crib in our last house – a dab of paint on the screws blends them in and you know even if a kid hung on it, it’s not coming down).
xo
s
Kaesey says
Ok, I did nothing house related this weekend besides vacuum up all the grit that’s coming in from outside…and go see The Lego Movie and then adapt “Everything is Awesome” to whatever task was at hand. As in, wiping up the lunch mess singing “everything is sticky….”
So, nice job on the crown molding! I like your crib skirt, too, Sherry. The green is a great pop of color. =)
YoungHouseLove says
Haha! We were listening to that song in the kitchen last night before dinner. Clara loves it!
xo
s
Elisa says
Just wanted to pop in and say that I LOVE the tone on tone thing you guys have going on. It’s slightly masculine without being too overly boyish. Love it.
YoungHouseLove says
Thanks Elisa!
xo
s
Maggie Brown says
Just seeing that hourglass in the picture and knowing that you are expecting a son – you should check out the song by Mindy Gledhill “Hourglass” on youtube. She wrote it about her little boy and I adopted it as a lullaby for my son.
YoungHouseLove says
Sounds really sweet! Will check it out!
xo
s
Kate K says
Love the progress! Have you considered something like this (http://ohhappyday.com/2012/08/diy-geometric-lanterns/) for above the crib?
YoungHouseLove says
Love those too! You guys have so many fun ideas!
xo
s
Helene says
The nursery is really gorgeous. I agree the bike prints don’t belong on the crib wall. The built-ins are super. You guys work so hard!
Jessie says
While I love the built-ins, I am having a hard time with the whiteness of the crib. And the shape of the crib, too. It’s looks inexpensive compared to the built- ins. I love the sheet, but the crib skirt needs some more attention. It needs some inverted pleats.
YoungHouseLove says
Thanks Jessie! I think since there are three unaddressed walls there’s not much context for the clean lines of the crib (and the skirt, etc) but once the room has a chair and other furniture items and art and window treatments it’ll hopefully all layer in and make sense :)
xo
s
alisa says
Have you checked out baby jives mobiles? they are beautiful!!!
YoungHouseLove says
Sounds awesome! Will check them out!
xo
s
HeatherM says
Hi there. What is this crib drawer that you keep referring to? Did you build it yourself or buy it somewhere?
Also, I definitely would NOT hang anything big and heavy on the wall above the crib, for safety reasons. Things can fall or be accidentally knocked off the wall (and on to the baby), and when the baby gets a bit bigger, he can also grab the pictures and pull them down off the wall. The American Academy of Pediatrics also says it is dangerous to hang things on the wall over the crib (http://www.healthychildren.org/English/ages-stages/baby/sleep/pages/Suitable-Sleeping-Sites.aspx). Personally we will be doing a vinyl wall cling because it is safer. You guys influence and inspire SO many of your readers with your style and design, and I would really prefer to see you do so in a way that is safe and consistent with AAP guidelines.
YoungHouseLove says
Oh yes we have blogged all about how we secure things to the wall to ensure they’re 100% secure (we drilled through a mirror’s frame right into heavy duty anchors to hang a mirror over Clara’s crib so even if she yanked it couldn’t come down on her- even though it was out of her reach). We’re leaning towards a mobile here though, like I mentioned :)
The crib drawer came with the crib, so that’s not something we built. Hope it helps!
xo
s
Lesli DeVito says
I got a hankering to paint maybe a giraffe with a goat….or some crazy farm animal meets zoo animal thing on a kelly green background…maybe we should talk…I have a huge canvas i have been dying to use….the nursery looks completely amazing…I am so very envious of your built ins…spectacular!
YoungHouseLove says
Aw thanks Lesli! You’re so sweet.
xo
s
Lindsay says
I think a big bold mirror with a bicycle mobile would be so awesome above the crib!
YoungHouseLove says
That’s a fun idea too!
xo
s
Meg says
I spent my weekend doing the exact same thing. Baseboard + Crown. We were w/o power for 5 days thanks to an ice storm so the first thing I did when the power came back on was to fire up the miter saw and brad nailer. We may not have milk but we have crown! Thanks for the Kreg Crown Pro tip. That saved us hours of work and there was no colorful language dropped during this install! The nursery looks amazing the Ikea hack is brilliant.
YoungHouseLove says
So glad! Congrats on your progress!
xo
s
See Emily Shop says
Looks really pretty. Where can I find information on the door that is visible in one of the photos?
YoungHouseLove says
Do you mean the doorknob or the door? The door is just original to our house, so it was here when we moved in and we painted it Simply White by Benjamin Moore :)
xo
s
Anne says
Random question I’ve been meaning to ask for months: Where do you guys makes your videos (Like the one of Clara’s first year)? Thanks!
YoungHouseLove says
We used to use iMovie (free with a Mac) but lately have been using Final Cut Pro since we bought that for a book project a while back. Hope it helps!
xo
s
Julianne says
Holy, guys….looks awesome!! I think I wanna move right in! It looks so welcoming already and I wish I had the talent to make my shelves look like that in a hot 4 minutes. Beautiful work on everything. Really impressive! :O)
YoungHouseLove says
Aw thanks Julianne!
xo
s
carly says
I love the color of the built ins. I also can’t wait to see the green door.
For some reason, I want to paint the wall behind the crib the same color as the built ins.
YoungHouseLove says
Never even thought about that!
xo
s
Caitlin says
Lookin good! Definitely something simple over the crib. I was reluctant to hang anything heavy over a crib anyway, regardless of how well it’s attached. Maybe a DIY mobile using driftwood? :)
YoungHouseLove says
That could be really fun!
xo
s
Jane says
Yeee! Long time reader and rare commenter, but this nursery makes me smile! I started reading well after Clara was born so I missed the first baby planning festivities. Especially since I had my little girl, I was (possibly overly) excited to learn I’d get to follow your progress with baby #2!
Kelly green — swoon! And THAT rug! I want to pin all the things.
YoungHouseLove says
Aw thanks so much Jane! You’re so sweet!
xo
s
Jackie says
I like this idea for above the crib if there happen to be fabrics out there that feature bicycles or other images you’re trying to incorporate.
http://www.etsy.com/listing/111811326/red-bicycle-hoop-art-screen-printed
YoungHouseLove says
Fun! Thanks for all the suggestions and links guys!
xo
s
Bailey says
The built-ins look amazzzzing!! I love that you did the small section of grey crown molding over them. Great detail!
YoungHouseLove says
Thanks Bailey!
xo
s
Holly says
I have a question about the crib. We have the same crib and white frame is in need of some touch-ups. Have you ever touched-up your crib? If so, what brand/color paint did you use? Thanks!
YoungHouseLove says
I would bring home white paint swatches and see which one matches and get a small test pot of that in no-VOC paint (and then seal it with something non-toxic like Safecoat Acrylacq).
xo
s
Laura & the Shell says
The built ins look GREAT!! Good job!!!! Your home is getting more and more beautiful. :)
Tara says
Love my PB crib sheets:) i scored 2 brand new pink polka dot sheets on ebay for my daughter for $25. i was pretty stoked
YoungHouseLove says
So sweet!
xo
s
Jessica L says
So sweet! I’m wrapping up our baby boy’s nursery and have come to a dilema. If you had decided to put the bike prints over the crib, what would you have done to secure them to the wall so he wouldn’t have been able to pull them off/break glass? I’m wanting to do a set of frames over his changing table and know he’ll want to pull on them when he gets older and feistier. :)
YoungHouseLove says
They’re light homemade frames without any glass, so we would have screwed through the frames themselves into studs or anchors so even a kid yanking on them wouldn’t have moved them :)
xo
s
Laurie says
Boy, you guys really called it with the matching crown and baseboard on the built ins. I wouldn’t have thought of having them match the built ins themselves but it looks great!
I think a mobile of whales will be SO cute! Can’t wait to see that one.
YoungHouseLove says
Thanks so much!
xo
s
Andrea B says
Oh, I love this so much! And you’ve inspired me to try to finish my own plans for a crib skirt for our little man. I have the fabric, but I hemmed and hawed about whether to try to sew it or no-sew it so it didn’t get done.
He’s 6 weeks-old and my last few weeks of pregnancy were a whirlwind of illness and complications. So then with a newborn … yeah. Not the first thing on our to-do list lately (that would be SLEEP!) Maybe I can whip it up during nap time one of these days before the crib actually has to be lowered! ;)
YoungHouseLove says
Aw good luck Andrea!
xo
s
Jordan G @ The Happy Homebodies says
I’m really loving your projects in this room. I can’t wait to see the bicycle art on the wall. That whole wall will look amazing!
Chrissie says
I definately think you should go with a mobile like the one you linked! or a bunting.. something that is simple, but sweet. Looks great so far! We close on our first house next month, and .. omg I don’t even know where to start! lol
Meghan F says
Love the crown molding! We have those exact sheets on our son’s crib! We love them! I’m a huge fan of elephants so when I saw them I knew I had to get them. I don’t think we got them on sale though :(
Avi says
Looks great!
We are fixing up our current house to get ready for sale, while dreaming of all the projects in our new house. Like you we had to get a fixer upper to afford the neighborhood we wanted to get into.
But this weekend, we got granite counter tops installed (professionally), and laid new vinyl “wood” planks in the kitchen/entry way/ half bath. Sanded painted and primed the baseboards. Cause they were apparently wax sealed! And installed a new kitchen sink, and all the plumbing that entails.
YoungHouseLove says
Congrats on all that progress! So exciting!
xo
s
Jenny says
you need a spectacular mobile in that area.
The thing that drives me CRAZY about baby mobiles is often they are built to look cute from an adult’s perspective standing to the side, not from a babies laying down looking UP. Here is what we had in our living room over my “nursing chair” and it was worth every penny–we still use it today even though our kids are grown up!! It is a work of art and BIG…and you can customize the colors you use:
http://www.janrcarson.com/collection
And one of my favorite things, it is so light and airy, when a window is open, a gentle breeze will move it! (as will a parent blowing on it from nearby).
YoungHouseLove says
Those are amazing!!
xo
s
Jessica Leonard says
We were worried about our boy’s view when he was an infant too. So we had the cutesy mobile I put together to match the room: http://projectnursery.com/wp-content/uploads/2013/11/IMG_1648-1024×682.jpg
and then we had one of these attached to the crib for visual stimulation: http://www.babyearth.com/manhattan-toy-wimmer-ferguson-infant-stim-mobile.html
It didn’t visually look like a perfectly styled room, but the stim-mobile didn’t live there forever. ;)
YoungHouseLove says
Love those links! Thanks for sharing!
xo
s