We hoped to have all of the nursery’s extra chunky crown molding painted, cut, hung, caulked, and touched up by the end of the weekend, and we just made it by the skin of our teeth (where did that gross expression come from anyway?).
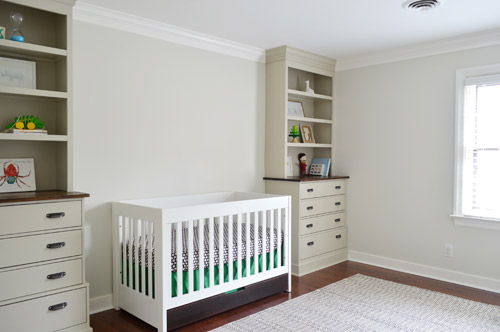
Crown is always one of the those “it’ll be nice” things on a to-do list, and then whenever we add it we’re blown away by how much of a difference it makes. Even the most basic and boxy rooms suddenly look taller and just generally upgraded in a surprisingly significant way. Which we always appreciate since a lot of the rooms in our homes have been devoid of amazing architecture (no extra high ceilings, arched doorways, cool columns, etc). So between the addition of our little corner built-ins, and the new extra chunky crown, this 11 x 13.5′ rectangle of a room is really coming along.
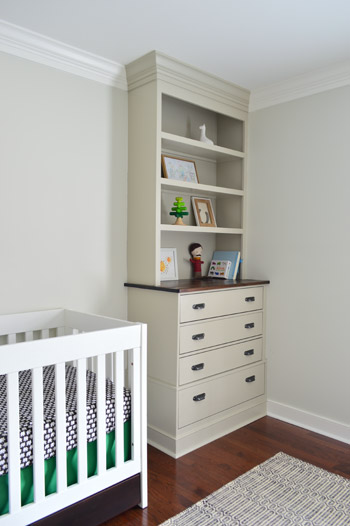
You know, after eight months of looking like this.
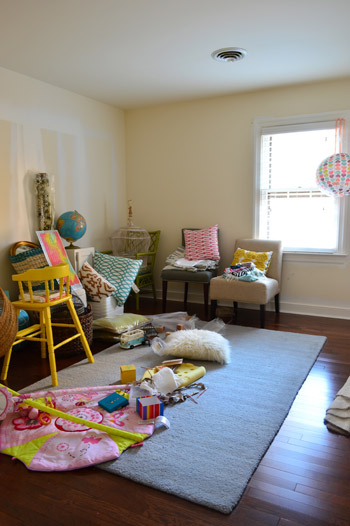
Don’t get me wrong – we still have a long way to go (there are three completely unaddressed walls, and not nearly enough color/fun/personality yet), but this chunky crown molding is a pretty glorious sight. It erased all of those unfinished cracks and crevices and made the room feel so much more polished in a few short days.
As for how we installed it, we followed the same method that we tried out in Clara’s room, which is to use 3 1/4″ baseboard as the first “layer” – and run that around the room first. We used a spacer to drop it an inch and a half down from the ceiling for more of a chunky look, a level to make sure it stayed straight, and we marked our studs with painters tape so we knew just where to fire the nail gun into the wall to hold them up.
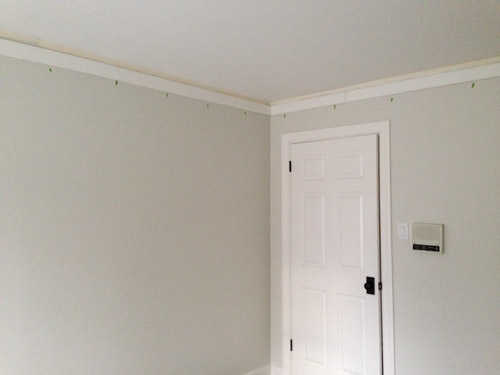
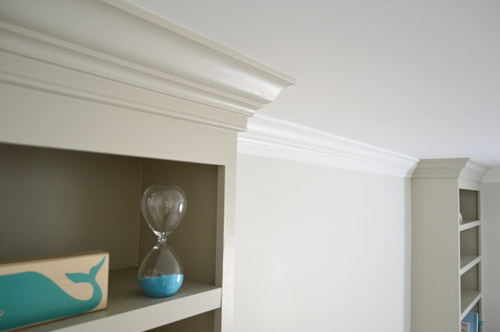
The second “layer” involved hanging actual crown molding (we got nice beefy 4 5/8″ stuff from Home Depot) right over the baseboard, for that extra chunky look. You can see how the left piece has been “crowned” and on the right there’s just baseboard waiting for us to hang crown over it to complete the look. This is how all the crown on the first floor of our house was done, along with the stuff in our master bedroom, so we wanted to keep any new crown that we added looking cohesive.
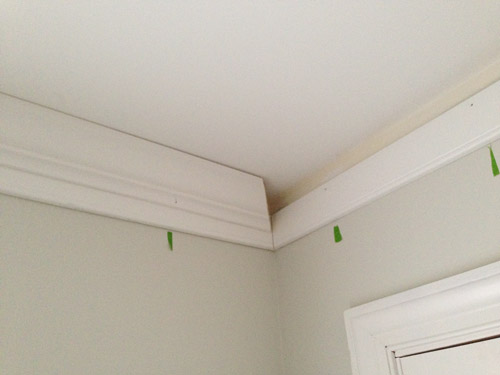
We went with pre-primed baseboard and crown to save ourselves a step, so we just had to lay it out on the floor with a drop cloth and paint it before we hung it. We prefer that to painting it in place because it’s a lot faster, and then we only need touch-ups after hanging it and caulking it. It was funny to paint just a tiny bit of it with the built-in color, and the rest of it white, but we’re really happy with how it all turned out.
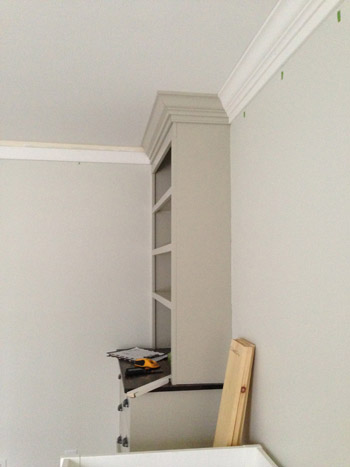
Here’s the crown between the built-ins after it was hung but before we caulked it or did any paint touch ups. See the slightly imperfect wavers of the ceiling above it? Those are nice and finished looking when you squeeze a line of caulk up along that crevice and just drag your finger across it to force it into those small gaps. And if you wipe it fast enough (we apply it about a foot at a time) you can usually get it off the pre-painted ceiling and crown so it’s just in those cracks and there’s no need to touch up the ceiling or crown again for the most part, which is nice.
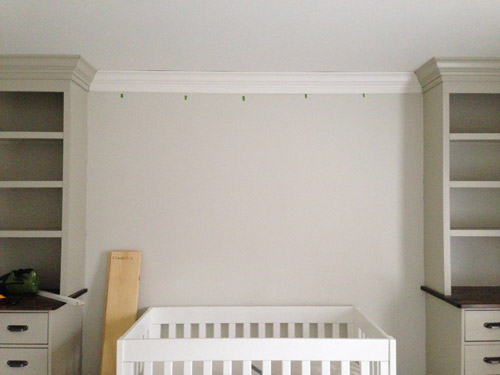
After some final paint touch ups (mostly along the nail marks that we filled with caulk), and removing all of those tape marks for the studs, it gets a lot better looking. Like so:
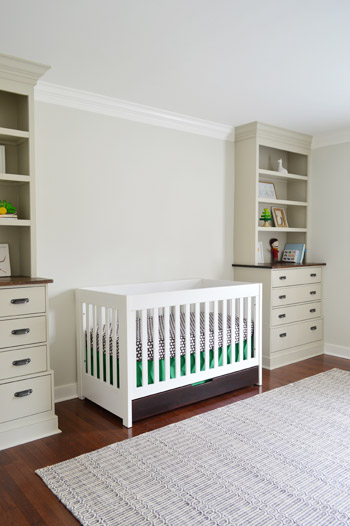
For anyone looking for additional details and photos of this chunkier crown effect using baseboards + molding, you can click here to read about how we installed it in Clara’s room. The cost of hers rung in at $137, and that’s a significantly larger room, so although we can’t find the receipt for this latest trip to Home Depot, we’re guessing it was around $115 to do the nursery. And you’ll want to add a tube or two of caulk and a can of paint to the project cost if you don’t have those on hand already.
I also finally got to dive into the crib bedding arena, which you all know I’ve been excited about thanks to John’s revelation that I wander around the house impersonating Golum and whispering “CRIIIB SKIRT.” Here’s a close up of the sweet little organic crib sheet that I found on sale from Pottery Barn for $9.99 (I think we paid something like $25+ for organic crib sheets before Clara was born, so I’m psyched to see that these have become a lot easier to find & more affordable in the last four years).
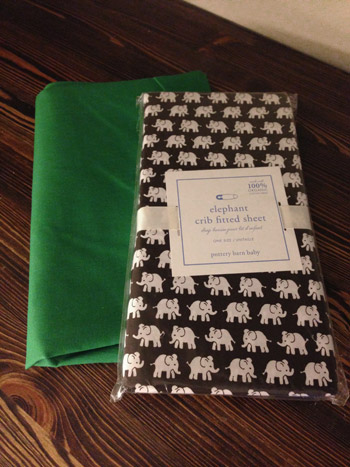
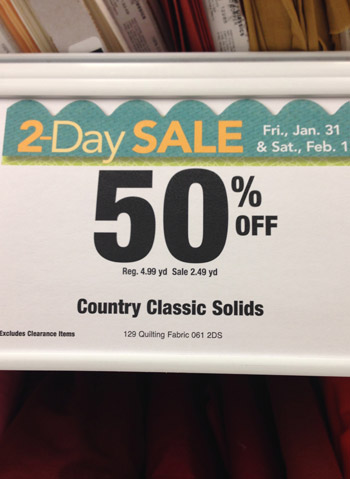
The green rectangle behind that parade of adorable elephants is just 1.5 yards of fabric that I grabbed from JoAnn during one of their 50% off sales. So the grand total for the 1.5 yards of fabric that I needed to make the crib skirt was a wallet-busing $3.73. You know I did The Mom Victory Dance at the checkout, right? For those not in the know, that involves all sorts of ridiculous movements like high fiving your embarrassed husband and waving your hands around like you’ve won the lottery when in fact you have just saved something like $3.50.
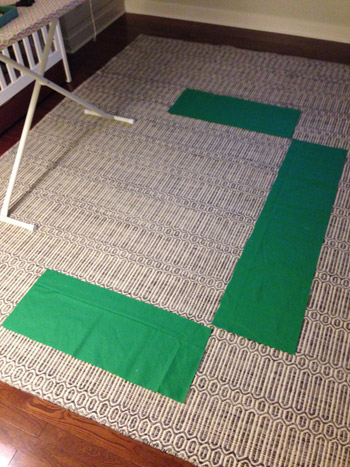
Once at home, I laid out my fabric and cut out three pieces (two sides and a front) which will make up the crib skirt. To get the measurements of those three pieces, I just measured the crib skirt area’s height and width in that section, and then added 3″ to each measurement (to account for 1.5″ hems on each side). So for example, if the measured height for the side panel of the crib was 10 inches, I added three more to make it 13 inches. And if the measured length of that side panel was 28 inches, I added another three inches to make it 31.
Oh and it would be a nice moment for me to mention that if you’re using any fabric with a pattern on it, make sure your three panels all go in the same direction and have the pattern level or centered (so you don’t end up with wonky stripes or something from cutting things in the wrong direction). You might need more yardage for certain patterns or longer crib skirts.
I debated sewing these panels together or just using Heat N’ Bond hem tape, but since the crib skirt that I made for Clara was with Heat N’ Bond, and it held up really well, I figured that was a good choice again – especially since this is more of a tucked away element in the room (for example, I sewed Clara a quilt, but I used hem tape for her crib skirt, since it’s less of a hands-on item).
As far as what materials you’ll need if you’re attempting to make a crib skirt using this method, you’re all set with fabric, hem tape, scissors, and an iron. Oh and some velcro tabs, but we’ll get to that in a minute. First you just need to use hem tape on all four backsides of each of your three panels to hem them for a nice finished look in the front.
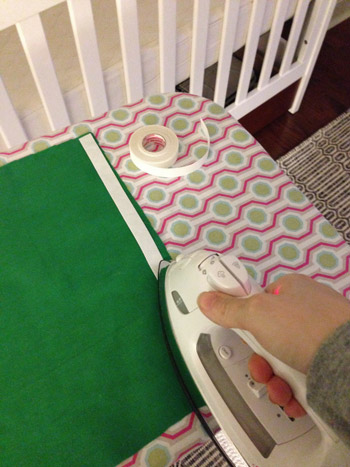
It’s really easy stuff to use, just iron it on, peel off the backing, fold the fabric over, and iron it again to make a hem. The fabric panel on the left of this picture was hemmed on all sides, and the panel on the right was also hemmed all the way around, and then I laid one more strip of hem tape down the side (along the back edge) so that I could join these two panels by ironing it on, peeling the backing, moving the second panel over the first one to overlap them, and then ironing that edge so they were fused together.
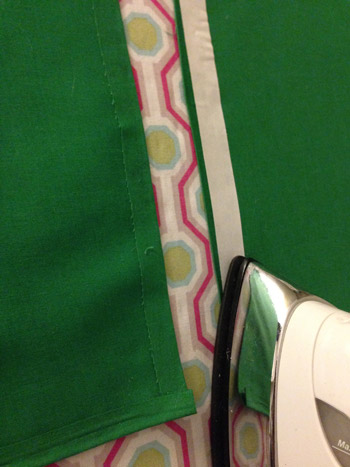
Once you turn it over, you’re left with a nice clean seam in the front of the fabric. And that seam will fall on a corner of our crib (behind one of the legs) so it won’t be seen.
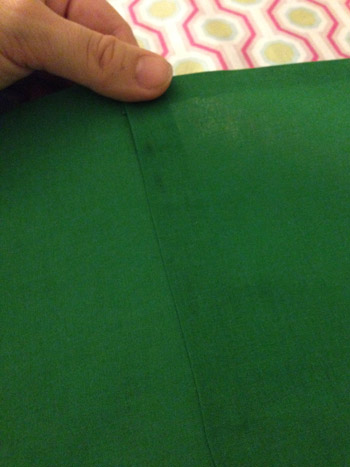
I joined the middle panel to the two end panels this way on both sides and then it was ready to be attached to the crib. I used small velcro tabs around the metal frame of the crib to hold our skirt in place (you can get them at JoAnn or Michael’s which is also where they sell Heat N’ Bond).
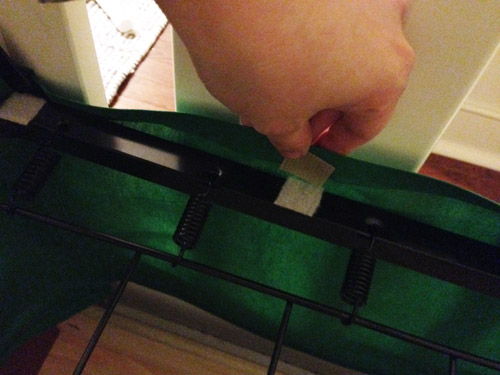
Velcro is a nice option because it makes it easy to remove and wash it if you ever need to (hem tape is washable if you follow the directions and avoid high heat).
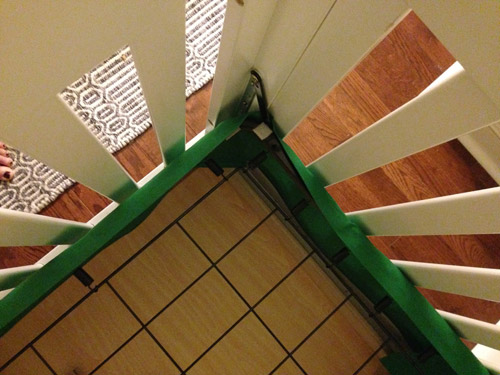
Our crib mattress will be lowered once the little guy is more mobile, so we won’t always need this skirt to bridge the gap between the bottom of the mattress and the drawer, but it’s such a fun little addition. Especially for $3.73.
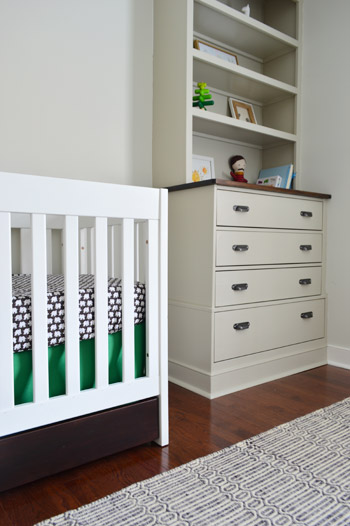
We also used two coats of satin PolyShades gel stain (in Tudor) to make the bottom drawer of the crib a little darker, since it was looking kind of reddish-orange in comparison to the floors and the wood dresser-tops. We thought a hit of darker color would be nice to ground our light-colored crib, and it would also tie into things like the dark hardware on the built-ins, the chocolate elephant crib sheet, and even the oil-rubbed bronze doorknob that leads to his room.
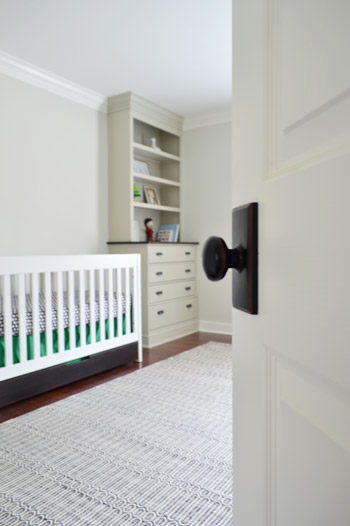
We sealed the PolyShades with two satin coats of Safecoat Acrylacq, which is an awesome non-toxic sealer that keeps things from off-gasing, since Polyshades is low-VOC but not no-VOC.
It’s probably obvious that I just tossed like eight things on the built-in bookcases so they weren’t painfully bare, but I literally gave them four minutes of my time, so I can’t wait to gather some baskets and frames and books and toys and other fun nursery items to fill them in for real. (Shout out to the lone giraffe on the top right shelf). I think they’ll end up being super functional and a nice way to add a lot more fun/color/personality to the room, so I can’t wait to get cracking.
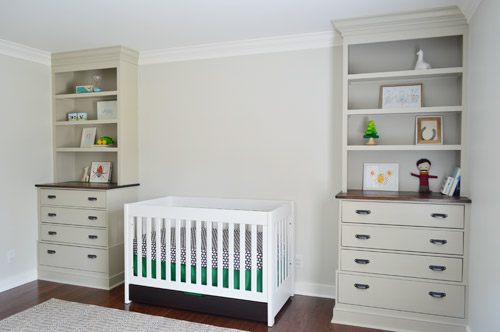
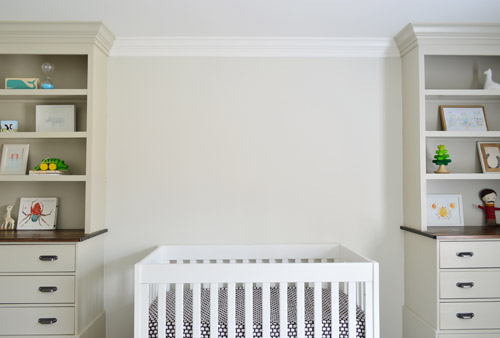
For the space above the crib, we’ve been debating everything from large scale art to some sort of accent like a slatted wall or a giant mobile. We even tried leaning the bike prints up there just to see what they’d look like, but we think they’re better suited for the opposite wall since they look a little busy with the built-ins.
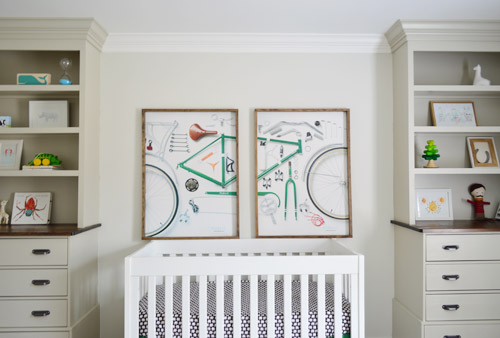
So we’re planning to fill those built-ins “for real” and then see where we end up with that wall. I think we’re leaning towards a really fun large scale mobile – maybe like this but with hits of bold green, black, and white? And maybe another animal instead of birds (Burgers? Or whales since he’s The Barnacle?)…
What did you guys work on this weekend? Do you have any mostly-empty bookcases that you’re ready to go nuts on? Or some bare walls that are begging for some action?
Psst- To see our nursery progress from the very beginning, here’s the planning and rug-buying post, the dresser-sourcing post, the wall and ceiling painting rundown, the first half of built-in building, and the second half of the built-in project.

Jeanna says
The room is really coming along! Just love it, it looks adorable :)
bella says
Everything looks amazing. This is going to be the sweetest boy’s room ever. And it will grow with him, which makes it even more a winner. Great job.
YoungHouseLove says
Thanks Bella!
xo
s
Heather says
Love it!! I am redoing my pantry, so that’s what I worked on all weekend!
YoungHouseLove says
Sounds awesome! My nesting self wants to get ours in order too!
xo
s
Tania says
Love the updates! I was wondering what brand of caulking do you guys use? My husband installed all new trim including crown molding in the nursery recently. He bought two types of caulking that barely work: one shrinks after you put it in a nail hole or crack and the other is too thick to work with. We are down to the wire to complete the nursery since our baby is due in 7 weeks.
YoungHouseLove says
Congrats on the little one on the way! We like Dap window and door caulk, but specifically the white paintable kind. Hope it helps!
xo
s
Andrea says
I am loving the built-ins, and the handmade bed-skirt is a great idea! For my son’s above crib decor, I bought peel and stick wall decor from Babies R Us, and created my own pattern. (Gave the grandma peace of mind, who objected to the name plaque I was going to hang above his crib! Gotta keep the grandma happy sometimes!)
Happy decorating!
YoungHouseLove says
Those sound really sweet!
xo
s
Kristin says
I think you need to make this adorable elephant mobile to go above the crib!
http://www.pinterest.com/pin/268175352780778063/
YoungHouseLove says
Really cute!
xo
s
Alli says
You guys are making such great progress in this room. I can’t wait to see where it ends up! I also can’t wait to find out the barnacle’s name. I’m sure it will be perfect!
Lynn @ Our Useful Hands says
The crown looks great guys. Let me just tell you to get that out there in the universe. :o)
My best, Lynn
Sara says
Wow! I liked the built ins. Now I LOVE them. I can totally see now why you made the crown match the built ins too. They look like they’ve always been there. I can’t wait to see what you do for in between the built ins!
Sara
Colleen says
That’s it, we’re tackling the crown in our living room next weekend. We have teeny tiny crown that just looks ridiculous. I can’t wait to rip it out and try this method.
On another note, we installed a front yard fence this weekend and I had the task of painting/staining every. single. piece. of it. I had a short handled brush that worked so well – the whole time I just kept thinking, thank you Sherry for the tip! I love that little brush.
YoungHouseLove says
Wahoo! So glad! Congrats on all that progress.
xo
s
Nicole S says
These bike pieces always make me think of you guys. Not that you don’t already have bike art. http://www.cb2.com/bicycle-blue-acrylic-print/f9484
YoungHouseLove says
Really cute! Thanks for the link!
xo
s
Maria says
What kind of caulk do you use for the molding? We need to do some serious caulking on our baseboards.
YoungHouseLove says
We like Dap paintable white caulk for windows and doors.
xo
s
Erin says
Huge fan of the mobile idea! Our Clara loves hers, still, which I made before she was born. It’s just so heart-warming to see her love something I made her. I think it would look perfect in that space!
Andrea says
My friend made her crib mobile (little sailboats, and twigs) and I think it came out pretty cute! You can check it out here:
http://www.carrievines.com/2013/05/kieran-newborn-baby-collection/
The nursery looks GORGEOUS so far. John is a bonafide carpenter, I’m jealous of his skillz.
YoungHouseLove says
Such a sweet mobile!
xo
s
Chanelle says
Looks great, guys! Please don’t hang anything above the crib that can fall onto or be pulled down onto the baby. It is such a huge safety hazard and its simply not worth the risk. Something affixed to the wall, like the planks, would be great!
YoungHouseLove says
Of course! We have blogged in the past all about how to make sure nothing can be pulled down or fall on a child in a nursery (or beyond – we also anchor TVs and furniture and leaning mirrors in other rooms). Safety first!
xo
s
Stephanie says
Wow that crown is … Chunky. Is that the official name for larger crown molding?
YoungHouseLove says
I’m not sure there’s an official name other than extra thick or chunky or beefed up or some other adjective like that – haha!
xo
s
Abby says
Greetings! I guess I am avoiding working on my own projects so I am having fun thinking about yours. ;) I was thinking for the large mobile it would be fun to do 3D geometric shapes. I think it really gets their mind going trying to figure those things out. I did one with straws like Bower Power showed me to (I think she called it an orb). Looks great and light weight. Also, I am seeing in the future a nice long stretch of upper bookshelves running between those built ins… Thanks and have a great day!
YoungHouseLove says
Those are fun ideas too! Thanks Abby!
xo
s
cheryl says
What about a cool mobile over the crib instead of hanging something on the wall?
YoungHouseLove says
That’s actually what we mentioned we were leaning towards in the post, complete to a link to one that we love :)
xo
s
Becca says
Wow, it looks so good! Love the contrasting color of the build-ins!
I’m trying to work up the nerve to do crown molding in our living room and I love the look of the chunkier version you do with baseboard trick. Totally stupid question: So you kind of overlap the crown over the baseboard part? So is there a small space between the crown and the wall(that you can’t see, obviously)? We actually have a surround sound system and need to hide the cords for it, and it seems like they could hide behind the crown using this method. Another stupid question: Where do you drive the nail into the crown? Through the bottom portion to go through the crown, the baseboard, and then into the stud? I’m a crown newbie! Thanks, guys! Loooove your blog.
YoungHouseLove says
Yes, thanks to spacing the baseboard down from the ceiling a bit there are some small gaps that later get covered by crown, but I’m not sure if you can fit surround sound in there. It’s worth playing around with I think! Maybe get some scrap wood to see if you can make it work? As for where to drive the nail in, we mark all the studs around the room and then drive the nail straight through the baseboard (in the middle) into the wall. Then with the crown we fire straight through the bottom of it into the baseboard and straight up across the top part into the ceiling.
xo
s
Becca says
Thanks – this was so helpful! The surround sound cord is only a speaker wire so it should fit. Thanks again!! :)
YoungHouseLove says
Good luck Becca!
xo
s
Micalla says
Baby boy P is one classy boy! I especially love how you painted the molding both “traditional white,” AND “creamy grey” (paint companies are dying to have me on their Color Naming team) to “top off” the built-ins. That alone brings a sense of character and uniqueness to the room. Brilliant!
Can’t wait to see the rest of the space once it is finished!
YoungHouseLove says
Thanks so much Micalla!
xo
s
LC says
I love this room! I saw the individual elements and thought “hmmmm” but it really pulls together in a way that’s new and different. I really was not sold on the colored trim for the builtins, but I totally get it now. Thanks for making me expand my horizons, and I can’t wait to see what’s next!
YoungHouseLove says
Thanks so much LC!
xo
s
Susan in CA says
Just wanted to say thank you SO MUCH for showing how to do an adorable crib WITHOUT bumper pads. I provide education to new moms in my county about how to provide a safe sleep environment for infants and even though bumpers are on the no-no list (babies can suffocate if they have their face next to them), some new moms don’t want to give them up because they think they look cute. I’ll be showing them pictures of your nursery to demonstrate how to be cute AND safe!!
YoungHouseLove says
Thanks Susan!
xo
s
Ms R. says
Looks great! So how would you secure those big frames to the wall so that when baby bean gets old enough and curious enough he doesn’t grab them and they fall off the wall?
YoungHouseLove says
Although we’re leaning towards a mobile, if we wanted to hang the bike frames they’re prime candidates for over a crib because they’re homemade frames without glass using small pieces of pine wood around them so they’re extra lightweight. We would have screwed right through their frames into studs to hold them up, so even if a child pulled on them they wouldn’t budge.
xo
s
Elizabeth says
We painted Baby boy # 2’s nursery Black Pepper this weekend. Thanks for the color inspiration!
YoungHouseLove says
So exciting! We love that color so much!
xo
s
MJ says
beautiful nursery. your built-ins looking amazing and wicked idea for the bedskirt.
YoungHouseLove says
Thanks MJ!
xo
s
Tiz Larkin says
Looks fantastic. Love the colours but would have stained the cot in the same timber as the shelf.
YoungHouseLove says
That would have been fun too!
xo
s
Evelyn W says
When did John become a master carpenter?
This isn’t just good, this is amazerballs.
Also, you guys should bottle up your energy and enthusiasm and sell it.
YoungHouseLove says
Aw thanks Evelyn! I’m reading your comment out loud to John because he’s still all shy and coy about his building skills and I’m trying to hammer it into his head that he’s good! You’re so sweet to help my case ;)
xo
s
Adrienne says
I don’t know if your Ikea dressers have the same particle board bottoms as most other Ikea dressers, but I’ve noticed that my kids tend to push on them (stuffing clothes, leaning on them them while getting stuff out, etc.). Over time, the bottoms on a few drawers have partially come out of their grooves in the drawer sides. I’ve popped them back into the grooves and used a little gorilla glue (Elmers might work too, but gorilla glue hardens into a nice foam that really locks stuff in place). Just a warning as the solid wood Ikea dressers are really nice, but the bottoms can be flimsy (or maybe my kids are just really rough).
YoungHouseLove says
Thanks Adrienne! I will have to check on ours (don’t remember if they’re wood bottoms or those thinner ones you describe). Thanks for the tip!
xo
s
Sydnie F says
I can’t believe how fast this room is coming together! You guys are on fire right now.
I think a huge mobile would be really cool in that wall space. I made three vellum mobiles for my daughter’s nursery and it is still one of my favorite and easiest projects. It was also incredibly affordable and completely customizable, since vellum paper comes in lots of colors. Here is the tutorial from Oh Happy Day: http://ohhappyday.com/2010/04/vellum-mobiles/ . And this is a great source for vellum (they do single sheets, not just huge packs): http://www.paperandmore.com/vellum-paper?gclid=CNL-xuWrwrwCFUcaOgodGHwA1Q
Keep up the good work!
YoungHouseLove says
Thanks so much Sydnie! Love the links!
xo
s
Gail says
You guys are so freakin’ awesome! :) Love the built-ins. They look amazing…also the crown- wow! And I’m pinning this crib skirt tutorial…looks so easy!! Thanks! And last but not least—the mobile idea! I think a fun whale mobile in bright colors like you said would be perfect. :)
Thanks always for the inspiration. Just think—very soon you’ll be holding that sweet baby and you can just soak him in and know that every little thing you did to prepare for him led up to that moment. It’s the greatest feeling!
Hugs,
Gail
YoungHouseLove says
Aw thanks so much Gail, you’re so sweet!
xo
s
Ash says
LOVE it love it love it :) And that happy dancing for serious sale items – described to perfection :) Seriously amazing job beautiful work
Laura C says
This room is coming along so nicely! I love those elephant sheets – I bought the same ones for my niece and I have to say, I’m a little mad that Pottery Barn doesn’t make them for adult mattresses, too.
YoungHouseLove says
I know right?! We want some! Haha!
xo
s
Gnome Lover says
I love the crown molding! I also love the colors you chose. Really cool! When I saw the art work hanging over the crib, my heart skipped a beat. Here in California, nothing can hang over our beds. But then I remembered you guys don’t have our earthquakes. You can accessorize walls!
Jenni
Kutiel says
I really love your built ins. I am tempted to do the same for my tiny guest room. But then I’d have to find new homes to hide the deer heads..
Amanda says
Love how this room is turning out, you guys! It’s so sweet and not overly “boy”. You guys know just how to create perfect balance in a room — can’t wait to see more!!
Susan says
Love what you have done so far. The Built ins look so high end. Nurseries/kids rooms are my favorite to design.
Susan Winters says
The room is coming along beautifully. You guys do such lovely work. I loved the bird mobile idea. You could choose different types of birds or make them the same but in different colors. I particularly liked how they did that one with different markings on each bird, but I’m drawn to linear art and art that mirrors abigorinal markings. Little chihuahuas in different poses would be sweet because the little one will quickly relate to it.
I’ve done that victory dance, embarrassed husband and all. LOL! Live a bargain.
Annie says
I LOVE that crib sheet! From a distance it looks all cool and geometric, but up close it’s cute and animal-y!
Arlene says
I came across this nautical mobile and thought of Baby Barnacle! Just thought I would share because I thought it was so cute!
http://feltandhoney.com/2012/01/11/nautical-baby-mobile/
YoungHouseLove says
SO COOL!
xo
s
Paula M. says
Love how the room is shaping up and the difference the crown molding makes. Good job! It’s coming together as a really sweet, creative room :)
As for the space above the crib, this may just be because I live in Earthquake Country (east of San Francisco), but the idea of framed art hanging on a wall above a crib freaks me out! …
For that reason, I’d be thinking something like a lightweight mobile, or maybe removable high-end decals on the walls or even a stencil effect on just that one part of the wall between the built-ins, rather than framed art or some other heavy thing. ….
But is that not a concern in your region?
YoungHouseLove says
We had a mirror hanging over Clara’s crib in our first and second house (we blogged all about how we screwed right though the mirror frame and used heavy duty anchors so even John couldn’t yank them out of the wall once they were secured). We’re actually leaning towards a mobile here though (we linked to one that we love right in this post) and if we hung the bike prints those have no glass and incredibly light pine frames so they would have been easy to screw into the wall so they’d never come off unless we unscrewed them :)
xo
s
Katie says
I so appreciate the crib skirt tutorial! We are also expecting this spring, and I was planning to just not do a crib skirt because they are so expensive (we’re also having a boy after a girl). But I think I can swing a few bucks for solid fabric and give this a try!
YoungHouseLove says
Good luck Katie!
xo
s
Morgan says
I worked on my kitchen this weekend. I am hoping to have a post up on it soon, but I am revitalizing it. Did the painting this weekend. Weather permitting, I will be able to get the trim painted on Wednesday. When it snows in the South, everything comes to a standstill. The built-ins are awesome, by the way. Have pinned them and saving that idea for another day.
YoungHouseLove says
Aw thanks Morgan. Good luck with your kitchen (and this crazy weather- we’re hearing 12-20″ this Wed/Thurs!).
xo
s
Ashleigh says
Have you considered a custom vinyl quote/ decal above the crib? We did this in our baby’s nursery so we didn’t have to worry about anything falling in the crib. http://www.sweetumssignatures.com/i-love-you-alphabet-wall-decals.html Ours is navy with red I (heart) U. We LOVE it! Just adds such a visual walking in and it doesn’t break the bank!
YoungHouseLove says
That’s a really sweet idea too! Thanks for the link Ashleigh!
xo
s
Traci says
It is looking beautiful. My two favorite details in the room are the blue sand hourglass and the elephant sheet. The latter is a given–I am obsessed with all things elephant! I would use those sheets myself. :]
Holly says
Duuuuude! His nursery is coming along so well!
I saw this wallpaper and totally thought of you guys – wouldn’t it look awesome in Barnacle’s room?
http://www.hyggeandwest.com/collections/view-all/products/daydream-gray
I’m getting some in another color and framing it like art. ;)
YoungHouseLove says
Ahhh! I love it! Just ordered a sample for $5 to frame. Hope there’s at least one of those sweet green birds in it!
xo
s
Lauren says
Looking great! Every time you do a post about crown I get so inspired! We have 4 rooms in our house that don’t have crown, but they all have some type of vaulted/angled ceiling so I’m scared. I’ve looked at tutorials, but I’m still unsure! I need to get over it just do it!! : )
YoungHouseLove says
Good luck Lauren! You can totally do it!
xo
s
Karen says
Adorbs!!!
Marcy says
Have you seen the Montessori mobile progressions? There are some pictures of babies enjoying their various mobiles on this site: http://www.howwemontessori.com/how-we-montessori/infant-mobiles/
The idea is to cater to the infants’ natural attention progression.
Making multiple mobiles might seem a little crazy to some, but many of the examples are very beautiful too and might hit your inspiration bone just right.
YoungHouseLove says
Never heard of that! It’s a really fun idea!
xo
s
Marcy says
Also, I love those built-ins. They are amazing and definitely look high-end custom. I can’t imagine what it would have cost to hire a finish carpenter to build something like that.
YoungHouseLove says
Aw thanks Marcy! I keep meaning to show a picture of them to the showhouse carpenter to ask what he’d charge – just so I can tell John how amazing he is with some sort of concrete number. Haha!
xo
s
Katie says
Quick question. What is the color of the walls of the nursery?
Thanks
Room is looking cute!
YoungHouseLove says
They’re Going To The Chapel by Ben Moore.
xo
s