We hoped to have all of the nursery’s extra chunky crown molding painted, cut, hung, caulked, and touched up by the end of the weekend, and we just made it by the skin of our teeth (where did that gross expression come from anyway?).
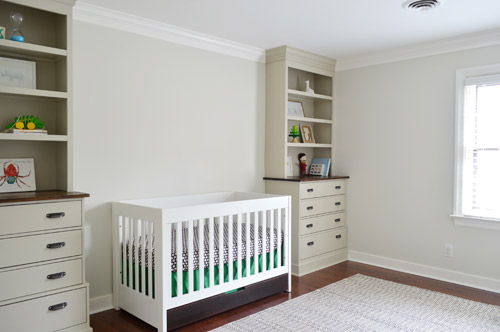
Crown is always one of the those “it’ll be nice” things on a to-do list, and then whenever we add it we’re blown away by how much of a difference it makes. Even the most basic and boxy rooms suddenly look taller and just generally upgraded in a surprisingly significant way. Which we always appreciate since a lot of the rooms in our homes have been devoid of amazing architecture (no extra high ceilings, arched doorways, cool columns, etc). So between the addition of our little corner built-ins, and the new extra chunky crown, this 11 x 13.5′ rectangle of a room is really coming along.
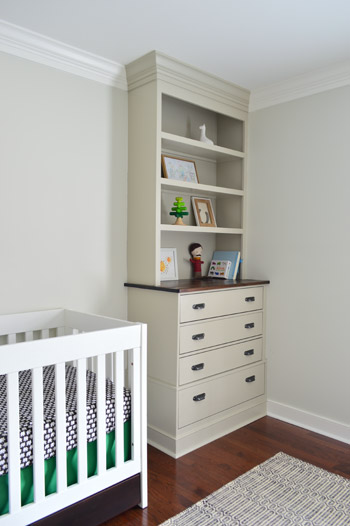
You know, after eight months of looking like this.
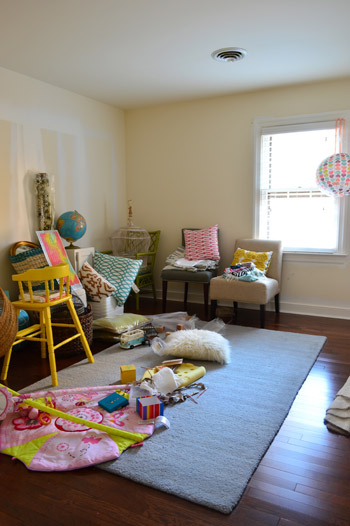
Don’t get me wrong – we still have a long way to go (there are three completely unaddressed walls, and not nearly enough color/fun/personality yet), but this chunky crown molding is a pretty glorious sight. It erased all of those unfinished cracks and crevices and made the room feel so much more polished in a few short days.
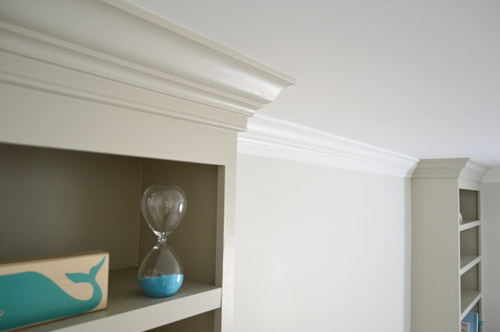
As for how we installed it, we followed the same method that we tried out in Clara’s room, which is to use 3 1/4″ baseboard as the first “layer” – and run that around the room first. We used a spacer to drop it an inch and a half down from the ceiling for more of a chunky look, a level to make sure it stayed straight, and we marked our studs with painters tape so we knew just where to fire the nail gun into the wall to hold them up.
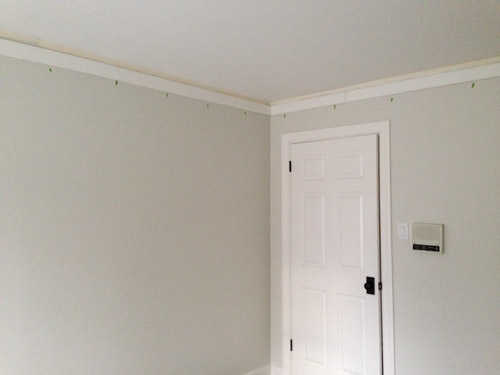
The second “layer” involved hanging actual crown molding (we got nice beefy 4 5/8″ stuff from Home Depot) right over the baseboard, for that extra chunky look. You can see how the left piece has been “crowned” and on the right there’s just baseboard waiting for us to hang crown over it to complete the look. This is how all the crown on the first floor of our house was done, along with the stuff in our master bedroom, so we wanted to keep any new crown that we added looking cohesive.
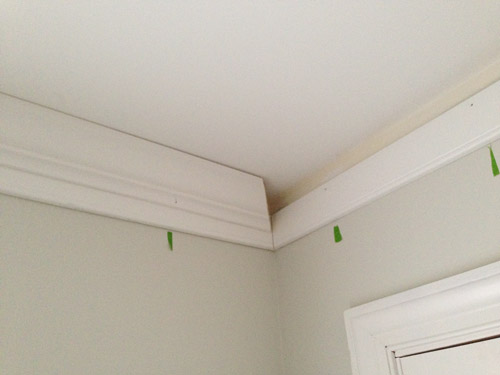
We went with pre-primed baseboard and crown to save ourselves a step, so we just had to lay it out on the floor with a drop cloth and paint it before we hung it. We prefer that to painting it in place because it’s a lot faster, and then we only need touch-ups after hanging it and caulking it. It was funny to paint just a tiny bit of it with the built-in color, and the rest of it white, but we’re really happy with how it all turned out.
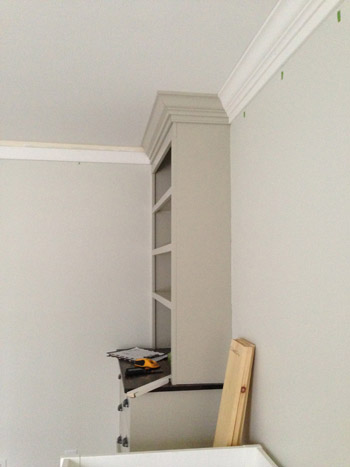
Here’s the crown between the built-ins after it was hung but before we caulked it or did any paint touch ups. See the slightly imperfect wavers of the ceiling above it? Those are nice and finished looking when you squeeze a line of caulk up along that crevice and just drag your finger across it to force it into those small gaps. And if you wipe it fast enough (we apply it about a foot at a time) you can usually get it off the pre-painted ceiling and crown so it’s just in those cracks and there’s no need to touch up the ceiling or crown again for the most part, which is nice.
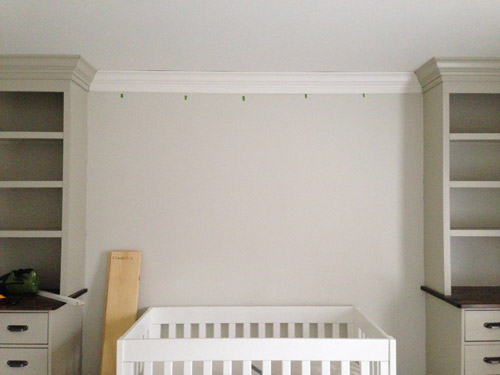
After some final paint touch ups (mostly along the nail marks that we filled with caulk), and removing all of those tape marks for the studs, it gets a lot better looking. Like so:
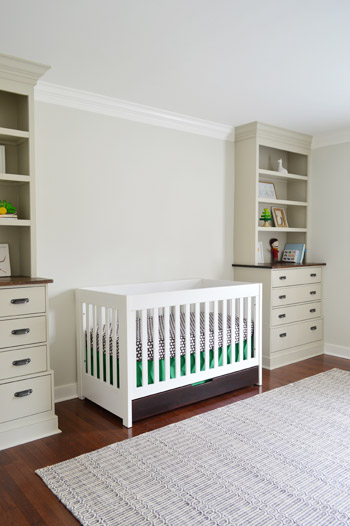
For anyone looking for additional details and photos of this chunkier crown effect using baseboards + molding, you can click here to read about how we installed it in Clara’s room. The cost of hers rung in at $137, and that’s a significantly larger room, so although we can’t find the receipt for this latest trip to Home Depot, we’re guessing it was around $115 to do the nursery. And you’ll want to add a tube or two of caulk and a can of paint to the project cost if you don’t have those on hand already.
I also finally got to dive into the crib bedding arena, which you all know I’ve been excited about thanks to John’s revelation that I wander around the house impersonating Golum and whispering “CRIIIB SKIRT.” Here’s a close up of the sweet little organic crib sheet that I found on sale from Pottery Barn for $9.99 (I think we paid something like $25+ for organic crib sheets before Clara was born, so I’m psyched to see that these have become a lot easier to find & more affordable in the last four years).
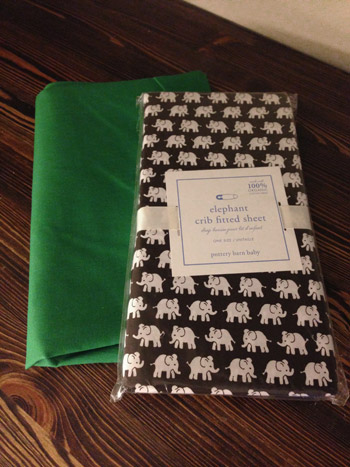
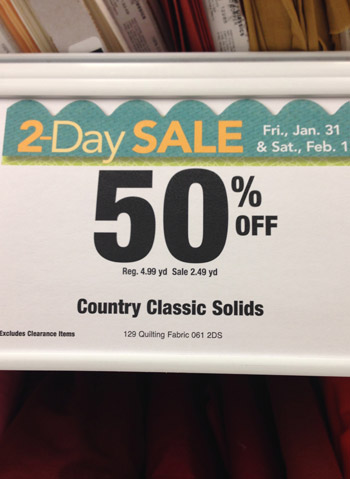
The green rectangle behind that parade of adorable elephants is just 1.5 yards of fabric that I grabbed from JoAnn during one of their 50% off sales. So the grand total for the 1.5 yards of fabric that I needed to make the crib skirt was a wallet-busing $3.73. You know I did The Mom Victory Dance at the checkout, right? For those not in the know, that involves all sorts of ridiculous movements like high fiving your embarrassed husband and waving your hands around like you’ve won the lottery when in fact you have just saved something like $3.50.
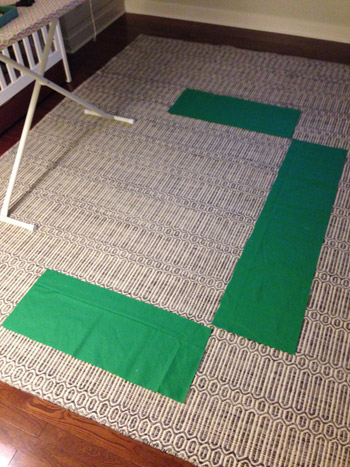
Once at home, I laid out my fabric and cut out three pieces (two sides and a front) which will make up the crib skirt. To get the measurements of those three pieces, I just measured the crib skirt area’s height and width in that section, and then added 3″ to each measurement (to account for 1.5″ hems on each side). So for example, if the measured height for the side panel of the crib was 10 inches, I added three more to make it 13 inches. And if the measured length of that side panel was 28 inches, I added another three inches to make it 31.
Oh and it would be a nice moment for me to mention that if you’re using any fabric with a pattern on it, make sure your three panels all go in the same direction and have the pattern level or centered (so you don’t end up with wonky stripes or something from cutting things in the wrong direction). You might need more yardage for certain patterns or longer crib skirts.
I debated sewing these panels together or just using Heat N’ Bond hem tape, but since the crib skirt that I made for Clara was with Heat N’ Bond, and it held up really well, I figured that was a good choice again – especially since this is more of a tucked away element in the room (for example, I sewed Clara a quilt, but I used hem tape for her crib skirt, since it’s less of a hands-on item).
As far as what materials you’ll need if you’re attempting to make a crib skirt using this method, you’re all set with fabric, hem tape, scissors, and an iron. Oh and some velcro tabs, but we’ll get to that in a minute. First you just need to use hem tape on all four backsides of each of your three panels to hem them for a nice finished look in the front.
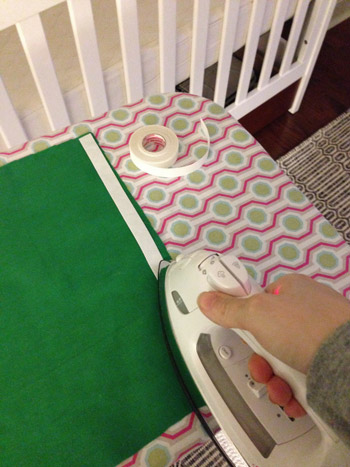
It’s really easy stuff to use, just iron it on, peel off the backing, fold the fabric over, and iron it again to make a hem. The fabric panel on the left of this picture was hemmed on all sides, and the panel on the right was also hemmed all the way around, and then I laid one more strip of hem tape down the side (along the back edge) so that I could join these two panels by ironing it on, peeling the backing, moving the second panel over the first one to overlap them, and then ironing that edge so they were fused together.
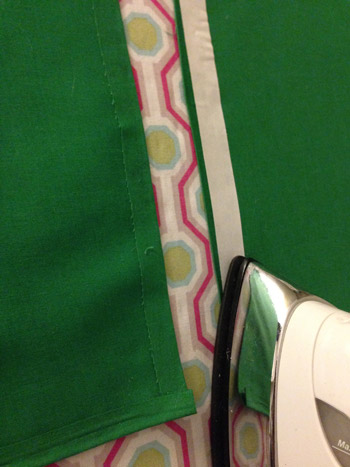
Once you turn it over, you’re left with a nice clean seam in the front of the fabric. And that seam will fall on a corner of our crib (behind one of the legs) so it won’t be seen.
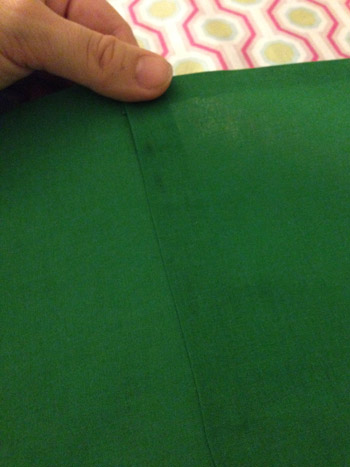
I joined the middle panel to the two end panels this way on both sides and then it was ready to be attached to the crib. I used small velcro tabs around the metal frame of the crib to hold our skirt in place (you can get them at JoAnn or Michael’s which is also where they sell Heat N’ Bond).
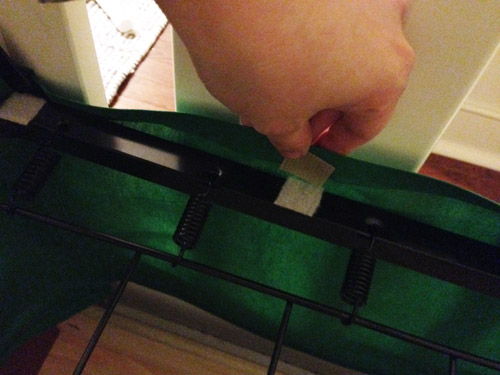
Velcro is a nice option because it makes it easy to remove and wash it if you ever need to (hem tape is washable if you follow the directions and avoid high heat).
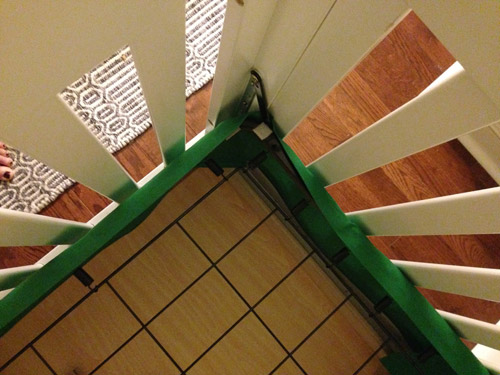
Our crib mattress will be lowered once the little guy is more mobile, so we won’t always need this skirt to bridge the gap between the bottom of the mattress and the drawer, but it’s such a fun little addition. Especially for $3.73.
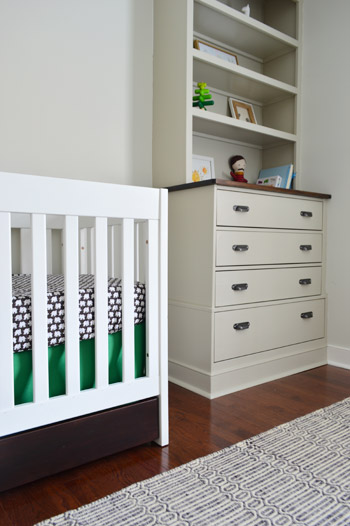
We also used two coats of satin PolyShades gel stain (in Tudor) to make the bottom drawer of the crib a little darker, since it was looking kind of reddish-orange in comparison to the floors and the wood dresser-tops. We thought a hit of darker color would be nice to ground our light-colored crib, and it would also tie into things like the dark hardware on the built-ins, the chocolate elephant crib sheet, and even the oil-rubbed bronze doorknob that leads to his room.
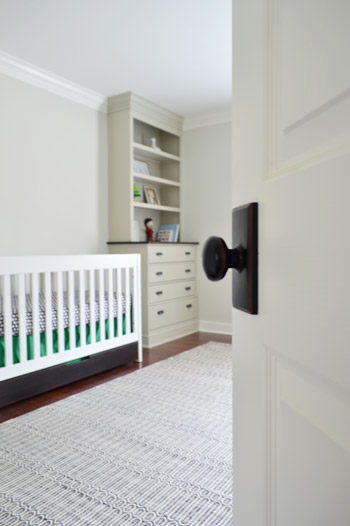
We sealed the PolyShades with two satin coats of Safecoat Acrylacq, which is an awesome non-toxic sealer that keeps things from off-gasing, since Polyshades is low-VOC but not no-VOC.
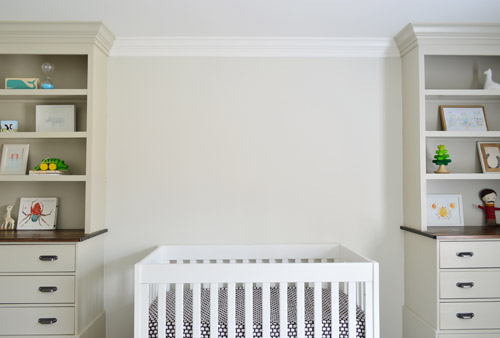
It’s probably obvious that I just tossed like eight things on the built-in bookcases so they weren’t painfully bare, but I literally gave them four minutes of my time, so I can’t wait to gather some baskets and frames and books and toys and other fun nursery items to fill them in for real. (Shout out to the lone giraffe on the top right shelf). I think they’ll end up being super functional and a nice way to add a lot more fun/color/personality to the room, so I can’t wait to get cracking.
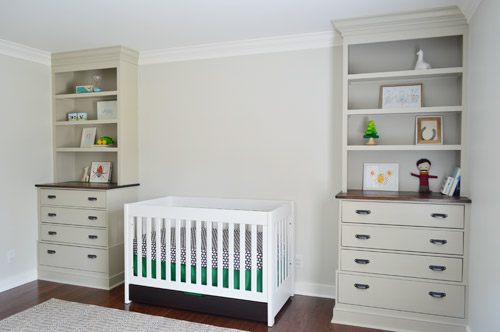
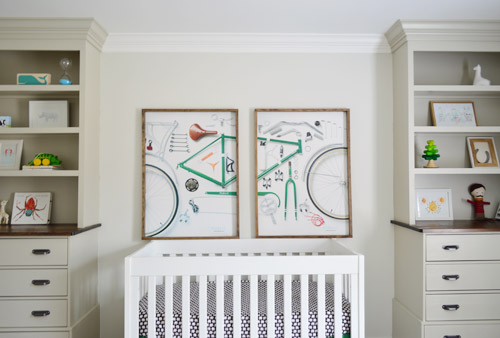
For the space above the crib, we’ve been debating everything from large scale art to some sort of accent like a slatted wall or a giant mobile. We even tried leaning the bike prints up there just to see what they’d look like, but we think they’re better suited for the opposite wall since they look a little busy with the built-ins.
So we’re planning to fill those built-ins “for real” and then see where we end up with that wall. I think we’re leaning towards a really fun large scale mobile – maybe like this but with hits of bold green, black, and white? And maybe another animal instead of birds (Burgers? Or whales since he’s The Barnacle?)…
What did you guys work on this weekend? Do you have any mostly-empty bookcases that you’re ready to go nuts on? Or some bare walls that are begging for some action?
Psst- To see our nursery progress from the very beginning, here’s the planning and rug-buying post, the dresser-sourcing post, the wall and ceiling painting rundown, the first half of built-in building, and the second half of the built-in project.

Anne says
I think y’all are going to love these built ins for many years to come! It’s a great base, and while it is a little bit of beige overload, I know you’ll fill it with life and color!
I think a mobile will look so elegant and playful above the crib. I was always sorry I never made one for my little girl.
So happy for your little barnacle. :)
Jess says
We have the same fitted sheet for our little boy’s crib. I love it but I will warn you. At night, with just a night light on, the elephants dance. Since the rows face opposite directions, it toally looks like they are walking. It’s freaky! Maybe it only happens once the exhaustion sets in but both my husband and I have noticed it :)
YoungHouseLove says
So funny! I’ll keep an eye out for dancing elephants!
xo
s
Nicole says
Maybe it was asked in the comments but what are you doing for a changing table or will a changing pad fit on those built ins? I always used the dresser like you guys did for Clara so I was curious what you were doing this time around?
YoungHouseLove says
A changing pad will fit on the built-ins but we’re thinking once he gets longer he might kick the shelf so we’re probably going to use some sort of console or cubby system on the wall across from the crib (so it can work double-duty to store baskets of toys and the top can work for changing).
xo,
s
Tracy says
I think I’d hang a string of penants above the crib. You could make one really cheaply with scrap fabrics. Good way to add pattern to the room, it would be soft and curve (to contrast the hard and straight lines you have with the crib and built-ins), and could add a lot of color as well. You could even put a monogram on one of them, a birth date, etc…like the needlework samplers people do for babies.
YoungHouseLove says
That sounds sweet too! Love all the ideas guys!
xo
s
Chelsea says
Hey guys,
Where is your crib from? We’re expecting our own little one and we’re in the process of crib shopping…it looks like IKEA, but I’m not positive. Would love to know where we might be able to find one similar. BTW, I love how this nursery for little man is turning out. :)
YoungHouseLove says
Thanks so much Chelsea! Here’s that post for ya: https://www.younghouselove.com/2010/02/nursery-progress-crib-notes/
xo
s
Mackenzie says
I think a special family picture or multiple small family pictures would be cute above the crib! A picture of the family including the new member; a picture of the current family; and/or even a picture of Clara with the Mustache Man! Love what you have done with the room and I am super excited to see the end product and the new member of the family! Congrats!
Mackenzie says
http://www.pinterest.com/pin/548242954609982508/
http://www.pinterest.com/pin/548242954609895501/
And you can even do his name above his crib! (in green letters??)
YoungHouseLove says
Really cute! Love all the ideas and links :)
xo
s
Kaitlin McDonald says
I love the soft colour scheme so far!
I noticed that there is a bit of empty space at the top of the built-ins where the crown molding covers the shelves. I thought it would be very neat to put secret cubbies into that space and use it creatively. I could see it being very fun for the kid to have a secret spot all his own.
Just a thought. Love all your posts and evolving style!
YoungHouseLove says
That would be fun!
xo
s
Camellia says
I know this post is a couple days old but I found this adorable stuffed whale from Catbird that would go perfectly in the room!
https://catbirdnyc.com/shop/product.php?productid=18976&cat=304&page=1
Camellia
YoungHouseLove says
AHHH! SO cute!!
xo
s
karen says
hi sherry and john im a loyal follower im attepmting to do the beffy crown moulding project already ran into a road block im using the kreg crown tool but because it sit really high on saw how do i get the cut to go all the way through the moulding it. the saw stops almost near end of cut. by the way i love everything you guys do. your my favorite.
YoungHouseLove says
I ran into this same thing a couple of times when I was trying to use the bigger crown. What I ended up doing was just sawing off the last little bit manually with a hand saw, keeping the blade flat against the existing cut so I was sure to make the angle on the rest of the way down. It did make me wish I had a bigger miter saw though! :)
-John
Yami says
I love the bedskirt tutorial! I am expecting a nephew in April and I just did my sister’s nursery. Her and her husband wanted a Batman theme so I was able to give them a custom velcro pleated bedskirt along with a few other custom items. I finished their room and just posted it on my site! Thanks for the inspiration!
Lynn says
How tall are your ceilings in this room and how tall is your baseboard? We want to install crown and replace our baseboards, but are not sure how chunky to go in our relatively small (1500 sq ft) craftsman house. THanks!
YoungHouseLove says
Our ceilings are standard height (8′) and our baseboard is standard too (I believe it’s around 4-5″).
xo
s