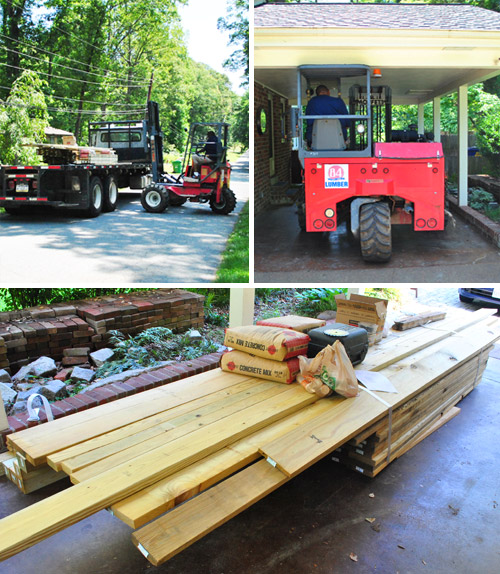
Good news: we made progress on deck building. Huzzah! Bad news: we didn’t make as much as we’d hoped. Harumph. I’m kind of having flashbacks to our bathroom remodel project back in 2009, when we’d schedule a long weekend with my dad to hopefully complete the whole thing but found ourselves just having started tiling by the end of the last day with him. But that’s just how real DIY life tends to go. So let’s rewind to the middle of last week when we got all of our materials delivered from our local 84 Lumber store (totaling about $1,000 including delivery and screws/metal hardware/concrete for footers/etc). That all went smoothly, especially when we realized that our carport was barely tall enough for a forklift to fit under. Seriously, the top of it just grazed an old plant hook hanging from the ceiling. Phew.
My dad arrived on Thursday morning to lend a hand while Sherry Clara-wrangled/tended to the blog/took pics/conferred as we went. We all spent the first hour-ish talking through the plan together. It was my chance to double-check that I knew what I was doing (or at least sort of knew what I was doing) and my dad’s chance to get up to speed. Here’s roughly what our deck frame will look like (except it’ll have stairs, which we’ll talk more about when we get to that step) thanks to the plan that 84 provided me. Oh but this isn’t the plank pattern that we’ll be attempting (that can be seen in this post).
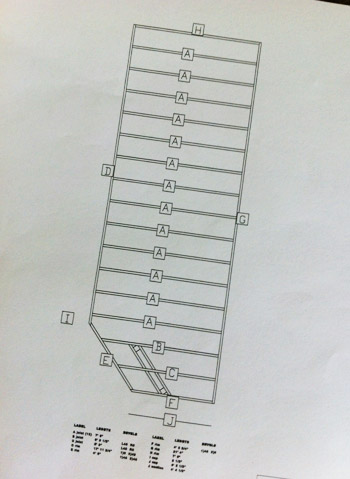
I realize that’s not a terribly descriptive picture, so bear with me. The only thing to note right now is that our deck-itself (not including the stairs) only requires two posts (near labels B and C) since most of it will be attached directly to the house. The only mid-project inspection from the county needed is a footing inspection, which ensures that I’ve dug my post holes to the right depths and widths. So theoretically I could just find those points, dig, get the inspection, and then do everything else. But Sherry and I figured we should start other portions of the deck before the footing inspection because (A) they’ll help us be more precise about our exact footing placement so there are no woopsies later on and (B) the inspector can warn us if we’re off track with anything else during the footing inspection – rather than telling us to take everything apart once the whole sucker is done. So the focus of Thursday’s work was to hang ledger boards and joists. Allow my little Photoshopped picture to explain that a bit further…
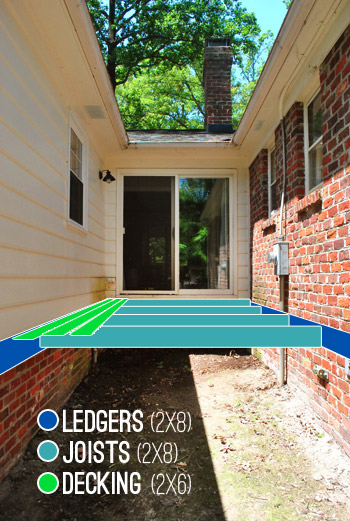
The ledger boards are bolted or screwed into the house on both sides, then joists will attached to each side, creating a span on which the decking boards can be nailed. Pretty simple, right? Well, there’s all sorts of considerations and steps that need to be taken – especially in regards to hanging the ledgers. For instance, they need to go all the way through your house into the band board (i.e. not just into the siding or brick facade) and you need to install flashing to prevent moisture damage. This graphic from decks.com is the closest thing I found online (after LOTS of searching) to what the whole dealio looks like:
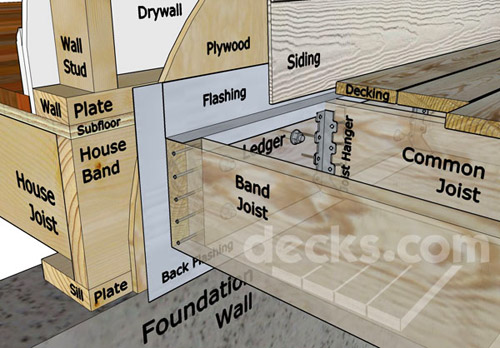
So our first actual step was to installing flashing. Our county just requires back flashing, but I also plan to add some on the top too since after a bit more research we hear it’s generally a good idea to further protect things from water damage and rot. I had trouble finding info about attaching flashing to brick, until I happened upon these “Flash The Ledger Board” steps on One Project Closer‘s deck tutorial. Looks like my first step was to “trench out one of the horizontal mortar joints above the ledger board” about an inch – which I did by setting the depth of my circular saw and using a masonry blade:

It was quite dusty. At this point Clara and Sherry were glued to the sliding glass doors inside, watching all the action. And Clara started yelling “fire is hot!” because all the dust actually looked like hibachi smoke (more on how we might have permanently scarred her with that experience here). But it was all good. No actual fires started and Clara simmered down and actually enjoyed watching the process when Sherry explained that the white dust was kind of like snow (the girl loves Frosty, so we were all good from there).
The idea here is that we could fold over a small hem on the end of the flashing and stick it into the exposed joint, sort of wedging it into place (though it also says to add a bead of clear silicone caulk over the seam, which we’ll also be doing). You can see my test strip of flashing below. I’m using vinyl flashing, since standard aluminum flashing isn’t recommended for pressure-treated wood applications (and is actually not permitted by our county). My other option was copper, but it was about three times the cost and seemed more finicky to work with, so I went for the cheaper and easier option.
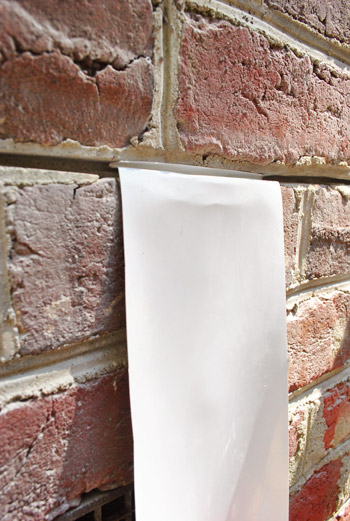
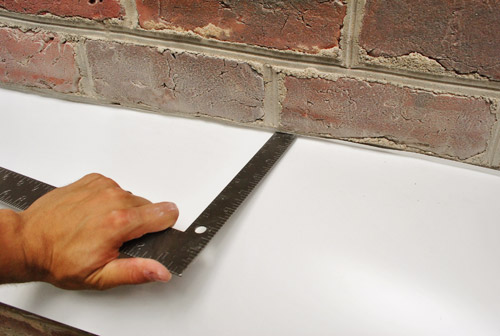
I rolled out the right length of flashing, cut it with my scissors, and bent the folded hem by hand (which was actually really easy to do). Though it did take the assistance of a ruler to actually force it back into my trench (probably a good sign that it’ll stay in place).
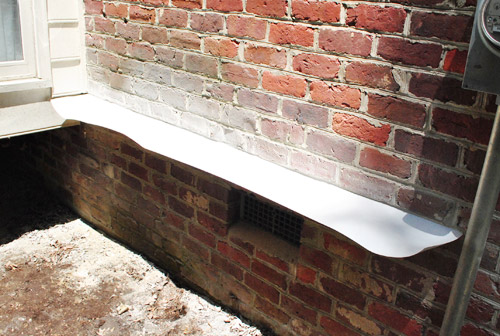
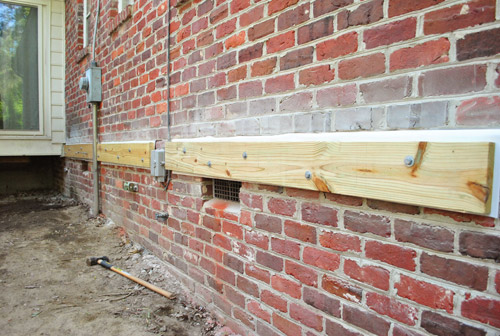
Here’s our first piece of flashing in place (though it will lay flat against the house once the ledger is attached by being drilled through the brick over the length of flashing). This is a good time to point out that the ledger board on the brick side of the house will be broken into three sections, since we have to work around a couple of obstacles like the electrical meter on the right side of this picture (thankfully the electrical municipality in our county is all good with us building this deck although it makes the height of the meter a bit lower so someone reading it will have to crouch). The lesson: be sure to call yours to make sure there’s no odd zoning rule like “the meter must be at eye level” that could ruin your deck-building plans. We hear in other parts of Virginia this entire deck could have been a no-go due to that rule.
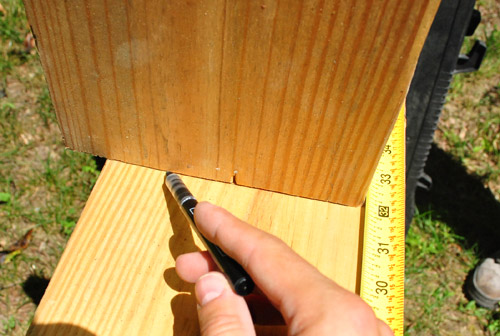
With the flashing held in place, we went to work on our first piece of ledger board (a 2 x 8′ board of pressure treated lumber). I cut it to length using the circular saw and starting by marking where my joists would go (my county guidelines required them to be no more than 16″ apart when measured center to center). I used a scrap piece of 2 x 8 to draw where they would go so I was sure not to place any screws in the way.
Speaking of screws, our county is very specific about those, as illustrated by this graphic in their deck guide:
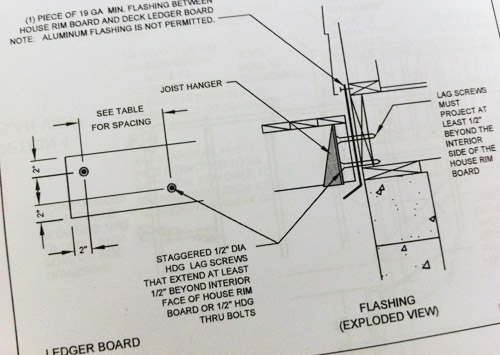
The spacing guide said my screws needed to be no more than 23″ apart. I opted to do them at 16″ increments because it’d be easier to remember that I just had to do one between each joist.
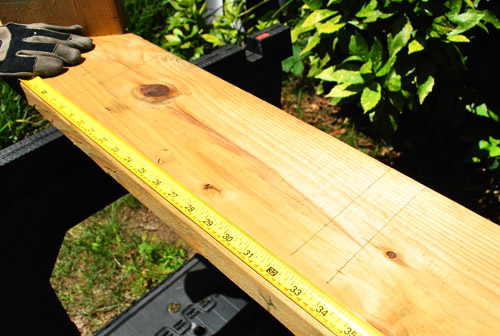
So after marking the ledger board and pre-drilling some pilot holes in both the wood and in the brick, my dad held the board in place so that I could get our first screw in on one end just enough to hold the board up. When then checked that it was level and put a screw on the other end the same way, that way we didn’t have to exhaust ourselves holding it up against the wall.
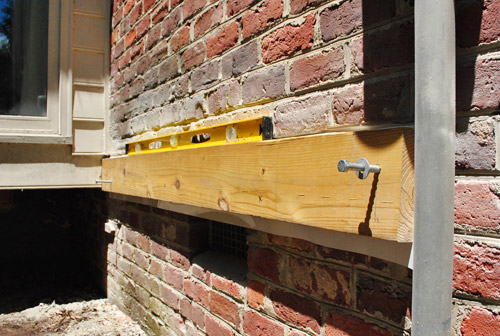
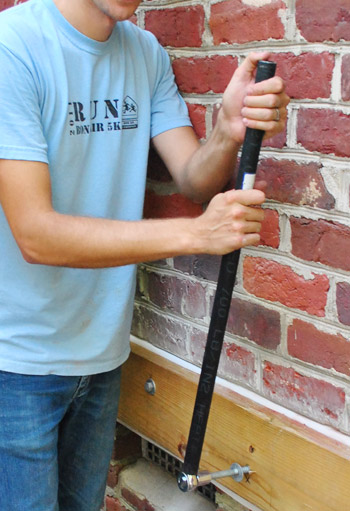
The screws we’re using are technically HDG (hot-dipped galvanized) lag screws, which are one of only two types of screws that are approved by our county. They’re massive: 1/2″ thick, 6″ long, with a big hex head on the top. My power drill didn’t have enough torque to help me, so we had to hand wrench all of them in place…
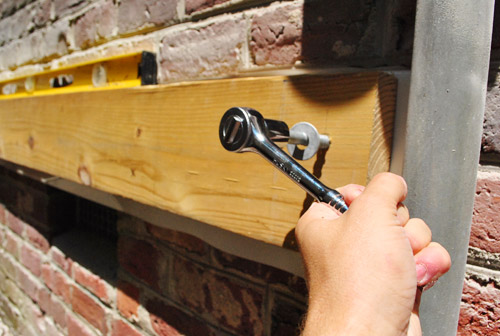
… fortunately my dad had the bright idea of buying a piece of $2 scrap pipe to extend the handle of our socket wrench to give us more leverage. It actually made it quite easy to drive them in.
The not so easy thing? The hiccups we hit that caused some delays. First off, we had to go out and buy longer screws – 8 inchers – because the county requires the screws to stick out the other side of the house’s band board. When I checked on our first two screws in our crawl space I could see the 6″ guys weren’t making it all the way through. The 8″ screws did the trick, but we had to be more delicate with them because a couple of them broke off mid-way, requiring some extra work to remove the broken screw and drill new holes. So by about 2pm (after over four solid hours of work), this is all we’d accomplished. Can I get a womp-womp?
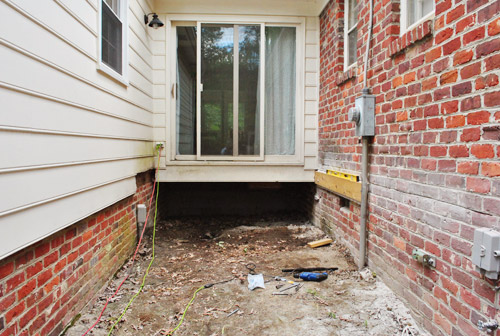
Fortunately we found our rhythm after lunch (my Whopper must’ve done wonders) and made lots of progress in the next couple of hours – completing the rest of the ledger board on the brick side of the house. Woo hoo!
Wasting no time to celebrate our accomplishment, we turned our attention to the ledger board on the siding side of the alley. I wanted to make sure it sat level with brick-side ledger, so we decided to temporarily set a joist to help us out. The joists attach to the ledger boards in these metal hangers. I just loosely nailed in it place at this point.
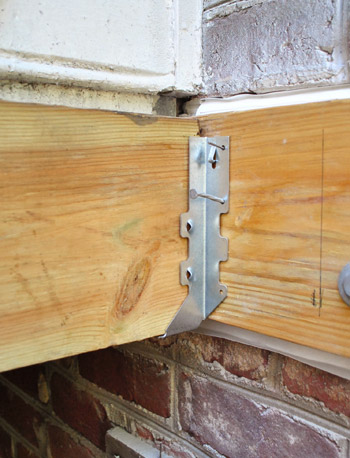
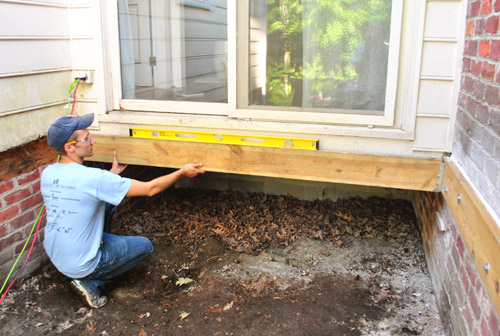
After having cut another 2 x 8′ board to act as a temporary joist, I held it up using my level as a guide. Then I marked the siding wall to indicate where the top of our ledger on that side should go.
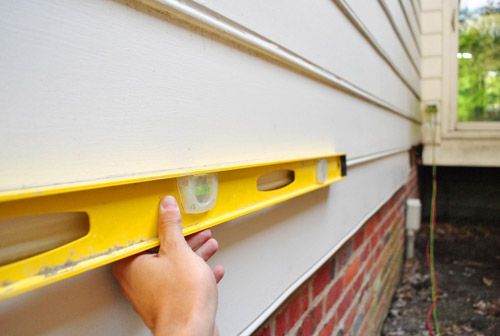
Since a ledger board is never supposed to attach through siding, it meant we’d need to remove the siding that was in our way. And since we have wood siding, it meant cutting it with a circular saw. Not gonna lie, the idea kinda got me nervous. It just felt so wrong to cut into perfectly good siding. But I measured up from my ledger board mark to accommodate for the width of the decking (as well as a small extra gap, which I had read was helpful to keep moisture from getting trapped against your siding). Then I used my level to make a straight line down the length of the wall. A laser level would’ve done this much faster, but we had left it at my dad’s house. Oops.
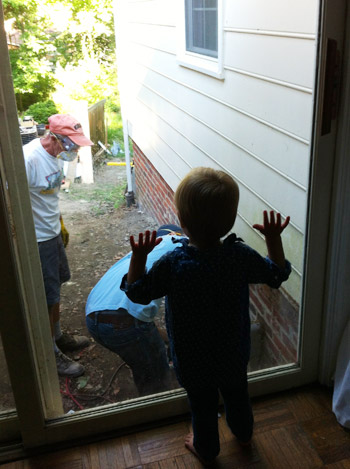
This must qualify as the “exciting part” of the day, since Clara again became glued to the window. I’d like to pretend she’s fascinated by construction, but really I think she just wanted to get her grandpa’s attention (picture a broken record of hearing “Hi Tom Tom! Hi Tom Tom! Hi Tom Tom!” like a kid on the way to Disney asking “Are we there yet? Are we there yet?”).
After setting the depth of my circular saw to be sure I’d only go through the siding (and not the band board of the house), I followed my line as carefully as possible.
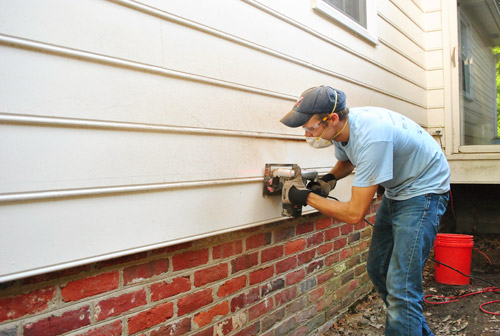
The noise and the dust from the saw must’ve been too much for Clara, as this is about the time she took cover in the curtains.
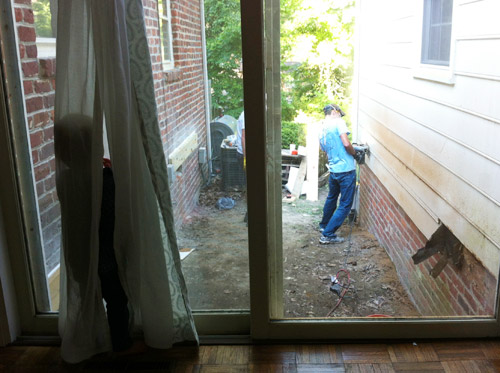
Once I had my line cut, it took a bit of prying but we quickly got all of the wood siding loose from the wall. It was a beautiful sight.
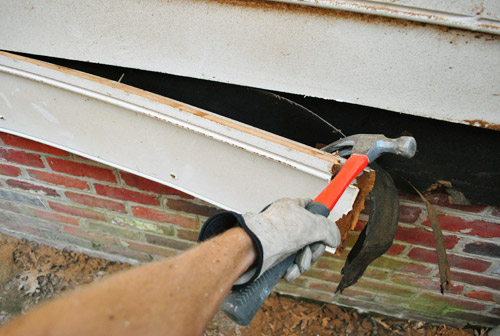
It was getting on about 6pm at this point, and Sherry and my mom had dinner waiting for us inside. But since a thunderstorm was forecasted for that evening, I wanted to at least get the flashing up on the now exposed siding-side of the house. To do this I took sheets cut to length and shoved about 5 or 6″ inches up under the bottom edge of the siding so that it overlaps. Then I nailed the flashing in place right under the siding (I’m later going to use silicone caulk on these nail spots to make sure moisture doesn’t seep through and will also run the bead that I’m supposed to add across the flashing on the brick side of the house).
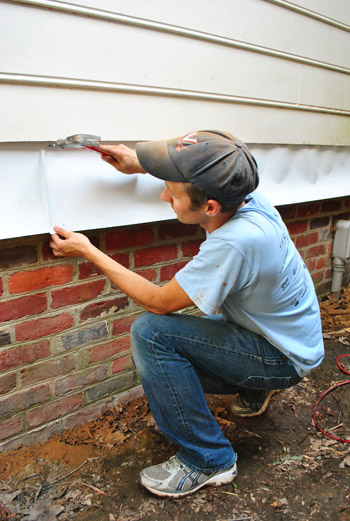
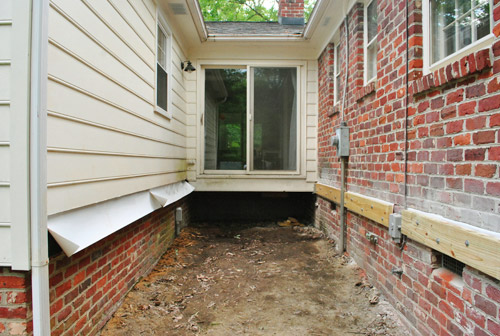
With that, we decided to call it a day. We didn’t get anywhere close to measuring for post holes. Heck, we didn’t even get both ledger boards up. But I feel really good about the work we did accomplish… even though it doesn’t look much like a deck yet. We hear it’s this leveling and framing stuff in the beginning that takes the most time, but really lays the groundwork for a nice long-lasting end product. So we’re looking forward to smooth sailing when we get all of this annoying stuff out of the way. Here’s hoping, anyway! We certainly won’t be setting any speed records for our construction method since we can only work on this baby about one or two days a week, but we figure that’s actually pretty close to how it works for most evening-and-weekend-DIYers out there.
Oh and I definitely could’ve earned the “dirtiest” award for the day. Between the dust kicked up by cutting out the mortar and slicing off some of the siding, I was quite the looker. Sherry especially loved that goggle line I was rocking.

So next up will be finishing the ledger board installation and making some pretty sizable footing holes. Then we have our first inspection. And you know we’ll keep you posted. Here’s hoping slow and steady wins the race builds the deck…
Who else is in the midst of a project that’s taking them longer than expected? Have you been hitting snags or are things just more complex and time consuming than you anticipated? I know I always feel better knowing I’m not the only one behind on a project – and it’s also pretty satisfying to get something done right, even if it means things take a little longer to knock out. Hope to be back with more deck progress later in the week! Until then, I can be found trying to get all of the sawdust out of my eyebrows…
Pssst- See how we stated planning the deck here, how we cleared the alley so it was ready for building here and here, how we selected our deck materials here, and how we got our permit here.

Emily says
This looks a big job! Best of luck it all gets smoothly!
What is flashing by the way? In the uk there’s none of this super strict regulations on something like a deck!
YoungHouseLove says
It’s a protective cover to help keep rain and other moisture from getting into your house by diverting it around and beneath the boards (since otherwise they have a tendency to trap water).
-John
Emily says
*goes smoothly!
Can’t type today!
Emily says
I don’t know if some other astute commenter has already pointed this out, but YOUR BOOK COVER IS UP ON AMAZON and it looks sooooo good. And so you!!! I am so beyond excited to have it sitting on my coffee table to browse absolutely any time I want :)
A million congratulations. I realize it doesn’t come out for another couple of months, but considering how excited *I* was to see it, I cannot begin to imagine how you might be feeling!!!
YoungHouseLove says
Aw thanks Emily! It’s so crazy. Sometimes we think it’s not really happening (is it all a dream? haha) and then we get awesome comments like yours. We’re still working on the cover (John’s arm is photoshopped to be holding that drill, haha, and none of the type is finalized) but it’s pretty fun to see something there instead of no image at all! Should be funny for you guys to see the tweaks as they happen since they seem to be showing up as things change!
xo,
s
Aline says
With Thanks and love <3
http://www.mycolorfulnest.com/2012/06/my-top-10-blogs.html
:)
YoungHouseLove says
Aw, thanks so much Aline! Love right back atcha!
xo,
s
Chris says
My husband’s been rebuilding 3 of the screens on our porch for about, oh, 8 months or so. I think your progress is looking pretty amazing in comparison! Keep up the great work!
Chrissie says
I’m stupidly excited that you guys have started! All that measuring and the charts and the rules make this stage look a bit scary.
We did kinda hit a snag this weekend, though not on anything we were doing… one of the biggest storms we’ve ever had came crashing through our state and took all three of our back fences with it. They’re completely flattened, it’s crazy town! Fortunately no one has been injured in the storms so far.
Our dogs are with the in laws now, since we now have open access to six of our neighbours yards/houses, and they’re too big to be kept inside our little house for an extended period of time.
We’re in for what’s supposed to be an even worse storm tonight, so we’re keeping our fingers crossed that our roof stays on… and our shed falls down ;) Hey, you gotta get some benefits, right?
YoungHouseLove says
Oh my goodness – glad to hear everyone is okay though!
-John
Cari says
I have a quick question (probably not the best there is but….) What are your plans for under the deck as far as grass, weeds, critters, etc? I know that once the decking is on, the sun won’t really reach under there to help things grow, but just curious…..
YoungHouseLove says
We hear that the best thing to do under there is after the footing inspection (since they need to see the depth of the holes clearly) putting down weed blocking fabric and a nice thick layer of gravel makes it an inhospitable place for weeds and critters. Will keep you posted as we go for sure!
xo,
s
Kristin says
Nice work! My husband and I had a brilliant idea of starting a retaining wall project last July. On one of the hottest days of summer. We bought 300 blocks, loaded them in his truck (which was about 2 times more weight than his truck is supposed to carry), and started building a wall. Almost 1 year later, it’s still not done, which is probably a good thing since I changed my mind on the blocks, and since I had a near run in with a snake on Saturday I told my husband I am NOT doing any more yard work and he can hire it out!! Happy fathers day to him!!
Qaseh Gifts says
looks like your dcek is coming along nicely. Can’t wait for the reveal! You guys are so into DIY and prove that with determintaion anything can happen.
katie says
Congrats on the deck progress – very exciting! I was checking out the blog Centsational Style and I think she featured your old entryway as a small space solution. Third picture from the top? Or am I just crazy/creepy and know way to much about your house?
http://www.bhg.com/blogs/centsational-style/2012/06/09/smart-entry-solutions/
YoungHouseLove says
Yep – that’s us! That’s actually photo that Do It Yourself magazine snapped back in 2008 (DIY is owned by the same company that does BHG) so looks like they pulled it from their library to illustrate the point. Too funny!
-John
Lauren says
Did I catch a glimpse of the secret door project? : )
YoungHouseLove says
Oh crap, good eye. Haha. Maybe just a sliver, but you can’t see much of it. Whew. Kinda had a heart attack there- haha.
xo,
s
Eva says
Good luck with the deck! I admire you guys for having an endless appetite for all this diy! We are in the midst of a bathroom renovation and this will be the last big project to tackle in our house. Then I am planning to give my marriage and my wallet a vacation from renovations for the next few years (or until I forget how difficult it can be and buy a new place that needs lots of love).
Lindsay says
I have a random question for you…My husband is starting to get into more “DIY” projects. He has wanted a mytre saw but doesn’t have one. I have decided to surprise him with one for Father’s Day. Can you help me with a recomendation?? I don’t want to get the most expensive one but something middle of the road….please let me know what you think.
YoungHouseLove says
I think John has a Craftsman miter saw (from Sears) – it was actually his dads but he stores it at our house so we get to use it. We have no idea how much it would be, but maybe check out that line at Sears since they have a ton of options and just tell the salesperson you’d like something in the middle and they can tell you which one would be best? Good luck!
xo,
s
Jeff Patterson says
Great job John, I feel your pain with the lag screws breaking off. I had the same thing happen on a railing project. You guys are so thorough and detailed-awesome prep work!
YoungHouseLove says
Yeah, it sucked but it felt pretty good when we figured things out and got moving!
-John
Annalea says
Next time you need to match heights, or something similar, try a water level. (http://www.deckmagazine.com/article/64.html). They’re super-cool, better than a spinning laser in a lit of ways, and we love them!
YoungHouseLove says
What a cool idea!
-John
Erika says
I’m a first-time homebuyer. I moved in three months ago and I got all the rooms painted. Unfortunately it’s the little things that are taking longer than expected. Like baseboards, fresh paint on the doors and installing some fixtures. It’s a bit overwhelming our to-do list but our mantra has been “little by little.” It’s just frustrating, because a tight budget is slowing us down a bit.
YoungHouseLove says
Oh man, it does seem to take forever, but it’s going to look so good!
xo
s
Aubri says
I don’t usually comment, but I just have to say that after last night, I TOTALLY feel Clara’s fire-trauma. Lol! I was attempting a pinterest recipe (a “Dude, get ON that already” project for me) and nearly caught my oven on fire! It’s actually really funny NOW, but in the moment, when there were FLAMES in my OVEN, I totally felt Clara’s pain. So, I understand the “Fire is hot!” upon seeing the “smoke”. Ha!
I’m excited to see how this turns out! I love your projects. My boyfriend gets to hear me retell all the exciting stories from your daily adventures over and over. Lol!
YoungHouseLove says
Oh my gosh! So scary, but glad you can laugh about it!
xo,
s
Heather says
I feel like the Garage Project is taking longer than expected, but our end-goal date is September 1 so we can’t possibly be as behind as I feel we are seeing as we’ve finally actually started working on it. All we have to do is a lot of sorting, but that’s the time-consuming part and I’m giving it another two months to happen between other projects. Re-arranging boxes and furniture should only take a day or two, even in my everything-takes-longer-than-it-should world, and then we will have a functioning Rec Room!
Peggy says
I have always wondered about how those lag bolts go into brick. Do you drill the pilot hole for the entire depth of the bolt or does it have a tapered end that cuts into the brick after you’ve begun using the wrench? Also, is the pilot hole drilled a bit smaller in diameter than the lag bolt? I guess I’ve never really understood how the lag bolt actually holds the entire ledger board and decking up. Whenever I have asked men at the home stores, they kind of look at me weird as in “Why isn’t a man doing this type of work?” I like to do things myself because then I am assured that it was done properly! This is not meant as a slight against men but rather, because there are so many lousy workpeople out there, who no longer take pride in their work.
YoungHouseLove says
We pre-drilled a hole all the way through the brick (but not into the wood rim board behind it) and we pre-drilled a 3/8″ hole for our 1/2″ screw so the lag screw wasn’t just floating in the hole. In general I always try to make my pre-drilled holes smaller than the actual screw I’m using.
-John
Peggy says
Thank you for answering my questions John… You confirmed what I suspected but I was afraid to ask. You guys ROCK!
YoungHouseLove says
So glad!
-John
sean says
hey there, i am a contractor in NE USA and stumbled on your blog researching flashing products. my comment is meant to be helpful, not be taken as criticism. flash with lead next time. use 3/4 to 1 1/2 spacers between house and ledger, especially at the door. Double up E in your structural diagram if that is to be the stair header. Pay attention to grain orientation and the annular rings when laying the decking. Use nails for fastening the framing, and if you are going to stain or treat your deck, i recommend nailing the decking. if your going to lay the decking and forget about it for 10 yrs, screw it down. I have a degree in architecture and have built for 10+ yrs, just so you know i am not your everyday contractor. looks like you do nice work, if you want explanations or advice on your projects email me. good luck and godspeed!
YoungHouseLove says
Thanks for the tips!
xo,
s
Andrew says
What is the point of adding flashing if you tucked it under the ledger? It’s supposed to hang over the ledger to prevent moisture (snow, rain) from sitting on the top of the ledger. Otherwise, nice job.