After excitedly declaring “the hardwood floors are done!” just in time to move in, we got a bunch of requests for a follow up post with details about the “tricky stuff” like how we handled transitions, cutting boards shorter, cutting them thinner, how we addressed the top of the stairs, and how long it all took. So let’s dive back into floor world for a second. The entire floor-laying process took us about 6 days from the placing of the first board to the nailing of the final strip of quarter round. Sherry was able to help me for some of those days, but other days were just me myself and I while Sherry was back at the old house with Clara (to keep her out of the sawdust).
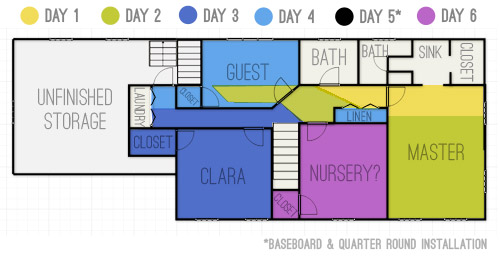
Note: Some days were shorter and tackled solo while others were mega-long with two of us working, so take this little graphic with a grain of salt, and know that four hands are faster than two.
Day 1 was a pretty slow start because we were still finding our groove. But even once we’d found our rhythm slapping boards down, a flooring installation is still riddled with various side-tasks that can eat up a lot of time. Even having installed a floor before, we had mentally blocked out many of the non-laying-floor activities so some of them caught us by surprise again. Things like…
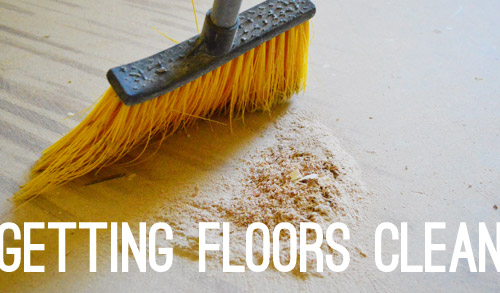
Getting Floors Clean: Since your subfloor needs to be free of dust and dirt, we swept and vacuumed each room thoroughly before we started on Day 1. But since the install was a messy process (more on that soon) we went over each floor again as we moved from room to room. You know, just to be sure.
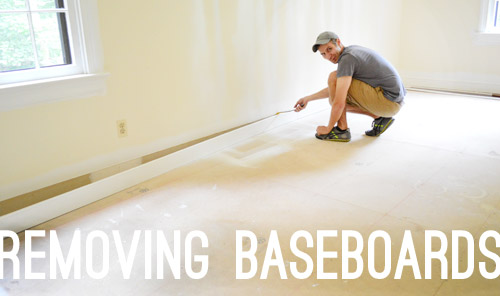
Removing Baseboards: As mentioned before, we ended up having to remove our baseboards before the install. It took a couple of pulls with a crowbar preceded by slicing a utility knife along the seam between baseboard and the wall to diminish paint peelage. It was a simple process but it can add up to a fair amount of time when we’re talking 4 bedrooms and a long hallway.
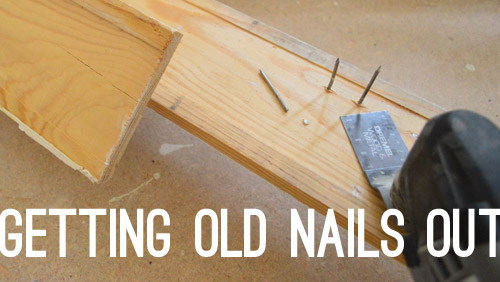
Getting Old Nails Out: Since we planned to reinstall the old baseboard, we wanted to get all of the old nails out so it’d be easy to sit them flush to the wall later. Rather than hammer them through the front (damaging the paint job), we found that our Dremel’s metal cutting bit sawed them off nice and flush.
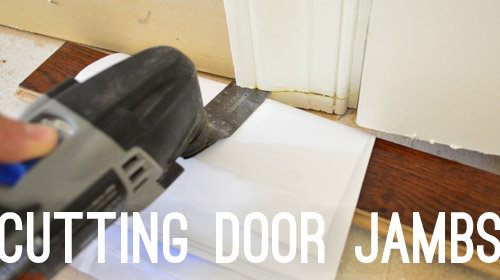
Cutting Door Jambs: Speaking of the Dremel, it was a life-saver when it came to cutting the door trim and jambs (all 12 of them!) so that the floor boards could slide under them, helping to create that seamless look between rooms. To determine the height of my cut, I used a scrap piece of wood (plus a scrap piece of underlayment) to rest my blade on as a guide. Oh and a scrap piece of paper just to protect the wood in case I needed to use it later.
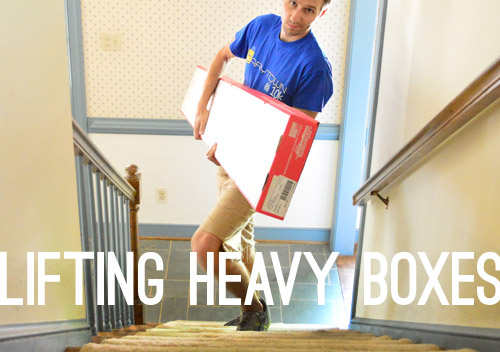
Lifting Heavy Boxes: All of our boxes of flooring were downstairs in the dining room, so every hour or two we’d need to carry up a few more to keep ourselves well stocked in whatever room was being worked on. Since boxes can vary in color slightly, we always tried to grab planks from three different boxes at any given time. So whenever it was time to take a pause from leaning over flooring (our aching backs) to carry a few 60lbs boxes up a flight of stairs … well, it wasn’t really a break, but it had to be done.
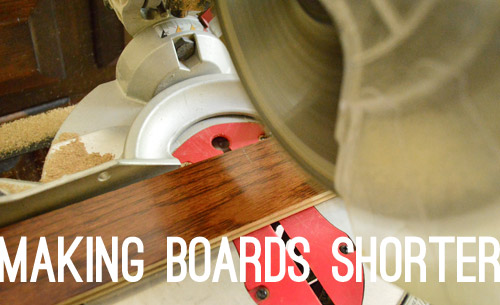
Making Boards Shorter: When you reach the end of a row of floor boards, you’ll probably have to cut the last piece to fit. We used our miter saw to make quick, straight cuts and whenever possible, tried to cut the end boards for 2 to 3 rows at a time so that we were minimizing time spent going back and forth.
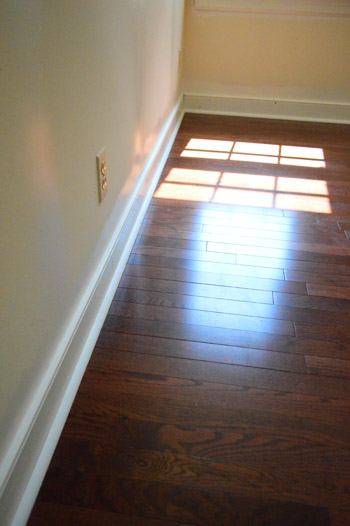
Since the ends of these boards would eventually be covered by baseboard and quarter round, we knew they’d all look flush and finished as long as they weren’t too short (you’d see the gap sticking out from the quarter round). It could also be bad if we cut them too long down the line (they’d still look seamless at first, but if they expanded when it got hotter, they could warp/shift) so we were careful to leave the manufacturer’s recommended expansion gap hidden behind the baseboard.
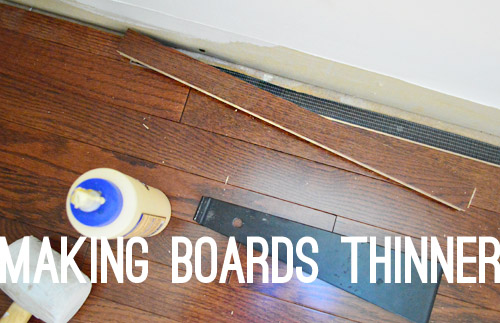
Making Boards Thinner: At the beginning or end of a full room, we often found ourselves having to rip boards the long way so that the last row would fit. To do this we used a table saw since it can make cuts of any length. Once again, we knew these would be hidden behind baseboard and quarter round, so it just came down to allowing for the recommended expansion gap.
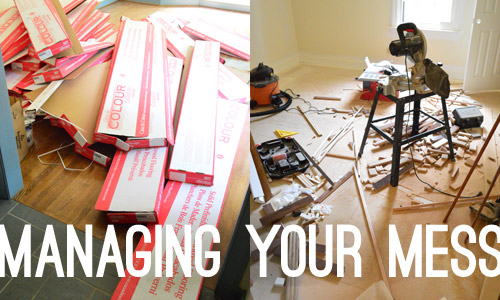
Managing Your Mess: With all of this cutting came lots of sawdust and scraps, not to mention empty boxes. We designated the spare-room/possible-future-nursery as the lowest priority (i.e. if we didn’t get it finished before we moved in, it wasn’t that big of a deal) so it became our cutting room. That way we weren’t hiking up and downs the stairs all week every time we got to the end of a wall and needed to make a cut. But when it came time to finish that room on Day 6, it meant we had to spend a good portion of Day 5 cleaning it up so it was dust free and ready for flooring.
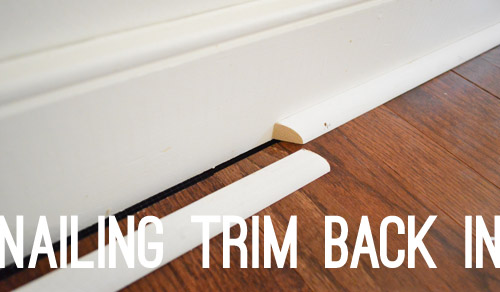
Nailing Trim Back In: As we hit Day 5 and all but the last room was done, I decided to reinstall the baseboard (and add new quarter round) in the other rooms so I had fewer piles of baseboard in my way (they were cluttering up almost every room at that point). Relying on my nail gun to reattach the already cut-to-size baseboard made the job pretty quick (maybe 2 hours?) but having to measure and cut the new quarter round slowed me down. In the end it surprised me that I spent an entire work day doing this, but it also was that turning point where the new floors finally came together and the rooms started looking a lot more finished.
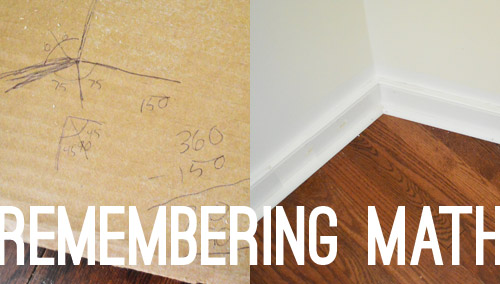
Remembering Math: We have the privilege of having an angled wall (which you can see better in photos like this). Which meant I got to conjure up some semblance of 9th grade geometry so that I could cut my boards and my quarter round at the right angle. I’m not even going to try to explain how I figured it out. I think there was a complementary angle in there somewhere. But it definitely wouldn’t hurt to have a calculator (even if it’s just on your phone) as well as a scrap piece of paper and a pen in case any unexpected math pops up during your installation.
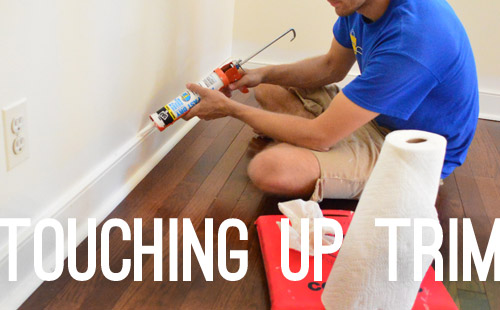
Touching Up Trim: Removing and reinstalling our baseboards banged them up a little in a few areas (kinda made us feel silly for so carefully painting them beforehand) but we were pleasantly surprised with how fast re-caulking the seam against the wall went, followed by some touch-up paint here and there. It actually wasn’t too bad. So the lesson we took from this was that installing baseboard and quarter round is the long part. The caulking and touch ups (if it’s already painted) aren’t bad at all.
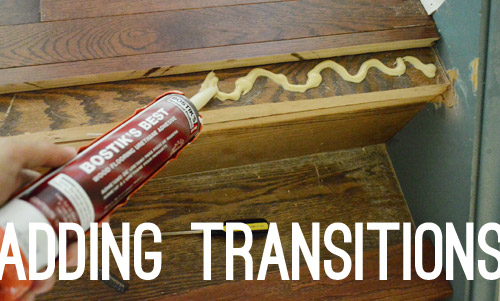
Adding Transitions: These are the spots where the new floor meets another flooring surface. Since we went seamlessly between all of the bedrooms we didn’t have too many of these, but that didn’t spare us from adding one at the top of the stairs. At the advice from the Lumber Liquidator guys, we cut off the end of the existing step (called a “bullnose”) and added some special adhesive to hold the new bullnose piece in place (which we purchased to match our new floor when we made our initial order).
We also followed up with a couple of nails with our nail gun just to hold that nice and steady. Here’s a shot where you can see the existing oak flooring on the stairs and our new floors at the top of the staircase. It’s not a perfect match, but it’s close enough. It’s less obvious in person than this photo, maybe because of the way light reflects on different planes and because photos look flatter than real life?
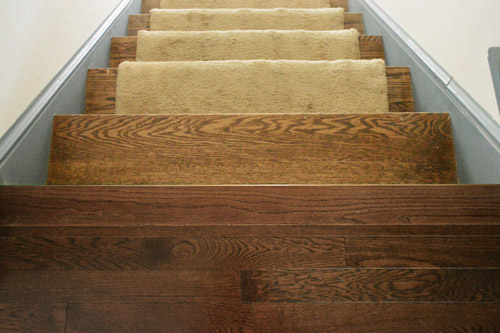
Once we had that bullnose piece at the top of the steps installed, the long journey of putting in the new floors was officially done. After which we furiously packed like our lives depended on it. No rest for a DIYer, eh? Speaking of which, that carpeting on the stairs gets the stink eye every time we come upstairs, so that’s definitely on the list…
Did any part of installing floors catch you guys off guard? Or are you working on another project that has “little” steps that seem to be more time consuming than you accounted for?
PS- Here’s the original post about how we laid our hardwoods for additional info about the underlayment, how we installed each board, etc.

Sheryl says
Oh gorgeous, gorgeous, gorgeous!!! Love those dark wood floors.
We also have a second floor – 5 bedrooms that we are dying to rip out the carpet (did I mention 5 kids and a dog….) How do you decide where to begin laying the floor (hallway or bedrooms) or does it matter? Thanks!
YoungHouseLove says
We thought we’d just start in one side of the layout and work our way out from there so it all could be seamless. We dry fitted some things (just laying them out to see if it would branch out into the hall like we thought, etc, and it seemed to work so we went for it!
xo
s
Jennifer says
You make installing hardwood floors look easy. I may have to tackle this project myself someday.
One question though. If you went to all the trouble to remove the baseboards, which are usually 3/4 inch thick, did you really need to put the quarter round on after you put the baseboards back up. If you leave the appropriate amount of expansion space doesn’t the baseboard still cover the gap? Seems like an added expense and takes away from the seamless edge of flooring meeting baseboard. Just curious.
YoungHouseLove says
Oh yes, we planned to go without quarter round but every manufacturer’s recommended expansion gap is different – and in order for our warranty not to be void we needed to leave an inch for expansion on all sides – which was just slightly wider than our baseboards. So the quarter-round bridged the gap, and it wasn’t too bad price wise (we even got it pre-primed which saved time).
xo
s
Julia says
Once you’re finished with your dream house, assuming you don’t move again, John should totally start his own contracting business.. you would already have a substantial client list!
YoungHouseLove says
Haha! I don’t know if that would make him proud or very very scared (after big projects like the deck and the flooring he says “I’m glad I did it, but I wouldn’t do it again tomorrow… give me a year or two…” Haha!
xo
s
N Shirley says
Watching the weather channel- keep safe! Looks like some terrible storms hit your area.
YoungHouseLove says
Thanks! They were intense but brief so all is good and sunny now!
-John
tanya says
Ummm….. Im completely spinning out!! im sure its only a few months since i checked in on your blog, and you’ve moved house???!!! I cant believe it! i feel completely out of the loop. This must have happened very fast!
YoungHouseLove says
Haha, oh yes, it was pretty fast! We thought it would take longer to sell our last house but it was quick!
xo
s
Michele | aka Raw Juice Girl says
You did such a beautiful job! My mom helped me refinish the hardwood floors in my house – and that was enough work for me! lol
Y’all are SO inspiring! :-)
minabey says
Hi guys, I just saw this photo and immediately thought of your huge tree in the deck that you were planning on taking down. Wouldn’t this be awesome?
http://9gag.com/gag/aEwvobM
YoungHouseLove says
Oh my gosh, Clara would go nuts! I actually have a plan for letting “parts” of that tree live on. Can’t wait to share!
xo
s
Meg says
Hey Guys,
I love following your progress and secrectly excited that get to watch you start a new house. We bought and started to gut iur house in September. We have refinished the wood throughout the house before we moved in. Our kitchen has been in temporary mode since we started. We took out a wall and half bath to make a bigger space. When wemoved in we didn’t have insullation, drywall or a floor! We finally have all three. We installed the hardwoods last weekend but went with unfinished so we could match the stain to the other floors. The whole process took much longer than expected since we had three doors we were working arou d and the unfinished wood was not all good. We had a lot of waste. We hope to use the waste elswhere just in a less obvious space. Great work, you help motivate me to keep going!
Megan says
This brings back memories of laying the hardwood floor in my living room over several weeks last summer (all on my own!). It took forever because every board had to be screwed down individually. (I propped my tv up in the fireplace with the olympics on to ease the boredom!) The guys in the timber merchants laughed at me at first when I told them I was planning to do it myself – they obviously didn’t think I was up to it, but I proved them wrong and have had loads of compliments on how good it looks!
Really enjoying hearing all about your new place guys, massive congratulations. I’m checking your blog religiously at 3pm every day desperate for the latest update – I think I need to get out more! ;) I have massive house envy, to buy something as big as your place in the UK (even in the cheap end of the country where I live)would easily cost over a million. Can’t wait to see how you make it all your own. Good luck and have fun!! xx
Shannon says
Seriously, you guys rocked it out with those floors! Not only did you choose a great match for the house, but they look professionally done! Virtual fist bumps all around!
Susan says
First, fab & amazing work on the floors! Q: You had cork in your previous kitchen… I realize you’re going for consistency in this house (hardwoods) but was that the only reason you did not use cork again? Did purchaser of previous house comment on the cork? Thanks!
YoungHouseLove says
We really liked the cork. It was soft underfoot, still gave us that rich color that hardwoods give, and was easy to clean. The new owner seemed excited about it and only asked one thing about it (how do you clean it). So we said we just use mild cleaner and a mop (or a swiffer works too). Hope it helps!
xo
s
J says
Did adding hardwood/bullnose change the rise on the top stair? We thought about adding hardwood but it would change that rise on our top step by 3/4″ which seems like a tripping hazard.
YoungHouseLove says
Yes, it’s 3/4″ higher and we thought we might feel it or have to get used to it but even though we know it’s there we can’t feel it at all! In our first house we had a top step leading to the sunroom that was 3″ higher and you definitely noticed that, but maybe such a small amount isn’t noticeable? I imagine lots of steps vary by small amounts anyway. I’d build up the step by that much (maybe lay a thin book on it) and step up and down a few times and see if you “feel” the difference? Good luck!
xo
s
Janel says
I apologize if this has already been asked/discussed, but what kind of tile are we (mmm-hmm, I wrote “we”…and I’m sure I can speak for all of your fans that we all think of ourselves as part of the Petersik family…not THAT weird, come on!) thinking for the kitchen: travertine? slate? good ol’ ceramic? I absolutely LOVED the cork you had in the previous house!
YoungHouseLove says
Haha, thanks Janel! The truth is that we have no idea yet, and very possibly could go look at tile and end up with something else, so that’s just a first thought. We were intrigued by the idea of doing heated tile since we heard it wasn’t that hard to do but such a nice thing to feel (I feel like I’m being pampered when I’m riding in someone’s car that has heated seats, haha). It’s the little things!
xo
s
colette says
This is so helpful, thank you for sharing. I’m happy to see that it’s somewhat easy to replace baseboards. This is something I’ve been wanting to do, but have been scared it’s going to turn into a giant project. I definitely need to buy that Dremel tool too! It seems like the perfect tool for trim work.
Amy Bull says
Hi John and Sherry!!
I just had to let you know that I’m currently in labor with my first baby and your site is providing a lot of pleasant distraction between contractions! Ever heard that one before? :)
I do have a legit DIY question. We just laid 2500 sq. ft. of wood laminate in our house and the contractor removed and replaced our baseboards. They are really banged up and my husband and I are trying to decide if we should sand off the existing paint and try to repaint them, or just touch up here and there. In some places, when they were removed a portion of the paint came off, taking the first layer or so of baseboard with it, so now there’s compressed wood showing. We also have rounded corners on our walls so there are tons of little angled corners too. Would you be able/willing to show exactly how you touched up the baseboards, or recommend how we might go about ours?
You know, for in a year or so when we feel like people again? ;) Thank you so much!
YoungHouseLove says
Wahoo for labor! Hope it’s going well! As for your question, ours weren’t really gouged or peeling they just had spots where the nail gun shot a nail for example that needed caulk and then some paint on top of that. In your case it sounds like sanding it until its smooth might be the best method. Hope it helps!
xo,
s
Jennifer Fogerty-Gibson says
You two are rockstars. I mean, I’ve laid my own floors as well, but no where NEAR to the level of perfection as you two and definitely not in that sort of timeline. I’m still without transitions in some doorways-YEARS in.
You humble me.
Jennifer
YoungHouseLove says
Aw thanks Jennifer, you’re so sweet!
xo,
s
Kaitie says
On an almost completely unrelated note, could you tell me what font you used for these photos?
YoungHouseLove says
It’s Ostrich Sans Bold.
-John
amy says
You guys make this look so easy! :)
Big Tex says
Quick question about the quarter round. We’ve only used it when we DON’T remove the baseboards, to cover up the gaps. I always thought it screamed “We put new floors in without removing the baseboards!” What is the reason yo,u needed baseboard AND quarter round if you removed the baseboards prior to installing the floor? Our floors seem to be just fine seven years in– the baseboards were deep enough to cover any gaps that were required between the floor and the wall.
YoungHouseLove says
The required expansion gap for our floors to be warrantied was a smidge thicker than the baseboard, so we needed more to bridge the gap (enter quarter round, stage left). We don’t mind it though since it just appears to beef up the molding when it’s painted to match :)
xo
s
Eco Handyman says
These are some great tips! And putting flooring in is dealing with all the small details to make it perfect!
Angie M says
Your work always looks so good! I love watching what you do for ideas and inspiration. We are actually putting in engineered hard wood floors on our main level this week, gluing down on the concrete. My question is furniture pads….. my husband and I have never had hardwoods before, and we are used to just dragging stuff around on carpet and tile. Do we need to consider those little felt pads for everything that will touch the floor? Or only for things like chairs that pull out from the table?
You guys have so much work ahead of you, and I can’t wait to see how this house turns out!
Thanks!
YoungHouseLove says
You can usually buy a pack of a bunch (like 48 or so) at a store for a few bucks and then you can put them on everything you worry about (better safe than sorry with new floors I think!). Good luck Angie!
xo
s
Jenny says
Hi guys,
thanks for the tip on cutting the nails as we also have a ton to remove from cabinets. Okay, we used to live in a one story and moved to a two. As simple as it sounds here are a few things to consider: 1) going up and down the stairs a hundred times a day: if you forgot anything on a different level you go up and down a lot. Having carpet on the stairs feels better than a hard wood but not as pretty. 2) For a new baby when the time comes: you may not have thought about it but its good to decide on a spot down stairs for a changing area and baby sleeping area as it stinks to always have to run up stairs to get this or that for baby or change a diaper. And since you guys have your washer/dryer upstairs thats great! No laundry up and down…
YoungHouseLove says
Great tips!
xo
s
Ashley L says
I am so glad to see someone else installed shoe molding on its side! We did that in our other house before we realized it was sideways, and we left it. Have you seen it done that way elsewhere?
YoungHouseLove says
So sorry, that’s just the way it looks in that picture since it’s a scarf joint (cut on an angle so it looks oddly elongated in that pic). We actually used quarter-round which is as tall as it is wide, so it looks the same on each side :)
xo
s
esther says
This post reminded me of the work my dad and I put in to installing the floors upstairs in our new home.. Now that it’s all in the past it doesn’t feel so bad no more. But I remember laying flat on the floor after finishing, thinking “I’m never ever ever going to finish this” followed by a “I’m never ever going to install a floor myself again”. Of course the top floor needed flooring still as well so off I went ;-)
It’s quite a bit of work but the knowledge I did it does make me feel a bit proud, silly enough :)
(btw I LOVE the way you set up that floor plan.. did you use a special program or ?)
YoungHouseLove says
We used floorplanner.com and then put colors on it in Photoshop.
xo
s
Rhune says
Late question… did you caulk the seam between the quarter-round and the wood floors? I’m wondering about that.
YoungHouseLove says
No, we didn’t caulk that seam because it would’ve been too hard to not get it on the wood. Instead I just tried to lay the quarter round as close to the wood as possible so the seam was minimal.
-John
Mamaw03t says
I love the set up of this house. It makes sense to me. For some reason, I never could figure out where you were in house without going back and looking at the floor plan. Love what y’all doing to this one so far. Happy recreating.
– Mamaw03t
Hector says
Amazing! You two are speedy! And super helpful, Thanks for sharing!
Jen G says
That floor looks incredible! I would love to put in new hardwood because I have a very old, very uneven wood floor now. What type of underpayment would work for this?
YoungHouseLove says
Here’s what we used. We really liked it! https://www.younghouselove.com/2013/05/get-on-the-floor/
xo
s
melissa says
you guys are so flippin thorough, which we greatly thank you for! we are redoing our living room wood floor this week and need to add a transition to the stairs. thanks for the details of what you did.
Donna Huebsch says
Hubby is installing our bamboo flooring room by room as we slowly work our way through renovating our 30-year-old house. So I have a real appreciation for the great job you guys did in such a short amount of time!
Just thought I’d share a link – it’s a blog post about when Jim put the flooring in our master. We set up a camera on a tripod and took pictures during the process. We made a cool little animated GIF that’s about halfway down the post.
http://donnahuebsch.wordpress.com/2011/11/09/bamboo-flooring-in-the-house/
YoungHouseLove says
That’s awesome!!!
xo
s
Sarah says
We’re about to install about 1700 square feet of hardwood flooring in our new house–with noooooo experience. Your wonderful post was reassuring and realistic at the same time.
I hadn’t realized we would probably need quarter to fill the gap round even if we kept our old baseboards. So I have one question about that. What happens when the quarter round meets the molding around doors or at the top of stairs? Does it just stick out a bit further than that molding? I worry it will look awkward.
Oh, and, now that you’ve worked with it, would you recommend Elastilon even over a plywood subfloor?
Thanks so much for your beautiful and inspiring blog,
Sarah B.
YoungHouseLove says
If we had plywood we definitely would nail and skip the elastalon (it’s an added expense, and nailed floors are so nice, we just couldn’t do that over the flooring we had here). As for the molding, it looks nice if you angle it on the end so it’s more of a graceful flow into the doorways, like this picture shows. Good luck!
xo
s
Kerry Kay says
Hi guys! Love the floors ;) Just a quick question. I know you used your Dremel to cut around door jams. What exactly is the name of it and is their an attachment that needs to be purchased to do this? I just have a small Dremel with little circular attachments. Thanks!!
Doing floors in the dining room today, trying to get’er done before Xmas dinner!
YoungHouseLove says
It’s a Dremel Multi-Max and it comes with a long flat rectangular wood-cutting attachment to do the jambs. Hope it helps!
xo
s