Yesterday you saw how our board and batten project came out for the Pinterest Challenge, so today we’re back with the full tutorial shebang. And hold onto your safety goggles, it’s 2,000 words long. But don’t let all the words fool you, we’d say that this was one of the biggest bang-for-you-buck / most fool-proof ways to make an easy upgrade that we’ve encountered in a while. Wow, just realized I’m five sentences into this and I’ve already said “bang” twice. Not sure if that’s a good sign or what…
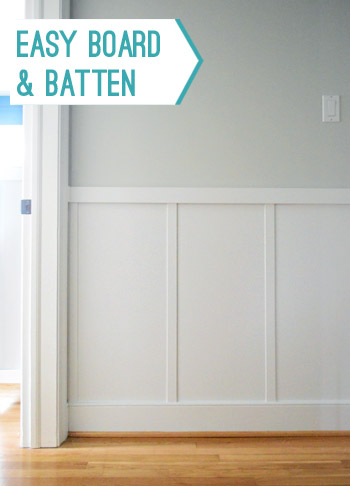
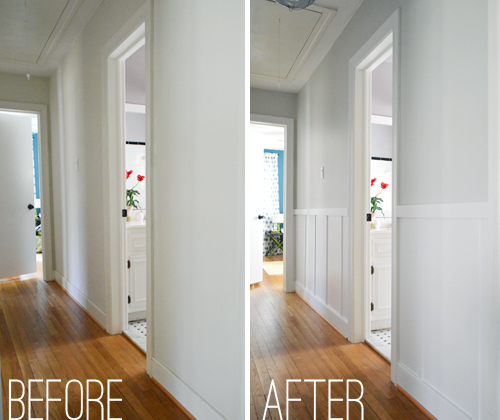
We had long known that adding some sort of molding feature to our hallway was in our future… and now we’re just kicking ourselves for waiting so long. It cost us a mere $57 for the materials (we did buy a tool on top of that, but we’ll get to that in a second) and it only took a few hour-or-two-long work periods over the course of 6 days (including some break days for paint-curing) to finally bring some oomph to our boring hall. So anyone who’s looking to tackle this on nights and weekends could hopefully do it within a week since each step only took a few hours and could be spaced out across each evening.
Planning Our Board & Batten
We were inspired by a few other tutorials – like Ana’s, Kate’s, Sarah’s, and Emily’s – and took pieces and parts of each to figure out what worked best for us. So our tutorial below may not be exactly what your space needs, but between the lot of us there should be a fitting solution in there! Let’s just say that we learned that there are many different ways that you can approach board and batten, so a lot is about personal preference, what suits your home, etc.
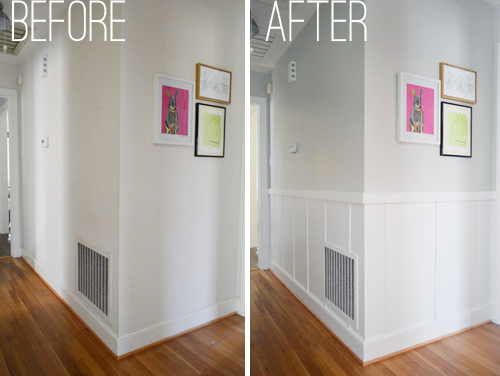
As for our approach, there are a few things to note upfront:
- We did not add any “board” to the wall – i.e. large flat panels. Since our walls are smooth (not textured) we just used the existing drywall as the backdrop for our vertical battens. Once everything was painted it all looked seamless and gleaming, just like a board would have looked. But if you have textured walls, check out Kate’s tutorial above.
- We used our existing baseboards. Why? Because it was easier – and you know we love to use what we have. Simply by choosing battens that were thinner than our baseboards, we could keep them in place and work with them (saving us time and money). But if you can’t or don’t want to take this approach, both Ana and Kate’s tutorials above talk about replacing the baseboard.
Oh, and if you’re not the word-reading type we made two videos of the process for you (one for the building portion and one for the finishing). So here’s how it all went down when it came to installing the rails and battens (including tips for how to keep the boards level, how to space them out, how to keep them from bowing too far from the walls, etc).
And here’s how we finished everything (including how we filled the nail holes, how I cut in without taping off, and a bunch of other stuff that we shoved in there):
And fret not if you can’t watch the videos (if, say, you’re at work) – we broke down all the steps with photos and descriptions right here (note: watching them later if you’re planning to tackle this might simplify things a lot – I always think videos make things less intimidating).
Measuring & Shopping For Materials
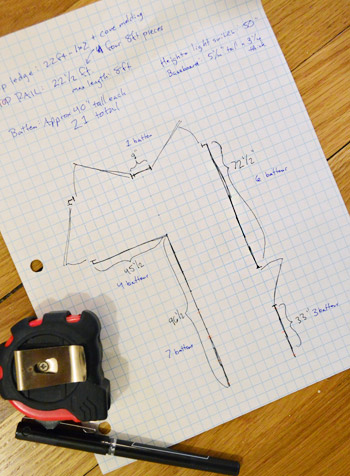
To start, we measured the space and planned our materials. My graph-paper sketch was probably overkill, but it made me feel better. It helped us plan how many boards we needed for the top rail and ledge, as well as count how many battens (the vertical strips) we might need.
Next up was a supply run. We had most of what we needed on hand, so the only four items that we ended up purchasing are pictured below (the nail gun being a belated birthday gift from my sweet wife who was just waiting for me to pick out the one I wanted). Update: The nail gun shown below is no longer sold, but we’ve switched over to using this compressor-less nail gun these days anyways.
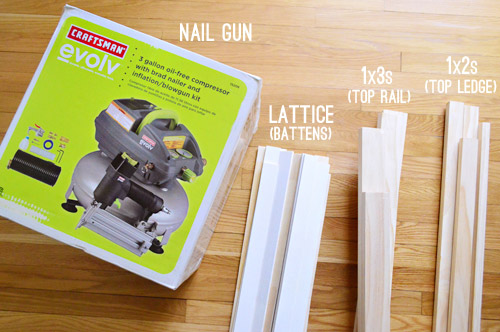
Tools & Supplies Needed
Here’s a full list of supplies & materials that we used (many of which we had on hand, along with the things we purchased above):
- Pneumatic brad nail gun
- Pre-primed lattice strips (our came in 12ft lengths, so I cut them down in store for easier transport)
- 1 x 3″ pine boards (for top rail)
- 1 x 2″ pine boards (for top ledge)
- Measuring tape
- Laser level (optional)
- Level
- Stud finder
- Miter saw (you can also use another saw for cutting wood, or even have them pre-cut in the store)
- Spackle, joint compound, or wood filler (for filling nail holes)
- Paintable white caulk meant for moldings & a caulk gun
- Sandpaper and/or palm sander
- Primer
- White paint (we used an extra durable cabinet-type paint in a satin finish)
- Paint brush, roller, and other painting supplies
*Buy your wood around a week before you start the project and just let it sit in your house (this is called “acclimating” the wood) to avoid any cracks caused by expansion or contraction, which happens if it’s not acclimated when it’s installed.
Installing The Top Rail
We opted to use 1 x 3″ pine boards for the top rails, which we wanted to attach first (after their acclimation period). So I cut them with my miter saw to fit snugly along each stretch of wall. If you have exact measurements for your space you can even get them pre-cut for you at Home Depot, so don’t let the use of a saw scare you off from this project.
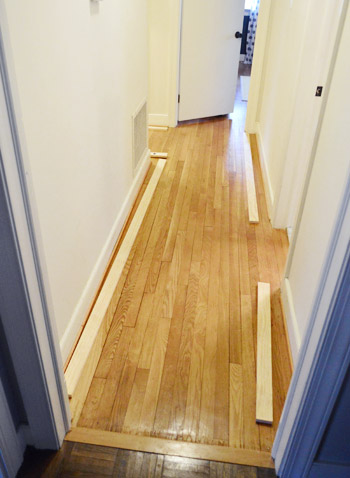
Before attaching them to the wall, we had to do a few things – like deciding the height of our board and batten. We first assumed “the higher the better!” and held it just under our light switches and thermostat. But after stepping back, we realized the high placement was just making our eight foot ceilings look lower than they already are.
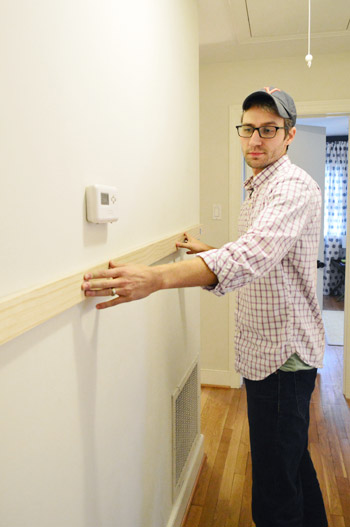
So, as you’ll see, we later landed on a more traditional height of 40″ off the floor, which is a lot closer to the “traditional range.” But again, many aspects of installing board and batten are just a personal preference thing, so go with whatever you think looks best for your space. I’m sure rooms with tall ceilings or ornate crown molding might look awesome with higher board and batten (as well as mudrooms and other entryway areas, etc).
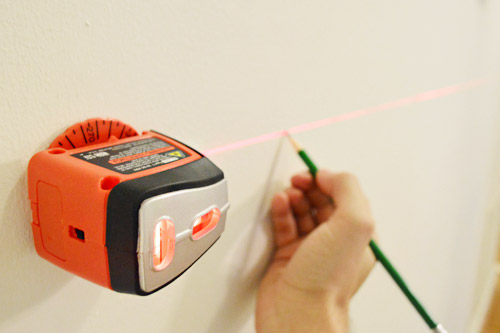
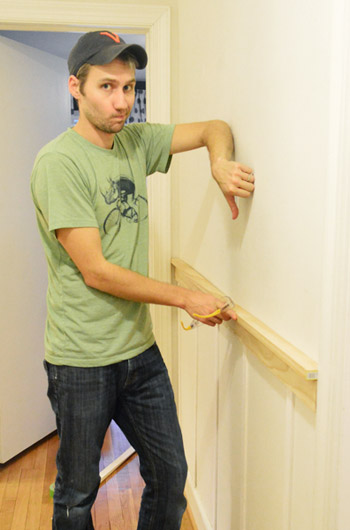
Since floors and baseboards aren’t always level, we relied on this cheap laser level that I picked up a while ago to mark the 40″ line on a few spots along each wall. Those marks created a guide for us when holding our 1 x 3″ board in place.
And since nails are always more secure when they go into studs, we also broke out our stud finder to mark each to-be-nailed spot along the wall. Obviously just remember to make your marks low enough that they won’t be covered when you hold up your top rail piece.

Next up was nailing the rails into place with my new pneumatic (i.e. air compressor powered) brad nail gun (the one photographed has been discontinued, but we switched to using this air-less nail gun anyways). This was my first time ever using one and it intimidated me the first few times, but now I’m in love with it (not as much as Sherry, who says she wants to marry it). I’ll write a separate post about it later, but let’s just say it was the saving grace of this project. It probably would’ve taken us three or four times as long to complete the construction portion of this project without it. We bought a pretty basic, but well-reviewed Craftsman model (here’s an affiliate link to it for ya).
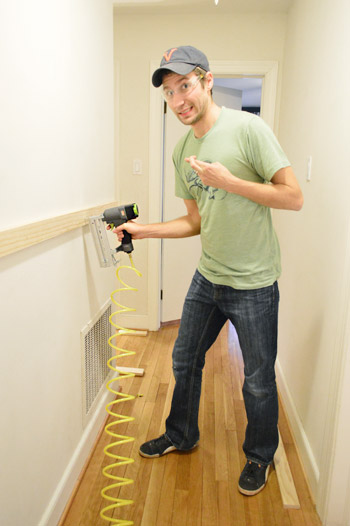
So here are all of the top rails in place. We opted not to glue them to the wall in addition to nailing them into studs simply because if we ever decide to remove or replace this, we don’t want to rip off chunks of drywall in the process. The good news is that the boards are so light – especially all of the vertical lattice pieces – that nails shot into studs with a nail gun are supremely secure… especially with the caulking that we did around any cracks to hold them even more firmly.
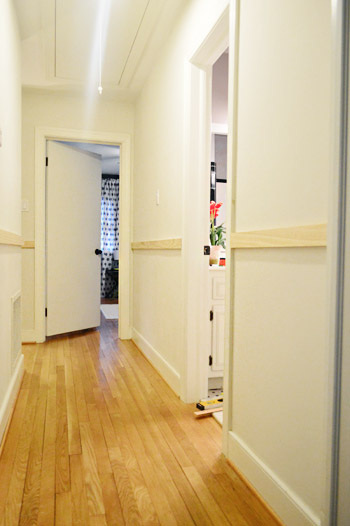
But even if you opted to glue things on top of nailing them, it wouldn’t add much time or cost to the project (a tube of Liquid Nails is just a few bucks). Speaking of time, if you subtract the time it took us to set up and figure out the nail gun, I’d say the process of measuring / cutting / nailing these took us about an hour.
Adding The Vertical Battens
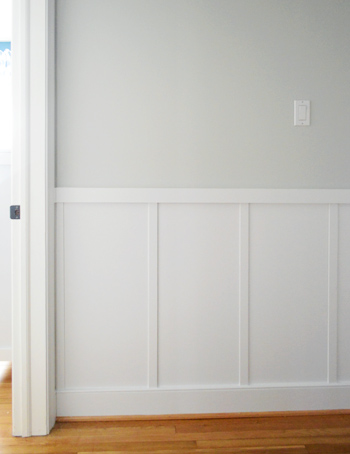
We used lattice strips at Sarah and Emily’s suggestion because they were cheap (66 cents per foot!) and they didn’t stick out past our existing baseboard. Had we used 1 x 2″ boards like some folks do, it would’ve hung over our baseboards. We could’ve replaced our baseboards too, but then they would’ve stuck out past the trim around the four (count ’em four!) doors in our hallway. So yes, chunkier battens could be nice in less narrow spaces (we didn’t want ours to jut out too far and close things in) but in our case we actually thought the lattice + rail setup was ideal and we like the dimensional-but-not-crazy-thick result.
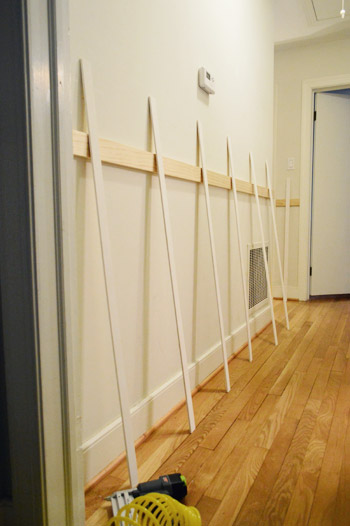
We chose to space our battens at 16″ intervals because our studs are 16″ apart and this meant that more nails would go into studs, not just into drywall. Plus, when we held up a few spacing options it looked pretty darn good (seriously, half of this project is just deciding what looks best and going with it). To make our lives easy, we used a scrap piece of 1 x 3″ board to make a spacer (a 14.5″ spacer kept the lattice 16″ apart from center to center).
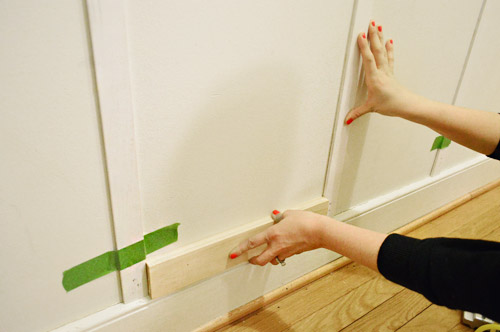
The lattice was light enough that tape held it to the wall while we used a level to make sure each batten was perfectly vertical. Then Sherry went back with the nail gun and secured them in place. Is it wrong to say that watching my lady concentrate so hard while wielding a power tool got me a little hot and bothered?
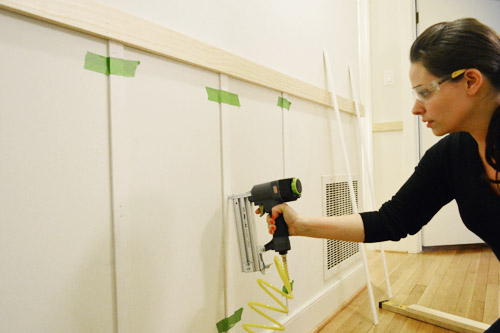
About an hour-ish later, all of the battens were cut to size and nailed into place.
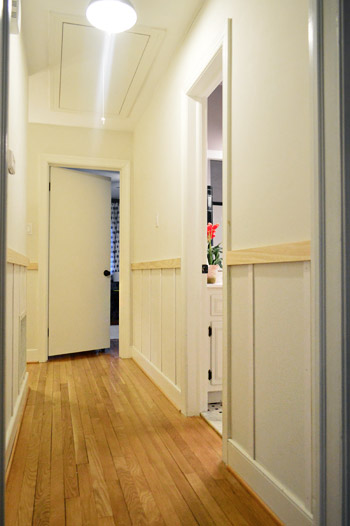
Since we wanted the batten on the facing walls to line up (and that’s where the studs were, which added stability), the placement was pretty easy to determine. But if you were tackling this and not every batten could end up in a stud to accomplish a balanced look, I’d go with balanced placement over hitting every stud (they’re seriously as heavy as a paint stirrer, so they’ll likely hold up fine either way).
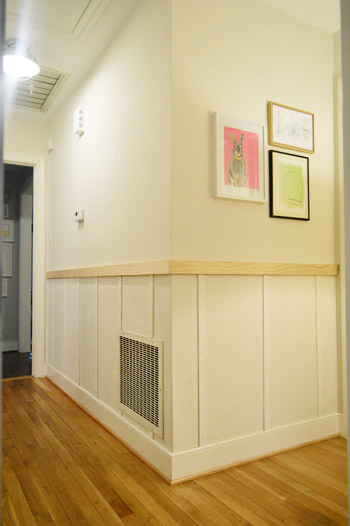
At around this stage of the project, Clara saw it for the first time – and here’s her reaction word for word: “Wow! It’s beautiful! Did a man come while I was sleeping and bring that?” Is that kid hilarious or what? She totally didn’t give us credit for it. We think it’s because that morning the heating guy came with an oil delivery for us, so she remembered a man coming to help with something and assumed he came back to fix up the hallway for us. Naturally.
Lots of the tutorials we saw included adding a ledge along the top to sort of beef things up or create a spot to lean art or other items. We bought some 1 x 2″ pine for this purpose but as soon as we held it in place we realized we didn’t really like it. Since it wasn’t going to be a functional ledge for us, it basically just narrowed the hallway more and created a few hazardous little corners for tiny heads to walk into. So we scrapped the idea, returned the wood, and enjoyed calling the construction phase: COMPLETE.
Prepare For Painting
The next day we started to prep the space for painting by filling nail holes and caulking gaps. At the recommendation of some of you guys, we went with spackle over wood putty (we hear joint compound works too) since it’s said to be easier to work with and holds up better over time. It certainly went on easier than wood filler so assuming it keeps looking as good as it looks right now, we’re completely sold on that approach for filling nail holes after your rails and battens are hung.
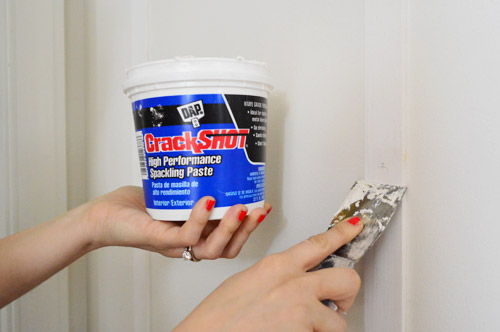
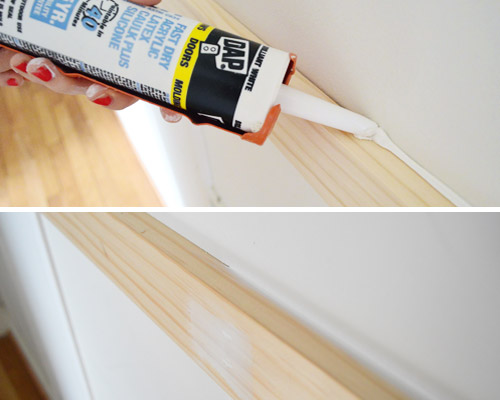
After all of the nail holes were spackled (not a fast process, but not too bad – maybe it took an hour total?) we used paintable white caulk to fill some of the gaps between our boards and the wall. Since our old house doesn’t have perfectly flat walls, this was a necessary step to keep the project looking nice and polished in the end. We didn’t do every edge, just the ones that needed it (across the top rail and a few places along the battens). I’d say the caulking step added another hour of work in case you’re wondering. Oh and definitely watch the finishing video in this post for more details about exactly what caulk we used, how I smoothed it, etc.
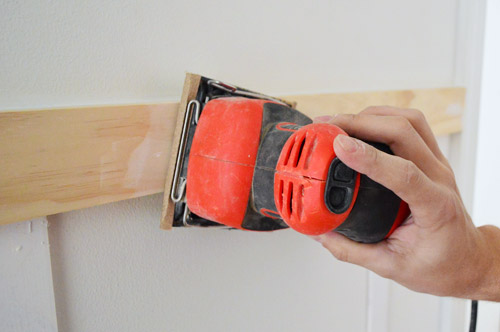
Later that day we broke out the palm sander to get rid of any excess spackle around the nail holes.
Prime & Paint
After that, the rails and battens were ready for primer. We already had Kilz Premium (which is a stainblocking primer) on hand, so we used a brush and a small foam roller to put one coat of primer on each piece of wood to prevent any bleed-through in the wood down the road (always a worthwhile “insurance” step). And we went over the battens too, just to be safe (even though they came pre-primed). Here’s the whole thing primed and almost ready for paint. Just had to let the primer dry.
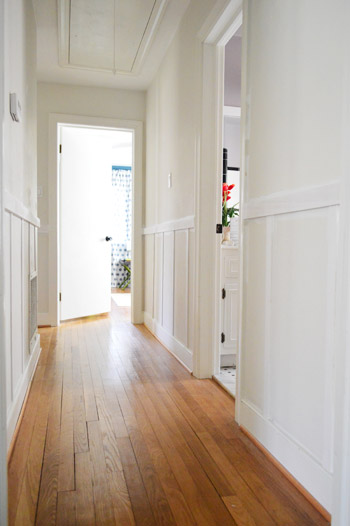
The next day it was finally time to paint the board and batten. We used Benjamin Moore Advance paint in Decorator’s White in a satin finish leftover from our office cabinet painting project. Advance paint is especially durable (we used it on our kitchen cabinets too) so we figured it was a good choice for hallway molding that might get its fair share of wear and tear.
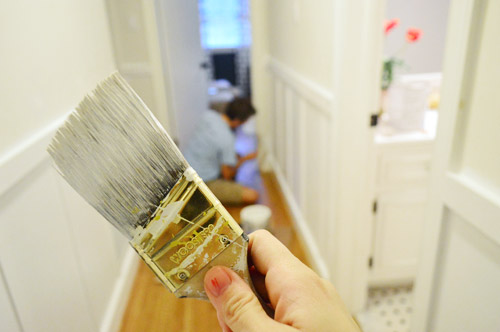
Admittedly, the finished picture of the painting step isn’t very dramatic since the walls above were still off-white.
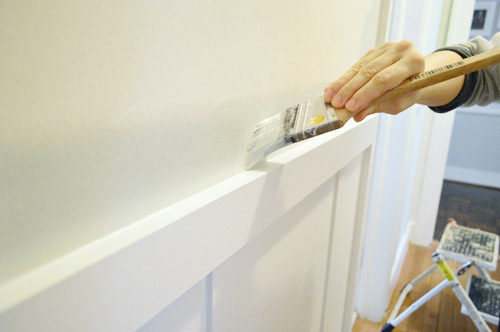
So after letting the paint cure for a couple of days we tackled painting the walls above the board and batten. Sherry was still nervous that taping the freshly-painted top rail could peel paint off, so she opted to cut in by hand around the top rails (you can read her tips for doing that here and watch the video in this post and the video here for even more tips). She did a great job, despite not having her usual short-handled brush handy.
After she was done edging, I went back with the roller and (after a second coat) we had the finish line in sight.
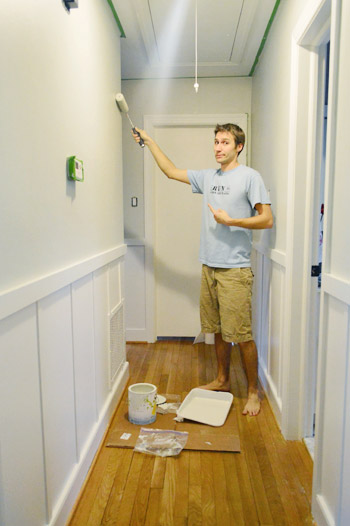
Oh, and if you couldn’t tell – we were painting the walls with Moonshine by Benjamin Moore since:
- we had some leftover from painting our dining room
- we didn’t want anything too bold/dark to close in the hallway
- it’s the color in the adjacent frame-filled hall and we wanted them to relate to each other (so things didn’t feel too choppy)
Note: we still have to paint the trim in the frame hallway the same white color as the board and batten.
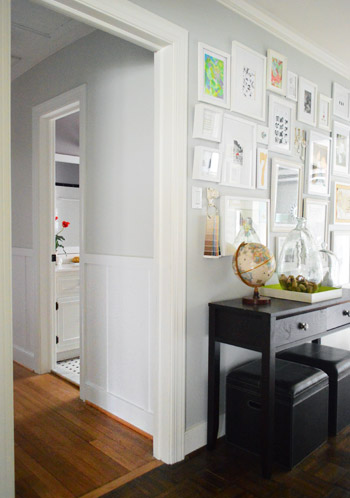
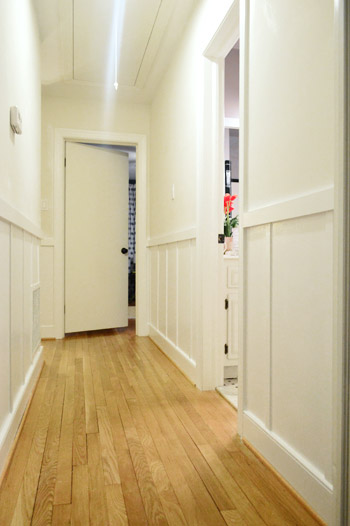
Boom. Just like that we’re ready for after pictures. So here we go!
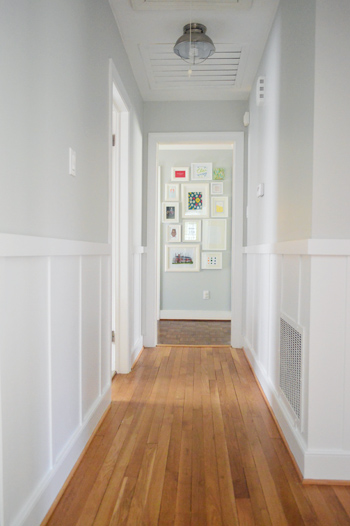
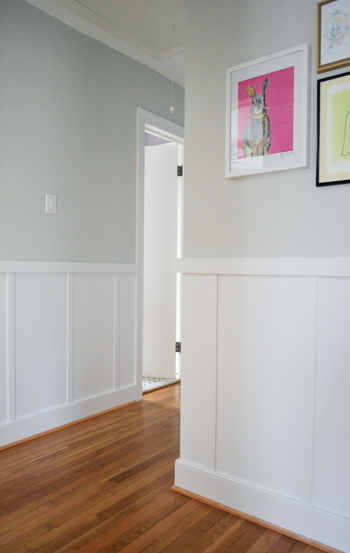
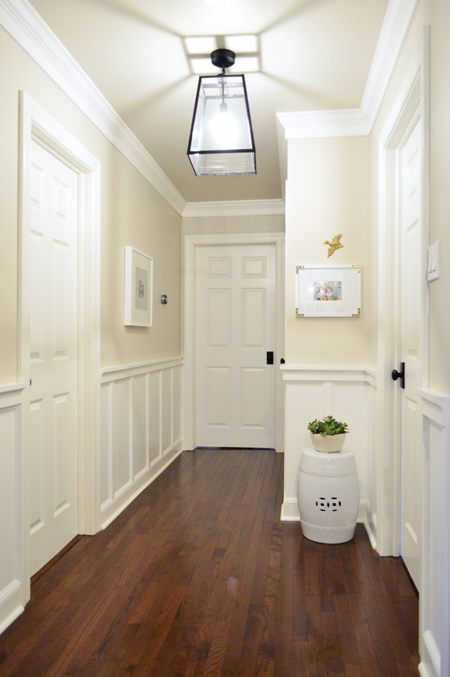
We’re in love with the result. And we’re kicking ourselves that we didn’t do it sooner. You know how you never quite realize how “blah” a space is until you do something to it and wonder why you waited so long? I mean, we walk through this hallway dozens of times a day and all we had done up to this point was hang some art in one small corner (the most hidden part of the hallway, ironically). But now that we’ve got the board and batten up we’re ready to hang some more.
Total Project Cost
Okay, so let’s break down the budget. We only spent money on three items since we had things like paint, spackle, and caulk on hand. And had we actually purchased my nail gun back at my birthday in November as planned, our total cost for the project would’ve been only $57. Crazy, right?!
- Four 12′ pieces of lattice – $32 ($0.66/foot at Home Depot)
- Two 8′ pieces and two 6ft pieces of 1 x 3″ pine – $25 (also from Home Depot)
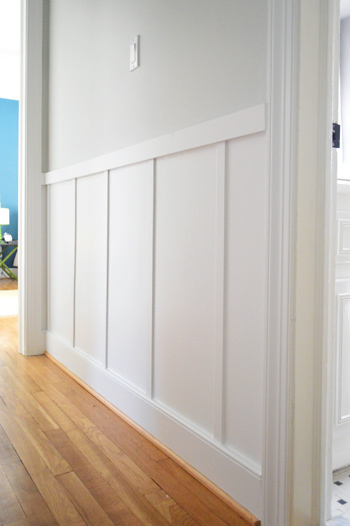
And time-wise, our project stretched over the course of five days (six if you count the trip to Home Depot for the materials). But if we had the luxury of not having to schedule things around Clara, it probably could’ve been completed in three days (first day for construction & spackling/caulking, second day for sanding/priming/painting the board and batten, third day for painting the wall). Heck, you could probably even ditch that third day if you’re doing this project on an already painted wall.
But if you’re doing the nailing by hand it might take longer (which explains why Sherry had the urge to make out with our nail gun). Oh but if you don’t want to buy one, you can always rent one from your local home improvement store, so that’s another option.
But here we are, roughly six days later and waaaay more excited to walk down our hallway. We’re now in the midst of figuring out what to hang on the walls above the board and batten, as well as choosing what next project we can take on to satisfy the itch I’ve now got on my nail gun trigger finger (after I wrestle it away from Sherry). I smell some crown molding in our future…
UPDATE: We repeated this project in our new house, but with a twist to make it feel a little bit fancier. Check out the tutorial for our new twist on classic board & batten here.
Update – Wanna know where we got something in our house or what paint colors we used? Just click on this button:


Elizabeth@real inspired says
Love it! I’ve been in love with board and batten for some time but can’t do it since we have textured walls and don’t want to dump that much time and money into our rental. And replace baseboards. I don’t think we could get permission for that!
I love the color on the walls too!
Gabriella @ Our LIfe In Action says
I love it – it gives the house a more finished feel. Now the walls “feel” more like an artsy addition rather than “just walls” (if that makes any sense. And geeze!! You can’t beat that price!
Megan F says
Seriously amazing. We have a HD gift card from Christmas burning a whole in our pockets so maybe a nail gun is just what I, I mean WE, need. :-)
Jani says
Thanks for the simple breakdown, loooove the result! I’ve got an entry/hallway/kids bathroom that is screaming for this treatment–any idea how it would look in a newer house with rounded corners? I would have to add a flat panel behind over my orange-peel textured walls, so there’d be sharp corners down below and rounded corners above. Hmmm.
I have the same laser level and stud finder, too! Maybe I’ll ask for a nail gun for Mother’s Day–that’s how I got a miter saw last year! My husband thinks he’s won the gift-giving lottery.
YoungHouseLove says
Haha, I love it! And as for a newer house with rounded corners if you could make it work I think it would be gorgeous!
xo
s
D. Marcos says
Hi Guys,
Love the site! I have a random-ish question for you guys, if you start out on a free WordPress.com site, can you easily carryover your site and site name to other places, i.e. WordPress.Org, and then other other places? I don’t know a lick of coding and have been dying to start my own blog, but the fear of needing to be a coding expert or needing to start from scratch if you move from one site to another has me a bit paralyzed. Any advice/comments/suggestions? Thank you in advance!!
YoungHouseLove says
We did that (started with a free site and migrated to a dedicated URL later) and it was a huge pain in the neck. We still think it’s smart to start with a free one because for every 100 people who start a blog, probably only 50% are still doing it a year later, so it’s nice to see if you love blogging enough to get a dedicated URL later, so it’s annoying to transfer but doable if/when the time comes :)
xo
s
Jennifer E. says
Awesome job!
Have you ever thought about painting the quarter round white to match the baseboards?
YoungHouseLove says
It’s like this throughout the house, so that would be a big job (we also found that it hides dust/hair/scuffs when it blends into the floor so that’s a definite perk!).
xo
s
mary says
What my hallway really needs is a solar tube. Any chance you have plans to do one of those someday? I love it when you guys are my guinea pigs. LOL
YoungHouseLove says
That could be fun, but we have an attic (with the access right in this hallway) so a solar tube there probably wouldn’t be ideal :)
xo
s
T says
The B&B looks great! You should get some caulk applicators. They’re little blue rubber tools that are usually just a few bucks at the hardware store – worth not having to clean the caulk out from under your fingernails!
Here’s more info from the original product (though they are less expensive now and I think more generic ones are avail): http://www.toolsnob.com/archives/2009/08/dap.php
YoungHouseLove says
Oh yes, those are cool! I’ve never bought them but they look nice and easy!
xo
s
Deborah says
The hallway looks beautiful! I have been reading a lot about board & batten before I try to tackle our dining room. I plan on removing the cheap baseboard. Can you tell me the height of your baseboards?
My husband has a nail gun with a big compressor which is not as easy to use. Thanks for the tip on a more portable one!
YoungHouseLove says
They’re around 4″ tall. Hope it helps!
xo
s
Lisa says
Still absolutely obsessed with this! Quick question, and my apologies if its been asked already. It looks like you have a few inches of wall space between the doors of Clara’s big girl room and the guest room–did you squeeze a batten in there, or just the top rail and paint down to the baseboard? My hallway has a lot of those little spaces, so I would hope it wouldn’t look weird or missing something.
Thank you so much!
L
YoungHouseLove says
We just did a top rail there since we tried both ways and it looked too cluttered and cramped with a batten there. Just trust your eye!
xo
s
Ali Miller says
I am commenting just to make sure you don’t feel any shortage of enthusiasm from your readers for this post! I have a very long hallway and I think this might be JUST what it needs! Great, easy instructions as well. And…even if no one is interested in any of that…it includes John in his glasses. Oh my! :)
YoungHouseLove says
Haha, isn’t he a cutie with his glasses on? I’m on a campaign to get him to wear them more.
xo
s
Ali Miller says
Well, everyone has commented. John…you gotta give the ladies what they want. Campaign complete. Victory for Team $herdog.
YoungHouseLove says
Hahah!
xo
s
adrianne@dreambookdesign says
You guys are so great! We are big lovers of B&B, and are about to tackle our new house with it everywhere. We did it in our sons nursery in our old house, so we feel like we know what were doing- but still love your tips!! Thanks so much for taking the time to show all the details. We look up to you guys a lot:)
Dream Book Design
YoungHouseLove says
Aw you’re so sweet Adrianne! I’m sure it’ll be gorgeous! Good luck with everything.
xo
s
Debbie C says
The hallway looks fabulous! I saw this on Kate’s blog when she first posted it and it definitely looks easier without the boards. How smooth are your walls, do they have any texture at all? My condo used to be an apartment, so it’s been painted over many times and as a result has a slight orange peel texture. Nothing crazy, but wondering if you think I could get away without boards?
YoungHouseLove says
They’re super smooth (no texture at all). I bet if it’s just a slight texture you could skip the boards and once it’s painted it would hopefully not be very noticeable :)
xo
s
sarah says
Love it. You get such a great result from something that is cheap and relatively easy! Like crown moulding, it’s one of those things you only realise the impact of when it’s there. It makes the whole space seem so much nicer.
Jamie says
How is your paint holding up on your kitchen cabinets? We are planning on painting ours and I noticed Katie Bower had some issues with the Sherwin Williams paint. I think you guys used the Benjamin Moore paint on your cabinets?
YoungHouseLove says
Still awesome! We used Benjamin Moore Advance paint and over a year later it’s mint!
xo
s
Jules says
Do you have plaster or drywall?
YoungHouseLove says
We have plaster in some parts of the house, but the hallway is drywall!
xo
s
Stacy says
I love how it looks. May I ask how you keep all the white baseboards clean? I have such a hard time keeping mine looking white and have recently noticed a lot of peeling in my living and dining room where I have wiped them down. Just curious as to how often you clean them as well, especially with your little one and all your DIY projects. Thanks!
YoungHouseLove says
The key is to use semi-gloss or satin paint (much more wipeable, and good paint is much more scrubbable than cheap paint!). Hope it helps!
xo
s
Stacy says
Thank you! Hopefully we’ll be repainting this summer (my neighbor offered to help me after I have baby #2 in June) and I will keep that in mind. I get the feeling the previous owners used the cheapest paint they could find. Half of my house is peeling or chipping and it looks awful!
verucaamish says
Your studfinder comment – “that’s how I found Jon!” – cracked me up. I was thinking back to the sex appeal show that you all got pitched.
YoungHouseLove says
Hahahah!
xo
s
Kathy C. says
Your hall came out amazing! I love this type of board and batten. We took on this labor of love for our sons nursery last year. (link to the finished look below). I love how clean it makes the space look. Excited to see what artwork you chose to decorate the walls! I agree with leaving out the ledge. We used one for the bedroom..but for a hallway it can be a bit much. :)
http://lovelacefiles.blogspot.com/2012/05/our-nursery-reveal.html
YoungHouseLove says
So pretty!
xo
s
Amanda says
Bahahaha Sherry! You killed me when you said “And that’s how I found my husband!” Love it. The hallway looks UH-mazing! Great job you guys! :D
YoungHouseLove says
Haha, thanks Amanda! I’m so corny (hides face in hands).
xo
s
Susan Winters says
Great job guys! It hit all the points – flexible enough to accommodate parenting responsibilities, incredibly cost effective, manageable in small chunks and minimal materials as well as adding a nice, clean grown up look to a utilitarian space. Pat yourselves on the back.
YoungHouseLove says
Aw thanks Susan!
xo
s
Jill @ The Rozy Home says
Looks great! I actually used plywood between the stiles but I kind of had to – my three year old likes to throw toys down the stairs and was dinging up my walls! I’ve had the new b&b up for only a couple of weeks and he’s already damaged one of the panels. Boys!!!! :-)
YoungHouseLove says
So smart!
xo
s
audrey says
Love it!! Quick Question – where is that light fixture from (the one in the beautiful new hallway…)
YoungHouseLove says
Ooh we have to blog about that too! Soon I hope!
xo
s
Barb says
Looks awesome, you two! You guys are ‘fearless’ DIYers. :)
YoungHouseLove says
Aw thanks Barb! It’s hilarious to us that it took us this long to get a nail gun! Haha. Slowly but surely!
xo
s
Danielle says
Eeeee I see a new light fixture in the hallway! Love it! :)
YoungHouseLove says
Wahoo! Can’t wait to blog about those details soon!
xo
s
Jessi says
I love how y’all keep pointing out that the trim in the frame hall needs to be painted “pure white”. I recently repainted our whole house but haven’t gotten to all of the trim yet, and I feel the need to point that out to everyone who visits-at which point they give me the crazy eye. Glad I’m not the only one who a)is bothered by it and b)is living with off white trim until i can get to it! :)
YoungHouseLove says
Hahaha! It’s one of those things that once you notice it you can’t un-notice it!
xo
s
Laura says
It looks beautifull!
Just for clarification: You used the same acrylic paint on the wood and on the wall behind it, right?
I have never heard of using anything other than designated wall paint on a wall, so I am curious. Would it be possible to paint over tha<t surface again using normal wall paint?
YoungHouseLove says
Oh yes, it’s not acrylic paint, it’s just wall paint (Benjamin Moore Advance) and we used it on the walls and the wood. So they can all be repainted any color we’d like down the line. Hope it helps!
xo
s
Sara says
LOVE. THIS. We are totally going to do this in our upstairs hallway. You guys are transforming our house!!! Thank you so much for you inspiration! I never thought I had it in me to do the things are so easily doing!! I also happen to live in Richmond which makes it super fun to read your blog!
YoungHouseLove says
Aw thanks Sara! Good luck with everything!
xo
s
Jen@The Decor Scene says
LOVE IT!!! I totally want to do this in our hallway now. Turned out great. Added lots of character. :)
Donita says
Love the look!!! You guys did a great job, looks amazing!! This was a great post full of good information!!!
P.S. On both of the videos, an advertisement from FB popped up. It said, “2 friends want to rebound with you.” See who I did not click on anything, just the X to get rid of it, but it left arrows at the bottom of the video, so that the ad could be brought back up. Hope that made sense. Anyway, maybe you were already aware of the ad, but just in case you didn’t add them yourself. Love the hall!!
YoungHouseLove says
Boo! What the heck is that? Thanks for the tip!
xo
s
Staci @ My Friend Staci says
This looks amazing!! The hallway looks so great, and I’m sure it feels much less forgotten now.
A cautionary tale about letting the guy at Home Depot cut your wood for you… They almost always assume I have no idea what I’m talking about since I am just a 5’2″ 25 year old girl. Last time, I specifically asked for my piece to be cut at 61″ and he cut it at 60″. I don’t know if he was just used to cutting things at the even 5-foot length, or if he was lazy and didn’t measure right, or if he assumed I didn’t know what I was talking about. However, it was just one more instance in a string of being corrected by “helpful” employees when I know I had done my research before coming in.
Gah! Just realized how long this reply was. Sorry for venting! The board and batten looks fabulous!
YoungHouseLove says
Oh man, that stinks Staci! I’m the weirdo who double checks the measurement before I drag it to the front and pay! Maybe that’ll nip it in the bud if it happens again :)
xo
s
tricia says
Yep – this is so awesome I couldn’t wait to see your reveal- gives me confidence that my hub & i can do it – now to find a place to make it happen hahaha! also- noticed that ceiling light – looks to be the same one as in your guest room bath… can’t wait to see the future posts about it – you guys are very inspiring!
YoungHouseLove says
Aw thanks Tricia! We can’t wait to write about it!
xo
s
Desiree C. says
Fifty-seven dolla hollas?! I’m shocked. It looks so expensive, you guys! Great work. I’m officially inspired to do this in our kitchen instead of wainscotting (though I love wainscotting, this seems cheaper). One thing (along with so many other things) I truly appreciate about you guys is you compare it to those working outside their homes and how do-able your projects are at nights and on weekends. Thank you, thank you, thank you! It looks wonderful!
YoungHouseLove says
Aw thanks Desiree! You’re so sweet. Good luck with everything!
xo
s
Casey says
Looks so good! However my favorite part of this post is Clara’s reaction. So funny.
We did wainscotting similar to this several years ago in our basement family room and painted Behr’s Marine Magic above (a deep navy with a hint of teal, very close to the color on the back of your built ins). Still one of my favorite projects we’ve ever done, and it was so much easier than expected!
YoungHouseLove says
Sounds so pretty!
xo
s
Cory says
Wanted to stop by and say hi. I’m a long time fan but don’t think i’ve ever commented- trying to get over my internet shyness:) Love how your hallway turned out, adds so much character. We’ve been contemplating B&B for our entryway but i think we’re going to take it right to the cieling. I guess we’ll see once we get the strips in here. Thanks for doing what you do.
YoungHouseLove says
Aw thanks so much Cory! Good luck with everything!
xo
s
Jess @ Jess{ly} in Cleveland says
Wow, that looks incredible! You guys really did make it look easy too. I love your blog & it makes me look forward to owning my own house in the semi-distant future :) Will definitely be referring back for ideas!
YoungHouseLove says
Thanks Jess! You can do it!
xo
s
Heather W says
You may have answered this but I am at work and can’t read all the comments right now. First off I absolutely love what you did and how you did it. I am so inspired to do my own hallway….or room or something!! I couldn’t tell in the photo above but the wall (with the register( that meets the wall with Clara’s rabbit pic did you all miter those or leave them squared off with one sort of overlapping the other…I wasn’t sure if John cut those or did Home Depot. Just curious because we don’t own a saw of any type. Thx.
YoungHouseLove says
We didn’t actually miter them since we held them up and they looked just fine squared off in that overlapping way (once we caulked and primed and painted it looked nice and seamless). Hope it helps!
xo
s
Shannon S. says
It looks fantastic! I love the flatness (word?) of the lattice. Great job!
Michelle says
Can I just say I have followed you guys for years now and you just get better and better. Your video was very informative and the instructions and the pics make it look SO easy! Cus this girl ain’t crafty/handy/or anything in between/plus have too many kids to have the time;)
YoungHouseLove says
Aw thanks Michelle! It really was simple – especially with the nail gun! Good luck!
xo
s
Lynn @ Our Useful Hands says
Oh that’s all?!? ;) No but you guys seriously made this look pretty easy and very doable for weekend warriors like ourselves. It’s so purdy too! The only thing is that we have one wall this is gouged out like crazy because of our dog/puppy getting bored one rainy day so we have to use the slabs of wood over the wall in that area in particular. I wonder if it would look odd to do it just to that spot and not the others to conserve our budget? Hmm….
My best, Lynn
YoungHouseLove says
I bet you could spackle the gouges and then once you prime and paint it would hopefully look seamless!
xo
s
Lynn @ Our Useful Hands says
(One hand on hip, the other wagging a finger at you) You guys….see???….this is why you guys are who you are…the best!…spackle!!! You have the best ideas for avoiding unnecessary mayhem. :)
My best, Lynn
YoungHouseLove says
Hahah! Good luck Lynn!
xo
s
Krissy says
Looks beautiful! I cringe every time I read the word “lattice,” because when we moved into our place, the walls stopped a foot below the ceiling and the gap was filled with lattice (painted black. why black??) to allow heat to travel through the space more freely. Ripping that down felt SO good.
YoungHouseLove says
Oh no, that’s crazy!
xo
s
Stephanie says
Looks so great guys! That must feel like a big upgrade for not a lot of money! I’m also digging the mixing of frames. I know you guys are partial to the crisp white ones, but the contrast of the wood/white/black looks very cozy! It adds a lot of character, don’t you think?
YoungHouseLove says
Oh yes, I love that little mismatched collection at the end of the hall near Clara’s room.
xo
s
Chaney says
LOVE this! All aspects. Great job y’all!!
stacy says
It looks amazing!!!! I have a quick question about the paint. I know you painted the walls and B&B with the satin BM Advanced paint, did you keep the baseboards Semi gloss in Decorator’s White?
YoungHouseLove says
I repainted all of the trim in the hallway (around all of the doors, the baseboards, etc) just so it all matched.
xo
s
Kay says
Wow. Why haven’t I thought of that? I’m short, need a stepladder to grab the rope & ball anyway, why not make it pretty and not dangley instead?
Steph says
First of all I loooove it, it looks great! My boyfriend just found out some good news about the house he’s under contract with (woo hoo!!) so it looks like closing will be at the end of March if everything continues to go well. Anyway, I feel like this is something that is definitely in our skill range to start out with, and I can think of a great place for it! It’s so overwhelming to think of all of the projects we’re going to have to do. I honestly had no idea it was this easy to do, it looks a lot fancier than that :)
YoungHouseLove says
That’s so exciting Steph! Congrats!
xo
s
Emily W says
I apologize if this is a dumb question (or if someone else already asked it), but did you have any problems with the nails going all the way through the lattice? I did essentially this same project for my son’s room using chair rail moulding and lattice, but my brad nailer had so much force that the nails shot directly through the lattice into the studs. I would love to do this for my dining room also, but I dread the thought of nailing all of the lattice by hand again…
YoungHouseLove says
Oh no, we didn’t have that issue. Anyone know why that would happen to Emily?
xo
s
Annie says
I LOVE it!! I’m {patiently} waiting to do this at our house- maybe if I show my hubby one more tutorial he will be confident enough to help me lol.
Can’t wait to see your hallway art! In my mind I’m picturing an interchangeable Clara gallery ;)
Nate says
Did you consider painting the top half of the wall before installing the top rail to avoid cutting in? I’d like to try this project at home and that thought popped in my head.
Thanks!
YoungHouseLove says
Oh yes, we mentioned in the post and in the video that would be easy, although with the caulking from the install you’d still need to touch up the wall paint :)
xo
s
Paige @ Little Nostalgia says
Your timing could not be more perfect, because we’re adding this to one of our bedrooms! I never would’ve thought to use lattice! Duh, Paige.
Question: I know you’ve been using that white paint for everything. It’s not still the same gallon, is it? How much of it did you use in the kitchen?
YoungHouseLove says
Oh no, for the kitchen we used one gallon of Cloud Cover (that’s the color name) in Advance paint. And in the office for the cabinets we used Decorators White in Advance paint (which we still had leftover for the hallway). Hope it helps!
xo
s