We mentioned in this year’s holiday decorating post that we wanted to get some sort of fireplace mantel built this month and, well, Santa delivered! ::pats self on back::
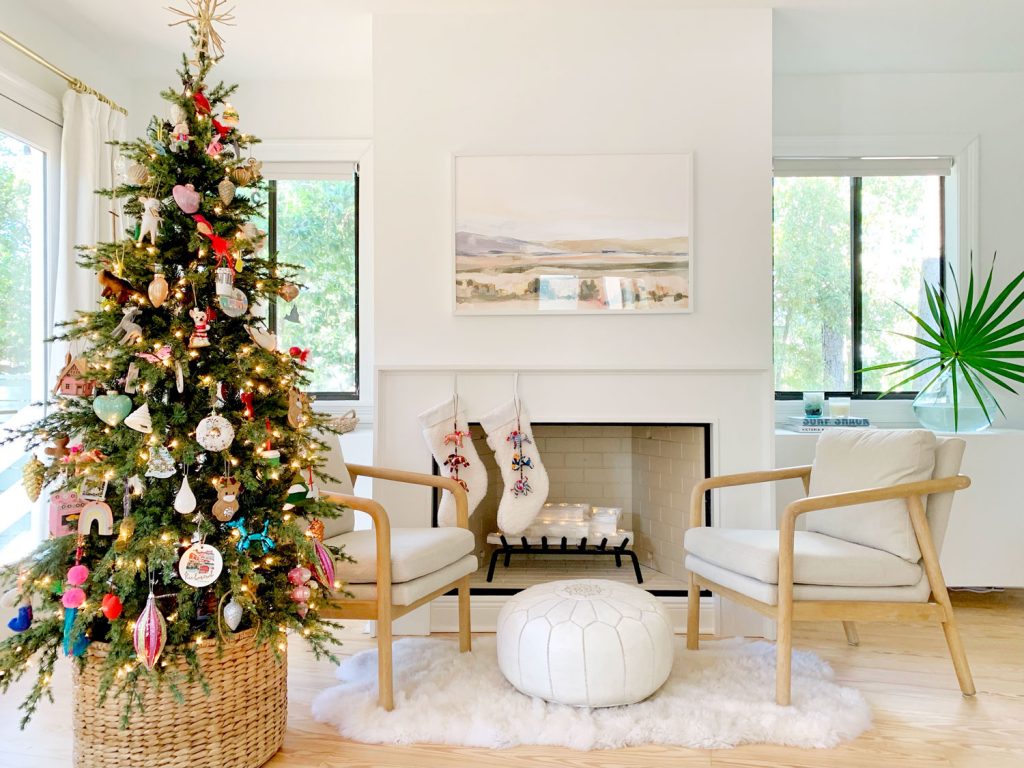
Yes, setting a goal to have a place for hanging our kids’ stockings is a little random, but we were happy to have the motivation to check this project off our list sooner rather than later.
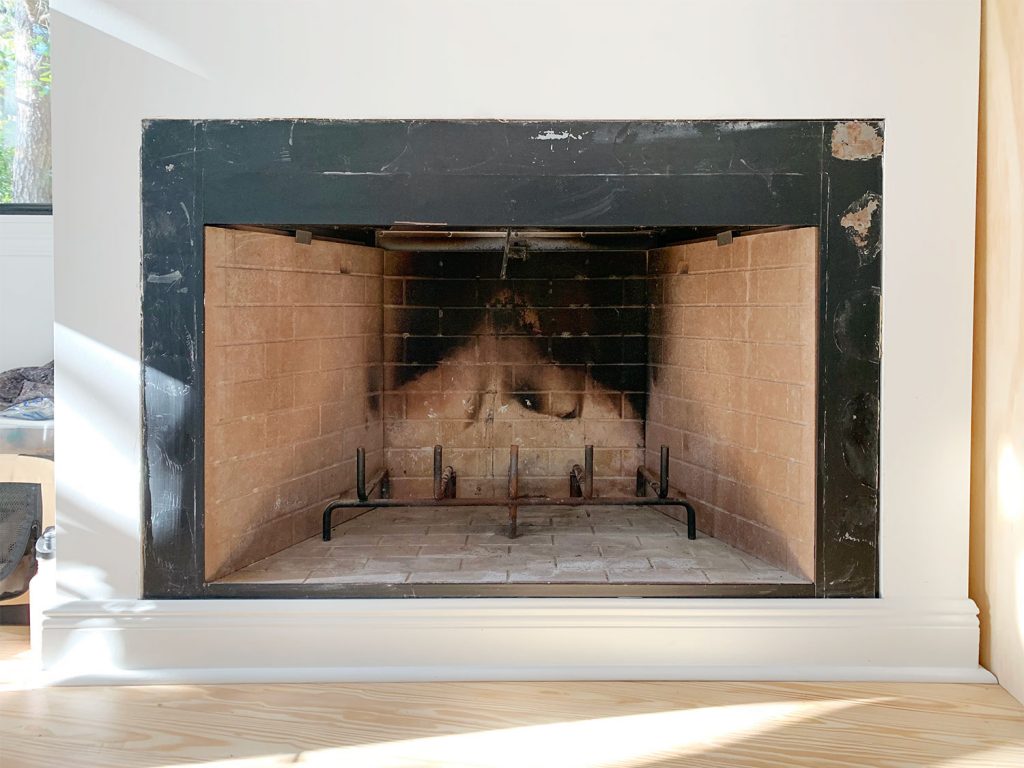
If you recall, our fireplace looked like this when we moved in:
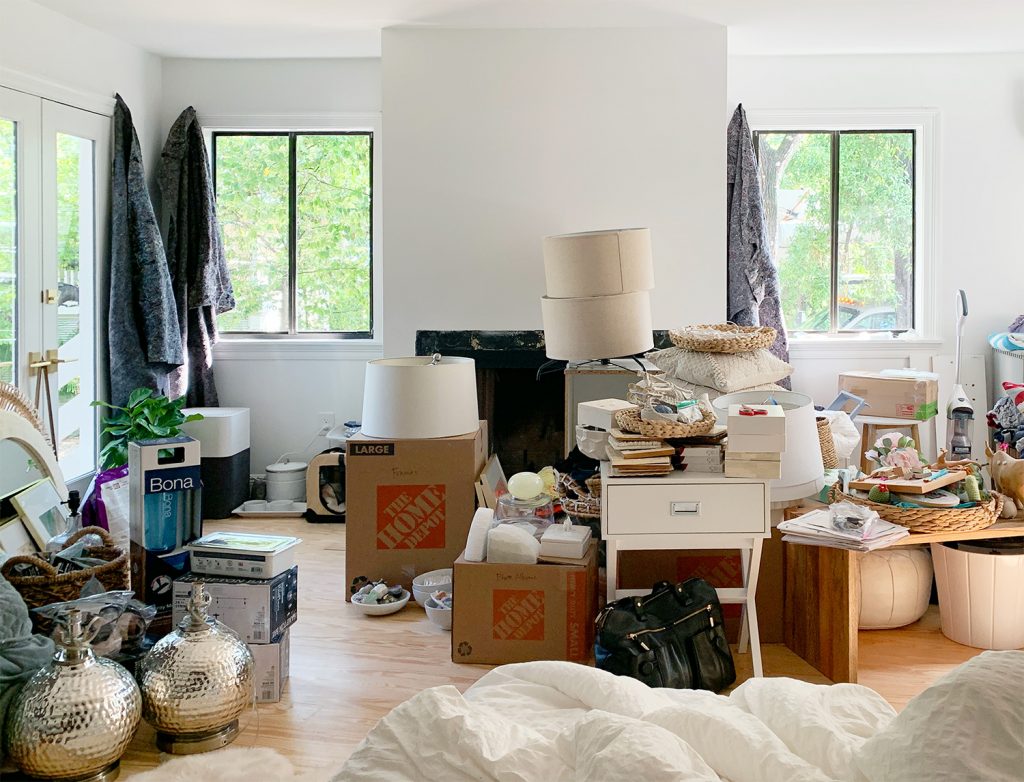
Here’s a wider shot of that area right after we got here, just for kicks. Ah, those packing blankets as curtains are #MEMORIES.
So yeah… it feels good to be here:

Sherry did some work to freshen it up over the summer, like scraping and painting the black surrounded and lightening up the interior brick with paint. And in a surprise turn of events that even I didn’t see coming, she finished things off with some crystal “logs” (since it’s a non-functional fireplace, more on that here). So here’s where it was the last time we blogged about it:
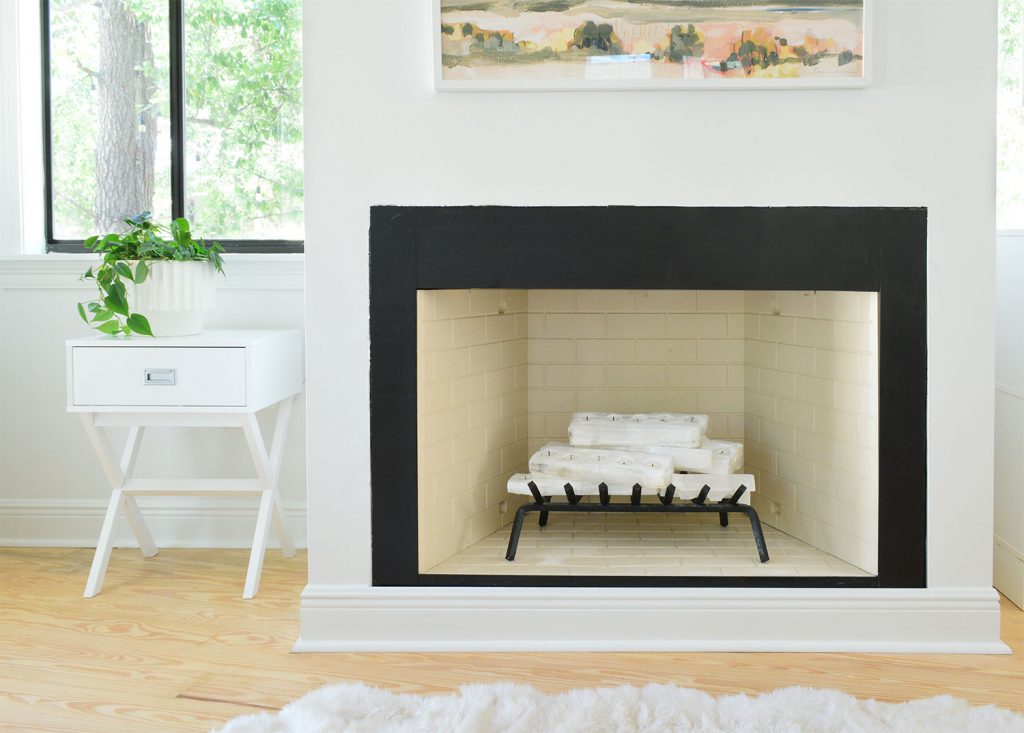
The view was much improved, but we still yearned for a bit more dimension and a mantel of sorts. And even more fundamentally, something to cover the rough transition from metal edge to drywall. We were excited to tackle this as a DIY because it’s actually the third fireplace surround project that we’ve tackled.
Our first one was almost 8 years ago in our second house, which involved covering an old brick mantel and adding a marble tile surround (you can see the final result here). Then a couple of years later we built a new mantel for our last house – this time using remnants of a marble countertop to create the surround:
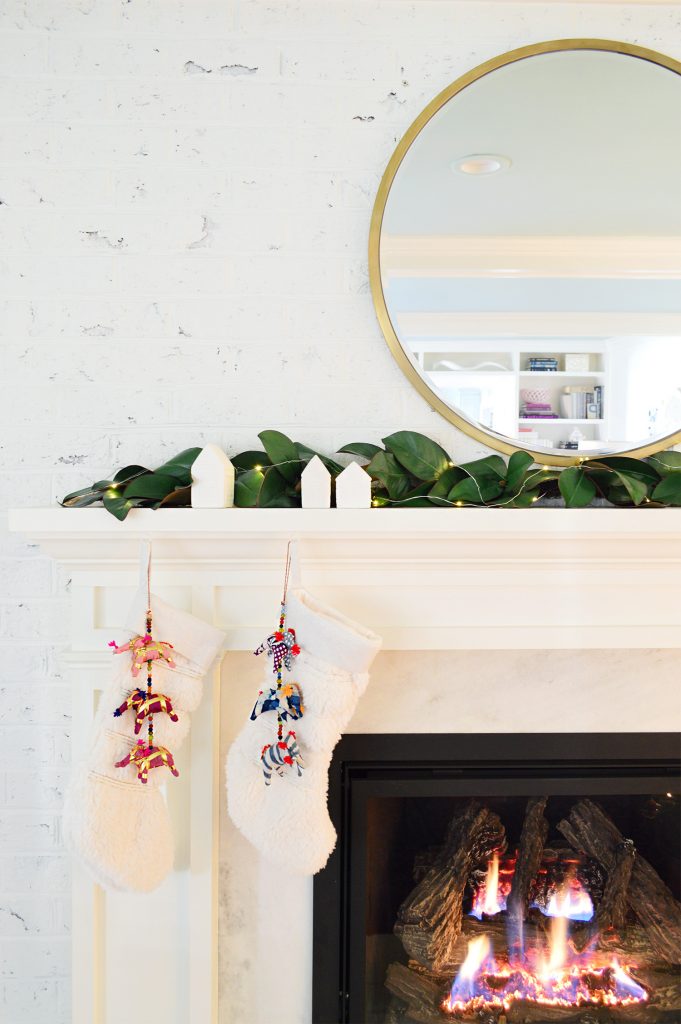
We loved how both of those fireplaces turned out – but going into this third fireplace project, we wanted something more modern for our more modern house (you can see the outside of it here and here). In general, we’ve been more drawn towards clean lines and a more modern silhouette for most things lately (maybe it’s the casual beach house vibe, or over a decade of leaning towards traditional things that made us want to flex back in the other direction).
So we dug up some modern fireplace inspiration – like this one and this one – and they immediately felt like they’d be a good fit. With the general direction of where we wanted to end up set in motion, we just had to figure out to execute something similar (our goal was something relatively easy and quick versus something that would leave our bedroom feeling like a construction zone for months on end).
The final look was something we just kinda figured out based on the wood and molding options available at the store. One of my favorite methods of planning a build like this is just to lay different pieces of wood out in different combinations on the floor of the hardware store to pin down something that looks good.
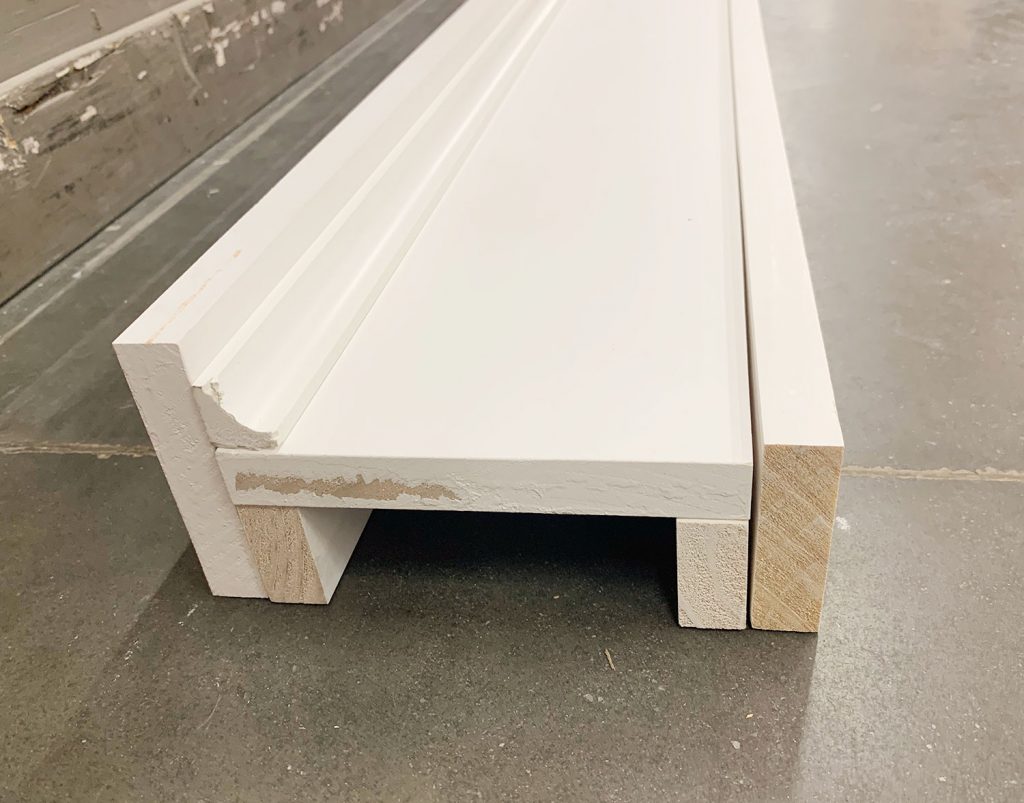
In this case I was texting Sherry photos of each option (like the picture) above to make sure we were on the same page. And the good news is that what we ended up with is something you could easily recreate this weekend! And it only cost us about $105!
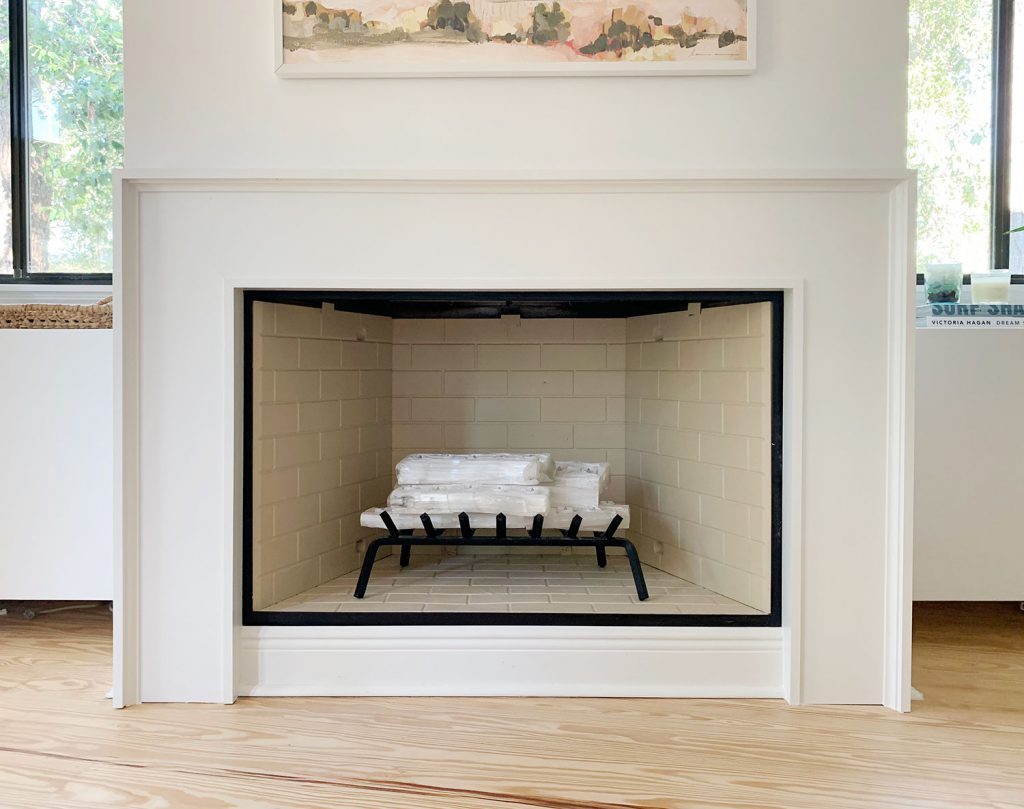
As you can see in the picture above, the mantel is identical on all three sides and kinda like an upside-down U (at least that’s how we kept talking about it amongst ourselves). We debated different thicknesses and depths but ultimately landed on it being 9″ wide on all three sides of the U, and 4″ deep along the outside edge (anything deeper would jut into the room a bit more than we’d like).
It’s basically constructed by creating a “hidden brace” that is secured to the wall and then trimmed out to create the final look. You can sort of see what I’m talking about in the cross-section I mocked up below using some cut pieces.
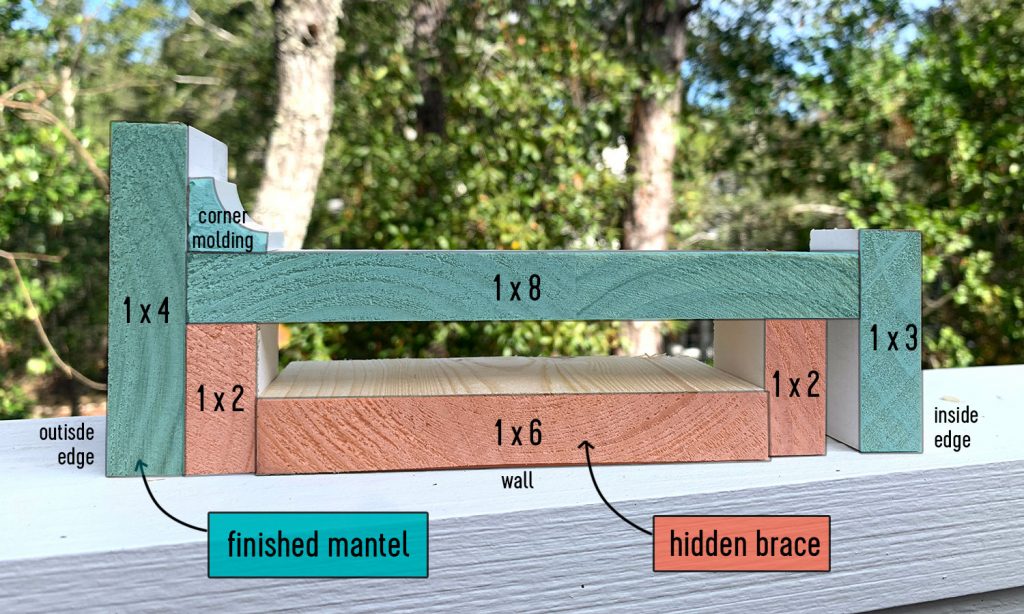
It’s just some basic 1 x 2″, 1 x 3″, 1 x 4″, 1 x 6″, and 1 x 8″ boards (you can see them labeled above). The only “decorative” piece of trim is a cheap piece of inside corner molding that you can find at any hardware store. All of the brace pieces can be raw common boards since they won’t be seen, but I chose primed boards for everything that would be visible (my store was out of 1×2″ common boards, so that’s why you’ll see me using a primed 1×2).
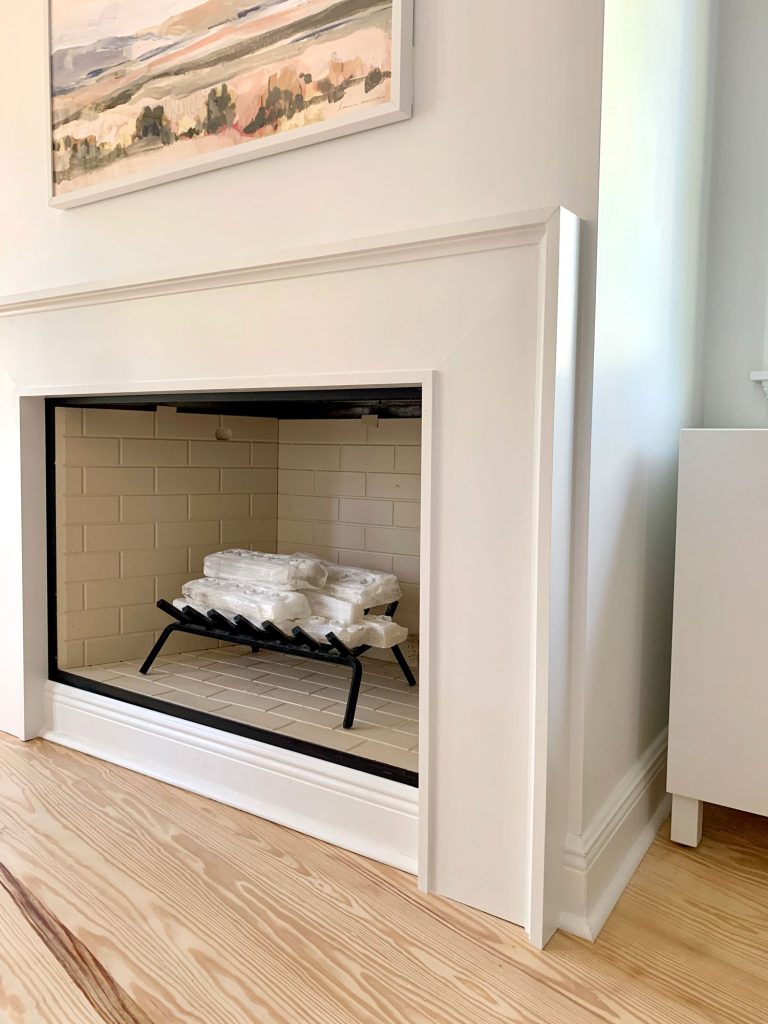
Honestly, the toughest part of it all was just the upfront math. You know, making sure we attached the brace in the right spot so our finished mantel was exactly where we wanted it (we wanted a specific amount of drywall and black metal exposed around it). It may be hard to see in some of these photos (especially the straight-on shots) but we intentionally left some drywall and baseboard visible on each outer edge of the fireplace, rather than having the mantel go fully wall-to-wall…er, corner-to-corner.

The result is a nice clean looking wall corner that turns (with the baseboard that follows it around the corner) and then terminates into our mantel, which leaves just a smidge of drywall exposed on each side of the front of the fireplace column. Feels nice and dimensional that way, and the real miracle is that we got all of our measurements right so it worked out just as we hoped.
So here’s a quick step-by-step rundown of how it actually came together.
Step 1. Construct The Base Of Your Brace
After removing the baseboard carefully (since we’d be reinstalling some of it later), we started by constructing the brace. The brace is three pieces of 1×6″ common board that’s attached in that upside-down U shape I mentioned earlier.
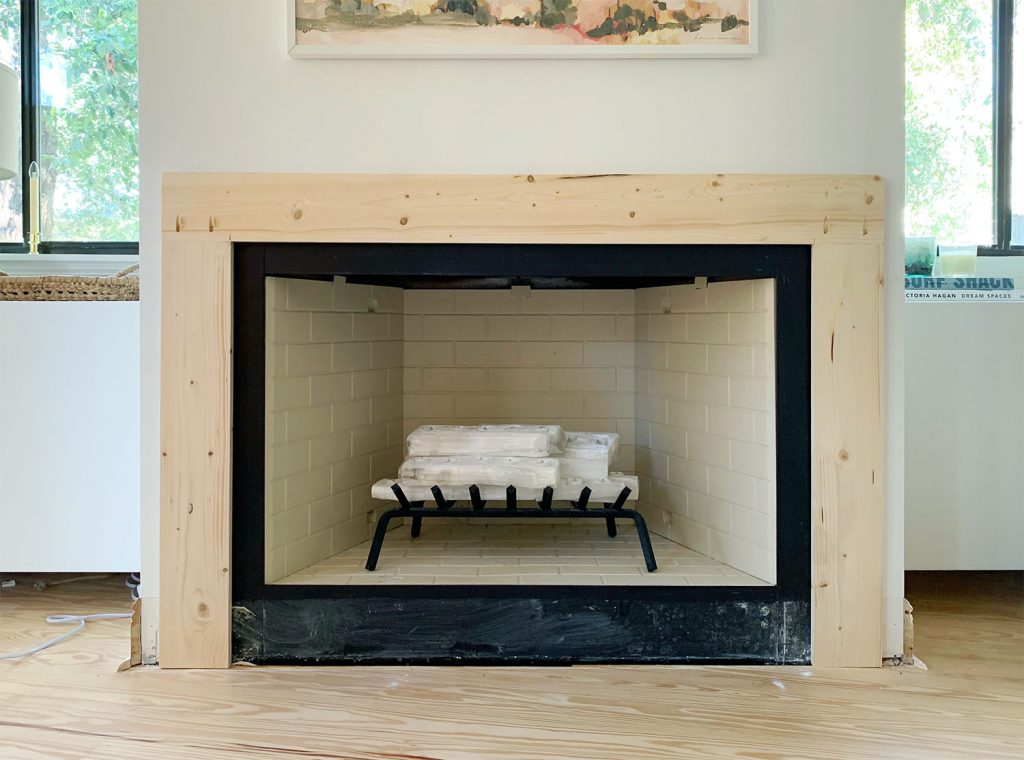
I attached the top piece to the two sides using pocket holes, but since this will all be hidden in the end, it’s not important that they be pocket holes. In fact, you could just attach each piece individually to the wall if that’s easier. Just make sure all of your boards are level and square before you screw anything to your wall.
Step 2: Trim Out Your Brace
With the brace firmly attached to our wall in a few places, we trimmed it out with 1×2″ boards along the inside and outside edges. This will help your mantel project away from the wall a bit, which creates that dimension we were looking for. Again, 4″ was the depth we chose, but if you want yours deeper just use thicker wood for this step.
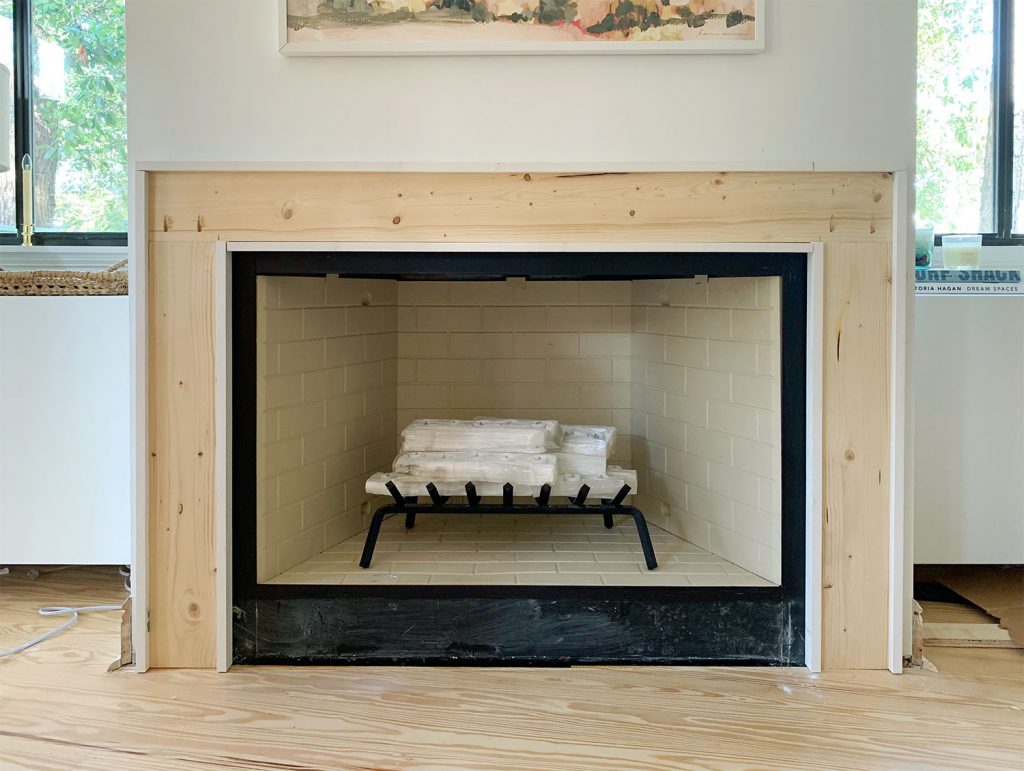
These border pieces of wood will be completely hidden, so it’s not important that they be pretty looking. In other words, you don’t need fancy mitered corners and you can cobble together scrap pieces for this part. They don’t have to be primed (again, that’s just what my store had in stock that day). Oh and we used some wood glue along with our nail gun to attach them to the wood brace so they’re extra sturdy.
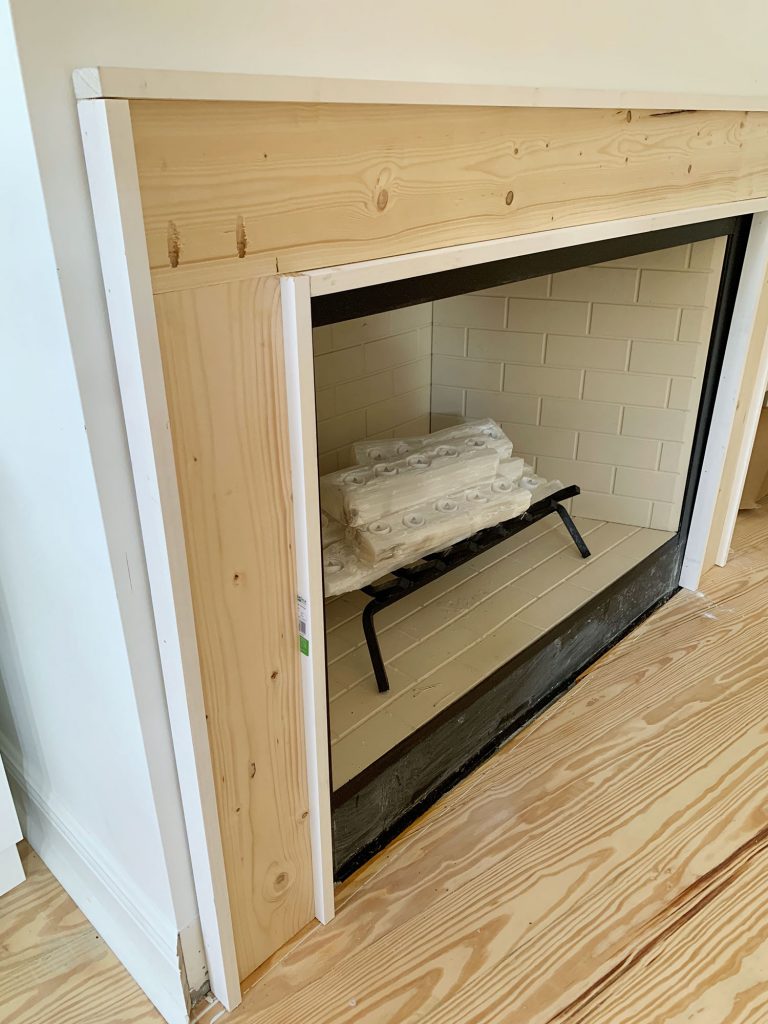
These two steps complete the hidden part of the mantel, so now we’re moving on to the visible parts of the build.
Step 3: Add Your Face Panels
Even though these next parts are visible, the steps are pretty similar to what we just did. We started using careful mitered cuts so we got those crisp finished corners and nice angled joints wherever two boards met. First up, we added two 1×8″ primed boards on each side of the brace:
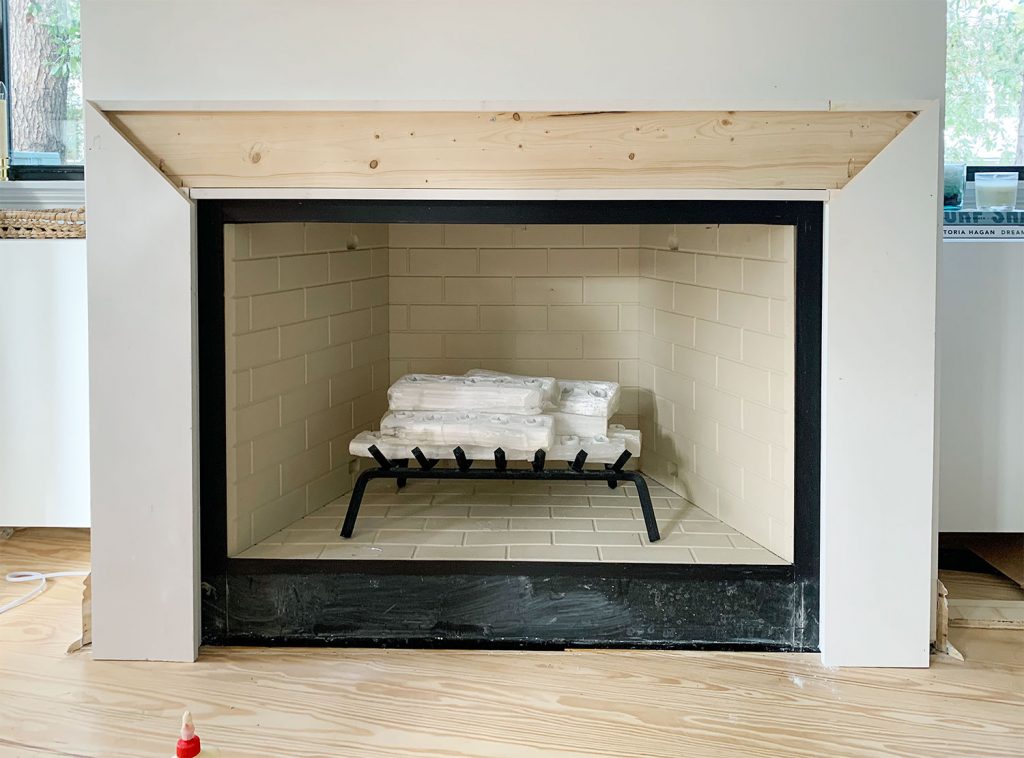
Again, we used wood glue and nails to attach all of our pieces together. Those are always a great combo for a long lasting hold, since nails alone can cause cracking or loosening over time. That’s not my cleanest wood gluing below, but it did the trick!
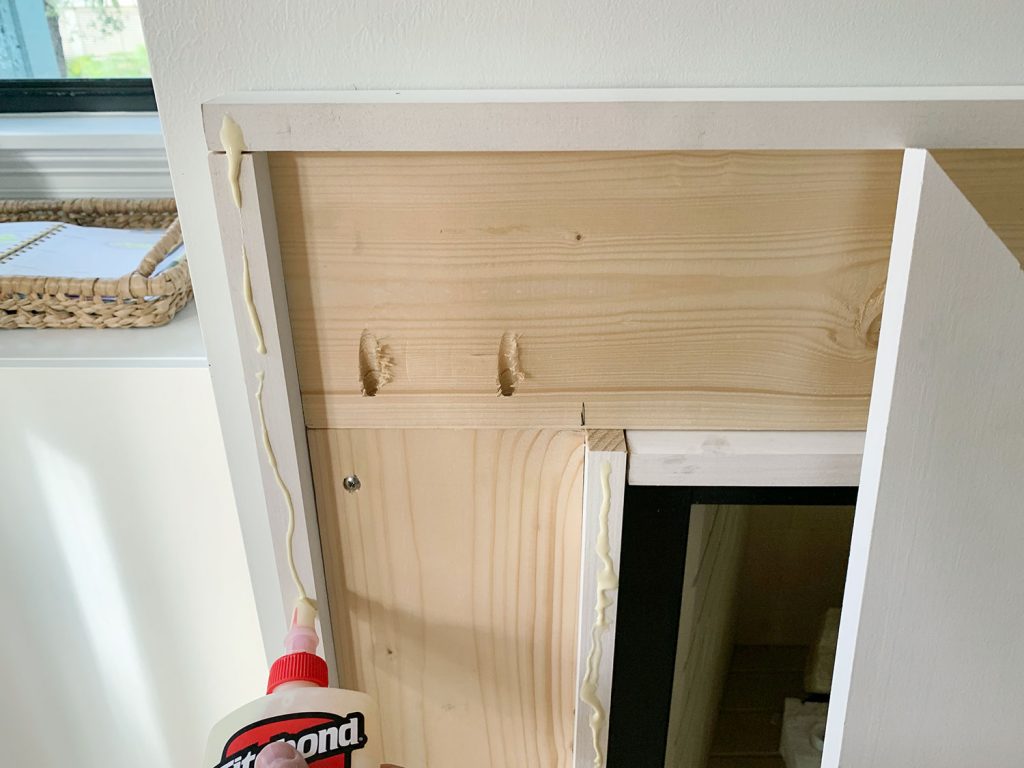
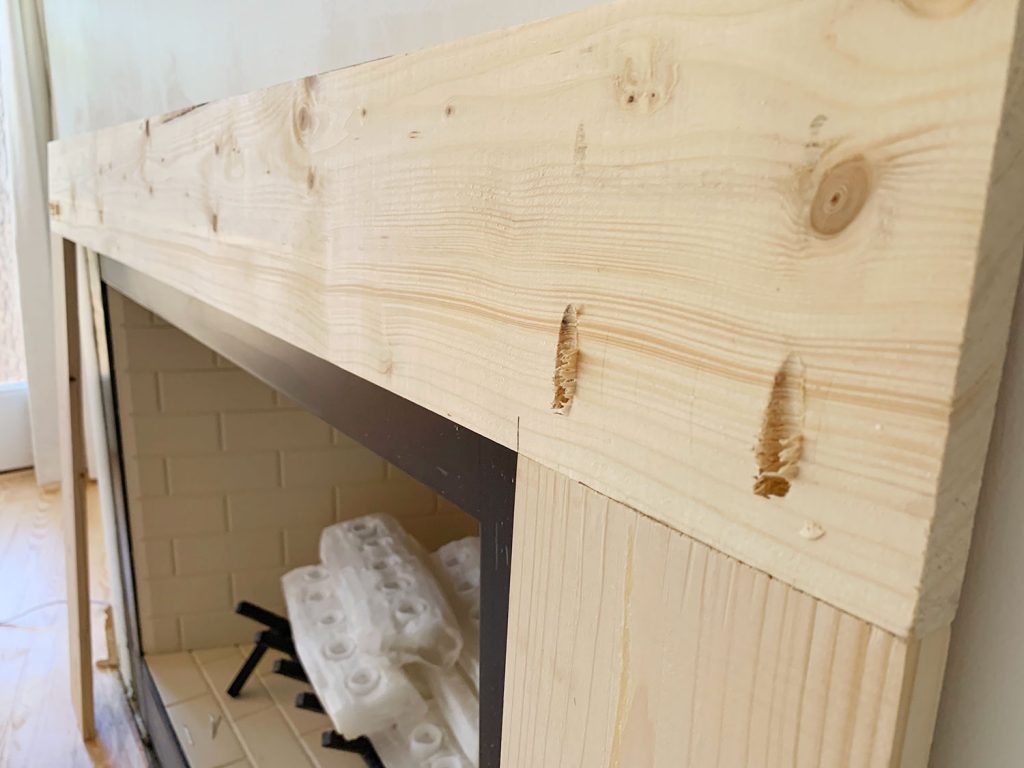
Next, we carefully measured and cut the top piece to go across and join the two vertical boards to make that beautiful (let’s say it together) upside-down U.
Now, as you can see in that cross-section graphic, our 1×8″ was a little wider than the brace underneath (see how it overhangs on that left side below?). It’s not a problem, I just point it out because you want to make sure you account for it in your math and make sure you’re consistent with which side it overhangs (we chose the inside edge). None of the brace is seen, so it’s really just something to account for so you know where to shoot your nails, and so you end up with a centered result.

Step 4: Trim Out The Edges To Your Liking
With the flat face panels secured, we trimmed out the sides again (kinda like we had done with the brace piece). We chose a 1×4″ around the outside edge to add extra depth and, again, we used mitered cuts so we didn’t have any raw wood on our edges or corners.
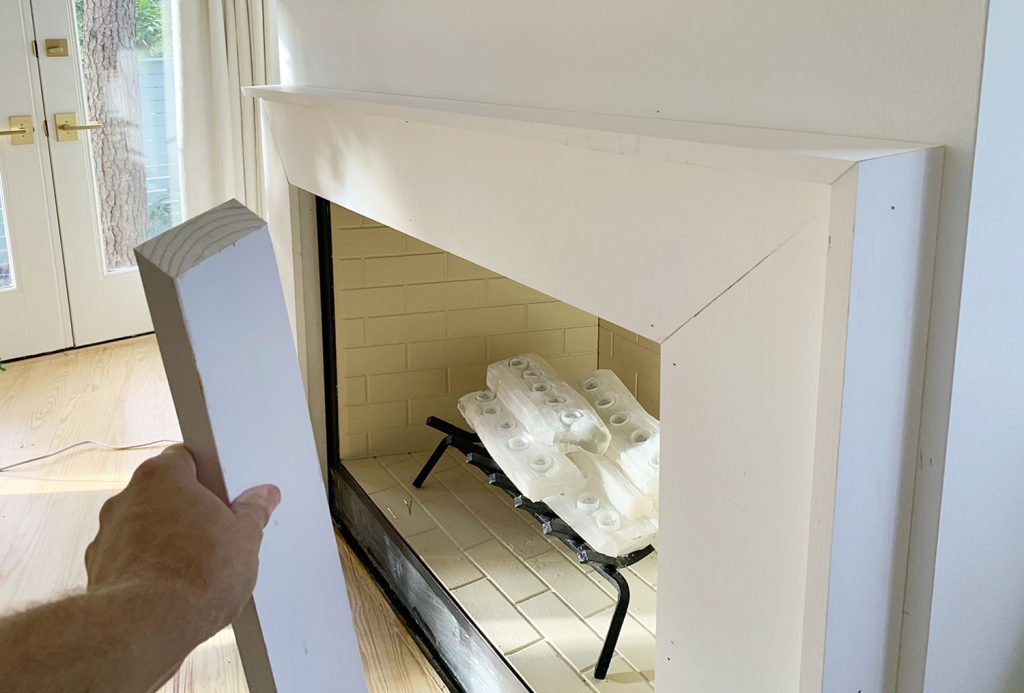
Here it is with the outside 1×4″s added…
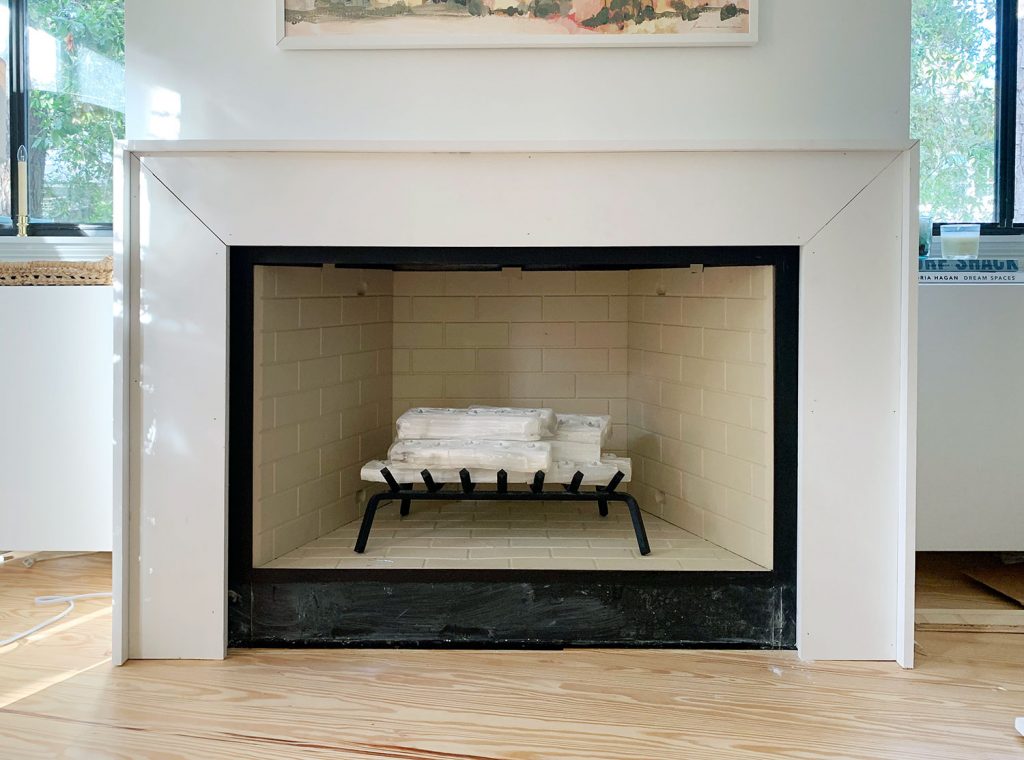
Then we went around the inside edge with a slightly smaller 1×3″ primed board. The 1×3″ board hung over the edge of the face panel just enough to create a nice border.
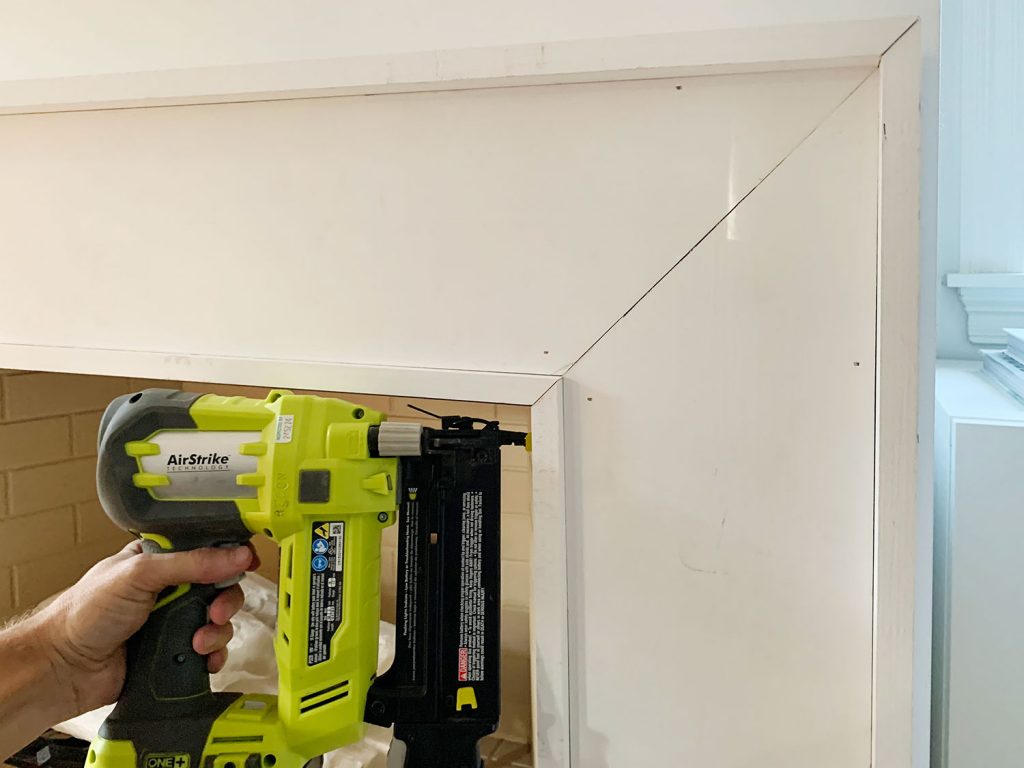
Since the 1×4″ on the outside edge stuck out even more, we added a very simple inside corner molding to give this outer edge a little bit more detail. We were hesitant to add too much or too ornate molding here because we didn’t want our modern mantel to skew too traditional, so we felt like this was just enough.
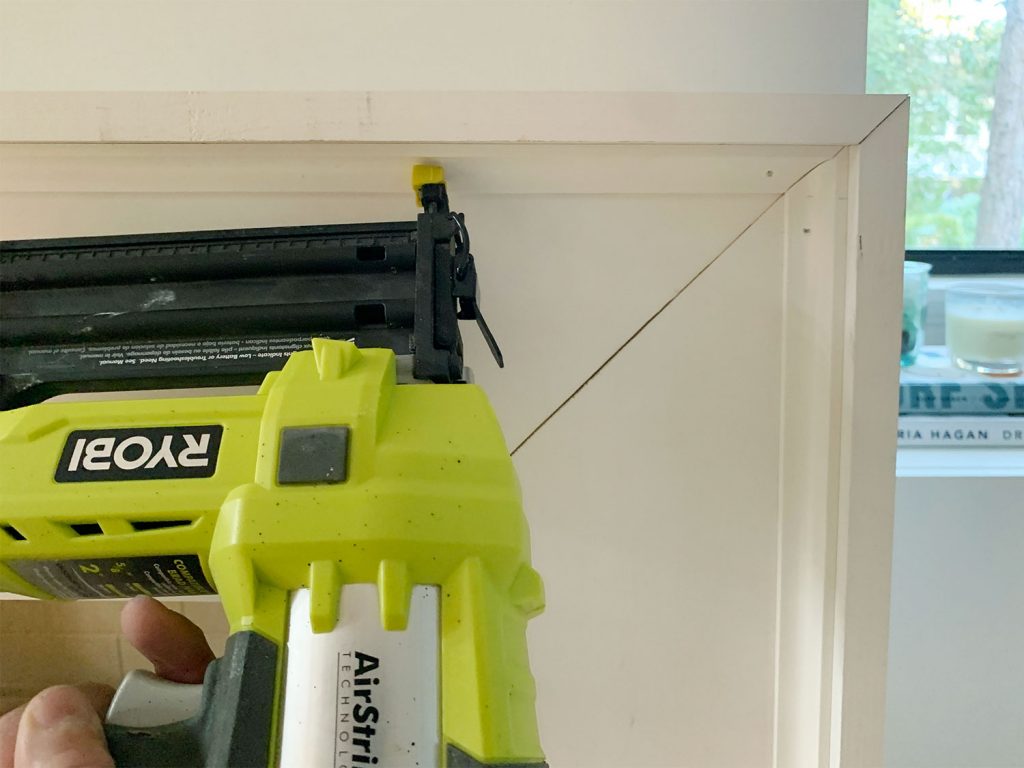
Step 5: Finish Off The Bottom Edge
Going into this fireplace project, we weren’t sure how we wanted to deal with the bottom side of our fireplace (aka, the open end of our U). Sometimes you just wait for something to be built and then try a bunch of different trim options to see what you like. So after holding up a few scrap pieces, we ultimately decided to reattach the baseboard that had been there before (just cutting it to fit between the new surround, obviously).
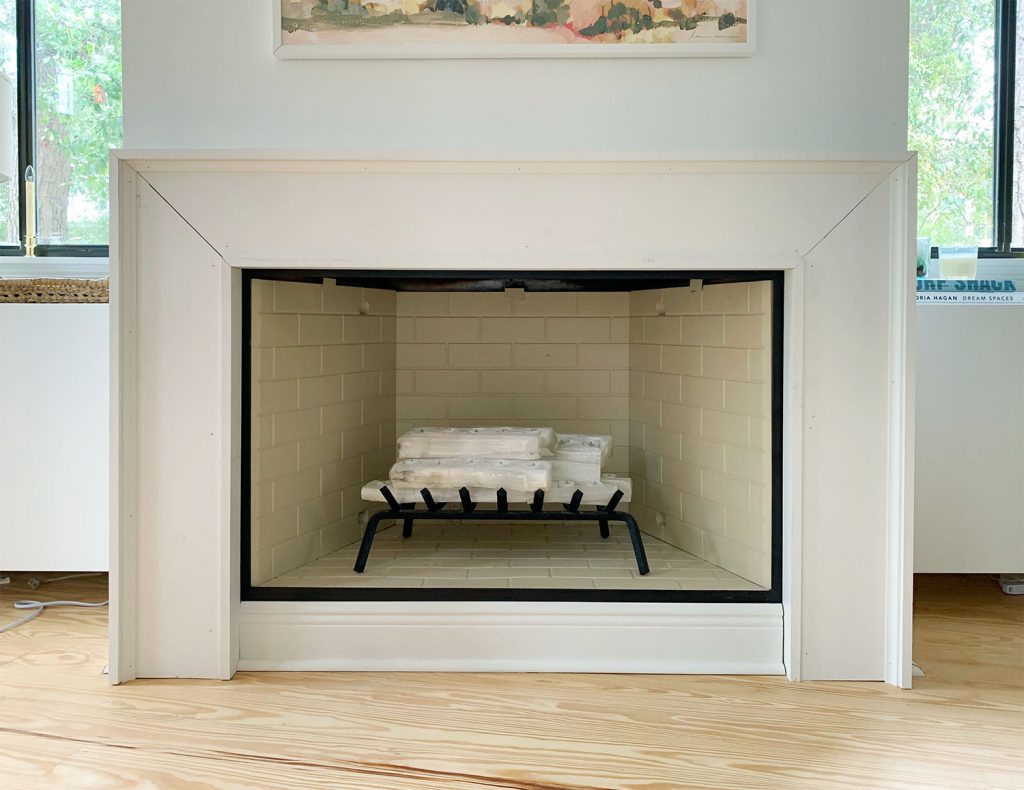
Since it was going against metal, not drywall or wood, we attached it using some caulk as a light-duty adhesive because we didn’t have any actual adhesive around. And speaking of caulk…
Step 6: Spackle, Caulk, and Paint!
The last thing to do is to spackle your nail holes, caulk your seams, and then paint everything. We used the same paint we have on all of our interior trim, which is Sherwin-Williams Pure White in a semi-gloss finish.

Like I mentioned, we kept our fireplace depth pretty slim because we didn’t want it to stick out very far from the wall, but you could easily get the same finished look on the front and use deeper trim pieces to get a deeper profile.
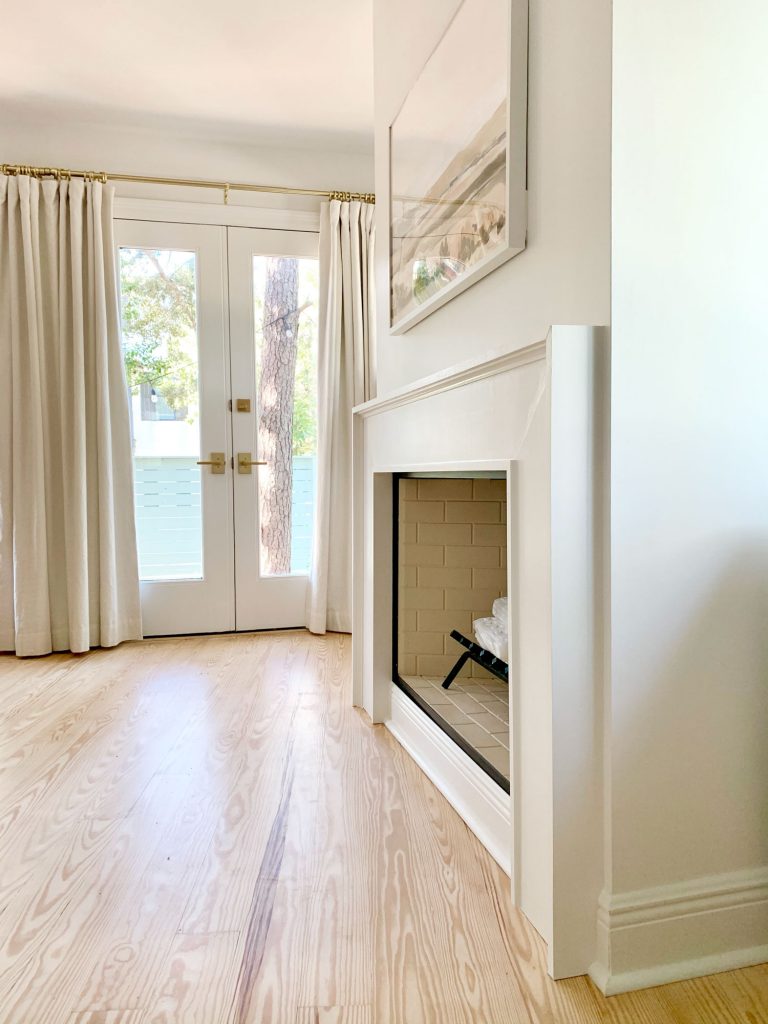
Meanwhile, our version means that our fireside chairs (and our Christmas tree) don’t have to bump out into the rest of the room any further.
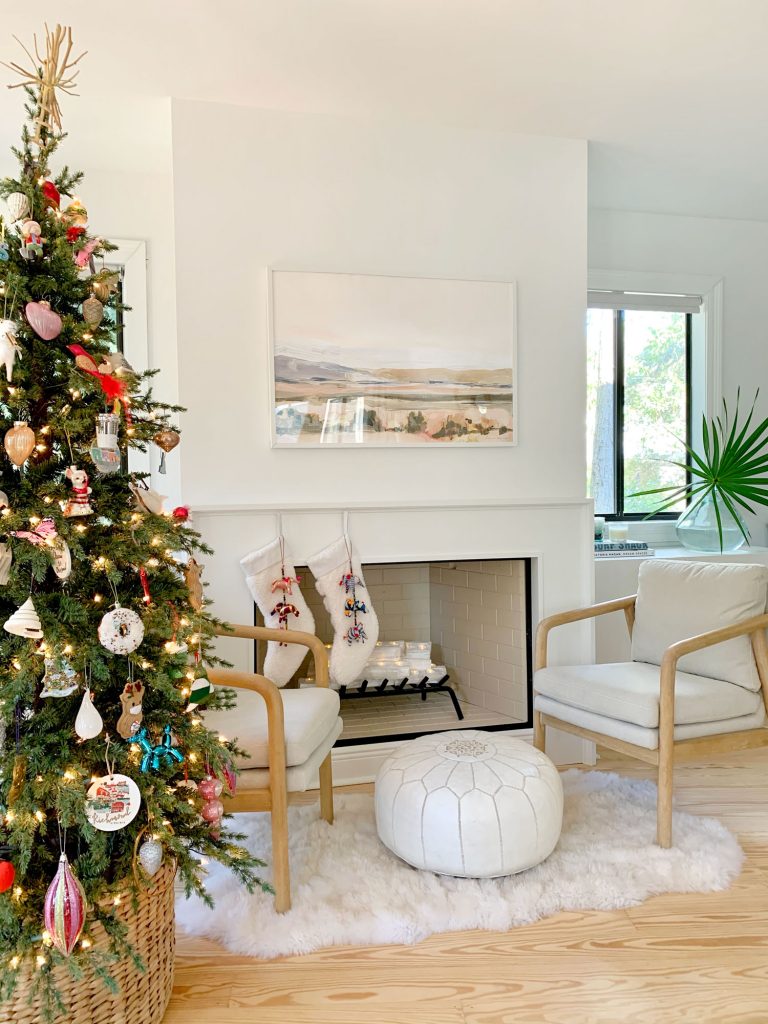
Sidenote: maybe Sherry and I should issue a retraction about hating bedrooms with sitting areas, because we put these chairs here while doing a kitchen project and ended up sitting in them all the time, so they live here now. It must have something to do with our bedroom being on the main level, so we go into that room WAY more throughout the day (in our last house we’d come downstairs for the day and our bedroom was just sort of a place we retired to at the very end of the night).
Heck, Sherry has taken about a dozen Zoom calls for work from these chairs! Yes, that’s right, she has graduated from Zoom calls in bed! (Now that we have a headboard, it’s more obvious that it’s a bed – but more on the new headboard in a second).

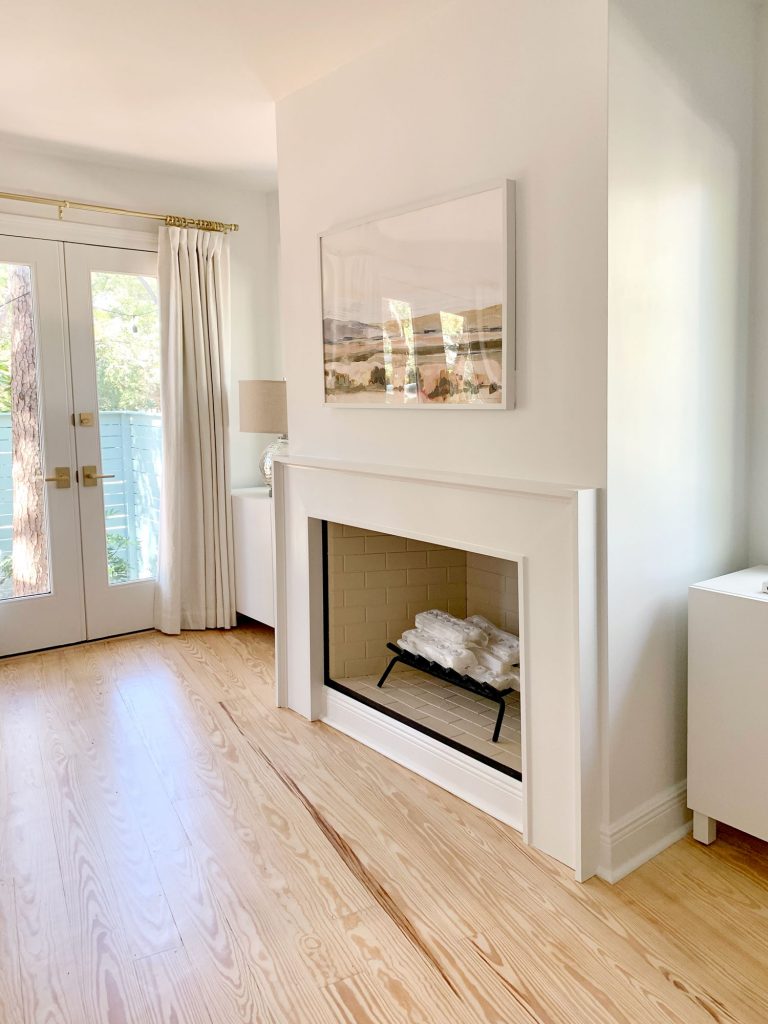
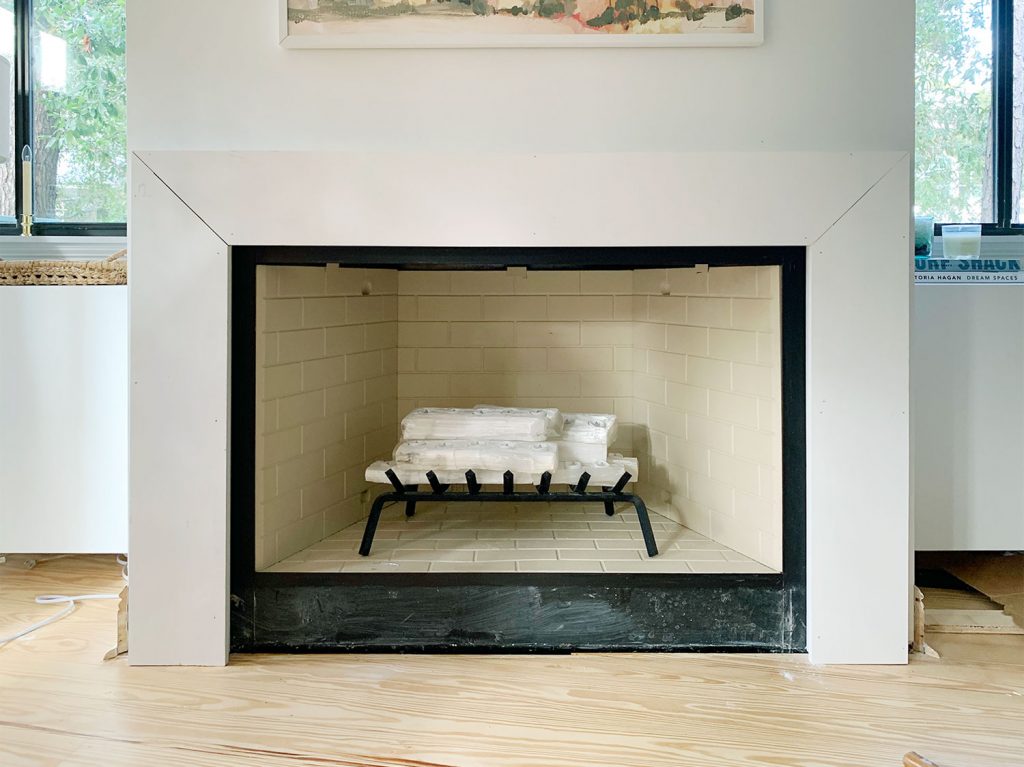
And although this project was driven by Christmas stockings (we really are simple creatures, aren’t we?) we wanted to snap a photo of what it’ll look like the other 11 months of the year for our House Tour page. So we slid the Christmas tree out of frame and popped off the stockings for this quick photo. We still plan to build in the cabinets on either side of the fireplace, so picture them with baseboard running under them instead of that dark gap from being up on legs.
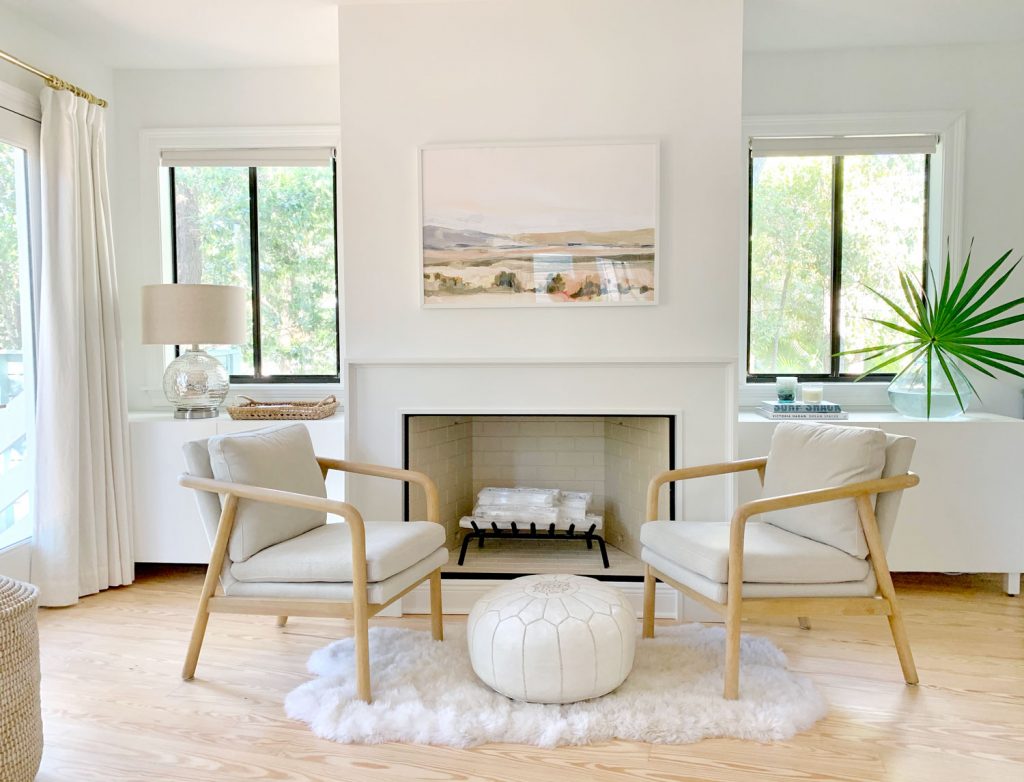
But as much as we’re looking forward to that clean simple look in 2021 – right now we’re enjoying the coziness of this festive-ized holiday version. Oh and if you’re wondering how we hung the stockings, we’re using our go-to white cup hook solution.
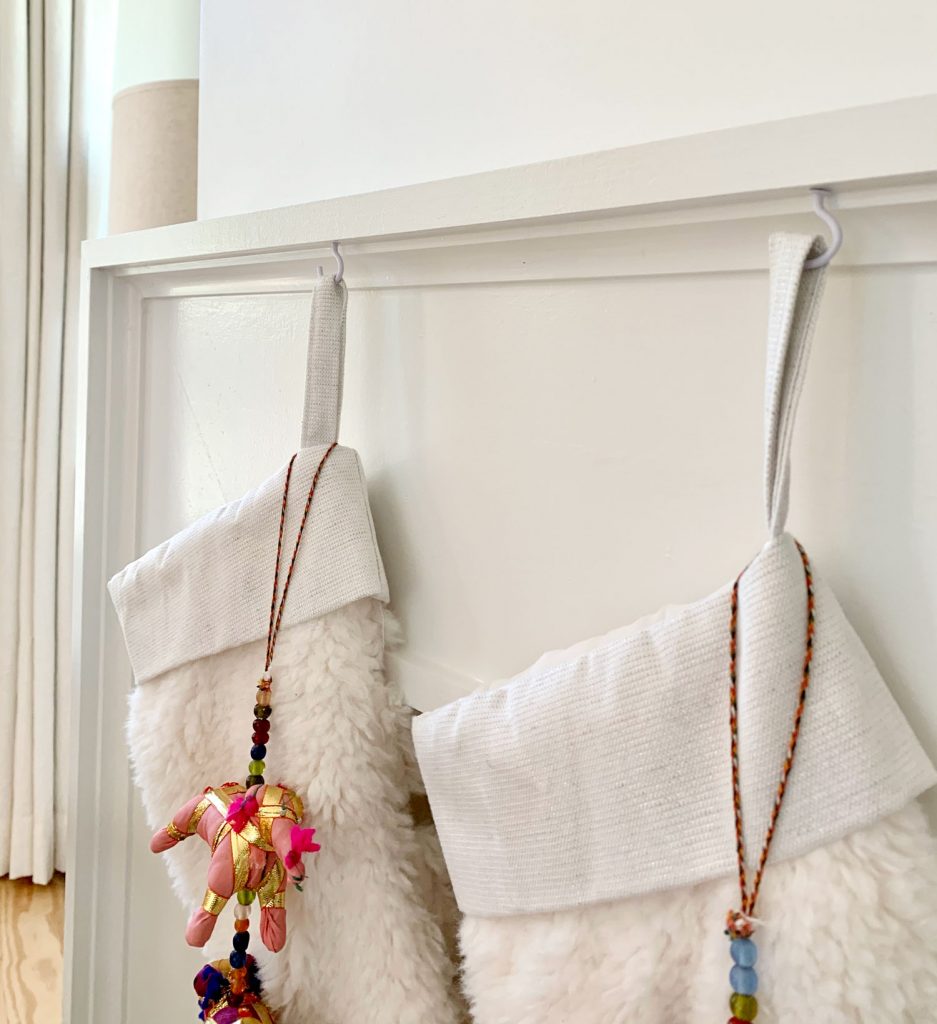
Just like we did in our last house, we screwed two small cup hooks into the underside of the mantle. Come January we’ll just remove the hooks (we store them right inside the stocking themselves in a little ziplock bag) and the tiny holes aren’t noticeable at all. Sherry’s going to share a video demonstration of how that all works on InstaStories for you soon.
Oh and we made one change inside of the fireplace, even though we were resistant to the idea at first! We finally gave it a try, and it makes it super easy for us to get that fireplace glow without bending over. And it ensures that zero stockings will be catching on fire anytime soon (always a plus).

Actually, you can see that change in action in the quick video below that Sherry filmed (here are the exact ones that we used). Plus there’s a sneak peek at the very end of our bedroom patio with the fence all painted & our s’mores pit surrounded by chairs:
Note: You can also view the video here on YouTube.
On a somewhat related note, while we’re talking about updates in our bedroom: we finally got a headboard! After months of waffling about what we wanted, we decided to stop letting perfect be the enemy of good and we bought this… wait for it… kid’s headboard for our room.
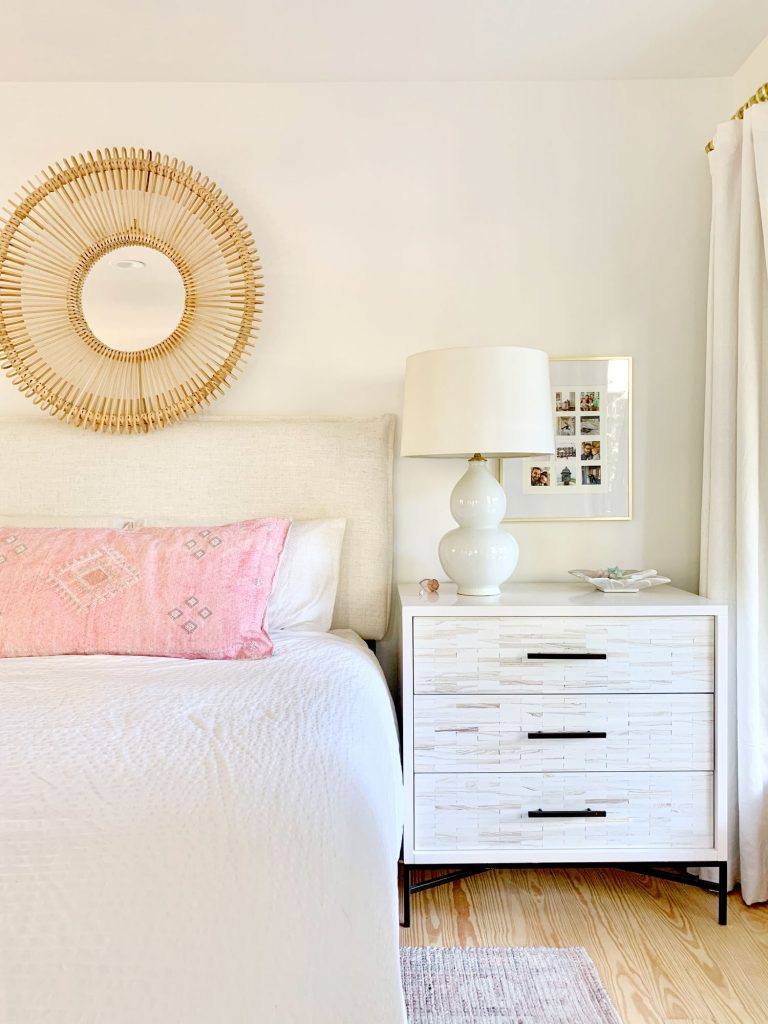
You know we’re suckers for a creamy linen headboard and we had zeroed in on something with a french seam (Sherry taught me this term – I kept calling it a knife-edge), since it feels a bit more casual & relaxed than our last headboard’s extra tailored edges. It just so happens that Target sells a kid’s Pillowfort headboard in a Queen size – and they call the color “talc” – which is the exact same color of our last house’s headboard. Are we creatures of habit or what? Note: They’ve since discontinued that headboard, but we’ve linked a similar replacement.
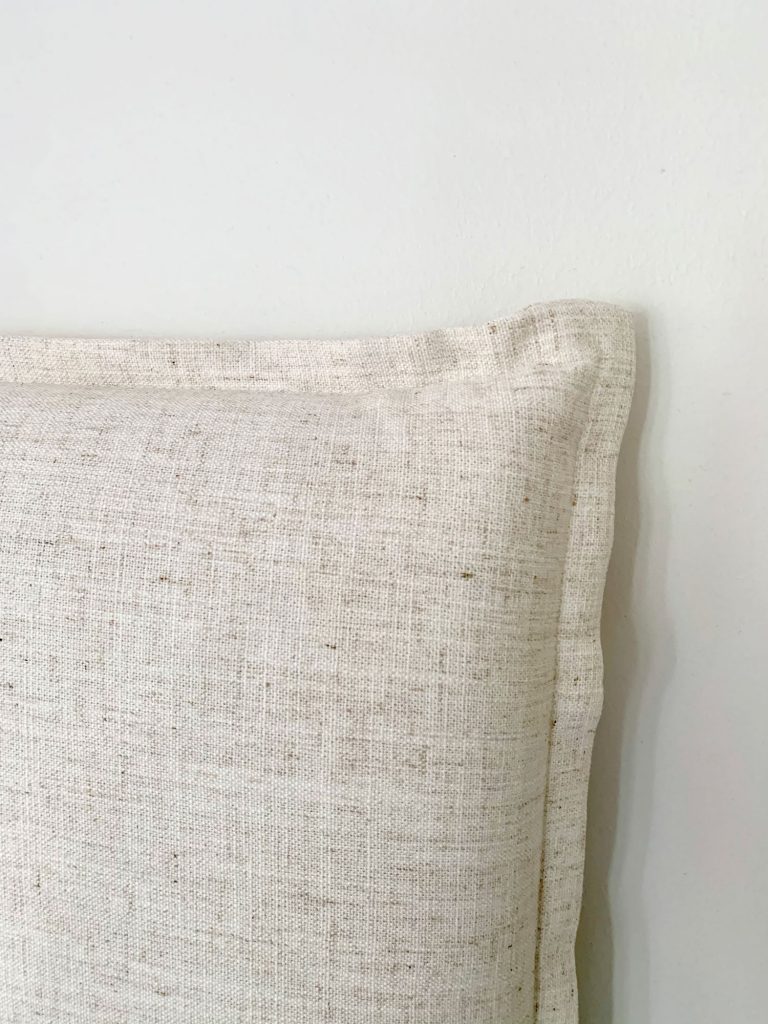
It took a few weeks to arrive, but once it did it was super easy to install and we’ve enjoying not leaning against the wall anymore while Netflixin’ at night. We probably need to hang that mirror a little higher, but I’ve been busy building a fireplace, okay? Kidding. Just been lazy.
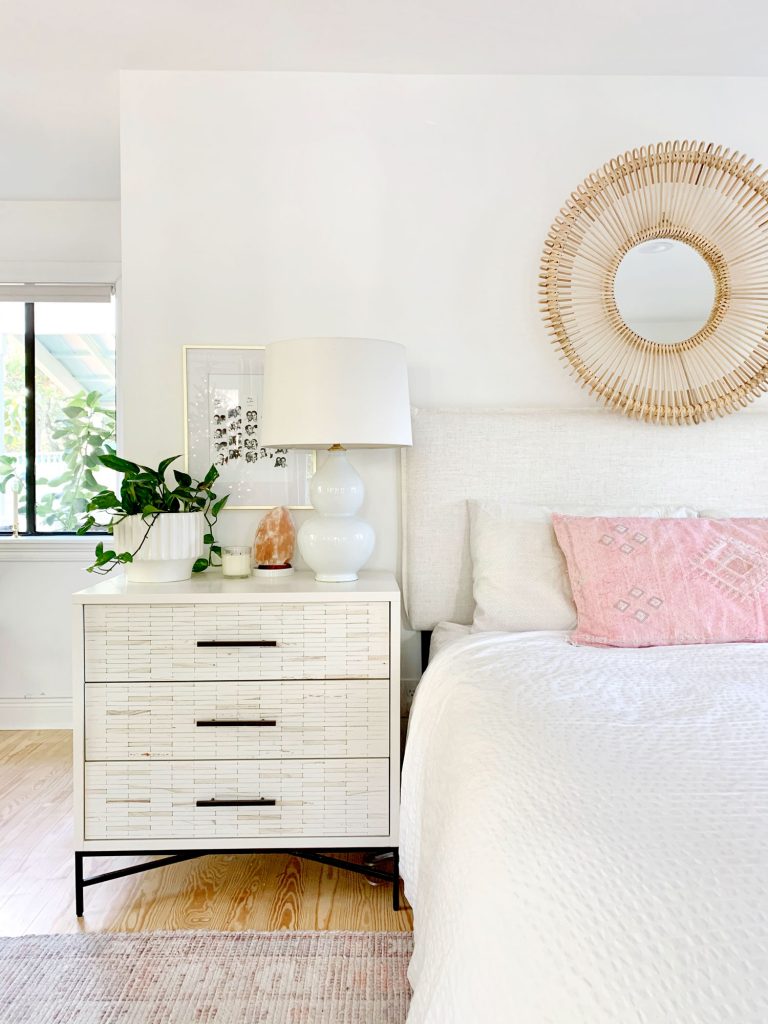
Here’s a wider shot of the whole wall. Lots of neutrals, a huge pink pillow that Sherry loves, and of course the obligatory salt lamp (that I have on a smart plug, along with our nightstands because nothing gives me a thrill like asking Alexa to turn off the bedroom while simultaneously pointing a remote at the fireplace like a true technology wizard).
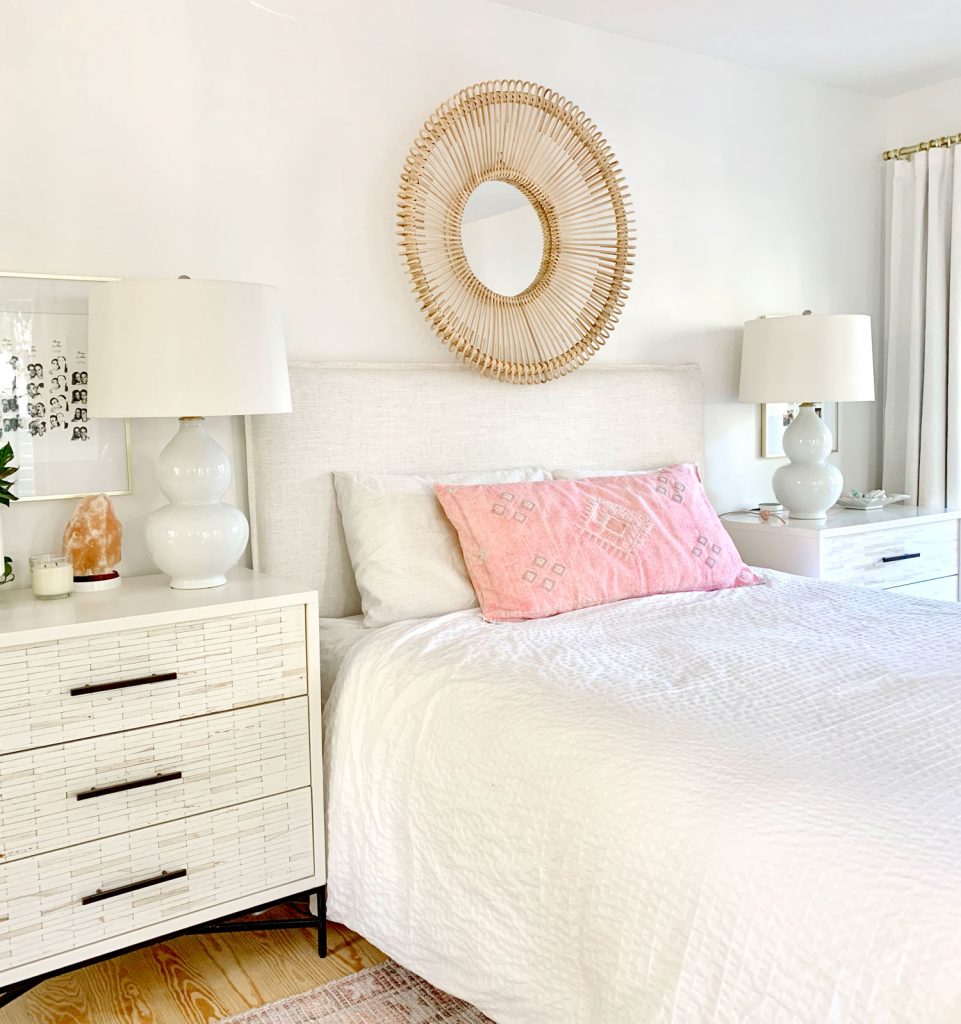
To read the first post about this bedroom coming together from July, here are all those details. And here’s how we added some much-needed storage to either side of the fireplace (still have to fully build them in). If you missed our holiday decorating post with more shots of the tree & various other bottle brush trees everywhere, here’s that photography extravaganza.
We also added a video walk-through and some additional photos to last week’s post about our kitchen/sitting area, so those are there for your viewing pleasure as well. Oh and we updated our current house tour page too – as well as our Before & After page. And as mentioned, stay tuned for that video on InstaStories of Sherry detailing our stockings/cup hook method. It promises to be RIVETING.
*This post contains affiliate links, so we may earn a small commission when you make a purchase through links on our site at no additional cost to you.
