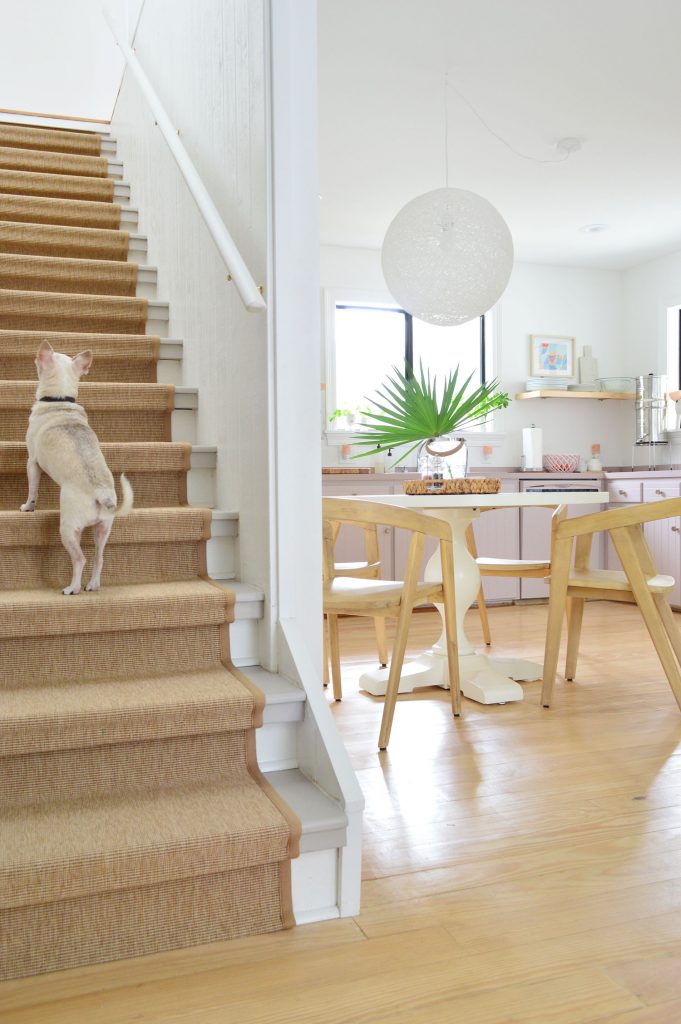
Sherry recently hinted on Instagram Stories that we were up to our old staple-coloring antics. And by that I mean we were installing another stair runner (admittedly one of the less popular definitions of “antics”). But after installing one in our old house 7 years ago it has become one of our favorite projects – just because we truly believe anyone can do it, and whatever runner you choose can give you a totally different look (and a nice grip underfoot, but more on that functional upgrade in a minute).
Why We Wanted A Stair Runner
Before we get into the “how” of adding this runner, let’s talk about the “why.” We’re not people who automatically default to covering our stairs. At our beach house, for instance, we decided against a runner because the original wood was so charming. We eventually did add some temporary stick-on runner treads to help our chihuahua, Burger, navigate the stairs more easily (we used this removable tape to hold them down, and it came up cleanly later when we sold the house).
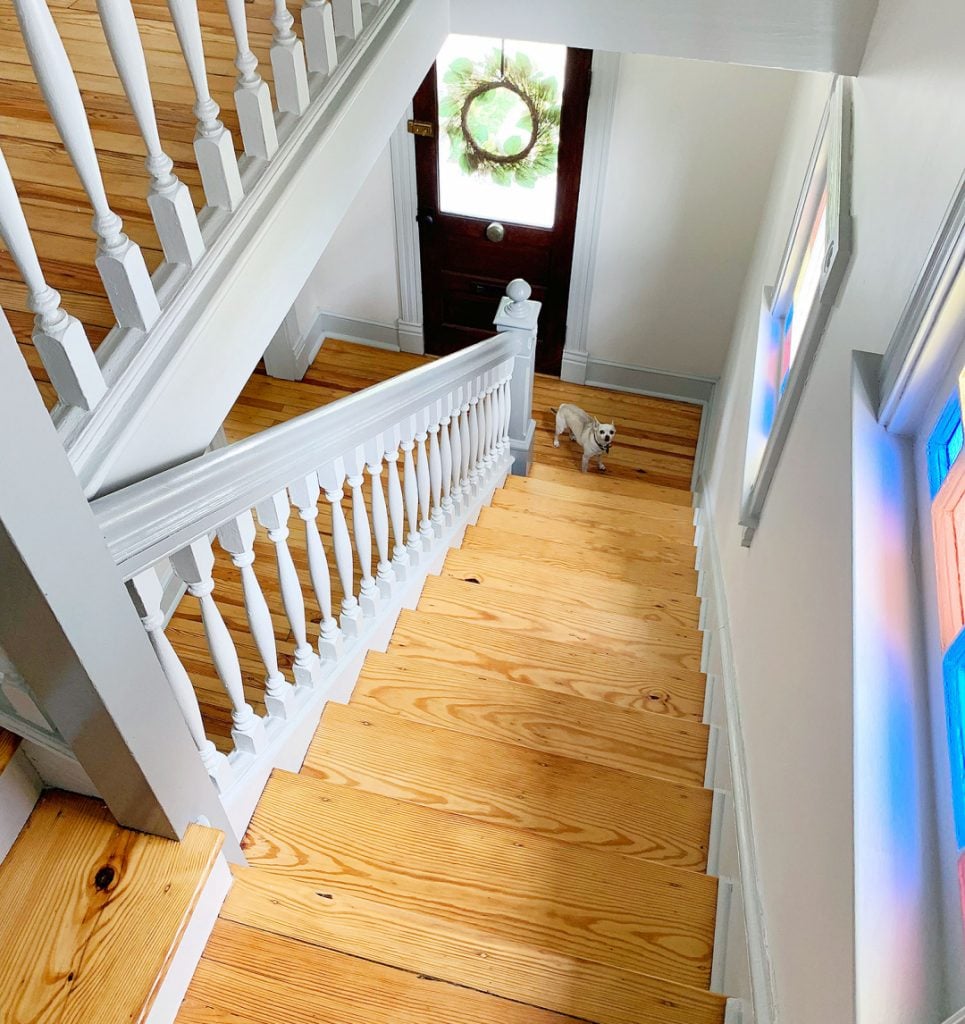
And that’s the #1 reason we chose to do a runner here at our new house. Burger is 14 years old, and is still pretty spry, but these wood stairs were just slick enough for him that he didn’t like going up or down on his own very much. And “chihuahua elevator” is not really a job description we were eager to keep on our resumes for very long. We knew adding a runner would have him trotting up and down a lot more sure-footedly all by himself, and spoiler alert: the runner actually has some great grip underfoot for us humans as well.
Why We Painted The Stair Treads
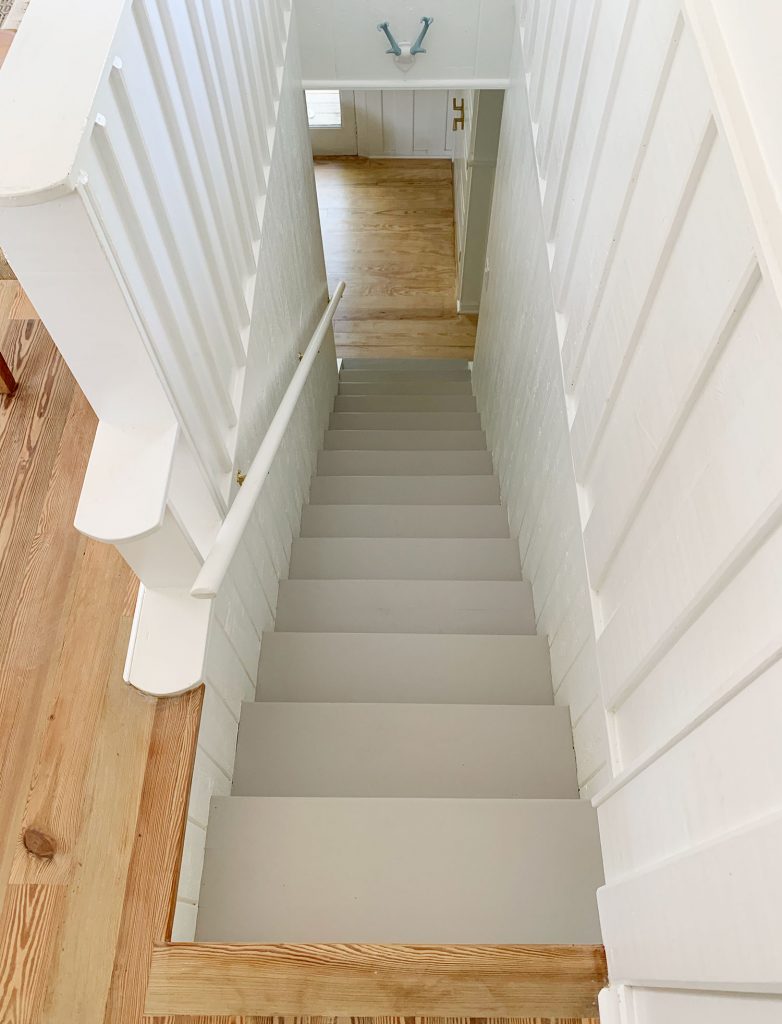
You’ll notice that in addition to adding the runner, we also painted the wood treads. This was partly just an aesthetic choice to better bridge the gap between two different wood tones (the stairs weren’t the same type of wood as the floors downstairs, which you can see below)…
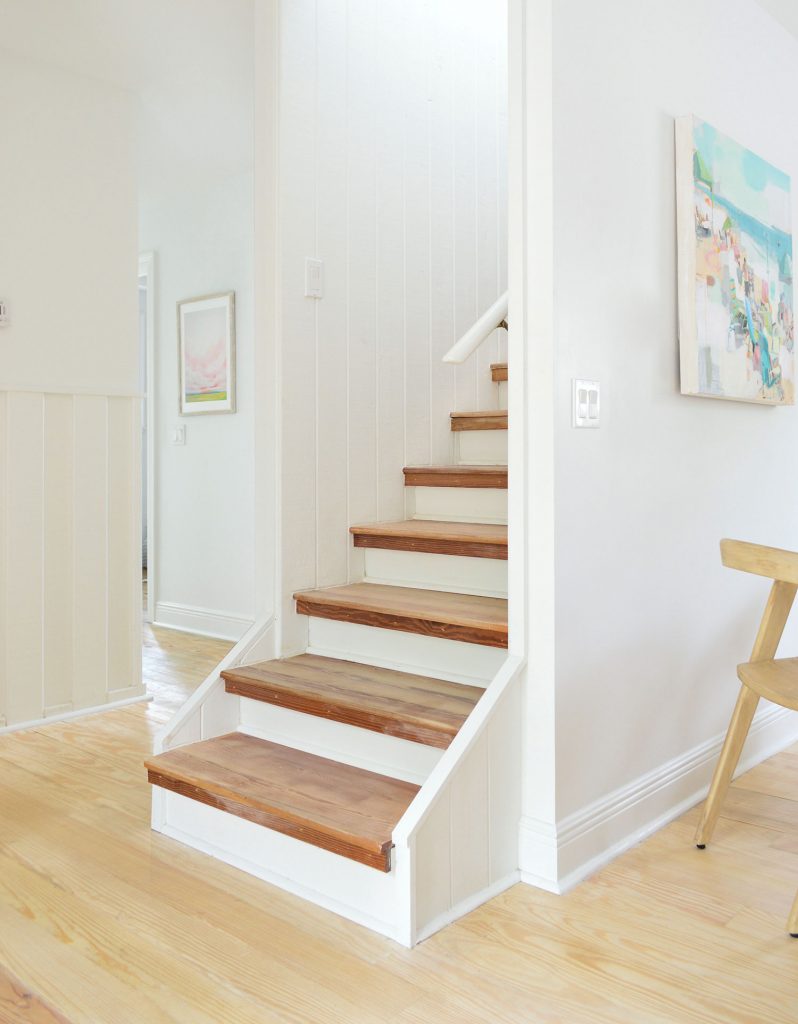
There were also some finish issues on the stairs themselves. Our best guess is that the pros who painted our house had taped off the stairs before the floor sealer had fully dried, so we were left with this line of discoloration when the tape was removed on both sides of nearly every step (and some stair fronts were in rougher shape too, which you can kind of see above).
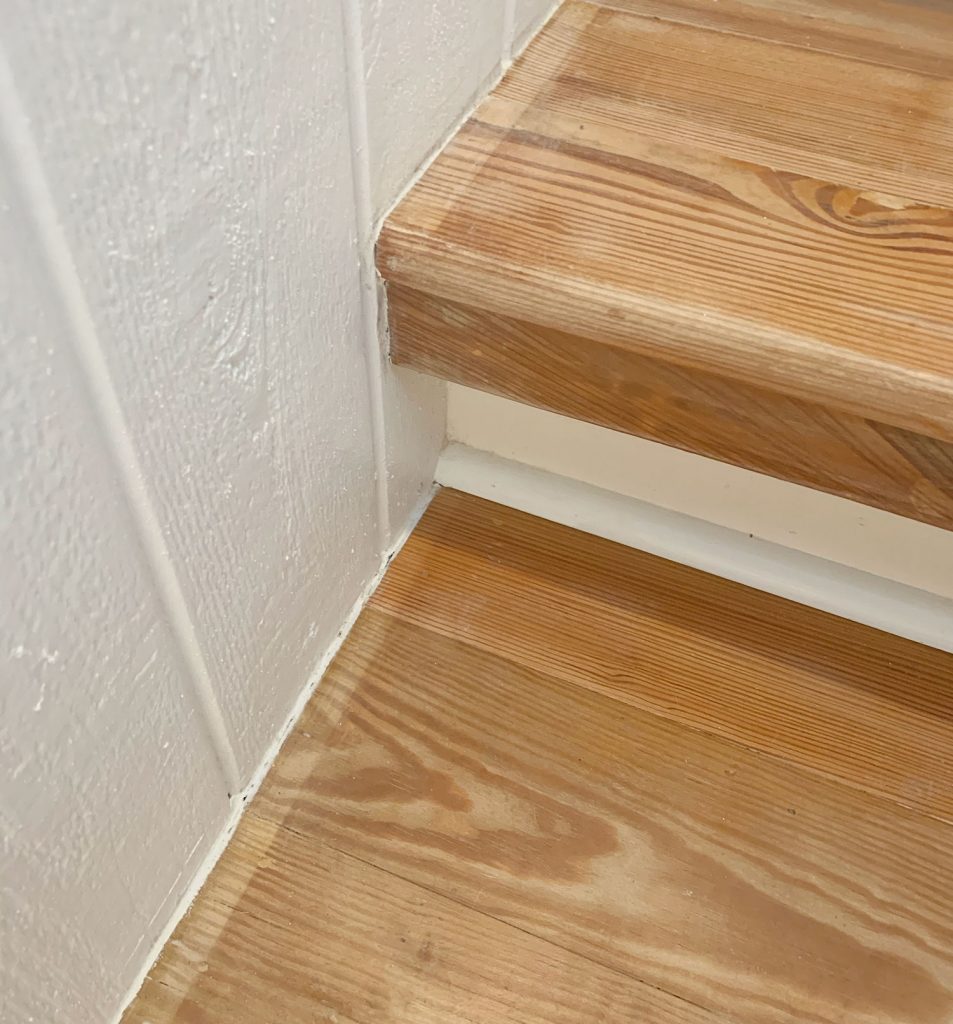
The steps could be fully resanded and resealed to hopefully fix it, but we knew only a few inches of them would show on either side of the runner once it was installed, and it would be pretty dusty to redo while living here (and they’d never match the downstairs wood flooring even if we could get a better finish on the stairs themselves anyway).
We didn’t rush right into painting them right away, which is generally a good idea whenever you’re debating painting something that could be somewhat complicated to undo (in this case they’d have to be sanded down again, which they needed to be in order to be fixed anyway). So we mulled things over for a couple of months, and then finally decided to get on with it because we felt sure about our choice, and we wanted to help Burger get up and down more easily. In retrospect, our only regret was not making the decision sooner, because we love the finished result.
Prep & Paint
The risers were already painted white, so our painting task was just to do the wood treads. Although the paint wouldn’t really be walked on directly, we still wanted something durable (your feet don’t tend to fall on the thin 3″ section along the wall beyond the runner because you’d basically be dragging your hip along the wall in that scenario). We chose this Porch & Floor Enamel that was recommended by the pro at the paint store, and we wanted a color that danced that line between gray and beige, so after some swatch debating, we landed on Requisite Gray by Sherwin-Williams.
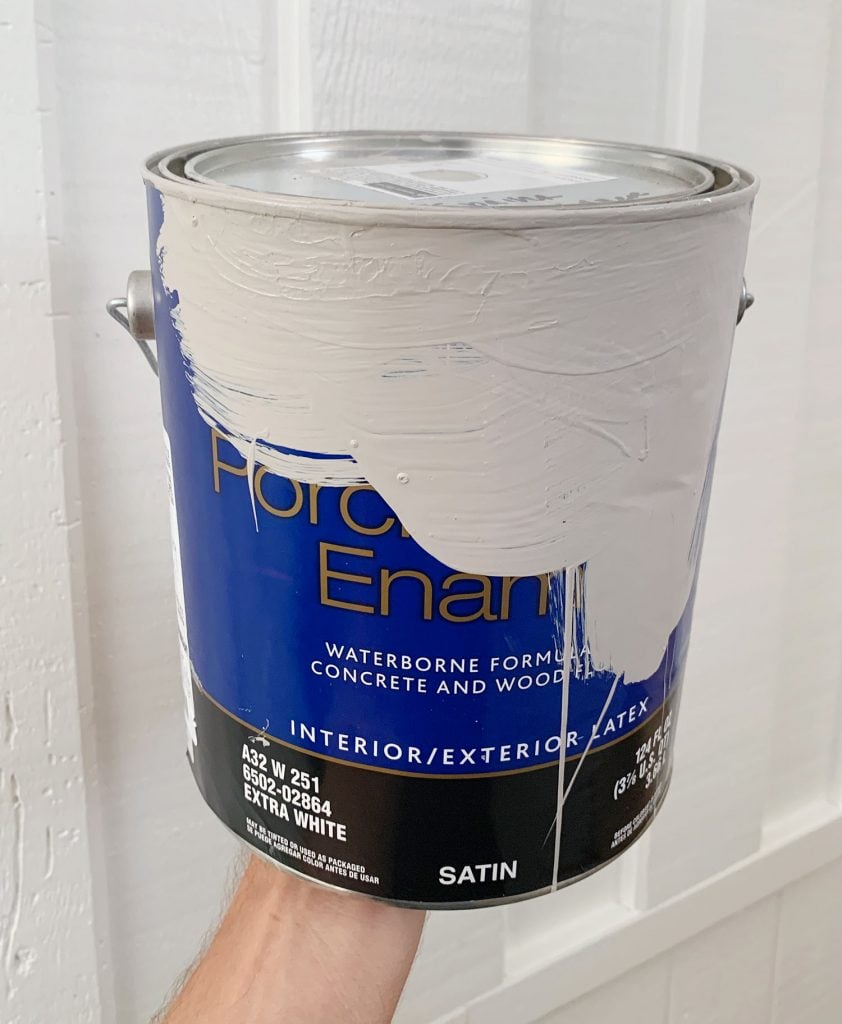
I don’t have any shots of the painting part of this project, but it was mostly just A LOT of cutting in. We didn’t need a separate primer (the paint pro said it wasn’t necessary with this type of paint) and it took two coats to get a fully solid finish.
Choosing The Runner
We loved our old house’s runner from Dash & Albert, and assumed we’d just get another one of them for this project (it looked good, felt soft underfoot, and wore well over the years – really only getting a little worse for wear in Year 7 at our last house due to dragging stuff up and down the stairs during the master bathroom reno).
But about a year ago we saw our friends Kim & Scott’s stairs in person when we visited them in Chicago and, while it may seem weird for a staircase to leave a lasting impression on someone, it’s the first thing we both thought of when we decided to add a runner to our stairs. They had two larger dogs at the time, as well as a cat and a toddler, and they said it looked as good as the day they got it, even with pet claws and mud dragged in on furry feet, etc.
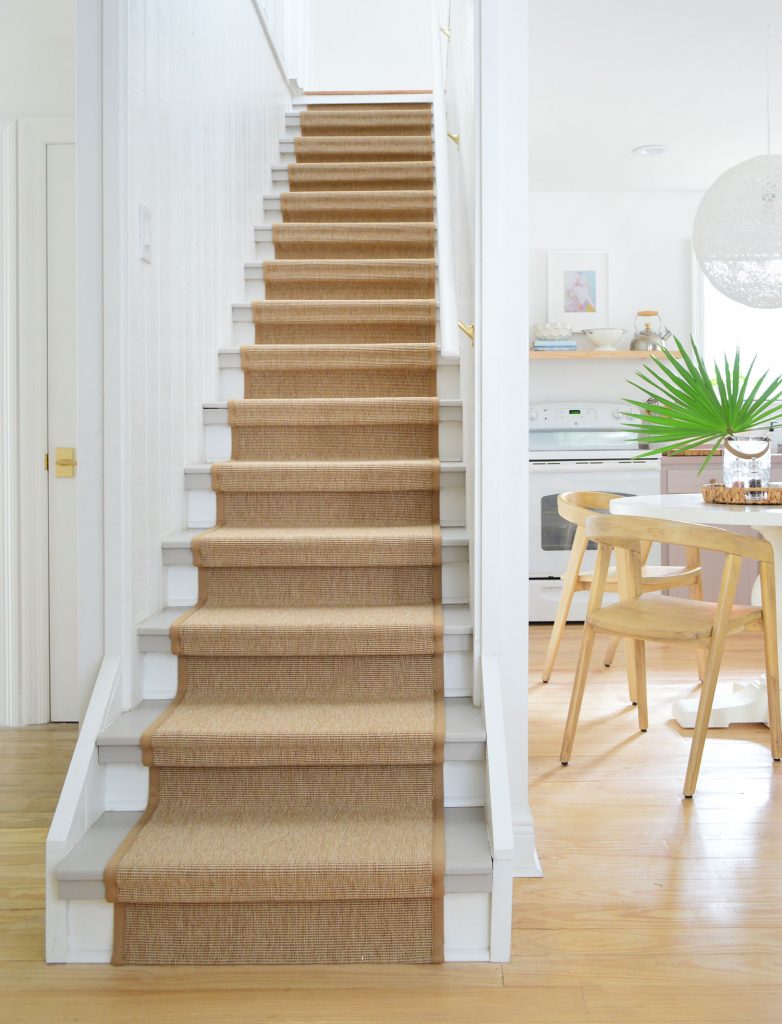
It’s made of an indoor/outdoor material and has a nice classic-look… even leaning towards beachy (it looks very much like a sisal rug up close). So we just kept coming back to how much we liked their sisal-looking runner. It’s comforting to have seen something in person – we knew it was a good neutral color, was well made, didn’t shed, held up to little dog claws, etc. As for the specifics, the color is Belize Dune, the border is Narrow Cotton, and the border color is Granola.
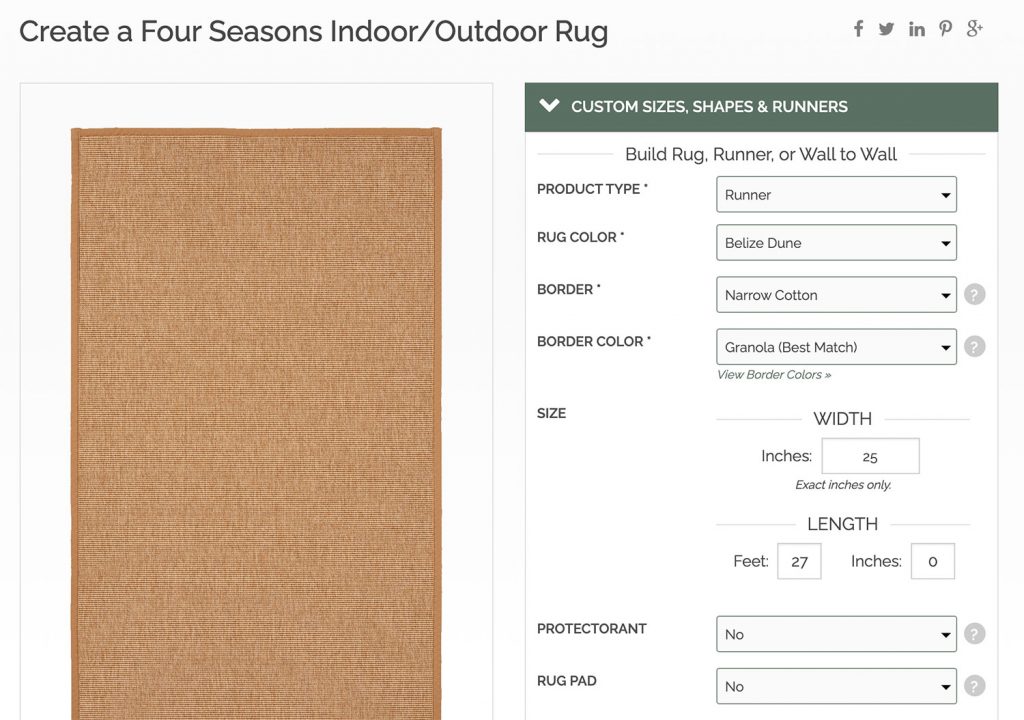
To arrive at the right size while making our order, we knew we wanted about a 3″ reveal on each side of the runner (so we went with a 25″ wide runner) and for length, we carefully measured the length of one “step” using a string (including the tread and the riser) and multiplied that by the total number of steps. Then we tacked on a few extra feet just to be safe since you need some excess at the top and bottom – more on that in a second.
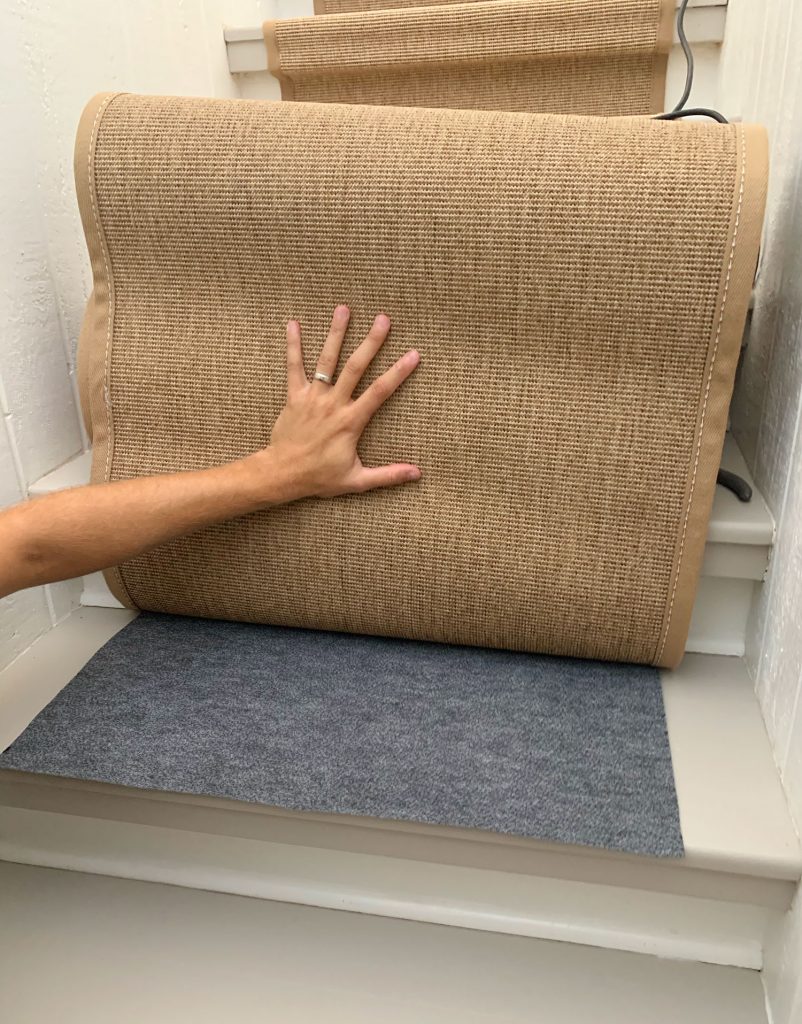
The website gives you the option to automatically add a rug pad, but we ordered ours independently. Since we knew we’d only be putting a pad on the top of the treads (and not up the vertical risers) we realized we could order a handful of these 2 x 3″ “premium” rug pads for the same price as the regular ones that the checkout page would’ve included automatically – which we thought would be extra nice. We just cut them into thirds and placed them under the runner as we went, which you can see below:
Installing The Runner
The process of actually installing the runner was pretty much exactly what we had done in our last tutorial. The only deviations were just figuring out (1) the best way to disguise our staples and (2) where to staple given the special profile of these steps. Our steps are a little weird in that they have a wide “lip” under the bullnose of the tread, but we actually think it’s a nice polished result – sort of a more substantial look for each step.
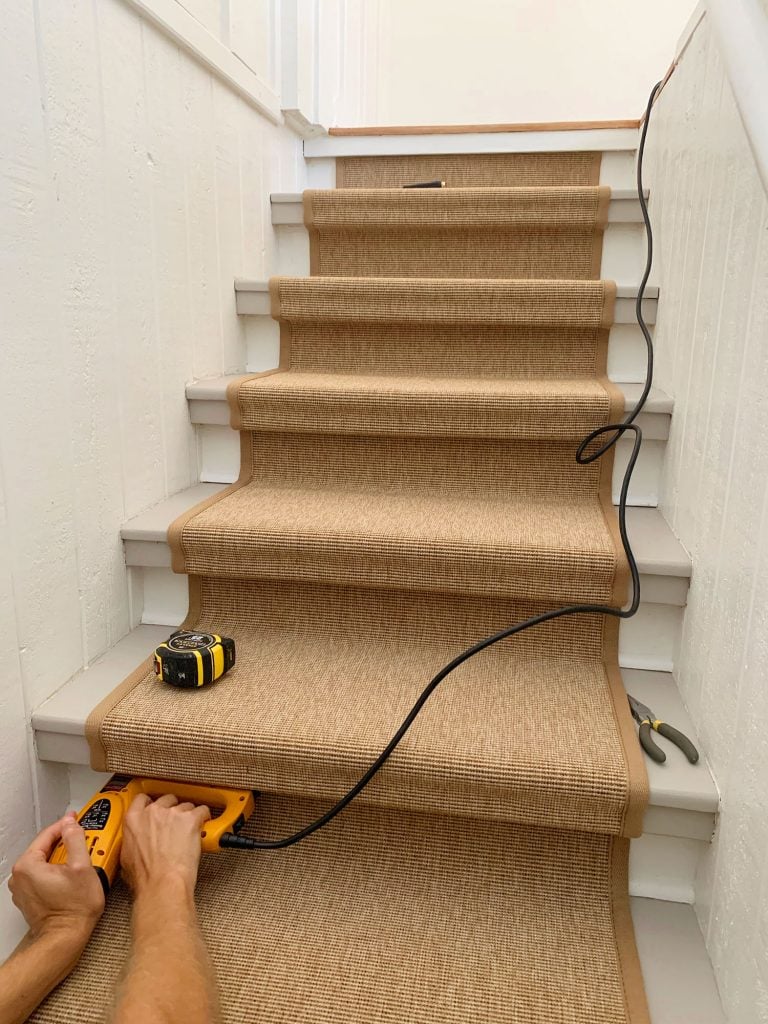
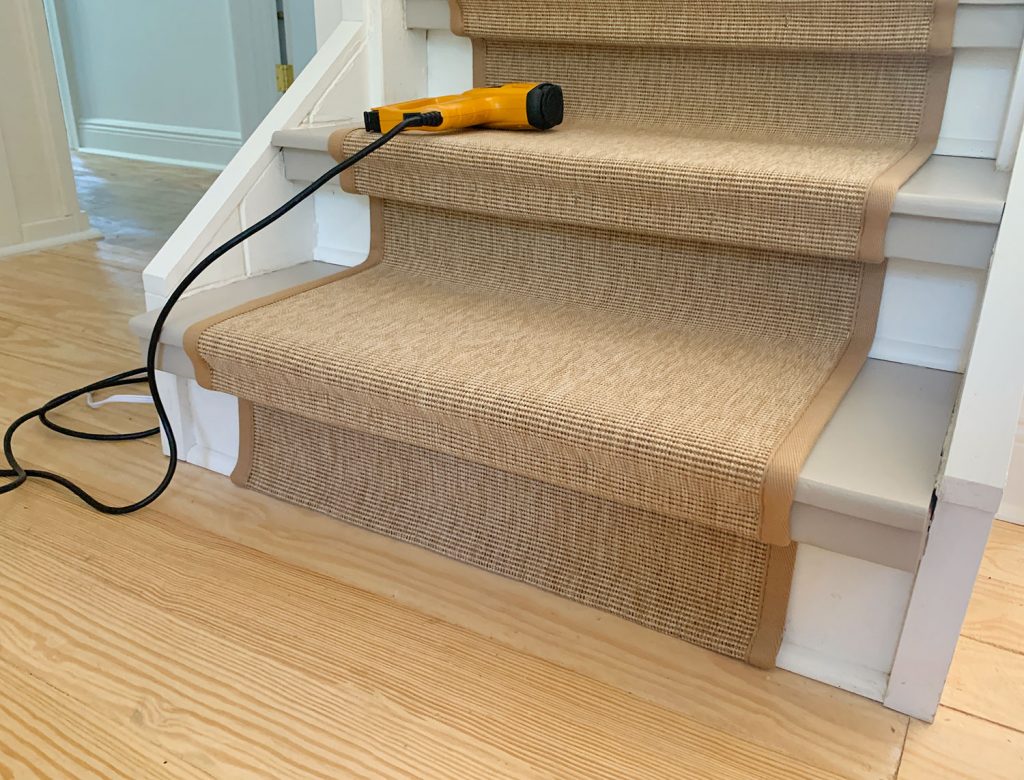
You can see that we started right under the top “lip” rather than the wood bullnose. We were using the exact same electric stapler that we used last time and employed our color-the-staples-ahead-of-time trick again too. Last time we used a black sharpie to help camouflage the staples within our black-and-white striped runner, but this time Sherry used a gold Sharpie to help it blend in with the golden-brown sisal colors.
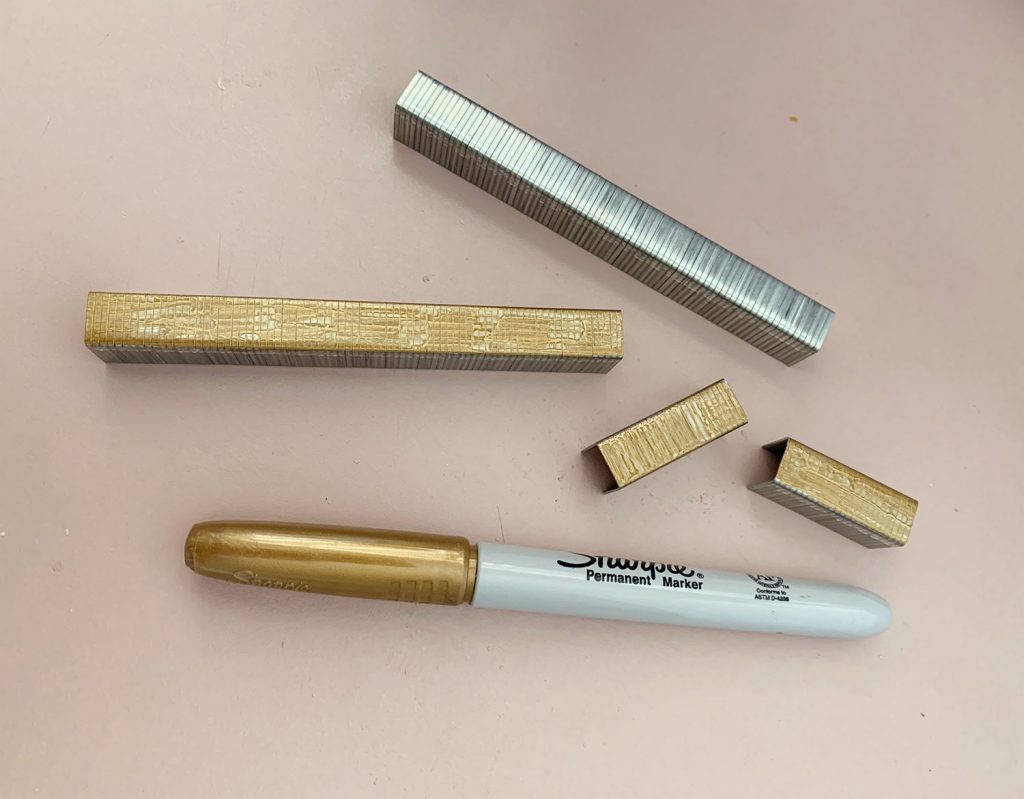
The color doesn’t have to be a perfect match because half of the battles is just dulling the shiny silver tone of the staples so they don’t catch the light as easily and gleam bright silver, which seems to show up a lot more than a color that’s closer to the rug’s main tone).
It took some trial and error on the first step to figure out where to put the stapes to achieve the best combination of hidden staples and a tight hold. We ultimately found that it helped to start with a staple just inside the binding, right under the bullnose (pulling the runner tight as you go).
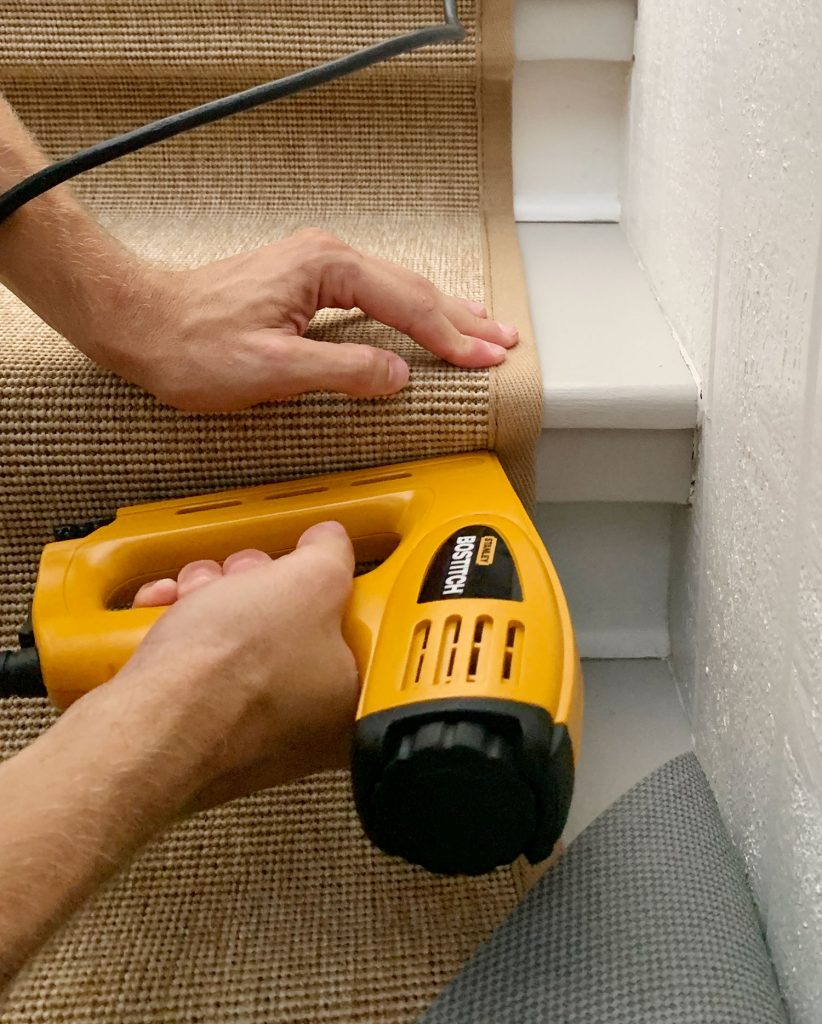
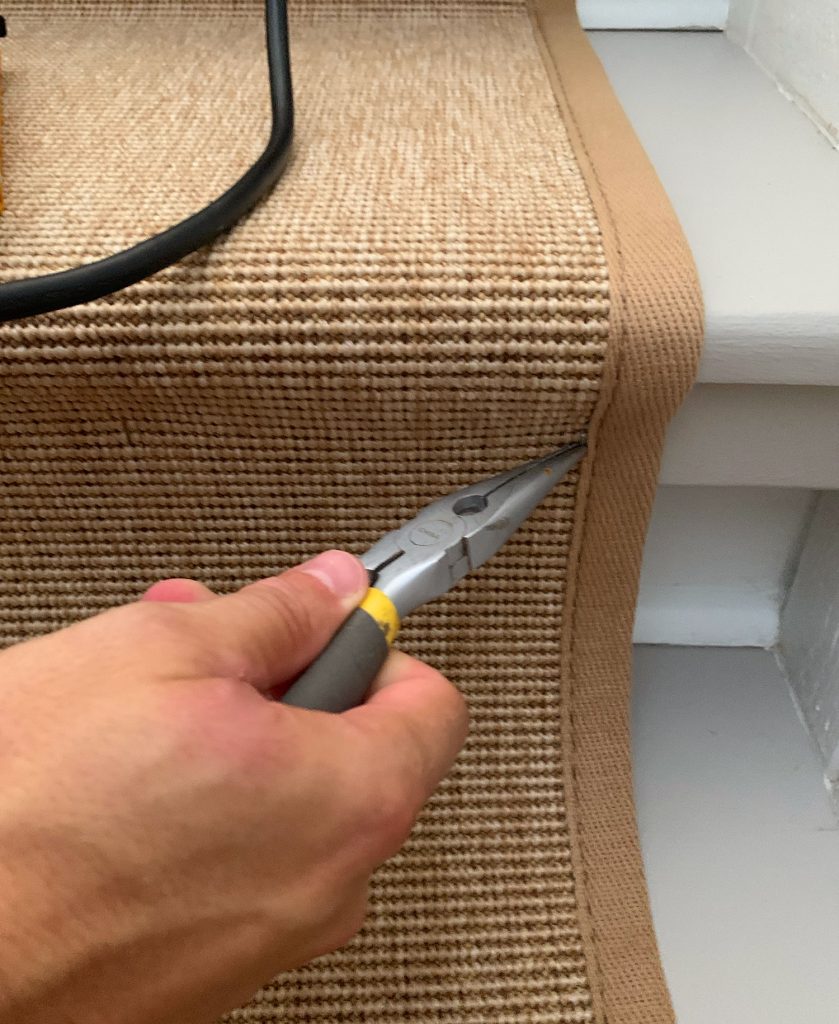
If our aim was right, we could even kind of tuck the staple under the small, loose edge of the binding. And if our aim wasn’t so great, it was easy enough to remove any misfired staples with some needlenose pliers and try again. Note: don’t feel bad, this happens – we probably removed 10-15 staples as we went, just to get a more covert result if they ended up overlapping the border and showing up a lot in that placement
We worked our way across the step to the other binding edge, ultimately putting 5 stapes in total (2 on each edge, 1 in the middle, and 2 between those). The sisal-looking rug material itself was pretty good at camouflaging the staples so it was no big deal to put them right in the middle of the step like that.
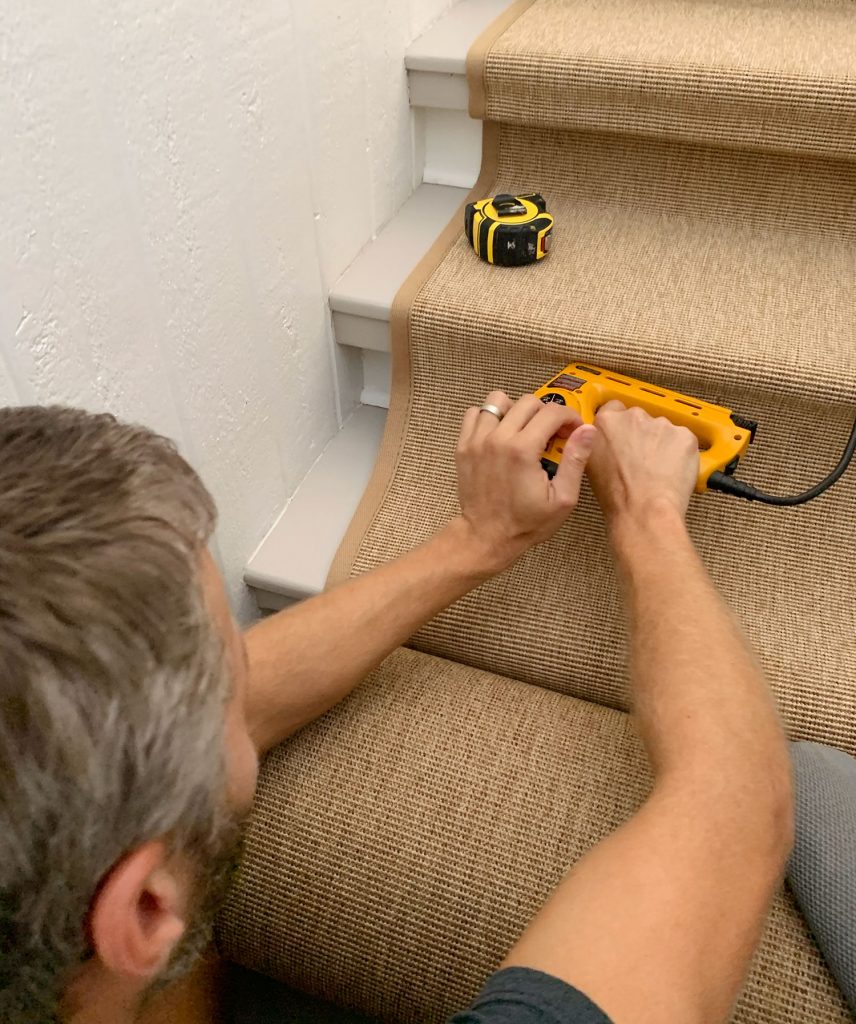
We then ran another 5 staples under the “lip” of each step against the top of the riser, which you may not need if your stairs have a more traditional profile. Lastly we did a row of 5 staples at the bottom of each riser, right above where the quarter round meets the stair tread (so nowhere are we actually nailing into the tread itself).
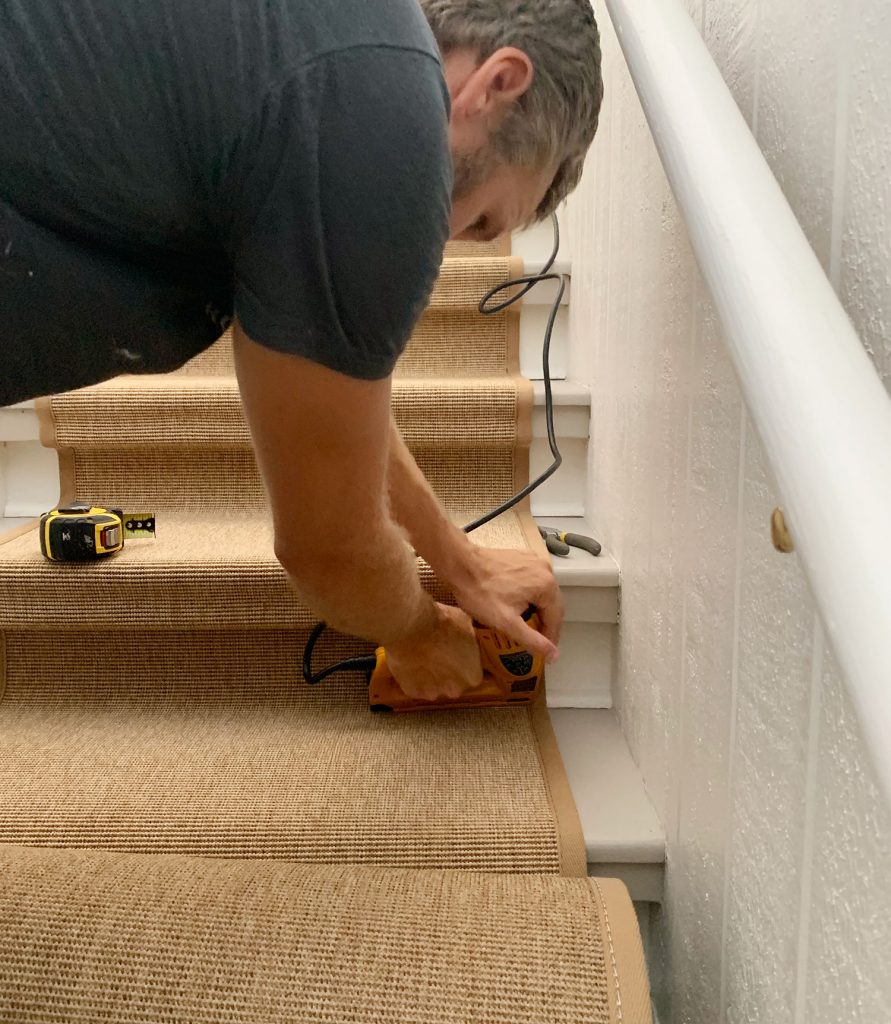
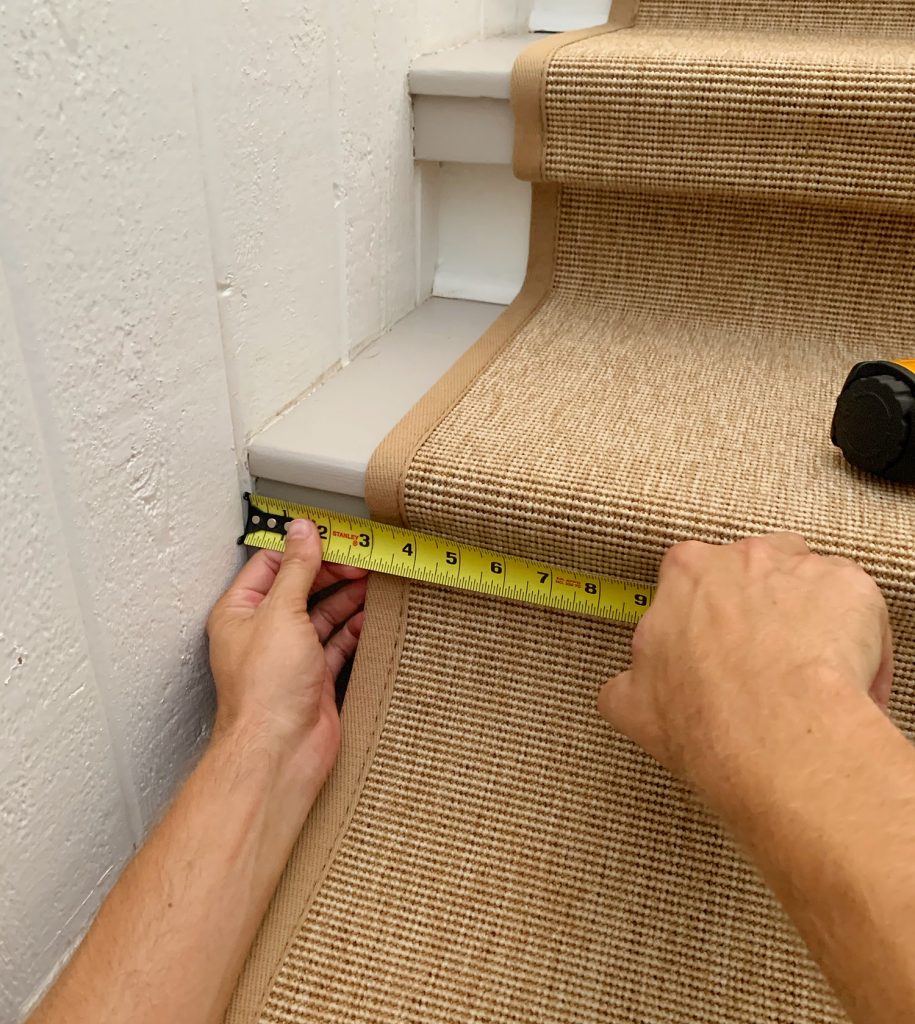
You’ll also notice in these photos that I’m using my free hand to press against the back of the stapler as I pull the trigger. We found that helps the staples go in straight and achieve the tightest hold. I should also point out that along the way we broke out our tape measure to make sure we were keeping the runner centered.
When it came time to end the runner, we had about 18″ of excess (so maybe we overshot our order, but we were relieved to not come up short). We just used regular old scissors to cut off the extra, leaving enough that we could fold under about 1″ at the very bottom for a nice clean hem down there, and staple it along the bottom of the last riser to secure it.
We’re so happy with the new stairs that, again, our only regret is that we didn’t jump on this sooner. They look better. They feel better. They’ve allowed Burger to return to his default stair speed which is, inexplicably, ONLY RUNNING. But as long as it’s not slipping and sliding and rolling, we’ll take it. And it’s easier for us humans to keep our footing too.
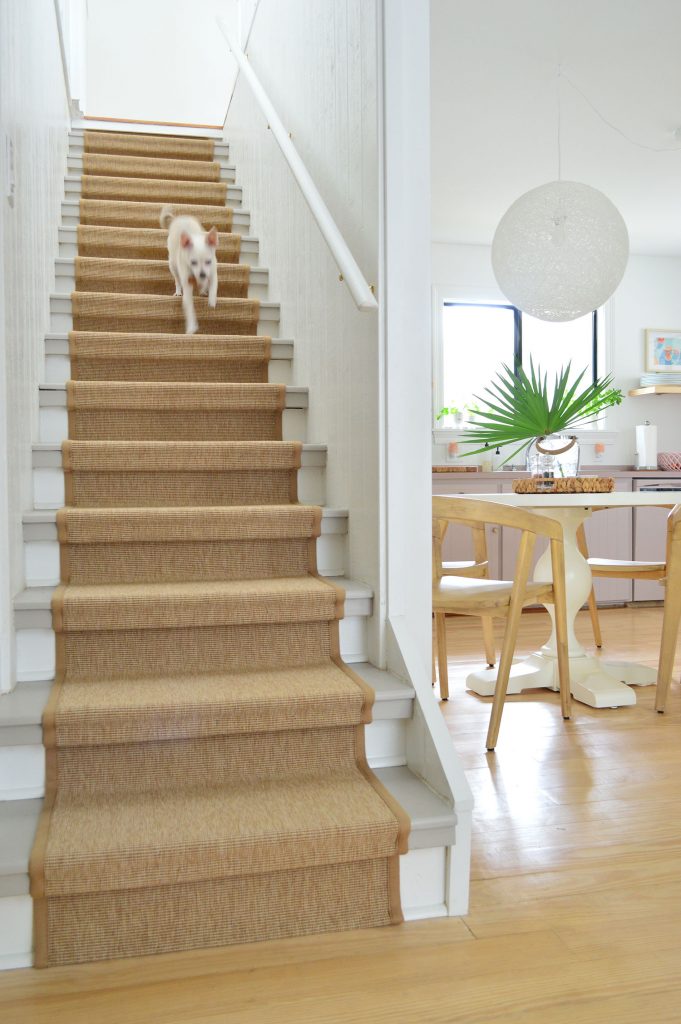
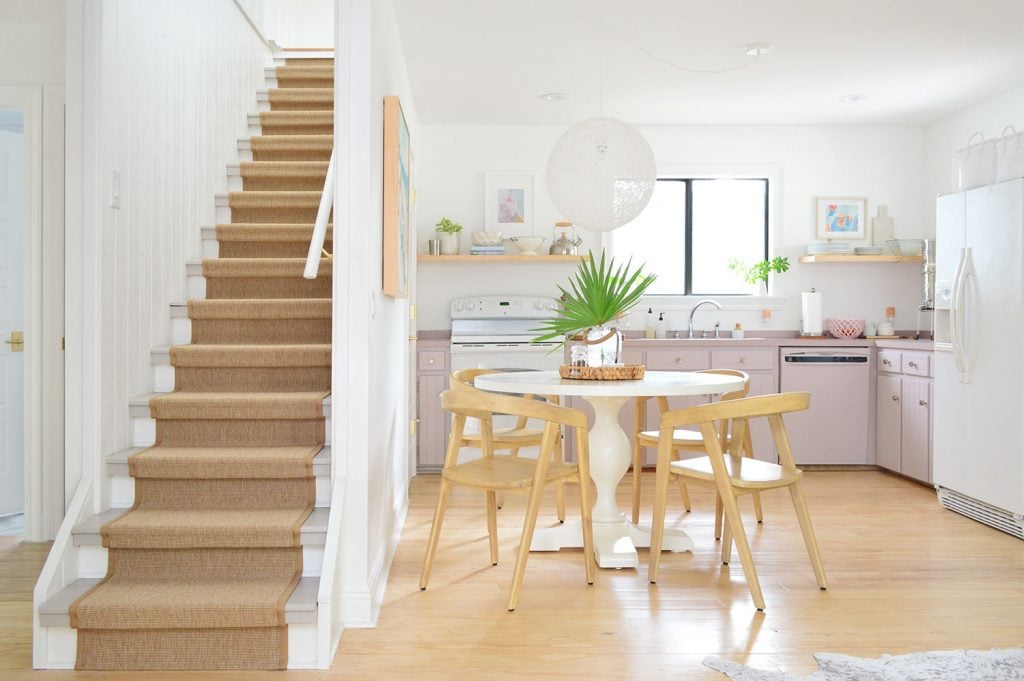
Here’s the view from upstairs now. We love all the original paneling and planking throughout this house, and our runner definitely seems to compliment it without making things too busy (which is why we resisted the urge to go with a busier pattern or bold stripe).
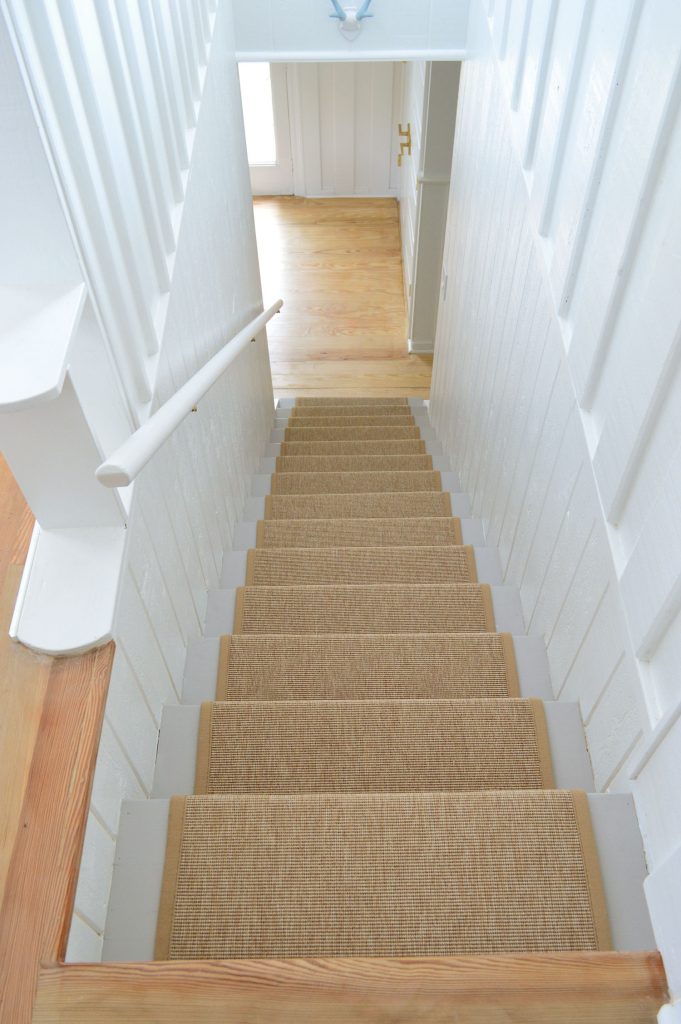
It also looks good with the gold hardware that we have everywhere (including the brackets of the stair handrail that you can’t see much of in the photo above, but notice quite a bit as you make your way up the stairs).
Here’s a look at the overall difference from this old before photo that we shared in April:
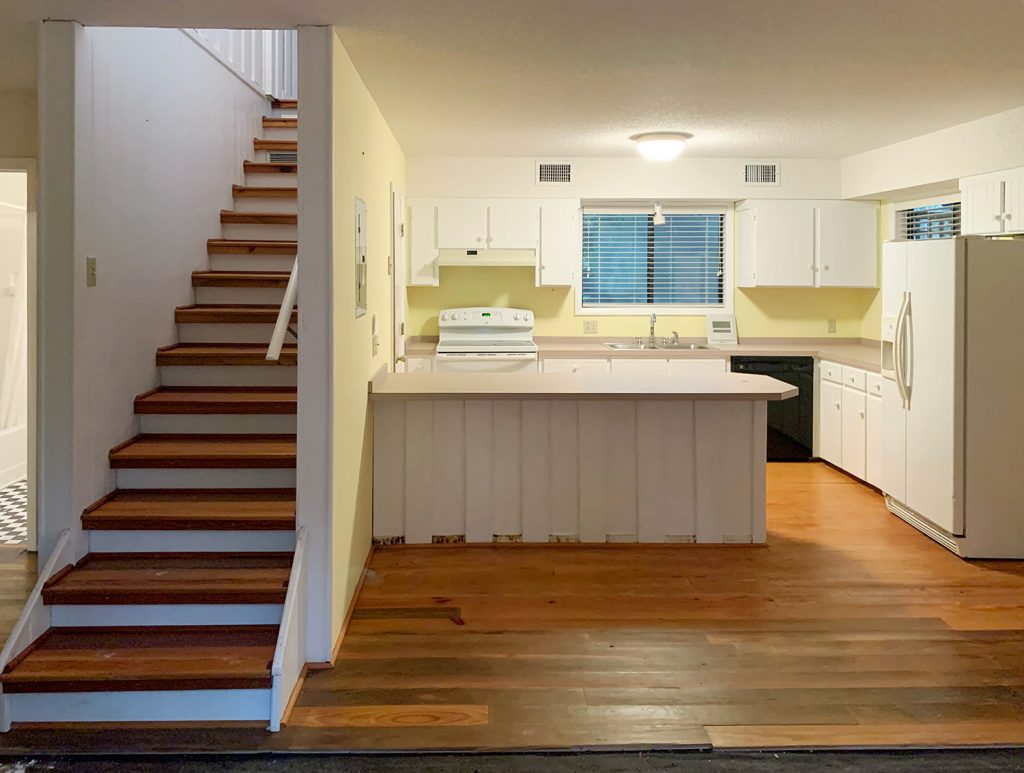
And here we are now with our brighter, cozier, dog-and-human-friendlier stairway.

It’s pretty much the view that you see right from our front door, so it’s a cozier welcome than the old stairs offered. Plus we feel like the natural sisal-looking material fits nicely with the lighter wood floors downstairs and the deeper toned ones upstairs – so it bridges things beautifully (the downstairs floors are pine and upstairs are heart pine, which is a deeper tone).
So that’s our recent stair update from around here. We actually have a few more interior (and exterior!) things to share with you guys, so we just have to photograph them and write them up – soon I hope. And if you missed any previous posts about every last room in our house, you can find them all here, and get caught up pretty quickly! We’ve come a long way in 5 months of living here!
*This post contains affiliate links, so we may earn a small commission when you make a purchase through links on our site at no additional cost to you.
